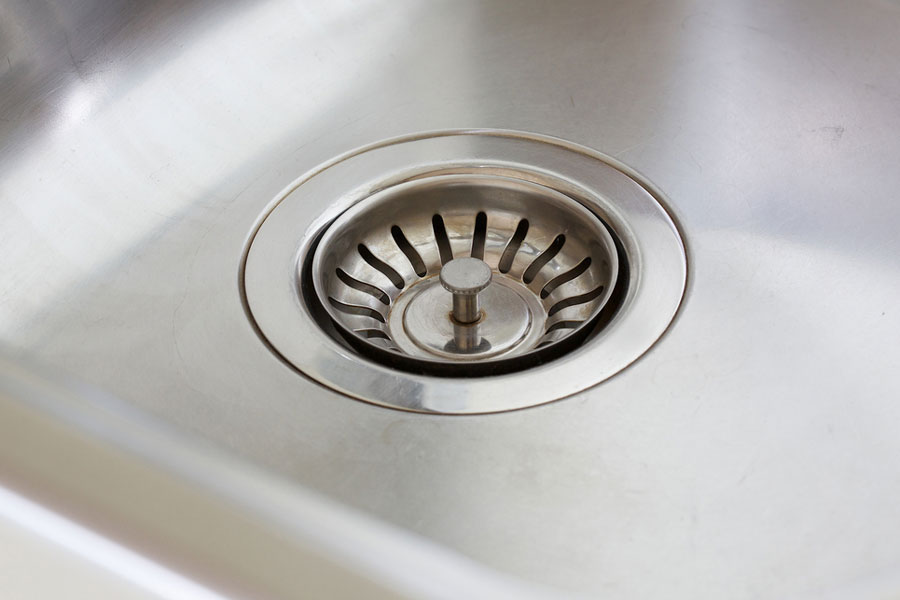
If you've noticed a leaky kitchen sink or a slow drain, it may be time to replace the strainer. This essential component of your sink helps to filter out food scraps and debris, preventing clogs and keeping your sink clean. Over time, the strainer can become worn or damaged, causing it to be less effective. Luckily, replacing a kitchen sink strainer is a simple DIY project that can be done in just a few steps.How to Replace a Kitchen Sink Strainer


How to Replace a Kitchen Sink Strainer


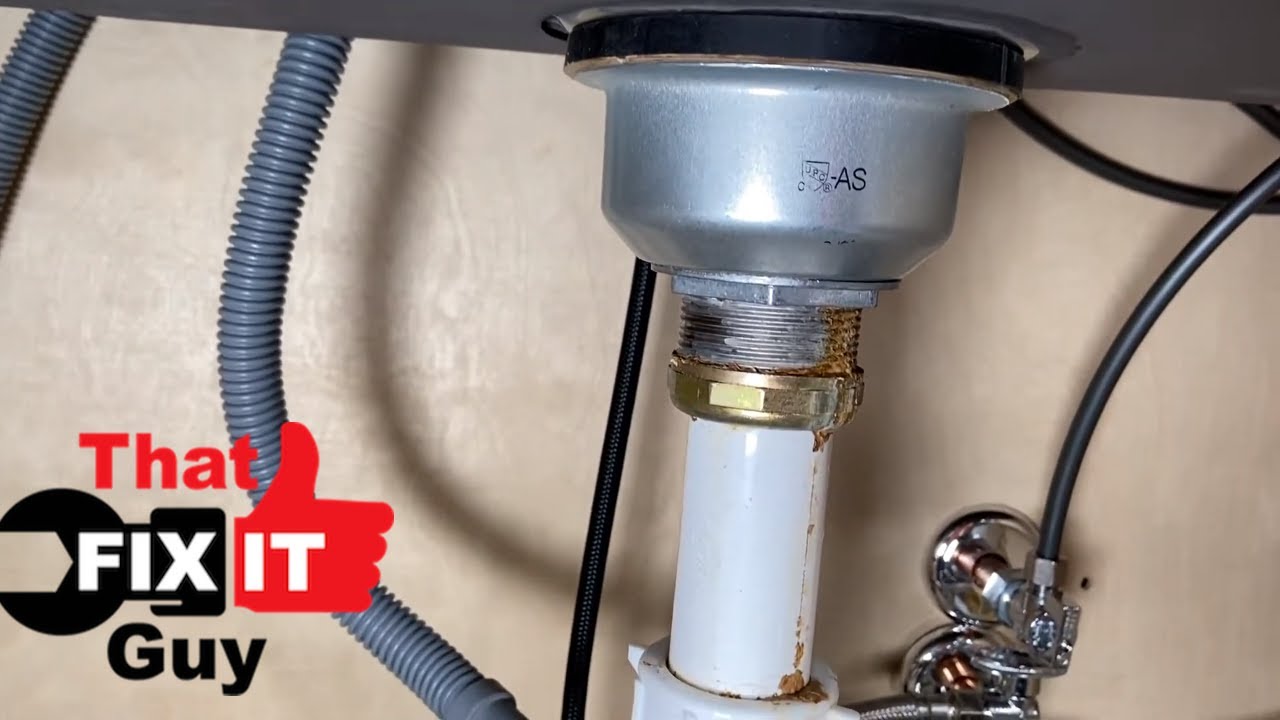

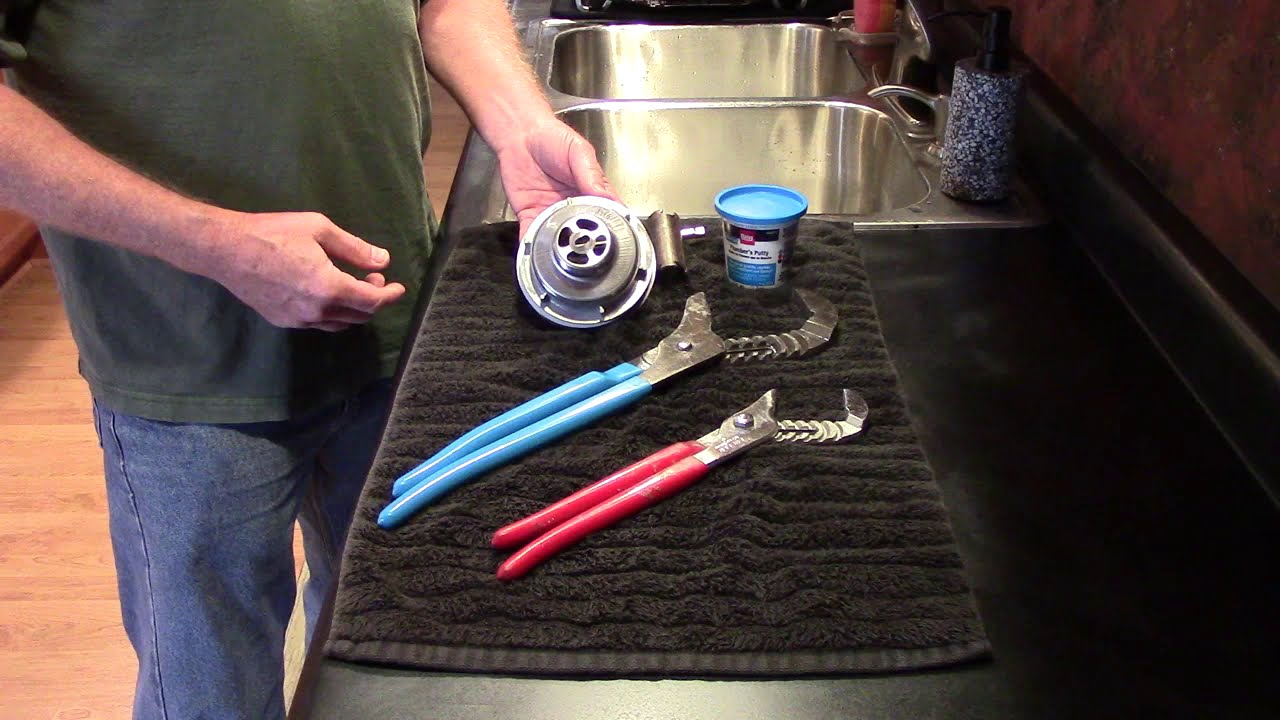
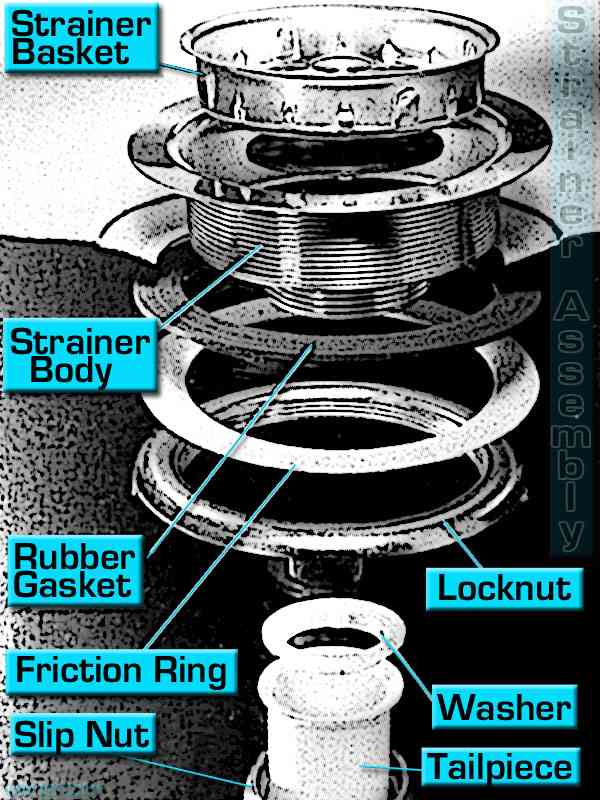
Before you get started, make sure you have all the necessary tools and materials. You'll need a new strainer, a wrench, plumber's putty or silicone sealant, and a screwdriver. Once you have everything ready, follow these six steps to replace the strainer. Step 1: Disconnect the plumbing The first step is to disconnect the plumbing underneath the sink. This includes the P-trap, the drain pipe, and any other connections. Use a wrench to loosen the nuts and remove the pipes carefully. Place a bucket or bowl underneath to catch any water that may spill out. Step 2: Remove the old strainer Using a screwdriver, loosen the screws that hold the old strainer in place. Then, gently pull the strainer up and out of the sink. This may take some effort if the strainer has been in place for a long time. Clean out any remaining debris from the sink and drain. Step 3: Apply plumber's putty or silicone Before installing the new strainer, you'll need to create a watertight seal. This can be done by applying plumber's putty or silicone sealant to the underside of the strainer. Roll the putty into a thin rope and wrap it around the flange of the strainer. Alternatively, you can squeeze a generous amount of silicone around the flange. Step 4: Install the new strainer Place the new strainer into the sink hole and press down firmly to create a seal. If using plumber's putty, wipe away any excess that squeezes out. Then, use a screwdriver to tighten the screws and secure the strainer in place. Step 5: Reconnect the plumbing Once the new strainer is in place, it's time to reconnect the plumbing. Use your wrench to tighten the nuts on the P-trap and drain pipe. Double-check that all connections are secure and there are no leaks. Step 6: Test the new strainer Turn on the water and let it run for a few minutes to test the new strainer. Check for any leaks and make sure the water is draining properly. If everything looks good, you're all set!Replacing a Kitchen Sink Strainer: 6 Steps


Replacing a Kitchen Sink Strainer: 6 Steps


Replacing a kitchen sink strainer is a simple DIY project that can save you time and money. Instead of calling a plumber, you can follow these easy steps to replace the strainer yourself. Not only will you feel accomplished, but you'll also have a functioning sink without any leaks or clogs.DIY: How to Replace a Kitchen Sink Strainer


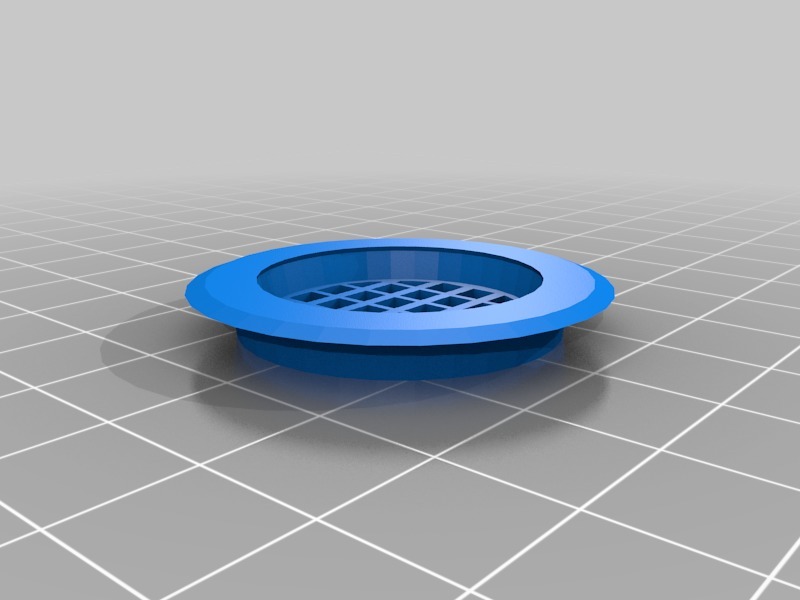
How to Replace a Kitchen Sink Basket Strainer


Here are a few tips and tricks to keep in mind when replacing a kitchen sink strainer: Choose the right strainer: Make sure to choose a strainer that is the right size and style for your sink. Measure the sink hole and consider the design of your sink before purchasing a new strainer. Use the right sealant: Plumber's putty is the traditional choice for creating a seal, but silicone sealant is also a popular option. Both work well, so choose whichever you feel most comfortable using. Be careful when tightening: When installing the new strainer, be careful not to over-tighten the screws. This can cause the putty or sealant to squeeze out and create gaps in the seal. Clean out the debris: Before installing the new strainer, make sure to clean out any debris or old putty from the sink and drain. This will ensure a proper seal and prevent any future clogs.Replacing a Kitchen Sink Strainer: Tips and Tricks


DIY: How to Replace a Kitchen Sink Strainer


:max_bytes(150000):strip_icc()/how-to-install-a-sink-drain-2718789-04-5715d67f5b7d41429d42bf705bb70e2c.jpg)

If you prefer a more detailed guide, here is a step-by-step breakdown of how to replace a kitchen sink strainer: Step 1: Gather all necessary tools and materials. Step 2: Disconnect the plumbing underneath the sink. Step 3: Remove the old strainer. Step 4: Apply plumber's putty or silicone to the underside of the new strainer. Step 5: Install the new strainer and tighten the screws. Step 6: Reconnect the plumbing. Step 7: Test the new strainer for leaks and proper drainage.Step-by-Step Guide to Replacing a Kitchen Sink Strainer


Replacing a Kitchen Sink Strainer: Tips and Tricks


While replacing a kitchen sink strainer is a relatively simple task, there are a few common mistakes that can cause issues. Avoid these mistakes to ensure a successful replacement: Not cleaning out the debris: As mentioned before, it's important to clean out any debris or old putty from the sink and drain before installing the new strainer. This will prevent any potential clogs or leaks. Over-tightening the screws: Over-tightening the screws can cause the putty or sealant to squeeze out and create gaps in the seal. Be careful not to tighten too much. Using too much sealant: While it's important to create a watertight seal, using too much sealant can cause issues. A thin layer of plumber's putty or a moderate amount of silicone should be sufficient.Replacing a Kitchen Sink Strainer: Common Mistakes to Avoid


Step-by-Step Guide to Replacing a Kitchen Sink Strainer


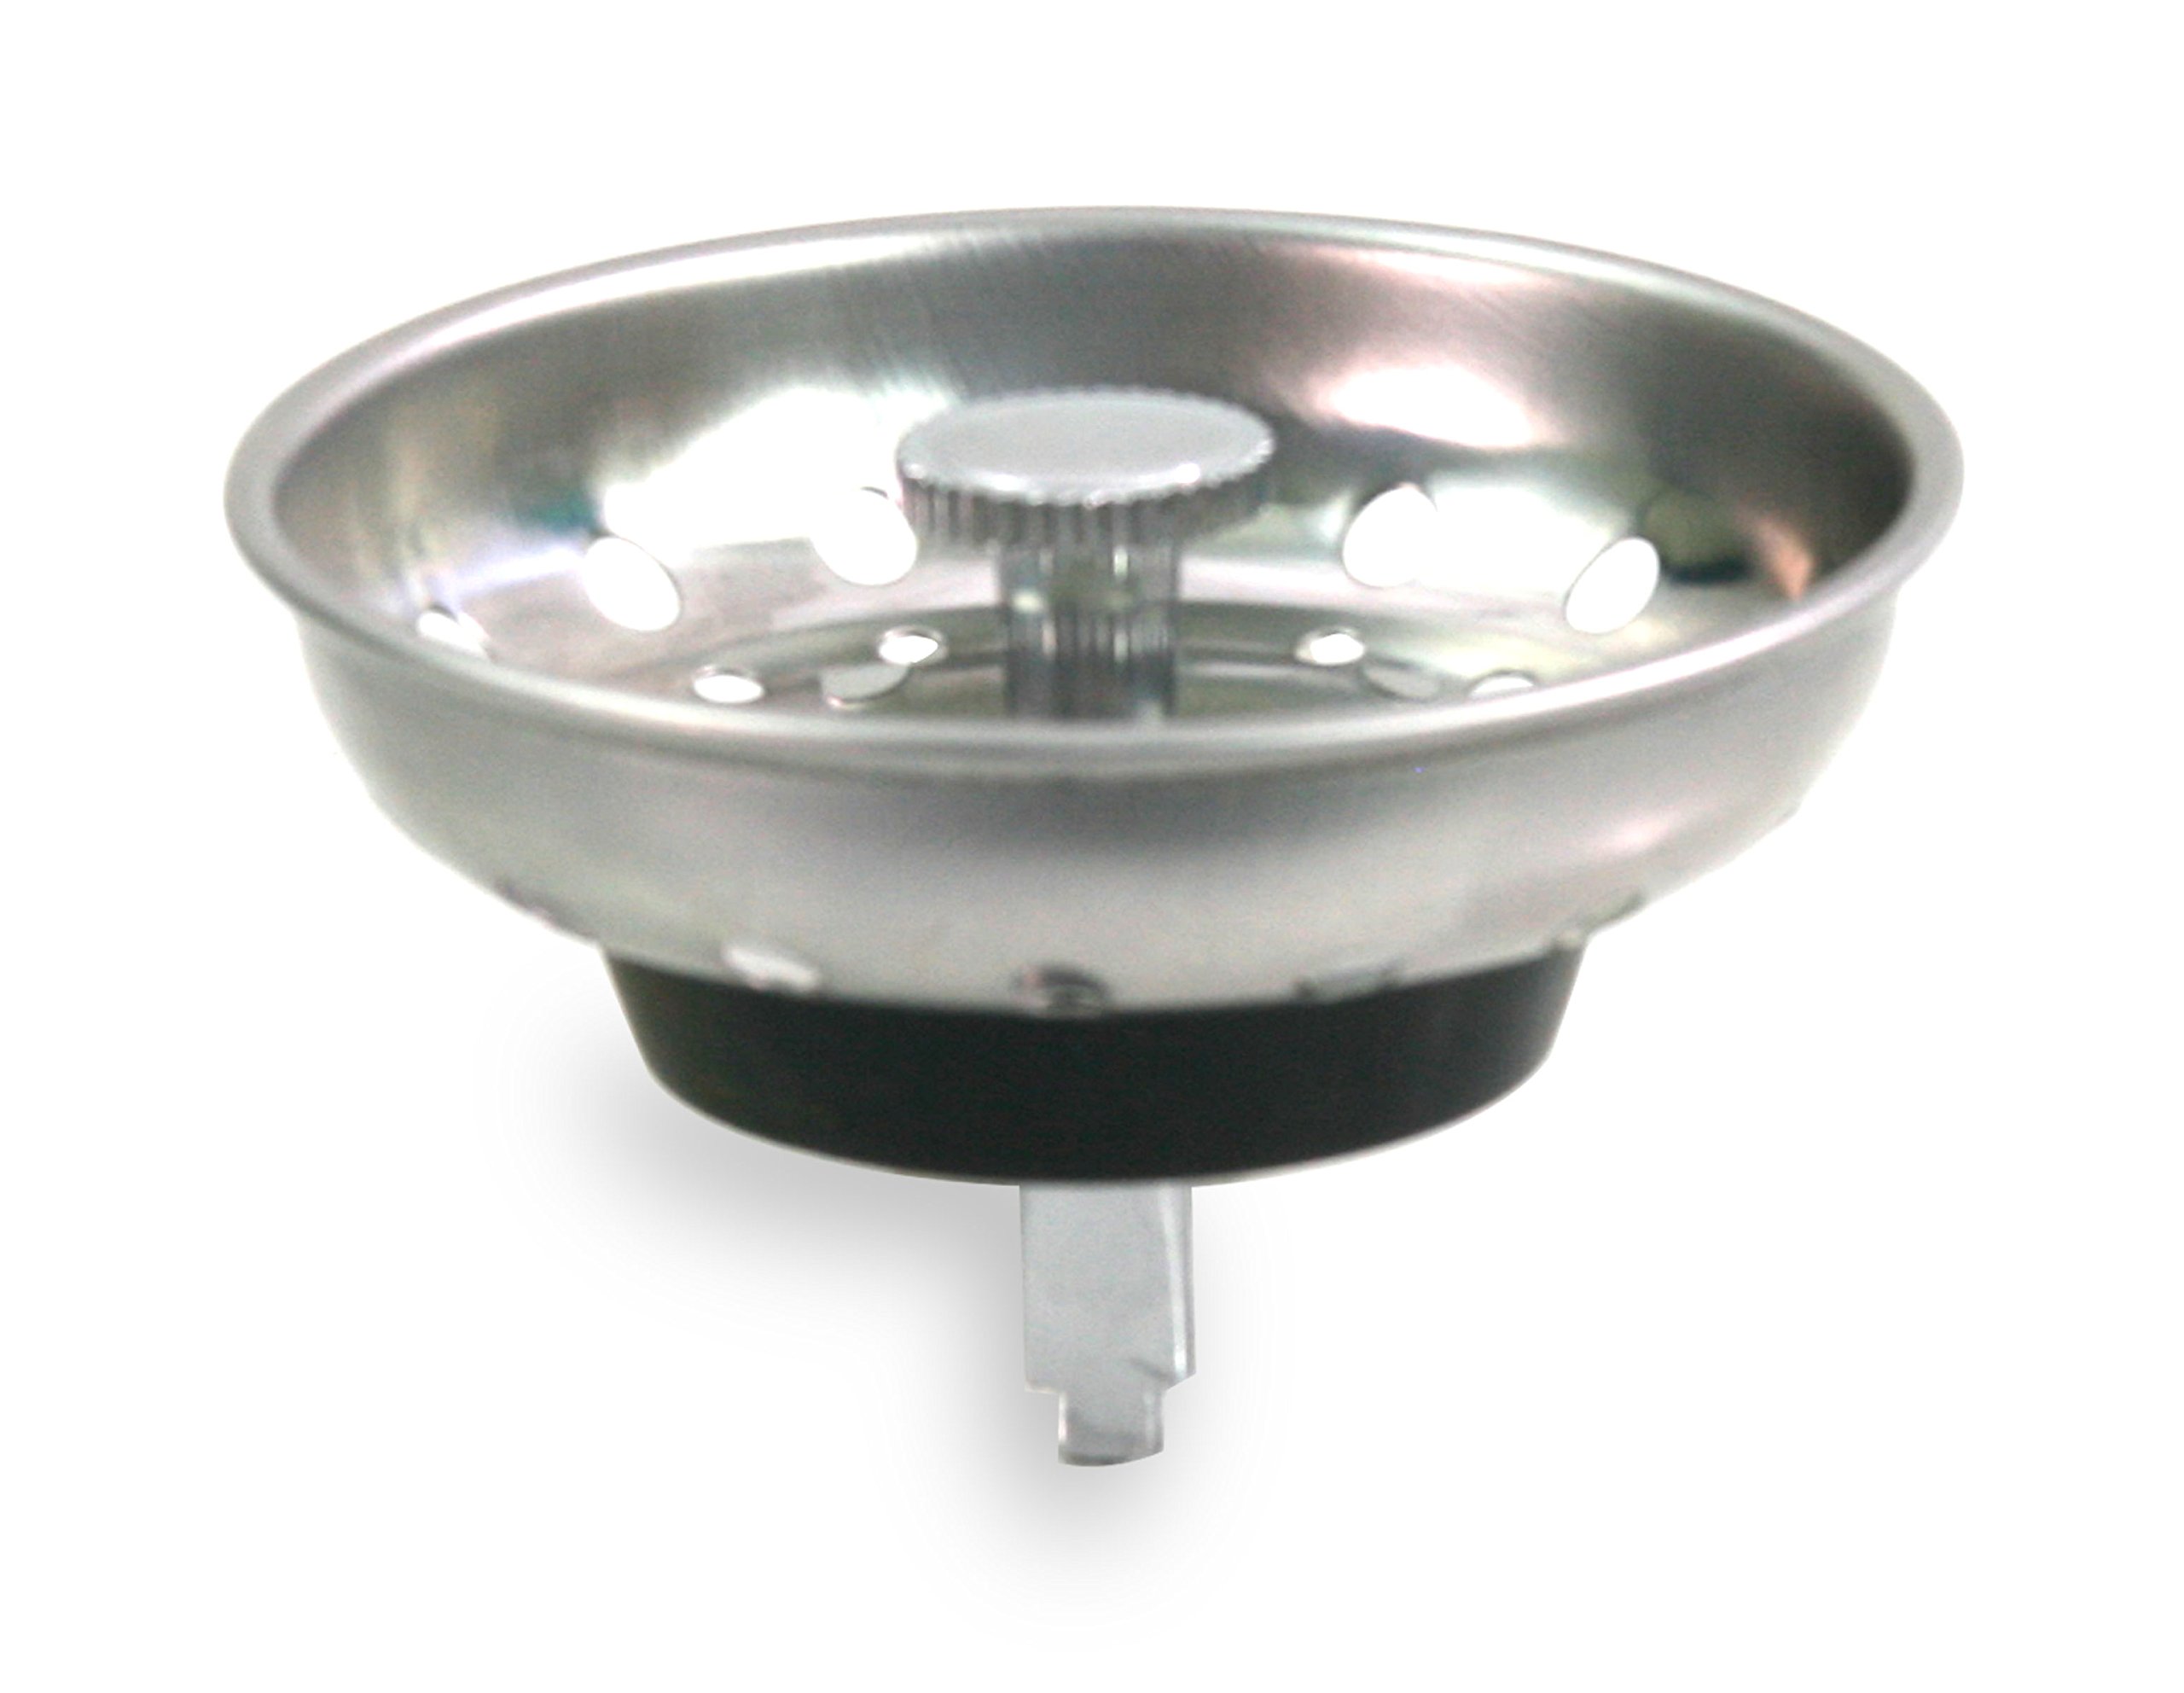
When it comes to choosing a new kitchen sink strainer, there are a few things to consider: Sink size: Make sure to measure the sink hole and choose a strainer that fits properly. Style: Consider the design of your sink and choose a strainer that complements it. Material: Strainers are available in a variety of materials, including stainless steel, brass, and plastic. Consider which material will work best for your sink and needs.How to Choose the Right Kitchen Sink Strainer for Replacement

Replacing a Kitchen Sink Strainer: Common Mistakes to Avoid

To replace a kitchen sink strainer, you'll need the following tools and materials: New strainer Wrench Screwdriver Plumber's putty or silicone sealant Bucket or bowl Clean cloth or paper towelsReplacing a Kitchen Sink Strainer: Tools and Materials You'll Need


How to Choose the Right Kitchen Sink Strainer for Replacement


Here are a few expert tips to keep in mind when replacing a kitchen sink strainer: Know when to call a professional: If you're not confident in your DIY skills, it's always best to call a professional plumber to replace your kitchen sink strainer. Choose quality materials: Don't skimp on the materials when it comes to replacing your strainer. Invest in a quality strainer and sealant to ensure a long-lasting, effective replacement. Regular maintenance: To prevent future issues, regularly clean out your strainer and check for any wear or damage. This will help to extend its lifespan. Replacing a kitchen sink strainer is a simple DIY project that can save you time and money. With the right tools and materials, you can easily complete this task in just a few steps. Keep these tips and tricks in mind to ensure a successful replacement and a fully functioning kitchen sink. Expert Tips for Replacing a Kitchen Sink Strainer

Replacing a Kitchen Sink Strainer: Tools and Materials You'll Need


Why Replacing Your Kitchen Sink Strainer is Essential for a Functional and Stylish Kitchen

Improve Functionality and Cleanliness
 One of the most used areas in a kitchen is the sink, making it prone to wear and tear. Over time, the
kitchen sink strainer
can become clogged with food particles and debris, causing slow draining and unpleasant odors. This can be frustrating and unhygienic, especially when preparing meals. By replacing your strainer, you can ensure a smooth and efficient flow of water, preventing any potential clogs and keeping your sink clean and odor-free.
One of the most used areas in a kitchen is the sink, making it prone to wear and tear. Over time, the
kitchen sink strainer
can become clogged with food particles and debris, causing slow draining and unpleasant odors. This can be frustrating and unhygienic, especially when preparing meals. By replacing your strainer, you can ensure a smooth and efficient flow of water, preventing any potential clogs and keeping your sink clean and odor-free.
Upgrade Your Kitchen Design
 Not only does replacing your
kitchen sink strainer
improve functionality, but it can also enhance the overall design of your kitchen. With a wide range of styles and finishes available, you can choose a strainer that complements your kitchen's aesthetic. For a modern and sleek look, opt for a
stainless steel strainer
, or add a pop of color with a
colored strainer
. Upgrading your strainer is an easy and cost-effective way to give your kitchen a fresh and updated look.
Not only does replacing your
kitchen sink strainer
improve functionality, but it can also enhance the overall design of your kitchen. With a wide range of styles and finishes available, you can choose a strainer that complements your kitchen's aesthetic. For a modern and sleek look, opt for a
stainless steel strainer
, or add a pop of color with a
colored strainer
. Upgrading your strainer is an easy and cost-effective way to give your kitchen a fresh and updated look.
Prevent Costly Plumbing Issues
 A clogged kitchen sink can lead to more serious plumbing problems, such as leaks and water damage. By regularly replacing your
kitchen sink strainer
, you can prevent these issues and save yourself from expensive repairs in the future. It's a small investment that can save you from bigger headaches down the line.
A clogged kitchen sink can lead to more serious plumbing problems, such as leaks and water damage. By regularly replacing your
kitchen sink strainer
, you can prevent these issues and save yourself from expensive repairs in the future. It's a small investment that can save you from bigger headaches down the line.
How to Replace Your Kitchen Sink Strainer
 Replacing your
kitchen sink strainer
is a straightforward task that can be done in a few simple steps. First, turn off the water supply to the sink and place a bucket underneath to catch any remaining water. Next, use a wrench to loosen and remove the old strainer. Clean the area thoroughly and apply plumber's putty around the rim of the new strainer. Place the strainer into the sink and tighten it with a wrench. Finally, turn the water supply back on and test the new strainer for any leaks.
In conclusion, replacing your
kitchen sink strainer
is not only necessary for a functional and hygienic kitchen, but it can also elevate the design of your space and prevent costly plumbing issues. With a simple replacement process and a variety of styles to choose from, there's no reason to hold off on upgrading your strainer. Keep your kitchen running smoothly and looking stylish with a new strainer today.
Replacing your
kitchen sink strainer
is a straightforward task that can be done in a few simple steps. First, turn off the water supply to the sink and place a bucket underneath to catch any remaining water. Next, use a wrench to loosen and remove the old strainer. Clean the area thoroughly and apply plumber's putty around the rim of the new strainer. Place the strainer into the sink and tighten it with a wrench. Finally, turn the water supply back on and test the new strainer for any leaks.
In conclusion, replacing your
kitchen sink strainer
is not only necessary for a functional and hygienic kitchen, but it can also elevate the design of your space and prevent costly plumbing issues. With a simple replacement process and a variety of styles to choose from, there's no reason to hold off on upgrading your strainer. Keep your kitchen running smoothly and looking stylish with a new strainer today.