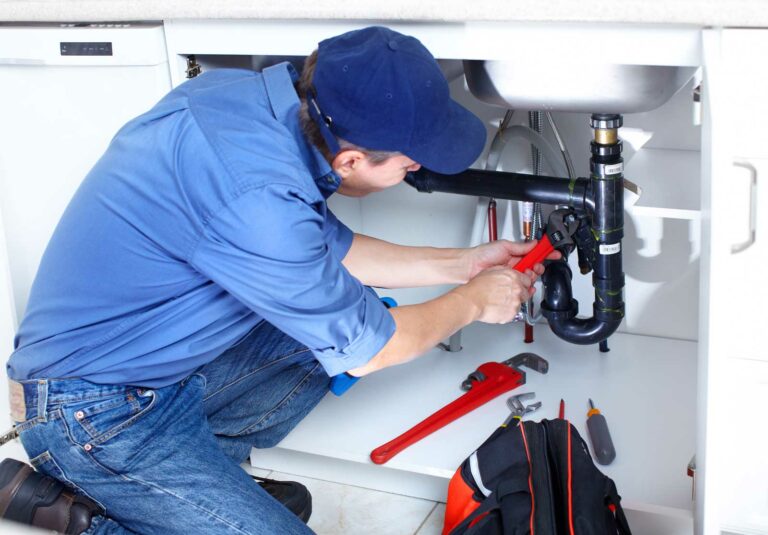
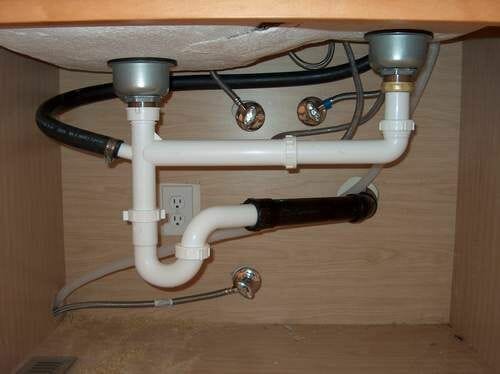
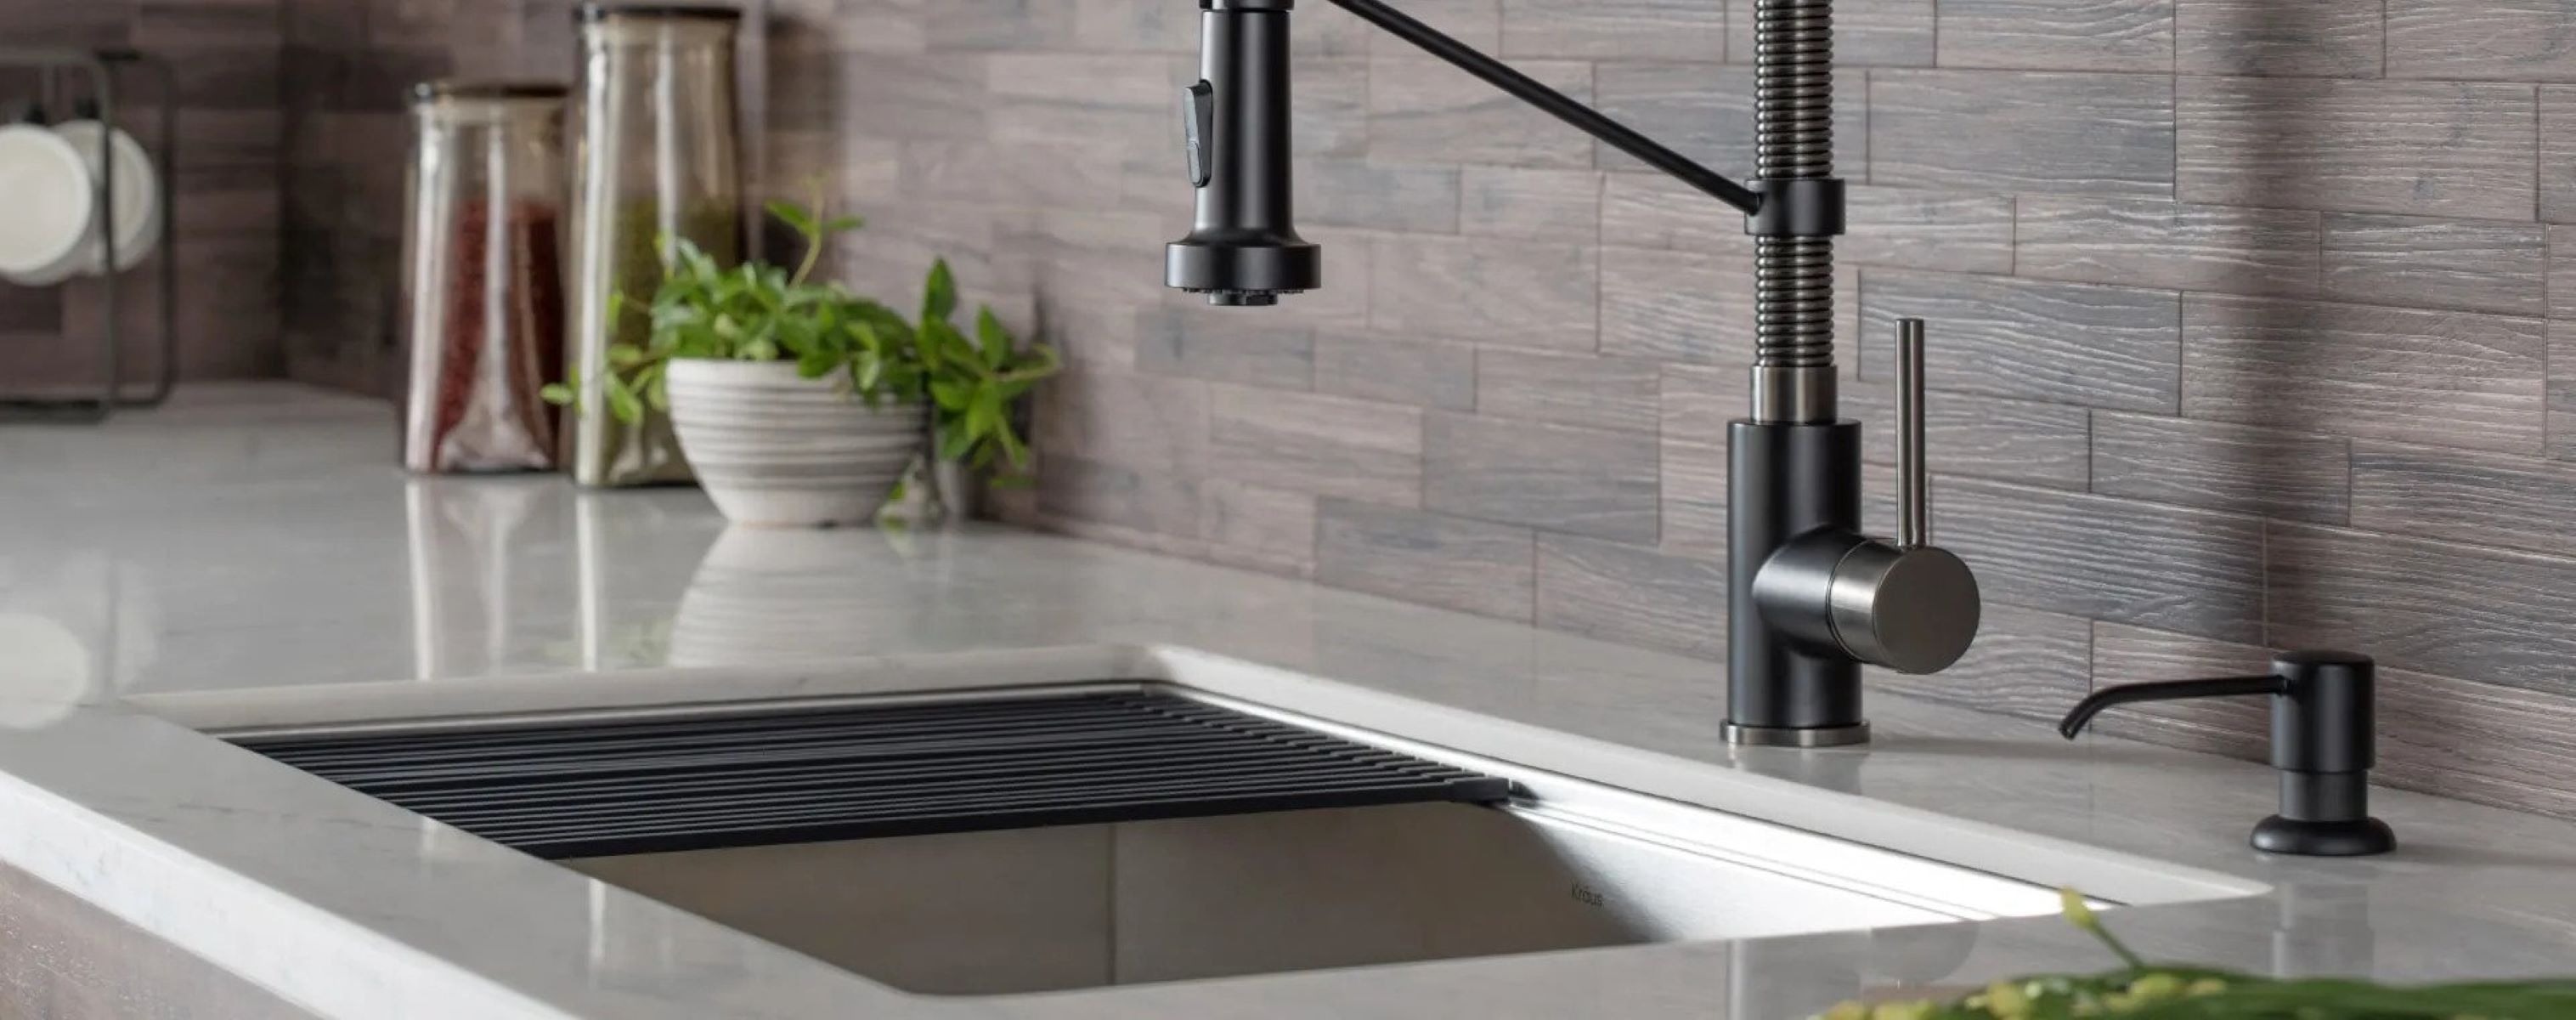
If you're planning to renovate your kitchen or have just purchased a new kitchen sink, one of the first things you'll need to tackle is installing the plumbing. This may seem like a daunting task, but with the right tools and knowledge, you can easily install the plumbing for your kitchen sink yourself. Here is a step-by-step guide to help you through the process: Step 1: Before you begin, make sure you have all the necessary tools and materials. This includes a sink installation kit, a drain assembly, a P-trap, plumber's putty, a wrench, and a screwdriver. Step 2: Start by attaching the faucet to the sink according to the manufacturer's instructions. Make sure to use the provided rubber or plastic gasket to prevent any leaks. Step 3: Next, insert the drain assembly into the sink's drain hole and secure it using the provided gasket and locknut. Apply plumber's putty around the edges of the drain to create a watertight seal. Step 4: Attach the P-trap to the drain assembly and tighten the connections with a wrench. The P-trap is a curved pipe that prevents sewer gases from entering your kitchen. Step 5: Now it's time to connect the water supply lines to the faucet. Use a wrench to tighten the connections, but be careful not to over-tighten as it may cause damage. Step 6: If you're installing a garbage disposal, now is the time to do so. Follow the manufacturer's instructions for installation and make sure to connect it to the sink drain and the dishwasher if you have one. Step 7: Finally, turn on the water supply and test your new kitchen sink for any leaks. If everything looks good, you're all set!1. Kitchen Sink Plumbing Installation: Step-by-Step Guide


1. Kitchen Sink Plumbing Installation: Step-by-Step Guide


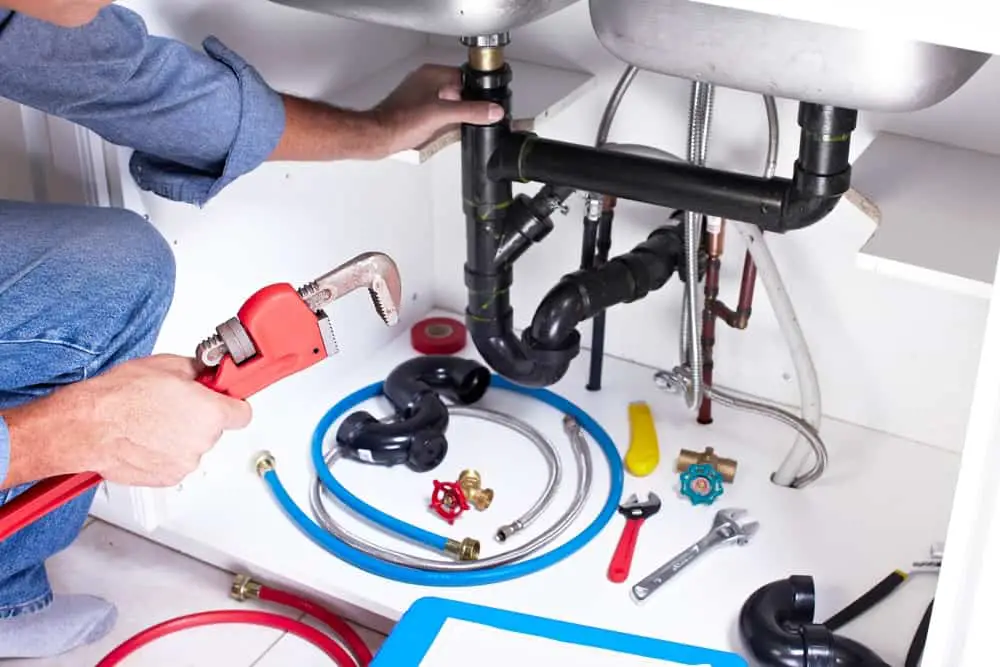
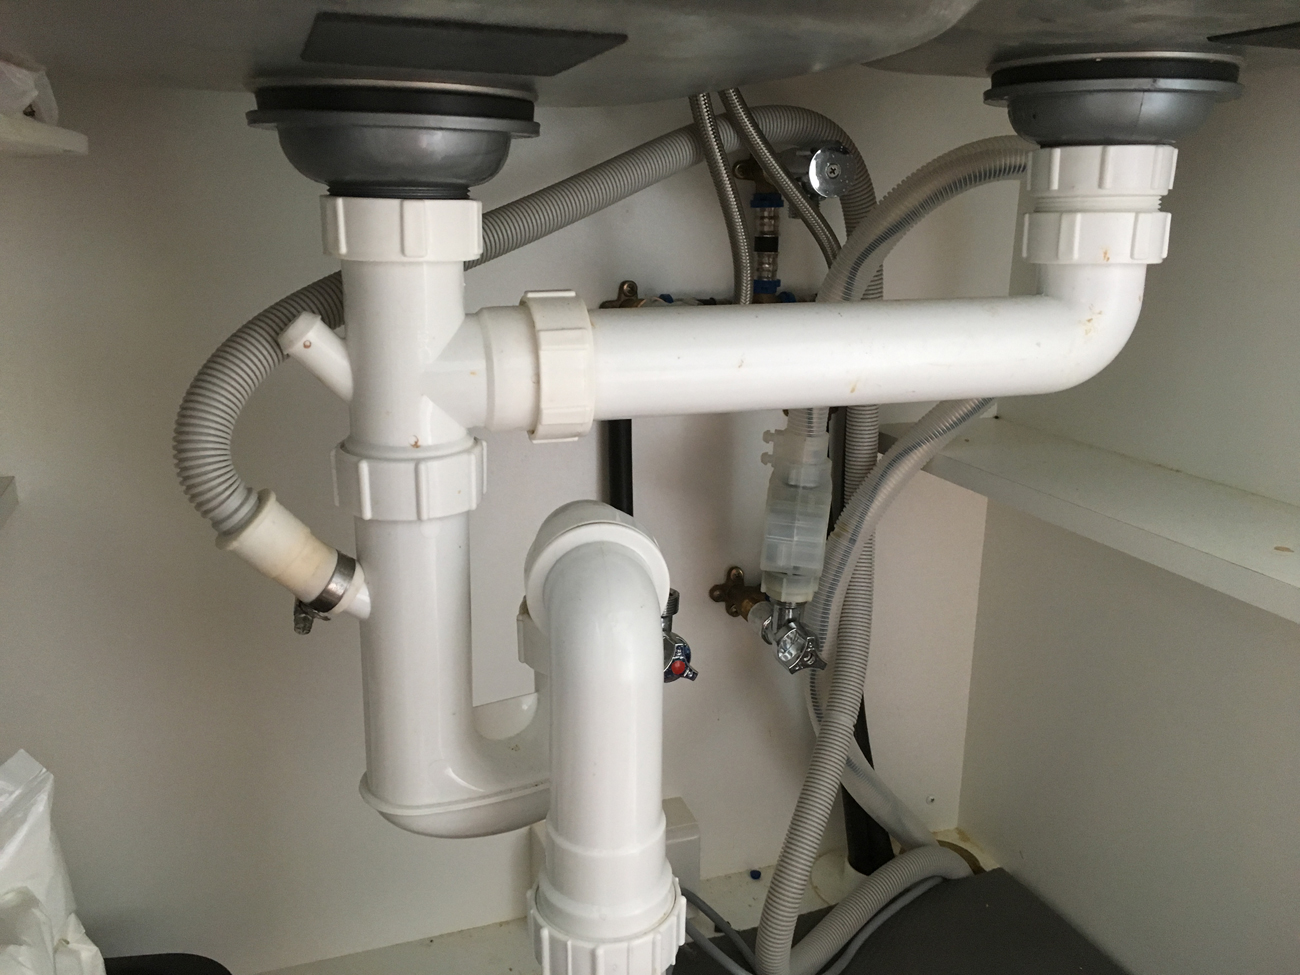
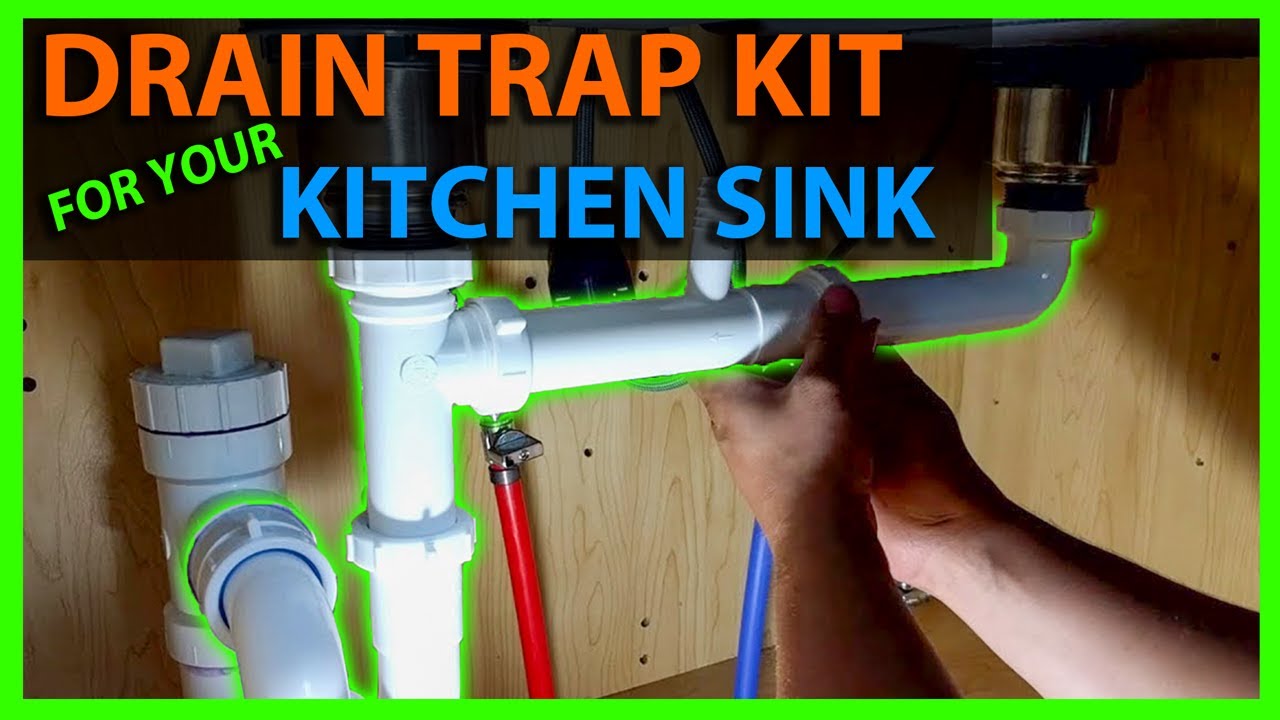
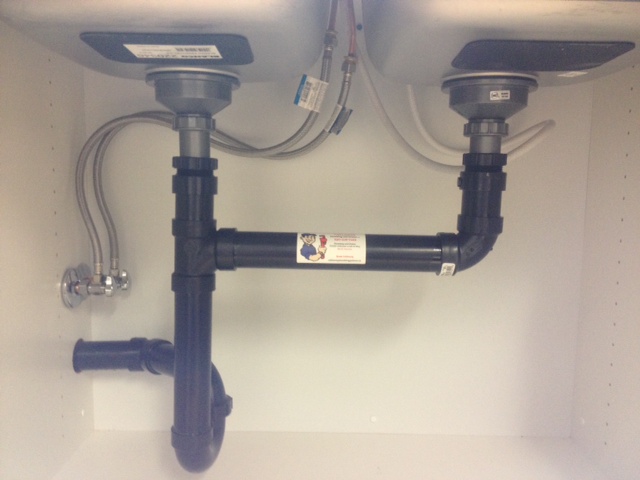
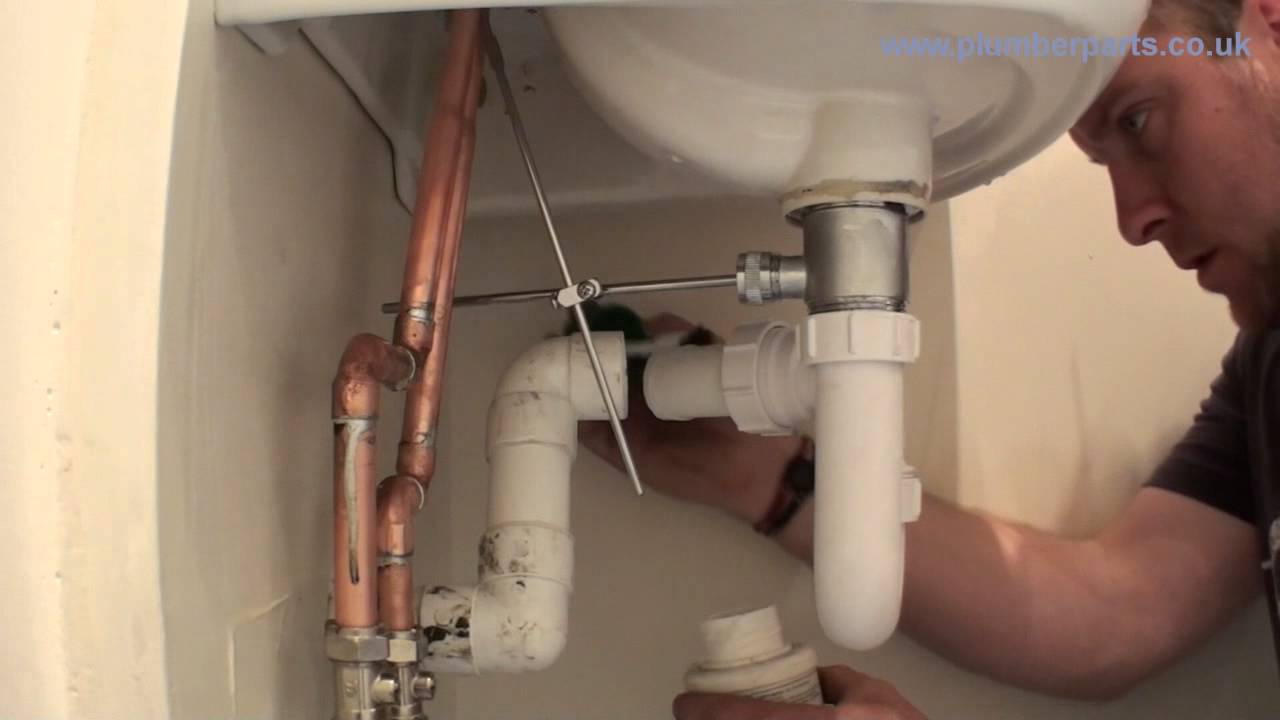
The kitchen sink drain is an essential component of your kitchen plumbing system. It carries wastewater from your sink and disposes of it safely. Here's a step-by-step guide to help you install a kitchen sink drain: Step 1: Start by removing the old drain assembly if you're replacing one. Use a wrench to loosen the connections and remove the drain from the sink. Step 2: Clean the sink's drain hole and the area around it using a degreaser. This will ensure a clean surface for the new drain assembly to be installed. Step 3: Apply plumber's putty to the underside of the new drain's flange and insert it into the sink's drain hole. Press down firmly to create a seal. Step 4: From underneath the sink, attach the rubber gasket and locknut to the drain flange. Use a wrench to tighten the connections. Step 5: Connect the P-trap to the drain and tighten the connections with a wrench. Make sure the P-trap is aligned correctly to prevent any leaks. Step 6: Turn on the water supply and test your new kitchen sink drain for any leaks. If everything looks good, you're all set!2. How to Install a Kitchen Sink Drain


2. How to Install a Kitchen Sink Drain
:max_bytes(150000):strip_icc()/how-to-install-a-sink-drain-2718789-hero-24e898006ed94c9593a2a268b57989a3.jpg)

/how-to-install-a-sink-drain-2718789-hero-b5b99f72b5a24bb2ae8364e60539cece.jpg)
:max_bytes(150000):strip_icc()/how-to-install-a-sink-drain-2718789-04-5715d67f5b7d41429d42bf705bb70e2c.jpg)
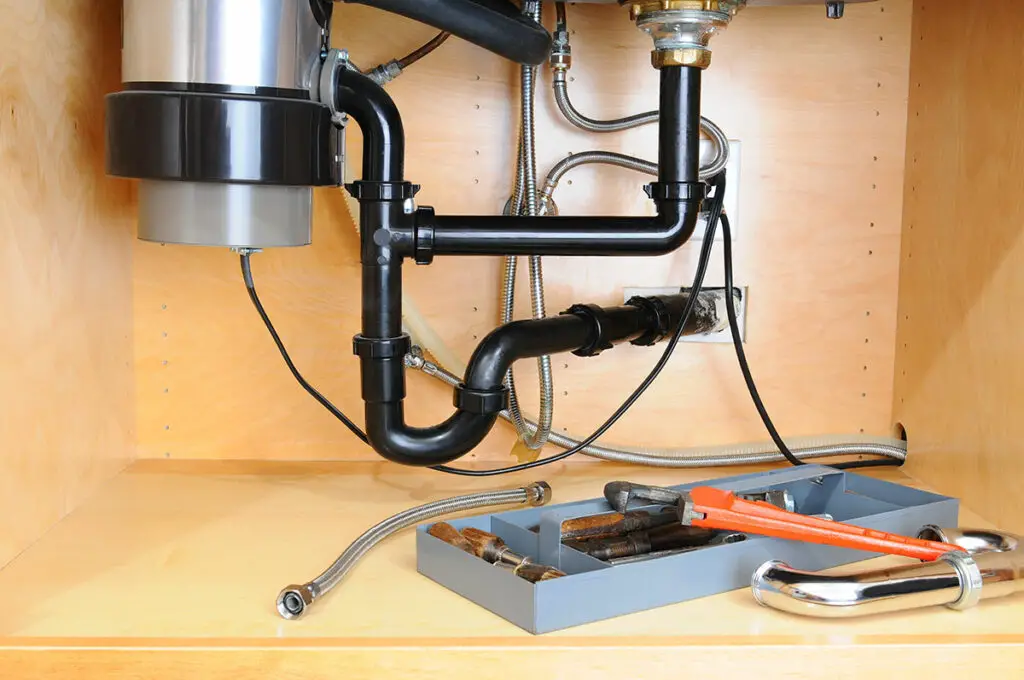
Installing the plumbing for your kitchen sink may seem like a job for a professional plumber, but with the right tools and knowledge, you can easily do it yourself. Here's a step-by-step guide to help you through the process: Step 1: Start by gathering all the necessary tools and materials. This includes a sink installation kit, a drain assembly, a P-trap, plumber's putty, a wrench, and a screwdriver. Step 2: Install the faucet onto the sink according to the manufacturer's instructions. Make sure to use the provided gasket to prevent any leaks. Step 3: Insert the drain assembly into the sink's drain hole and secure it using the provided gasket and locknut. Apply plumber's putty around the edges of the drain to create a watertight seal. Step 4: Connect the P-trap to the drain assembly and tighten the connections with a wrench. Step 5: Attach the water supply lines to the faucet using a wrench, making sure not to over-tighten. Step 6: If you're installing a garbage disposal, now is the time to do so. Follow the manufacturer's instructions and connect it to the sink drain and the dishwasher if you have one. Step 7: Turn on the water supply and check for any leaks. If everything looks good, your DIY kitchen sink plumbing installation is complete!3. DIY Kitchen Sink Plumbing Installation


3. DIY Kitchen Sink Plumbing Installation


If you're installing a new kitchen sink, you'll need to install the plumbing as well. This may seem like a daunting task, but with the right tools and knowledge, you can easily do it yourself. Here's a step-by-step guide: Step 1: Before you begin, make sure you have all the necessary tools and materials. This includes a sink installation kit, a drain assembly, a P-trap, plumber's putty, a wrench, and a screwdriver. Step 2: Follow the manufacturer's instructions to install the sink onto the countertop. Make sure to use the provided gasket to prevent any leaks. Step 3: Insert the drain assembly into the sink's drain hole and secure it using the provided gasket and locknut. Apply plumber's putty around the edges of the drain to create a watertight seal. Step 4: Attach the P-trap to the drain assembly and tighten the connections with a wrench. Step 5: Connect the water supply lines to the faucet using a wrench, making sure not to over-tighten. Step 6: If you're installing a garbage disposal, now is the time to do so. Follow the manufacturer's instructions and connect it to the sink drain and the dishwasher if you have one. Step 7: Turn on the water supply and check for any leaks. If everything looks good, your new kitchen sink and plumbing are ready to use!4. Installing Plumbing for a New Kitchen Sink


4. Installing Plumbing for a New Kitchen Sink


Installing a new kitchen sink can give your kitchen a fresh and updated look. Here's a step-by-step guide to help you install a kitchen sink: Step 1: Start by removing the old sink if you're replacing one. Shut off the water supply and disconnect the water supply lines and drain pipes. Step 2: Clean the countertop and sink cabinet to prepare for the new sink installation. Step 3: Follow the manufacturer's instructions to install the sink onto the countertop. Make sure to use the provided gasket to prevent any leaks. Step 4: Install the faucet onto the sink according to the manufacturer's instructions. Use the provided gasket to create a watertight seal. Step 5: Attach the water supply lines to the faucet using a wrench, making sure not to over-tighten. Step 6: If you're installing a garbage disposal, now is the time to do so. Follow the manufacturer's instructions and connect it to the sink drain and the dishwasher if you have one. Step 7: Turn on the water supply and check for any leaks. If everything looks good, your new kitchen sink is ready to use!5. Kitchen Sink Plumbing: How to Install a Kitchen Sink


5. Kitchen Sink Plumbing: How to Install a Kitchen Sink

The kitchen sink drain is an essential component of your kitchen plumbing system. Here's a step-by-step guide to help you install a kitchen sink drain: Step 1: Start by removing the old drain if you're replacing one. Use a wrench to loosen the connections and remove the drain from the sink. Step 2: Clean the sink's drain hole and the area around it using a degreaser. Step 3: Apply plumber's putty to the underside of the new drain's flange and insert it into the sink's drain hole. Press down firmly to create a seal. Step 4: From underneath the sink, attach the rubber gasket and locknut to the drain flange. Use a wrench to tighten the connections. Step 5: Connect the P-trap to the drain and tighten the connections with a wrench. Step 6: Turn on the water supply and check for any leaks. If everything looks good, your new kitchen sink drain is ready to use!6. Kitchen Sink Plumbing: How to Install a Kitchen Sink Drain


6. Kitchen Sink Plumbing: How to Install a Kitchen Sink Drain


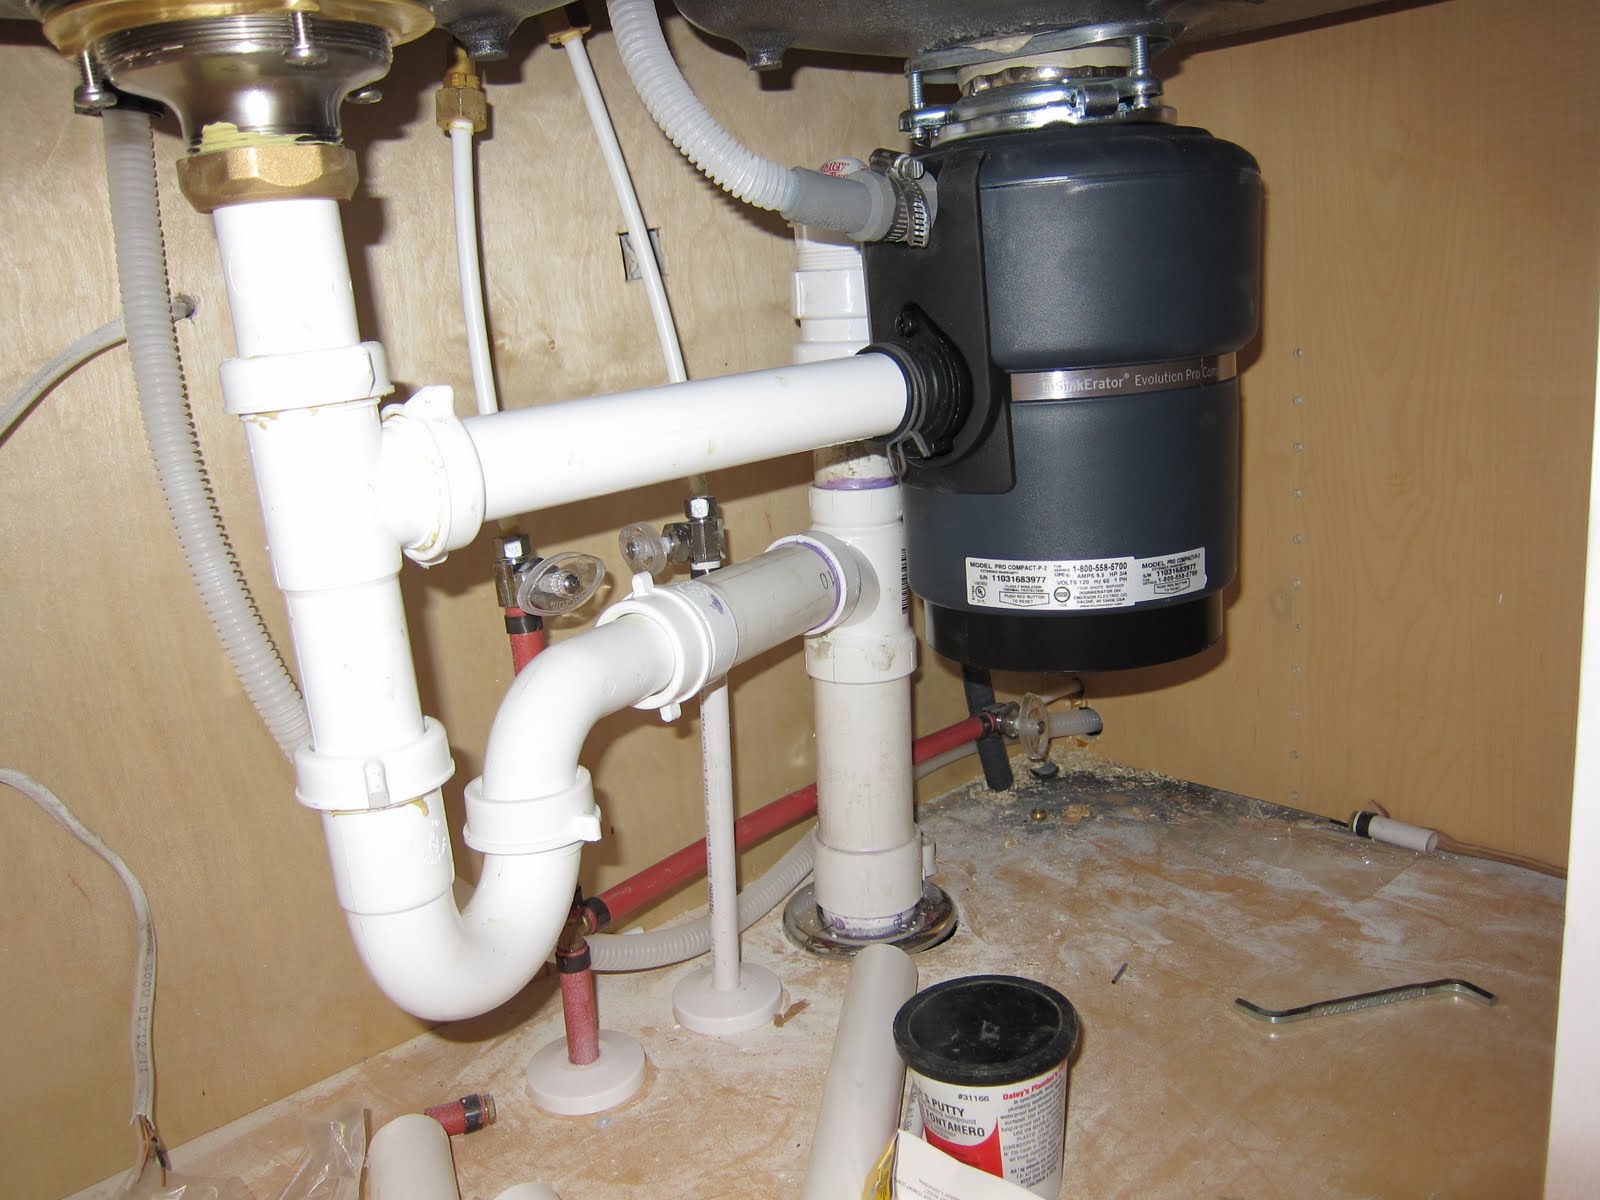
A garbage disposal is a convenient addition to any kitchen sink, making it easy to dispose of food scraps. Here's a step-by-step guide to help you install a garbage disposal: Step 1: Start by preparing the sink for installation. If you're replacing an old disposal, make sure to turn off the power and disconnect the old unit. Step 2: Install the mounting bracket onto the sink's drain hole according to the manufacturer's instructions. Step 3: Attach the disposal unit to the mounting bracket and secure it using the provided screws. Step 4: Connect the dishwasher drain line to the disposal unit if you have one. Step 5: Turn on the power and test the disposal to make sure it's working correctly.7. Kitchen Sink Plumbing: How to Install a Garbage Disposal
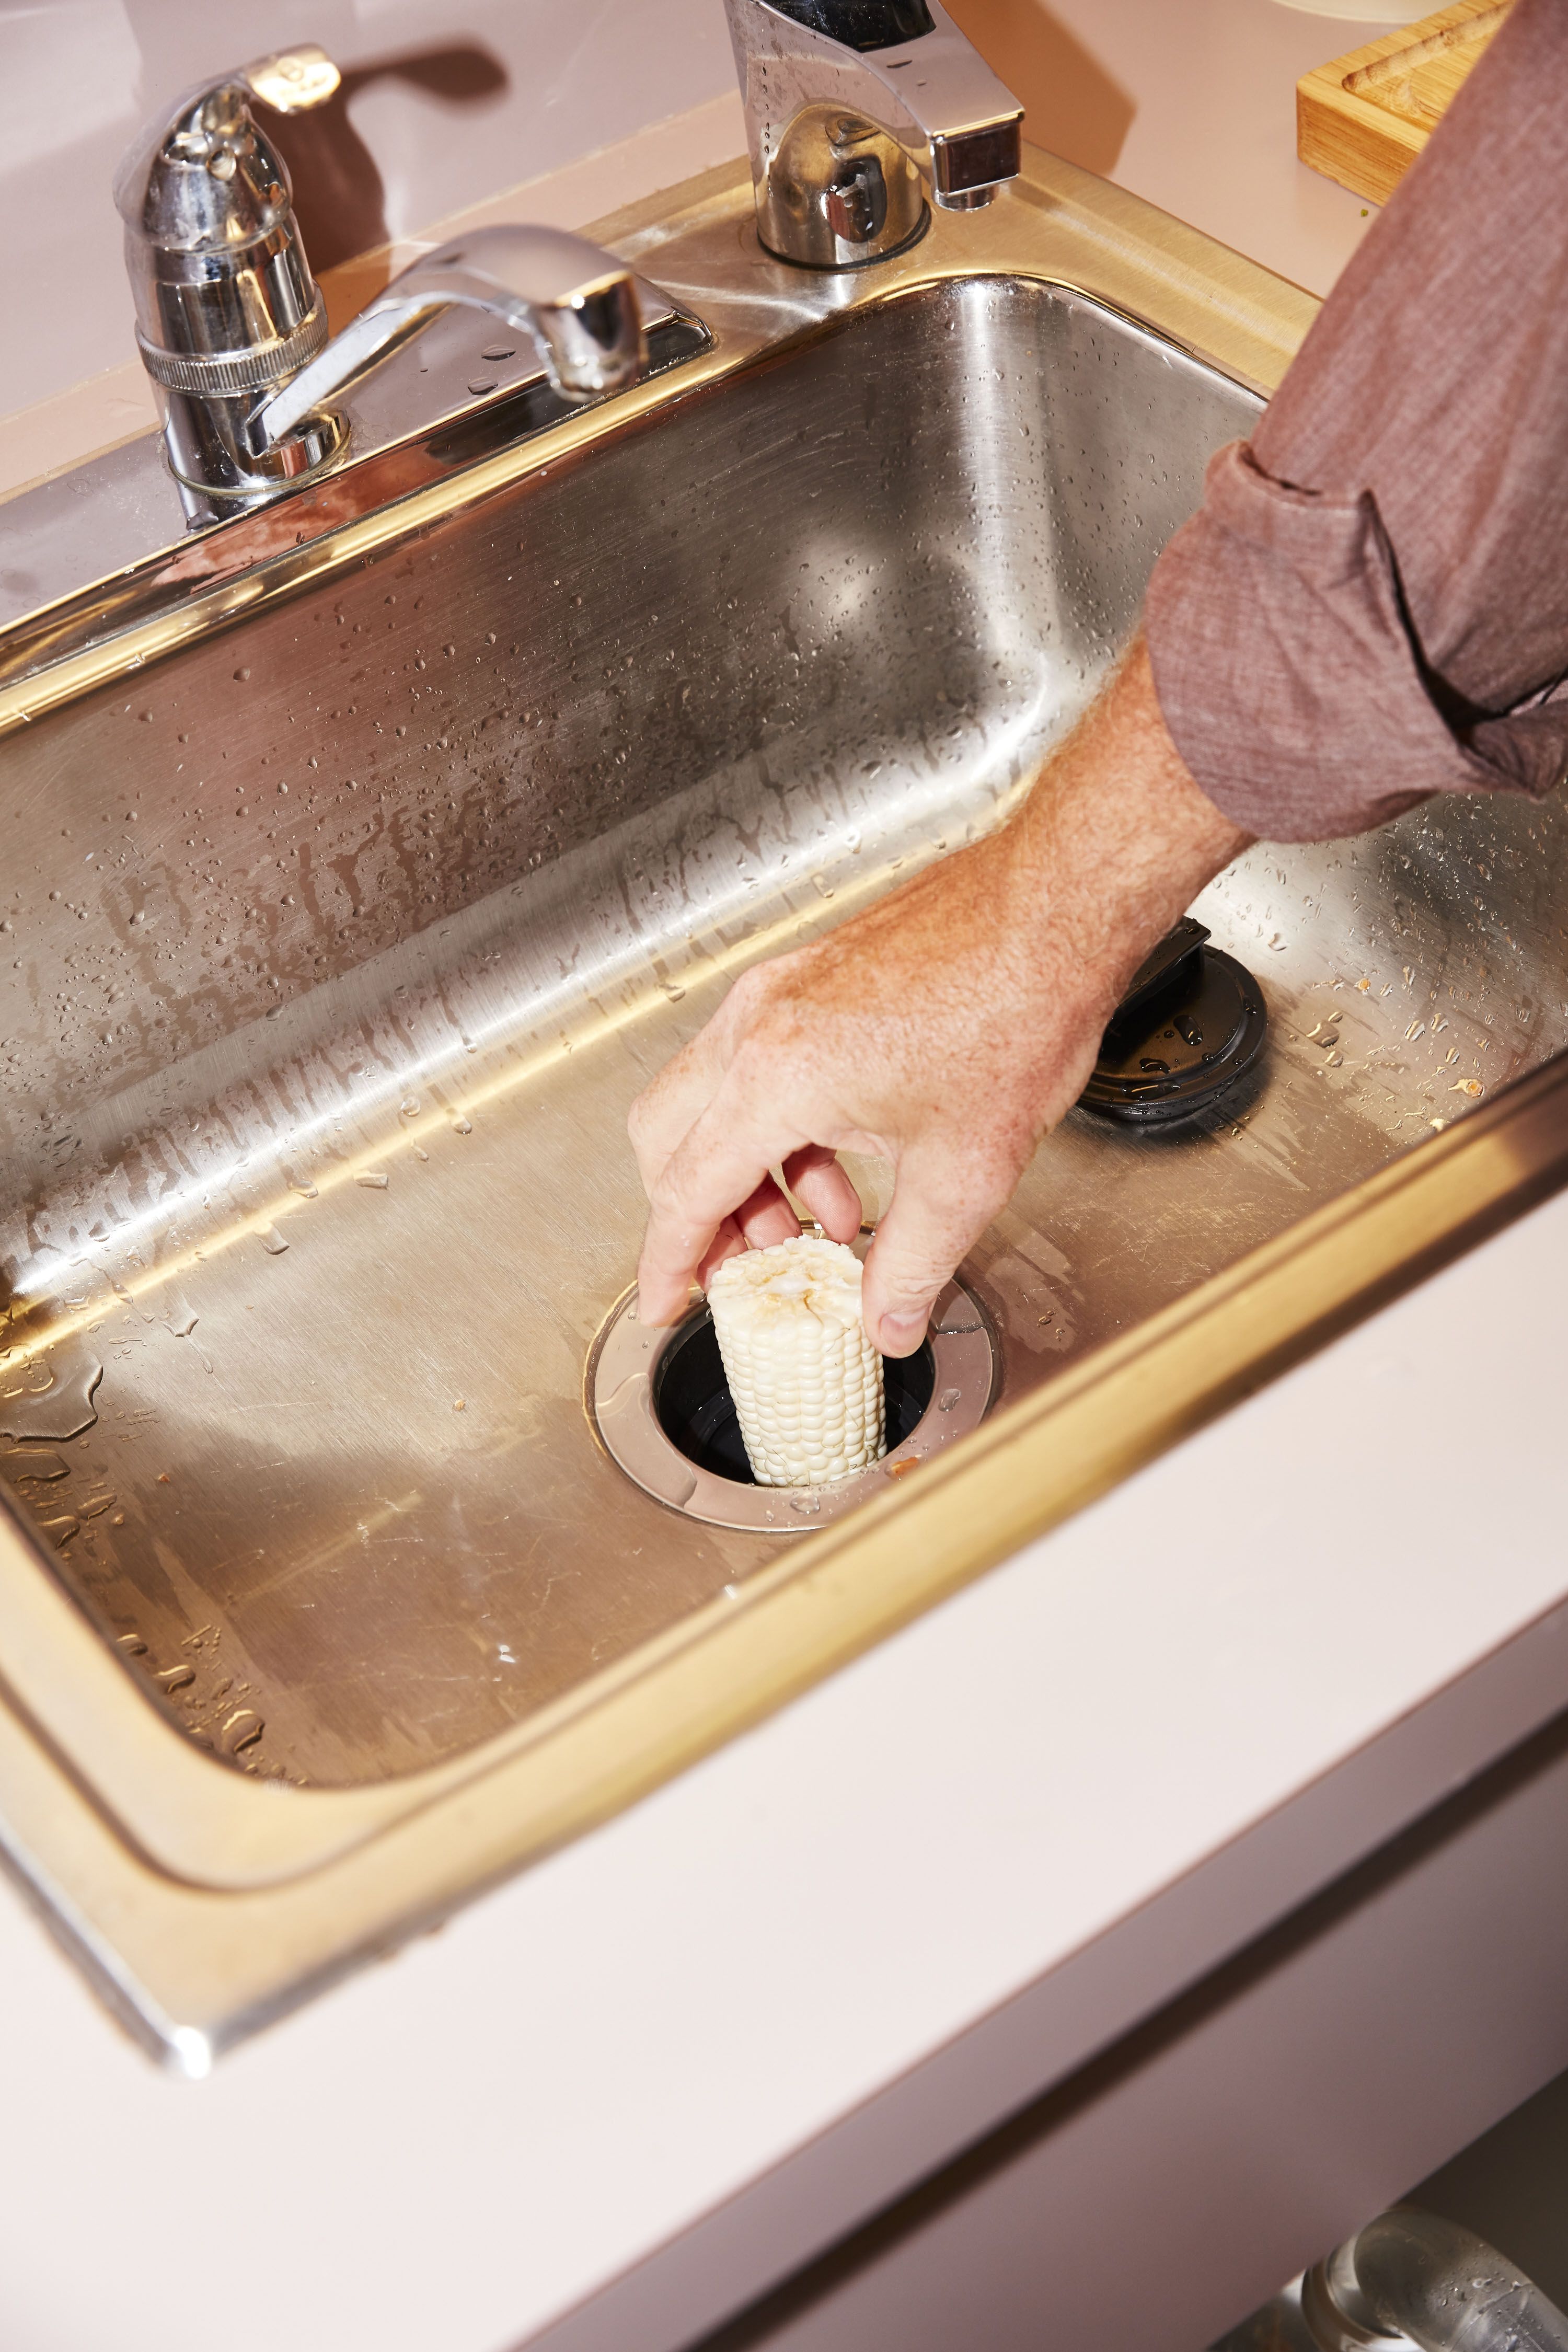
7. Kitchen Sink Plumbing: How to Install a Garbage Disposal


Installing a dishwasher can make your kitchen routine much more convenient. Here's a step-by-step guide to help you install a dishwasher: Step 1: Start by preparing the area where the dishwasher will be installed. This includes making sure there is an electrical outlet and a water supply line nearby. Step 2: Follow the manufacturer's instructions to install the mounting bracket onto the dishwasher. Step 3: Slide the dishwasher into place and secure it using the mounting bracket. Step 4: Connect the water supply line to the dishwasher and turn on the water supply. Step 5: Connect the dishwasher drain line to the sink's drain or garbage disposal unit. Step 6: Turn on the power and test the dishwasher to make sure it's working correctly.8. Kitchen Sink Plumbing: How to Install a Dishwasher


8. Kitchen Sink Plumbing: How to Install a Dishwasher


A water filter can improve the quality of your kitchen's drinking water. Here's a step-by-step guide to help you install a water filter: Step 1: Start by choosing a suitable location for the water filter under the sink. Step 2: Mount the filter onto the wall or cabinet using the provided hardware. Step 3: Connect the water supply line to the filter and turn on the water supply. Step 4: Connect the filter's output line to the water supply line for the sink. Step 5: Test the filter to make sure it's working correctly.9. Kitchen Sink Plumbing: How to Install a Water Filter


9. Kitchen Sink Plumbing: How to Install a Water Filter


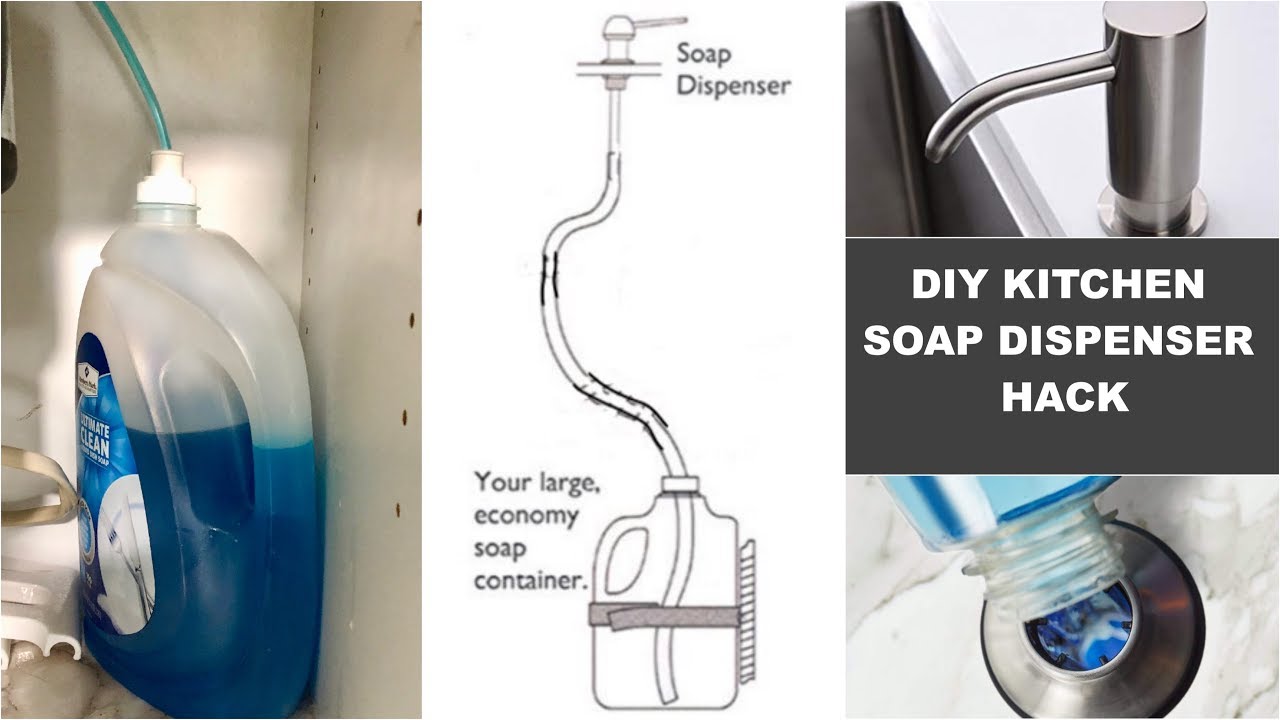
A soap dispenser can add convenience and style to your kitchen sink. Here's a step-by-step guide to help you install a soap dispenser: Step 1: Start by choosing a suitable location for the soap dispenser next to the faucet. Step 2: Drill a hole into the sink or countertop according to the manufacturer's instructions. Step 3: Insert the soap dispenser into the hole and secure it using the provided hardware. Step 4: Connect the dispenser to the soap bottle and test it to make sure it's working correctly. Congratulations, you've successfully installed the plumbing for your kitchen sink! With these tips and a little bit of patience, you can save money and complete this project yourself. Now it's time to sit back and enjoy your new kitchen sink and its fully functional plumbing system.10. Kitchen Sink Plumbing: How to Install a Soap Dispenser
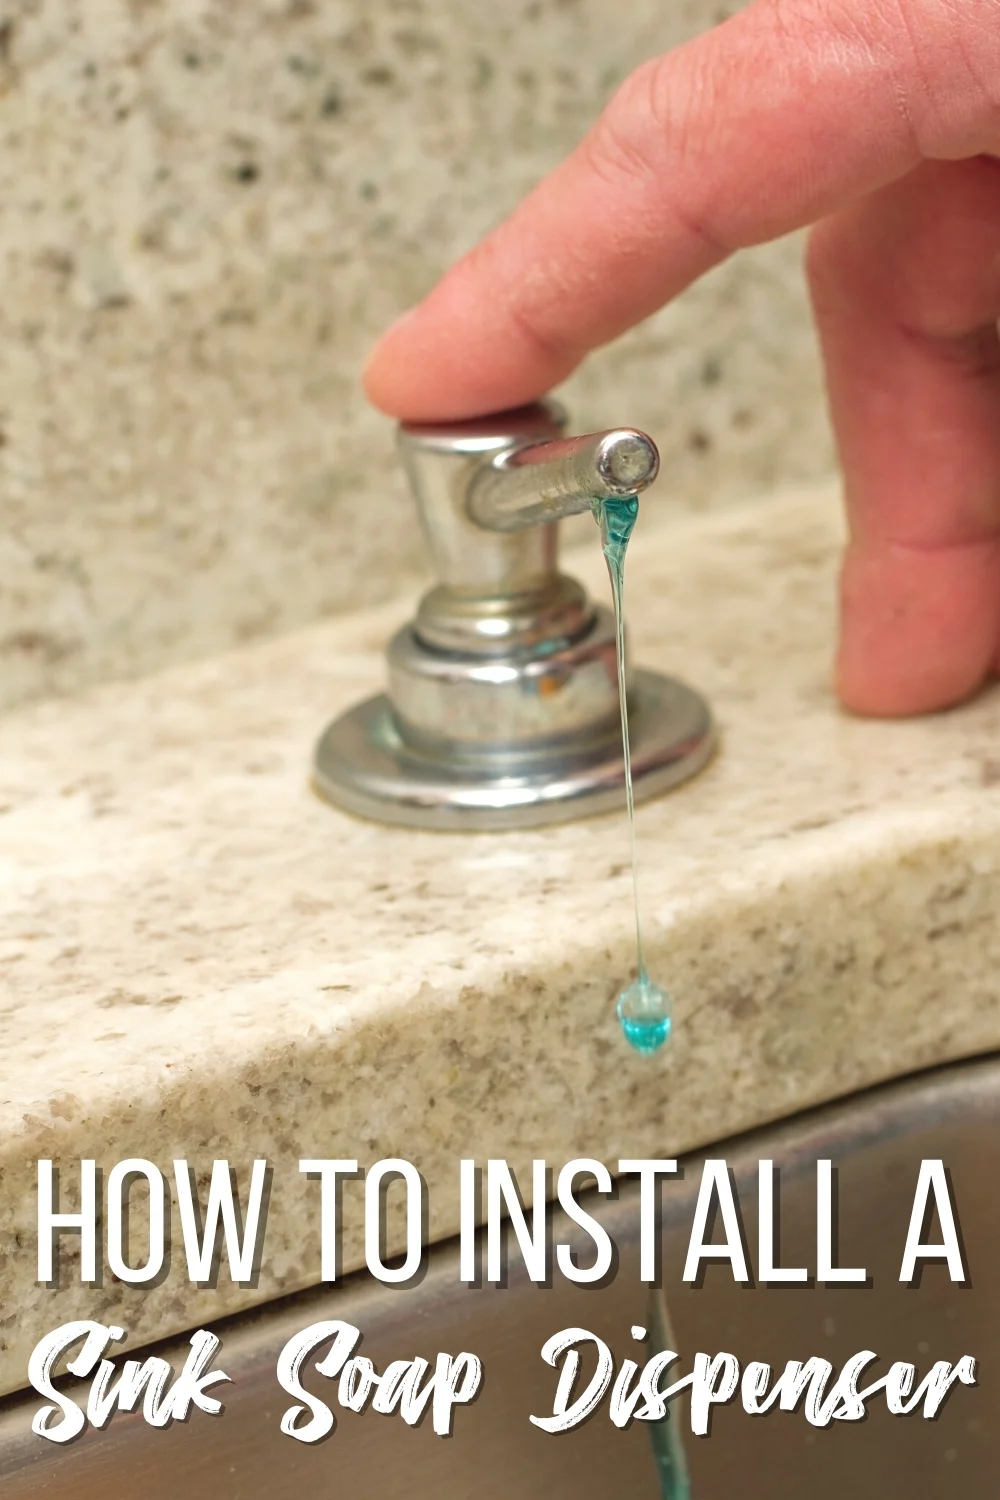

10. Kitchen Sink Plumbing: How to Install a Soap Dispenser


Additional Considerations for Installing Plumbing for Kitchen Sink
/how-to-install-a-sink-drain-2718789-hero-24e898006ed94c9593a2a268b57989a3.jpg)
Choosing the Right Materials
 When it comes to installing plumbing for your kitchen sink, it's important to choose the right materials. This not only ensures the longevity and functionality of your plumbing, but also helps to prevent any costly repairs in the future.
Copper
and
PEX
pipes are two commonly used materials for kitchen sink plumbing.
Copper
pipes are known for their durability and resistance to corrosion, making them a popular choice among homeowners.
PEX
pipes, on the other hand, are a more cost-effective option and offer flexibility in installation. Whichever material you choose, make sure to invest in high-quality pipes to avoid any potential issues down the line.
When it comes to installing plumbing for your kitchen sink, it's important to choose the right materials. This not only ensures the longevity and functionality of your plumbing, but also helps to prevent any costly repairs in the future.
Copper
and
PEX
pipes are two commonly used materials for kitchen sink plumbing.
Copper
pipes are known for their durability and resistance to corrosion, making them a popular choice among homeowners.
PEX
pipes, on the other hand, are a more cost-effective option and offer flexibility in installation. Whichever material you choose, make sure to invest in high-quality pipes to avoid any potential issues down the line.
Properly Venting Your Plumbing
 Venting is an essential aspect of plumbing installation that is often overlooked. This process involves creating a pathway for air to enter and exit your plumbing system, allowing for proper drainage. Without proper venting, your kitchen sink may experience slow draining or even clogs.
Properly venting
your plumbing also helps to prevent unpleasant odors from building up in your kitchen. It's important to consult with a professional plumber to determine the proper venting requirements for your specific kitchen sink setup.
Venting is an essential aspect of plumbing installation that is often overlooked. This process involves creating a pathway for air to enter and exit your plumbing system, allowing for proper drainage. Without proper venting, your kitchen sink may experience slow draining or even clogs.
Properly venting
your plumbing also helps to prevent unpleasant odors from building up in your kitchen. It's important to consult with a professional plumber to determine the proper venting requirements for your specific kitchen sink setup.
Consider Hiring a Professional
 While some homeowners may choose to tackle the installation of kitchen sink plumbing themselves, it's always a good idea to consider hiring a professional plumber. They have the knowledge, experience, and tools necessary to ensure that your plumbing is installed correctly and efficiently. This can save you time, money, and potential headaches in the long run. Additionally, professional plumbers are well-versed in local building codes and regulations, ensuring that your plumbing meets all necessary requirements.
In conclusion, installing plumbing for your kitchen sink is an important aspect of house design that should not be taken lightly. By choosing the right materials, properly venting your plumbing, and considering hiring a professional, you can ensure a functioning and efficient plumbing system for your kitchen sink. Don't overlook the importance of proper plumbing installation and consult with a professional for a stress-free and successful project.
While some homeowners may choose to tackle the installation of kitchen sink plumbing themselves, it's always a good idea to consider hiring a professional plumber. They have the knowledge, experience, and tools necessary to ensure that your plumbing is installed correctly and efficiently. This can save you time, money, and potential headaches in the long run. Additionally, professional plumbers are well-versed in local building codes and regulations, ensuring that your plumbing meets all necessary requirements.
In conclusion, installing plumbing for your kitchen sink is an important aspect of house design that should not be taken lightly. By choosing the right materials, properly venting your plumbing, and considering hiring a professional, you can ensure a functioning and efficient plumbing system for your kitchen sink. Don't overlook the importance of proper plumbing installation and consult with a professional for a stress-free and successful project.