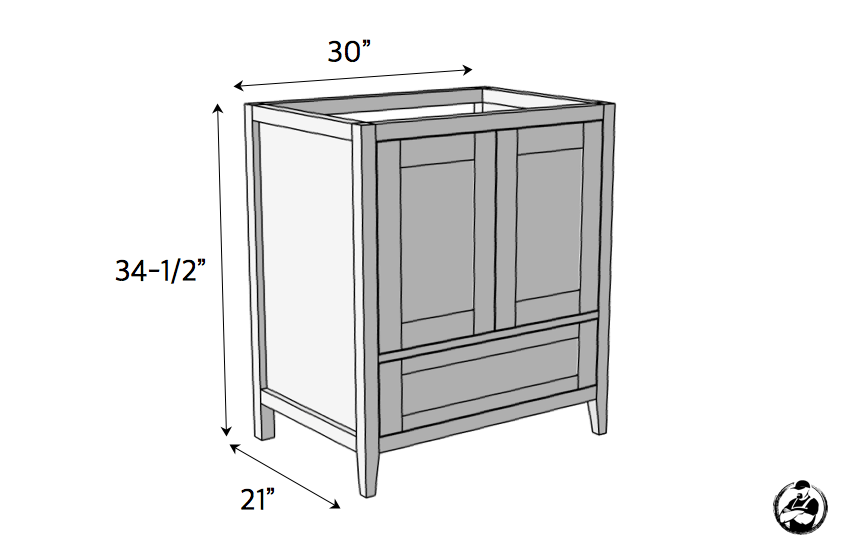
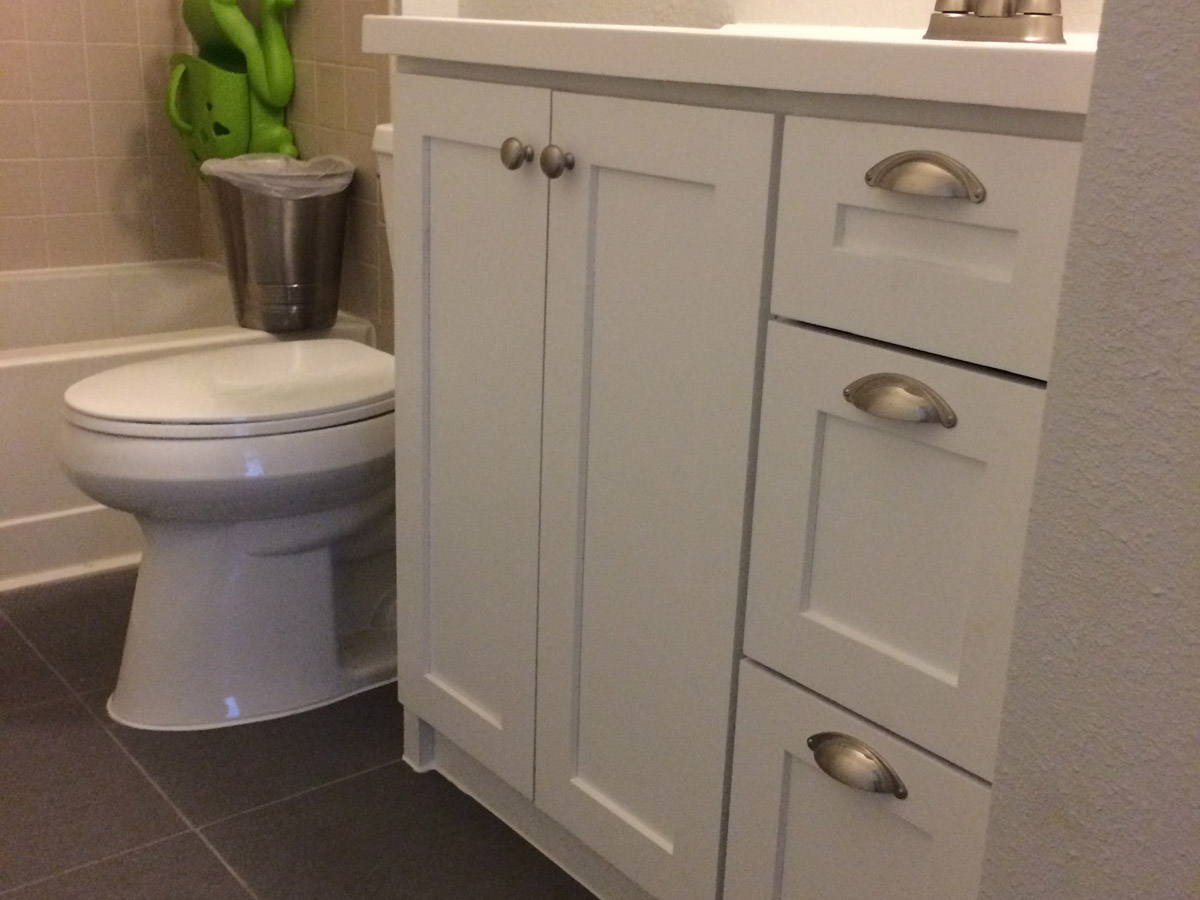
Are you looking to give your bathroom a stylish and functional upgrade without breaking the bank? A DIY shaker bathroom vanity might be just what you need. With a few tools, materials, and some basic woodworking skills, you can create a beautiful and customizable vanity that will add a touch of elegance to your bathroom. Before you start your project, it’s important to have a clear plan in place. This will not only help you stay organized and on track, but it will also ensure that you have all the necessary materials and tools. Here are some essential DIY shaker bathroom vanity plans to get you started: 1. Measure and Design Your Vanity Start by measuring the space where you want to install your vanity. This will help you determine the size and dimensions of your vanity. You can use an online design tool or sketch your own design on paper. Make sure to include details like drawers, shelves, and any other features you want in your vanity. 2. Gather Your Materials and Tools Once you have your design in place, it’s time to gather all the necessary materials and tools. This may include wood for the frame, plywood for the shelves, screws, nails, hinges, and drawer slides, among others. Make sure to have all the materials and tools on hand before you start your project to avoid any delays. 3. Cut and Assemble Your Vanity Using your measurements and design, cut the wood pieces to the appropriate size. Assemble the frame of your vanity using screws and nails. Then, attach the shelves, drawers, and doors using hinges and drawer slides. You can also add decorative features like trim and paneling to give your vanity a shaker style look. 4. Sand and Paint Your Vanity Once your vanity is assembled, use sandpaper to smooth out any rough edges and surfaces. This will also give the wood a clean and polished look. Then, apply a coat of paint or stain of your choice. Opt for a light color for a classic shaker style or a bold color for a more modern look. 5. Install Your Vanity Finally, it’s time to install your DIY shaker bathroom vanity in your bathroom. Make sure to secure it to the wall for stability. You can also add a countertop and sink of your choice to complete the look. Now sit back and admire your beautiful and budget-friendly creation.DIY Shaker Bathroom Vanity Plans


DIY Shaker Bathroom Vanity Plans

:max_bytes(150000):strip_icc()/build-something-diy-vanity-594402125f9b58d58ae21158.jpg)
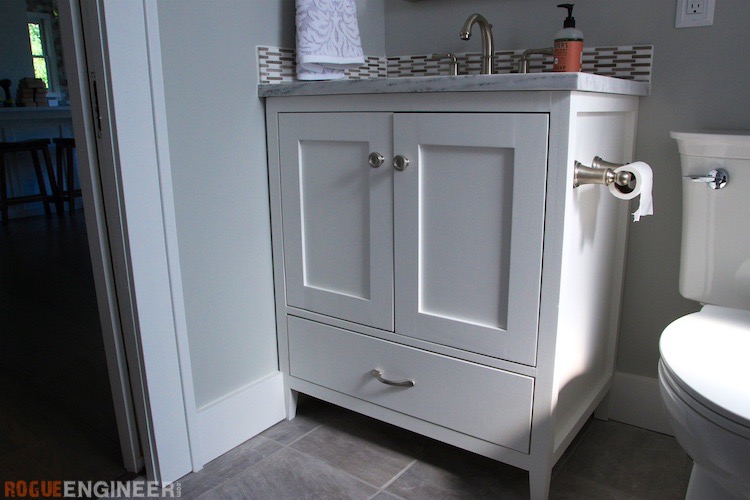


If you’re a fan of clean, simple lines and timeless design, then a DIY shaker style bathroom vanity is the perfect project for you. Shaker style furniture is known for its minimalist and functional design, making it a popular choice for both traditional and modern homes. Here’s how you can create your own shaker style bathroom vanity: 1. Choose Your Materials The key to achieving a shaker style look is to use high-quality and natural materials. Opt for solid wood like oak, maple, or birch for the frame of your vanity. For the doors and drawers, you can use plywood or MDF with a wood veneer. These materials are not only durable and sturdy, but they also have a beautiful grain that will add character to your vanity. 2. Keep It Simple The beauty of shaker style furniture lies in its simplicity. Avoid any intricate or ornate designs and opt for clean lines and minimal details. You can add some subtle accents like beading or paneling, but make sure to keep it understated. 3. Use Classic Hardware For a true shaker style look, choose classic and simple hardware for your vanity. This includes knobs and pulls in brushed nickel, brass, or black finishes. These timeless pieces will add a touch of elegance to your vanity without overpowering the overall design. 4. Stick to a Neutral Color Palette Shaker style furniture is known for its natural and muted color palette. Opt for light or neutral colors like white, beige, or light gray for your vanity. This will not only give your bathroom a clean and bright look, but it will also allow the natural beauty of the wood to shine through. 5. Add Functionality Aside from its simple and classic design, shaker style furniture is also known for its functionality. When designing your vanity, make sure to include features like drawers, shelves, and storage space. This will not only make your vanity more practical, but it will also add to its overall shaker style look.DIY Shaker Style Bathroom Vanity


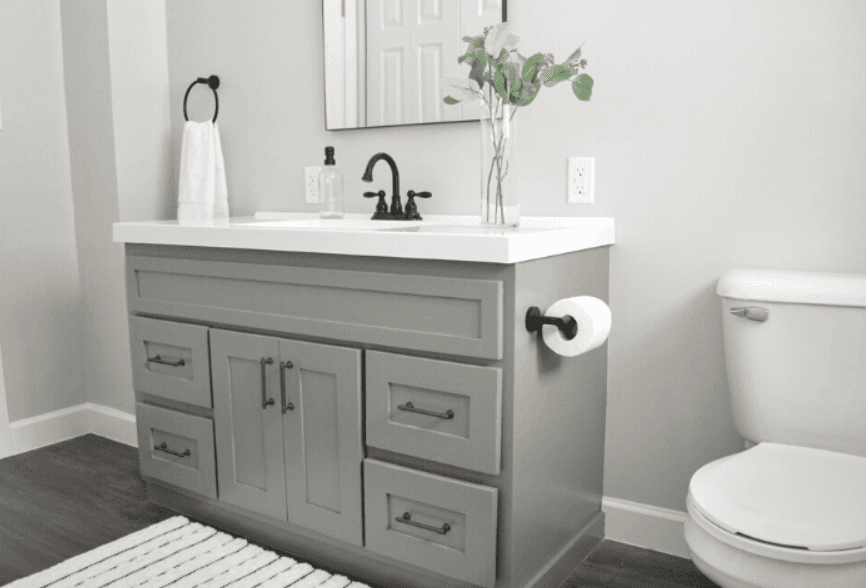
DIY Shaker Style Bathroom Vanity


A bathroom vanity is not only a functional piece of furniture, but it also serves as a focal point in the room. A DIY shaker bathroom vanity cabinet can add both style and storage to your bathroom. Here’s how you can create your own: 1. Measure and Design Your Cabinet Start by measuring the space where you want to install your vanity cabinet. This will help you determine the size and dimensions of your cabinet. You can use an online design tool or sketch your own design on paper. Make sure to include details like shelves, drawers, and any other features you want in your cabinet. 2. Gather Your Materials and Tools Once you have your design in place, it’s time to gather all the necessary materials and tools. This may include wood for the frame, plywood for the shelves, screws, nails, and hinges, among others. Make sure to have all the materials and tools on hand before you start your project to avoid any delays. 3. Cut and Assemble Your Cabinet Using your measurements and design, cut the wood pieces to the appropriate size. Assemble the frame of your cabinet using screws and nails. Then, attach the shelves and doors using hinges. You can also add decorative features like trim and paneling to give your cabinet a shaker style look. 4. Sand and Paint Your Cabinet After assembling your cabinet, use sandpaper to smooth out any rough edges and surfaces. Then, apply a coat of paint or stain of your choice. Opt for a light color for a classic shaker style or a bold color for a more modern look. You can also add a clear sealant for extra durability. 5. Install Your Cabinet Finally, it’s time to install your DIY shaker bathroom vanity cabinet in your bathroom. Make sure to secure it to the wall for stability. You can also add a countertop and sink of your choice to complete the look. Now you have a beautiful and functional storage solution for your bathroom.DIY Shaker Bathroom Vanity Cabinet
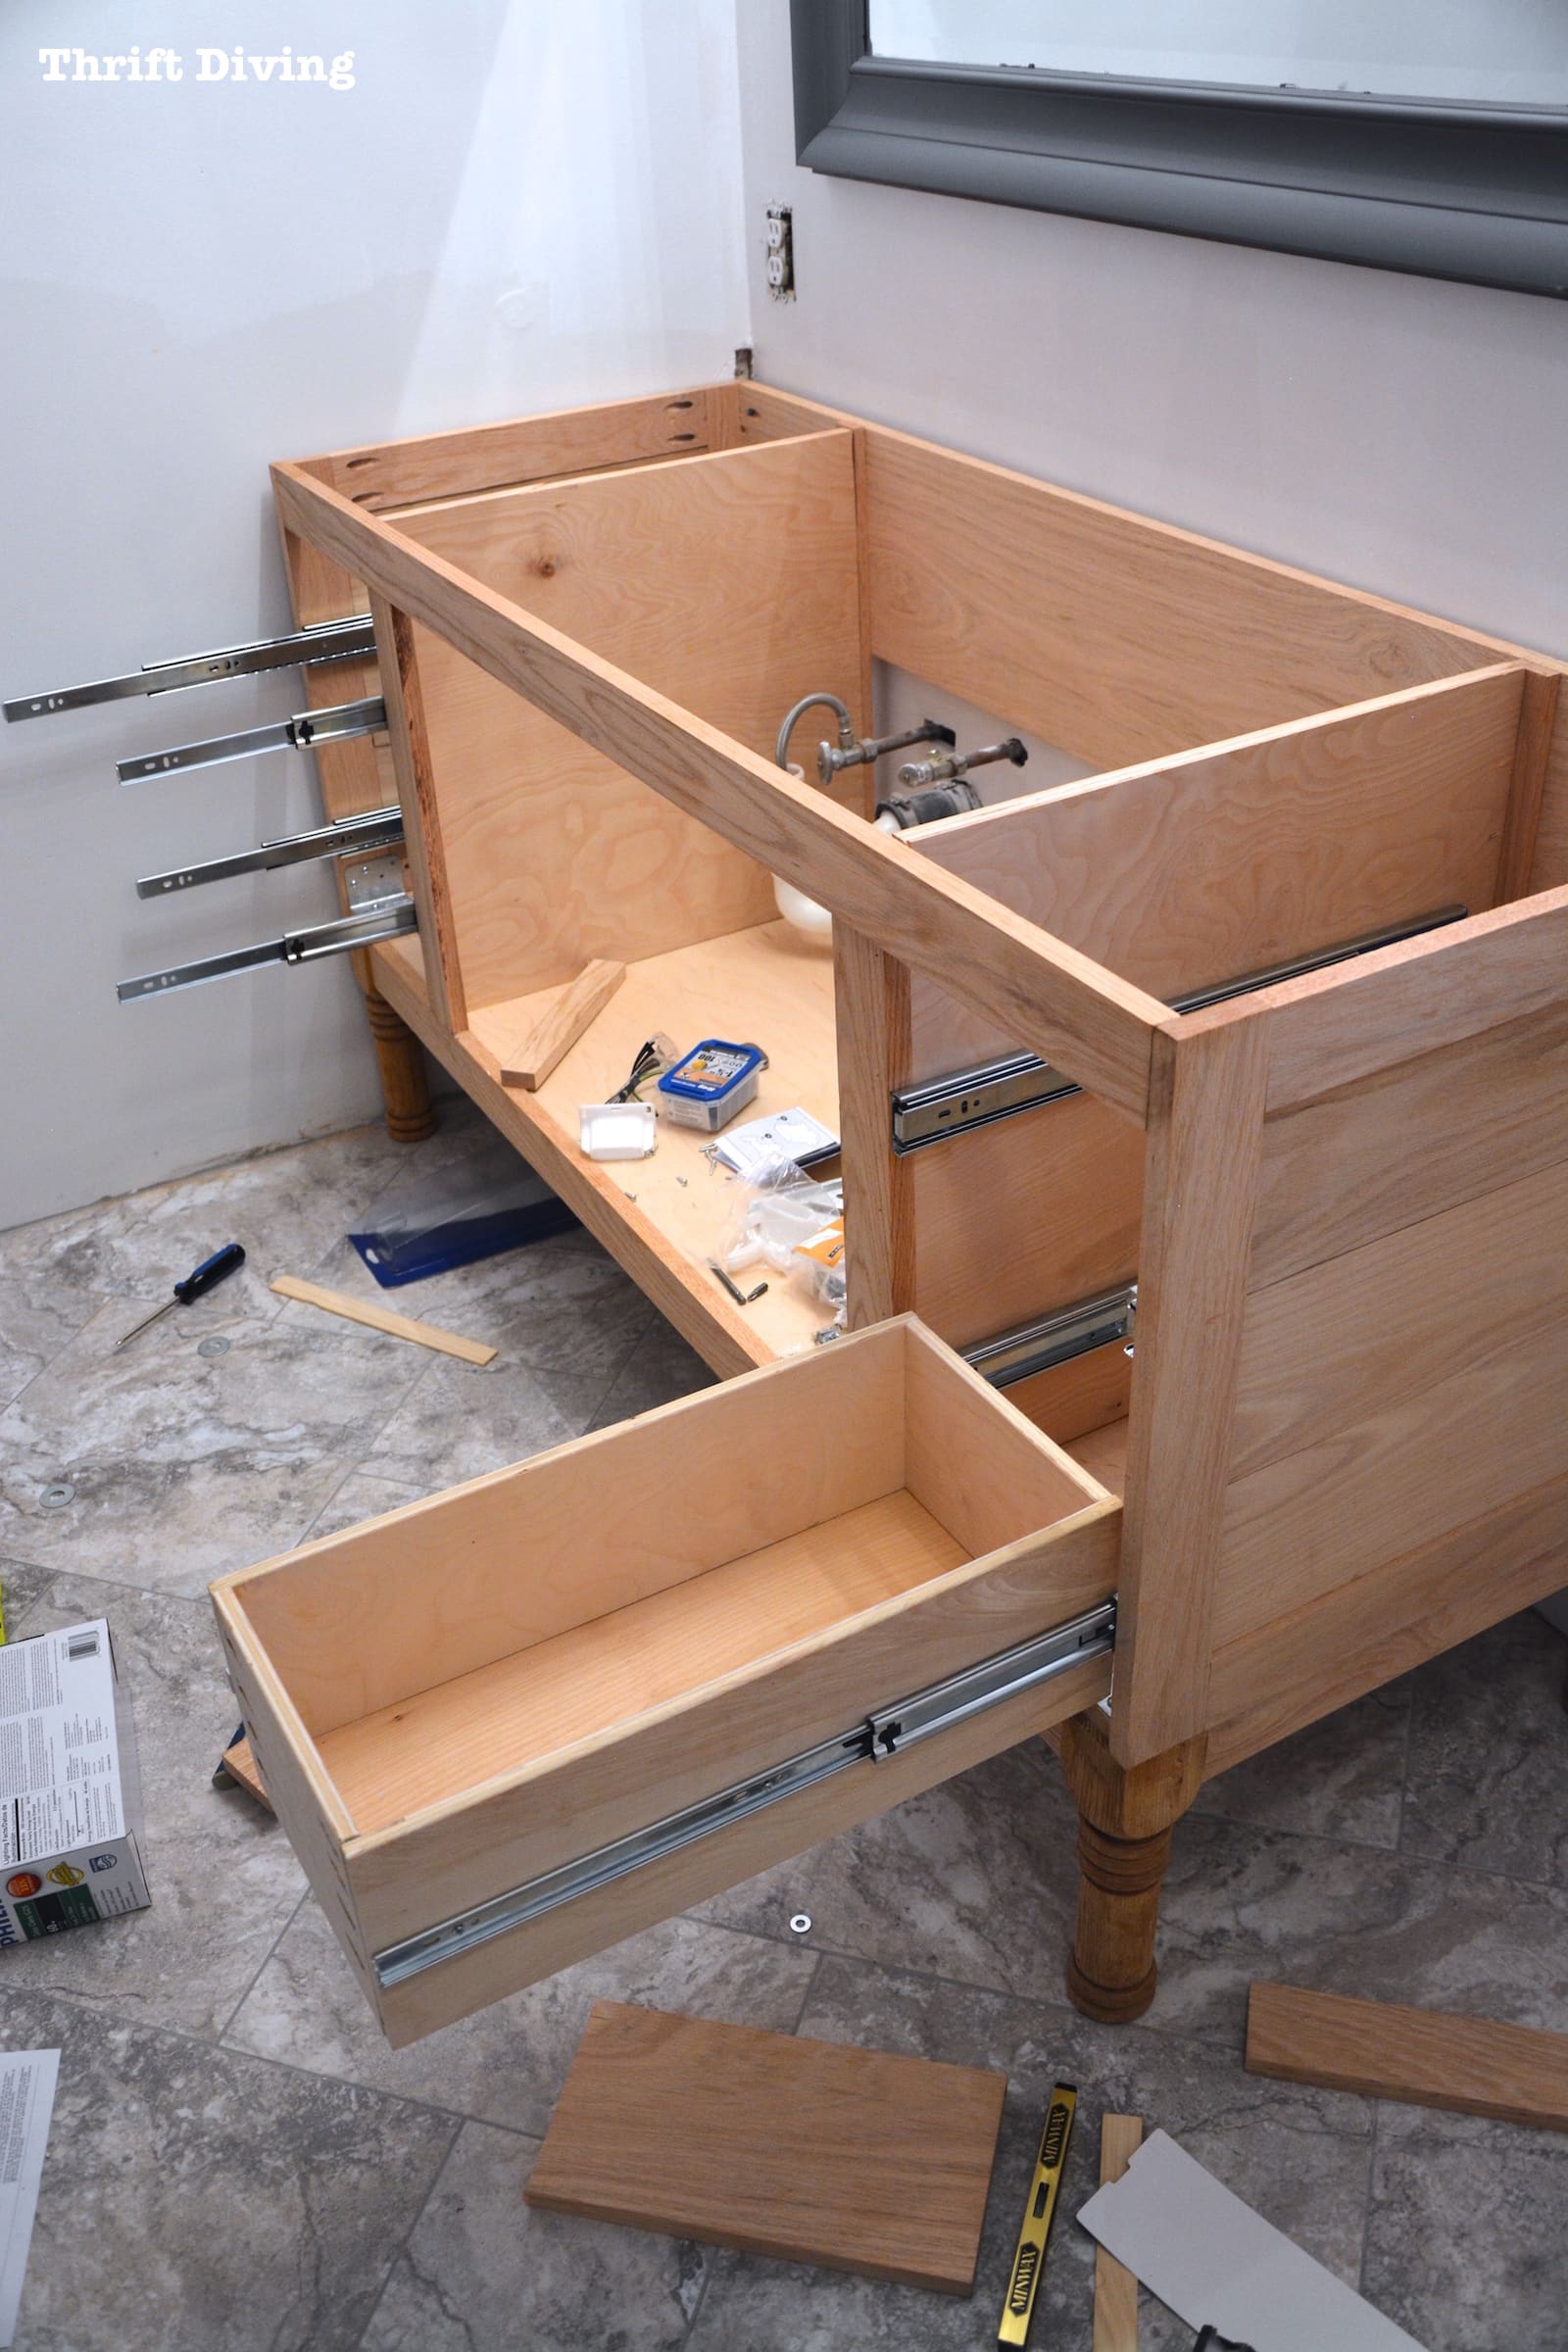

DIY Shaker Bathroom Vanity Cabinet
/cherry-diy-bathroom-vanity-594414da5f9b58d58a099a36.jpg)


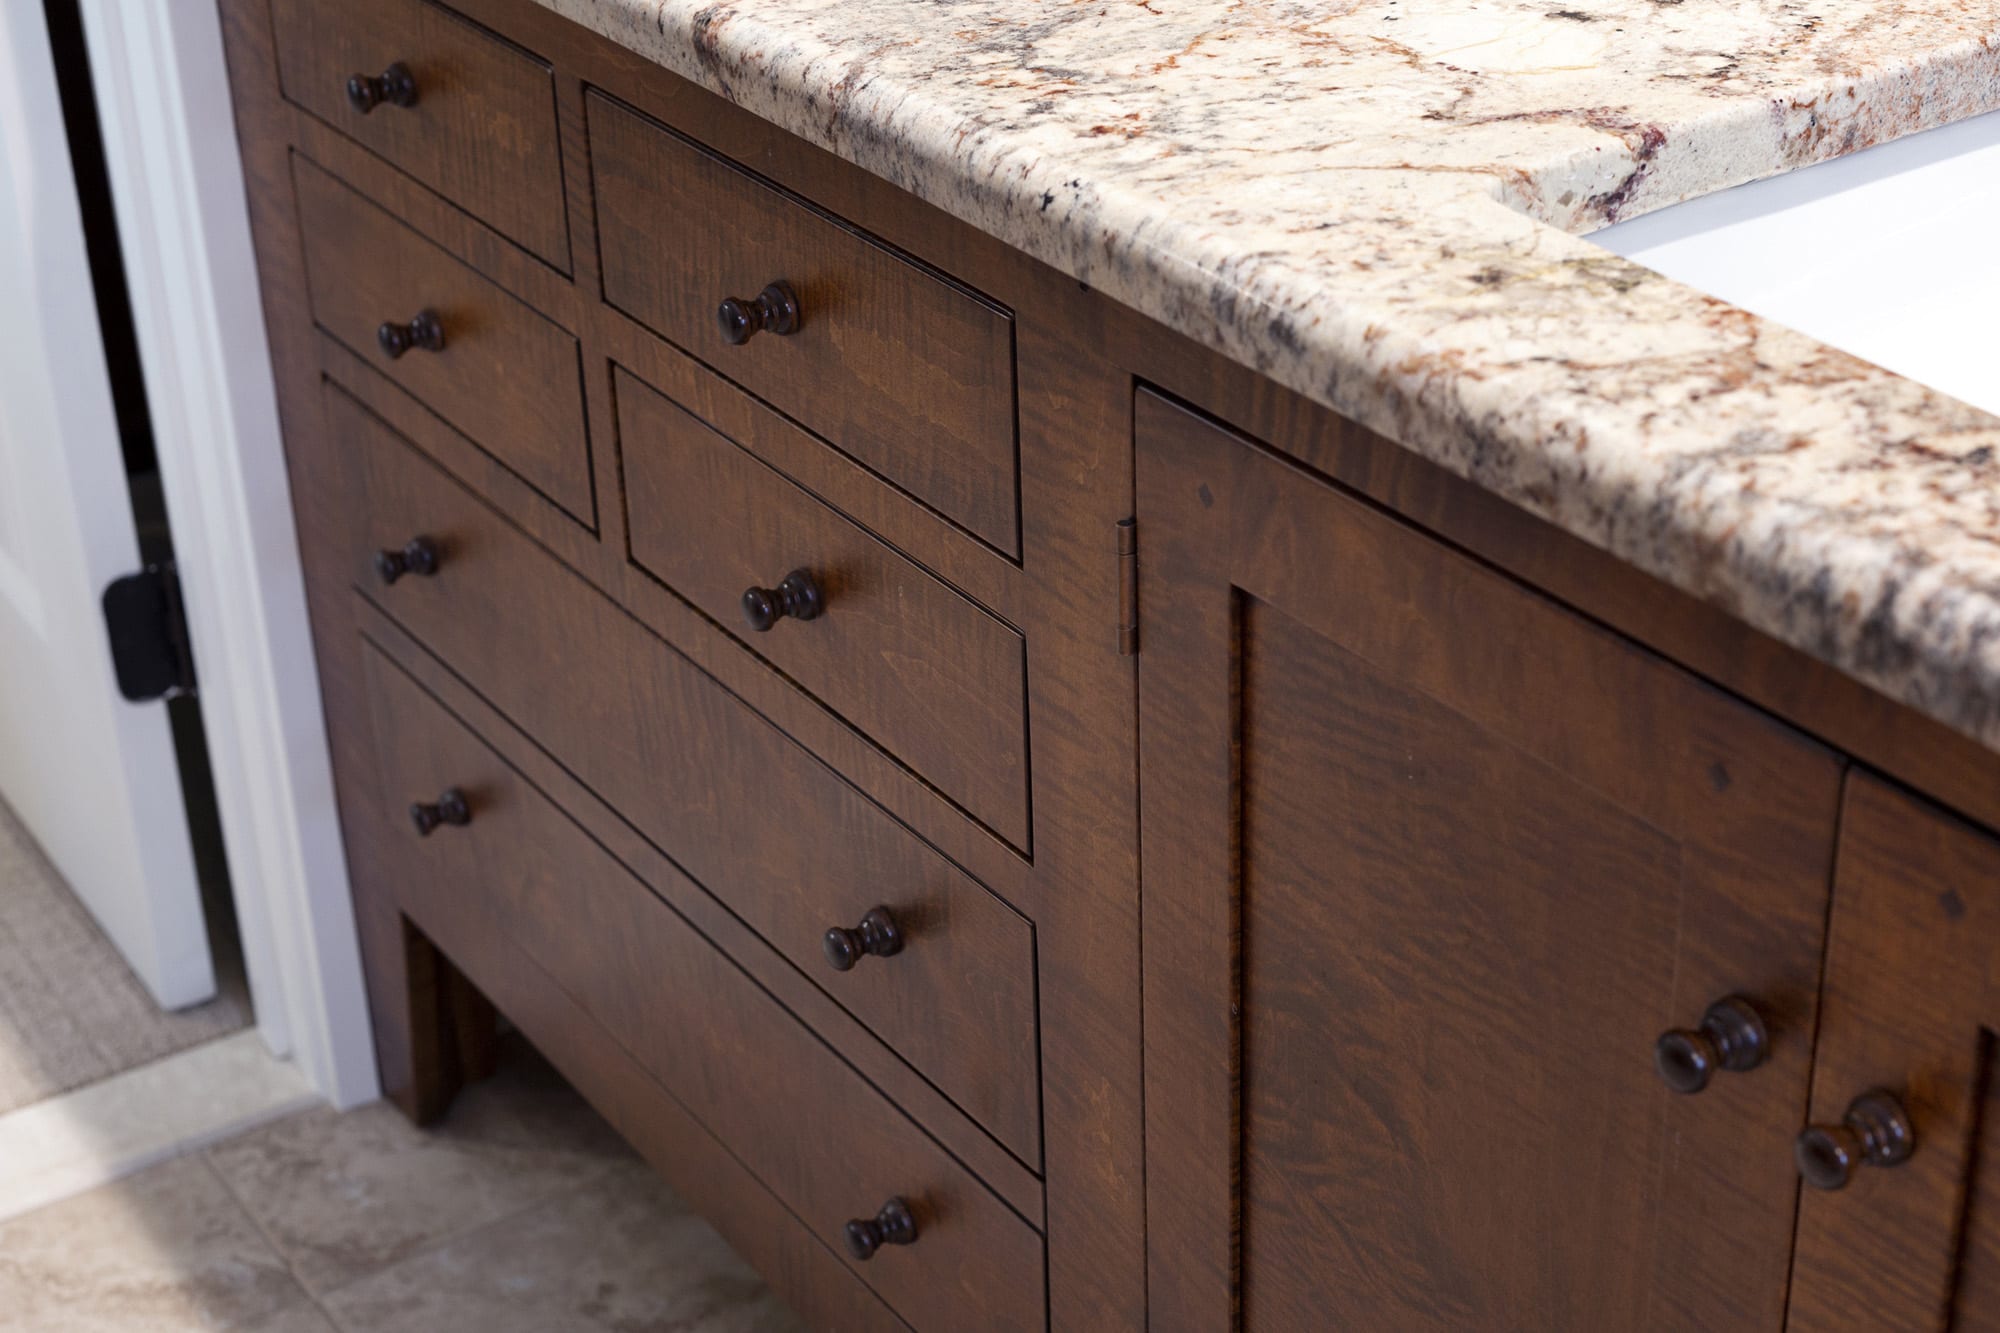
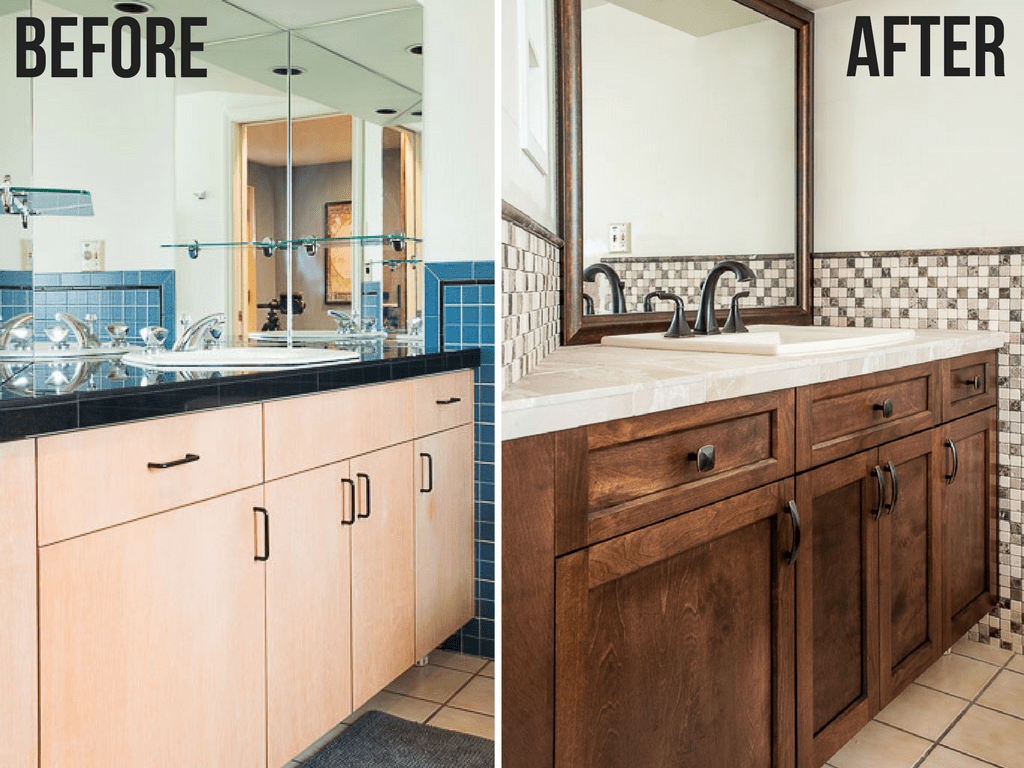
If your bathroom vanity is looking tired and outdated, a DIY shaker bathroom vanity makeover might be just what you need to give it a new lease on life. With a few simple updates, you can transform your old vanity into a beautiful and stylish piece of furniture. Here’s how: 1. Update the Doors and Drawers The easiest and most impactful way to give your bathroom vanity a shaker style makeover is to replace the doors and drawers. You can purchase pre-made shaker style doors and drawers or make your own using plywood and wood veneer. This will instantly give your vanity a fresh and modern look. 2. Add a Fresh Coat of Paint Another simple way to update your vanity is to give it a fresh coat of paint. Opt for a light or neutral color for a classic shaker style or a bold color for a more modern look. You can also add some distressing or glazing for a vintage or rustic feel. 3. Change the Hardware Swapping out the hardware on your vanity can make a big difference in its overall look. Choose simple and classic hardware in brushed nickel, brass, or black finishes for a shaker style look. This is also a great opportunity to add some functional features like soft-close hinges and drawer slides. 4. Update the Countertop and Sink If your budget allows, consider updating your vanity’s countertop and sink. This can instantly elevate the overall look of your bathroom and complement your shaker style vanity. You can choose from a variety of materials like marble, granite, or quartz, depending on your budget and personal preference. 5. Decorate with Accessories The final touch in giving your vanity a shaker style makeover is to decorate it with accessories. Add some woven baskets, apothecary jars, or a vintage mirror to complete the look. These small details will add charm and personality to your bathroom vanity.DIY Shaker Bathroom Vanity Makeover


DIY Shaker Bathroom Vanity Makeover


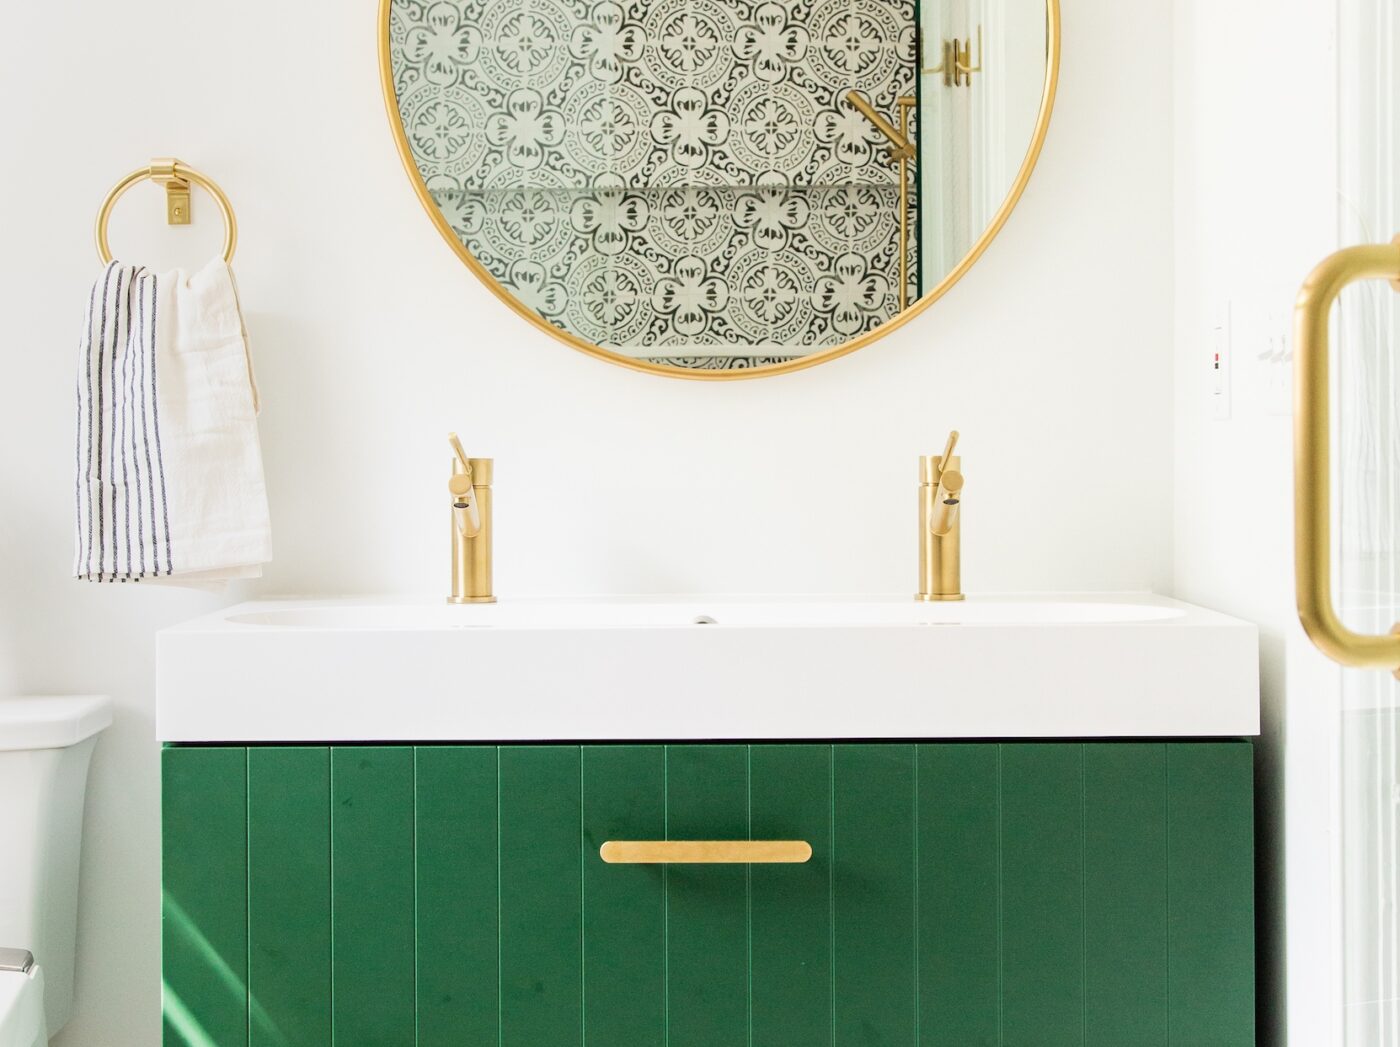
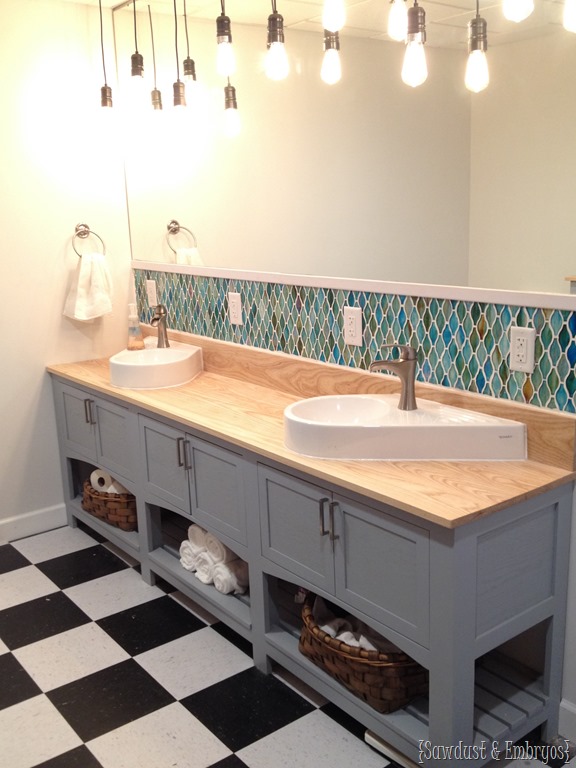
Looking for some inspiration for your DIY shaker bathroom vanity project? Here are some ideas to get your creative juices flowing: 1. Two-Tone Vanity Create a unique and eye-catching vanity by painting the frame in one color and the doors and drawers in another. This will add dimension and interest to your vanity while still maintaining the classic shaker style look. 2. Open Shelving If you have a small bathroom or want to add a modern twist to your shaker style vanity, consider opting for open shelving instead of traditional cabinet doors. This will not only make your vanity look more spacious, but it will also allow you to display decorative items or store frequently used items within easy reach. 3. Floating Vanity A floating vanity is a great option for those who want a sleek and minimalistic look. This style also makes cleaning the floor easier as it eliminates the need for a base or legs. You can achieve a shaker style look by adding simple doors and drawers to the floating frame. 4. Vintage Vanity Add some character and charm to your bathroom by repurposing an old dresser or buffet into a shaker style vanity. Simply cut a hole in the top for the sink and add some doors and drawers for storage. This is a great option for those who love the vintage shaker style look. 5. Rustic Vanity For a more rustic and natural look, opt for unfinished or reclaimed wood for your vanity. This will give your bathroom a cozy and warm feel while still maintaining the simple and understated shaker style design.DIY Shaker Bathroom Vanity Ideas

DIY Shaker Bathroom Vanity Ideas


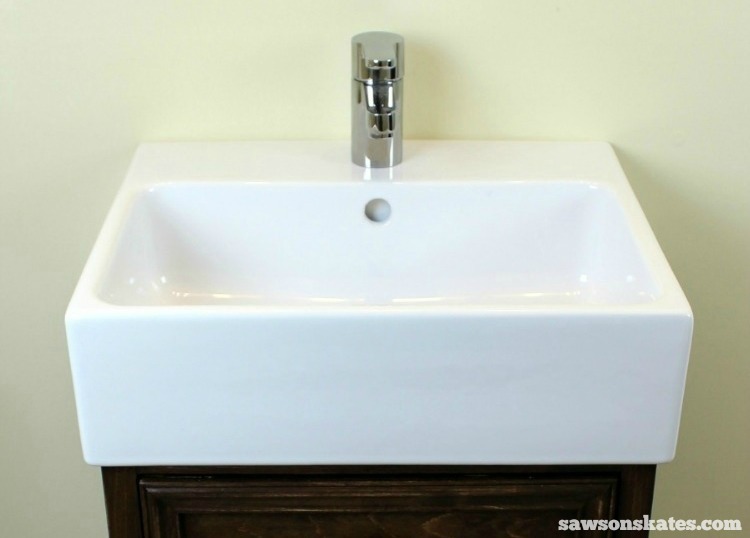
The vanity top is an essential part of your bathroom vanity, both in terms of functionality and aesthetics. Here’s how you can create a DIY shaker bathroom vanity top: 1. Choose Your Material The first step in creating your vanity top is to choose the right material. Popular options include marble, granite, quartz, and solid surface materials like Corian. Consider your budget, style, and maintenance preferences when making your choice. 2. Measure and Cut the Material Using your vanity’s measurements, trace the outline onto the material and cut it using a circular saw or jigsaw. Make sure to wear protective gear and follow proper safety precautions when cutting the material. 3. Smooth Out the Edges Use sandpaper or a router to smooth out the edges of your vanity top. This will give it a clean and polished look while also preventing any splinters or rough edges. 4. Install the Top Once your vanity top is ready, carefully place it on top of your vanity and secure it in place using adhesive and screws. Make sure to follow the manufacturer’s instructions for proper installation. 5. Seal and Finish Finally, seal and finish your vanity top to protect it from water damage, stains, and scratches. You can use a clear sealant or add a coat of wax for extra shine and protection.DIY Shaker Bathroom Vanity Top

-600x750.jpg)
DIY Shaker Bathroom Vanity Top
:max_bytes(150000):strip_icc()/build-something-diy-vanity-594402125f9b58d58ae21158.jpg)

The doors are an essential part of any bathroom vanity, both for functional and aesthetic purposes. Here’s how you can create your own DIY shaker bathroom vanity doors: 1. Measure and Cut the Wood Using your vanity’s measurements, cut the wood pieces for your doors. You can use solid wood or plywood with a wood veneer. Make sure to leave about 1/4 inch of extra space on each side for the hinges and door overlay. 2. Create the Paneling To achieve the classic shaker style look, you’ll need to add some paneling to your doors. This can be done using a router or a table saw. You can also purchase pre-made paneling if you prefer. 3. Assemble the Doors Once you have your wood pieces and paneling ready, it’s time to assemble your doors. Use wood glue and clamps to attach the paneling to the frame. You can also use screws for extra stability. 4. Sand and Paint After your doors are assembled, use sandpaper to smooth out any rough edges and surfaces. Then, paint or stain your doors in the color of your choice. Make sure to apply multiple coats for a long-lasting finish.DIY Shaker Bathroom Vanity Doors

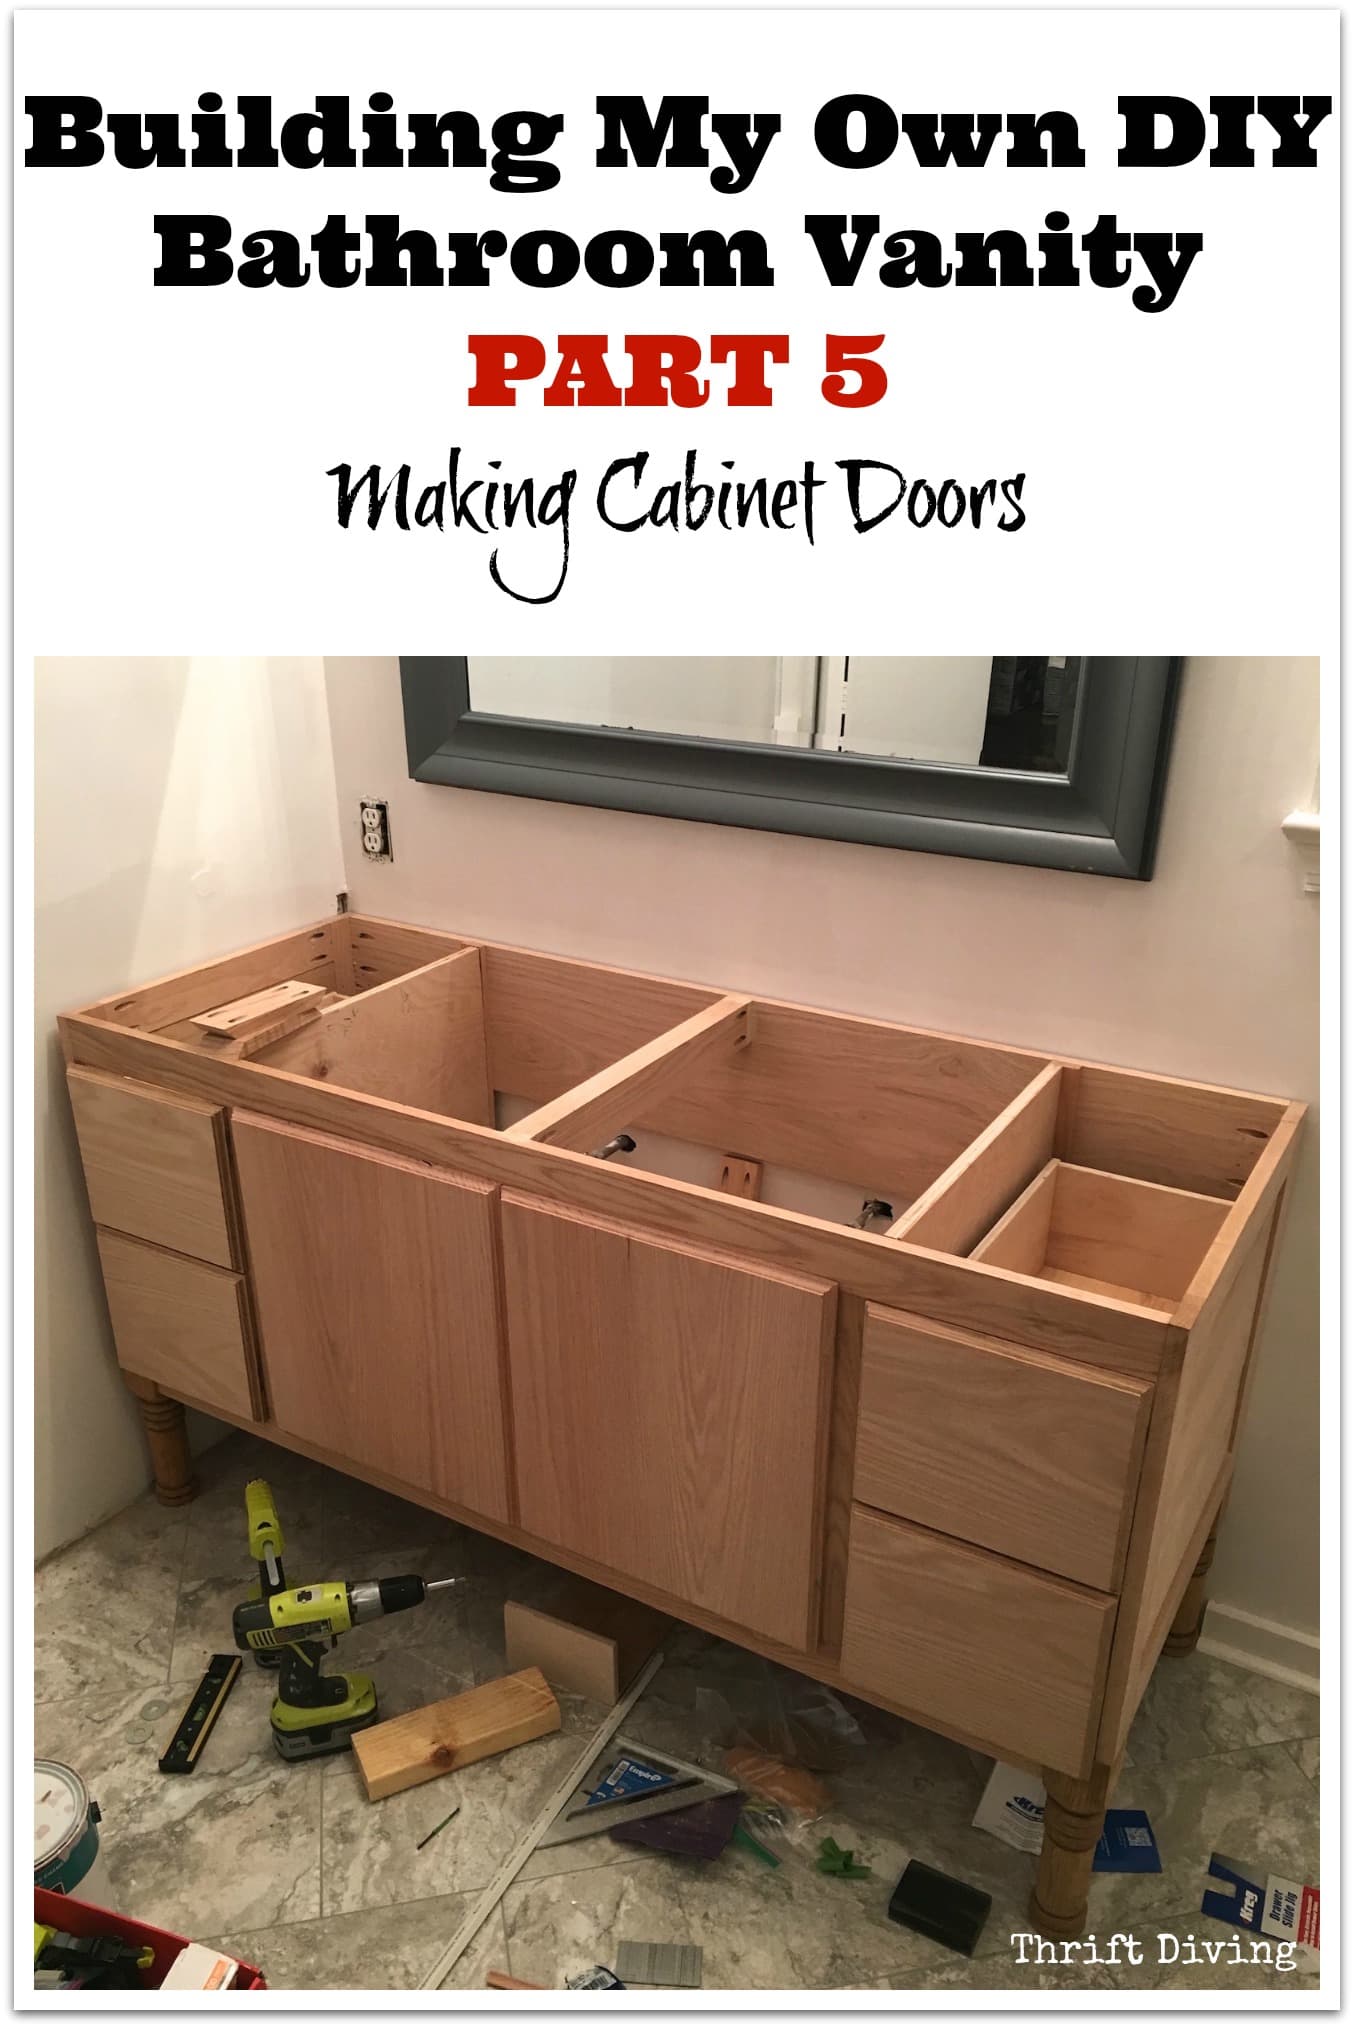
DIY Shaker Bathroom Vanity Doors


The Beauty of a DIY Shaker Bathroom Vanity
:max_bytes(150000):strip_icc()/cherry-diy-bathroom-vanity-594414da5f9b58d58a099a36.jpg)
Why Choose a DIY Shaker Bathroom Vanity?
 If you're looking to upgrade your bathroom and add a touch of elegance and style, a DIY Shaker bathroom vanity is the perfect choice. This classic design not only adds functionality to your space, but also brings a sense of sophistication and charm.
Shaker style
originated from the religious sect known as the Shakers, who believed in simplicity, functionality, and quality craftsmanship. This design philosophy is reflected in the clean lines, minimal ornamentation, and sturdy construction of Shaker furniture. By incorporating a DIY Shaker bathroom vanity into your home, you are not only embracing a timeless design, but also paying homage to a rich cultural history.
If you're looking to upgrade your bathroom and add a touch of elegance and style, a DIY Shaker bathroom vanity is the perfect choice. This classic design not only adds functionality to your space, but also brings a sense of sophistication and charm.
Shaker style
originated from the religious sect known as the Shakers, who believed in simplicity, functionality, and quality craftsmanship. This design philosophy is reflected in the clean lines, minimal ornamentation, and sturdy construction of Shaker furniture. By incorporating a DIY Shaker bathroom vanity into your home, you are not only embracing a timeless design, but also paying homage to a rich cultural history.
Customization and Personalization
 One of the main benefits of opting for a DIY Shaker bathroom vanity is the ability to customize and personalize it to your specific needs and preferences. You have the freedom to choose the size, color, and finish of your vanity, making it a truly unique piece for your bathroom. Whether you prefer a classic white vanity or a bold statement piece in a vibrant color, the options are endless with a DIY project.
DIY projects
also offer the opportunity to add personal touches and details that reflect your own style and personality. You can choose to add decorative hardware, such as
knobs or handles
, that complement the design of your bathroom. Additionally, you can incorporate storage solutions, such as shelves or drawers, that cater to your specific storage needs.
One of the main benefits of opting for a DIY Shaker bathroom vanity is the ability to customize and personalize it to your specific needs and preferences. You have the freedom to choose the size, color, and finish of your vanity, making it a truly unique piece for your bathroom. Whether you prefer a classic white vanity or a bold statement piece in a vibrant color, the options are endless with a DIY project.
DIY projects
also offer the opportunity to add personal touches and details that reflect your own style and personality. You can choose to add decorative hardware, such as
knobs or handles
, that complement the design of your bathroom. Additionally, you can incorporate storage solutions, such as shelves or drawers, that cater to your specific storage needs.
Cost-Effective and Sustainable
 Another reason to consider a DIY Shaker bathroom vanity is its cost-effectiveness and sustainability. By building your own vanity, you can save money on expensive store-bought options. Additionally, you have the freedom to use eco-friendly and sustainable materials, such as reclaimed wood, to create a vanity that not only looks beautiful but also promotes environmental responsibility.
DIY projects
also promote a sense of accomplishment and pride in creating something with your own hands. By building your own Shaker bathroom vanity, you are not only saving money, but also creating a unique and functional piece that adds value to your home.
In conclusion, a DIY Shaker bathroom vanity is a perfect addition to any bathroom design. Its timeless style, customization options, and cost-effectiveness make it a practical and beautiful choice for any homeowner looking to upgrade their space. So why wait? Start your DIY project today and enjoy the beauty and functionality of a Shaker bathroom vanity in your home.
Another reason to consider a DIY Shaker bathroom vanity is its cost-effectiveness and sustainability. By building your own vanity, you can save money on expensive store-bought options. Additionally, you have the freedom to use eco-friendly and sustainable materials, such as reclaimed wood, to create a vanity that not only looks beautiful but also promotes environmental responsibility.
DIY projects
also promote a sense of accomplishment and pride in creating something with your own hands. By building your own Shaker bathroom vanity, you are not only saving money, but also creating a unique and functional piece that adds value to your home.
In conclusion, a DIY Shaker bathroom vanity is a perfect addition to any bathroom design. Its timeless style, customization options, and cost-effectiveness make it a practical and beautiful choice for any homeowner looking to upgrade their space. So why wait? Start your DIY project today and enjoy the beauty and functionality of a Shaker bathroom vanity in your home.