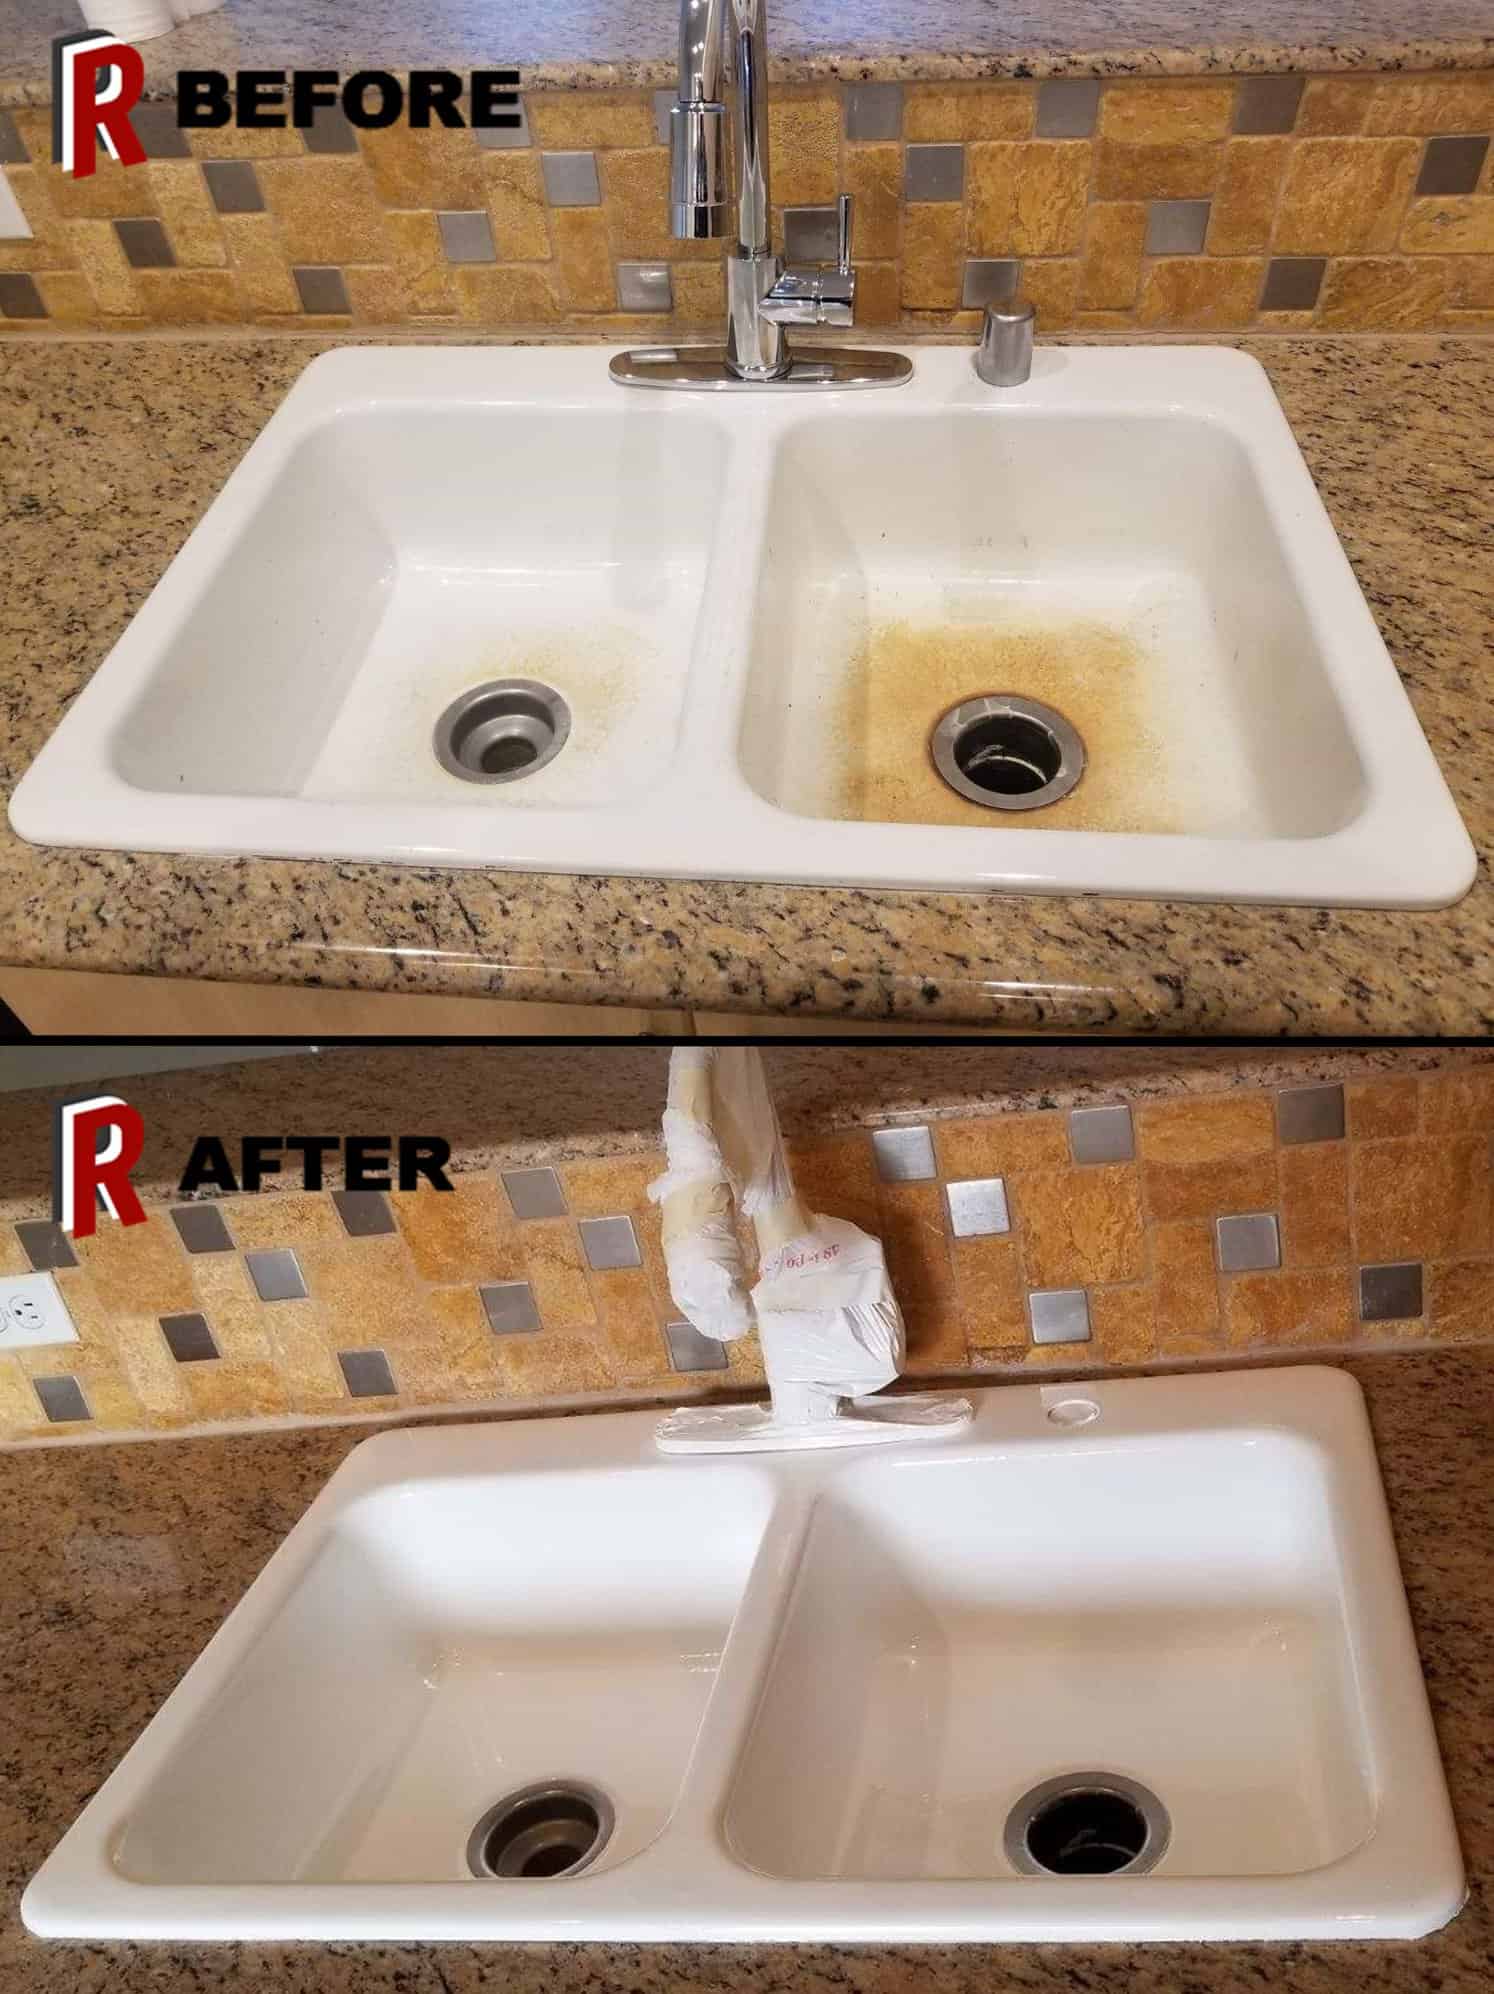
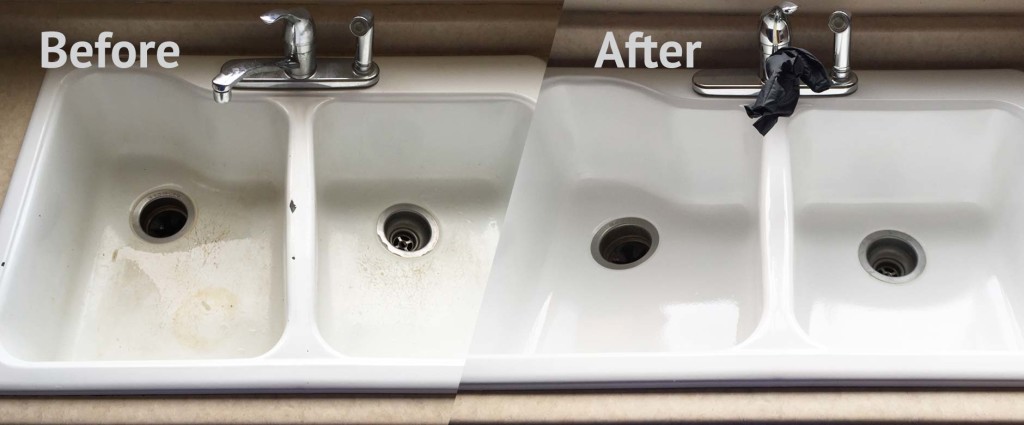
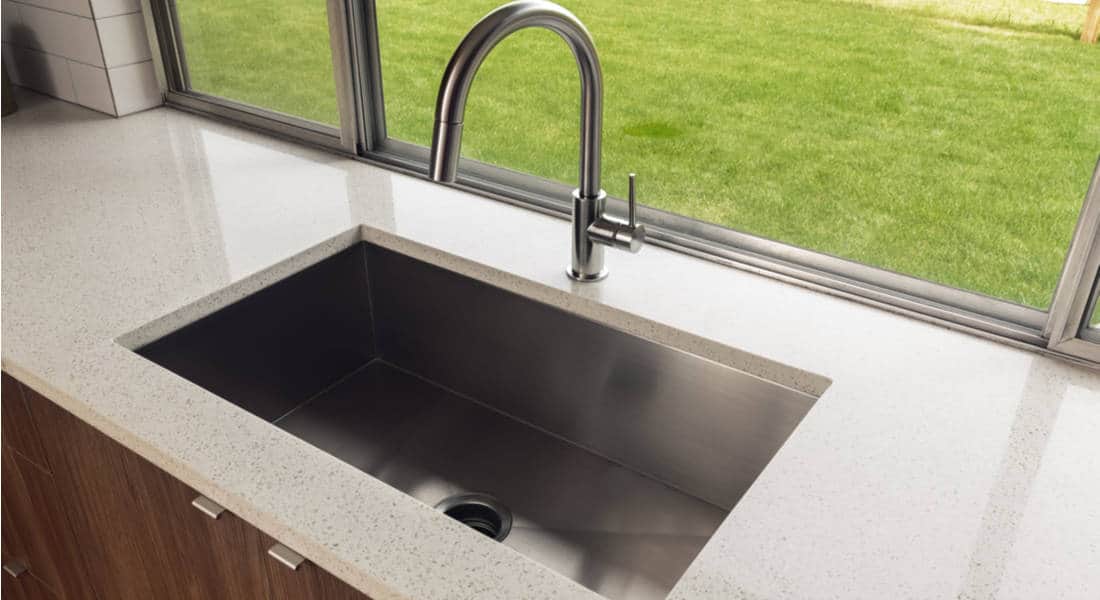
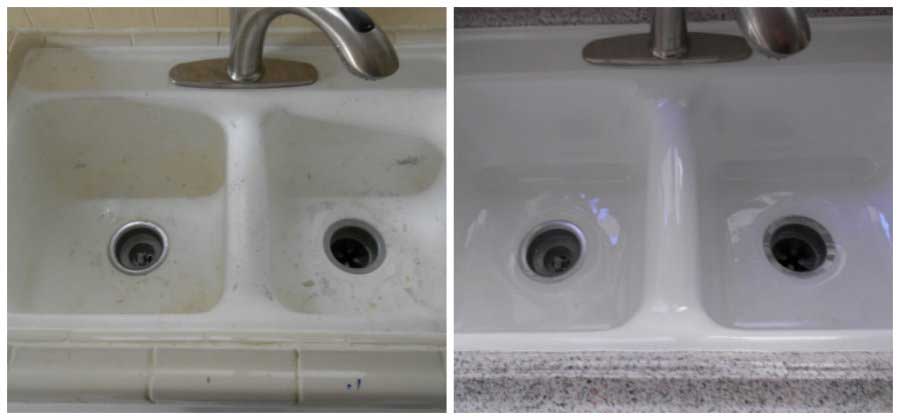
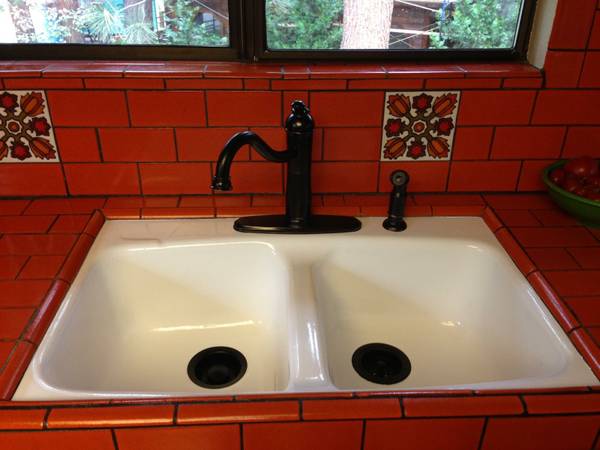
Are you tired of looking at your old, worn-out kitchen sink? Are you thinking of replacing it with a brand new one? Before you go out and spend hundreds of dollars on a new sink, consider resurfacing your current one. It's a cost-effective and relatively easy DIY project that can give your kitchen a fresh new look without breaking the bank. Here's a step-by-step guide on how to resurface your kitchen sink and make it look as good as new.How to Resurface a Kitchen Sink


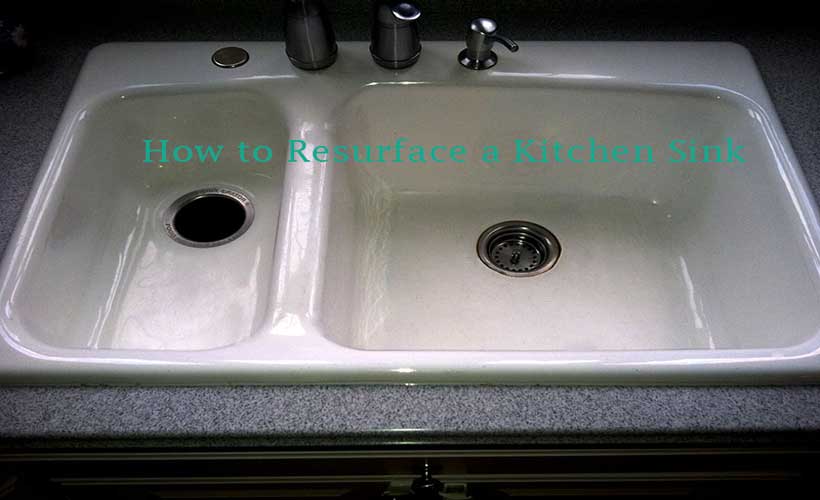
How to Resurface a Kitchen Sink


:max_bytes(150000):strip_icc()/giani-countertop-possible-hero-56d221aa5f9b5879cc84154c.jpg)
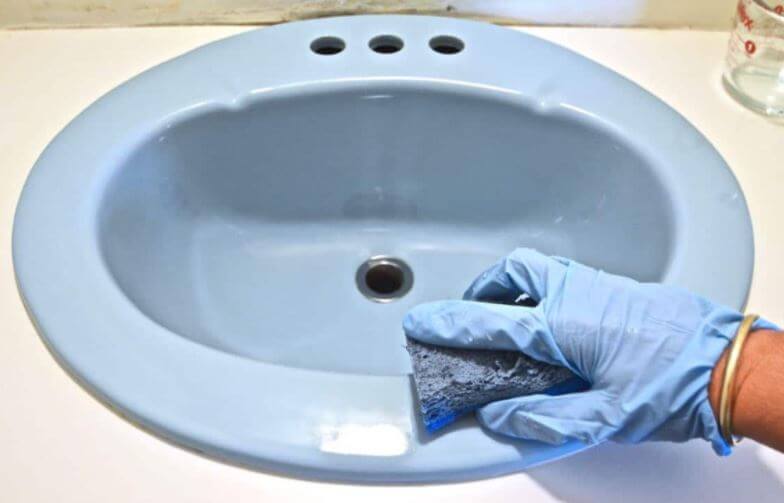
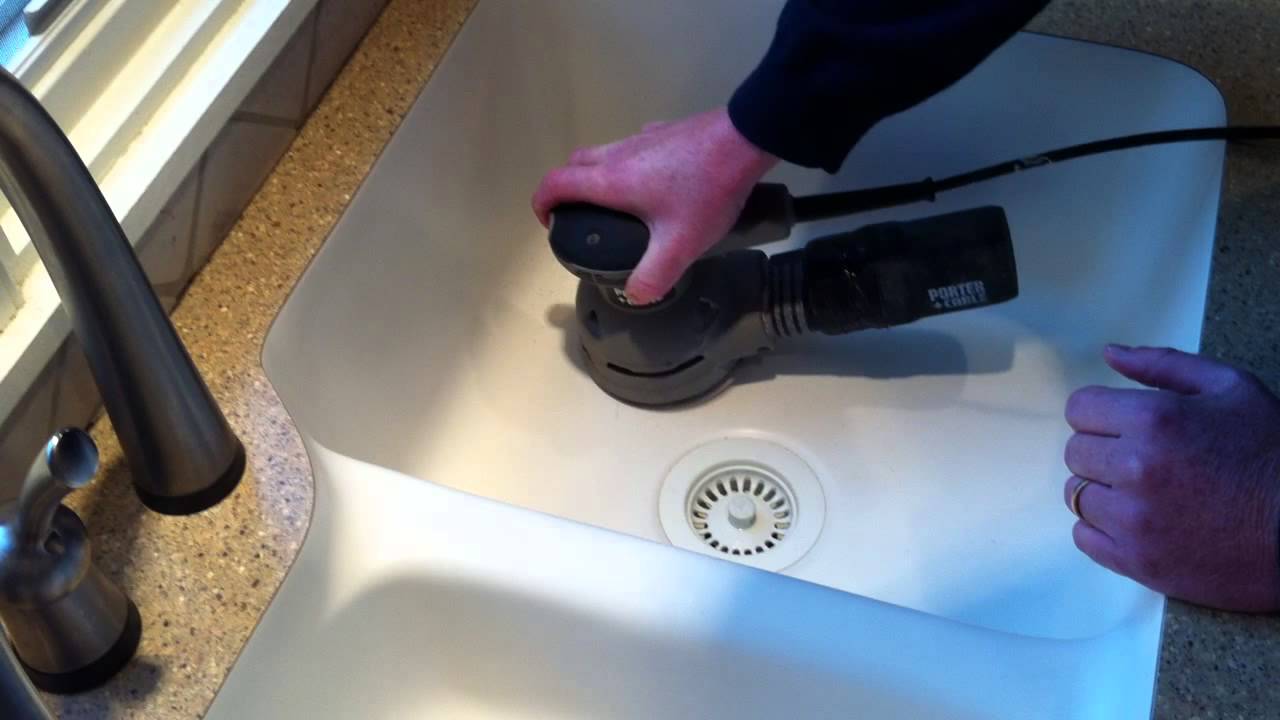
Resurfacing a kitchen sink is a simple process that involves sanding down the surface and applying a new finish. It's a great way to update the look of your sink without having to deal with the hassle of removing and installing a new one. Plus, it's much more affordable than buying a new sink. With the right tools and materials, you can easily tackle this project and have your sink looking like new in no time.DIY Kitchen Sink Resurfacing


DIY Kitchen Sink Resurfacing


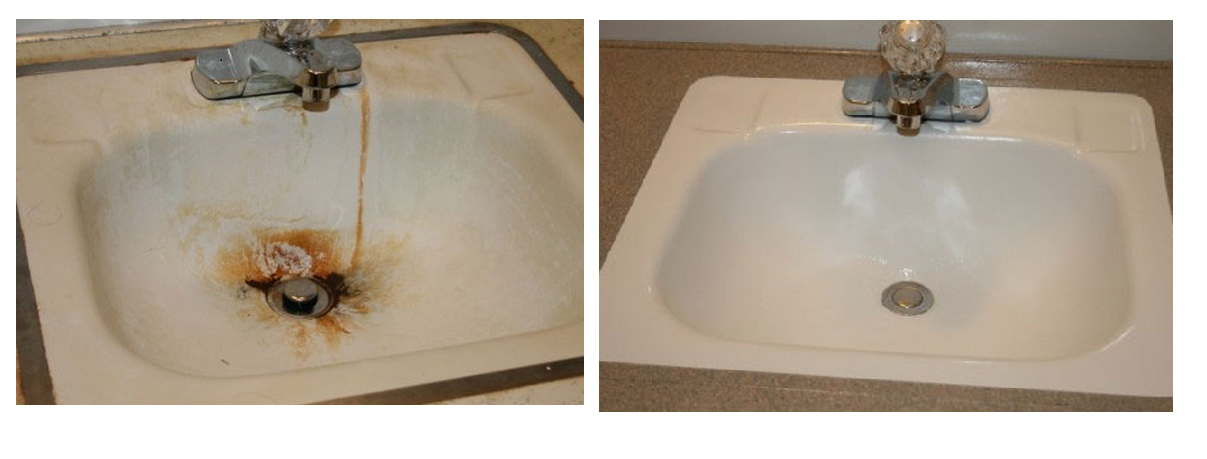


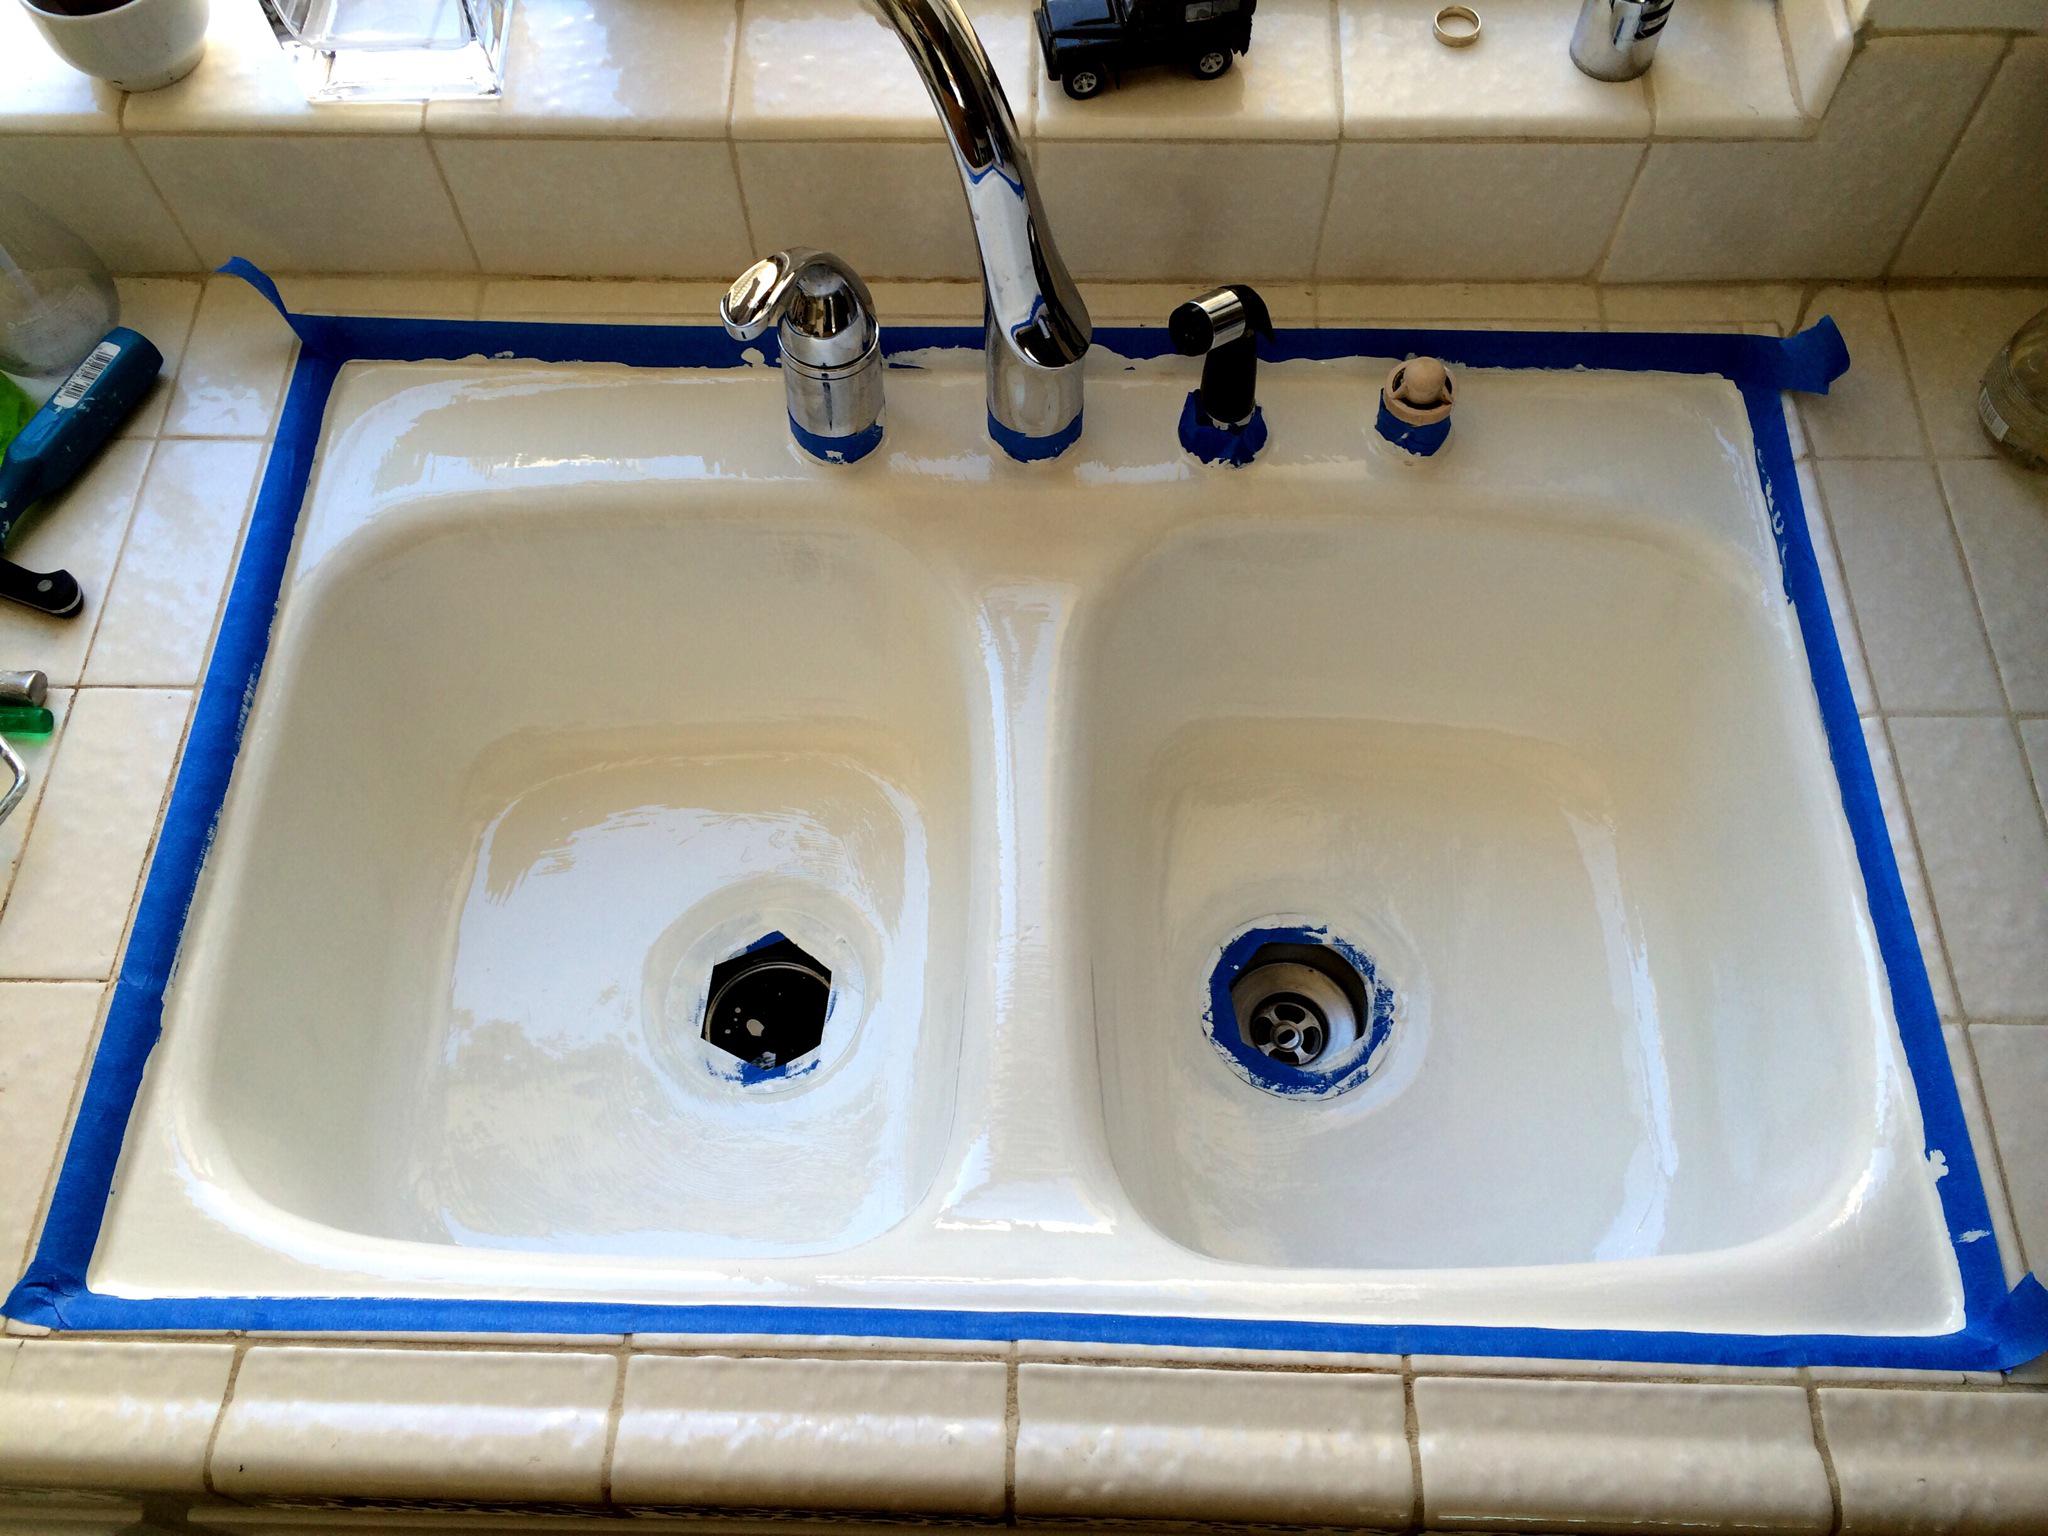
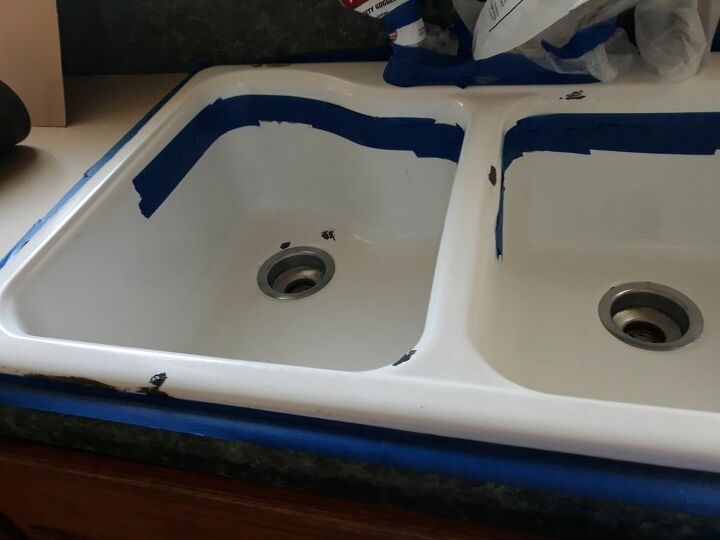
To begin, gather all the necessary materials, including sandpaper, a sander, a degreaser, a primer, and an epoxy or enamel paint. Start by thoroughly cleaning your sink with a degreaser to remove any dirt, grime, or residue. Next, use a sander to sand down the surface of the sink. This will help the new finish adhere better. Once the surface is smooth and free of any imperfections, apply a coat of primer to the sink and let it dry completely. After the primer has dried, it's time to apply the final coat of paint. You can use either an epoxy or enamel paint, depending on your preference. Make sure to apply the paint evenly and let it dry completely between coats. You may need to apply multiple coats to achieve the desired look. Once the paint has dried, your sink is ready to use again.Step-by-Step Guide for Resurfacing a Kitchen Sink


Step-by-Step Guide for Resurfacing a Kitchen Sink


:no_upscale()/cdn.vox-cdn.com/uploads/chorus_asset/file/19495086/drain_0.jpg)


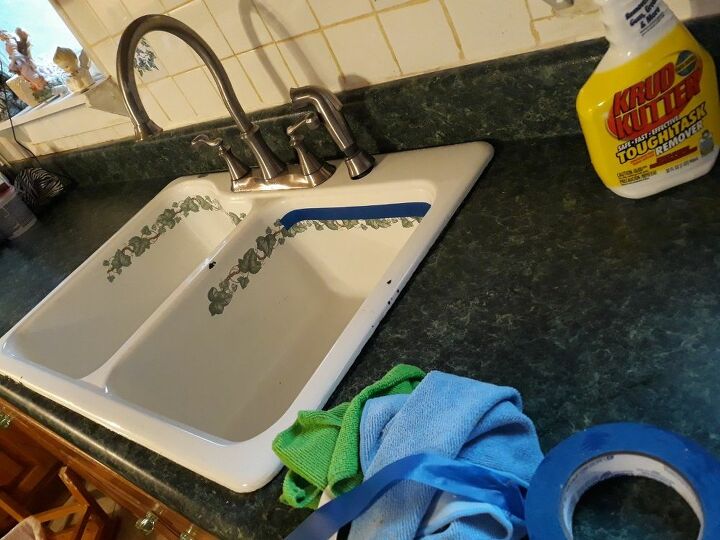
Refinishing a kitchen sink is a great way to give it a fresh new look without having to replace it. It's also a fantastic way to add a pop of color to your kitchen. You can choose from a variety of colors and finishes to match your kitchen's style and décor. Refinishing your sink is also a more eco-friendly option as it reduces waste and saves resources.DIY Kitchen Sink Refinishing

DIY Kitchen Sink Refinishing

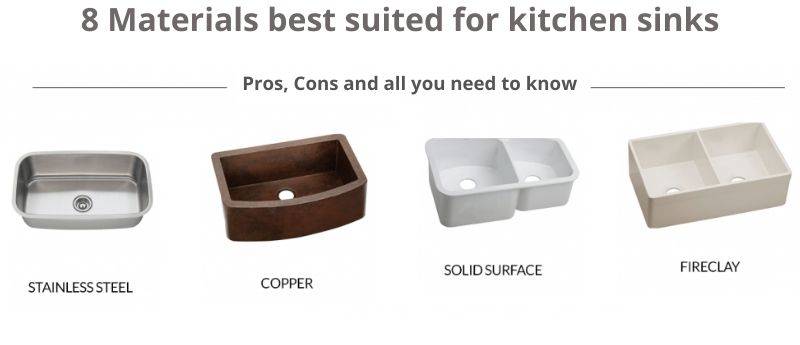
To successfully resurface your kitchen sink, you will need the following materials:Materials Needed for Resurfacing a Kitchen Sink


Materials Needed for Resurfacing a Kitchen Sink


Before starting your project, here are some helpful tips to keep in mind:Tips for a Successful DIY Kitchen Sink Resurfacing


Tips for a Successful DIY Kitchen Sink Resurfacing


When it comes to resurfacing your kitchen sink, there are many products available on the market. Some of the best ones include:Best Products for Resurfacing a Kitchen Sink


Best Products for Resurfacing a Kitchen Sink
:max_bytes(150000):strip_icc()/Epoxy-DIY-Countertops-Via-Smallspaces.about.com-56d33a003df78cfb37d23f47.jpg)


If you're looking to resurface your kitchen sink on a budget, there are a few ways to save money. You can opt for a more affordable paint option, such as enamel paint, instead of epoxy. You can also try using a DIY refinishing kit instead of hiring a professional. Additionally, you can repurpose old materials, such as sandpaper, to save on costs.DIY Kitchen Sink Resurfacing on a Budget


DIY Kitchen Sink Resurfacing on a Budget


While resurfacing a kitchen sink is a relatively simple process, there are a few common mistakes that people make. These mistakes can lead to a less-than-perfect finish and may even damage your sink. Some of these mistakes include not properly cleaning and degreasing the sink, not sanding the surface enough, and not applying enough coats of paint. Make sure to follow the steps carefully and avoid these mistakes for a successful DIY project.Common Mistakes to Avoid When Resurfacing a Kitchen Sink

Common Mistakes to Avoid When Resurfacing a Kitchen Sink


With proper care and maintenance, your resurfaced kitchen sink can last for years. Avoid using harsh chemicals or abrasive cleaners, as they can damage the finish. Instead, use mild soap and water to clean your sink regularly. Also, try to avoid leaving standing water in the sink for extended periods, as it can cause damage to the finish over time. With these simple steps, you can keep your resurfaced kitchen sink looking like new for a long time.How to Maintain a Resurfaced Kitchen Sink


How to Maintain a Resurfaced Kitchen Sink


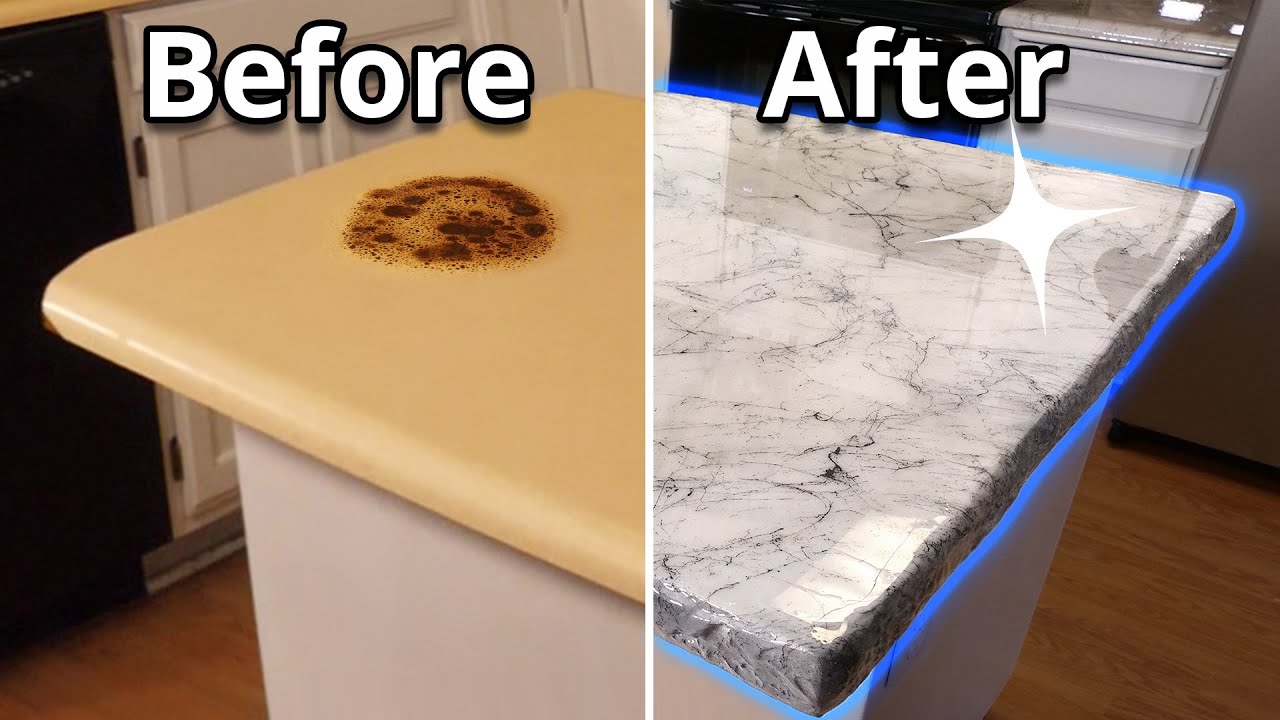
Why Resurfacing Your Kitchen Sink is a DIY Project Worth Trying

Revamp Your Kitchen at a Fraction of the Cost
 Are you tired of looking at your old and worn out kitchen sink? Do you dream of having a shiny and new sink but can't justify the cost of replacing it? Well, we have good news for you. With a little DIY magic, you can easily
resurface
your kitchen sink and give it a whole new look without breaking the bank.
Resurfacing your kitchen sink is a great way to
refresh
your kitchen without spending a fortune on a full renovation. It's a
cost-effective
solution that can transform your entire kitchen without having to replace any other fixtures or appliances. Plus, you'll have the satisfaction of knowing that you did it yourself.
Are you tired of looking at your old and worn out kitchen sink? Do you dream of having a shiny and new sink but can't justify the cost of replacing it? Well, we have good news for you. With a little DIY magic, you can easily
resurface
your kitchen sink and give it a whole new look without breaking the bank.
Resurfacing your kitchen sink is a great way to
refresh
your kitchen without spending a fortune on a full renovation. It's a
cost-effective
solution that can transform your entire kitchen without having to replace any other fixtures or appliances. Plus, you'll have the satisfaction of knowing that you did it yourself.
A Simple and Straightforward Process
 One of the best things about
DIY kitchen sink resurfacing
is that it's a relatively simple and straightforward process. You don't need any special skills or tools, and it can be completed in just a few easy steps. All you need is a resurfacing kit, which can be easily found at your local hardware store or online.
The first step is to thoroughly clean your sink to remove any dirt, grime, and soap residue. Then, you'll need to sand down the surface of the sink to create a smooth and even surface for the resurfacing material to adhere to. Once the sink is properly prepped, you can then apply the resurfacing material, following the instructions on the kit.
One of the best things about
DIY kitchen sink resurfacing
is that it's a relatively simple and straightforward process. You don't need any special skills or tools, and it can be completed in just a few easy steps. All you need is a resurfacing kit, which can be easily found at your local hardware store or online.
The first step is to thoroughly clean your sink to remove any dirt, grime, and soap residue. Then, you'll need to sand down the surface of the sink to create a smooth and even surface for the resurfacing material to adhere to. Once the sink is properly prepped, you can then apply the resurfacing material, following the instructions on the kit.
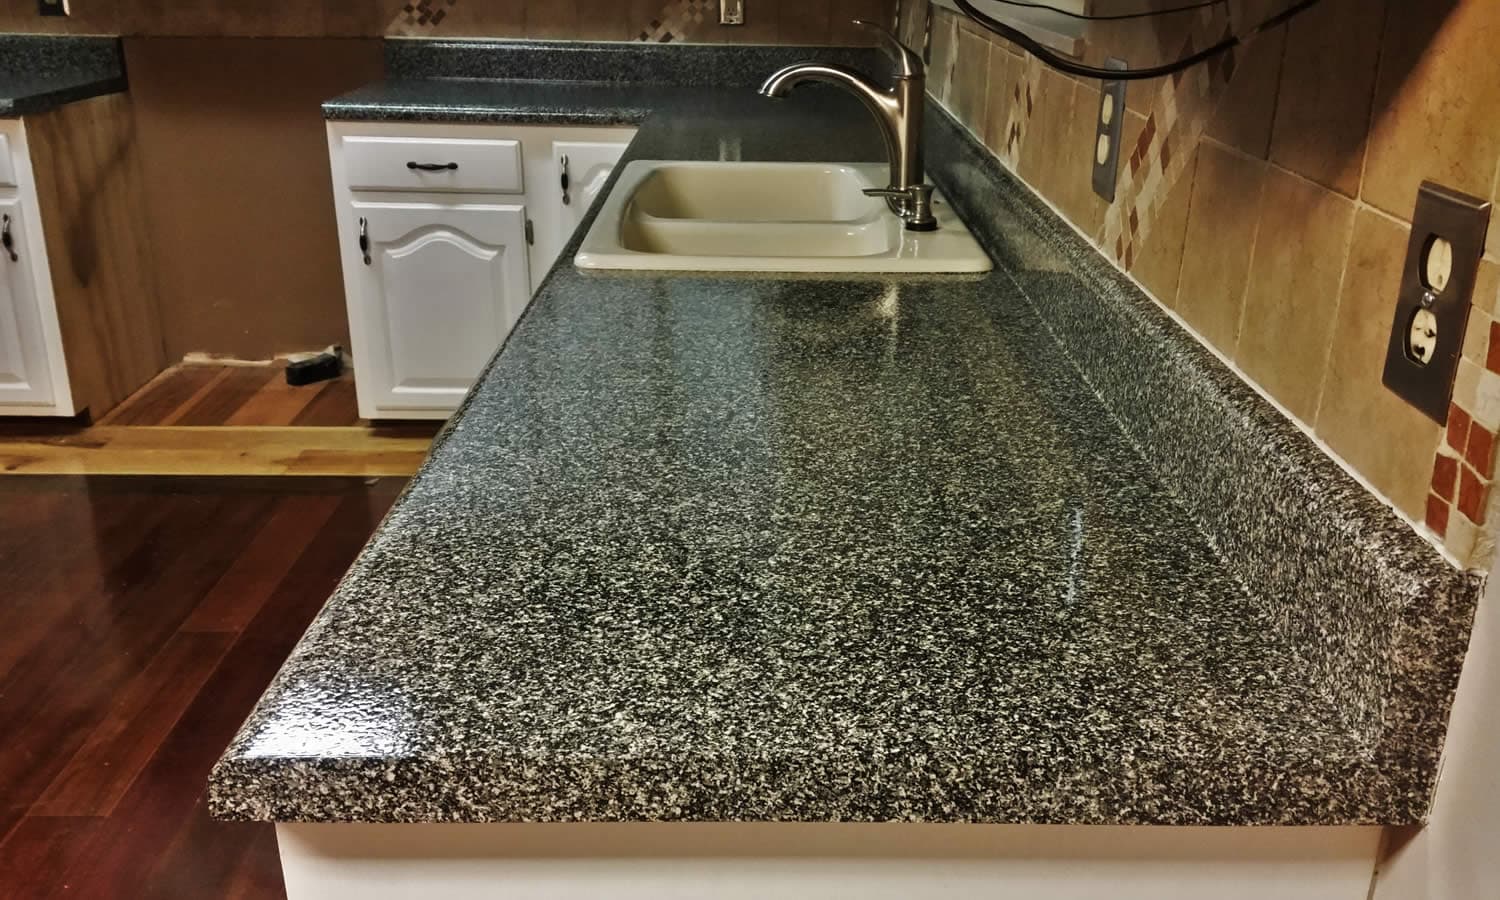
Endless Design Possibilities
 When it comes to
resurfacing your kitchen sink
, the design possibilities are endless. You can choose from a variety of colors and finishes to match your kitchen's style and aesthetic. Whether you want a classic white sink or a trendy metallic finish, you can achieve it with a resurfacing kit.
You can also get creative and add
textures
or
patterns
to your sink to give it a unique and personalized touch. With a little imagination and some simple techniques, you can turn your old and boring sink into a stunning focal point in your kitchen.
In conclusion,
DIY kitchen sink resurfacing
is a budget-friendly and
easy
way to upgrade your kitchen. It's a project that anyone can do, and the results are truly
impressive
. So why wait? Grab a resurfacing kit and give your kitchen sink the makeover it deserves.
When it comes to
resurfacing your kitchen sink
, the design possibilities are endless. You can choose from a variety of colors and finishes to match your kitchen's style and aesthetic. Whether you want a classic white sink or a trendy metallic finish, you can achieve it with a resurfacing kit.
You can also get creative and add
textures
or
patterns
to your sink to give it a unique and personalized touch. With a little imagination and some simple techniques, you can turn your old and boring sink into a stunning focal point in your kitchen.
In conclusion,
DIY kitchen sink resurfacing
is a budget-friendly and
easy
way to upgrade your kitchen. It's a project that anyone can do, and the results are truly
impressive
. So why wait? Grab a resurfacing kit and give your kitchen sink the makeover it deserves.