Removing a kitchen sink may seem like a daunting task, but with the right tools and knowledge, it can be a straightforward process. Whether you're looking to upgrade your sink or dealing with a leaky faucet, knowing how to remove a kitchen sink is an essential skill for any homeowner. In this guide, we'll walk you through the steps to safely and effectively remove your kitchen sink. How to Remove a Kitchen Sink


How to Remove a Kitchen Sink


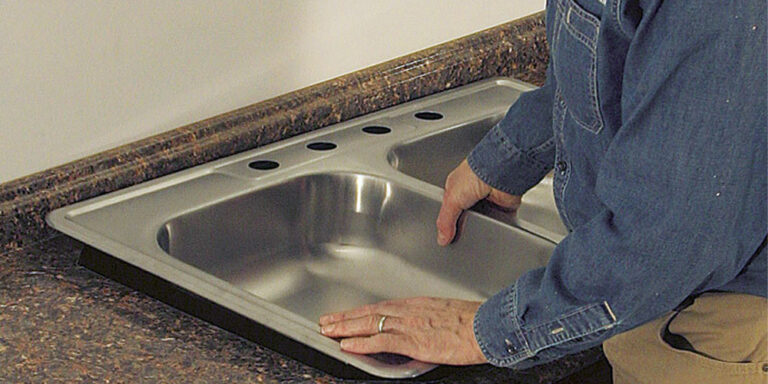
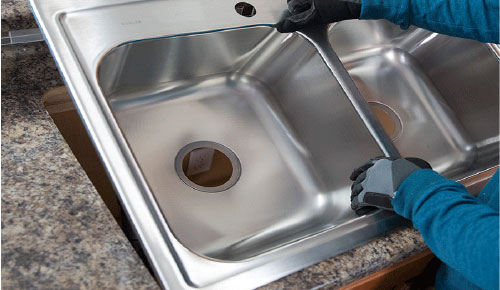
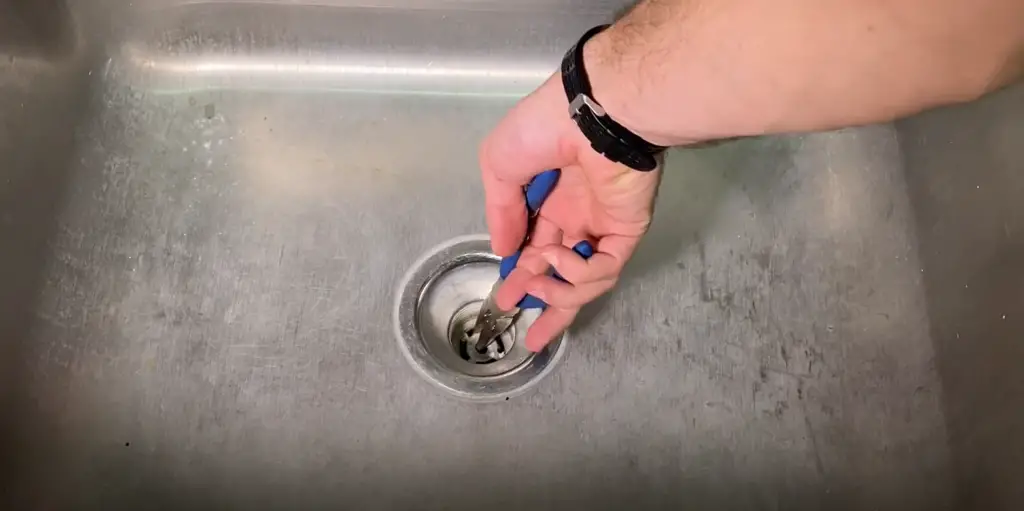
If you're planning on installing a new sink, it's crucial to first remove the old one. Here's a step-by-step guide on how to remove a kitchen sink: Step 1: Gather Your Tools Before you begin, make sure you have all the necessary tools on hand. These may include a wrench, pliers, screwdriver, putty knife, and a bucket to catch any water that may leak during the process. It's also helpful to have a helper to assist you in lifting and removing the sink. Step 2: Shut Off the Water Supply The first step in removing a kitchen sink is to shut off the water supply. This can usually be done by turning off the shut-off valves located under the sink. If you can't locate the valves, you may need to turn off the main water supply to your home. Step 3: Disconnect the Plumbing Next, you'll need to disconnect the plumbing from the sink. Use a wrench or pliers to loosen the nuts and disconnect the water supply lines and the drain pipes. Make sure to have a bucket underneath to catch any excess water. Step 4: Loosen the Sink Clips Most kitchen sinks are held in place by clips located underneath the countertop. Use a screwdriver to loosen these clips, and then carefully lift the sink up and out of place. If your sink is caulked to the countertop, use a putty knife to carefully cut through the caulk before lifting the sink. Step 5: Clean Up the Area Once the sink is removed, you'll want to take the opportunity to clean up the area. Remove any remaining caulk or debris from the countertop and clean the area thoroughly with a disinfectant. This will ensure a clean and smooth surface for your new sink to be installed on.Removing a Kitchen Sink: A Step-by-Step Guide


Removing a Kitchen Sink: A Step-by-Step Guide


If you're feeling confident in your DIY skills, removing a kitchen sink can be a simple and rewarding process. Here are five easy steps to follow for a successful DIY sink removal: Step 1: Turn Off the Water Supply As mentioned earlier, it's crucial to turn off the water supply before starting any work on the sink. This will prevent any accidental leaks or water damage during the removal process. Step 2: Disconnect the Plumbing Use a wrench or pliers to loosen and disconnect the plumbing connected to the sink. Make sure to have a bucket handy to catch any water that may drain out. Step 3: Remove the Sink Clips Using a screwdriver, loosen and remove the sink clips holding the sink in place. Once all the clips are removed, carefully lift the sink up and out of place. Step 4: Clean the Area Before installing a new sink, it's essential to clean the area thoroughly. Remove any excess caulk or debris from the countertop and give it a good clean with a disinfectant. This will ensure a clean and smooth surface for the new sink to be installed on. Step 5: Install the New Sink With the old sink removed and the area cleaned, you're now ready to install the new sink. Follow the manufacturer's instructions for installation, and your new sink will be up and running in no time!DIY: Removing a Kitchen Sink in 5 Easy Steps


DIY: Removing a Kitchen Sink in 5 Easy Steps


While removing a kitchen sink may not be the most challenging task, here are a few tips and tricks to make the process even smoother: Tip 1: Use a Bucket Having a bucket on hand to catch any water that may leak during the removal process will save you from having to clean up a big mess. Tip 2: Label Your Plumbing Connections Before disconnecting any plumbing, it's helpful to label each connection. This will make it easier to reconnect everything correctly when installing the new sink. Tip 3: Be Gentle When removing the sink, be gentle to avoid damaging the countertop or surrounding area. It's also helpful to have a helper to assist in lifting and removing the sink.Removing a Kitchen Sink: Tips and Tricks


Removing a Kitchen Sink: Tips and Tricks

While you can remove a kitchen sink with basic tools, having the right tools can make the process easier and more efficient. Here are a few tools that are essential for removing a kitchen sink: Wrench A wrench is a must-have tool for loosening and removing nuts and bolts. Pliers Pliers are useful for gripping and turning pipes and connectors. Screwdriver A screwdriver is necessary for loosening and removing sink clips. Putty Knife A putty knife is helpful for cutting through caulk and removing the sink from the countertop. Bucket Having a bucket on hand to catch any water that may leak during the removal process is essential.The Best Tools for Removing a Kitchen Sink


The Best Tools for Removing a Kitchen Sink


While removing a kitchen sink may seem like a simple task, there are a few common mistakes to avoid to ensure a successful removal: Mistake 1: Forgetting to Turn Off the Water Supply Always remember to turn off the water supply before starting any work on the sink. This will prevent any accidental leaks or water damage. Mistake 2: Not Labeling Plumbing Connections Before disconnecting any plumbing, make sure to label each connection to make it easier to reconnect everything correctly when installing the new sink. Mistake 3: Using Excessive Force When removing the sink, be gentle to avoid damaging the countertop or surrounding area. Using excessive force can cause damage and make the removal process more challenging.Removing a Kitchen Sink: Common Mistakes to Avoid


Removing a Kitchen Sink: Common Mistakes to Avoid


If you're planning on removing a kitchen sink, there are a few things you need to know beforehand: Know Your Plumbing System Before removing the sink, make sure you understand your plumbing system and how to shut off the water supply. If you're unsure, it's best to consult a professional plumber. Choose the Right Replacement Sink When removing a kitchen sink, it's essential to have a replacement sink ready to install. Make sure to choose a sink that fits your needs and the current layout of your kitchen. Consider Hiring a Professional If you're not confident in your DIY skills, or if the sink removal involves complex plumbing work, it's best to hire a professional. This will ensure the job is done correctly and save you from potential costly mistakes.Removing a Kitchen Sink: What You Need to Know


Removing a Kitchen Sink: What You Need to Know


The decision to hire a professional or tackle the project yourself ultimately depends on your skills and comfort level with DIY projects. While removing a kitchen sink may be a simple task for some, it may be more challenging for others. If you're unsure, it's always best to consult a professional plumber to ensure the job is done correctly and safely.Removing a Kitchen Sink: Professional vs. DIY


Removing a Kitchen Sink: Professional vs. DIY


While removing a kitchen sink is generally a straightforward process, there may be some common issues that arise. Here are some troubleshooting tips for common sink removal problems: Problem: Sink is Stuck to the Countertop Solution: If the sink is caulked to the countertop, use a putty knife to carefully cut through the caulk before attempting to lift the sink. Problem: Leaking Water Supply Lines Solution: Make sure all connections are tight and secure. If the problem persists, you may need to replace the supply lines. Problem: Difficult to Loosen Sink Clips Solution: Use a lubricant, such as WD-40, to help loosen the clips. If they are still difficult to loosen, you may need to use a hacksaw to cut through them.Removing a Kitchen Sink: Troubleshooting Common Issues
Removing a Kitchen Sink: Troubleshooting Common Issues


When removing a kitchen sink, it's essential to take the necessary safety precautions to avoid injury or damage. Here are a few safety tips to keep in mind: Wear Protective Gear Wear gloves and eye protection to protect yourself from any sharp or hazardous materials. Shut Off the Water Supply Always remember to turn off the water supply before starting any work on the sink to prevent any accidental leaks or water damage. Be Careful When Handling Tools Be cautious when using tools, especially around the plumbing and electrical components. Make sure to handle them with care and follow the manufacturer's instructions. Removing a kitchen sink may seem like a daunting task, but with the right tools and knowledge, it can be a simple and rewarding project. Whether you're planning to upgrade your sink or dealing with a leaky faucet, following these steps and tips will help you safely and effectively remove your kitchen sink. Remember, when in doubt, it's always best to consult a professional plumber to ensure the job is done correctly and safely. Removing a Kitchen Sink: Safety Precautions to Take

Removing a Kitchen Sink: Safety Precautions to Take


The Importance of Properly Removing a Kitchen Sink

Why is it Necessary to Remove a Kitchen Sink?
 Removing a kitchen sink
may seem like a daunting task, especially for those who are not familiar with
house design
and plumbing. However, it is an essential step in any kitchen renovation project or even just a simple sink replacement. Not only does it allow for a fresh start, but it also ensures a proper and secure installation of the new sink. Neglecting to remove the old sink can lead to potential issues in the future, such as leaks, mold growth, and even damage to surrounding cabinets and countertops. Therefore, it is crucial to understand the proper steps in removing a kitchen sink.
Removing a kitchen sink
may seem like a daunting task, especially for those who are not familiar with
house design
and plumbing. However, it is an essential step in any kitchen renovation project or even just a simple sink replacement. Not only does it allow for a fresh start, but it also ensures a proper and secure installation of the new sink. Neglecting to remove the old sink can lead to potential issues in the future, such as leaks, mold growth, and even damage to surrounding cabinets and countertops. Therefore, it is crucial to understand the proper steps in removing a kitchen sink.
Step-by-Step Guide to Removing a Kitchen Sink
 Before starting the removal process, it is essential to gather all the necessary tools and materials. This may include a wrench, screwdriver, putty knife, and a bucket or towel to catch any excess water.
Turning off the water supply
and
disconnecting the plumbing
are the first steps in removing a kitchen sink. This involves
loosening the nuts
that hold the pipes together and
unscrewing the drain
from the sink. It is important to have a bucket or towel ready to catch any water that may still be in the pipes.
Next, the sink can be
disconnected from the countertop
. This is typically done by
unscrewing the clips
that hold the sink in place. Once the sink is free, it can be carefully lifted out of the countertop and set aside. The
old caulk or putty
around the sink can then be scraped off using a putty knife.
Before starting the removal process, it is essential to gather all the necessary tools and materials. This may include a wrench, screwdriver, putty knife, and a bucket or towel to catch any excess water.
Turning off the water supply
and
disconnecting the plumbing
are the first steps in removing a kitchen sink. This involves
loosening the nuts
that hold the pipes together and
unscrewing the drain
from the sink. It is important to have a bucket or towel ready to catch any water that may still be in the pipes.
Next, the sink can be
disconnected from the countertop
. This is typically done by
unscrewing the clips
that hold the sink in place. Once the sink is free, it can be carefully lifted out of the countertop and set aside. The
old caulk or putty
around the sink can then be scraped off using a putty knife.
The Benefits of Professional Help
 While removing a kitchen sink may seem like a simple task, it is important to remember that proper installation of the new sink is crucial for its longevity and functionality. If you are unsure of your plumbing skills or do not have the necessary tools, it is always best to seek
professional help
. This not only guarantees a proper removal and installation process, but it also saves you time and potential headaches in the future.
In conclusion,
removing a kitchen sink
is an essential step in any kitchen renovation project or sink replacement. It ensures a fresh start, proper installation, and avoids potential issues in the future. By following a step-by-step guide and considering professional help, you can successfully remove a kitchen sink and prepare for the next step in your kitchen design journey.
While removing a kitchen sink may seem like a simple task, it is important to remember that proper installation of the new sink is crucial for its longevity and functionality. If you are unsure of your plumbing skills or do not have the necessary tools, it is always best to seek
professional help
. This not only guarantees a proper removal and installation process, but it also saves you time and potential headaches in the future.
In conclusion,
removing a kitchen sink
is an essential step in any kitchen renovation project or sink replacement. It ensures a fresh start, proper installation, and avoids potential issues in the future. By following a step-by-step guide and considering professional help, you can successfully remove a kitchen sink and prepare for the next step in your kitchen design journey.