Removing a kitchen sink drain flange may seem like a daunting task, but with the right tools and techniques, it can be done easily. Whether you're replacing a damaged flange or simply cleaning out your drain, here is a step-by-step guide on how to remove a kitchen sink drain flange.How to Remove a Kitchen Sink Drain Flange


How to Remove a Kitchen Sink Drain Flange


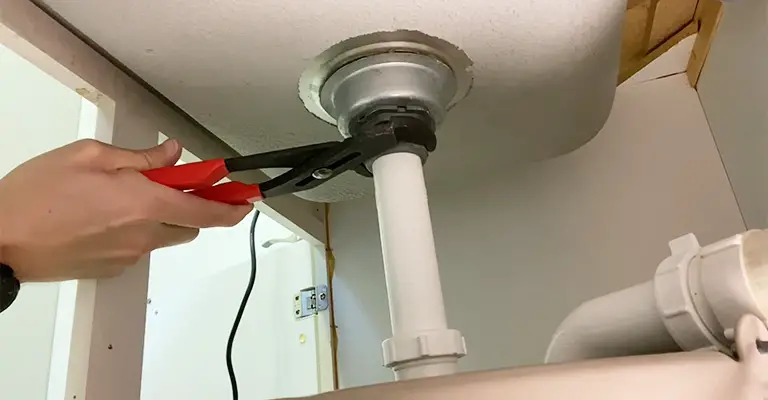
The first step in removing a kitchen sink drain flange is to gather all the necessary tools. You will need a screwdriver, pliers, a putty knife, and a wrench. Once you have all the tools, follow these steps: Step 1: Turn off the water supply. Before you start working on the drain flange, make sure to turn off the water supply to your sink. This will prevent any water from leaking out while you work. Step 2: Remove the drain cover. Using your screwdriver, remove the drain cover from the kitchen sink. This will expose the drain flange and make it easier to work on. Step 3: Loosen the locknut. Underneath the sink, you will see a locknut holding the drain flange in place. Use your wrench to loosen the locknut and remove it completely. Step 4: Remove the old putty. The drain flange is sealed in place with plumber's putty. Use your putty knife to scrape off the old putty from around the flange. This will make it easier to remove the flange. Step 5: Remove the flange. Once the putty has been removed, you can now use your pliers to twist and pull out the drain flange from the sink. Be careful not to damage the sink while doing this. Step 6: Clean the area. After removing the old flange, clean the area around the drain with a mild cleaner to remove any residue or debris.Removing a Kitchen Sink Drain Flange: A Step-by-Step Guide


Removing a Kitchen Sink Drain Flange: A Step-by-Step Guide


Removing a kitchen sink drain flange is a simple DIY project that can save you time and money. By following the steps above, you can easily remove the old flange and replace it with a new one without hiring a professional.DIY: Removing a Kitchen Sink Drain Flange


DIY: Removing a Kitchen Sink Drain Flange
Here are some additional tips and tricks to make removing a kitchen sink drain flange even easier: Use a hairdryer. If the plumber's putty is hard to remove, use a hairdryer to soften it before scraping it off with a putty knife. Protect your sink. To prevent any scratches or damage to your sink, place a towel or cloth over the drain while working on the flange. Replace the flange. It is recommended to replace the old flange with a new one, especially if it is damaged or worn out.Removing a Kitchen Sink Drain Flange: Tips and Tricks


Removing a Kitchen Sink Drain Flange: Tips and Tricks


There is no one "best" way to remove a kitchen sink drain flange, as it may vary depending on the type of sink and flange you have. However, following the steps outlined above is a safe and effective method that can be used for most sink types.The Best Way to Remove a Kitchen Sink Drain Flange


The Best Way to Remove a Kitchen Sink Drain Flange


When removing a kitchen sink drain flange, there are a few common mistakes that you should avoid: Using too much force. Be gentle when removing the drain flange to avoid damaging your sink. Not turning off the water supply. Failing to turn off the water supply can result in a messy and potentially damaging leak. Not replacing the flange. As mentioned before, it is recommended to replace the old flange with a new one to ensure a proper seal and prevent future issues.Removing a Kitchen Sink Drain Flange: Common Mistakes to Avoid
Removing a Kitchen Sink Drain Flange: Common Mistakes to Avoid


To summarize, here is a step-by-step guide on how to remove a kitchen sink drain flange: Step 1: Turn off the water supply. Step 2: Remove the drain cover. Step 3: Loosen the locknut. Step 4: Remove the old putty. Step 5: Remove the flange. Step 6: Clean the area.Step-by-Step Guide to Removing a Kitchen Sink Drain Flange

Step-by-Step Guide to Removing a Kitchen Sink Drain Flange


Here is a list of the tools you will need to remove a kitchen sink drain flange: Screwdriver - for removing the drain cover Pliers - for twisting and pulling out the flange Putty knife - for scraping off old putty Wrench - for loosening the locknutRemoving a Kitchen Sink Drain Flange: Tools You'll Need
Removing a Kitchen Sink Drain Flange: Tools You'll Need
Removing a kitchen sink drain flange can be done without damaging your sink by following the steps outlined above and being gentle with the process. It is also important to protect your sink by placing a towel or cloth over the drain while working.How to Remove a Kitchen Sink Drain Flange Without Damaging Your Sink

How to Remove a Kitchen Sink Drain Flange Without Damaging Your Sink


If you encounter any issues while removing a kitchen sink drain flange, here are some troubleshooting tips: Stuck flange: If the flange is stuck, try using a hairdryer to soften the putty and make it easier to remove. Leaking water: If you notice water leaking after removing the flange, check to make sure the locknut is securely tightened and that there is no damage to the sink or flange. Cracked or damaged flange: If the flange is damaged, it is recommended to replace it with a new one to prevent any future issues. Removing a kitchen sink drain flange may seem like a daunting task, but with the right tools and techniques, it can be done easily. By following these steps and tips, you can successfully remove a kitchen sink drain flange and have your sink functioning like new again.Removing a Kitchen Sink Drain Flange: Troubleshooting Common Issues

Removing a Kitchen Sink Drain Flange: Troubleshooting Common Issues

Why Removing the Kitchen Sink Drain Flange is Important for Your House Design

The Function of a Kitchen Sink Drain Flange
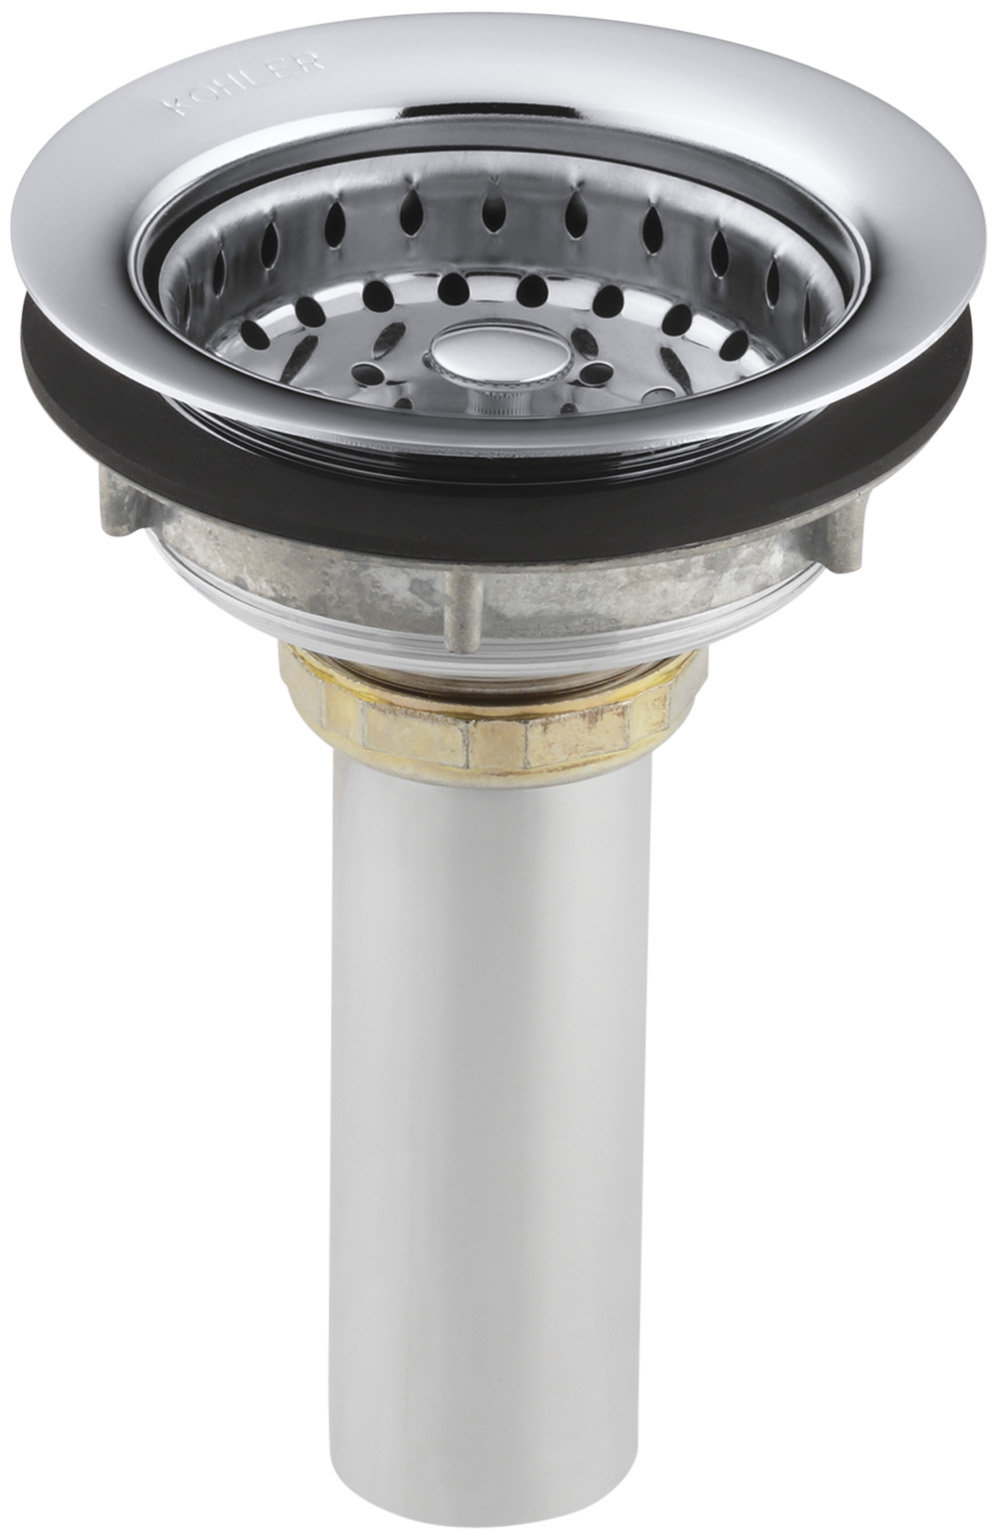
 The kitchen sink drain flange is an essential component of your sink's drainage system. It is the circular rim that sits on top of the drain hole and connects the sink to the drain pipe. This flange not only helps to keep the sink securely in place but also prevents any leaks between the sink and the drain pipe. Over time, the flange can become worn out or damaged, causing leaks and compromising the functionality and aesthetics of your kitchen. This is why it is important to know how to remove the kitchen sink drain flange properly.
Step-by-Step Guide to Removing the Kitchen Sink Drain Flange
 Kitchen sink drain flange removal
may seem like a daunting task, but it can be easily done with the right tools and techniques. Here is a step-by-step guide to help you remove the kitchen sink drain flange:
Kitchen sink drain flange removal
may seem like a daunting task, but it can be easily done with the right tools and techniques. Here is a step-by-step guide to help you remove the kitchen sink drain flange:
Step 1: Gather Your Tools
Before starting the removal process, make sure you have all the necessary tools on hand. These include a screwdriver, pliers, putty knife, and a wrench.Step 2: Turn Off the Water Supply
Before you begin working on the sink, it is important to turn off the water supply. This will prevent any water from flowing out when you remove the flange.Step 3: Remove the Sink Strainer
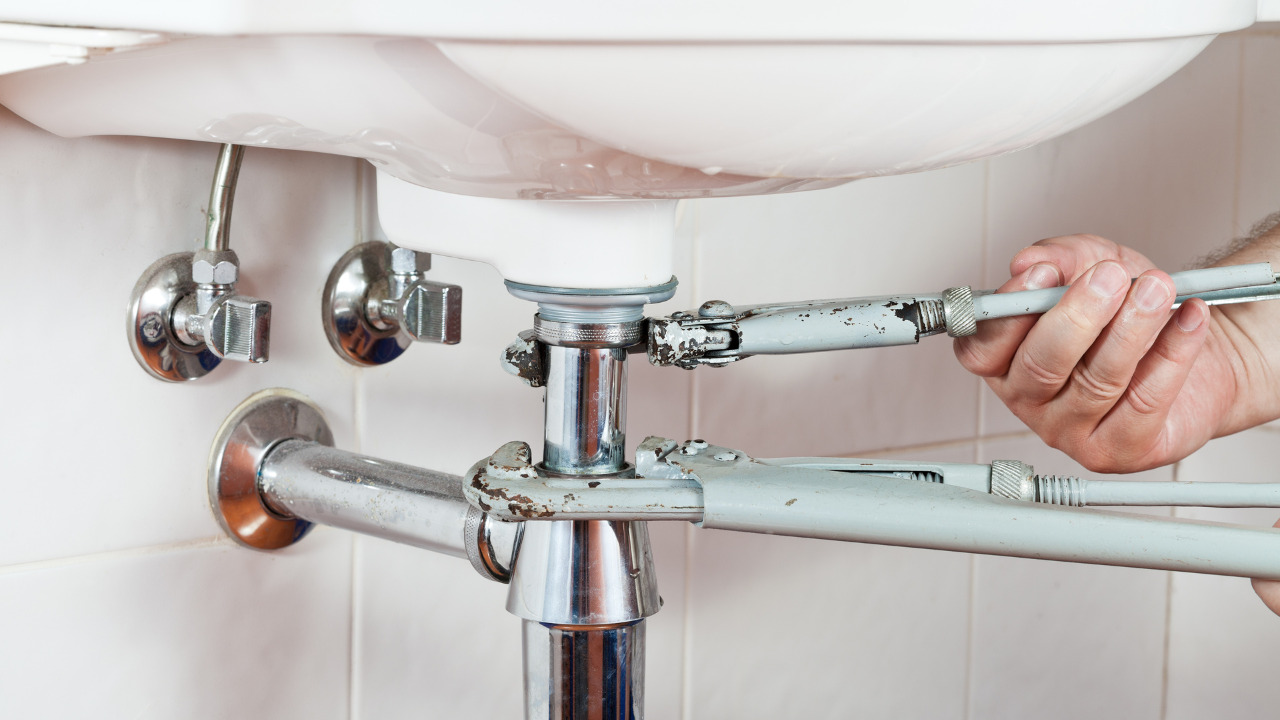
Using a screwdriver, remove the screws that hold the sink strainer in place. Once the screws are removed, you can easily lift the sink strainer out of the sink.Step 4: Loosen the Locknut
Using pliers or a wrench, loosen the locknut that holds the drain flange in place. Turn it counterclockwise until it is loose enough to remove.Step 5: Remove the Flange
Once the locknut is removed, you can pull out the flange from the sink. If it is stuck, use a putty knife to gently pry it loose.The Benefits of Removing a Kitchen Sink Drain Flange
 Removing the kitchen sink drain flange has several benefits for your house design. Firstly, it allows you to replace a damaged or worn-out flange, which can prevent leaks and improve the functionality of your sink. Secondly, it gives you the opportunity to upgrade your sink's design by choosing a new flange that complements your kitchen's aesthetic. Lastly, removing the flange also gives you access to the drain pipe, making it easier to clean and maintain.
Conclusion
In conclusion, removing the kitchen sink drain flange is an important task that should not be overlooked in your house design. It not only helps to prevent leaks and improve the functionality of your sink, but also gives you the chance to upgrade the design of your kitchen. With the right tools and techniques, you can easily remove the flange and enjoy the benefits it brings.
Removing the kitchen sink drain flange has several benefits for your house design. Firstly, it allows you to replace a damaged or worn-out flange, which can prevent leaks and improve the functionality of your sink. Secondly, it gives you the opportunity to upgrade your sink's design by choosing a new flange that complements your kitchen's aesthetic. Lastly, removing the flange also gives you access to the drain pipe, making it easier to clean and maintain.
Conclusion
In conclusion, removing the kitchen sink drain flange is an important task that should not be overlooked in your house design. It not only helps to prevent leaks and improve the functionality of your sink, but also gives you the chance to upgrade the design of your kitchen. With the right tools and techniques, you can easily remove the flange and enjoy the benefits it brings.