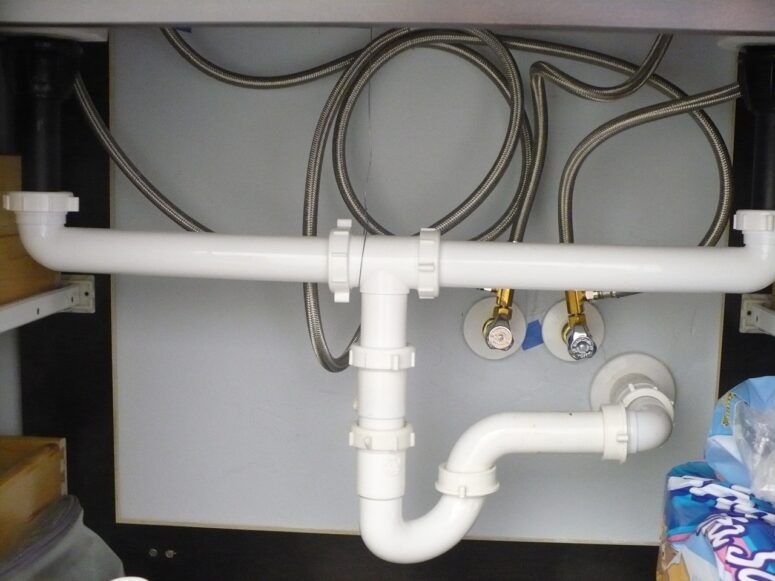
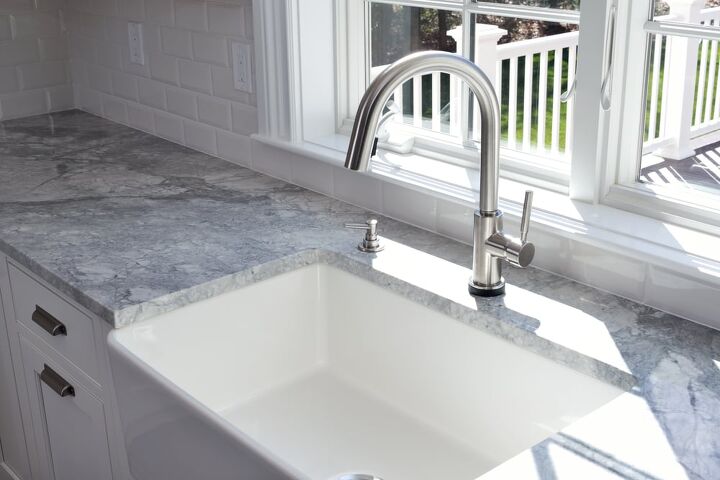
Installing a new kitchen sink can seem like a daunting task, but with the right tools and knowledge, it can be a straightforward process. Whether you're replacing an old sink or installing a brand new one, the key is to ensure proper plumbing for your sink. Follow these steps to learn how to install a kitchen sink and have it up and running in no time. First, you'll need to gather all the necessary tools and materials. This includes a new sink, sink installation kit, plumber's putty, adjustable wrench, screwdriver, and pipe wrench. Make sure to also turn off your water supply before beginning any work. Next, remove the old sink if you're replacing it. Disconnect the water supply lines and drain pipes, and unscrew the sink from the countertop. Then, carefully remove the sink and set it aside. Now it's time to install the new sink. Start by placing the sink in the desired position on the countertop and tracing around it with a pencil. This will serve as a guide for cutting the hole for the sink. Use a jigsaw to carefully cut along the traced line, making sure to wear safety glasses. Once the hole is cut, apply a thin line of plumber's putty around the edge of the sink and carefully place it in the hole. Press down firmly to create a seal. Next, attach the mounting clips to the sink and secure them to the underside of the countertop with the provided screws. Now it's time to connect the water supply lines and drain pipes. Wrap plumber's tape around the threaded ends of the water supply lines and screw them into the corresponding hot and cold water valves. Then, attach the drain pipes and tighten them with a pipe wrench. Finally, turn on the water supply and check for any leaks. Adjust the position of the sink if necessary and make sure all connections are secure. With these steps, you now know how to install a kitchen sink in your home. Remember to take your time and double check all connections to ensure a proper and leak-free installation.1. Kitchen Sink Plumbing: How to Install a Kitchen Sink


1. Kitchen Sink Plumbing: How to Install a Kitchen Sink


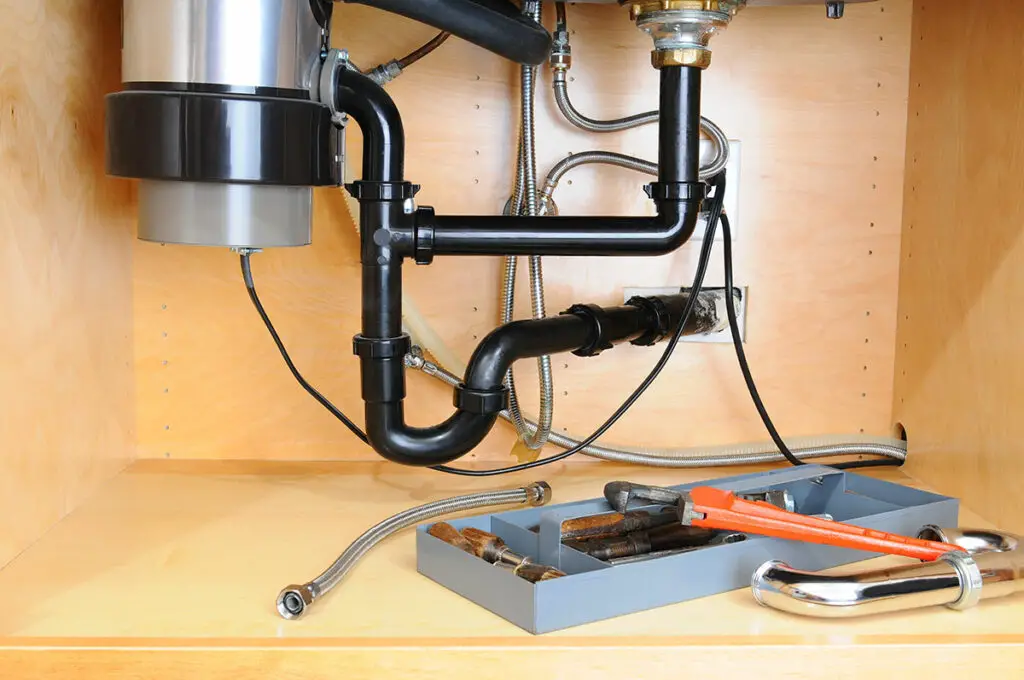
A garbage disposal is a convenient addition to any kitchen, helping to eliminate food waste and reducing the risk of clogged drains. If you're looking to install a garbage disposal in your kitchen, follow these steps for a successful and safe installation. Before starting, make sure you have all the necessary tools and materials. This includes a garbage disposal unit, mounting hardware, electrical cord, screwdriver, adjustable wrench, and plumber's putty. The first step is to prepare the area for installation. Turn off the power to the kitchen at the circuit breaker and disconnect the drain pipes from the sink. Then, remove the old drain flange and clean the area around the sink opening. Next, attach the mounting hardware to the underside of the sink. This will secure the garbage disposal to the sink and prevent it from moving around. Then, connect the electrical cord to the disposal unit according to the manufacturer's instructions. With the mounting hardware in place, you can now attach the garbage disposal. Apply a thin layer of plumber's putty around the flange and place it in the sink opening. Secure it in place with the mounting ring and screws provided. Once the disposal is attached, reconnect the drain pipes and turn on the power to the kitchen. Test the disposal by running water and turning it on. If there are no leaks and the disposal is functioning properly, you have successfully installed a garbage disposal in your kitchen.2. How to Install a Garbage Disposal


2. How to Install a Garbage Disposal
/garbage-disposal-installation-1824830-hero-1dcd7b5b05d44a2cb367e31692500c8c.jpg)
:max_bytes(150000):strip_icc()/garbage-disposal-installation-1824830-07-e7284aea27834f698710558d74c5ebda.jpg)

:max_bytes(150000):strip_icc()/garbage-disposal-installation-1824830-01-73cf0263b344447488ed8e15f7f2bc78.jpg)


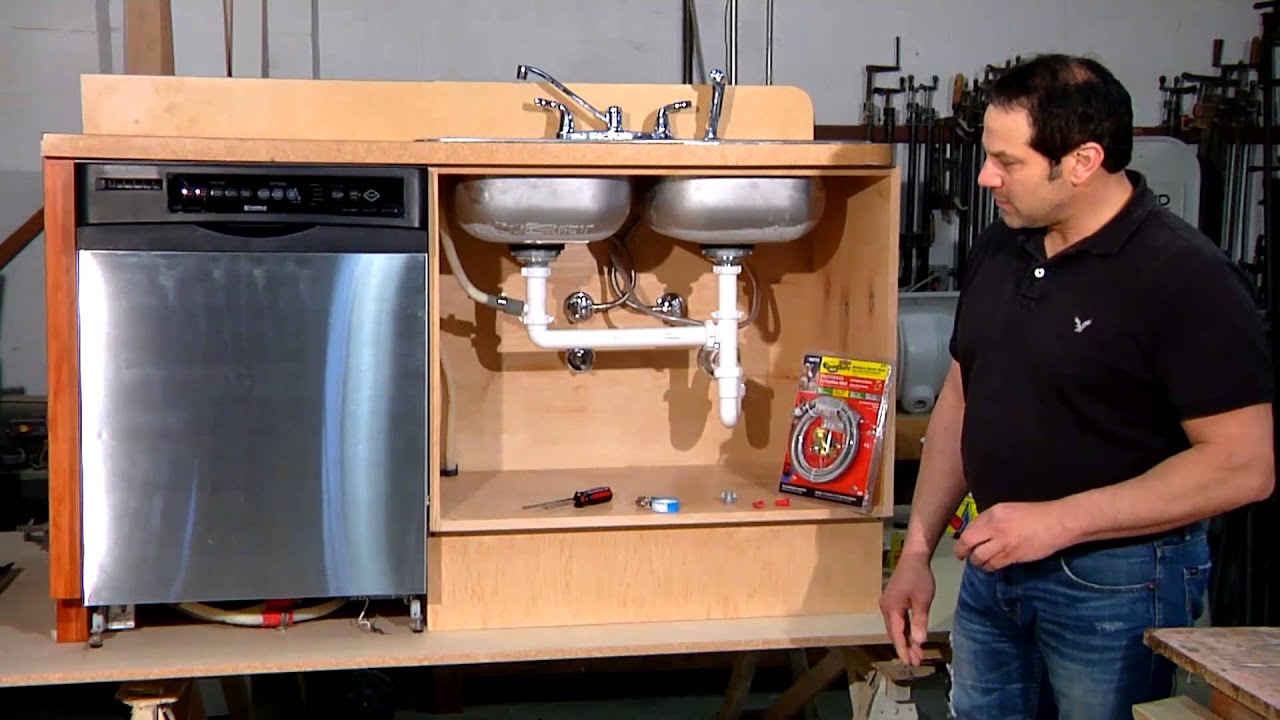
A dishwasher is a time-saving and essential appliance in any modern kitchen. If you're looking to upgrade your kitchen with a dishwasher, follow these steps to learn how to install one yourself. Start by making sure you have all the necessary tools and materials. This includes a dishwasher, dishwasher installation kit, screwdriver, pliers, and adjustable wrench. Before beginning installation, turn off the power to the kitchen at the circuit breaker. Then, remove the front panel of the dishwasher and install the mounting brackets on the sides of the unit. This will secure the dishwasher to the cabinet. Next, attach the water supply line to the dishwasher and make sure it is tight with pliers. Then, connect the drain hose to the disposal or sink drain and secure it in place with a hose clamp. With the connections in place, carefully slide the dishwasher into place and secure it to the cabinet with the mounting brackets. Make sure the dishwasher is level before attaching it to the countertop with the provided screws. Finally, turn on the power and test the dishwasher by running a cycle. If there are no leaks and the dishwasher is functioning properly, you have successfully installed a dishwasher in your kitchen.3. How to Install a Dishwasher


3. How to Install a Dishwasher


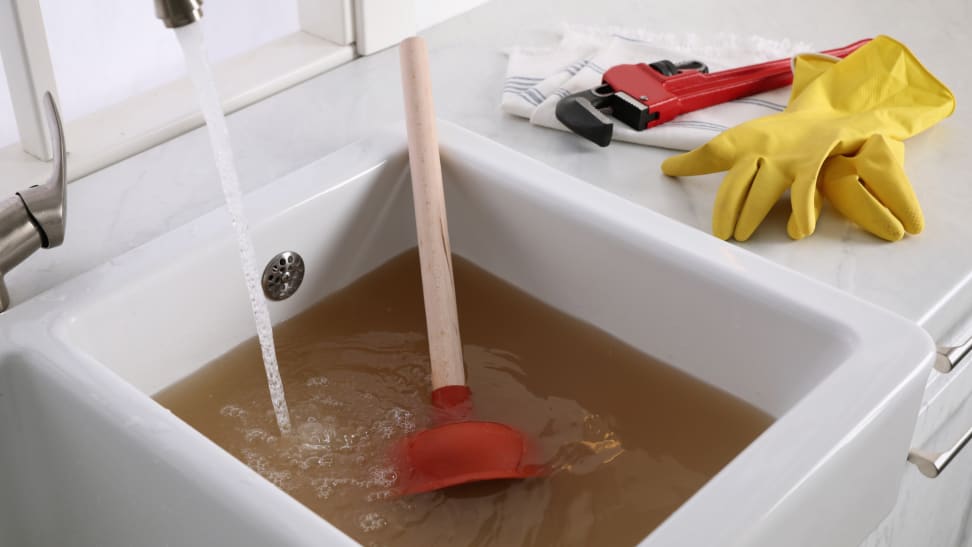
A clogged kitchen sink can be a frustrating and inconvenient issue to deal with. Fortunately, there are a few simple steps you can take to unclog your kitchen sink and get the water draining smoothly again. First, try using a plunger to remove the clog. Make sure there is enough water in the sink to cover the rubber part of the plunger. Then, place the plunger over the drain and push down and pull up several times. This should help to dislodge the clog. If the plunger doesn't work, you can try using a drain snake to remove the clog. Insert the snake into the drain and twist it to break up the clog. Then, pull the snake out and run hot water to flush out any remaining debris. If these methods do not work, you may have a more serious clog that requires professional help. Contact a plumber to assess and resolve the issue.4. Kitchen Sink Plumbing: How to Unclog a Kitchen Sink


4. Kitchen Sink Plumbing: How to Unclog a Kitchen Sink


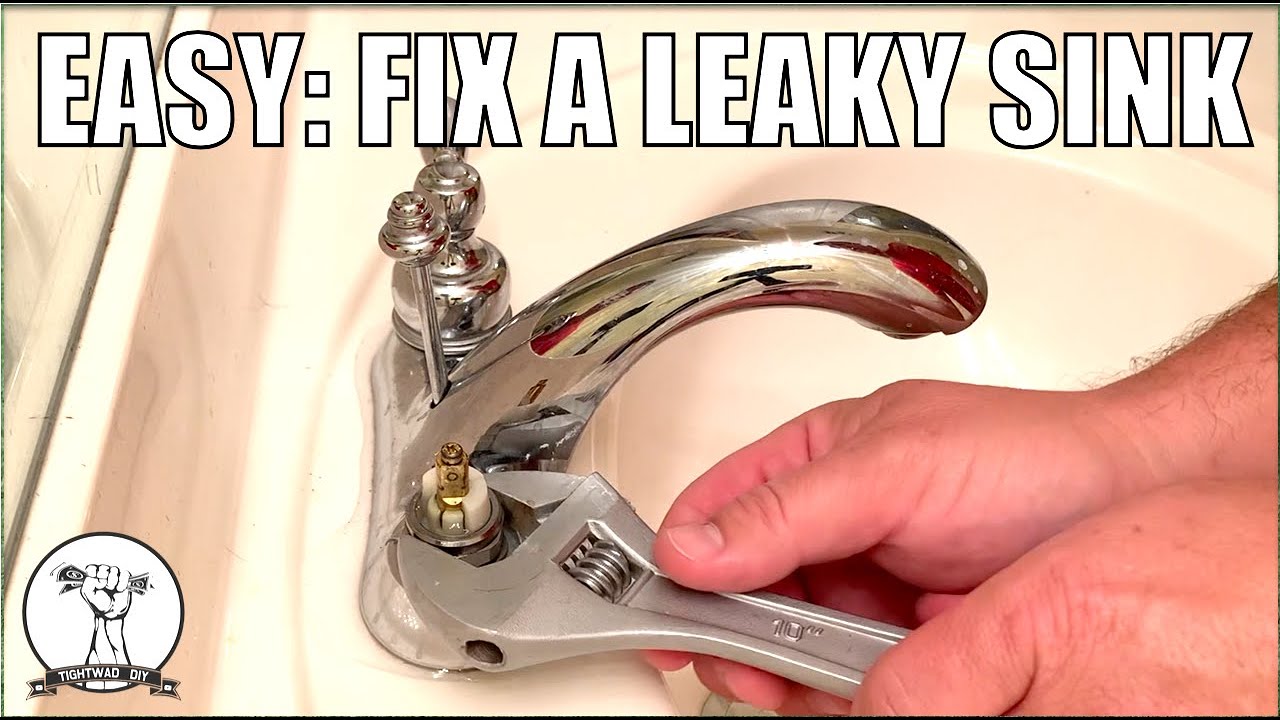
A leaky kitchen sink can not only be annoying, but it can also lead to water damage and higher water bills. Luckily, fixing a leaky kitchen sink is a simple task that can be done with a few basic tools. The first step is to locate the source of the leak. It could be coming from the faucet, the pipes under the sink, or the drain. Once you have identified the source, turn off the water supply to the sink. If the leak is coming from the faucet, you may need to replace the O-ring or cartridge. Consult the manufacturer's instructions for the correct replacement parts and follow the steps to remove and install them. If the leak is coming from the pipes under the sink, you may need to tighten or replace the connections. Use an adjustable wrench to tighten any loose connections, or replace any damaged pipes or fittings. For leaks in the drain, you may need to replace the drain flange or gasket. Again, consult the manufacturer's instructions for the correct replacement parts and follow the steps to remove and install them. Once all repairs have been made, turn the water supply back on and check for any remaining leaks. If everything is in working order, you have successfully fixed a leaky kitchen sink.5. How to Fix a Leaky Kitchen Sink


5. How to Fix a Leaky Kitchen Sink


Replacing a kitchen sink may seem like a daunting task, but with the right tools and knowledge, it can be a simple process. Follow these steps to learn how to replace a kitchen sink in your home. The first step is to remove the old sink. Turn off the water supply and disconnect the water supply lines and drain pipes. Then, unscrew the sink from the countertop and carefully remove it. With the old sink removed, you can now prepare for installation. If the new sink is the same size and shape as the old one, you can simply place it in the existing hole. If not, you may need to trace and cut a new hole in the countertop. Once the sink is in place, secure it to the countertop with mounting brackets and screws. Then, connect the water supply lines and drain pipes, making sure to tighten all connections with a wrench. Turn on the water supply and check for any leaks. Adjust the position of the sink if necessary and make sure all connections are secure. You have now successfully replaced a kitchen sink in your home.6. How to Replace a Kitchen Sink

6. How to Replace a Kitchen Sink


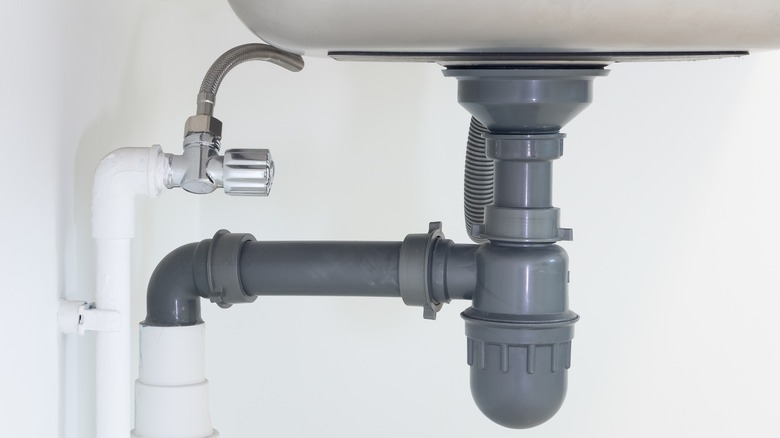
If you're installing a new kitchen sink, you will also need to install a kitchen sink drain. This is a simple process that can be done in a few easy steps. The first step is to prepare the area for installation. Turn off the water supply and remove the old drain flange. Clean the area around the sink opening and remove any old putty or debris. Next, apply a thin layer of plumber's putty around the new drain flange and place it in the sink opening. Then, secure it in place with the provided mounting ring and screws. Once the drain flange is in place, attach the drain tailpiece to the flange and tighten it with pliers. Then, connect the P-trap to the tailpipe and tighten all connections with a wrench. Turn on the water supply and check for any leaks. If everything is in working order, you have successfully installed a kitchen sink drain.7. How to Install a Kitchen Sink Drain


7. How to Install a Kitchen Sink Drain
:max_bytes(150000):strip_icc()/how-to-install-a-sink-drain-2718789-04-5715d67f5b7d41429d42bf705bb70e2c.jpg)
:max_bytes(150000):strip_icc()/how-to-install-a-sink-drain-2718789-hero-24e898006ed94c9593a2a268b57989a3.jpg)
:max_bytes(150000):strip_icc()/how-to-install-a-sink-drain-2718789-07-e20d2b61c2d4497b8738ed41060537ba.jpg)


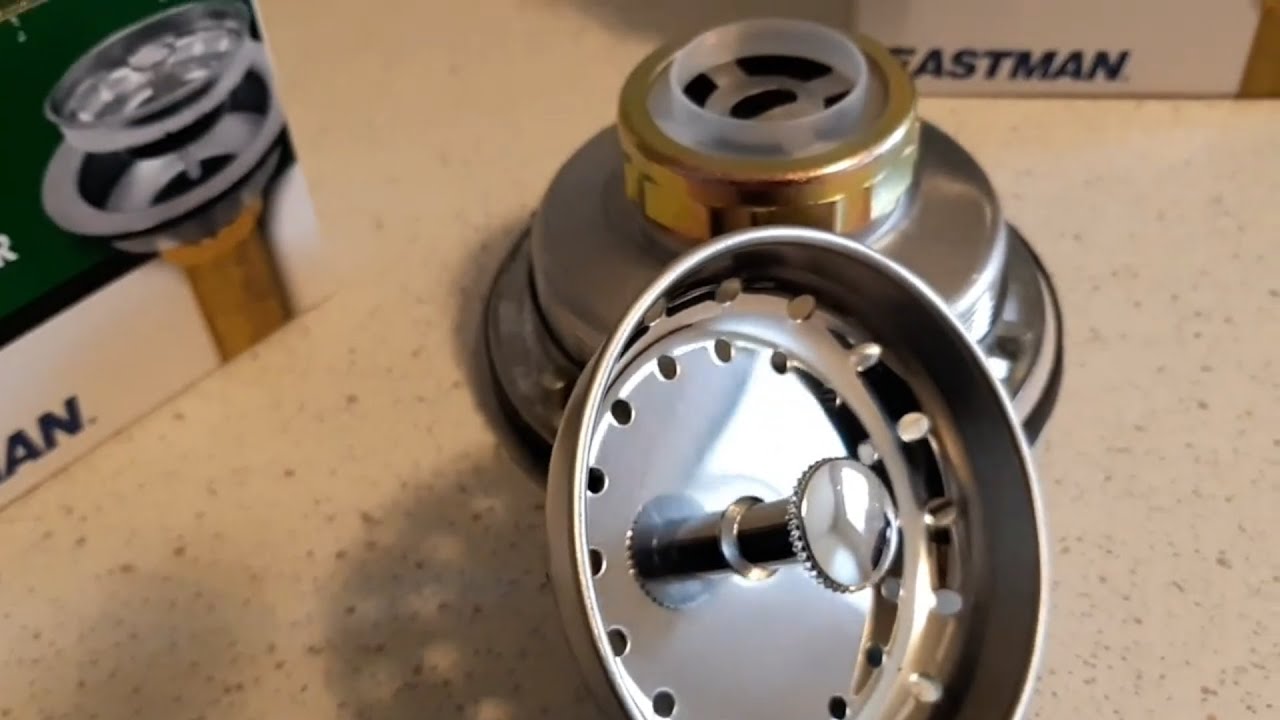
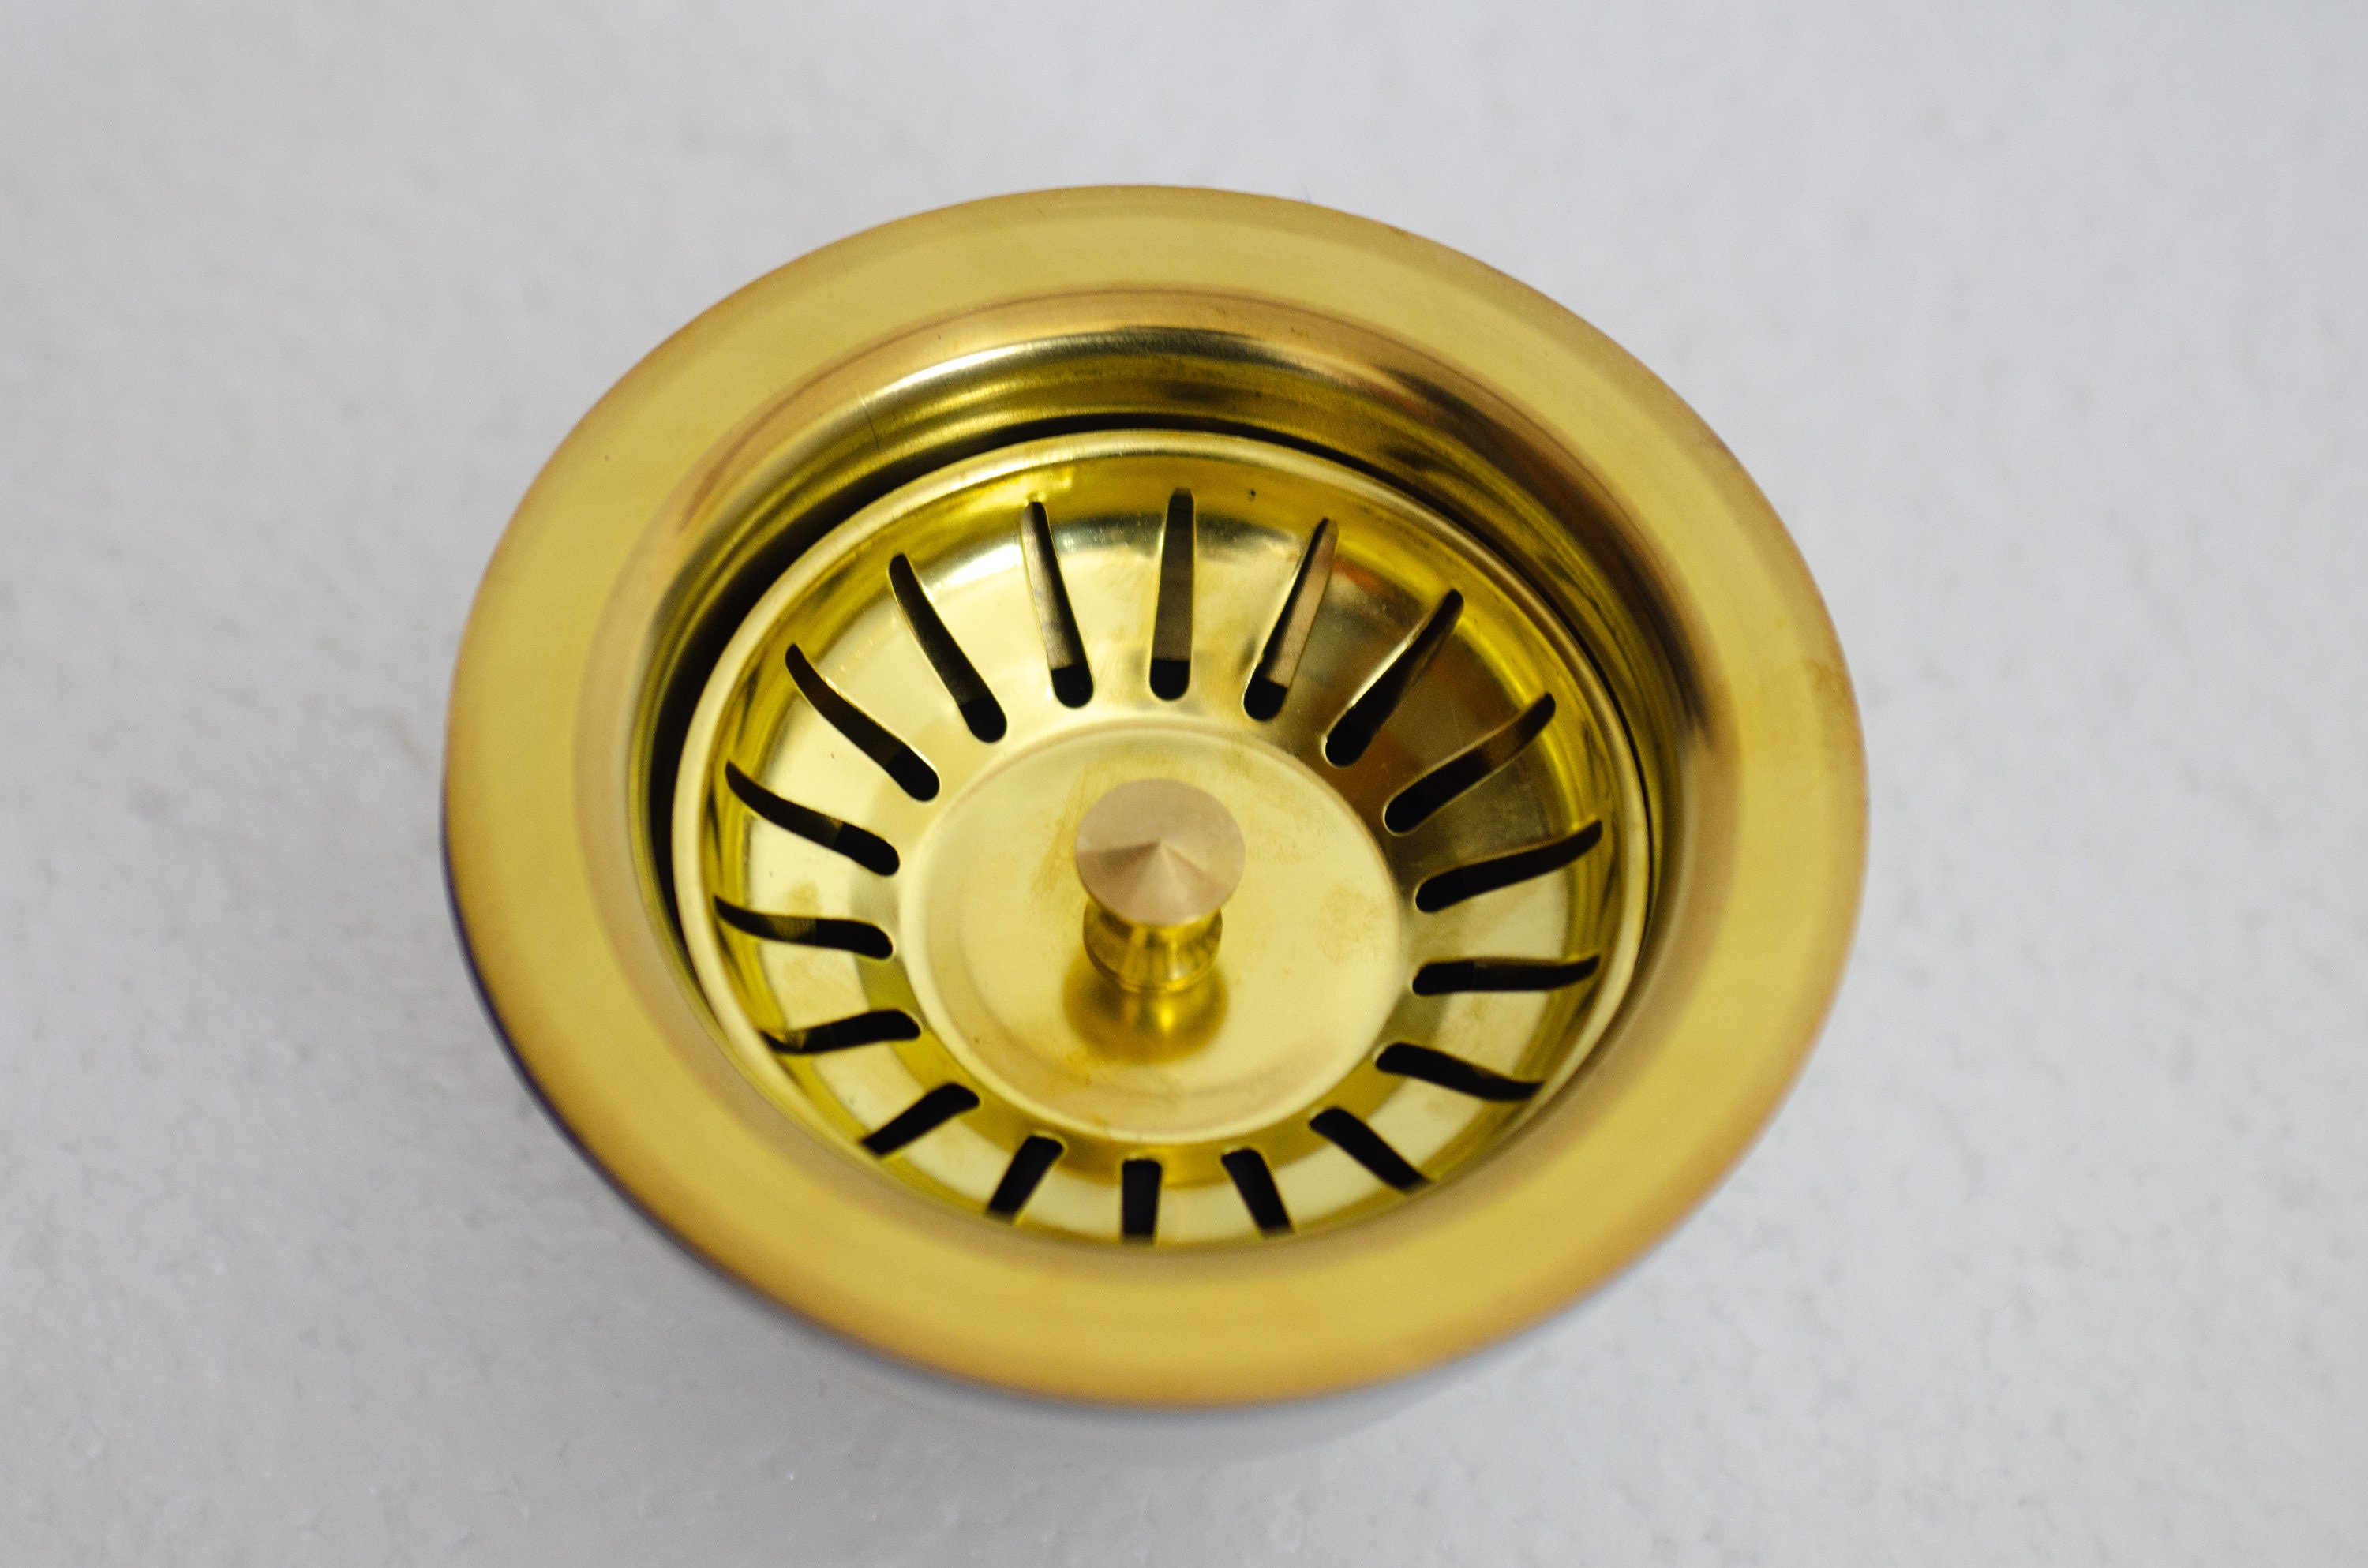
A kitchen sink strainer is an essential component to prevent food waste from clogging your kitchen sink. Installing a strainer is a quick and easy process that can be done in a few simple steps. Start by preparing the area for installation. Turn off the water supply and remove the old strainer from the sink. Clean the area around the sink opening and remove any old putty or debris. Next, apply a thin layer of plumber's putty around the new strainer and place it in the sink opening. Then, secure it in place with the provided mounting ring and screws. Once the strainer is in place, attach the strainer basket and tighten it with pliers. Then, connect the drain tailpiece and P-trap and tighten all connections with a wrench. Turn on the water supply and check for any leaks. If everything is in working order, you have successfully installed a kitchen sink strainer.8. How to Install a Kitchen Sink Strainer
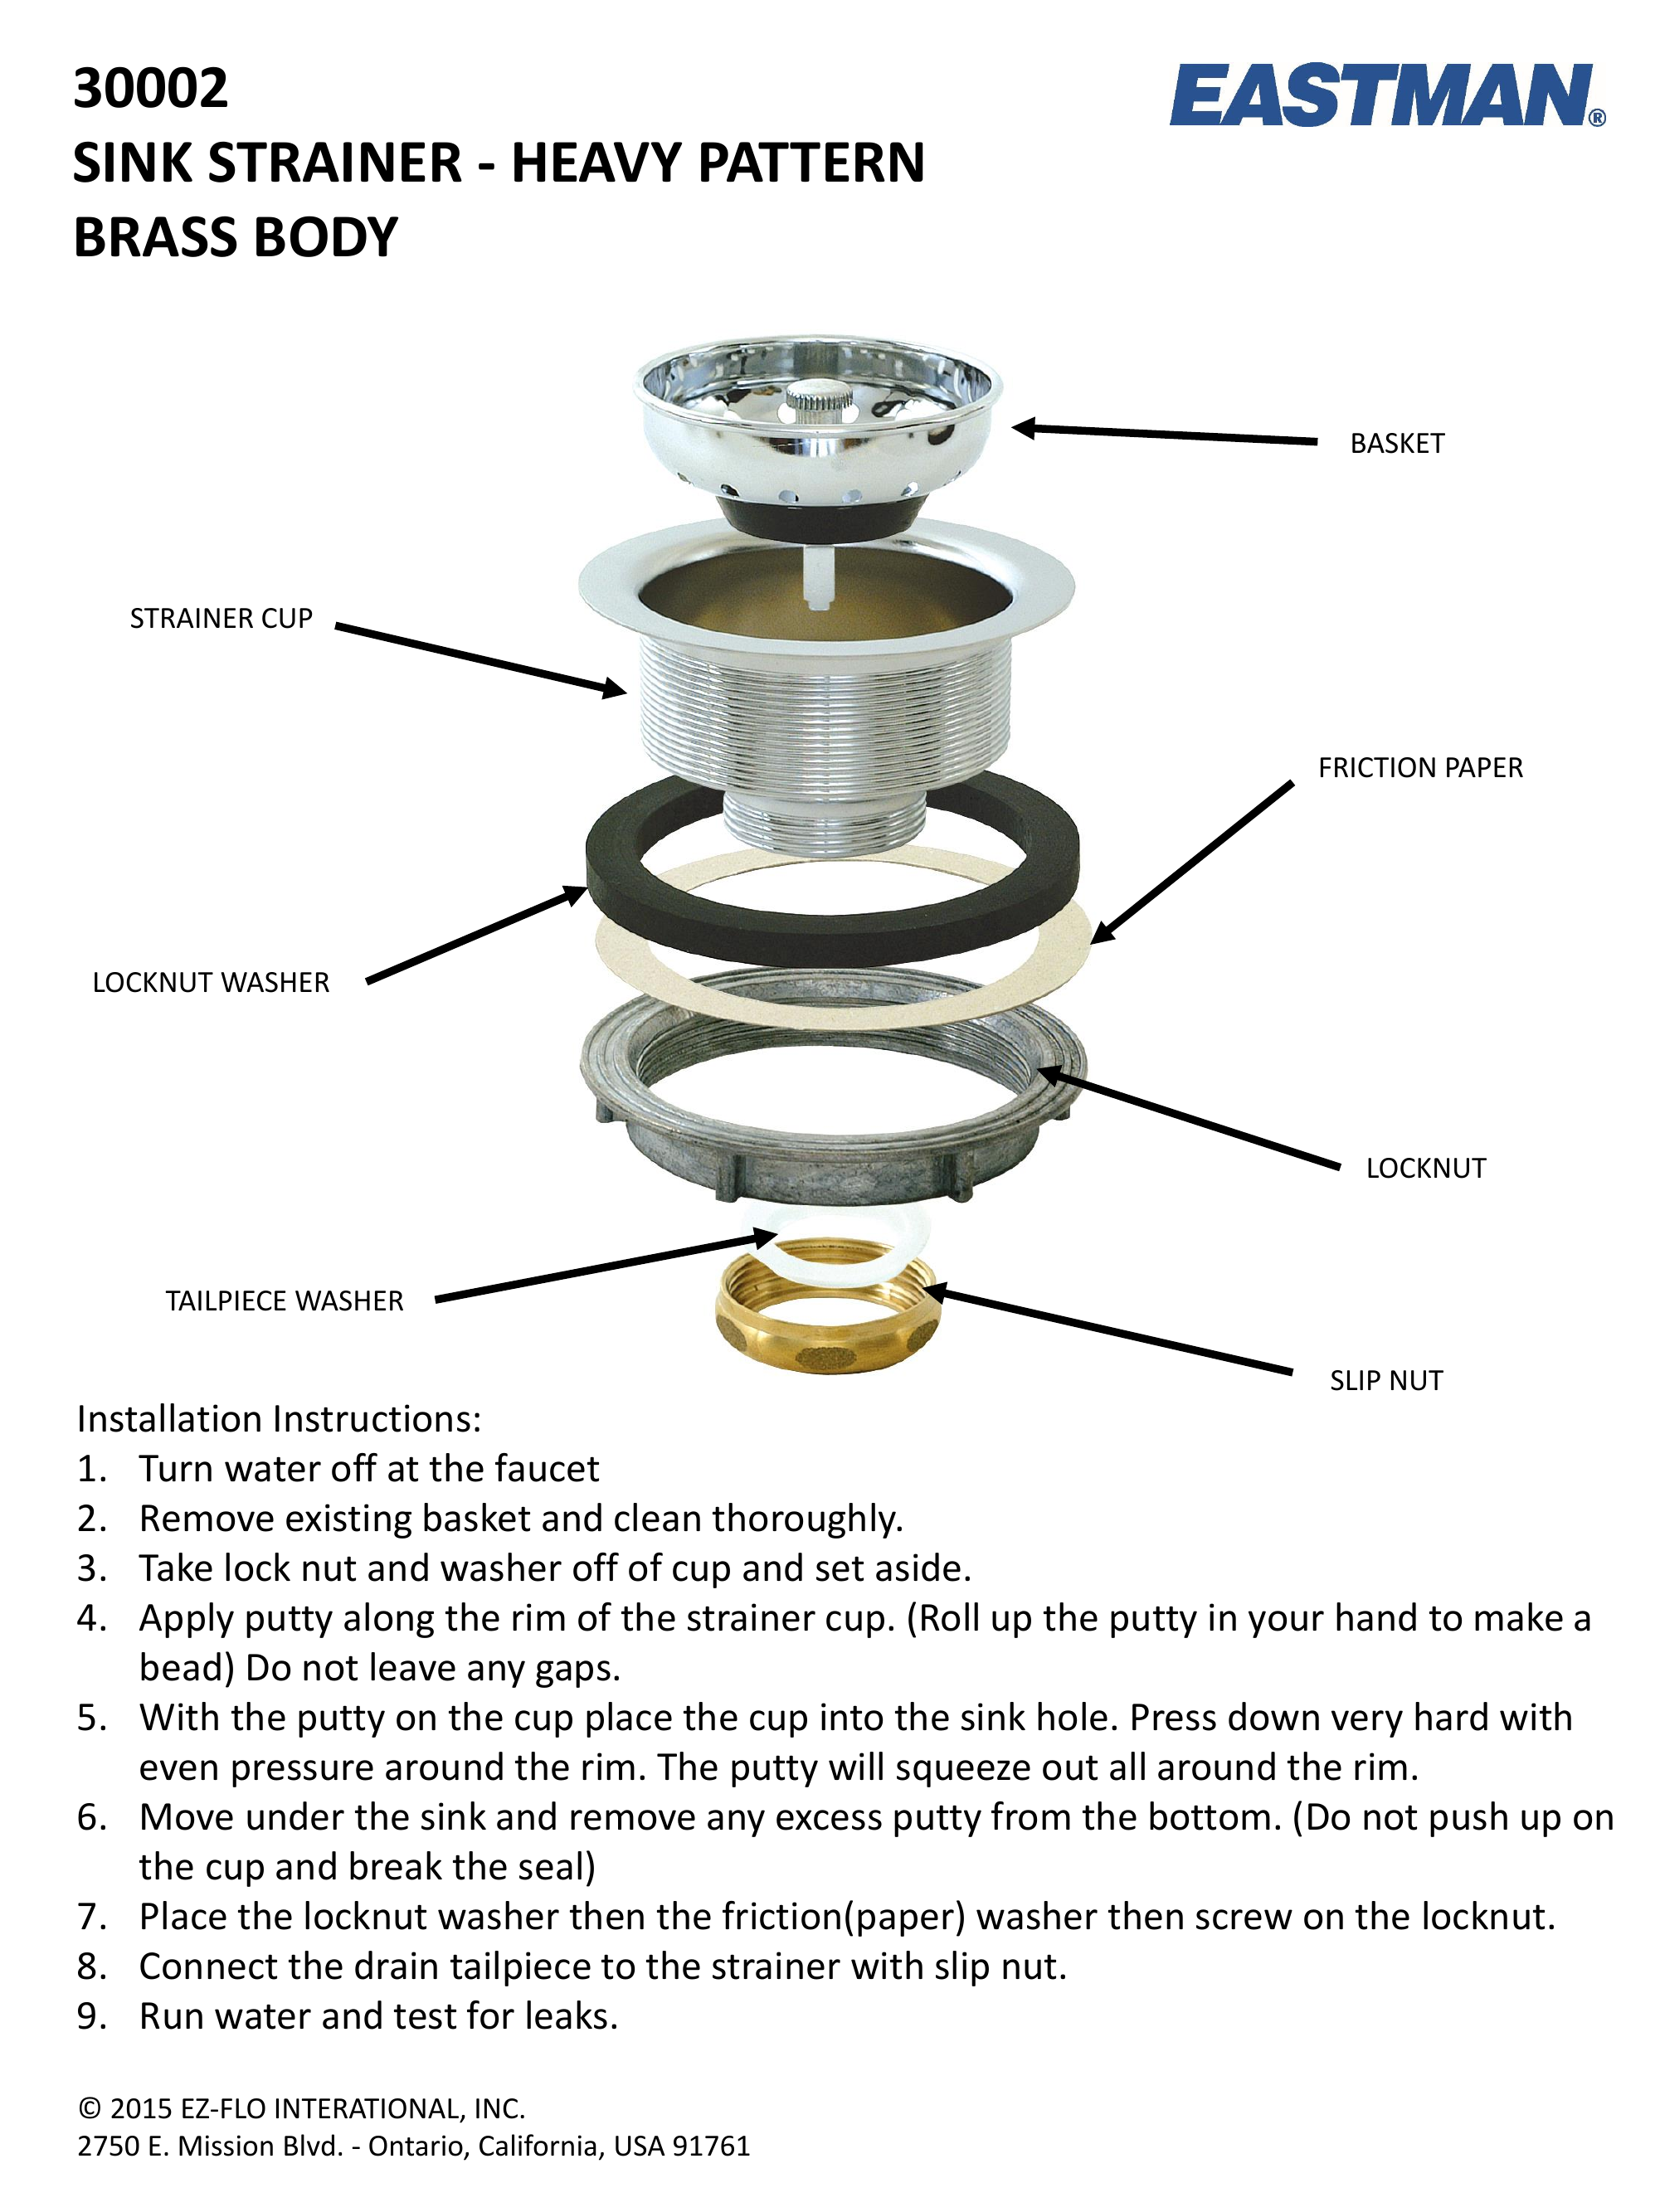


8. How to Install a Kitchen Sink Strainer


A kitchen sink sprayer can make washing dishes and cleaning the sink much easier. If you're looking to install a sprayer in your kitchen sink, follow these steps for a successful installation. The first step is to prepare the area for installation. Turn off the water supply and remove the old sprayer from the sink. Clean the area around the sink opening and remove any old putty or debris. Next, attach the sprayer hose to the sprayer head and feed it through the hole in the sink. Then, attach the hose to the water supply and tighten it with pliers. With the hose attached, you can now install the sprayer head by screwing it onto the end of the hose. Then, turn on the water supply and test the sprayer to make sure it is functioning properly. If there are no leaks and the sprayer is working, you have successfully installed a kitchen sink sprayer.9. How to Install a Kitchen Sink Sprayer


9. How to Install a Kitchen Sink Sprayer


A soap dispenser is a convenient addition to any kitchen sink, keeping your countertops clutter-free. Installing a soap dispenser is a simple process that can be done in a few easy steps. Start by preparing the area for installation. Turn off the water supply and remove the old soap dispenser from the sink. Clean the area around the sink opening and remove any old putty or debris. Next, insert the soap dispenser into the hole in the sink and secure it in place with the provided mounting ring and screws. Then, attach the dispenser bottle and fill it with soap. Turn on the water supply and test the dispenser to make sure it is functioning properly. You have now successfully installed a kitchen sink soap dispenser.10. How to Install a Kitchen Sink Soap Dispenser
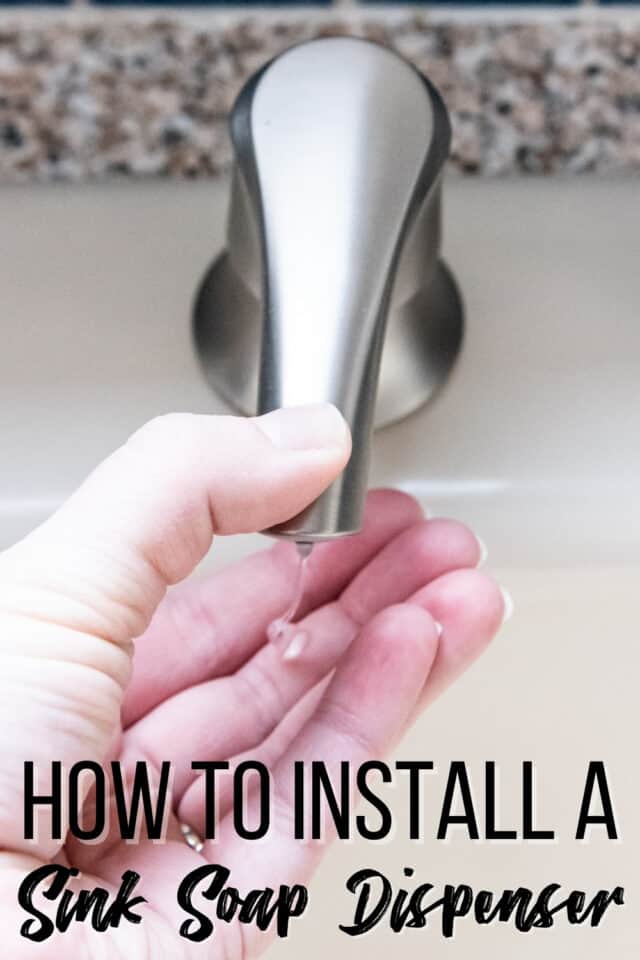
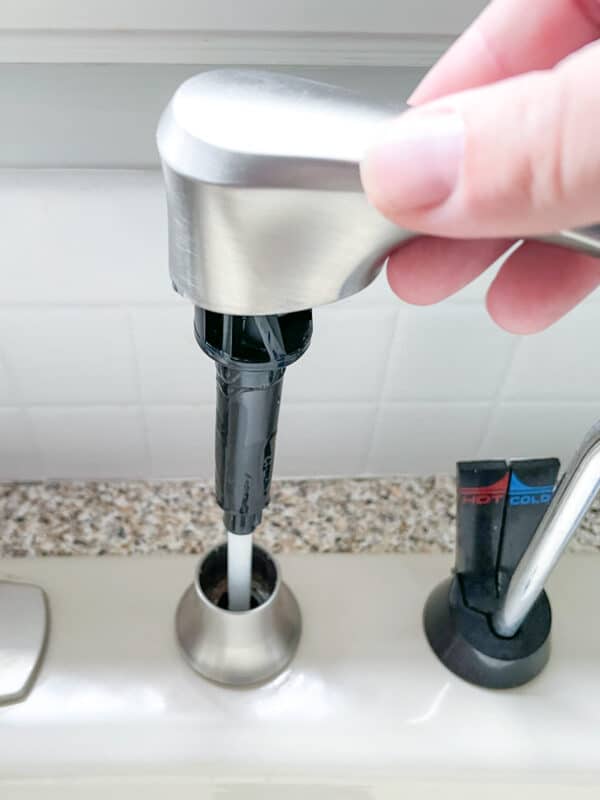

10. How to Install a Kitchen Sink Soap Dispenser

:max_bytes(150000):strip_icc()/Kitchensinksoapdispenser-GettyImages-91206440-59e82279054ad90011101a01.jpg)


Kitchen Sink Plumbing, Disposal, and Dishwasher: Essential Components for a Functional and Modern Kitchen
/how-to-install-a-sink-drain-2718789-hero-24e898006ed94c9593a2a268b57989a3.jpg)
Efficient Kitchen Design: Beyond Aesthetics
 When it comes to house design, the kitchen is often considered the heart of the home. Not only is it a space for cooking and preparing meals, but it is also a place for gathering and socializing. Therefore, it is essential to have a functional and well-designed kitchen that goes beyond just aesthetics. One crucial aspect of a well-designed kitchen is the plumbing system, particularly when it comes to the kitchen sink, disposal, and dishwasher. These components play a significant role in the overall efficiency and functionality of the kitchen.
The Importance of Proper Plumbing for Kitchen Sink
 The kitchen sink is one of the most used fixtures in any kitchen, and it is essential to have a properly functioning plumbing system for it. A clogged or leaky sink can cause a lot of inconvenience and frustration, not to mention potential water damage to the surrounding cabinets and flooring. That is why it is crucial to invest in high-quality plumbing materials and professional installation for your kitchen sink.
Additionally, choosing a sink with a garbage disposal unit can greatly improve the functionality and cleanliness of your kitchen.
The kitchen sink is one of the most used fixtures in any kitchen, and it is essential to have a properly functioning plumbing system for it. A clogged or leaky sink can cause a lot of inconvenience and frustration, not to mention potential water damage to the surrounding cabinets and flooring. That is why it is crucial to invest in high-quality plumbing materials and professional installation for your kitchen sink.
Additionally, choosing a sink with a garbage disposal unit can greatly improve the functionality and cleanliness of your kitchen.
The Benefits of Having a Garbage Disposal Unit
 A garbage disposal unit is a device that is installed under the kitchen sink and is designed to grind up food waste so that it can be easily washed down the drain. This not only eliminates the need for a separate compost bin but also prevents food scraps from clogging the drain and causing unpleasant odors.
A garbage disposal unit can also save you time and effort in cleaning up after meals, making it an essential component for a modern and efficient kitchen.
A garbage disposal unit is a device that is installed under the kitchen sink and is designed to grind up food waste so that it can be easily washed down the drain. This not only eliminates the need for a separate compost bin but also prevents food scraps from clogging the drain and causing unpleasant odors.
A garbage disposal unit can also save you time and effort in cleaning up after meals, making it an essential component for a modern and efficient kitchen.
The Convenience of a Dishwasher
 In today's fast-paced world, time is of the essence, and having a dishwasher in the kitchen can be a game-changer. Not only does it save you time and effort in cleaning dishes, but it also uses less water and energy compared to handwashing.
Moreover, a dishwasher can help keep your kitchen organized and clutter-free by providing a designated space for dirty dishes.
In today's fast-paced world, time is of the essence, and having a dishwasher in the kitchen can be a game-changer. Not only does it save you time and effort in cleaning dishes, but it also uses less water and energy compared to handwashing.
Moreover, a dishwasher can help keep your kitchen organized and clutter-free by providing a designated space for dirty dishes.
Professional Installation for Optimum Performance
 While it may be tempting to DIY your kitchen plumbing, it is highly recommended to hire a professional plumber for the installation. A professional plumber has the necessary skills, knowledge, and tools to ensure that your kitchen sink, disposal, and dishwasher are installed correctly and functioning at their best.
They can also provide valuable advice on the best materials and brands to use for your specific needs and budget.
In conclusion, a well-designed kitchen goes beyond just aesthetics, and proper plumbing for the kitchen sink, disposal, and dishwasher is crucial for a functional and modern kitchen. Investing in high-quality materials and professional installation can save you time, effort, and potential headaches in the long run. So if you are planning to renovate or build your dream kitchen, make sure to prioritize the plumbing components and choose wisely for a hassle-free and efficient cooking experience.
While it may be tempting to DIY your kitchen plumbing, it is highly recommended to hire a professional plumber for the installation. A professional plumber has the necessary skills, knowledge, and tools to ensure that your kitchen sink, disposal, and dishwasher are installed correctly and functioning at their best.
They can also provide valuable advice on the best materials and brands to use for your specific needs and budget.
In conclusion, a well-designed kitchen goes beyond just aesthetics, and proper plumbing for the kitchen sink, disposal, and dishwasher is crucial for a functional and modern kitchen. Investing in high-quality materials and professional installation can save you time, effort, and potential headaches in the long run. So if you are planning to renovate or build your dream kitchen, make sure to prioritize the plumbing components and choose wisely for a hassle-free and efficient cooking experience.