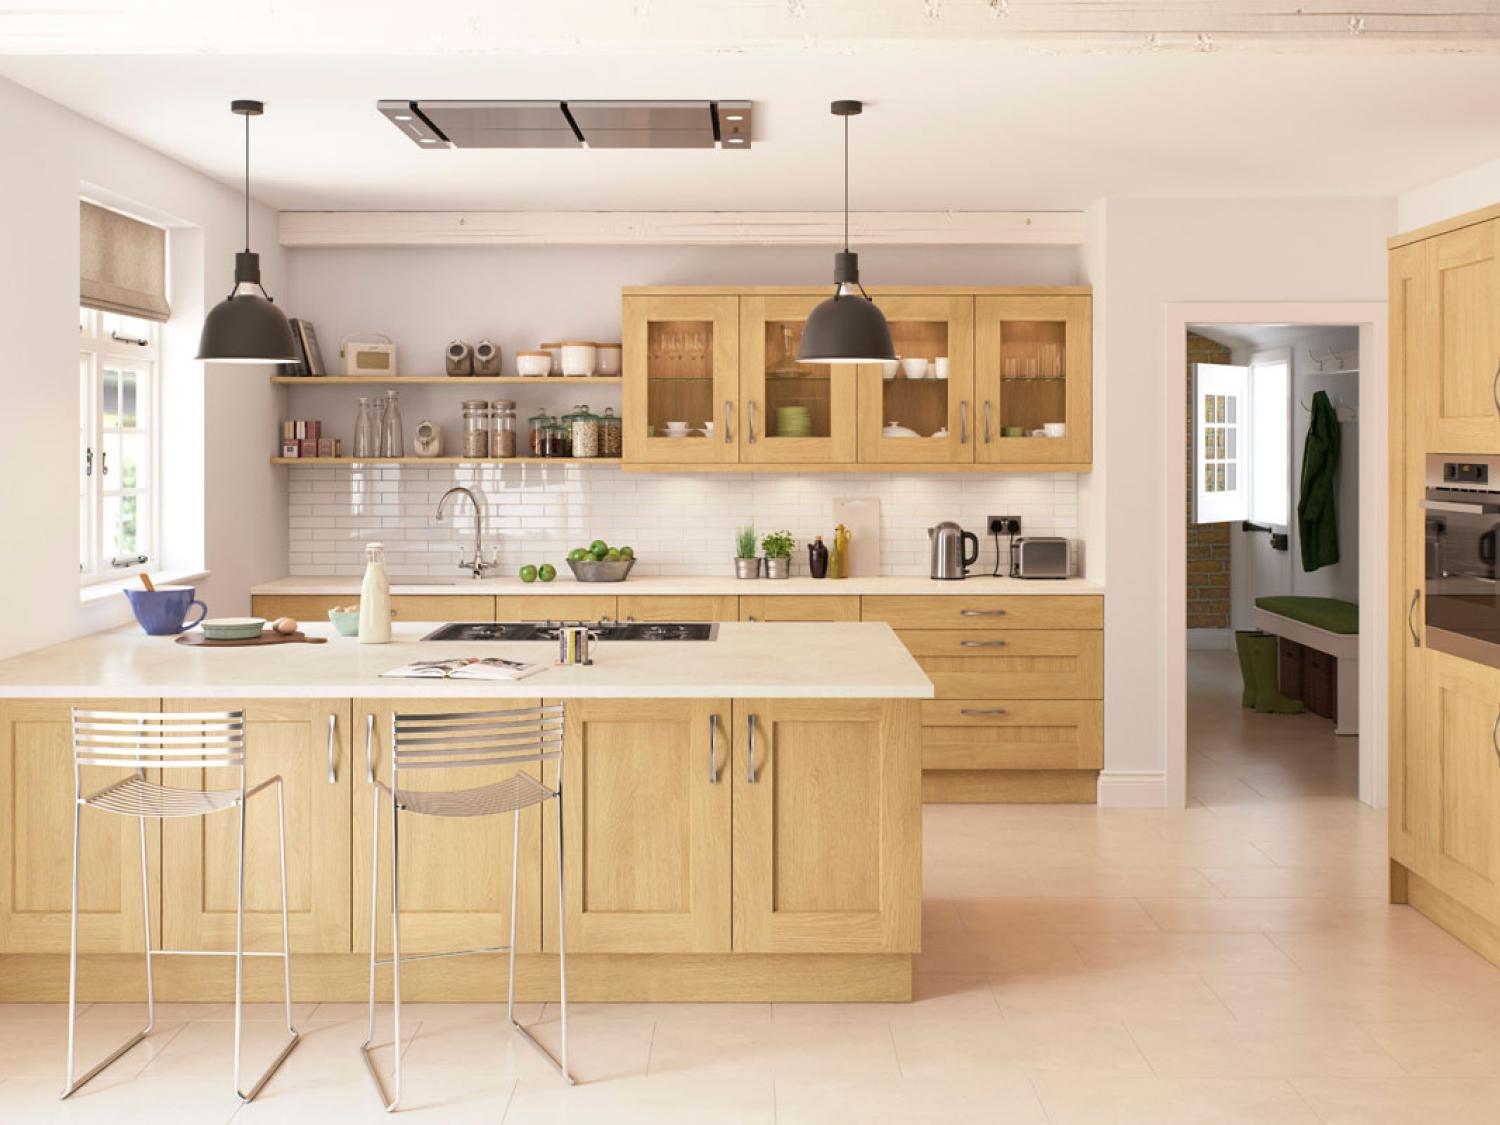
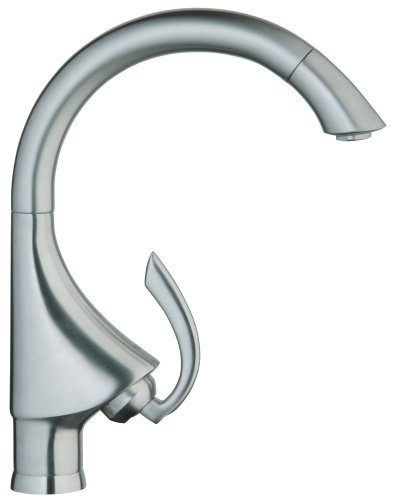
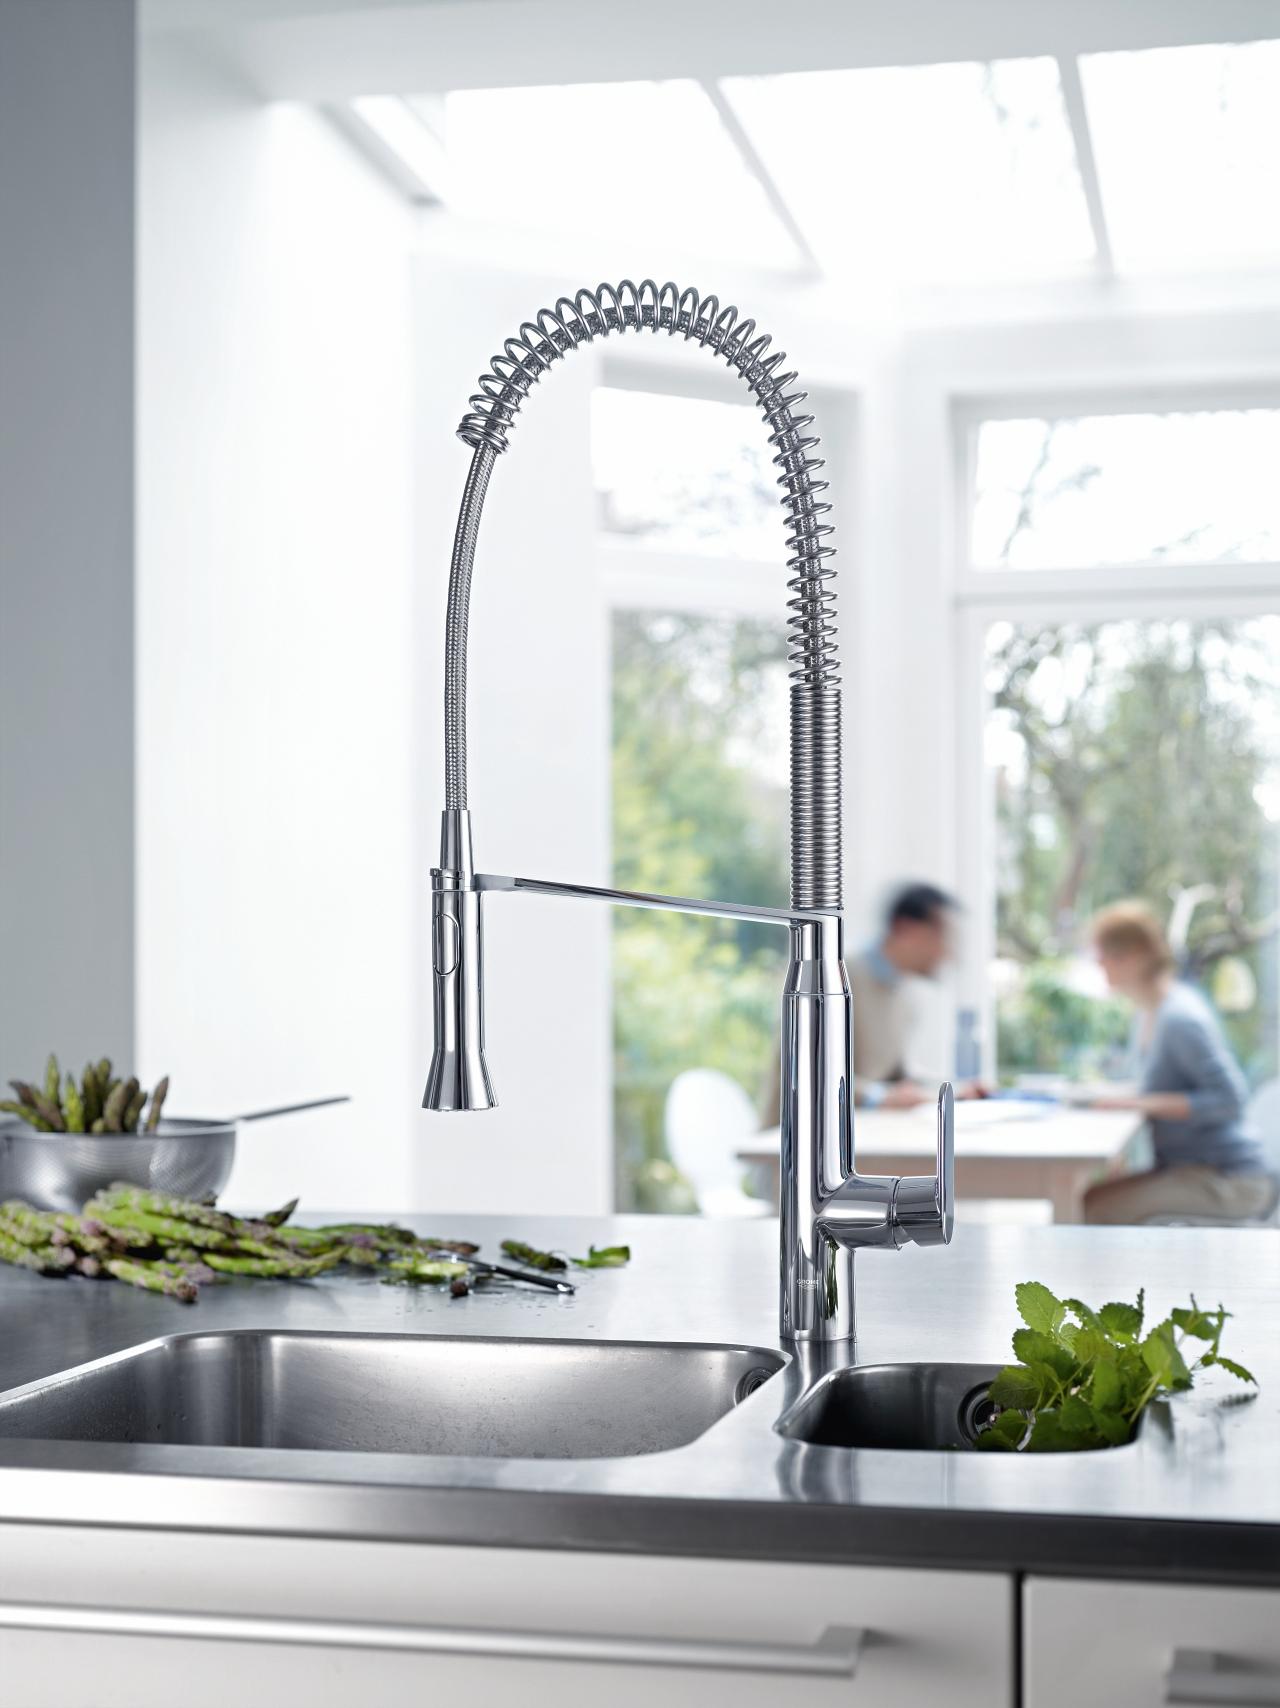
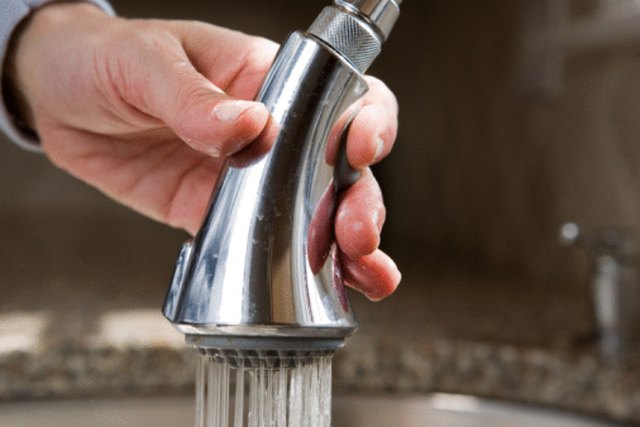
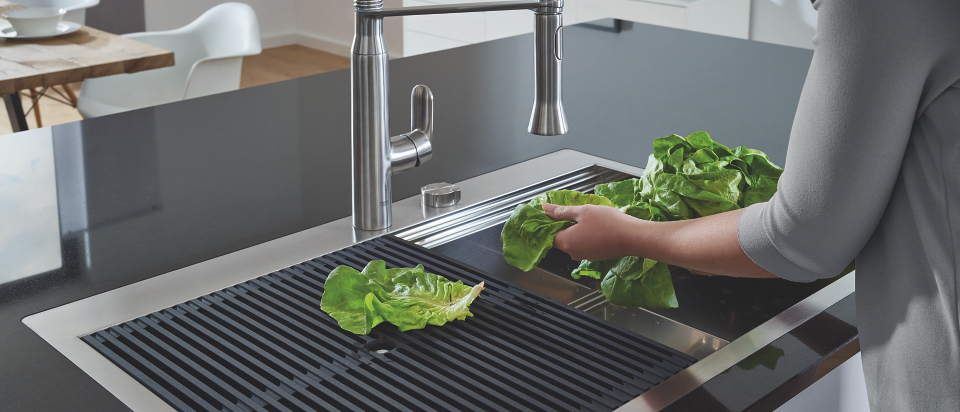
If you've recently purchased a Grohe kitchen sink side sprayer, you may be wondering how to properly use and care for it. Luckily, the instructions for operating this handy tool are straightforward and easy to follow. To begin, make sure the sprayer is securely attached to the sink. Then, simply pull the nozzle out from its housing and aim it at your desired area. Press the trigger and the sprayer will release a steady stream of water. When you're finished, release the trigger and the water flow will stop. It's important to note that the sprayer should only be used for rinsing dishes and cleaning the sink. Avoid using it to fill pots or containers as this can cause damage to the sprayer over time.1. Grohe Kitchen Sink Side Sprayer Instructions

1. Grohe Kitchen Sink Side Sprayer Instructions


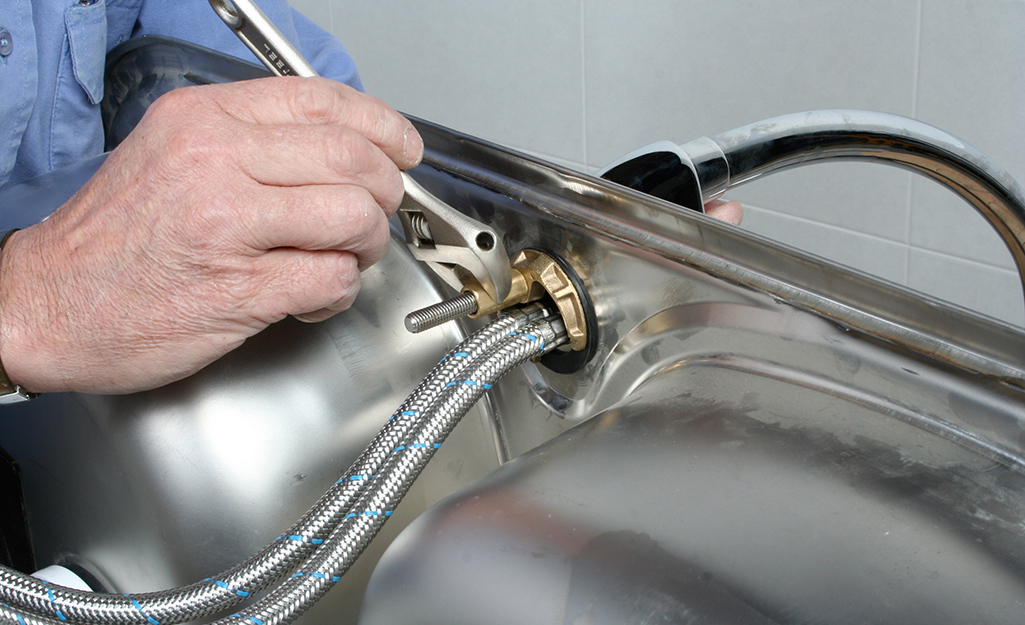
Installing a Grohe kitchen sink side sprayer is a fairly simple process that can be done in just a few steps. First, make sure you have all the necessary parts and tools. You will need a wrench, plumber's tape, and the sprayer itself. Begin by removing the old sprayer, if there was one, by unscrewing the hose from the water supply valve. Then, wrap plumber's tape around the threads of the valve and attach the new sprayer hose, tightening it with a wrench. Next, attach the sprayer head to the end of the hose and secure it with the provided clip. Finally, test the sprayer to ensure it is working properly and adjust the water pressure if needed.2. Grohe Kitchen Sink Side Sprayer Installation


2. Grohe Kitchen Sink Side Sprayer Installation


If your Grohe kitchen sink side sprayer is not functioning as it should, there are a few common issues that can be easily repaired. The most common problem is a clogged sprayer head, which can be fixed by soaking the head in a solution of equal parts water and white vinegar. If the sprayer is leaking, it may be due to a damaged hose or valve. In this case, the damaged part should be replaced. It's important to regularly inspect your sprayer for any signs of wear and tear and address any issues promptly to avoid further damage.3. Grohe Kitchen Sink Side Sprayer Repair


3. Grohe Kitchen Sink Side Sprayer Repair

If your Grohe kitchen sink side sprayer is beyond repair, it may be time for a replacement. Luckily, Grohe offers a variety of sprayers to choose from, making it easy to find one that fits your needs and budget. To replace your sprayer, follow the same installation instructions as mentioned earlier. Make sure to choose the correct size and style to fit your sink and existing plumbing. With proper care, your new sprayer should last for many years to come.4. Grohe Kitchen Sink Side Sprayer Replacement


4. Grohe Kitchen Sink Side Sprayer Replacement

If you're experiencing issues with your Grohe kitchen sink side sprayer, there are a few troubleshooting steps you can take to try and resolve the problem. First, check that the sprayer is securely attached to the sink and that the water supply valve is turned on. If the sprayer is still not working, check for any kinks or blockages in the hose. You can also try adjusting the water pressure to see if that makes a difference. If none of these solutions work, it may be time to consult a professional plumber.5. Grohe Kitchen Sink Side Sprayer Troubleshooting
5. Grohe Kitchen Sink Side Sprayer Troubleshooting

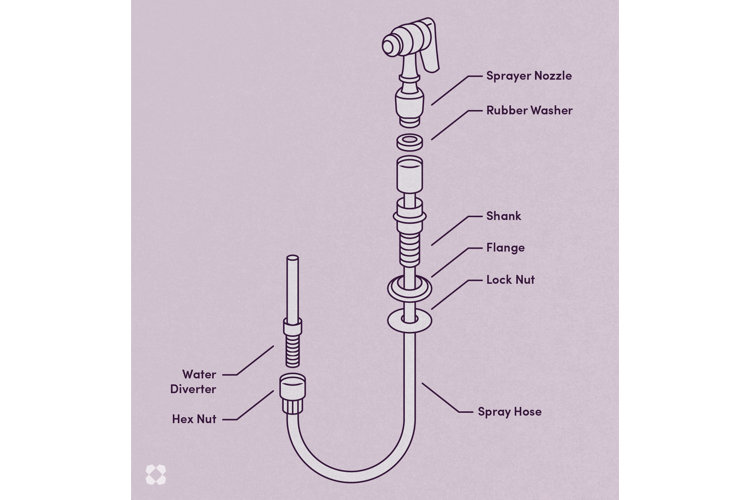

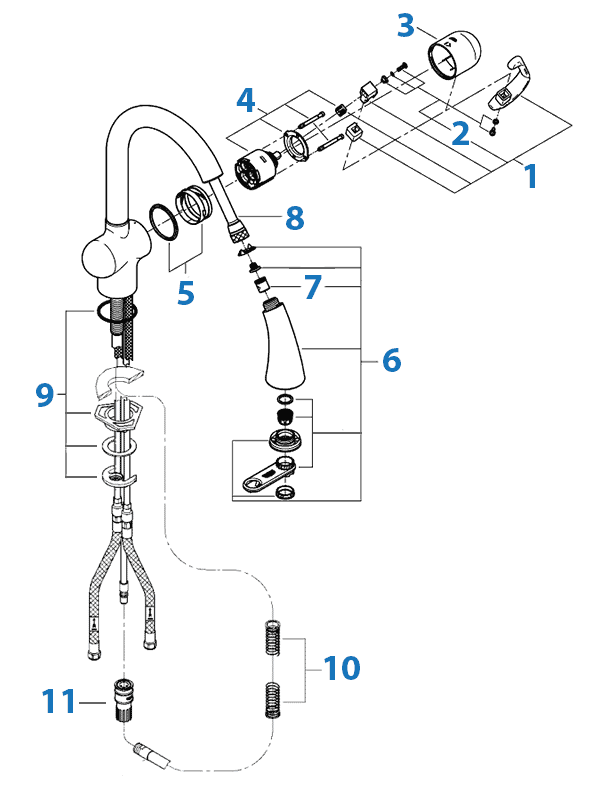
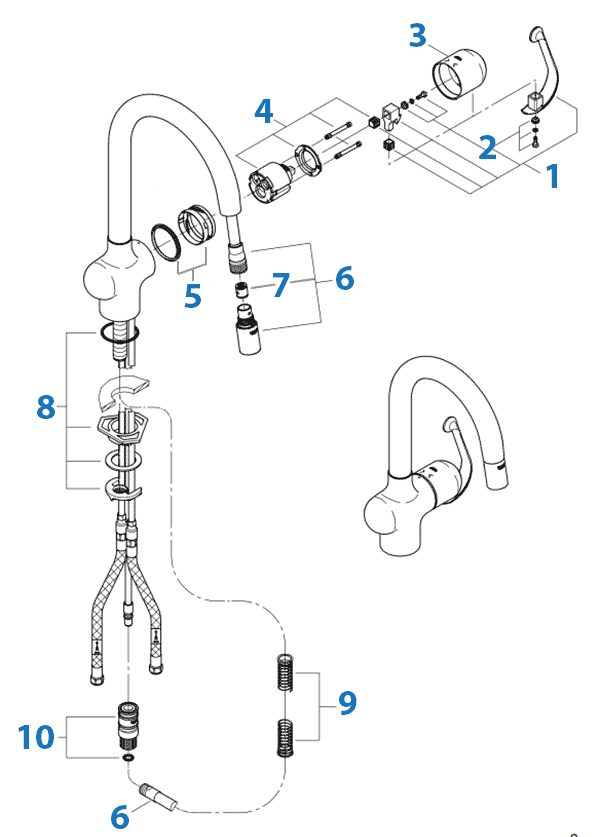
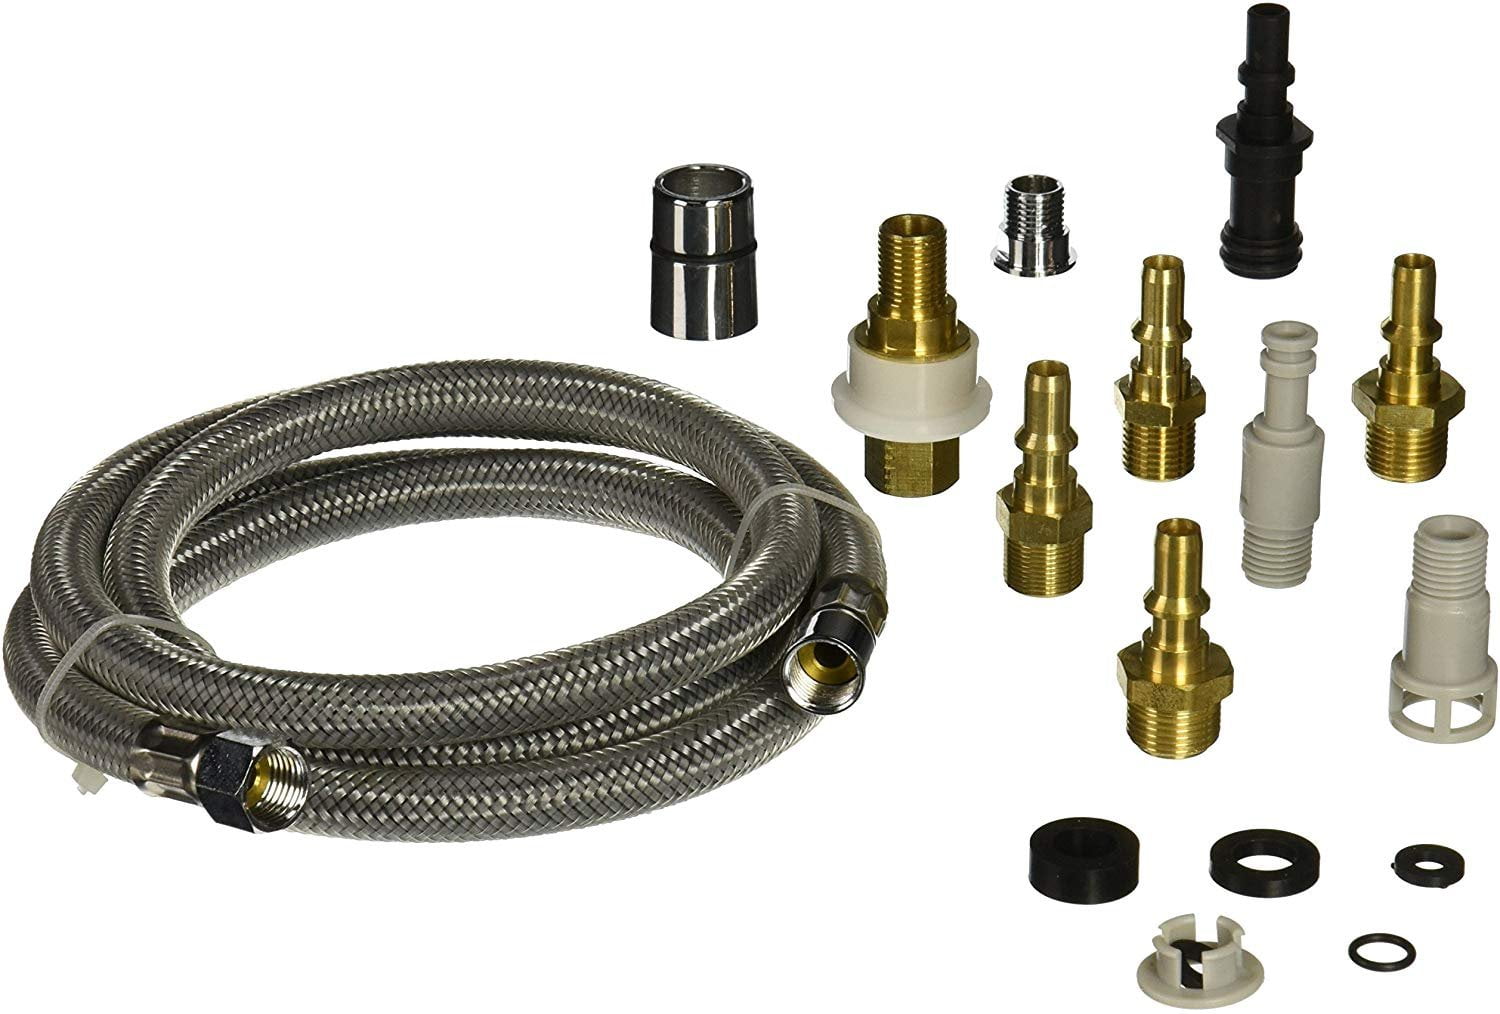
If you need to replace a part of your Grohe kitchen sink side sprayer, it's important to know the names of the different components to ensure you're purchasing the correct part. The main parts of a side sprayer include the hose, sprayer head, and water supply valve. You may also need to replace the sprayer clip, which holds the sprayer head in place, or the sprayer housing, which attaches the sprayer to the sink. These parts can be purchased separately or as part of a replacement kit.6. Grohe Kitchen Sink Side Sprayer Parts
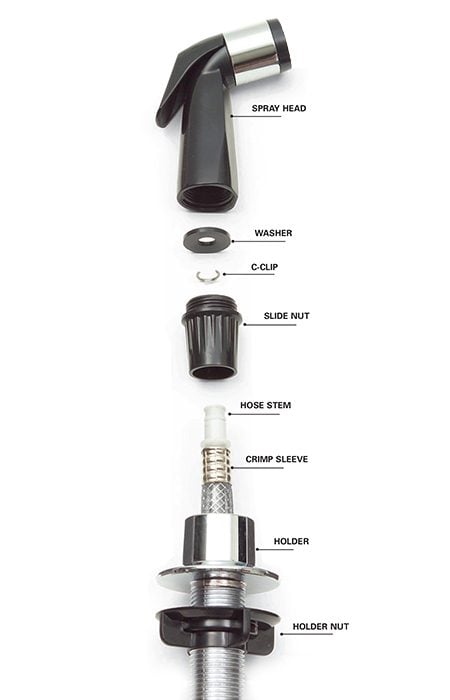

6. Grohe Kitchen Sink Side Sprayer Parts
To keep your Grohe kitchen sink side sprayer in top condition, regular maintenance is key. This includes cleaning the sprayer head regularly to prevent build-up and replacing any worn or damaged parts as needed. You should also inspect the sprayer for any leaks or issues on a regular basis. If you notice any problems, address them promptly to avoid further damage and ensure your sprayer continues to function properly.7. Grohe Kitchen Sink Side Sprayer Maintenance

7. Grohe Kitchen Sink Side Sprayer Maintenance


If you've purchased a Grohe kitchen sink side sprayer that needs to be assembled, it's important to follow the manufacturer's instructions carefully. Begin by gathering all of the necessary parts and tools. Then, assemble the sprayer according to the instructions, making sure all parts are securely attached. Finally, install the sprayer onto your sink using the appropriate methods for your specific model.8. Grohe Kitchen Sink Side Sprayer Assembly

8. Grohe Kitchen Sink Side Sprayer Assembly
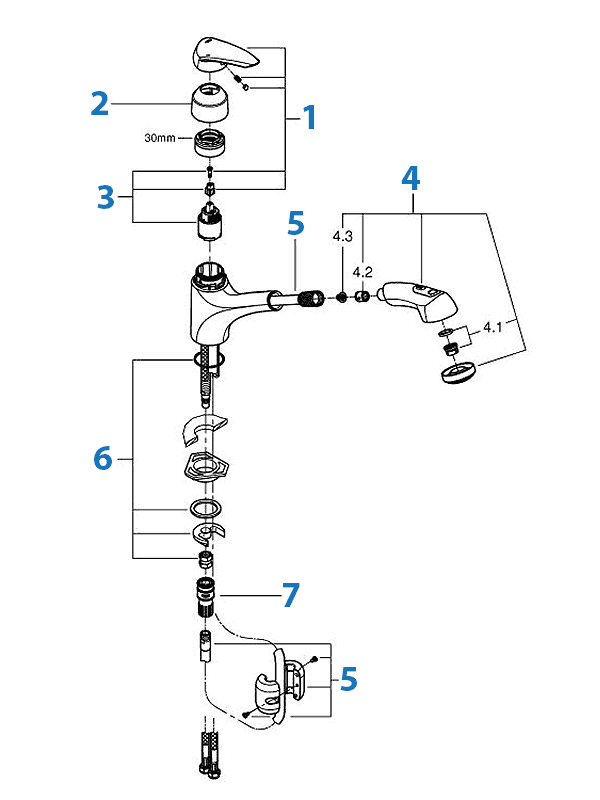
If you're having trouble visualizing the different parts and how they fit together, a Grohe kitchen sink side sprayer diagram can be a helpful reference. You can find diagrams online or in the instruction manual that comes with your sprayer. These diagrams will show you the different components and how they are connected, making it easier to understand and troubleshoot any issues you may encounter with your sprayer.9. Grohe Kitchen Sink Side Sprayer Diagram

9. Grohe Kitchen Sink Side Sprayer Diagram

For more detailed information on using, installing, and maintaining your Grohe kitchen sink side sprayer, consult the manual that comes with your particular model. This manual will provide step-by-step instructions for various tasks, as well as safety precautions and tips for proper care. It's important to keep the manual in a safe place for future reference, as it can be a valuable resource for troubleshooting and maintenance. With proper care and use, your Grohe kitchen sink side sprayer should provide you with years of reliable service.10. Grohe Kitchen Sink Side Sprayer Manual

10. Grohe Kitchen Sink Side Sprayer Manual


Grohe Kitchen Sink Side Sprayer Instructions: Enhance Your Kitchen's Functionality
Why Choose Grohe Kitchen Sink Side Sprayer?
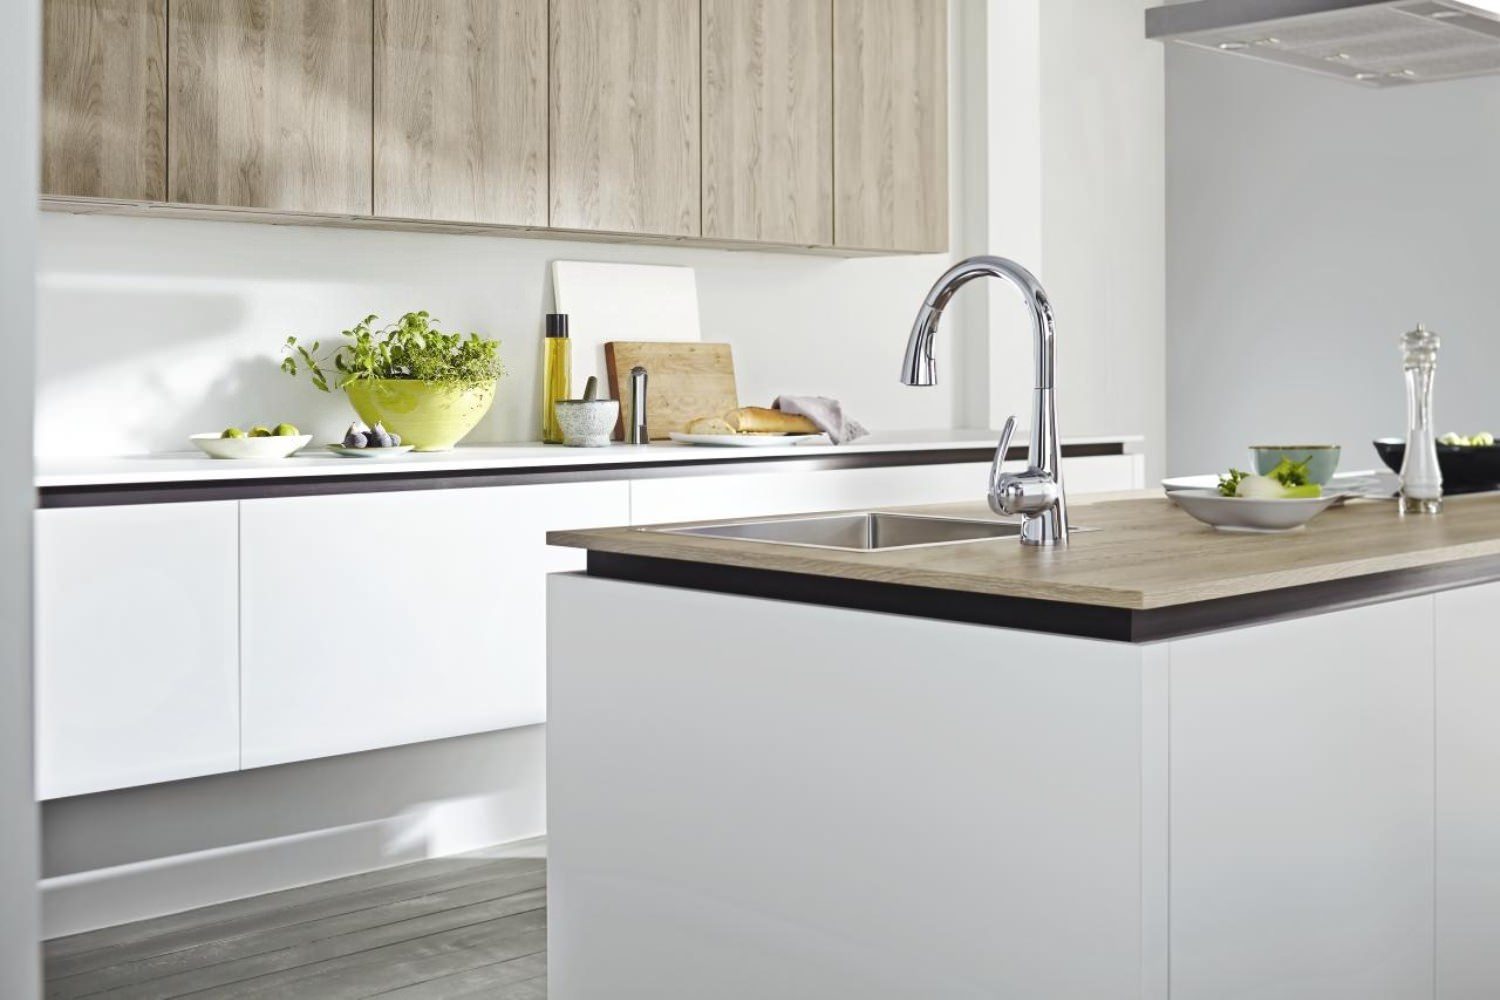
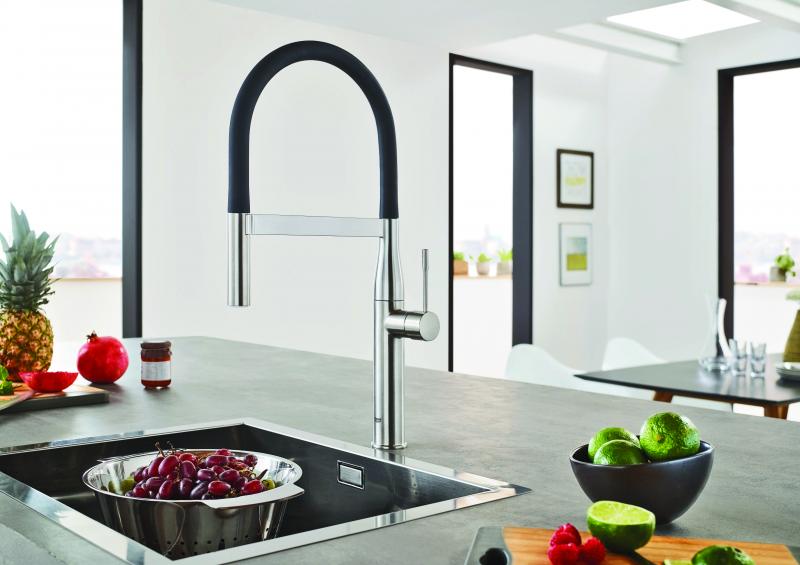
 Grohe is a renowned brand in the world of kitchen and bathroom fixtures. They are known for their high-quality and innovative designs that make everyday tasks easier and more efficient. One of their popular products is the Grohe kitchen sink side sprayer, which adds convenience and functionality to your kitchen sink. With its sleek design and superior performance, it is no wonder why many homeowners choose Grohe as their go-to brand for kitchen fixtures.
Installation Process
 Installing the Grohe kitchen sink side sprayer is a simple and straightforward process. The package comes with detailed instructions that are easy to follow. You will need basic tools such as an adjustable wrench and screwdriver to complete the installation. Begin by turning off the water supply and removing the existing sprayer from your sink. Then, insert the new Grohe sprayer into the hole on the sink and secure it with the mounting nut underneath. Finally, connect the sprayer hose to the water supply and turn on the water to test for any leaks. With just a few simple steps, you can upgrade your kitchen sink with the Grohe side sprayer.
Benefits of Using Grohe Kitchen Sink Side Sprayer
 The Grohe kitchen sink side sprayer offers many benefits that make it a valuable addition to your kitchen. First and foremost, it provides versatility in your sink usage. You can easily switch between the regular faucet and the sprayer for different tasks, such as washing dishes or filling up pots. The sprayer also has a powerful water flow, making it ideal for cleaning stubborn food stains or washing off soap suds. Additionally, the Grohe side sprayer is designed with durability in mind, ensuring that it will last for years to come. Its sleek and modern design also adds a touch of elegance to your kitchen.
Maintenance Tips
 To keep your Grohe kitchen sink side sprayer in top condition, regular maintenance is essential. It is recommended to clean the sprayer head and hose with a mild soap and water solution every few months to prevent buildup and maintain its functionality. Also, check for any leaks or cracks in the hose or sprayer head and replace if necessary. With proper maintenance, your Grohe side sprayer will continue to enhance the functionality of your kitchen for a long time.
Upgrade Your Kitchen with Grohe
 In conclusion, the Grohe kitchen sink side sprayer is a must-have for any modern kitchen. Its convenience, versatility, and durability make it a valuable addition to your sink. Follow the simple installation instructions, and you can easily upgrade your kitchen in no time. So why settle for a basic kitchen sink when you can have the added functionality and elegance of the Grohe side sprayer? Choose Grohe and experience the difference it can make in your daily kitchen tasks.