If you’re looking to upgrade your bathroom, installing a Briggs bathroom sink is a great choice. Briggs is known for their high-quality and durable bathroom fixtures, and their sinks are no exception. However, if you’ve never installed a sink before, it can seem like a daunting task. But fear not, we’ve put together this easy-to-follow guide for installing your Briggs bathroom sink. Briggs Bathroom Sink Installation Instructions

Briggs Bathroom Sink Installation Instructions


The first step in installing your Briggs bathroom sink is to gather all the necessary tools and materials. You will need a wrench, pliers, screwdriver, and a new sink kit that includes the faucet, drain assembly, and any other necessary hardware. Make sure to also have a bucket or towel handy to catch any water that may leak out during the installation process.Briggs Bathroom Sink Installation Guide


Briggs Bathroom Sink Installation Guide


If you prefer to have a physical guide to follow along with, you can also refer to the Briggs bathroom sink installation manual. This manual will provide you with detailed step-by-step instructions and diagrams to make the installation process even easier. You can usually find the manual in the sink kit or on the manufacturer’s website.Briggs Bathroom Sink Installation Manual


Briggs Bathroom Sink Installation Manual


Now that you have all your tools and materials ready, it’s time to start the installation process. The specific steps may vary depending on the style of Briggs sink you have, so be sure to refer to the manual for any specific instructions. However, here are the general steps for installing a Briggs bathroom sink: Step 1: Turn off the water supply to your bathroom. You can usually find the shut-off valve under the sink or in the basement. Step 2: Remove the old sink and faucet if you have one. This may require using a wrench or pliers to loosen any connections. Step 3: Place the new sink in the desired location on the vanity or countertop. Make sure it is level and trace around the edges with a pencil. Step 4: Drill any necessary holes for the faucet and other fixtures. Be sure to use a drill bit that is appropriate for the material of your sink. Step 5: Install the faucet and any other fixtures following the manufacturer’s instructions. Step 6: Attach the drain assembly to the sink. This may require using a wrench or pliers to tighten any connections.Briggs Bathroom Sink Installation Steps


Briggs Bathroom Sink Installation Steps


If you’re more of a visual learner, you can also refer to a Briggs bathroom sink installation video. Many manufacturers have videos on their websites or YouTube channels that show the installation process in detail. This can be a helpful resource to follow along with as you install your sink.Briggs Bathroom Sink Installation Video
Briggs Bathroom Sink Installation Video
Here are a few tips to keep in mind while installing your Briggs bathroom sink: Tip 1: If you’re installing a drop-in sink, use silicone caulk around the edge for a secure fit and to prevent any water from leaking out. Tip 2: When installing the drain assembly, make sure the gasket is properly aligned to prevent any leaks. Tip 3: Check for any leaks once the sink is fully installed. If you notice any leaks, tighten the connections or add additional caulk if necessary.Briggs Bathroom Sink Installation Tips
Briggs Bathroom Sink Installation Tips

If you’re still feeling unsure about the installation process, you can also refer to a Briggs bathroom sink installation tutorial. These tutorials provide a step-by-step guide with photos or videos to help you through the process. You can find these tutorials on the manufacturer’s website or on DIY home improvement websites.Briggs Bathroom Sink Installation Tutorial

Briggs Bathroom Sink Installation Tutorial
For a visual representation of the sink and all its parts, you can refer to a Briggs bathroom sink installation diagram. This diagram will show you how all the pieces fit together and can be a helpful reference as you install your sink.Briggs Bathroom Sink Installation Diagram

Briggs Bathroom Sink Installation Diagram


If you encounter any issues during the installation process, don’t panic. Refer to the troubleshooting section in the installation manual or contact the manufacturer for assistance. You can also check online forums for any common problems and solutions.Briggs Bathroom Sink Installation Troubleshooting

Briggs Bathroom Sink Installation Troubleshooting
Having the right tools is essential for a successful Briggs bathroom sink installation. Make sure to have a wrench, pliers, screwdriver, and a drill with the appropriate drill bits. You may also need a putty knife and silicone caulk for certain types of sinks. With this guide and the right tools and materials, you can easily install your Briggs bathroom sink and give your bathroom a beautiful and functional upgrade. Enjoy your new sink and the satisfaction of a job well done!Briggs Bathroom Sink Installation Tools


Briggs Bathroom Sink Installation Tools

Bathroom Sink Installation: A Step-by-Step Guide

Introduction
 When it comes to designing and renovating your house, the bathroom is an important space to consider. A well-designed bathroom not only adds value to your home but also enhances your daily routine. One of the key elements in bathroom design is the sink, and choosing the right one for your space is crucial. If you have decided on a Briggs bathroom sink, then this guide is for you. In this article, we will walk you through the
installation instructions
for a Briggs bathroom sink, making the process easy and stress-free.
When it comes to designing and renovating your house, the bathroom is an important space to consider. A well-designed bathroom not only adds value to your home but also enhances your daily routine. One of the key elements in bathroom design is the sink, and choosing the right one for your space is crucial. If you have decided on a Briggs bathroom sink, then this guide is for you. In this article, we will walk you through the
installation instructions
for a Briggs bathroom sink, making the process easy and stress-free.
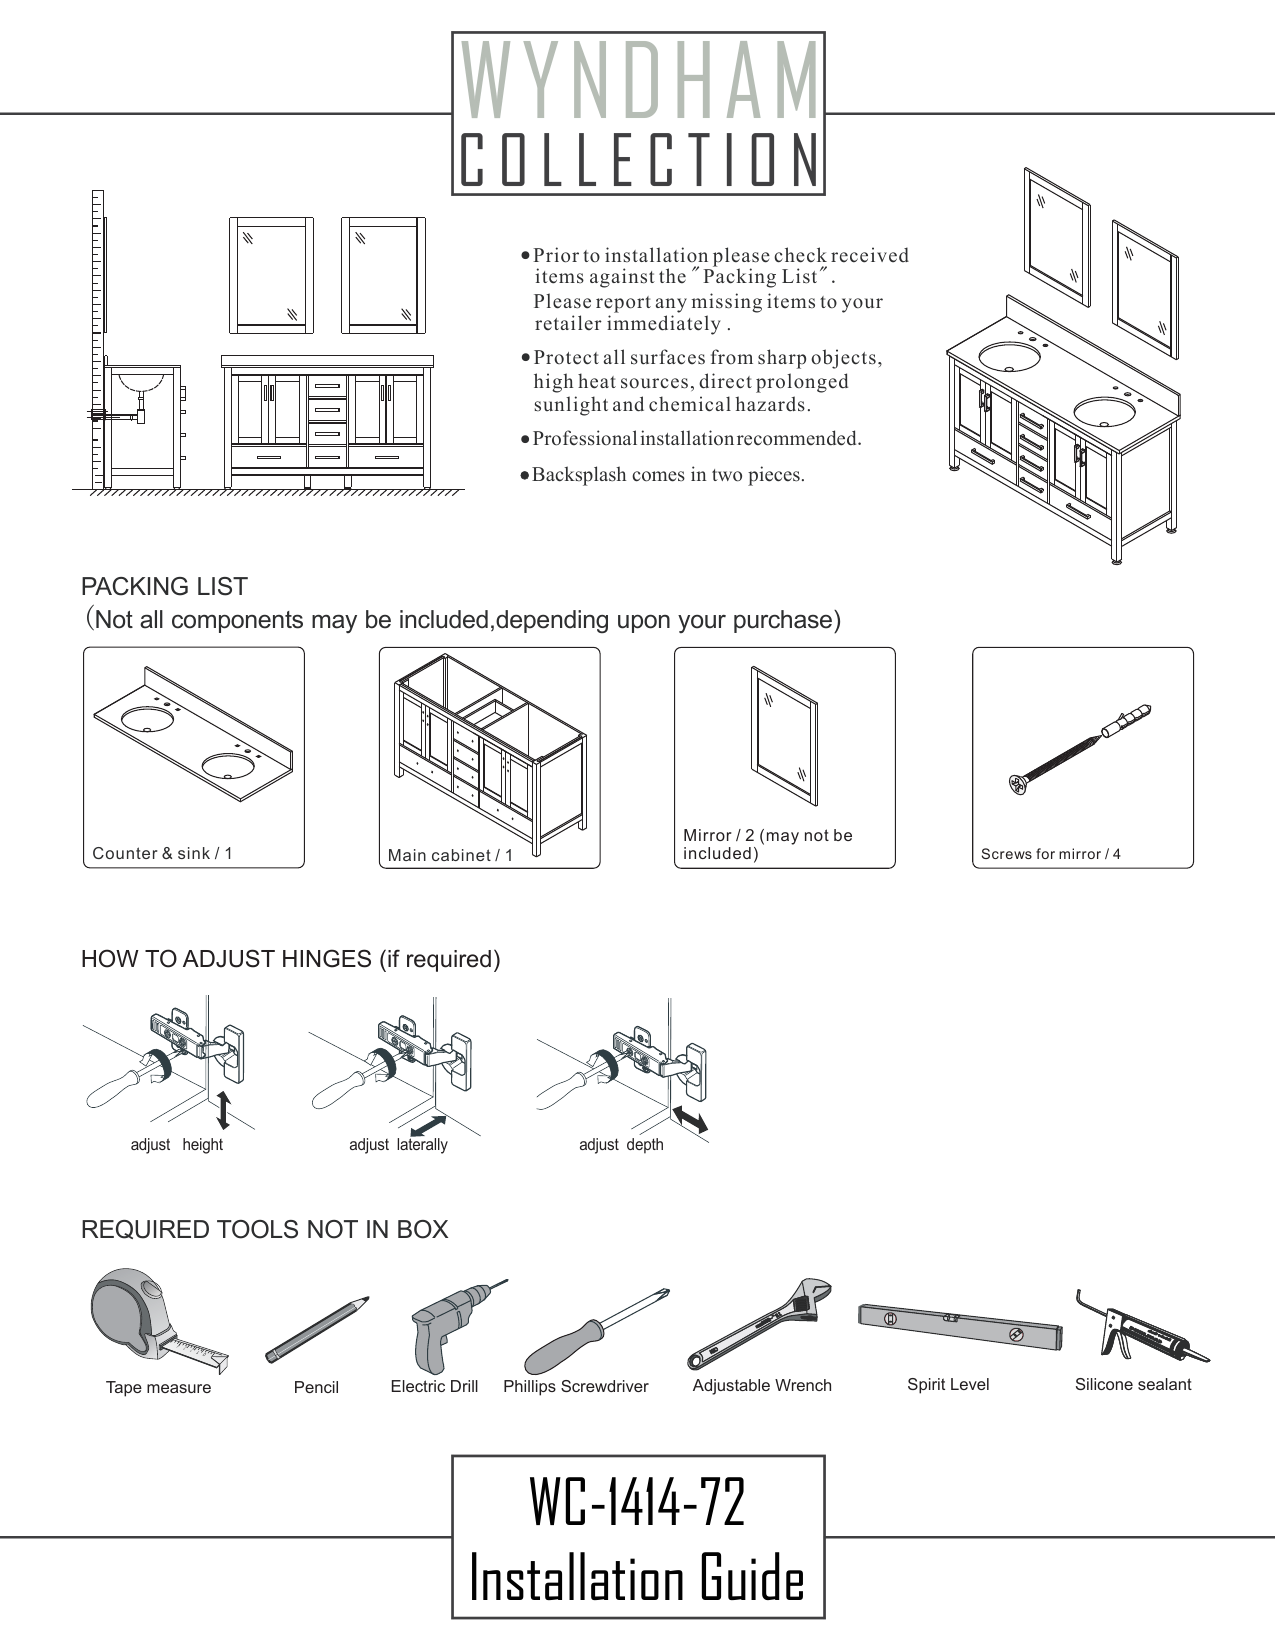
Step 1: Gather Your Tools and Materials
 Before you begin the installation process, make sure you have all the necessary tools and materials.
Briggs bathroom sinks
come with a complete installation kit, but you may need additional tools such as a wrench, pliers, and a screwdriver. It is also important to have a level, measuring tape, and a pencil on hand.
Before you begin the installation process, make sure you have all the necessary tools and materials.
Briggs bathroom sinks
come with a complete installation kit, but you may need additional tools such as a wrench, pliers, and a screwdriver. It is also important to have a level, measuring tape, and a pencil on hand.
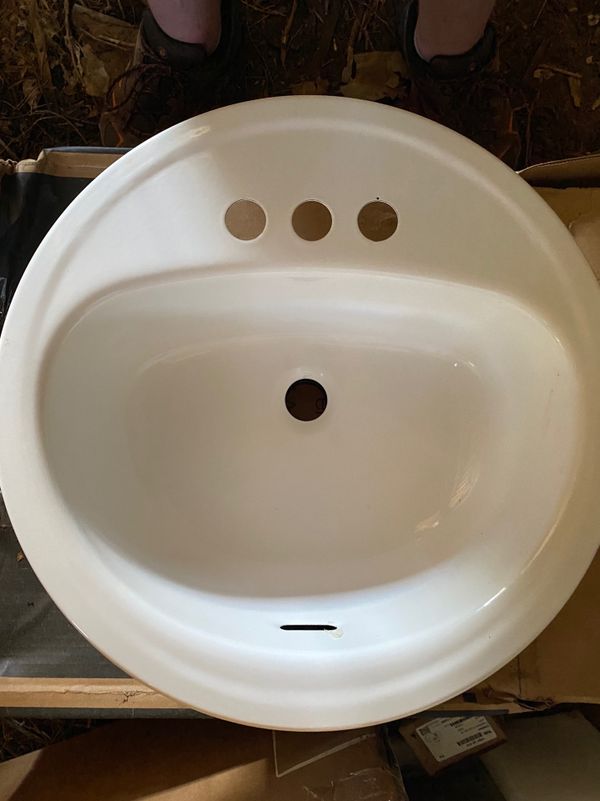
Step 2: Prepare the Area
 Before installing the sink, make sure the area is clear and clean. Remove any debris or old sink and measure the space to ensure your new sink will fit properly. If needed, use a saw or drill to make any necessary adjustments to the countertop.
Step 3: Install the Faucet
 Briggs bathroom sinks
come with pre-drilled holes for the faucet, making this step easy. Follow the instructions provided with your sink to properly install the faucet. Make sure to use plumbers tape to prevent any leaks.
Briggs bathroom sinks
come with pre-drilled holes for the faucet, making this step easy. Follow the instructions provided with your sink to properly install the faucet. Make sure to use plumbers tape to prevent any leaks.
Step 4: Attach the Sink to the Countertop
 Apply a bead of silicone caulk around the edge of the sink and carefully place it on the countertop. Use a level to ensure the sink is straight and press down firmly to secure it in place. Wipe away any excess caulk and let it dry for the recommended time.
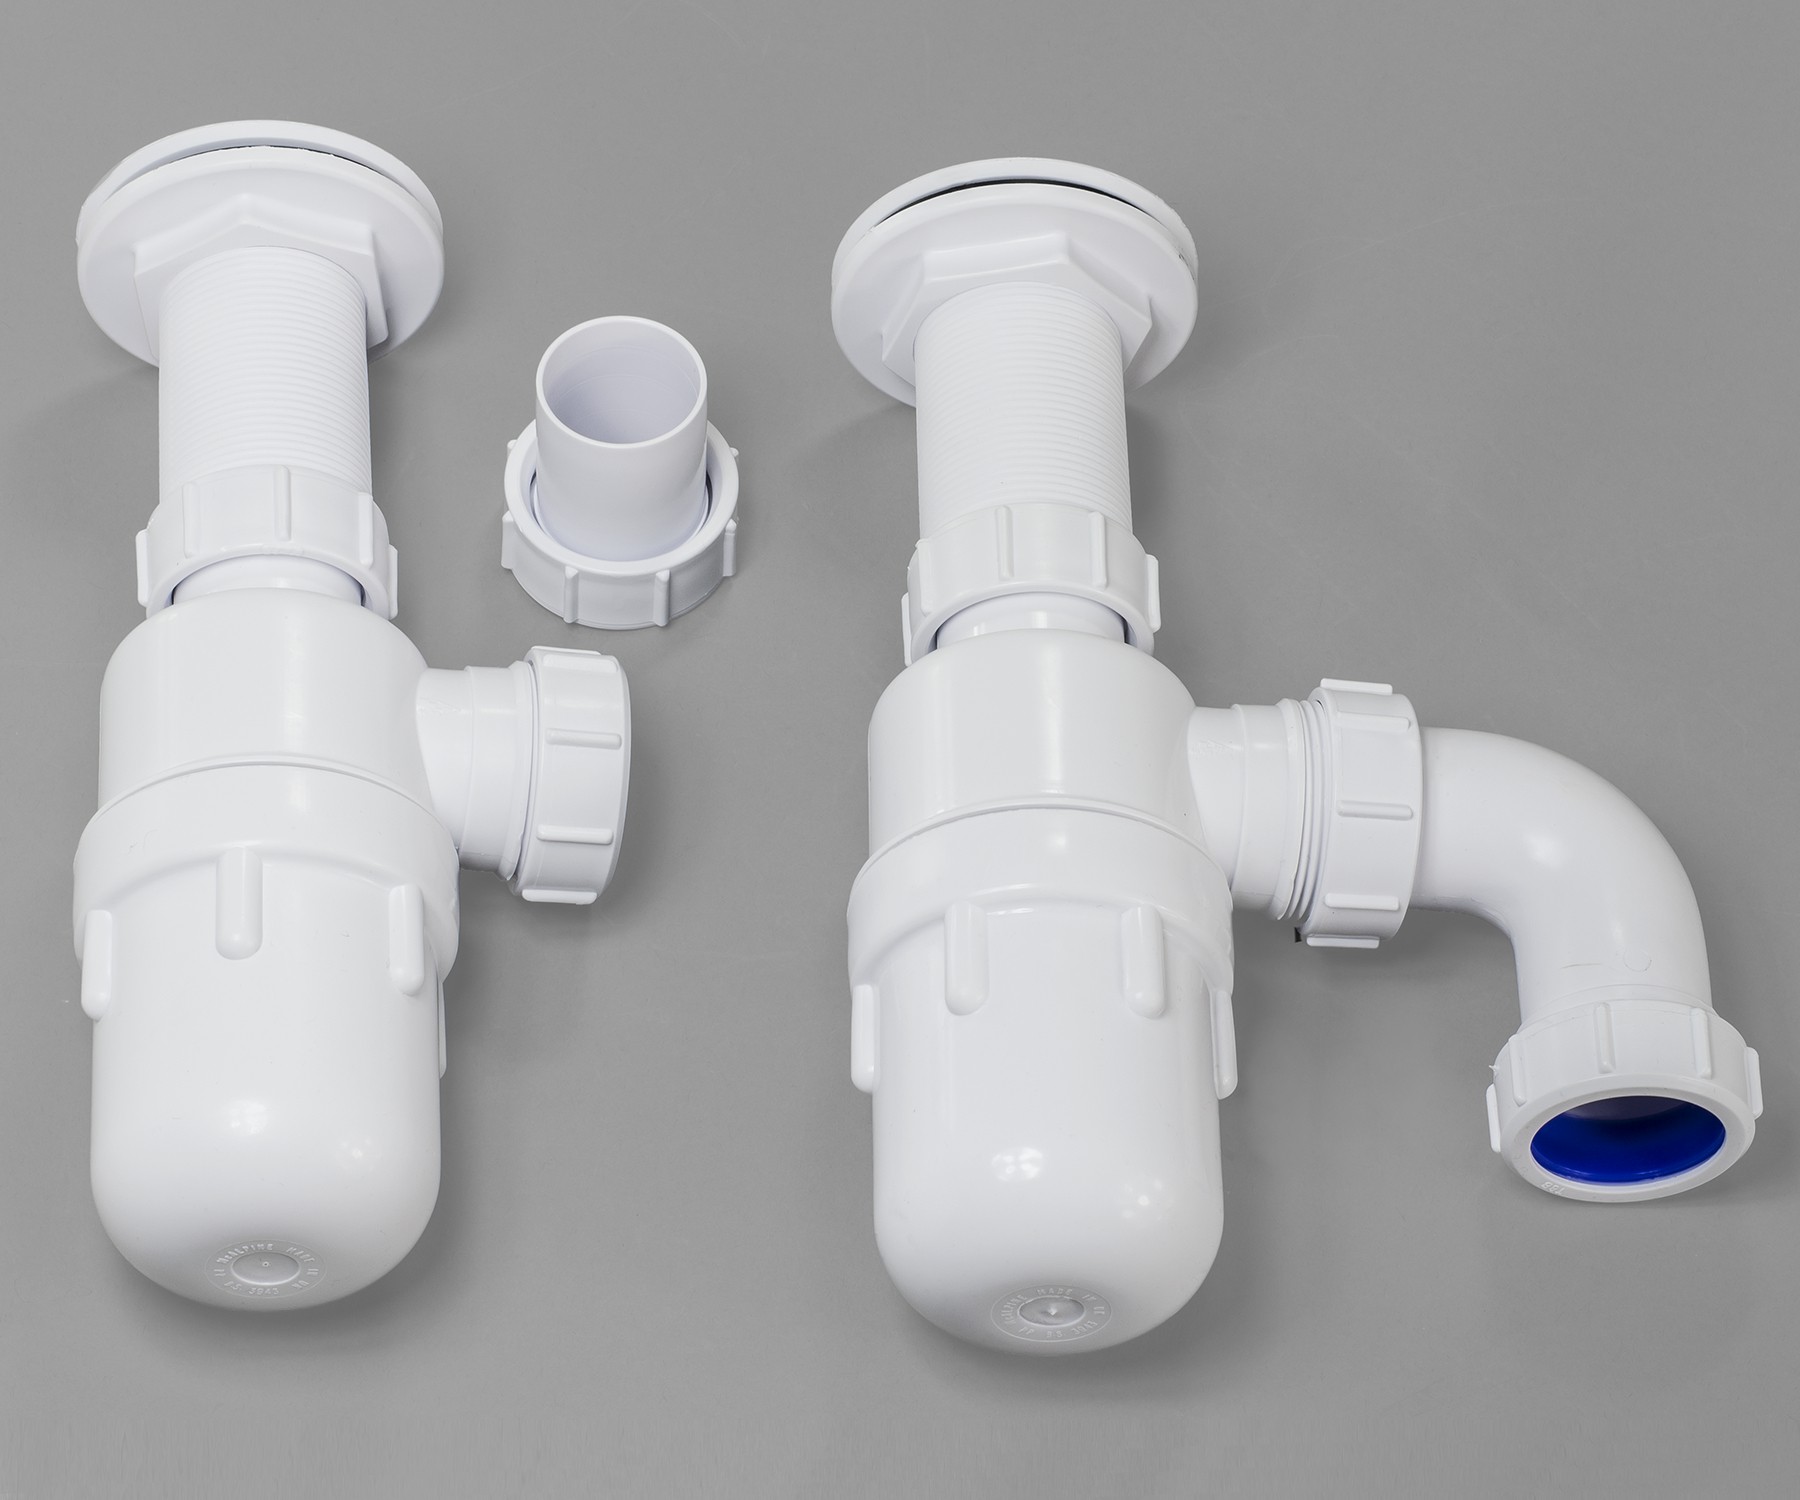
Step 5: Connect the Plumbing
 Once the sink is securely in place, it's time to connect the plumbing. This may involve attaching the drain, trap, and water supply lines. Make sure all connections are tight and test for any potential leaks.
Step 6: Finishing Touches
 Finally, add any finishing touches such as a backsplash or caulk around the edges of the sink to create a seamless look. Once everything is in place, turn on the water and check for any leaks. Congratulations, your Briggs bathroom sink is now installed and ready to use!
In conclusion,
installing a Briggs bathroom sink
is a straightforward process that can be done by anyone with basic DIY skills. With the right tools and materials, you can have a beautiful and functional sink in your bathroom in no time. Remember to follow the manufacturer's instructions and take your time to ensure a proper installation. Now that you know how to install a Briggs bathroom sink, you can confidently add it to your list of home improvement projects.
Finally, add any finishing touches such as a backsplash or caulk around the edges of the sink to create a seamless look. Once everything is in place, turn on the water and check for any leaks. Congratulations, your Briggs bathroom sink is now installed and ready to use!
In conclusion,
installing a Briggs bathroom sink
is a straightforward process that can be done by anyone with basic DIY skills. With the right tools and materials, you can have a beautiful and functional sink in your bathroom in no time. Remember to follow the manufacturer's instructions and take your time to ensure a proper installation. Now that you know how to install a Briggs bathroom sink, you can confidently add it to your list of home improvement projects.