If you've noticed a leaky faucet in your kitchen, chances are the seal on your kitchen sink faucet needs to be replaced. This may seem like a daunting task, but with the right tools and some simple steps, you can easily replace the seal and get your faucet working like new again. Follow this step-by-step guide for a hassle-free DIY project that will save you time and money.How to Replace a Seal on a Kitchen Sink Faucet


How to Replace a Seal on a Kitchen Sink Faucet


Before you begin, make sure you have all the necessary tools and materials. You will need an adjustable wrench, pliers, a screwdriver, a new seal, and some plumber's tape. Once you have everything ready, follow these simple steps to replace the seal on your kitchen sink faucet.Replacing the Seal on a Kitchen Sink Faucet


Replacing the Seal on a Kitchen Sink Faucet


Step 1: Turn off the water supply to your kitchen sink. This can usually be found under the sink or near the main water supply to your house. Step 2: Close the drain plug to avoid losing any small parts down the drain. Step 3: Use the adjustable wrench to loosen and remove the nuts holding the faucet in place. Step 4: Carefully remove the faucet from the sink and set it aside. Step 5: Use pliers to remove the old seal from the faucet. If it is stuck, use a screwdriver to gently pry it off. Step 6: Place the new seal in place and secure it with the pliers. Step 7: Wrap plumber's tape around the threads of the faucet to prevent any leaks. Step 8: Carefully place the faucet back on the sink and secure it with the nuts. Step 9: Turn the water supply back on and check for any leaks. Step 10: If there are no leaks, your new seal is now in place and your kitchen sink faucet should be working like new.Step-by-Step Guide for Replacing a Seal on a Kitchen Sink Faucet


Step-by-Step Guide for Replacing a Seal on a Kitchen Sink Faucet


If you're a DIY enthusiast, replacing the seal on your kitchen sink faucet is a great project to tackle on your own. Not only will it save you money on hiring a plumber, but it will also give you a sense of accomplishment and the satisfaction of fixing something yourself. With this step-by-step guide, you'll have your faucet back to its full function in no time.DIY: Replacing the Seal on a Kitchen Sink Faucet


DIY: Replacing the Seal on a Kitchen Sink Faucet


Replacing the seal on your kitchen sink faucet is a quick and easy fix that can save you from a bigger plumbing disaster down the road. A leaky faucet not only wastes water but can also cause damage to your sink and surrounding areas. By replacing the seal, you can prevent these problems and have your faucet working like new again in just a few simple steps.Quick and Easy Fix: Replacing the Seal on a Kitchen Sink Faucet


Quick and Easy Fix: Replacing the Seal on a Kitchen Sink Faucet


If you're new to DIY projects, replacing the seal on a kitchen sink faucet may seem intimidating. However, with the right guidance and tools, it can be a simple and rewarding task. This beginner's guide will walk you through each step and help you successfully complete the project with ease.Replacing the Seal on a Kitchen Sink Faucet: A Beginner's Guide

Replacing the Seal on a Kitchen Sink Faucet: A Beginner's Guide

Hiring a plumber to replace the seal on your kitchen sink faucet can be costly. However, by taking on this task yourself, you can save a significant amount of money. Not only will you save on labor costs, but you can also purchase the necessary materials at a fraction of the price. By following this guide, you can easily fix your leaky faucet without breaking the bank.Save Money by Replacing the Seal on Your Kitchen Sink Faucet

Save Money by Replacing the Seal on Your Kitchen Sink Faucet


It's important to keep an eye out for signs that your kitchen sink faucet seal needs to be replaced. Some common signs include a constant dripping sound, visible water leaks, and difficulty turning the faucet on and off. If you notice any of these issues, it's time to replace the seal to prevent any further damage.Common Signs that Your Kitchen Sink Faucet Seal Needs to be Replaced


Common Signs that Your Kitchen Sink Faucet Seal Needs to be Replaced
A leaky kitchen sink faucet can be a nuisance and can also lead to bigger problems if left unaddressed. By replacing the seal, you can easily fix the leak and have your faucet working like new again. This step-by-step tutorial will guide you through the process and help you successfully replace the seal on your leaky kitchen sink faucet.Replacing the Seal on a Leaky Kitchen Sink Faucet

Replacing the Seal on a Leaky Kitchen Sink Faucet


If you're a visual learner, this step-by-step tutorial will provide you with a helpful guide for replacing the seal on your kitchen sink faucet. With clear instructions and images, you can easily follow along and complete the project with confidence.Step-by-Step Tutorial for Replacing the Seal on a Kitchen Sink Faucet
Step-by-Step Tutorial for Replacing the Seal on a Kitchen Sink Faucet
Why You Should Replace the Seal on Your Kitchen Sink Faucet

Introduction
 Replacing the seal on your kitchen sink faucet may not be the most exciting home improvement task, but it is an important one. A damaged or worn out seal can lead to leaks, which can cause water damage and potentially lead to costly repairs. The good news is that replacing the seal on your kitchen sink faucet is a relatively simple and straightforward process that you can do yourself. In this article, we will discuss the importance of replacing the seal and provide you with a step-by-step guide on how to do it.
The Importance of Replacing the Seal
 The seal on your kitchen sink faucet is a small but crucial component that helps keep water from leaking out. Over time, the seal can become worn out or damaged due to regular use, exposure to harsh cleaning chemicals, or mineral buildup from hard water. This can result in leaks that not only waste water but also cause damage to your sink and surrounding areas. Additionally, if left unaddressed, a damaged seal can lead to mold growth and other potential health hazards. Therefore, it is important to replace the seal as soon as you notice any signs of damage or wear and tear.
Featured keyword: replace seal kitchen sink faucet
The seal on your kitchen sink faucet is a small but crucial component that helps keep water from leaking out. Over time, the seal can become worn out or damaged due to regular use, exposure to harsh cleaning chemicals, or mineral buildup from hard water. This can result in leaks that not only waste water but also cause damage to your sink and surrounding areas. Additionally, if left unaddressed, a damaged seal can lead to mold growth and other potential health hazards. Therefore, it is important to replace the seal as soon as you notice any signs of damage or wear and tear.
Featured keyword: replace seal kitchen sink faucet
How to Replace the Seal on Your Kitchen Sink Faucet
 Replacing the seal on your kitchen sink faucet is a simple process that can be completed in a few easy steps.
1. Turn off the water supply: Before starting any work, make sure to turn off the water supply to your kitchen sink faucet. This will prevent any water from leaking out while you are working.
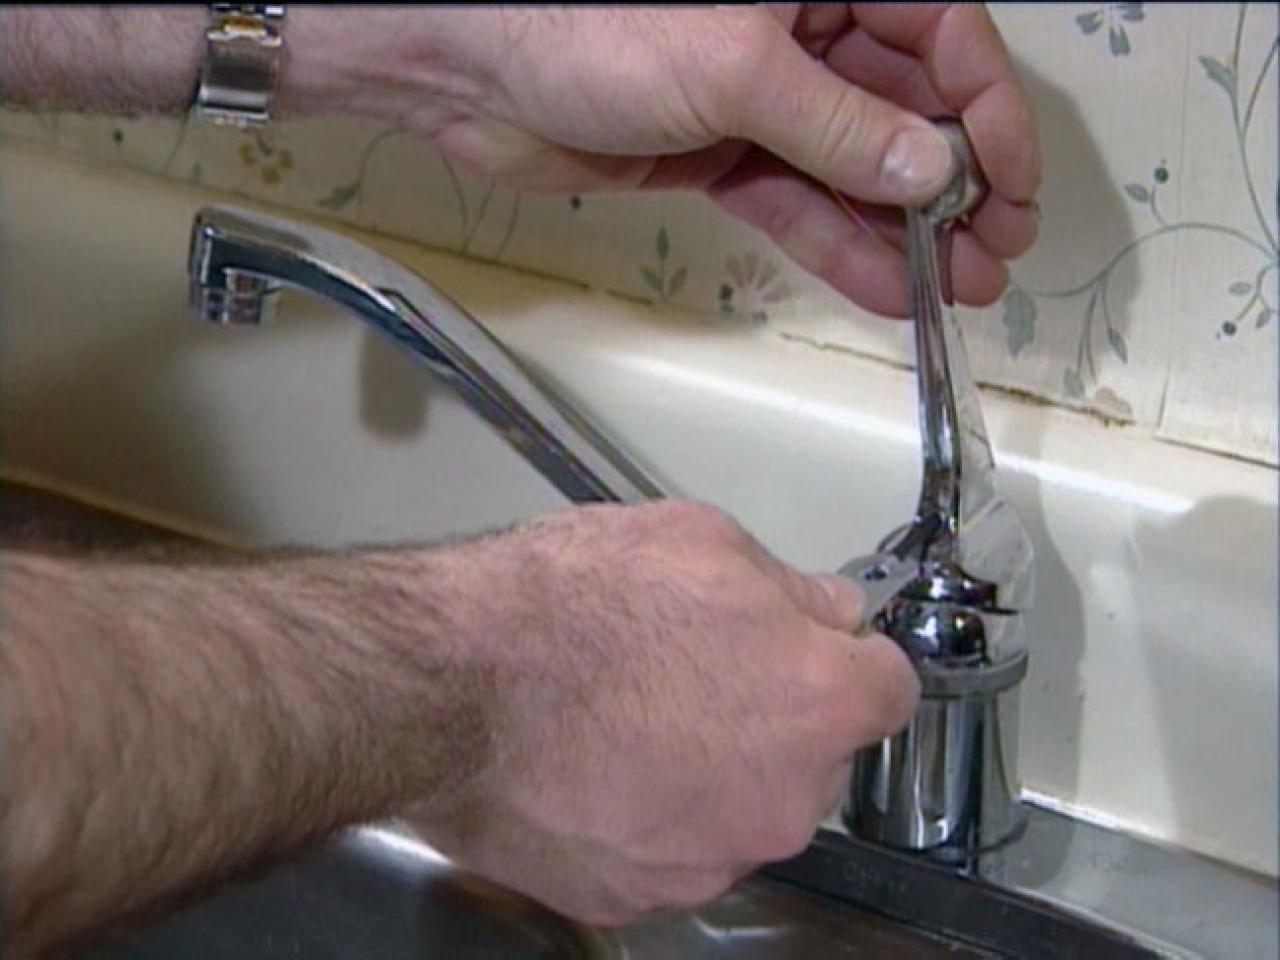
2. Remove the faucet handle: Use a screwdriver or Allen wrench to remove the handle of your faucet. This will expose the cartridge, which houses the seal.
3. Remove the cartridge: Using pliers, gently pull out the cartridge from the faucet. Be careful not to damage any surrounding parts.
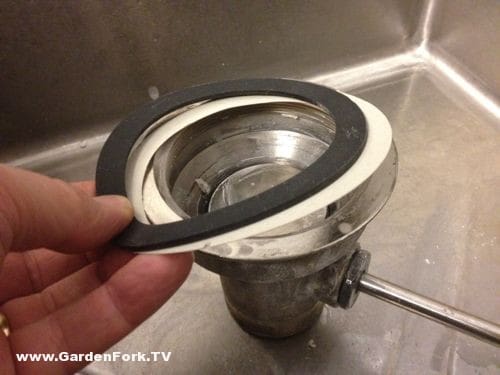
4. Remove the old seal: The seal is typically located at the bottom of the cartridge. Carefully remove the old seal and clean the area to ensure a proper seal with the new one.
5. Install the new seal: Place the new seal onto the cartridge, making sure it is properly aligned and securely in place.
6. Reinstall the cartridge: Carefully insert the cartridge back into the faucet, making sure it is properly aligned and secured.
7. Reattach the faucet handle: Once the cartridge is back in place, reattach the faucet handle using the screwdriver or Allen wrench.
8. Turn the water supply back on: Once everything is securely in place, turn the water supply back on and check for any leaks. If you notice any, make sure to tighten all connections and repeat the process.
Related main keyword: kitchen sink faucet
Replacing the seal on your kitchen sink faucet is a simple process that can be completed in a few easy steps.
1. Turn off the water supply: Before starting any work, make sure to turn off the water supply to your kitchen sink faucet. This will prevent any water from leaking out while you are working.
2. Remove the faucet handle: Use a screwdriver or Allen wrench to remove the handle of your faucet. This will expose the cartridge, which houses the seal.
3. Remove the cartridge: Using pliers, gently pull out the cartridge from the faucet. Be careful not to damage any surrounding parts.
4. Remove the old seal: The seal is typically located at the bottom of the cartridge. Carefully remove the old seal and clean the area to ensure a proper seal with the new one.
5. Install the new seal: Place the new seal onto the cartridge, making sure it is properly aligned and securely in place.
6. Reinstall the cartridge: Carefully insert the cartridge back into the faucet, making sure it is properly aligned and secured.
7. Reattach the faucet handle: Once the cartridge is back in place, reattach the faucet handle using the screwdriver or Allen wrench.
8. Turn the water supply back on: Once everything is securely in place, turn the water supply back on and check for any leaks. If you notice any, make sure to tighten all connections and repeat the process.
Related main keyword: kitchen sink faucet
In Conclusion
 Replacing the seal on your kitchen sink faucet is a simple yet important task that can save you from potential water damage and costly repairs. By following the step-by-step guide outlined in this article, you can easily replace the seal yourself and ensure that your faucet is functioning properly. Remember to regularly check the condition of your seal and replace it as needed to prevent any future leaks and maintain a well-functioning kitchen sink.