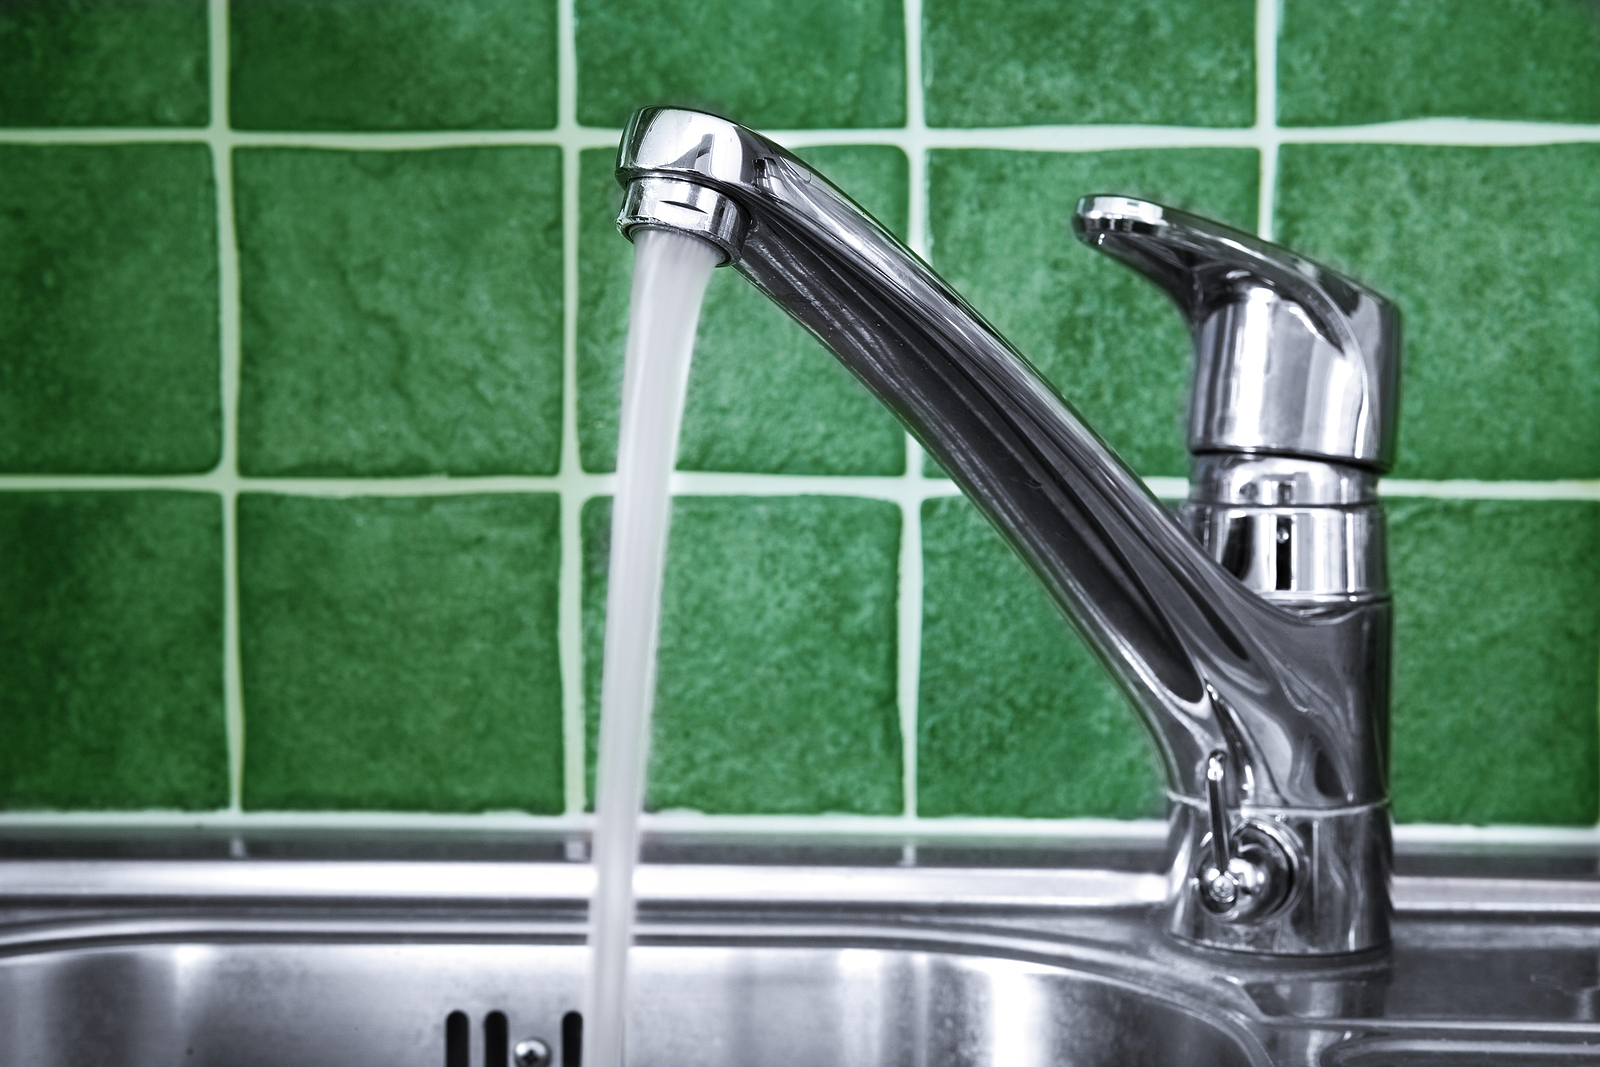
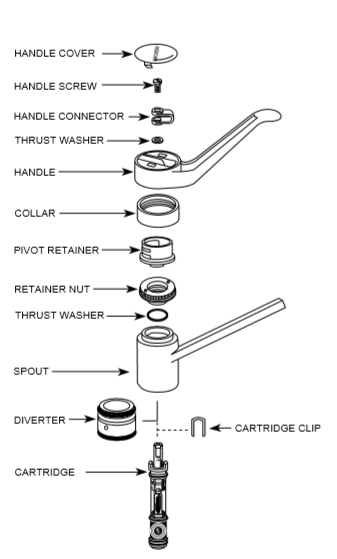
Moen is a popular brand when it comes to bathroom sink faucets, known for their durability and style. However, like any other fixture, they are prone to wear and tear over time. Instead of calling a plumber and spending a hefty amount on repairs, you can easily fix minor issues yourself with the help of a Moen bathroom sink faucet repair diagram. This diagram serves as a visual guide to help you identify the different parts of your faucet and how they work together. In this article, we will walk you through the top 10 Moen bathroom sink faucet repair diagrams to help you troubleshoot and fix common faucet problems. Introduction to Moen Bathroom Sink Faucet Repair Diagram
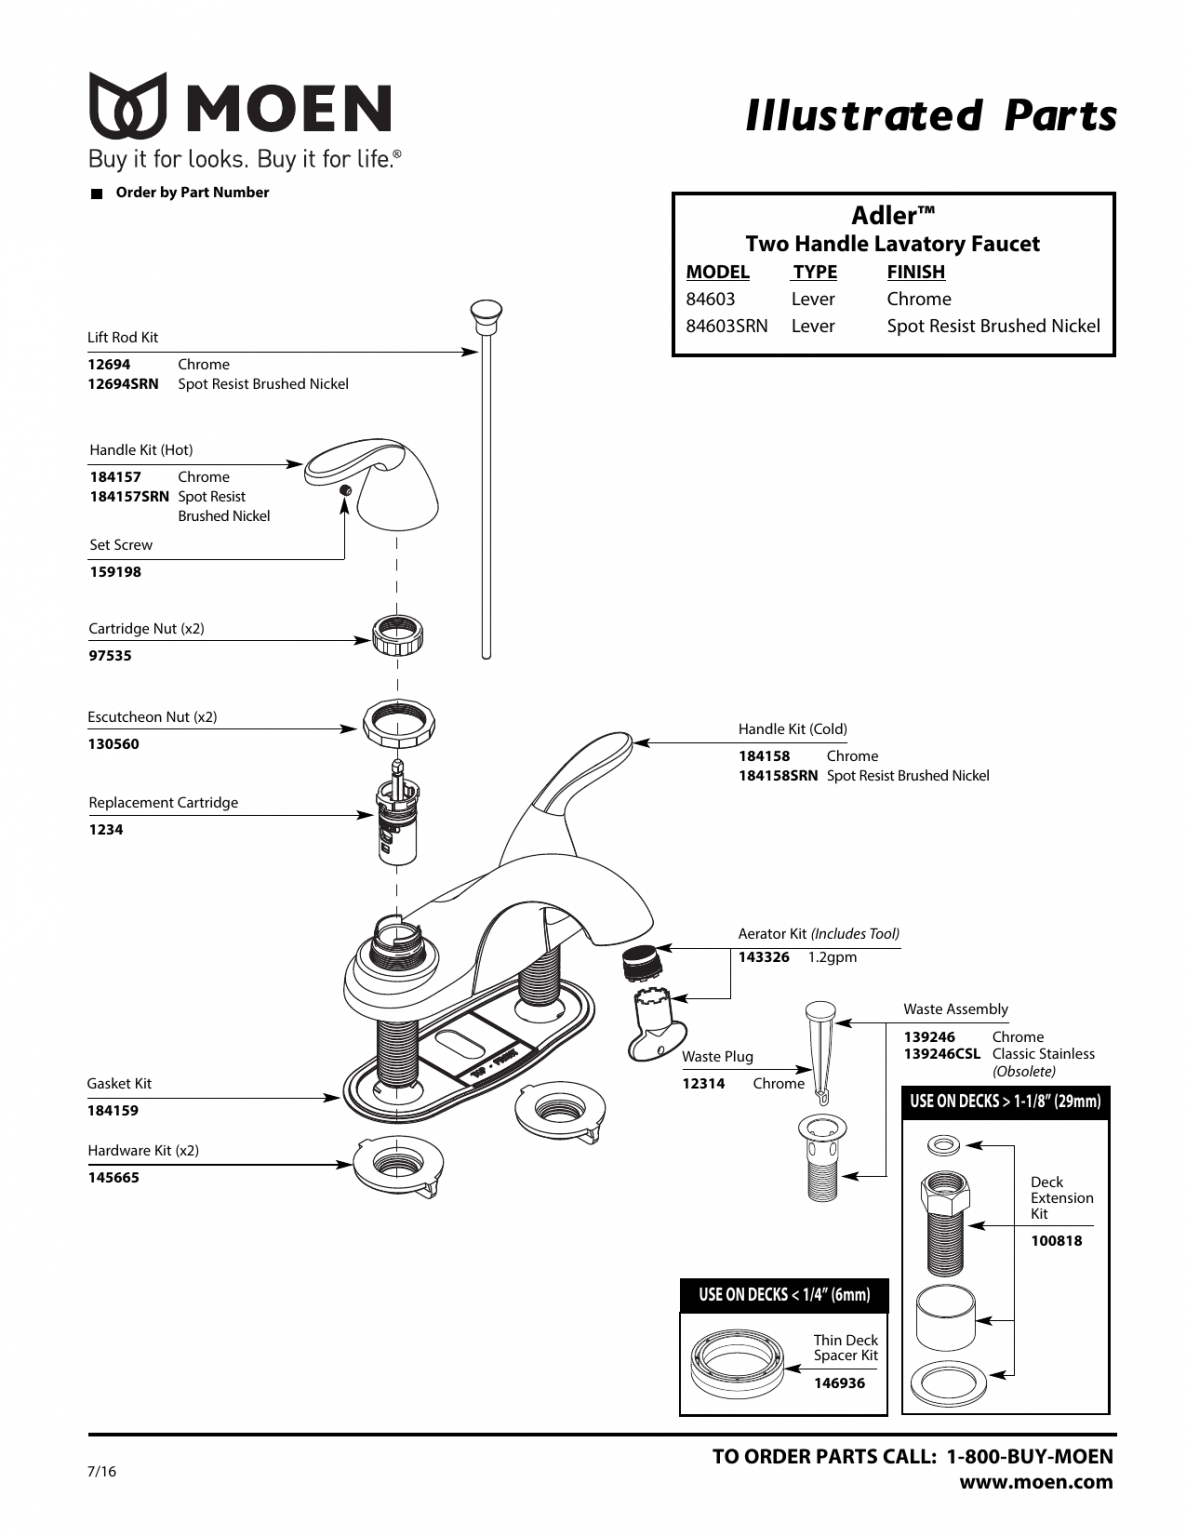


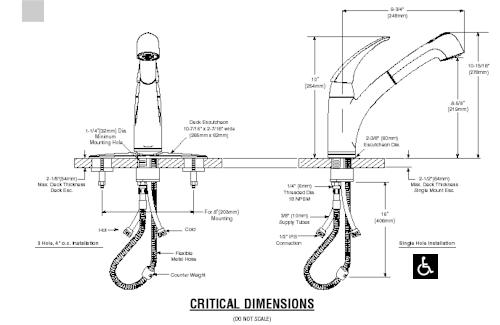
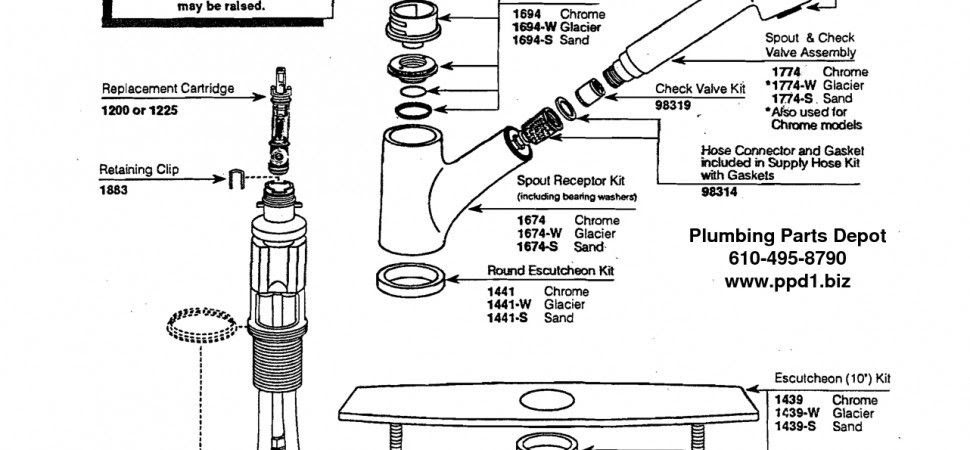
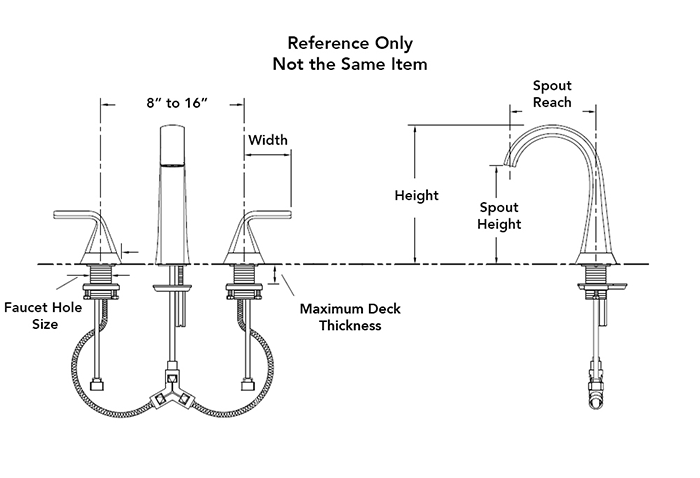
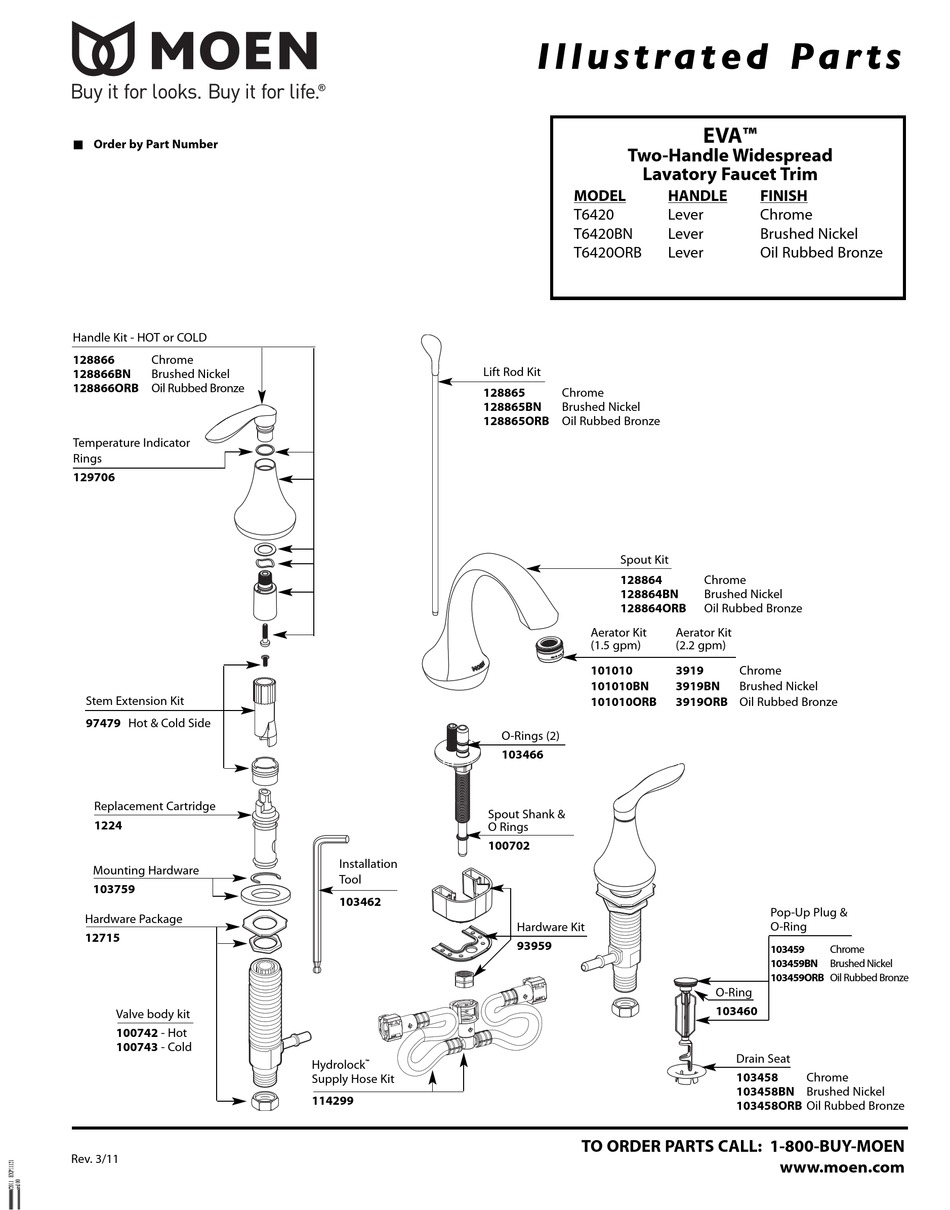
Moen Bathroom Sink Faucet Repair Diagram


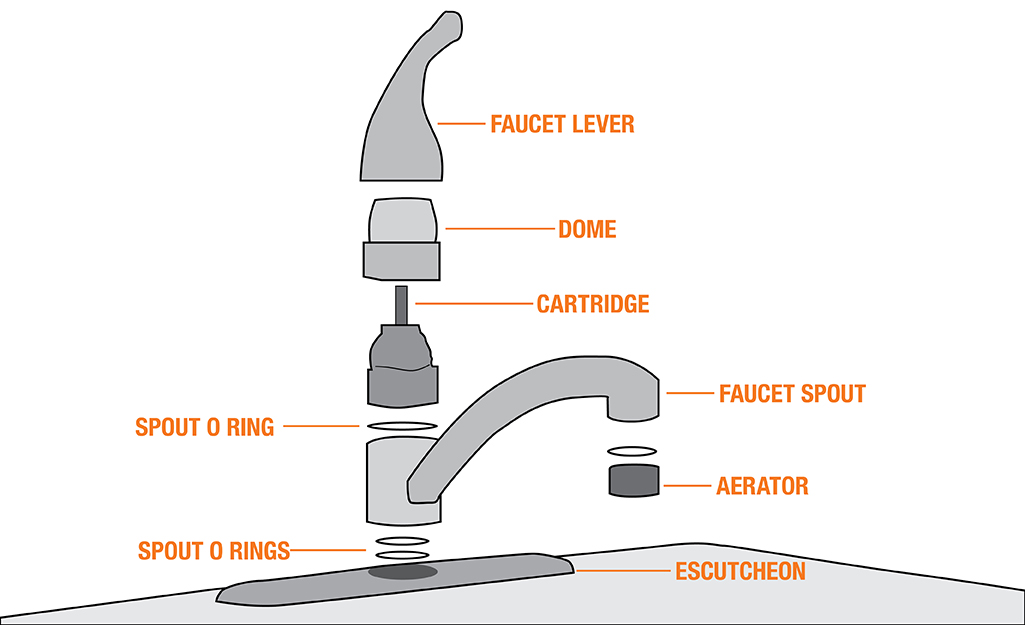
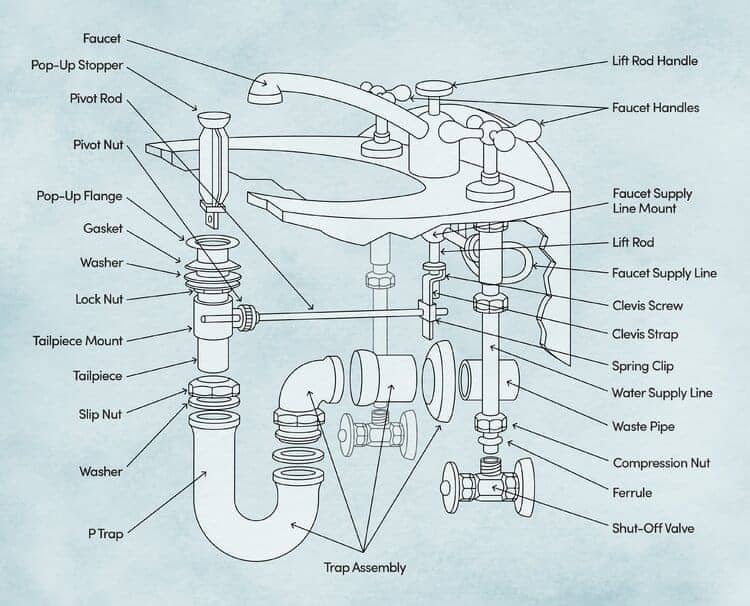
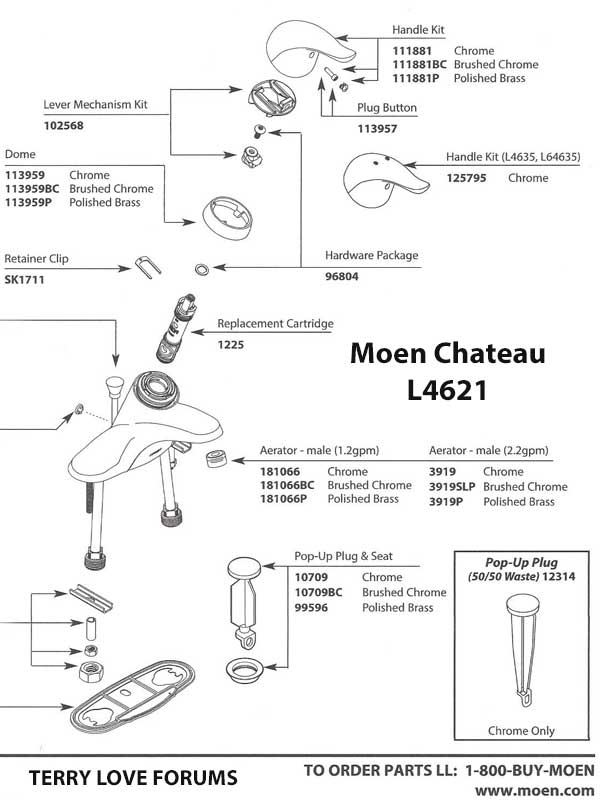
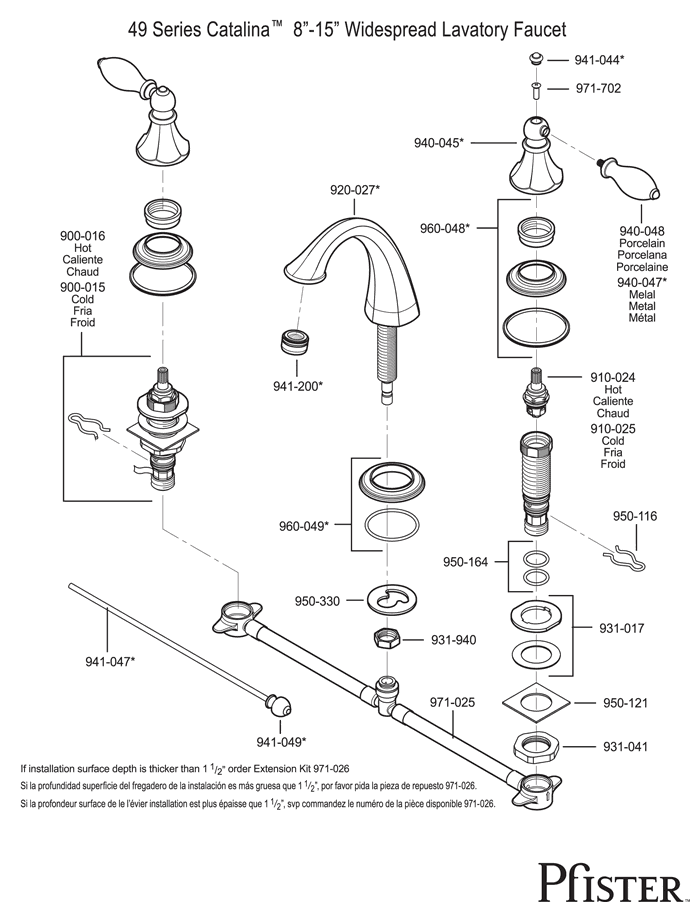
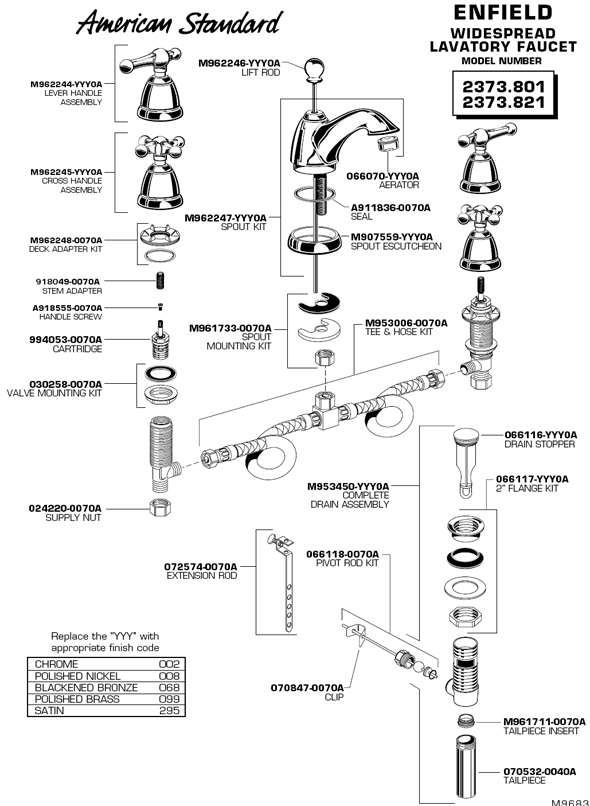
Before we dive into the specific diagrams, it is important to understand the basics of a Moen faucet repair diagram. Most Moen faucets have a cartridge system, which is responsible for controlling the flow of water. The cartridge can get clogged with mineral deposits or become damaged, leading to leaks or reduced water pressure. Other common parts of a Moen faucet include the handle, spout, aerator, and O rings. These components work together to control the flow and temperature of water. Now, let's take a look at the top 10 Moen bathroom sink faucet repair diagrams. Understanding the Moen Faucet Repair Diagram


Moen Faucet Repair Diagram


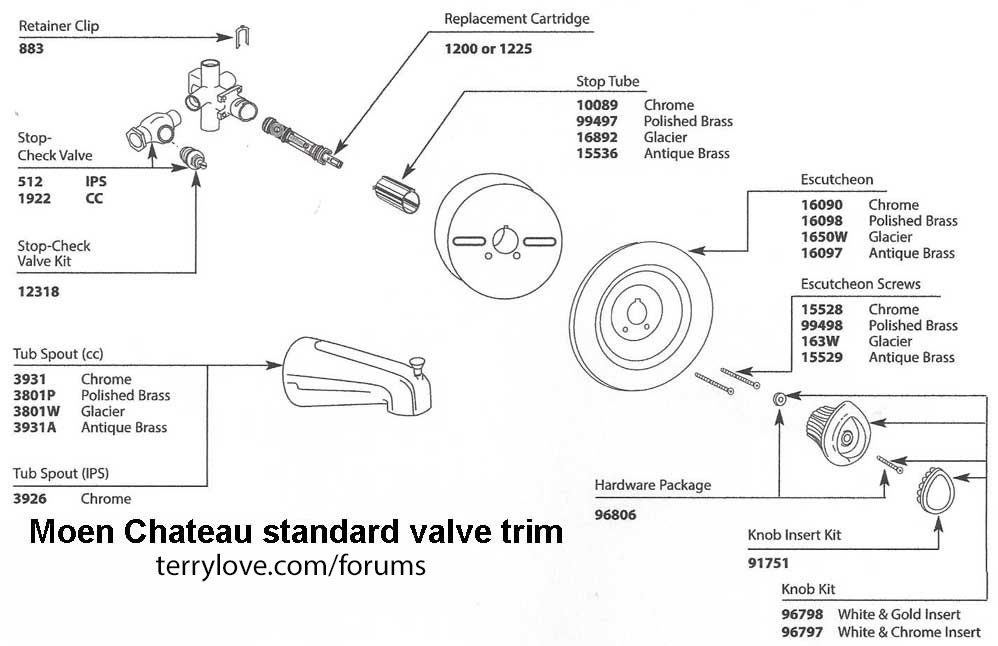
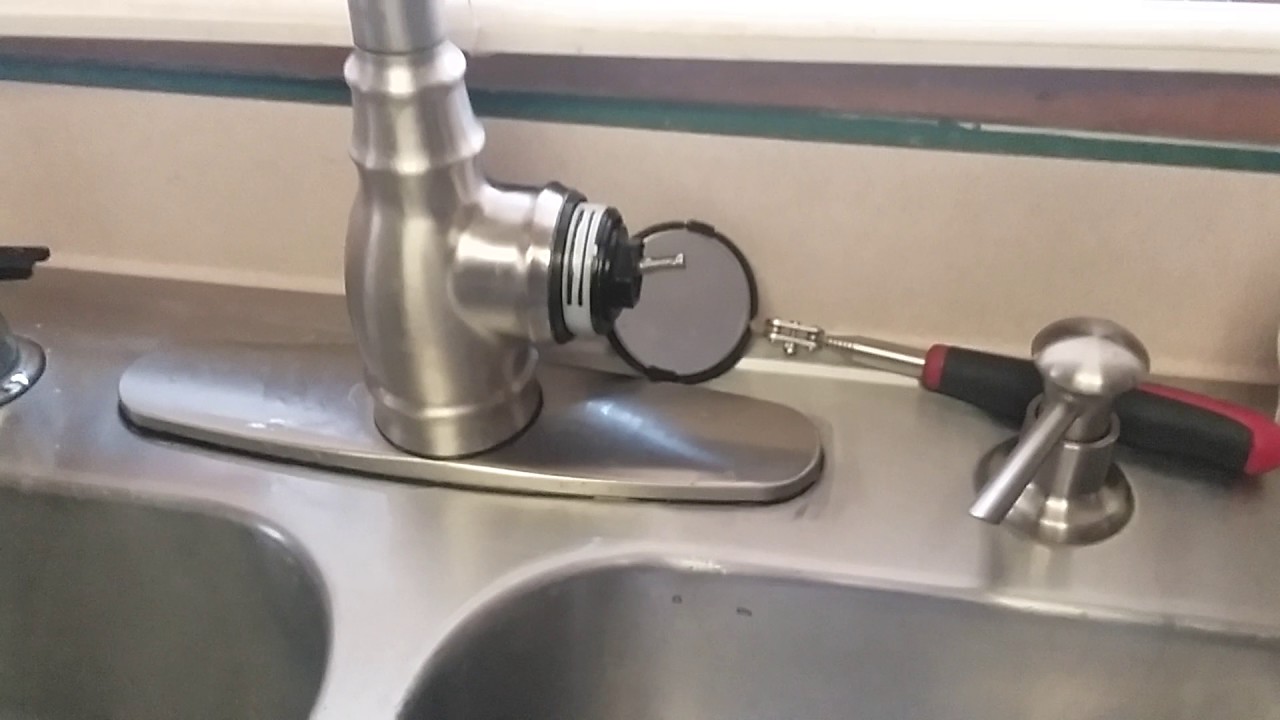
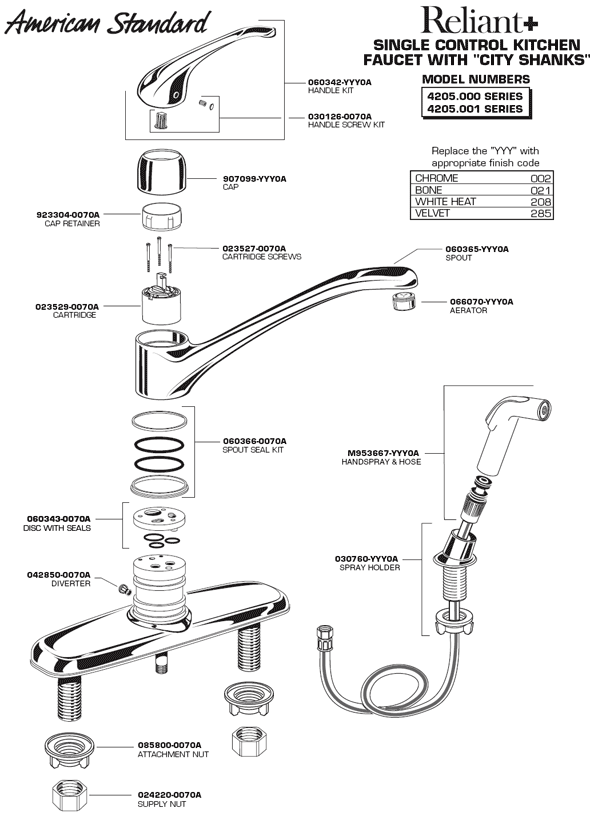
One of the most common issues with bathroom sink faucets is leaks. A leaky faucet not only wastes water but can also cause damage to your sink and countertop. To fix this problem, you will need to disassemble the faucet and replace the O rings and seals. The Moen bathroom sink faucet repair diagram for leaks will guide you through the process step by step, making it easy for you to identify the parts that need to be replaced. 1. Moen Bathroom Sink Faucet Repair Diagram for Leaks


Bathroom Sink Faucet Repair Diagram


Low water pressure can be caused by a clogged aerator, a faulty cartridge, or mineral build-up in the faucet. The Moen faucet repair diagram for low water pressure will help you troubleshoot the issue and identify the cause. Depending on the cause, you might need to clean or replace the aerator or cartridge to restore water pressure. 2. Moen Faucet Repair Diagram for Low Water Pressure


Moen Sink Faucet Repair Diagram


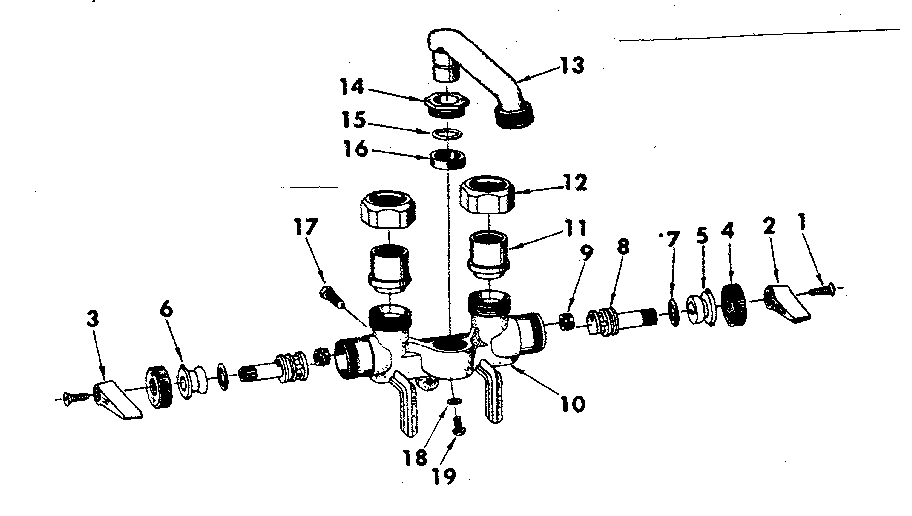
A dripping faucet is not only annoying but can also lead to a higher water bill. The most common cause of a dripping faucet is a worn-out cartridge. The bathroom sink faucet repair diagram for dripping faucets will show you how to remove and replace the cartridge to stop the drip. 3. Bathroom Sink Faucet Repair Diagram for Dripping Faucets

Moen Bathroom Faucet Repair Diagram
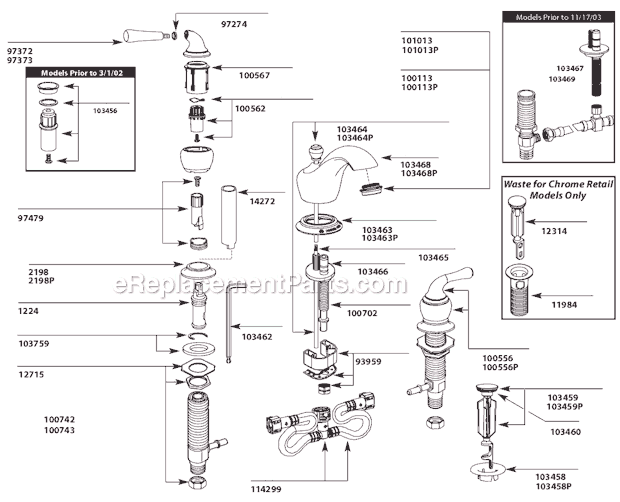


If your faucet is not producing hot water, it could be due to a faulty cartridge or a problem with the water heater. The Moen sink faucet repair diagram for no hot water will help you determine the cause and guide you through the repair process. You might need to replace the cartridge or call a plumber to fix the water heater. 4. Moen Sink Faucet Repair Diagram for No Hot Water


Sink Faucet Repair Diagram

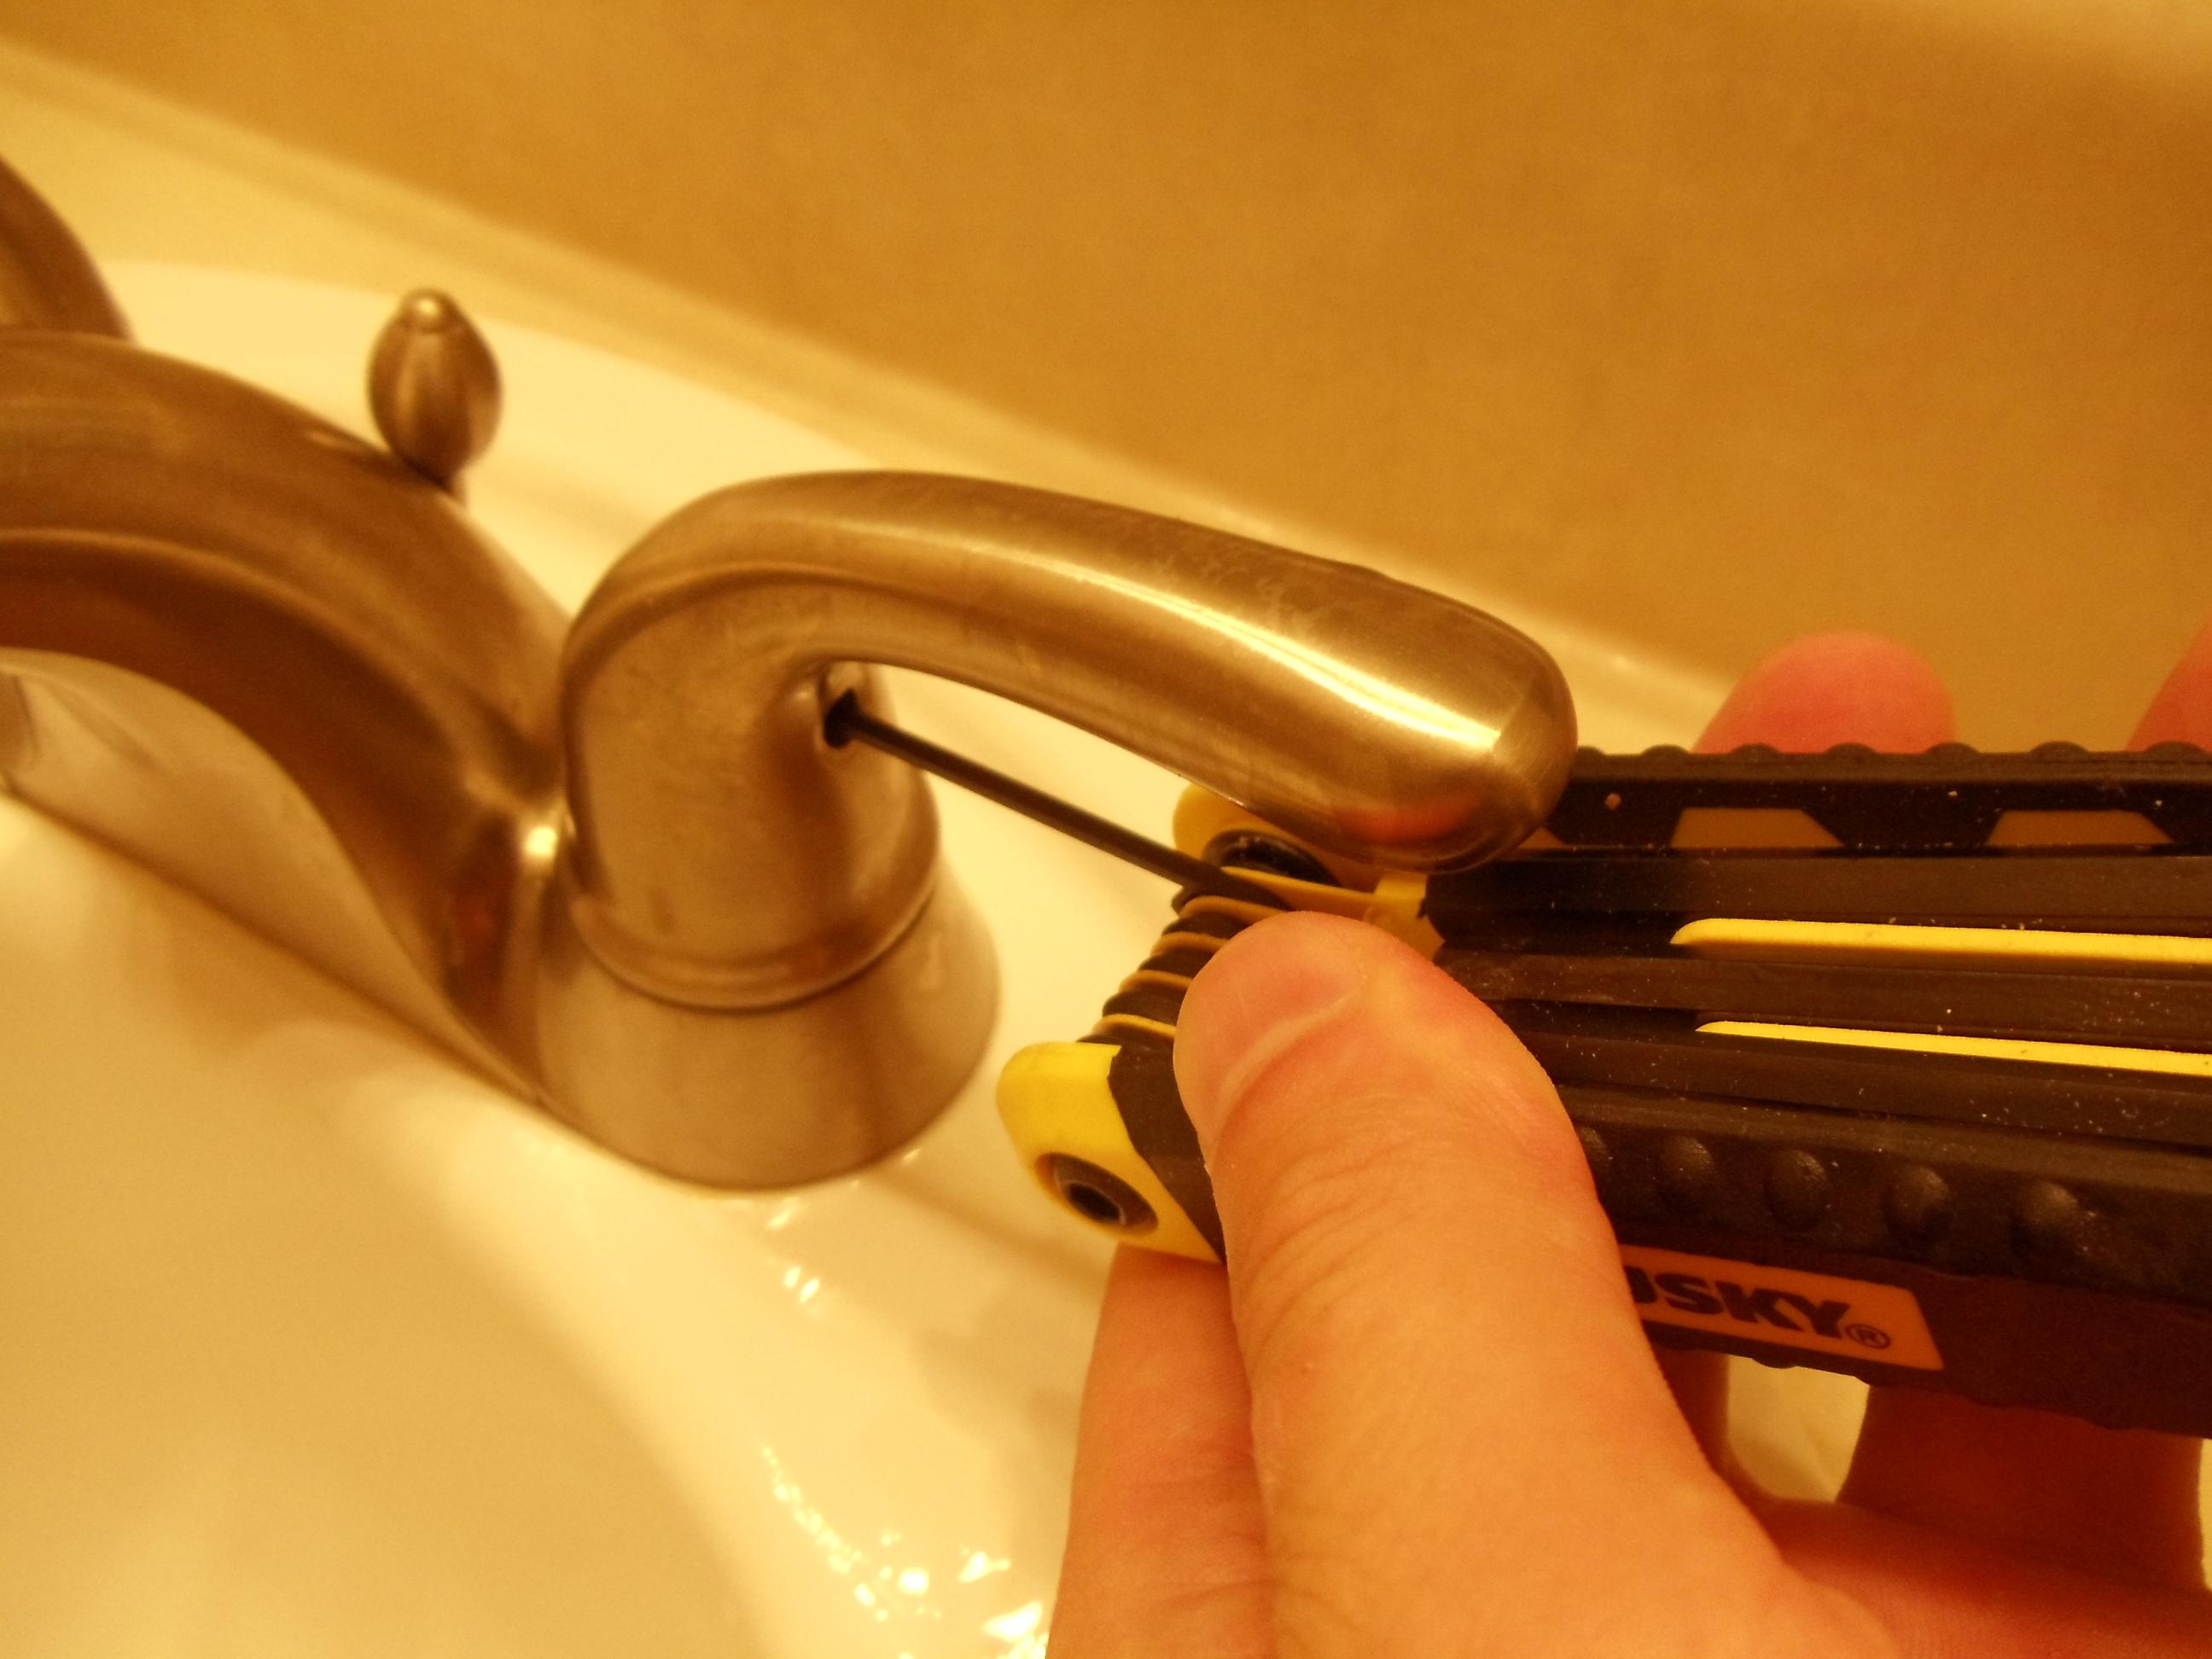
A loose handle can make it difficult to control the water flow and temperature. The Moen bathroom faucet repair diagram for loose handles will show you how to tighten the handle and fix any underlying issues. You might need to replace the handle or tighten the mounting nut to secure it in place. 5. Moen Bathroom Faucet Repair Diagram for Loose Handles

Moen Repair Diagram


:max_bytes(150000):strip_icc()/installing-a-moen-kitchen-faucet-2718847-07-1f27cf0de8b541f285e702fa58592819.jpg)
If your faucet is making strange noises, it could be due to a loose part or mineral build-up. The sink faucet repair diagram for strange noises will help you identify the source of the noise and take the necessary steps to fix it. You might need to tighten or replace a part, or clean the faucet to remove any mineral deposits. 6. Sink Faucet Repair Diagram for Strange Noises

Bathroom Faucet Repair Diagram


Some Moen faucets come with a sprayer that can be attached to the end of the spout. If the sprayer is not working properly, it could be due to a clogged aerator or a faulty diverter. The Moen repair diagram for sprayer malfunctions will guide you through the troubleshooting process and help you fix the issue. 7. Moen Repair Diagram for Sprayer Malfunctions


Moen Sink Repair Diagram


Rusty handles not only make your faucet look old and worn out but can also be difficult to use. The bathroom faucet repair diagram for rusty handles will show you how to remove and replace the handles to give your faucet a fresh look. You might also need to clean any rust or mineral build-up from the handles before reinstalling them. 8. Bathroom Faucet Repair Diagram for Rusty Handles

Faucet Repair Diagram


The Importance of Proper Faucet Repair for Your Bathroom Sink

Maintaining the Functionality and Aesthetics of Your Bathroom Sink
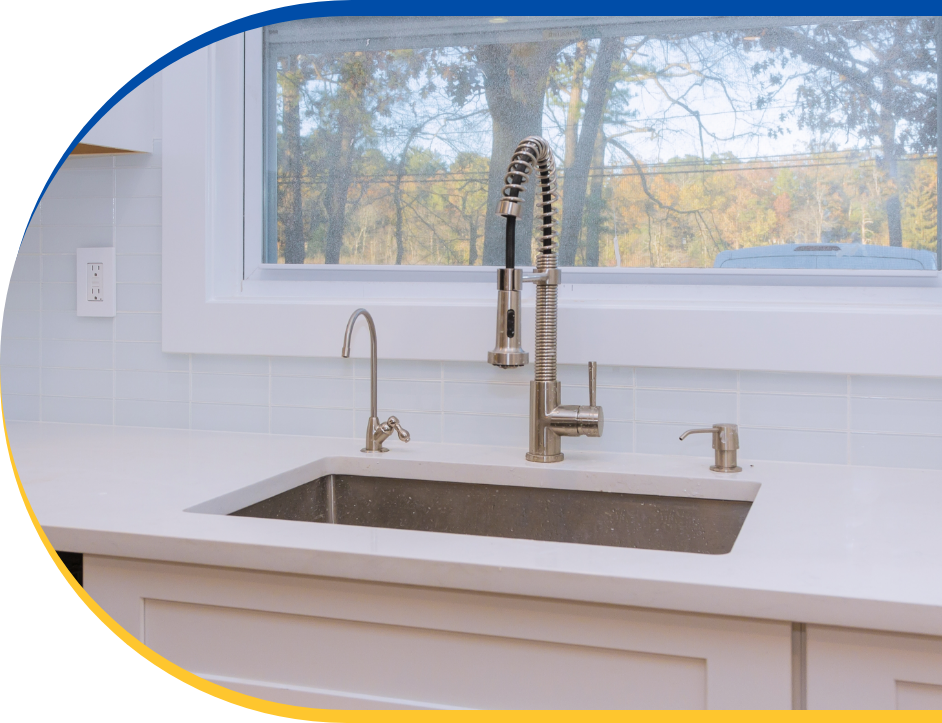
 When it comes to designing your dream house, every detail counts. From the color of the walls to the type of flooring, each decision contributes to the overall look and feel of your home. One often overlooked aspect of house design is the bathroom sink faucet. While it may seem like a small detail, choosing the right faucet can make a big difference in both functionality and aesthetics. That's why it's important to properly maintain and repair your
moen bathroom sink faucet
when needed.
A
broken faucet
not only affects the functionality of your sink but can also ruin the overall look of your bathroom. Leaky faucets can cause water damage to your countertops and cabinets, leading to costly repairs. It can also waste a significant amount of water, resulting in higher water bills. This is why it's crucial to address any faucet issues as soon as they arise.
When it comes to designing your dream house, every detail counts. From the color of the walls to the type of flooring, each decision contributes to the overall look and feel of your home. One often overlooked aspect of house design is the bathroom sink faucet. While it may seem like a small detail, choosing the right faucet can make a big difference in both functionality and aesthetics. That's why it's important to properly maintain and repair your
moen bathroom sink faucet
when needed.
A
broken faucet
not only affects the functionality of your sink but can also ruin the overall look of your bathroom. Leaky faucets can cause water damage to your countertops and cabinets, leading to costly repairs. It can also waste a significant amount of water, resulting in higher water bills. This is why it's crucial to address any faucet issues as soon as they arise.
Determining the Cause of the Problem
 Before attempting any repairs, it's important to properly diagnose the issue with your faucet. The most common problems with bathroom sink faucets include leaks, low water pressure, and clogged aerators. These issues can be caused by worn out parts, mineral buildup, or improper installation. It's important to
identify the root cause
in order to effectively repair the faucet and prevent future problems.
Before attempting any repairs, it's important to properly diagnose the issue with your faucet. The most common problems with bathroom sink faucets include leaks, low water pressure, and clogged aerators. These issues can be caused by worn out parts, mineral buildup, or improper installation. It's important to
identify the root cause
in order to effectively repair the faucet and prevent future problems.
Proper Repair Techniques
 Once you have determined the cause of the problem, it's time to fix your faucet. For simple issues such as clogged aerators, using a
cleaning solution
or replacing the aerator can quickly solve the problem. However, for more complex issues such as leaks or worn out parts, it's best to
seek the help of a professional plumber
. They have the experience and knowledge to properly diagnose and repair any faucet issues, ensuring that your bathroom sink functions properly and looks its best.
Once you have determined the cause of the problem, it's time to fix your faucet. For simple issues such as clogged aerators, using a
cleaning solution
or replacing the aerator can quickly solve the problem. However, for more complex issues such as leaks or worn out parts, it's best to
seek the help of a professional plumber
. They have the experience and knowledge to properly diagnose and repair any faucet issues, ensuring that your bathroom sink functions properly and looks its best.
The Benefits of Proper Faucet Repair
 Not only does proper faucet repair save you money in the long run, but it also
improves the overall aesthetic of your bathroom
. A functioning and visually appealing faucet can enhance the look of your sink and complement the rest of your bathroom's design. It also adds value to your home and makes it more attractive to potential buyers.
In conclusion, proper
moen bathroom sink faucet repair
is essential for maintaining the functionality and aesthetics of your bathroom. By addressing any issues promptly and seeking professional help when needed, you can ensure that your bathroom sink faucet continues to serve its purpose and enhance the overall design of your home. Don't overlook this small but important detail in your house design, and your bathroom will thank you for it.
Not only does proper faucet repair save you money in the long run, but it also
improves the overall aesthetic of your bathroom
. A functioning and visually appealing faucet can enhance the look of your sink and complement the rest of your bathroom's design. It also adds value to your home and makes it more attractive to potential buyers.
In conclusion, proper
moen bathroom sink faucet repair
is essential for maintaining the functionality and aesthetics of your bathroom. By addressing any issues promptly and seeking professional help when needed, you can ensure that your bathroom sink faucet continues to serve its purpose and enhance the overall design of your home. Don't overlook this small but important detail in your house design, and your bathroom will thank you for it.