Installing a bathroom sink drain plug may seem like a daunting task, but with the right tools and knowledge, it can be a quick and easy DIY project. Not only will you save money by doing it yourself, but you'll also have the satisfaction of knowing you completed the task on your own. Follow this step-by-step guide to learn how to install a bathroom sink drain plug like a pro.How to Install a Bathroom Sink Drain Plug


How to Install a Bathroom Sink Drain Plug


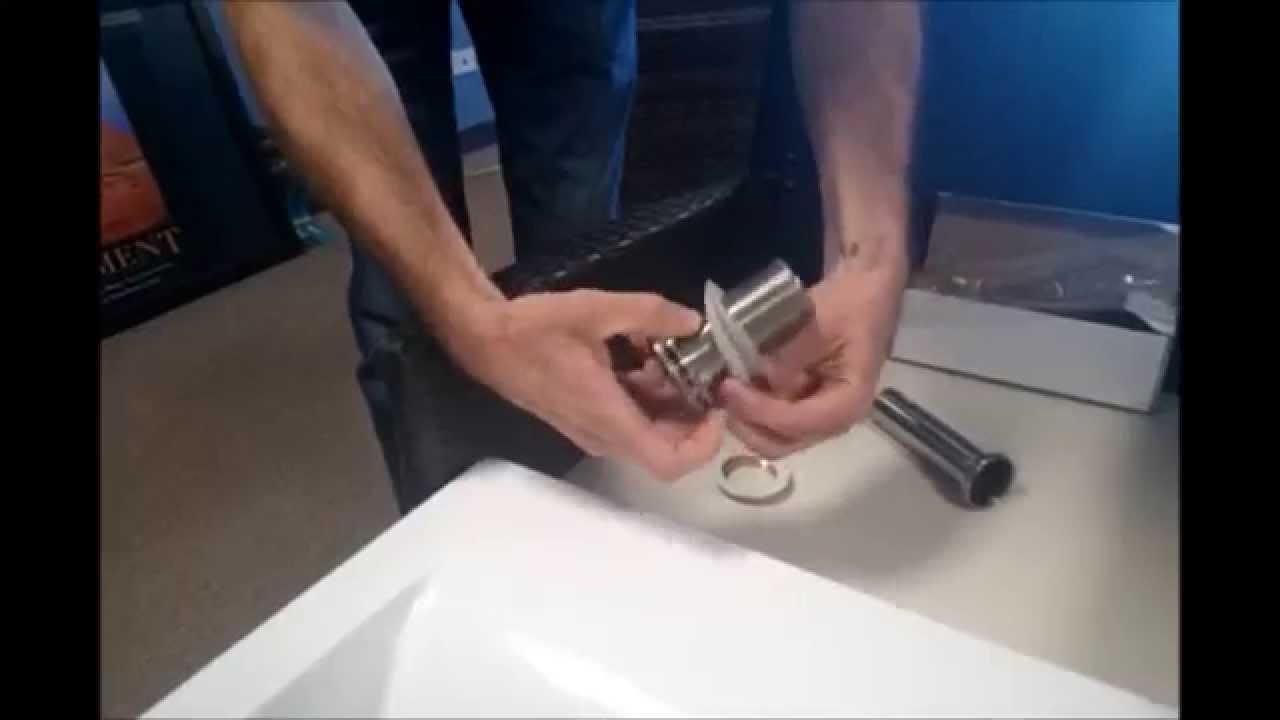
Step 1: Gather your materials. Before you begin, make sure you have all the necessary tools and materials on hand. This includes a new bathroom sink drain plug, a wrench, plumber's putty, and plumber's tape. It's also helpful to have a bucket or towel nearby to catch any water that may drip out during the installation process. Step 2: Remove the old drain plug. If you're replacing an old drain plug, start by unscrewing it from the sink using a wrench. Once it's loose, you can simply pull it out of the sink and discard it. Step 3: Clean the sink and drain. Use a clean cloth to wipe down the sink and the drain to ensure there is no debris or residue that could interfere with the new drain plug's installation. Step 4: Prepare the plumber's putty. Take a small amount of plumber's putty and roll it between your hands to create a thin rope. The putty will help create a seal between the sink and the new drain plug. Step 5: Apply the plumber's putty. Carefully place the putty around the edge of the drain opening on the underside of the sink. Make sure the putty is evenly distributed and covers the entire opening. Step 6: Insert the new drain plug. Take the new drain plug and insert it into the opening on the top of the sink. Press down gently to ensure the putty creates a seal between the sink and the drain plug. Step 7: Secure the drain plug. Use a wrench to tighten the drain plug from underneath the sink. Make sure it's snug, but be careful not to over-tighten, as this could cause damage to the sink or the drain plug. Step 8: Apply plumber's tape (optional). If you want to ensure an extra tight seal, you can wrap plumber's tape around the threads of the drain plug before screwing it into place. This will also make it easier to remove the drain plug in the future, if needed. Step 9: Test the drain plug. Once the new drain plug is installed, run water into the sink and make sure there are no leaks. If you notice any leaks, tighten the drain plug a bit more or remove it and add more plumber's putty before re-inserting it. Step 10: Clean up and admire your work. Use a damp cloth to wipe away any excess plumber's putty or debris from the installation process. Then step back and admire your newly installed bathroom sink drain plug!Installing a Bathroom Sink Drain Plug: A Step-by-Step Guide


Installing a Bathroom Sink Drain Plug: A Step-by-Step Guide


If you're feeling confident in your DIY skills, installing a bathroom sink drain plug is a great project to tackle on your own. Not only is it a simple and straightforward task, but it can also save you time and money by avoiding the need to hire a professional plumber. Follow the steps outlined above and you'll have your new drain plug installed in no time.DIY: Installing a Bathroom Sink Drain Plug


DIY: Installing a Bathroom Sink Drain Plug

:max_bytes(150000):strip_icc()/bathroom-sink-drain-installation-2718843-02-61e5ecbee1e949be8d8f45ac4f5a6797.jpg)

Don't have a lot of time or DIY experience? No problem! Installing a bathroom sink drain plug can still be a quick and easy task. With the right tools and a bit of patience, you'll have your new drain plug installed in less than an hour. And once it's in, you'll have a functional and stylish addition to your bathroom.Quick and Easy Guide to Installing a Bathroom Sink Drain Plug


Quick and Easy Guide to Installing a Bathroom Sink Drain Plug


While installing a bathroom sink drain plug may seem like a simple task, there are a few tips and tricks that can make the process even easier. For example, using plumber's tape can ensure a tight seal, and using a wrench can help you avoid over-tightening the drain plug. Taking your time and being thorough with the installation process can also prevent any potential issues down the line.Installing a Bathroom Sink Drain Plug: Tips and Tricks


Installing a Bathroom Sink Drain Plug: Tips and Tricks


If you want to be fully prepared for installing a bathroom sink drain plug, this is the guide for you. From gathering materials to troubleshooting common problems, this guide covers everything you need to know to successfully install a new drain plug. Follow it step-by-step and you'll have a perfectly functioning sink in no time.The Ultimate Guide to Installing a Bathroom Sink Drain Plug


The Ultimate Guide to Installing a Bathroom Sink Drain Plug
If you're a visual learner or prefer to have a step-by-step tutorial to follow, this guide is for you. With detailed instructions and helpful images, this tutorial will guide you through the process of installing a bathroom sink drain plug. You can pause and go at your own pace, making it perfect for beginners or those who want a more hands-on approach.Step-by-Step Tutorial: Installing a Bathroom Sink Drain Plug

Step-by-Step Tutorial: Installing a Bathroom Sink Drain Plug

Mistakes happen, but when it comes to installing a bathroom sink drain plug, it's best to avoid them as much as possible. Common mistakes such as using too much plumber's putty or over-tightening the drain plug can cause issues and potentially require you to redo the entire installation. By knowing what to avoid, you can save yourself time and frustration.Installing a Bathroom Sink Drain Plug: Common Mistakes to Avoid


Installing a Bathroom Sink Drain Plug: Common Mistakes to Avoid


If you want to take your DIY skills to the next level, here are a few expert tips to keep in mind when installing a bathroom sink drain plug. These tips can help you achieve a professional-looking installation and ensure your drain plug functions properly for years to come.Expert Tips for Installing a Bathroom Sink Drain Plug

Expert Tips for Installing a Bathroom Sink Drain Plug


If you encounter any issues or have questions during the installation process, this troubleshooting guide has you covered. From leaks to loose drain plugs, this guide will walk you through common problems and how to fix them. With this resource, you can tackle any unexpected issues with confidence.Troubleshooting Guide: Installing a Bathroom Sink Drain Plug


Troubleshooting Guide: Installing a Bathroom Sink Drain Plug

Proper Installation of a Bathroom Sink Drain Plug

Understanding the Importance of a Bathroom Sink Drain Plug
 A bathroom sink drain plug is an essential component of any bathroom sink. It is responsible for preventing water from draining out of the sink, allowing you to fill it with water for various purposes such as washing your face, brushing your teeth, or shaving. Without a properly installed drain plug, your sink will not function effectively, and you will constantly have to deal with water draining out, causing inconvenience and potential water damage to your bathroom. Therefore, it is crucial to know how to install a bathroom sink drain plug correctly.
Gather the Necessary Tools and Materials
 Before starting the installation process, make sure you have all the required tools and materials. You will need a pair of pliers, a screwdriver, plumber's putty, and a new sink drain plug. It is essential to use a new plug as old ones tend to wear out and may not fit or work properly. Additionally, check the manufacturer's instructions to ensure you have all the necessary tools and materials specific to your sink model.
Step-by-Step Installation Process
 1. Start by removing the old drain plug. Use pliers to loosen and unscrew the retaining nut underneath the sink. Once it is loose, you should be able to pull out the old plug.
2. Clean the area around the drain hole thoroughly. Use a mild cleaner and a cloth to remove any old putty or debris.
3. Roll a small amount of plumber's putty into a thin, snake-like shape. Place it around the underside of the new drain plug.
4. Carefully insert the new drain plug into the drain hole, making sure it sits flush against the sink.
5. From underneath the sink, screw on the retaining nut and tighten it with pliers. Make sure the drain plug is secure and does not move.
6. Wipe off any excess putty that may have oozed out around the drain plug.
1. Start by removing the old drain plug. Use pliers to loosen and unscrew the retaining nut underneath the sink. Once it is loose, you should be able to pull out the old plug.
2. Clean the area around the drain hole thoroughly. Use a mild cleaner and a cloth to remove any old putty or debris.
3. Roll a small amount of plumber's putty into a thin, snake-like shape. Place it around the underside of the new drain plug.
4. Carefully insert the new drain plug into the drain hole, making sure it sits flush against the sink.
5. From underneath the sink, screw on the retaining nut and tighten it with pliers. Make sure the drain plug is secure and does not move.
6. Wipe off any excess putty that may have oozed out around the drain plug.
Testing and Maintenance
 Once the installation is complete, run water into the sink and test the drain plug by filling and draining the sink. If it works correctly, you have successfully installed a bathroom sink drain plug. To maintain it, periodically check for any leaks and tighten the retaining nut if necessary. With proper installation and maintenance, your bathroom sink drain plug should last for years to come.
In conclusion,
a bathroom sink drain plug is a vital component of a functional bathroom sink. By following the steps outlined above, you can easily install a new drain plug and ensure it works effectively. Remember to use high-quality materials and regularly check for any leaks or issues to maintain the longevity of your bathroom sink drain plug.
Once the installation is complete, run water into the sink and test the drain plug by filling and draining the sink. If it works correctly, you have successfully installed a bathroom sink drain plug. To maintain it, periodically check for any leaks and tighten the retaining nut if necessary. With proper installation and maintenance, your bathroom sink drain plug should last for years to come.
In conclusion,
a bathroom sink drain plug is a vital component of a functional bathroom sink. By following the steps outlined above, you can easily install a new drain plug and ensure it works effectively. Remember to use high-quality materials and regularly check for any leaks or issues to maintain the longevity of your bathroom sink drain plug.