Are you tired of constantly dealing with leaks and water damage around your kitchen sink? It may be time to re-caulk your sink and ensure a tight seal to prevent any further damage. The good news is, caulking a kitchen sink doesn't have to be a difficult or time-consuming task. With the right tools and techniques, you can easily caulk your kitchen sink and have it looking like new in no time. Follow these simple steps to get the job done quickly and efficiently.1. Caulking a Kitchen Sink Made Easy


1. Caulking a Kitchen Sink Made Easy


Caulking your kitchen sink may seem like a daunting task, but with these tips, you'll be a pro in no time. First, make sure to choose the right type of caulk for your sink. Silicone caulk is the best option as it is waterproof and flexible, making it perfect for areas that are constantly exposed to water. Next, clean the area around your sink thoroughly to ensure the caulk adheres properly. Use a mild cleaner and a scrub brush to remove any dirt or grime. Finally, use a caulk gun for precise application and a smooth finish.2. Quick and Simple Caulking Tips for Your Kitchen Sink


2. Quick and Simple Caulking Tips for Your Kitchen Sink


If you're looking for a quick and easy way to caulk your kitchen sink, this method is for you. Start by filling your sink with water to weigh it down and create a gap between the sink and the countertop. Next, apply a thin bead of caulk along the gap, making sure to cover the entire area. Use your finger or a caulk smoothing tool to smooth out the caulk and remove any excess. Finally, drain the sink and let the caulk dry for 24 hours before using the sink again.3. The Easiest Way to Caulk a Kitchen Sink


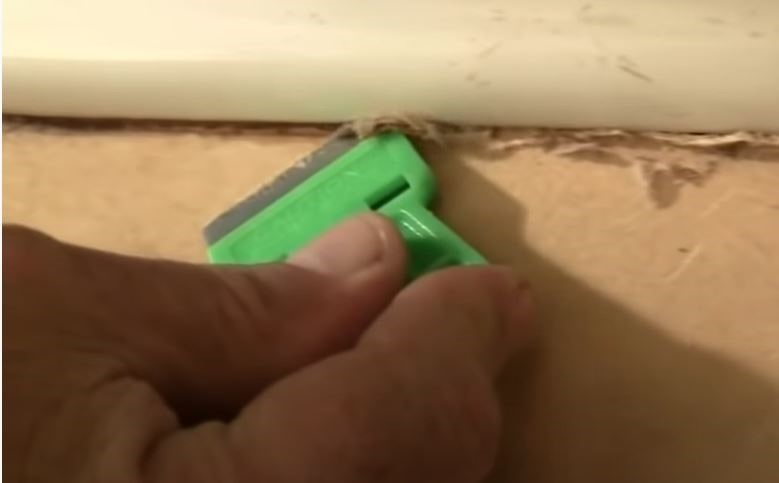
3. The Easiest Way to Caulk a Kitchen Sink


Caulking a kitchen sink may seem like a daunting task, but with these 5 simple steps, you'll have it done in no time. First, use a caulk remover tool to remove any old caulk and clean the area thoroughly. Next, cut the tip of your silicone caulk at a 45-degree angle and insert it into a caulk gun. Squeeze the trigger and apply a thin bead of caulk along the gap between the sink and the countertop. Use a caulk smoothing tool or your finger to smooth out the caulk and remove any excess. Finally, let the caulk dry for 24 hours before using the sink.4. How to Easily Caulk a Kitchen Sink in 5 Steps


4. How to Easily Caulk a Kitchen Sink in 5 Steps


If you're new to caulking, don't worry, this step-by-step guide will walk you through the process. First, prepare the area by cleaning it thoroughly with mild cleaner and a scrub brush. Next, cut the tip of your caulk at a 45-degree angle and insert it into a caulk gun. Slowly and evenly squeeze the trigger while moving the gun along the gap between the sink and the countertop. Use a caulk smoothing tool or your finger to smooth out the caulk and remove any excess. Let the caulk dry for 24 hours before using the sink.5. Caulking Your Kitchen Sink: A Step-by-Step Guide


5. Caulking Your Kitchen Sink: A Step-by-Step Guide


When it comes to caulking your kitchen sink, there are a few methods to choose from. However, the best method is the one that works best for you and your sink. Some people prefer using a caulk gun, while others find it easier to use their finger to smooth out the caulk. Whichever method you choose, make sure to follow the proper steps and use high-quality silicone caulk for the best results.6. The Best Caulking Method for Your Kitchen Sink


6. The Best Caulking Method for Your Kitchen Sink


If you're looking for some tips and tricks to make caulking your kitchen sink even easier, look no further. First, use painter's tape to create a straight line along the gap between the sink and countertop. This will give you a clean and precise caulk line. You can also use a hairdryer to speed up the drying process of the caulk. Simply set it to the lowest heat setting and point it at the caulk line for a few minutes. This will help the caulk set and dry faster.7. Caulking Hacks for a Perfectly Sealed Kitchen Sink


7. Caulking Hacks for a Perfectly Sealed Kitchen Sink


If you're short on time but still want to ensure a perfectly caulked kitchen sink, this method is for you. First, clean the area around the sink and cut the tip of your caulk at a 45-degree angle. Next, apply a thin bead of caulk along the gap and use your finger to smooth it out. Then, use a hairdryer on the lowest heat setting to speed up the drying process. Finally, let the caulk dry for 1-2 hours before using the sink.8. The Quickest and Most Effective Way to Caulk a Kitchen Sink


8. The Quickest and Most Effective Way to Caulk a Kitchen Sink


If you want to achieve a professional-looking caulk line, follow these tips. First, make sure to choose a high-quality silicone caulk that is specifically designed for kitchen and bathroom use. Next, take your time and apply the caulk slowly and evenly. Use a caulk smoothing tool or your finger to smooth out the caulk and remove any excess. Finally, clean up any smudges or mistakes with a wet paper towel before the caulk dries.9. Caulking 101: How to Caulk Your Kitchen Sink Like a Pro


9. Caulking 101: How to Caulk Your Kitchen Sink Like a Pro


:max_bytes(150000):strip_icc()/Basic-kitchen-sink-types-1821207_color_rev-0b539306b9ef4236a136624ad2a89a4c.jpg)
Caulking your kitchen sink doesn't have to break the bank. There are plenty of affordable options when it comes to caulk and tools. You can find high-quality silicone caulk for a reasonable price at your local hardware store or online. You can also use household items like a plastic spoon or an old credit card as a caulk smoothing tool. With a little creativity and resourcefulness, you can easily caulk your kitchen sink without spending a fortune.10. Easy and Affordable Ways to Caulk Your Kitchen Sink


10. Easy and Affordable Ways to Caulk Your Kitchen Sink


The Importance of Properly Caulking Your Kitchen Sink

Prevent Water Damage and Mold Growth
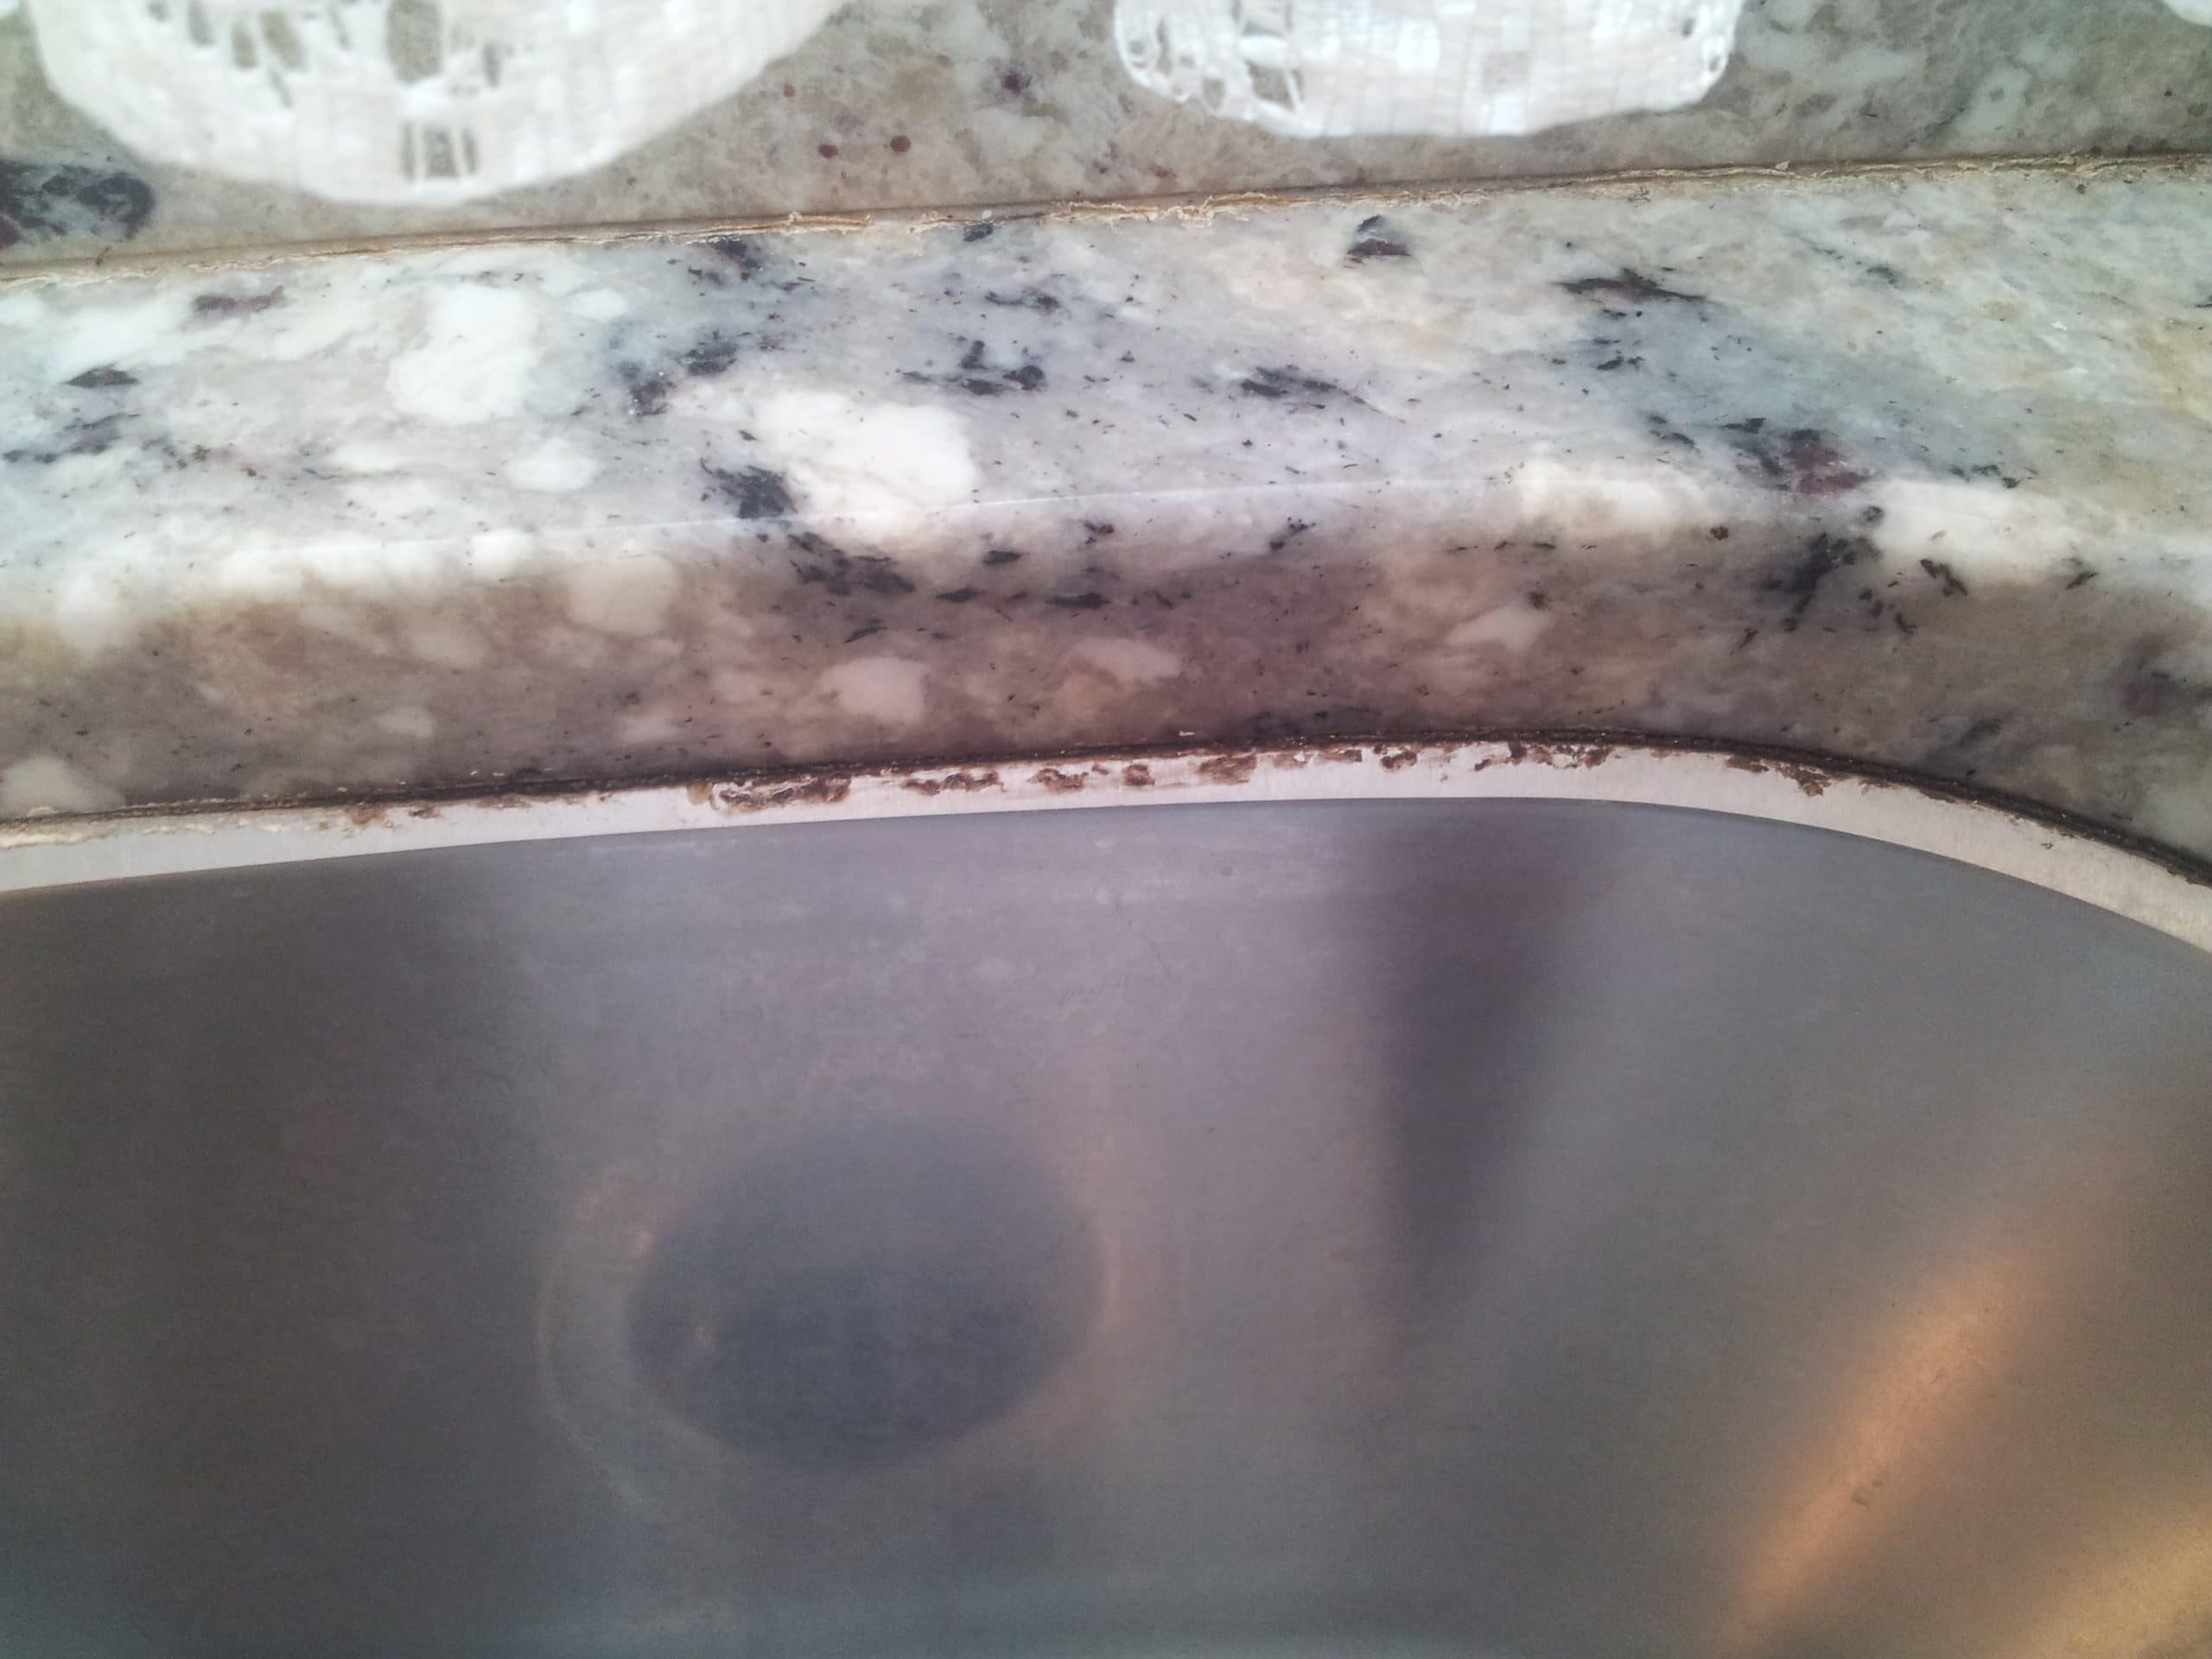
 One of the most important reasons to properly caulk your kitchen sink is to prevent water damage and mold growth. Over time, water can seep into the cracks and gaps between your sink and countertop, causing damage to the surrounding area. This can lead to costly repairs and even potential health hazards from mold growth. By
regularly maintaining
and
properly caulking
your kitchen sink, you can avoid these issues and keep your kitchen in top shape.
One of the most important reasons to properly caulk your kitchen sink is to prevent water damage and mold growth. Over time, water can seep into the cracks and gaps between your sink and countertop, causing damage to the surrounding area. This can lead to costly repairs and even potential health hazards from mold growth. By
regularly maintaining
and
properly caulking
your kitchen sink, you can avoid these issues and keep your kitchen in top shape.
Improve Aesthetic Appeal
 In addition to preventing water damage, caulking your kitchen sink can also improve the overall aesthetic appeal of your kitchen.
Old and worn out caulking
can make your sink appear dirty and unkempt, even if it's been thoroughly cleaned. By
replacing the old caulking
with a fresh application, you can instantly give your kitchen a cleaner and more polished look.
In addition to preventing water damage, caulking your kitchen sink can also improve the overall aesthetic appeal of your kitchen.
Old and worn out caulking
can make your sink appear dirty and unkempt, even if it's been thoroughly cleaned. By
replacing the old caulking
with a fresh application, you can instantly give your kitchen a cleaner and more polished look.
Save Money on Energy Bills
 Properly caulking your kitchen sink can also help you save money on energy bills. When there are gaps and cracks in the caulking, it can allow air to escape, making it harder for your kitchen to maintain a consistent temperature. This can result in your air conditioning or heating system working harder and using more energy to keep your kitchen comfortable. By
sealing these gaps
with new caulking, you can improve the energy efficiency of your kitchen and potentially lower your energy bills.
Properly caulking your kitchen sink can also help you save money on energy bills. When there are gaps and cracks in the caulking, it can allow air to escape, making it harder for your kitchen to maintain a consistent temperature. This can result in your air conditioning or heating system working harder and using more energy to keep your kitchen comfortable. By
sealing these gaps
with new caulking, you can improve the energy efficiency of your kitchen and potentially lower your energy bills.
Easy Steps to Caulking Your Kitchen Sink
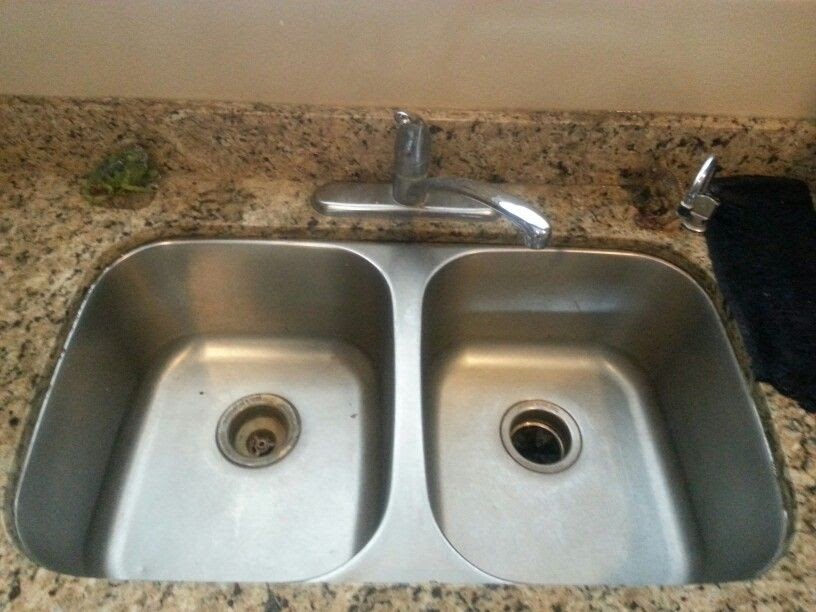
 Now that you understand the importance of properly caulking your kitchen sink, you may be wondering how to do it. Luckily, it's a relatively easy process that you can complete in just a few simple steps. First,
remove any old caulking
with a caulk removal tool. Then,
clean the area
thoroughly with a mild cleaner and let it dry completely. Next,
cut the tip off
of a tube of caulk at a 45-degree angle and insert it into a caulk gun.
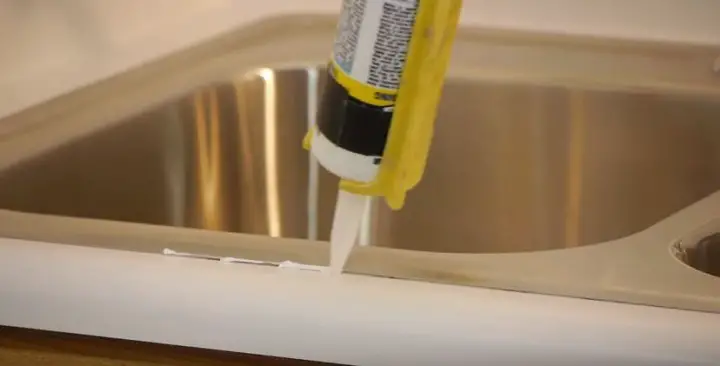
Apply a thin and even line
of caulk along the edges of your sink and countertop, using a damp finger or caulk smoothing tool to smooth out any bumps or excess caulk. Finally,
let the caulk dry
according to the manufacturer's instructions before using your sink again.
Now that you understand the importance of properly caulking your kitchen sink, you may be wondering how to do it. Luckily, it's a relatively easy process that you can complete in just a few simple steps. First,
remove any old caulking
with a caulk removal tool. Then,
clean the area
thoroughly with a mild cleaner and let it dry completely. Next,
cut the tip off
of a tube of caulk at a 45-degree angle and insert it into a caulk gun.
Apply a thin and even line
of caulk along the edges of your sink and countertop, using a damp finger or caulk smoothing tool to smooth out any bumps or excess caulk. Finally,
let the caulk dry
according to the manufacturer's instructions before using your sink again.
Conclusion
 Properly caulking your kitchen sink is an important part of maintaining a functional and visually appealing kitchen. By preventing water damage, improving aesthetic appeal, and saving money on energy bills, caulking is a small but impactful task that can make a big difference. With just a few easy steps, you can keep your kitchen in top shape and avoid potential issues in the future. Keep in mind that it's important to
regularly inspect and replace caulking
as needed to ensure your kitchen remains in the best condition possible.
Properly caulking your kitchen sink is an important part of maintaining a functional and visually appealing kitchen. By preventing water damage, improving aesthetic appeal, and saving money on energy bills, caulking is a small but impactful task that can make a big difference. With just a few easy steps, you can keep your kitchen in top shape and avoid potential issues in the future. Keep in mind that it's important to
regularly inspect and replace caulking
as needed to ensure your kitchen remains in the best condition possible.