If you're experiencing flickering lights or a complete light outage in your kitchen, it may be time to replace the ballast in your kitchen light fixture. The ballast is responsible for regulating the electrical current to the light bulbs, and when it starts to fail, it can cause these issues. While it may seem like a daunting task, replacing a ballast in a kitchen light is actually a simple process that can be done with just a few tools and some basic knowledge. In this article, we'll guide you through the steps of replacing a ballast in your kitchen light fixture.How to Replace a Ballast in a Kitchen Light Fixture


How to Replace a Ballast in a Kitchen Light Fixture

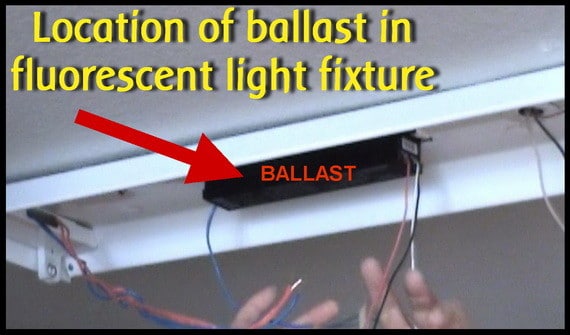

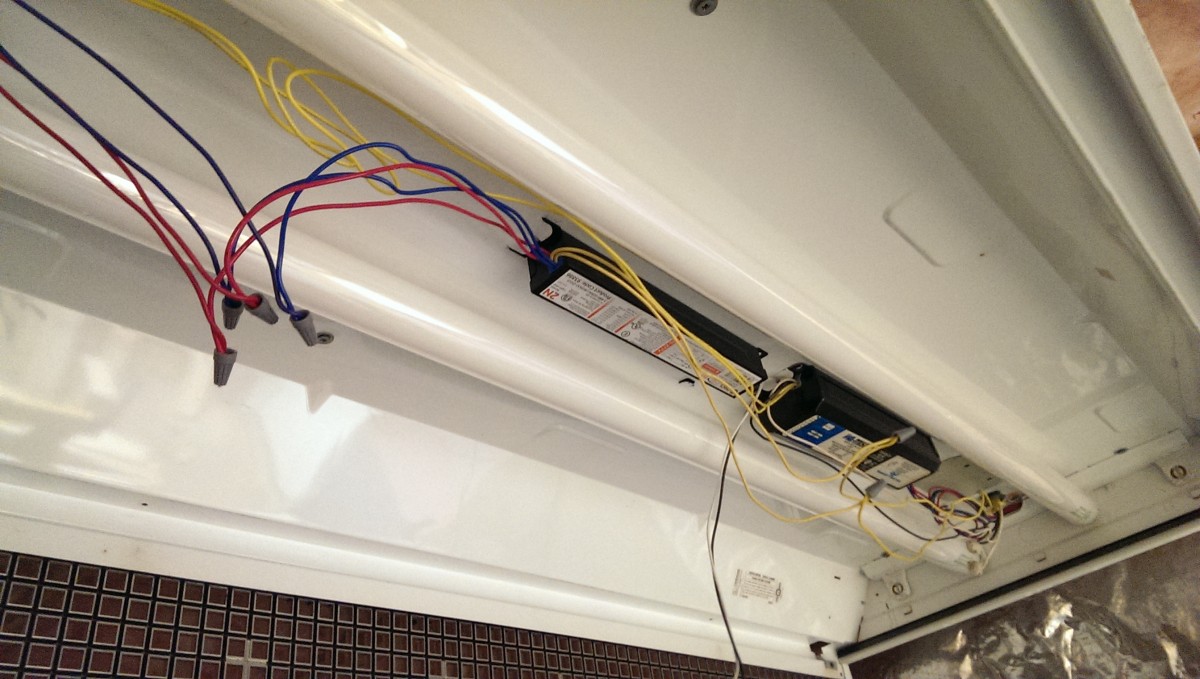


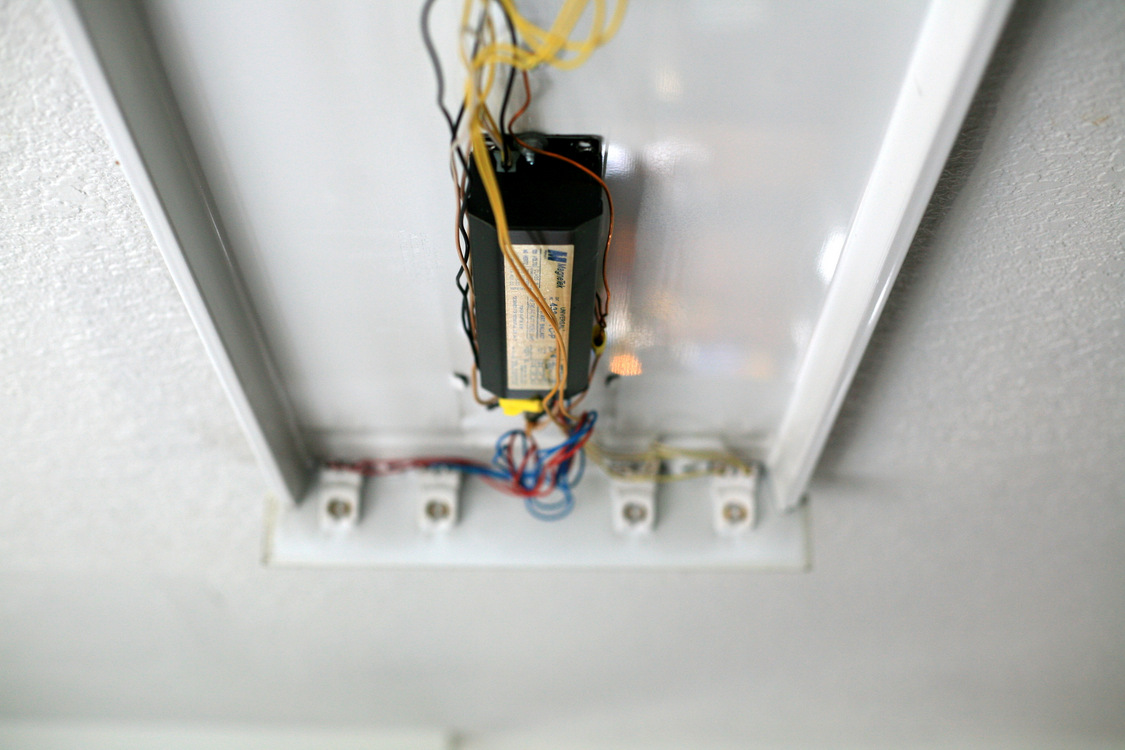

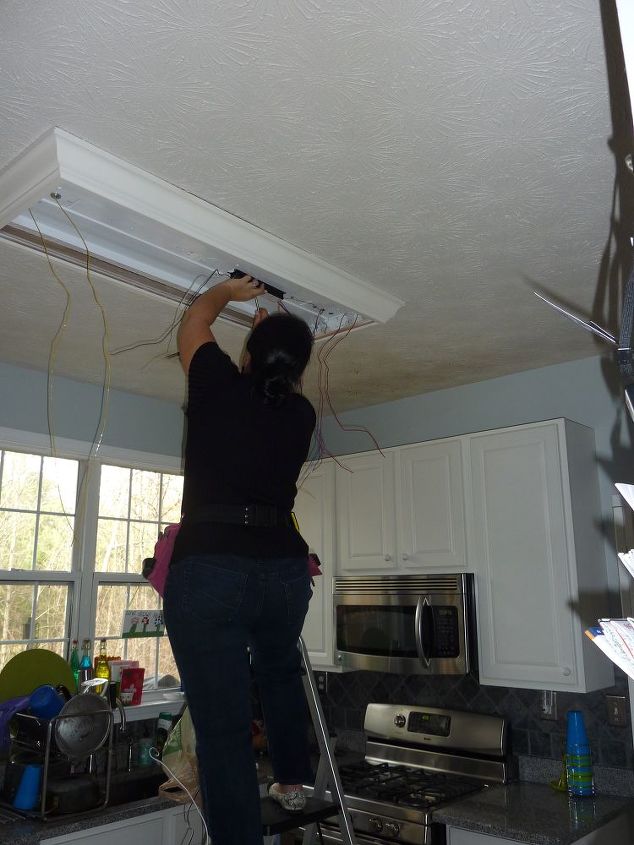
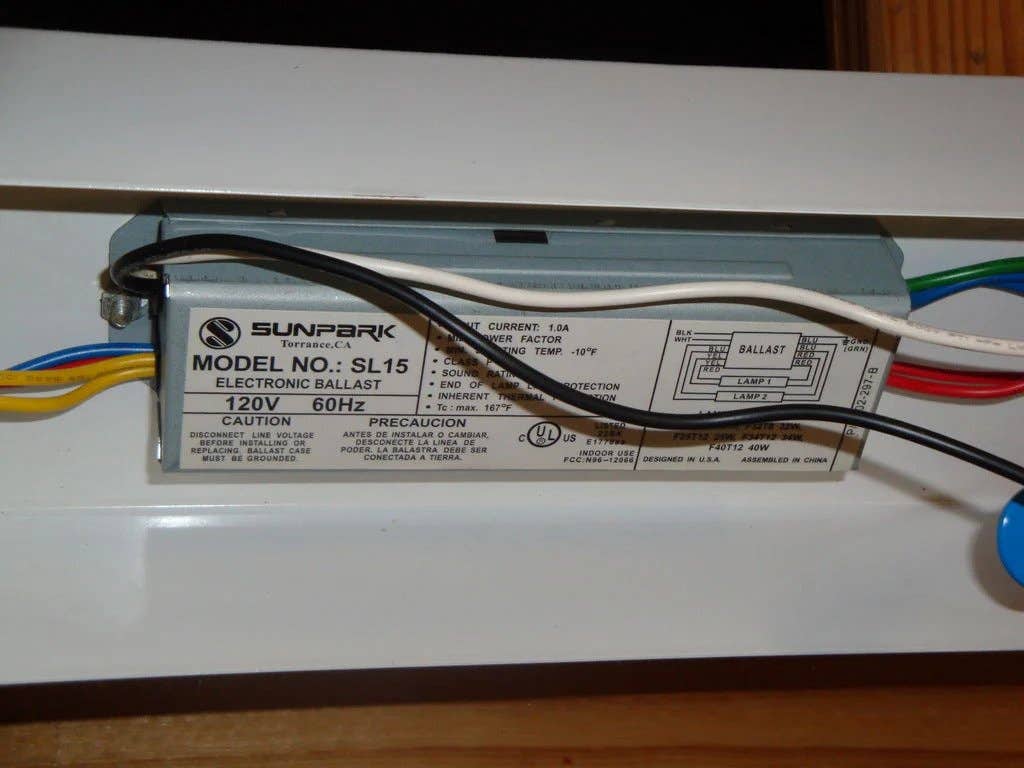
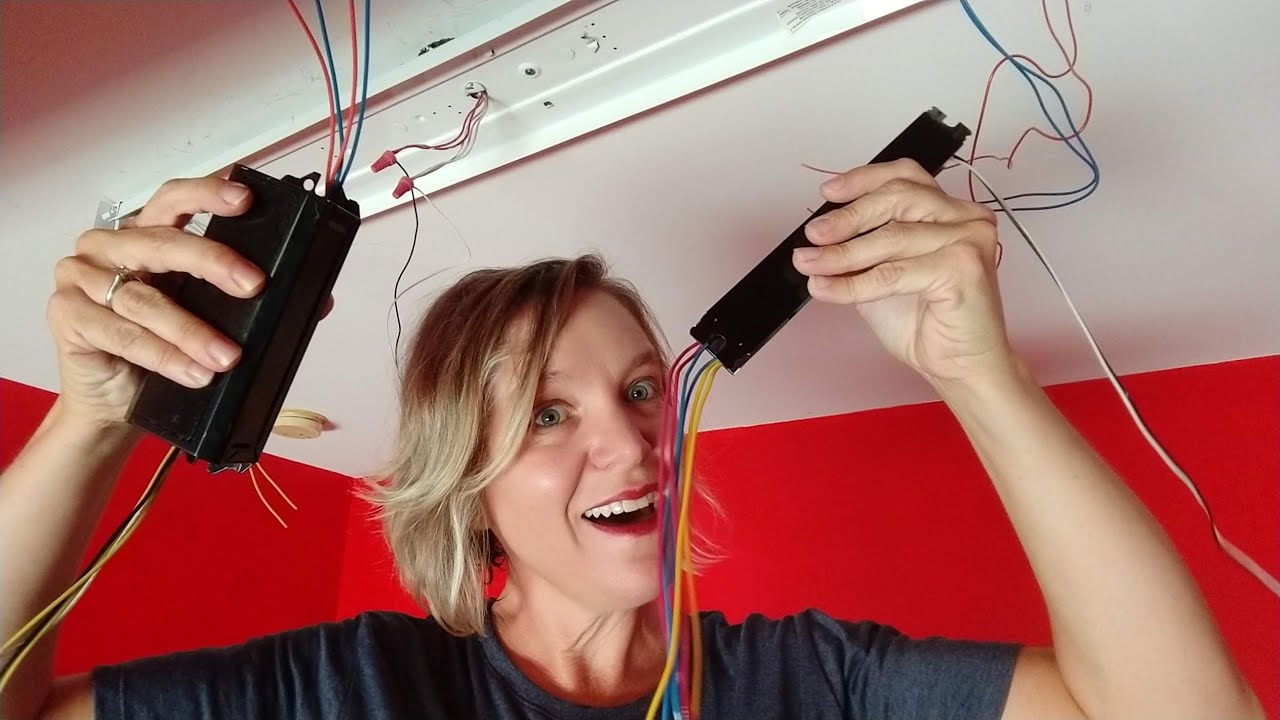
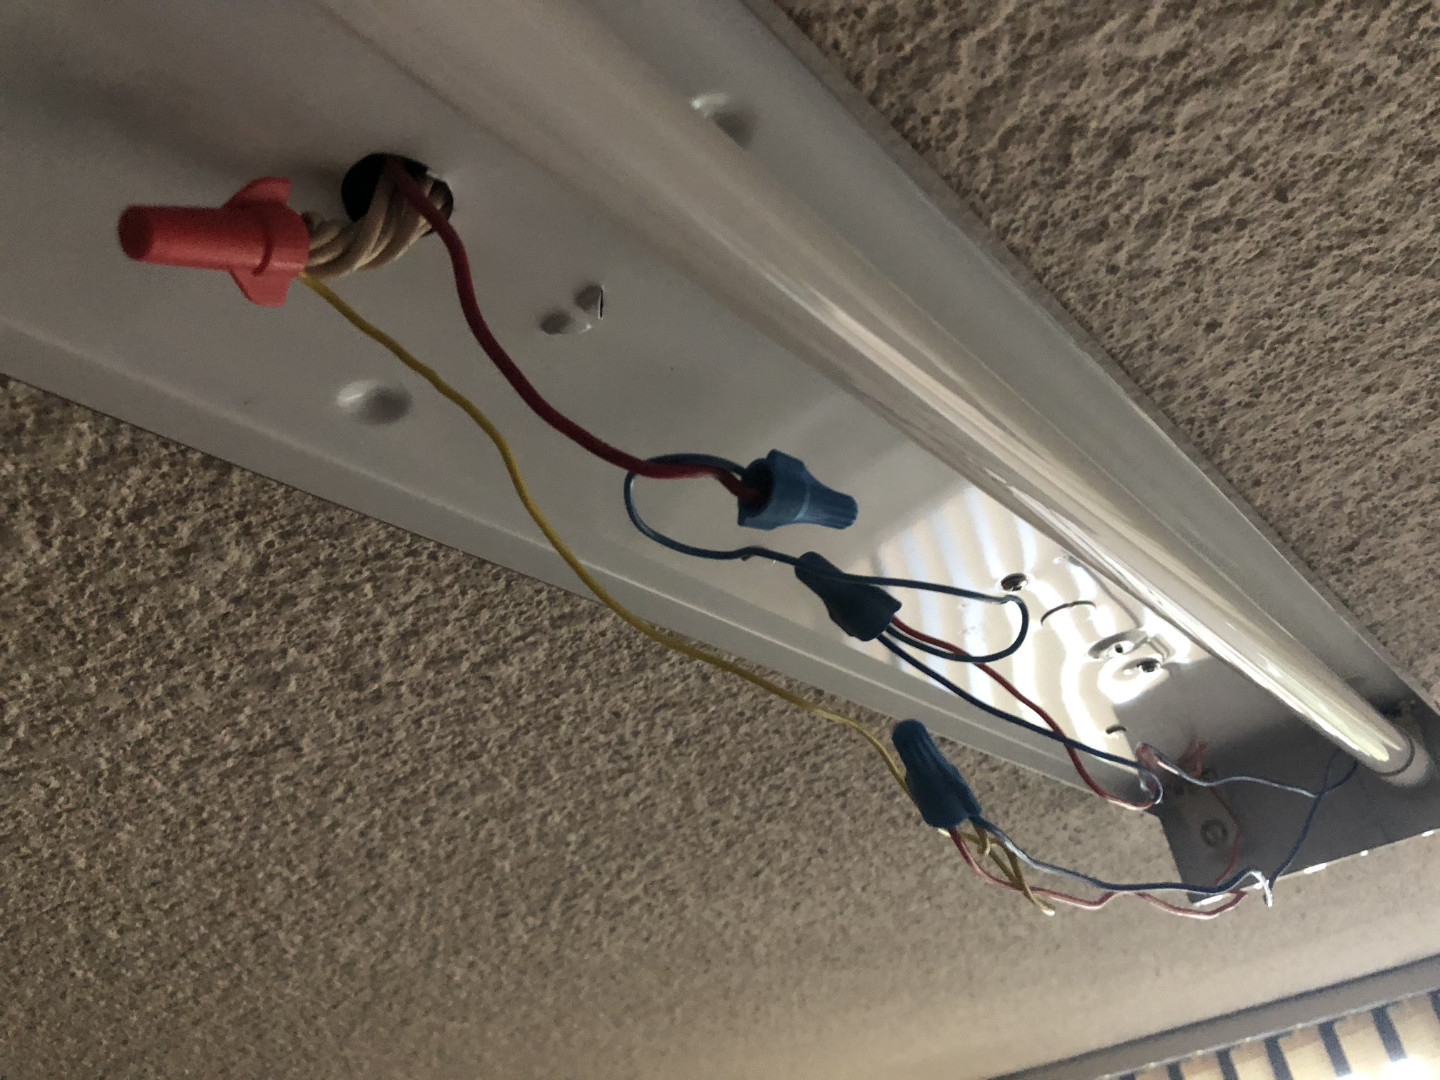
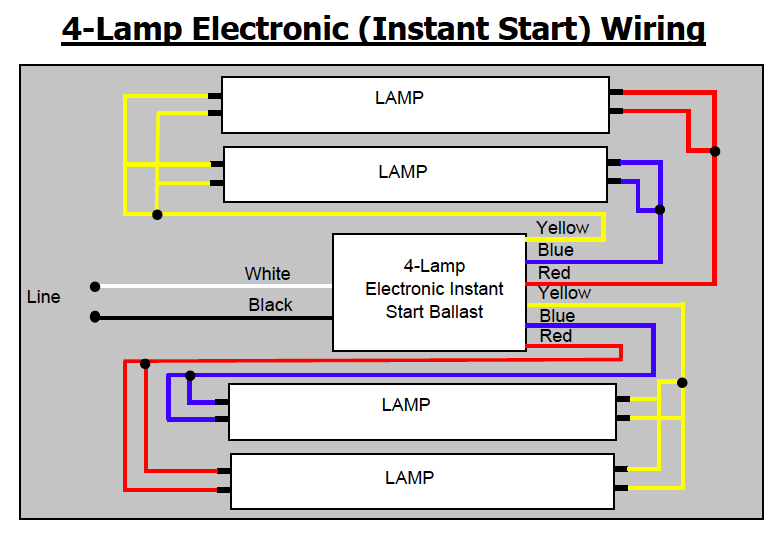
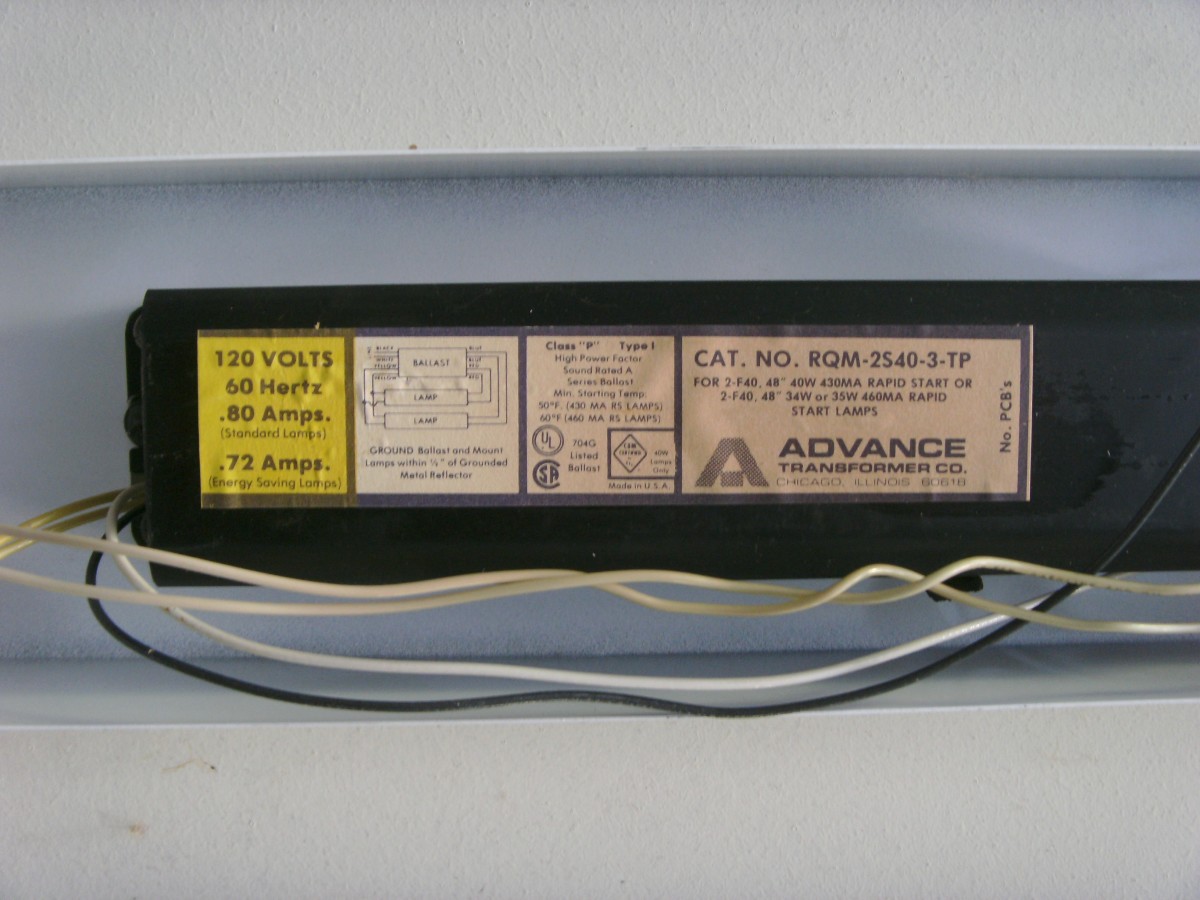
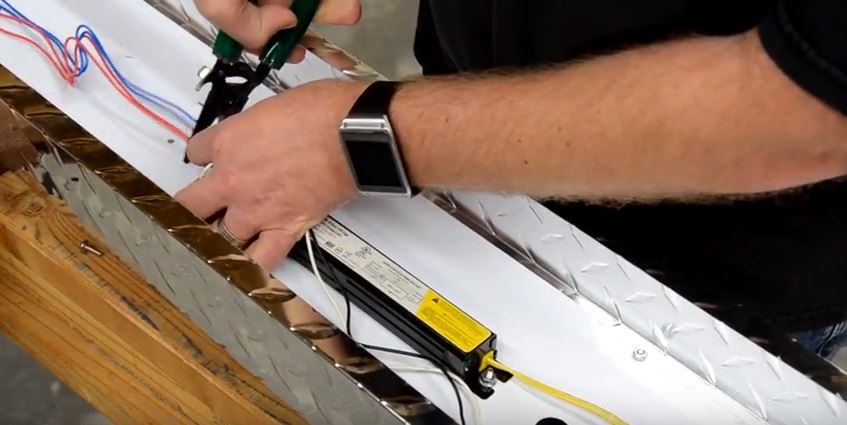
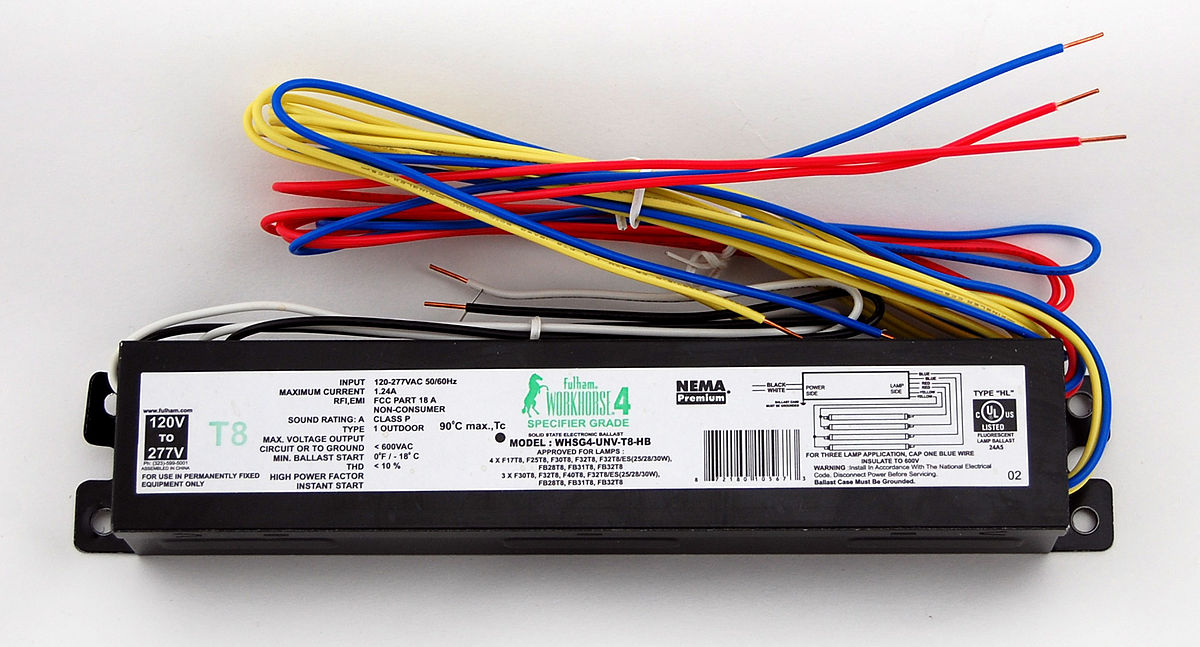
Before you begin, make sure to turn off the power to your kitchen light fixture. You can do this by either turning off the circuit breaker or unscrewing the fuse that controls the kitchen lights. This is important for your safety and to prevent any electrical mishaps. Step 1: Remove the cover of your kitchen light fixture. This may require unscrewing a few screws or simply sliding the cover off. Set the cover aside. Step 2: Locate the ballast. It is typically a black box with wires attached to it. If you're unsure, refer to the manufacturer's instructions for the specific model of your light fixture. Step 3: Disconnect the wires from the ballast. This may require unscrewing the wire connectors or simply pulling them apart. Make sure to take note of which wires are connected to which terminals so you can reconnect them correctly later. Step 4: Remove the old ballast. It may be attached to the light fixture with screws or clips. Once it's removed, dispose of it properly according to your local regulations. Step 5: Install the new ballast. Make sure it is the correct replacement for your specific light fixture. Attach it to the light fixture with screws or clips. Step 6: Connect the wires to the new ballast. Refer to your notes from earlier to ensure they are connected correctly. Use wire connectors to secure the connections. Step 7: Replace the cover of the light fixture and secure it in place. Step 8: Turn the power back on to your kitchen light fixture. Test the lights to make sure they are working properly. Congratulations, you have successfully replaced the ballast in your kitchen light fixture!Replacing a Ballast in a Kitchen Light: Step-by-Step Guide


Replacing a Ballast in a Kitchen Light: Step-by-Step Guide


Replacing a ballast in a kitchen light fixture is a relatively simple DIY project that can save you time and money. Instead of hiring a professional electrician, you can do it yourself with just a few tools and some basic knowledge. Not only will you save money on labor costs, but you'll also have the satisfaction of completing the project on your own.DIY: Replacing a Ballast in a Kitchen Light


DIY: Replacing a Ballast in a Kitchen Light


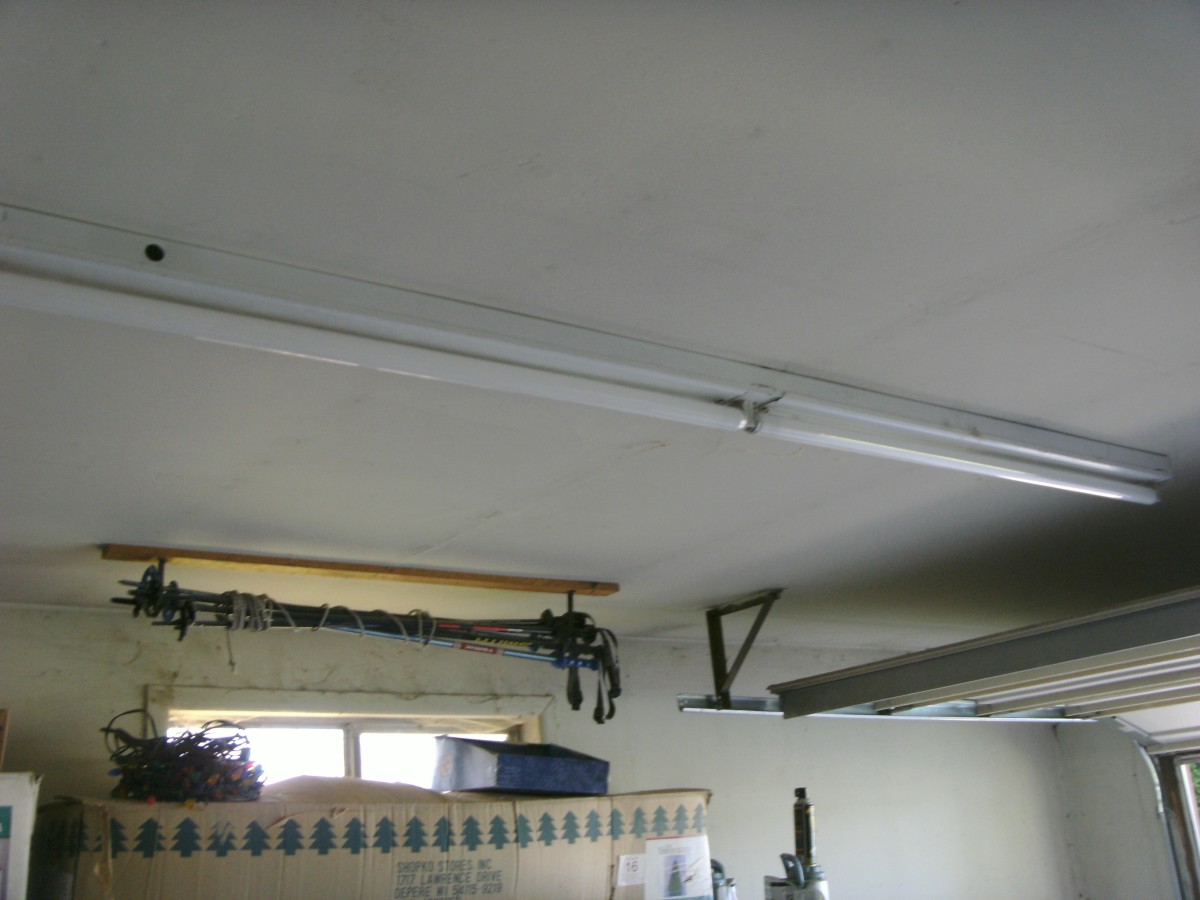
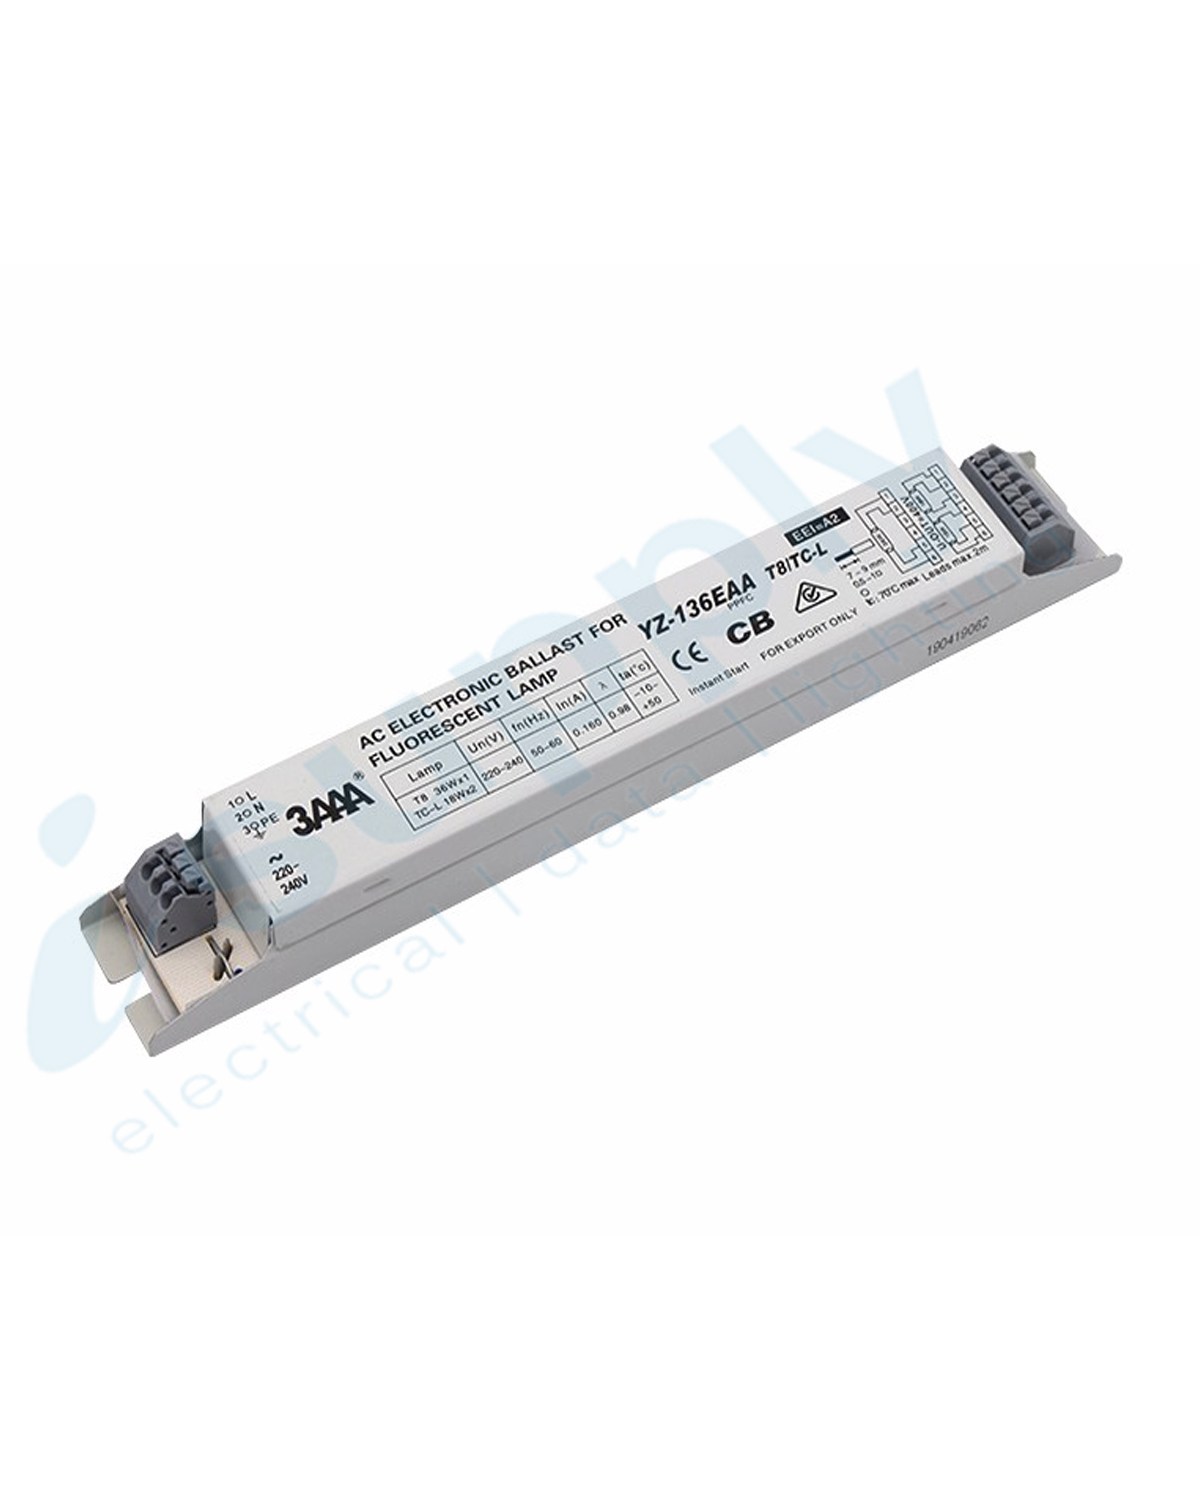
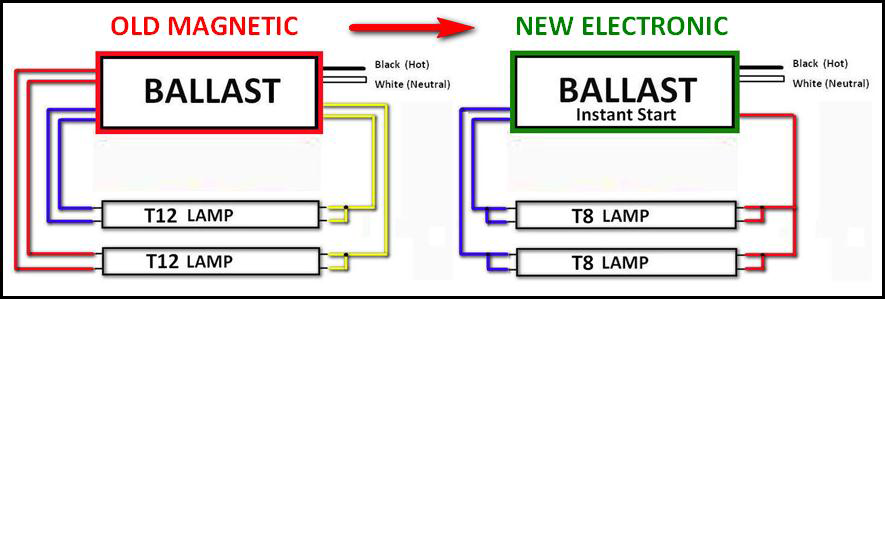
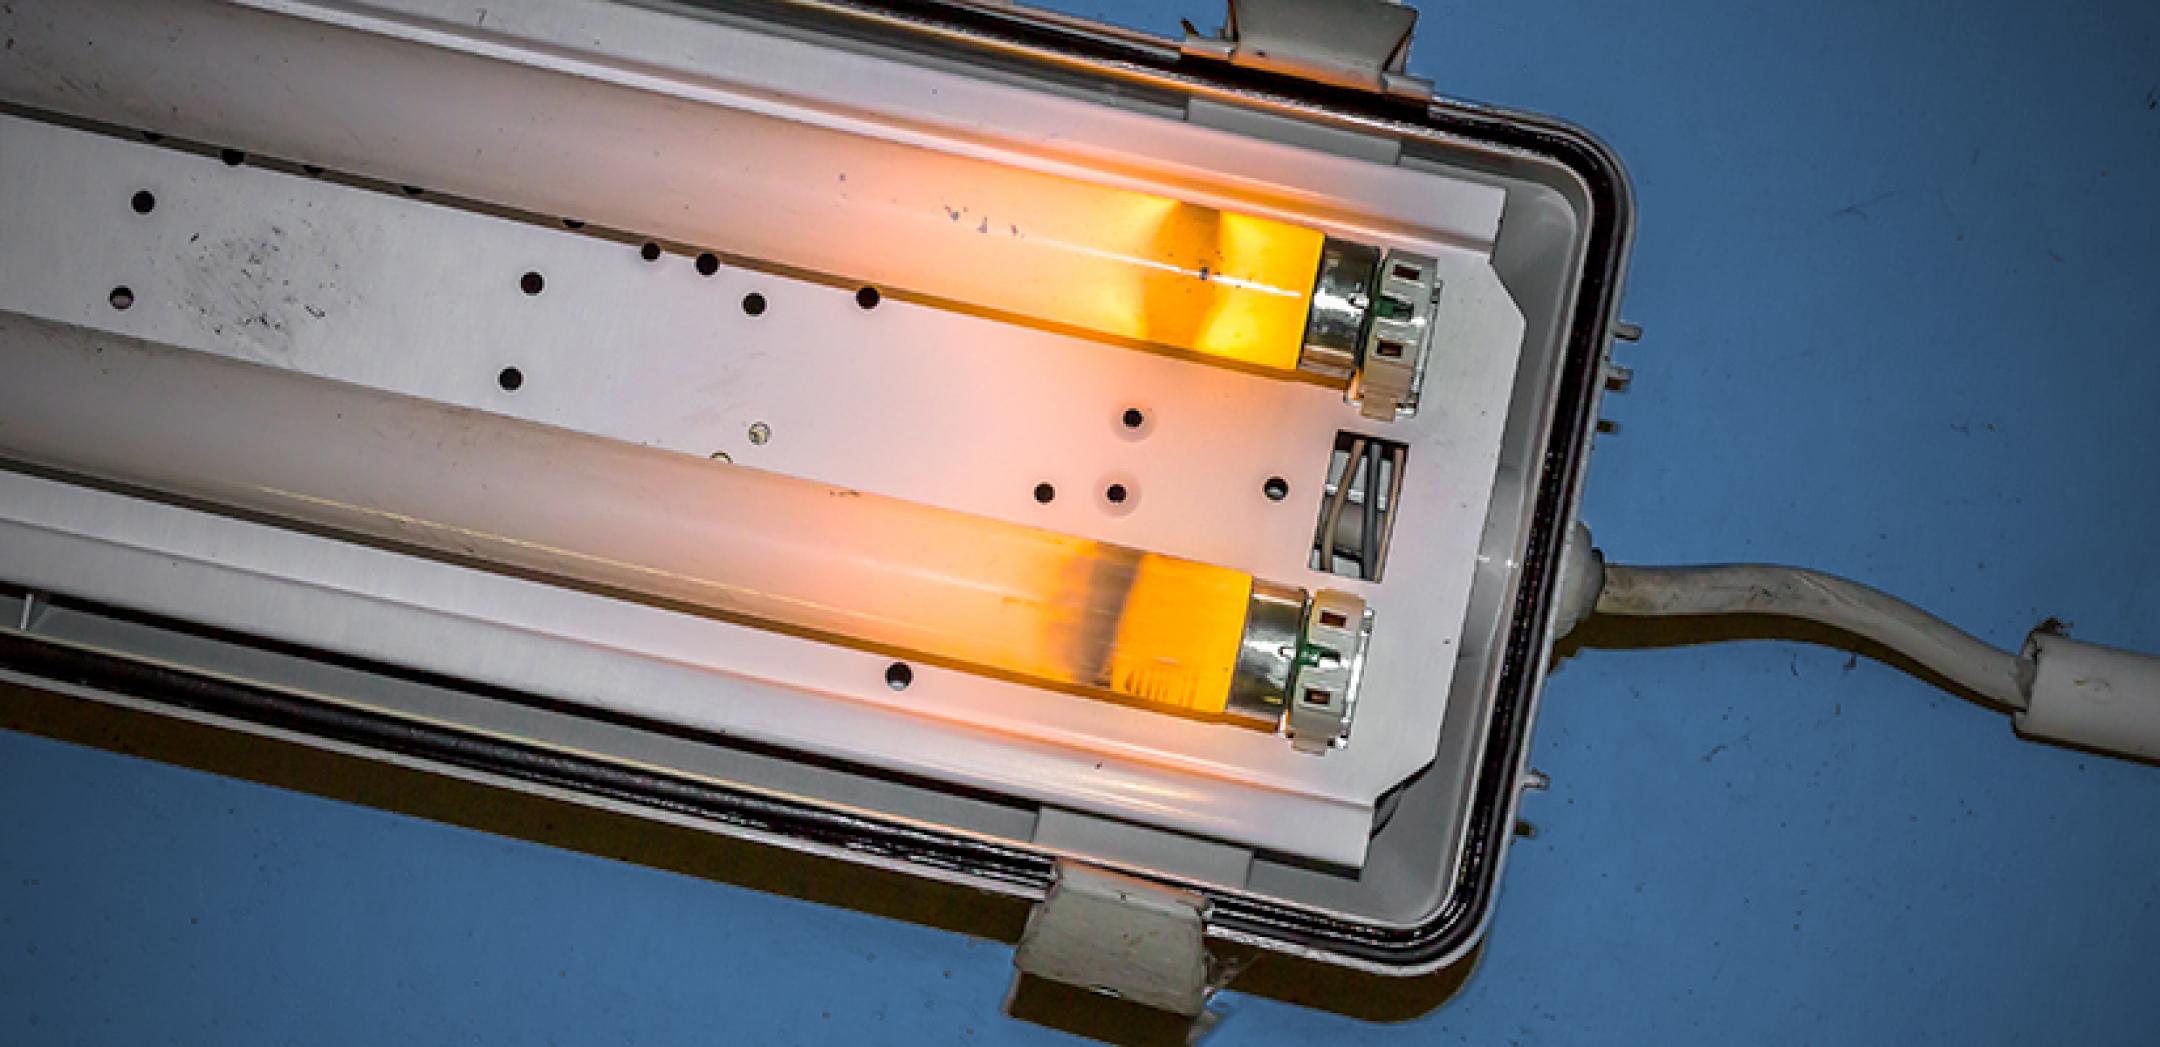
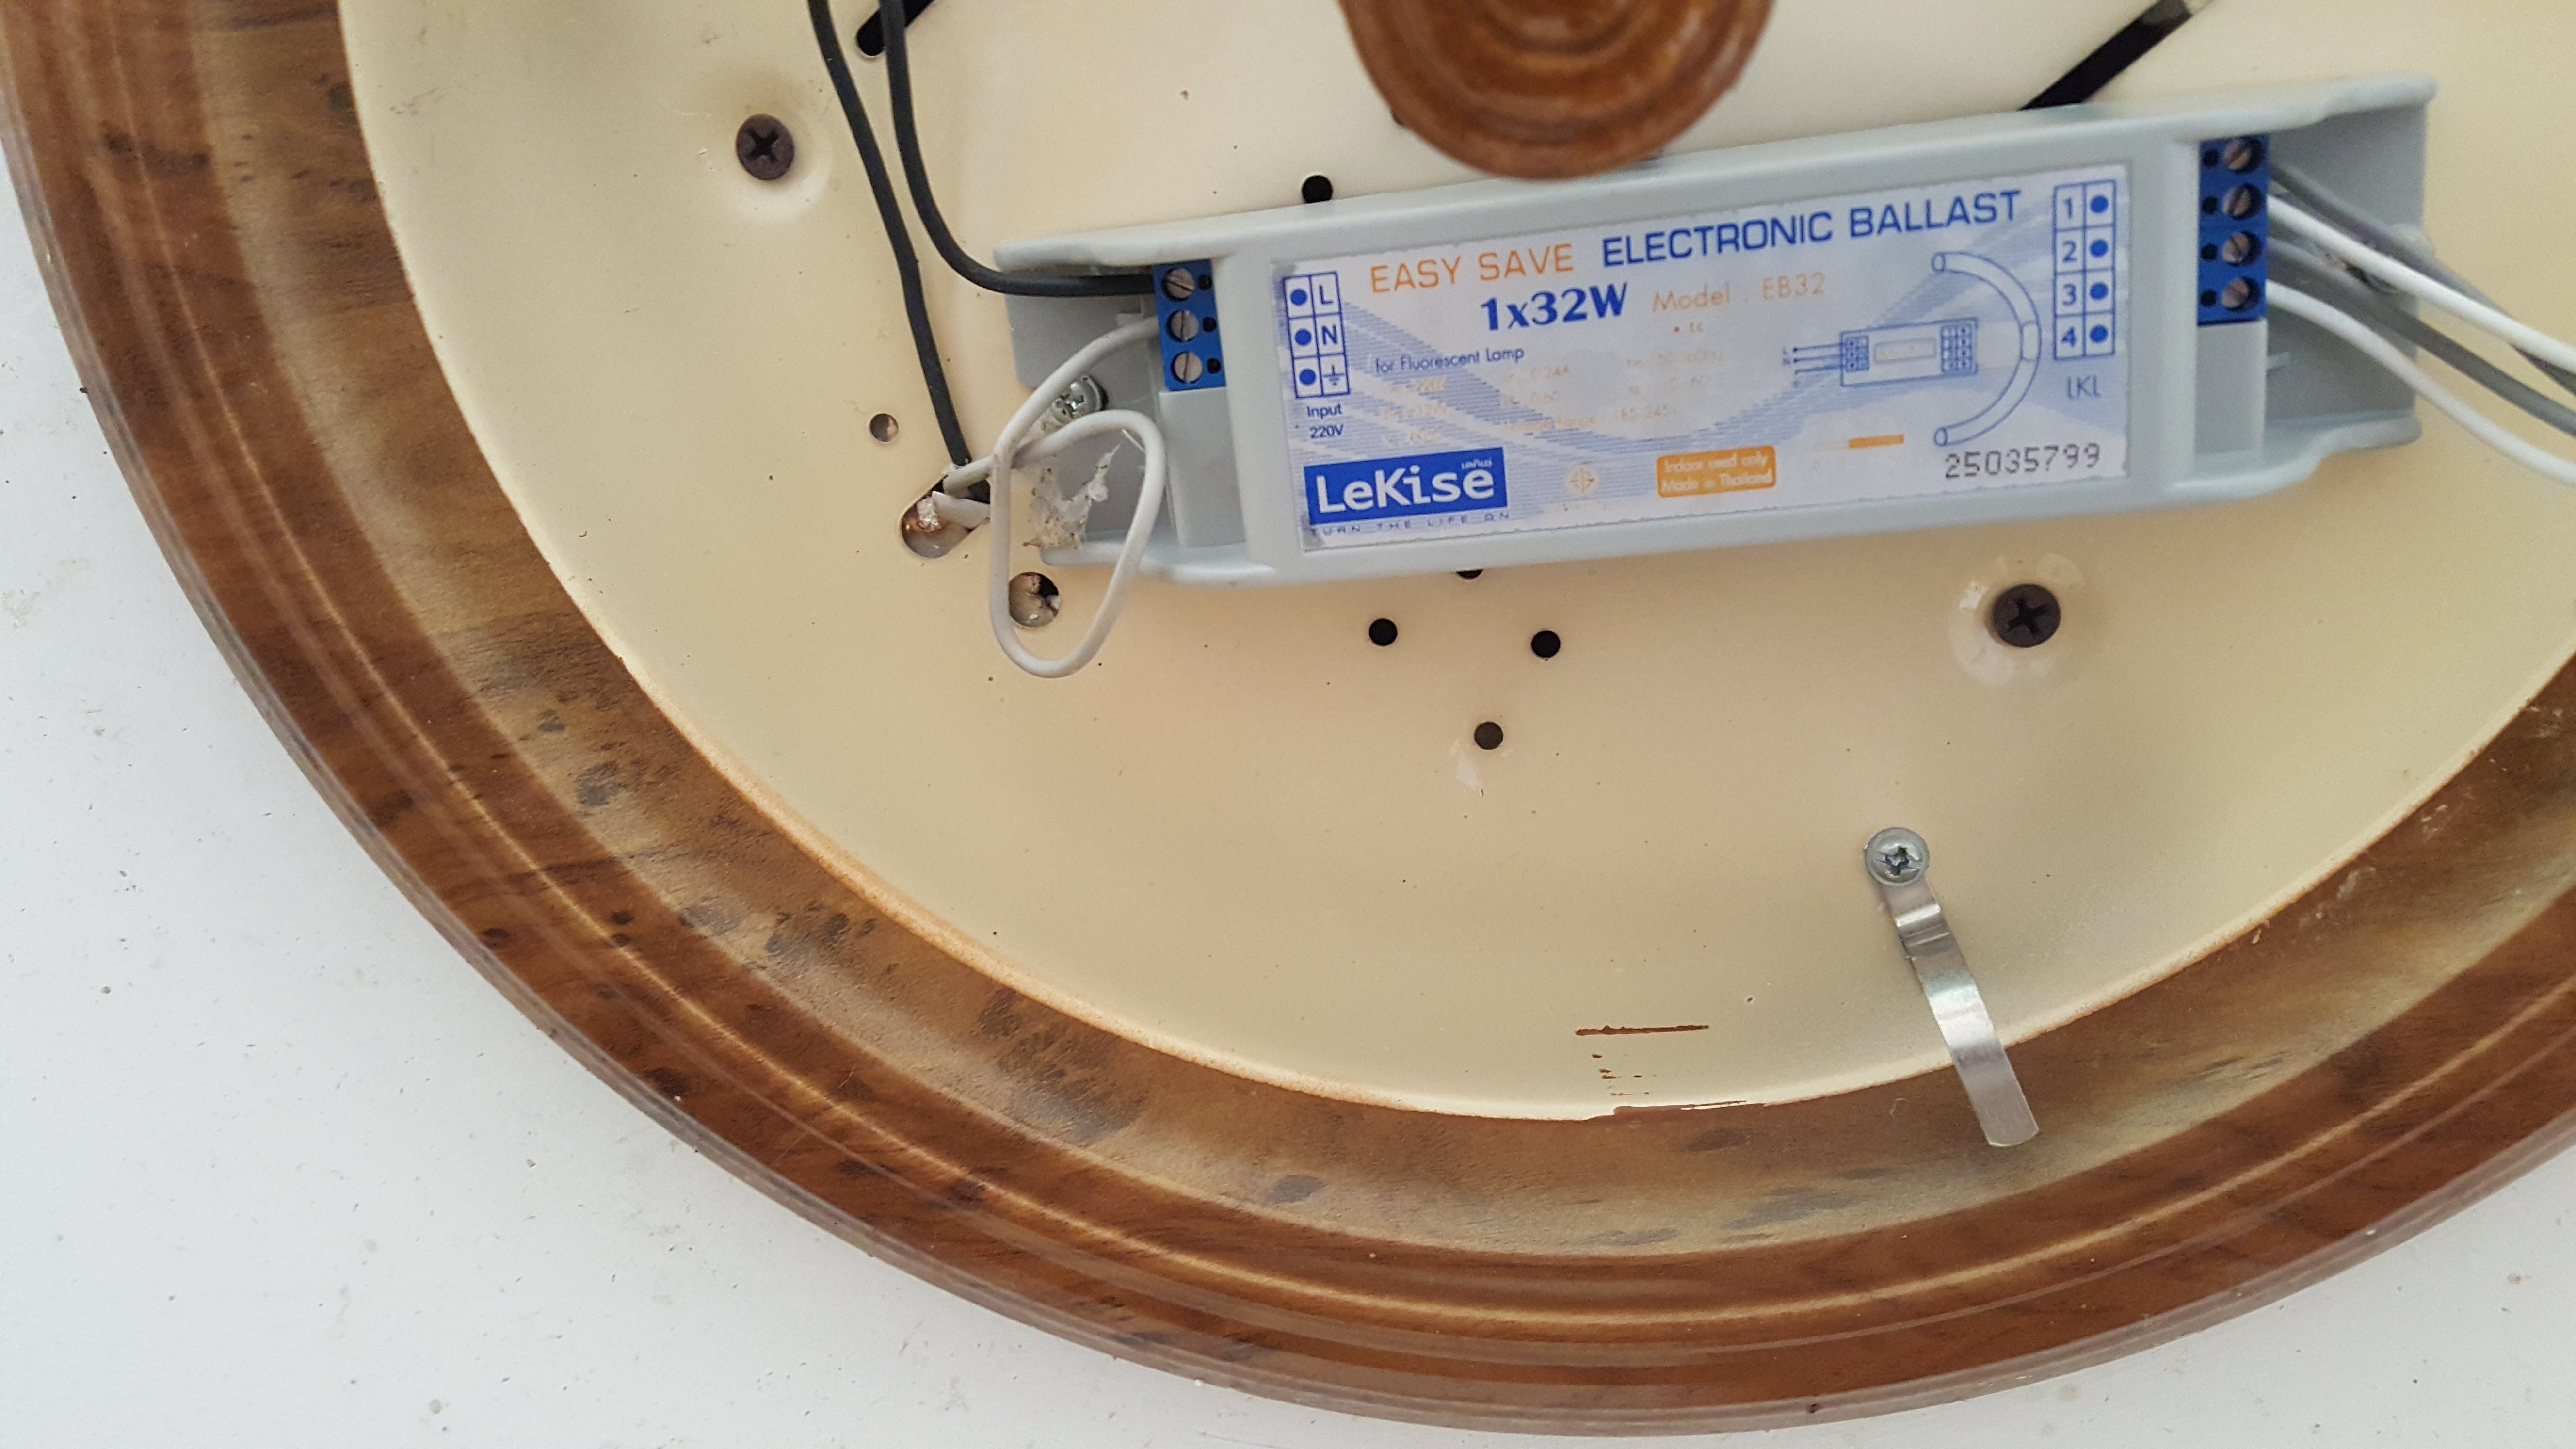
Fluorescent light fixtures are commonly found in kitchens, and the ballast is an essential component of these fixtures. If you have a fluorescent kitchen light, the steps for replacing the ballast are the same as outlined above. Just make sure to purchase a ballast that is compatible with fluorescent lights.Replacing a Ballast in a Fluorescent Light Fixture


Replacing a Ballast in a Fluorescent Light Fixture


For a more detailed guide, here are the steps to follow when replacing a ballast in a kitchen light fixture: Step 1: Turn off the power to the kitchen light fixture. Step 2: Remove the cover of the light fixture. Step 3: Locate and disconnect the wires from the ballast. Step 4: Remove the old ballast and replace it with a new one. Step 5: Connect the wires to the new ballast. Step 6: Replace the cover of the light fixture. Step 7: Turn the power back on and test the lights.Step-by-Step Guide for Replacing a Ballast in a Kitchen Light


Step-by-Step Guide for Replacing a Ballast in a Kitchen Light


:max_bytes(150000):strip_icc()/SPR-ballast-gone-ballistic-1152461-hero-f0a1c039d31a4d9aa074ed25f4675762.jpg)
While replacing a ballast in a kitchen light is a relatively simple process, there are a few things you should keep in mind: - Make sure to turn off the power before beginning any work on your light fixture. - Take note of how the wires are connected to the ballast before disconnecting them. - Purchase a replacement ballast that is compatible with your specific light fixture. - Dispose of the old ballast properly according to your local regulations.Replacing a Ballast in a Kitchen Light: What You Need to Know


Replacing a Ballast in a Kitchen Light: What You Need to Know
If you're experiencing issues with your kitchen light, such as flickering lights or a complete outage, it may be due to a faulty ballast. By following the steps outlined in this article, you can easily replace the ballast and get your kitchen light working properly again.How to Replace a Faulty Ballast in Your Kitchen Light


How to Replace a Faulty Ballast in Your Kitchen Light


While replacing a ballast in a kitchen light is a simple task, there are a few mistakes that can be easily avoided: - Forgetting to turn off the power before beginning work on the light fixture. - Not properly disposing of the old ballast. - Purchasing the wrong replacement ballast for your specific light fixture. - Not taking note of how the wires are connected before disconnecting them.Replacing a Ballast in a Kitchen Light: Common Mistakes to Avoid
Replacing a Ballast in a Kitchen Light: Common Mistakes to Avoid


Replacing a ballast in a kitchen light is a DIY project that can be easily completed with just a few tools and some basic knowledge. By following the steps outlined in this article, you can save money on labor costs and have the satisfaction of completing the project on your own.DIY: How to Replace a Ballast in a Kitchen Light Fixture


DIY: How to Replace a Ballast in a Kitchen Light Fixture
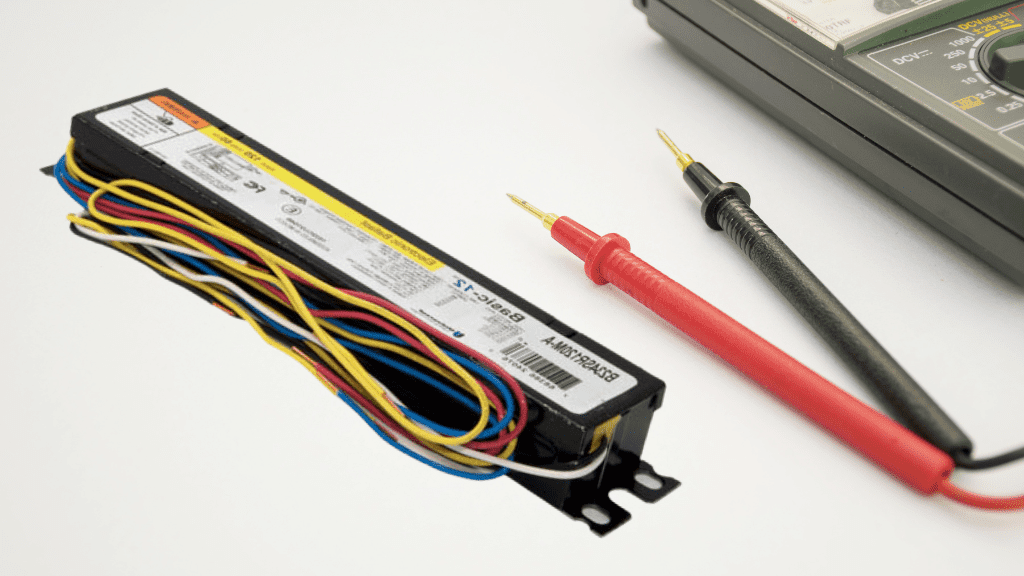
Here are a few tips and tricks to keep in mind when replacing a ballast in your kitchen light fixture: - Take a photo of the old ballast before removing it to use as a reference when connecting the wires to the new ballast. - If possible, purchase a ballast with a warranty to ensure its quality. - If you're unsure about any step, refer to the manufacturer's instructions or consult a professional electrician. Now that you know how to replace a ballast in a kitchen light fixture, you can easily tackle this task yourself and have your kitchen lights working like new again. Remember to always prioritize safety and consult a professional if you are unsure about any step. Happy DIY-ing!Replacing a Ballast in a Kitchen Light: Tips and Tricks


Replacing a Ballast in a Kitchen Light: Tips and Tricks


Why Ballast Replacement is Essential for Kitchen Light Maintenance

What is a Ballast?
 Before delving into the importance of replacing ballast in kitchen lights, let's first understand what a ballast is. A ballast is a device that regulates the flow of electricity to fluorescent and HID (high-intensity discharge) lights. It helps to start and control the flow of electricity, ensuring that the light bulbs do not overheat and burn out. Essentially, the ballast acts as a safety mechanism for your light fixtures.
Signs of a Failing Ballast
 Now that we know what a ballast is, it's important to know when it's time to replace it. There are a few tell-tale signs that your ballast may be failing. One of the most common signs is flickering or buzzing lights. This could indicate that the ballast is not functioning properly and is not providing a consistent flow of electricity to the bulbs. Another sign is if your lights are taking longer than usual to turn on. This could mean that the ballast is not properly starting the flow of electricity. If you notice any of these signs, it's important to replace your ballast as soon as possible.
The Importance of Replacing Ballast in Kitchen Lights
:max_bytes(150000):strip_icc()/SPR-ballast-gone-ballistic-1152461-hero-f0a1c039d31a4d9aa074ed25f4675762.jpg) Now, you may be wondering why it's important to replace the ballast specifically in your kitchen lights. Well, the kitchen is often one of the most used rooms in a household, and the lights are constantly being turned on and off. This frequent use can put a strain on the ballast, causing it to wear out faster. Additionally, kitchen lights are often exposed to heat and moisture, which can also contribute to the deterioration of the ballast. By replacing the ballast in your kitchen lights, you can ensure that they continue to function properly and efficiently.
In conclusion
, replacing ballast in kitchen lights is an essential part of maintaining your home. By understanding what a ballast is, recognizing the signs of a failing ballast, and knowing the importance of replacing it in your kitchen lights, you can ensure that your home is well-lit and safe. Don't wait until your lights start flickering or failing to take action. Stay ahead of the game and replace your ballast regularly for a well-maintained and functional kitchen.
Now, you may be wondering why it's important to replace the ballast specifically in your kitchen lights. Well, the kitchen is often one of the most used rooms in a household, and the lights are constantly being turned on and off. This frequent use can put a strain on the ballast, causing it to wear out faster. Additionally, kitchen lights are often exposed to heat and moisture, which can also contribute to the deterioration of the ballast. By replacing the ballast in your kitchen lights, you can ensure that they continue to function properly and efficiently.
In conclusion
, replacing ballast in kitchen lights is an essential part of maintaining your home. By understanding what a ballast is, recognizing the signs of a failing ballast, and knowing the importance of replacing it in your kitchen lights, you can ensure that your home is well-lit and safe. Don't wait until your lights start flickering or failing to take action. Stay ahead of the game and replace your ballast regularly for a well-maintained and functional kitchen.