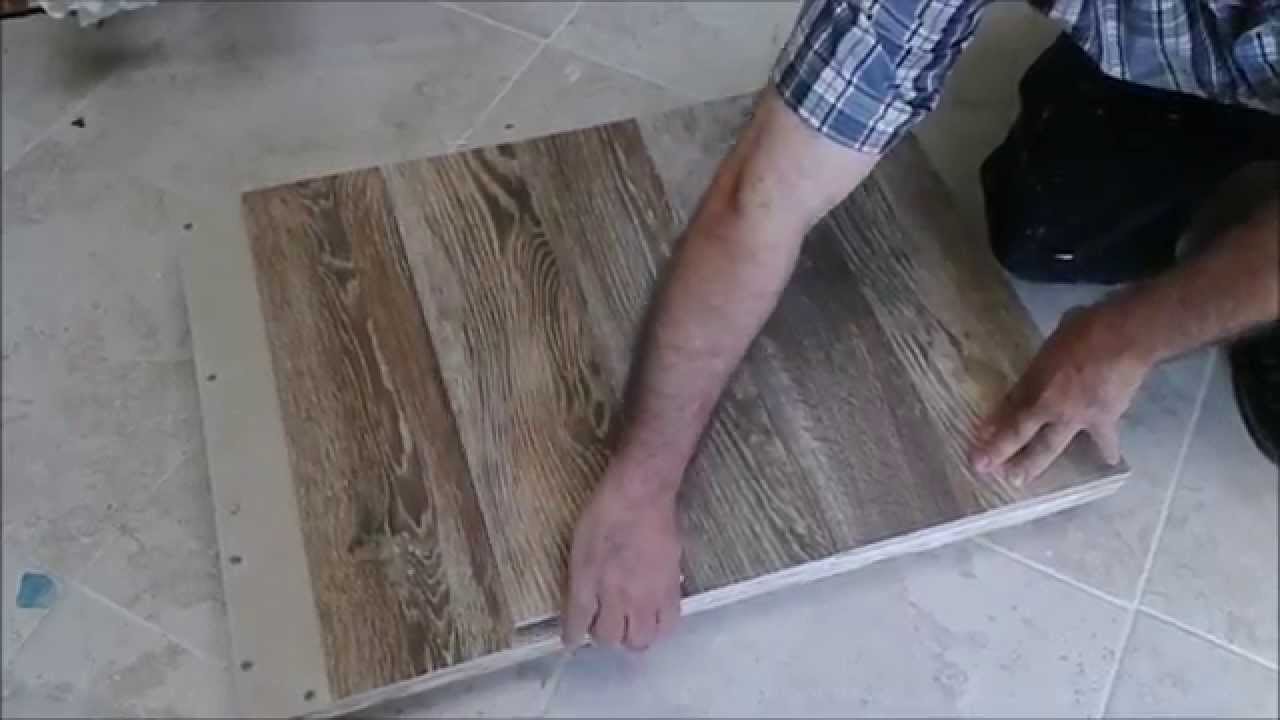
If you've noticed a cracked or damaged tile in your kitchen sink, don't panic. Replacing a tile in your kitchen sink is actually a relatively simple task that you can do yourself with the right tools and materials. To start, you'll need to gather a few supplies before getting started. These include a replacement tile, tile adhesive, a putty knife, a hammer, and a tile cutter (if necessary). Make sure to also wear protective gear, such as gloves and safety glasses. Once you have everything you need, follow these steps to successfully replace a tile in your kitchen sink:1. How to Replace a Tile in a Kitchen Sink


1. How to Replace a Tile in a Kitchen Sink


Replacing a tile in your kitchen sink is a great DIY project that can save you time and money. It's also a great way to put your handyman skills to the test. Start by removing the damaged tile using a putty knife and hammer. Be gentle to avoid damaging the surrounding tiles. Once the old tile is removed, clean the area thoroughly and let it dry. Next, apply a layer of tile adhesive to the back of the replacement tile and carefully place it in the designated spot. Use spacers to ensure the tile is aligned with the surrounding tiles. Let the adhesive dry completely before removing the spacers.2. DIY Kitchen Sink Tile Replacement


2. DIY Kitchen Sink Tile Replacement


If you're new to DIY projects, replacing a tile in your kitchen sink may seem intimidating. But with these step-by-step instructions, you'll have it done in no time. Step 1: Remove the damaged tile with a putty knife and hammer. Step 2: Clean the area and let it dry completely. Step 3: Apply tile adhesive to the back of the replacement tile. Step 4: Carefully place the tile in the designated spot, using spacers to ensure proper alignment. Step 5: Let the adhesive dry completely before removing the spacers.3. Step-by-Step Guide for Replacing Tile in a Kitchen Sink


3. Step-by-Step Guide for Replacing Tile in a Kitchen Sink


Replacing a tile in your kitchen sink may seem like a daunting task, but with these helpful tips, you'll have it done with ease: - Use a tile cutter to ensure the new tile fits perfectly in the designated spot. - Choose a tile adhesive that is specifically designed for kitchen sinks to ensure a strong bond. - Wear protective gear, such as gloves and safety glasses, to avoid any accidents. - Take your time and be gentle to avoid damaging the surrounding tiles.4. Tips for Successfully Replacing Tile in a Kitchen Sink


4. Tips for Successfully Replacing Tile in a Kitchen Sink


While replacing a tile in your kitchen sink may seem like a straightforward task, there are a few common mistakes that can easily be avoided: - Using the wrong type of tile adhesive can result in a weak bond and cause the tile to come loose over time. - Not cleaning the area properly can also result in a weak bond, so make sure to remove any debris before applying the adhesive. - Applying too much adhesive can cause it to seep out from under the tile and create a messy appearance. Use just enough to ensure a strong bond.5. Common Mistakes to Avoid When Replacing Tile in a Kitchen Sink


5. Common Mistakes to Avoid When Replacing Tile in a Kitchen Sink


To successfully replace a tile in your kitchen sink, you'll need the following tools and materials: - Replacement tile - Tile adhesive - Putty knife - Hammer - Tile cutter (if necessary) - Spacers - Gloves and safety glasses6. Tools and Materials Needed for Replacing Tile in a Kitchen Sink


6. Tools and Materials Needed for Replacing Tile in a Kitchen Sink


The cost of replacing a tile in your kitchen sink will vary depending on the type of tile you choose, as well as the cost of any necessary tools and materials. On average, you can expect to spend between $20 to $50 for a replacement tile, and an additional $10 to $20 for adhesive and other supplies. If you choose to hire a professional to replace the tile for you, expect to pay anywhere from $100 to $300 for labor and materials.7. Cost Breakdown for Replacing Tile in a Kitchen Sink


7. Cost Breakdown for Replacing Tile in a Kitchen Sink


When choosing a replacement tile for your kitchen sink, it's important to consider the overall design and aesthetic of your kitchen. You'll want to choose a tile that complements the rest of the space and blends in seamlessly with the surrounding tiles. It's also important to choose a tile that is specifically designed for kitchen sinks, as they are more durable and resistant to water and heat.8. How to Choose the Right Replacement Tile for Your Kitchen Sink


8. How to Choose the Right Replacement Tile for Your Kitchen Sink


Deciding whether to hire a professional or tackle the project yourself ultimately depends on your level of experience and comfort with DIY projects. If you're confident in your abilities and have the necessary tools and materials, DIY may be the best option for you. However, if you're unsure or don't have the time or resources to do it yourself, hiring a professional can ensure a flawless and hassle-free replacement.9. Professional vs. DIY: Which is the Best Option for Replacing Tile in a Kitchen Sink?


9. Professional vs. DIY: Which is the Best Option for Replacing Tile in a Kitchen Sink?


Still not convinced that replacing a tile in your kitchen sink can make a big difference? Take a look at these before and after photos for some inspiration: - Before: A cracked and outdated tile in a kitchen sink. - After: A sleek and modern tile that instantly updates the look of the kitchen sink. With these tips and guidelines, you'll be able to successfully replace a tile in your kitchen sink and transform the look of your space. So don't put it off any longer – get started on your DIY project today!10. Before and After: Inspiring Kitchen Sink Tile Replacement Transformations


10. Before and After: Inspiring Kitchen Sink Tile Replacement Transformations


Why You Should Consider Replacing the Tile in Your Kitchen Sink

The Importance of a Well-Designed Kitchen
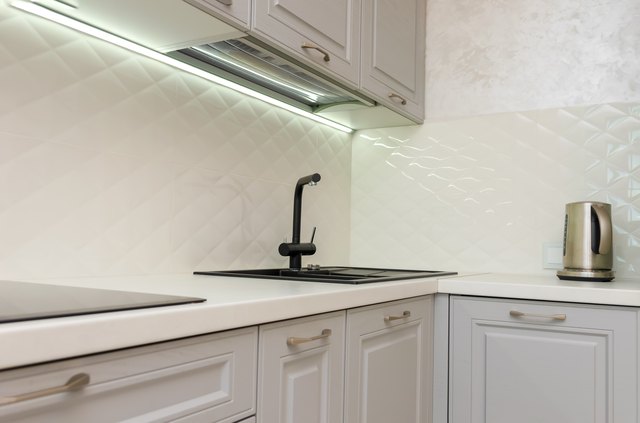
 A kitchen is often considered the heart of a home. It is where meals are prepared and memories are made. As such, it is important to have a functional and aesthetically pleasing kitchen. This includes having a well-designed kitchen sink. However, over time, the tile in your kitchen sink may become worn, cracked, or outdated. This can not only affect the overall look of your kitchen, but it can also create potential problems such as water damage and mold growth. Therefore, it is important to consider replacing the tile in your kitchen sink to maintain a functional and beautiful kitchen.
The Benefits of Replacing Your Kitchen Sink Tile
 Replacing the tile in your kitchen sink has numerous benefits. First and foremost, it can greatly enhance the appearance of your kitchen. By choosing
modern and stylish tile
, you can give your kitchen a fresh and updated look. This can also increase the value of your home, making it more attractive to potential buyers. Additionally, replacing the tile can also prevent potential problems such as water damage and mold growth. The grout between the tiles can become cracked and allow water to seep through, causing damage to the underlying structure. By replacing the tile, you can prevent these issues and save yourself from costly repairs in the future.
Replacing the tile in your kitchen sink has numerous benefits. First and foremost, it can greatly enhance the appearance of your kitchen. By choosing
modern and stylish tile
, you can give your kitchen a fresh and updated look. This can also increase the value of your home, making it more attractive to potential buyers. Additionally, replacing the tile can also prevent potential problems such as water damage and mold growth. The grout between the tiles can become cracked and allow water to seep through, causing damage to the underlying structure. By replacing the tile, you can prevent these issues and save yourself from costly repairs in the future.
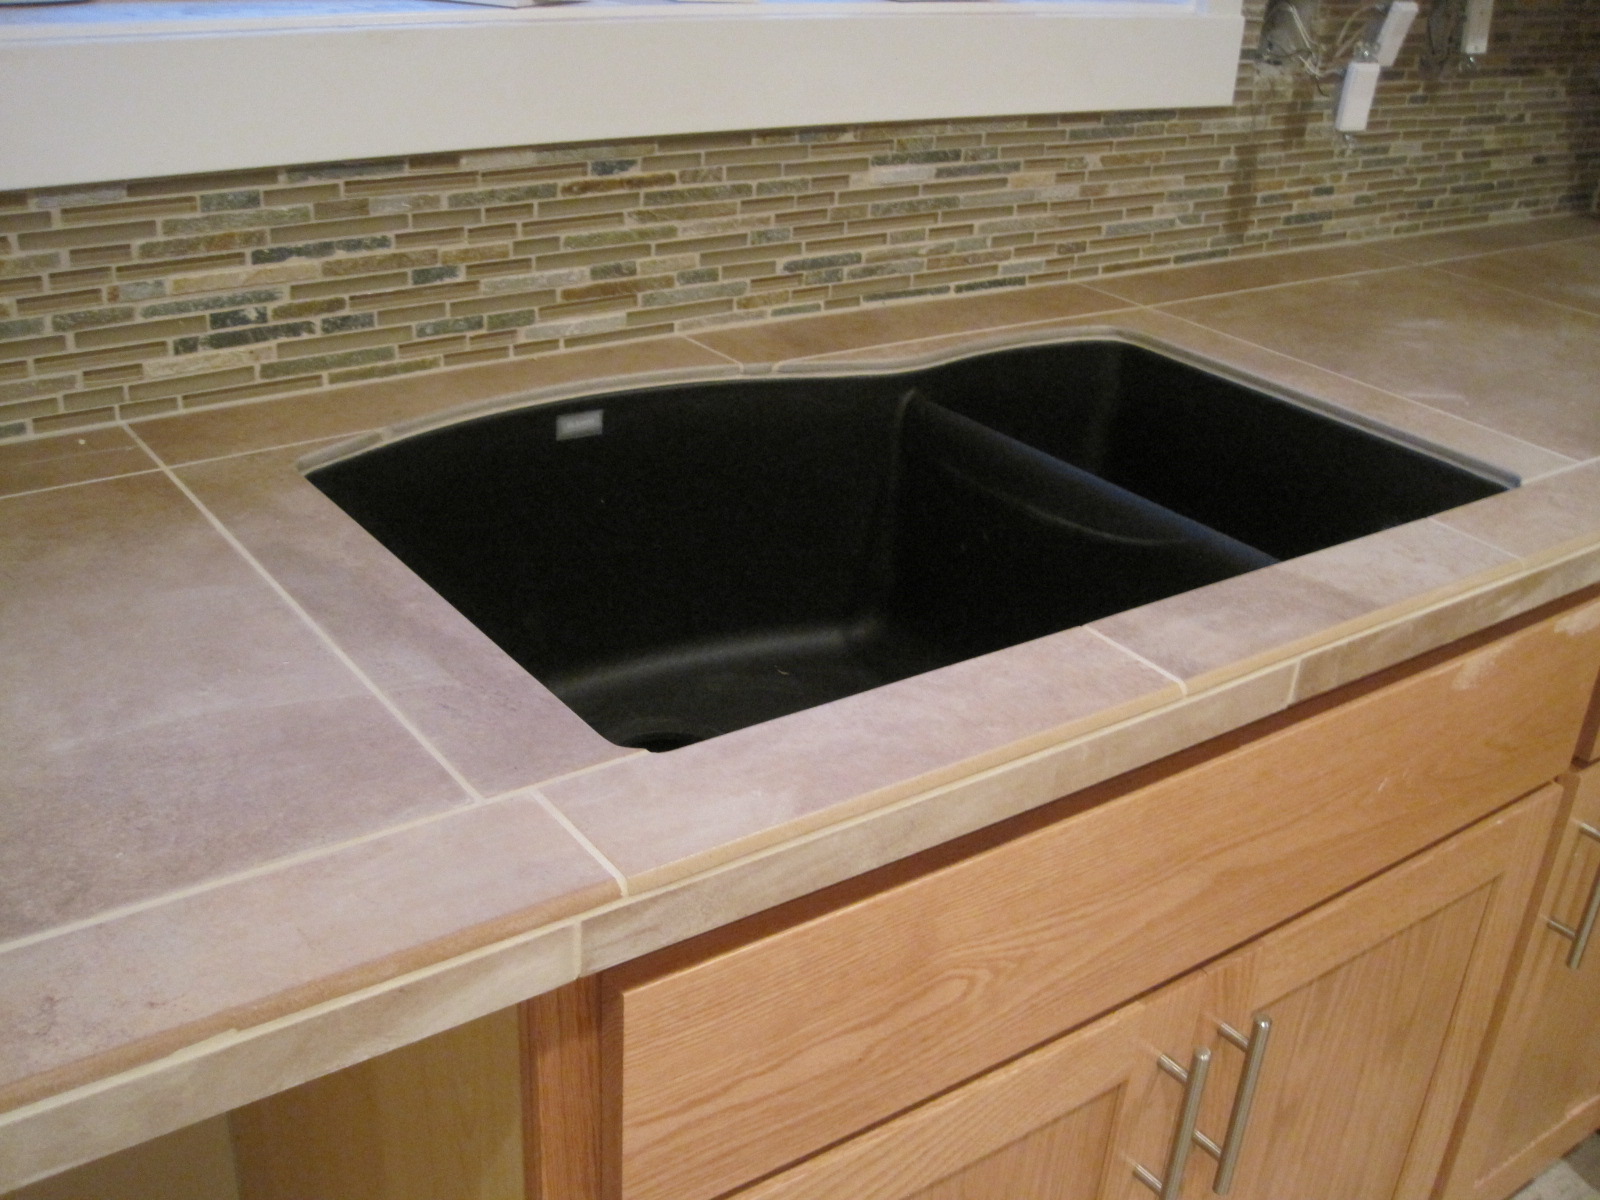
The Process of Replacing Kitchen Sink Tile
 Replacing the tile in your kitchen sink may seem like a daunting task, but it can be a relatively straightforward process. First, you will need to remove the old tile. This can be done by chiseling away the grout and prying off the tiles with a putty knife. Once the old tile is removed, you will need to clean and prep the surface before installing the new tile. This includes removing any remaining grout and ensuring the surface is smooth and free of debris. Then, you can begin laying the new tile, making sure to use
high-quality adhesive
to ensure a secure bond. Finally, you will need to grout the new tile and allow it to dry before using your sink again.
Replacing the tile in your kitchen sink may seem like a daunting task, but it can be a relatively straightforward process. First, you will need to remove the old tile. This can be done by chiseling away the grout and prying off the tiles with a putty knife. Once the old tile is removed, you will need to clean and prep the surface before installing the new tile. This includes removing any remaining grout and ensuring the surface is smooth and free of debris. Then, you can begin laying the new tile, making sure to use
high-quality adhesive
to ensure a secure bond. Finally, you will need to grout the new tile and allow it to dry before using your sink again.
Final Thoughts
 Replacing the tile in your kitchen sink may seem like a small task, but it can have a big impact on the overall look and functionality of your kitchen. By choosing modern and high-quality tile, you can enhance the appearance of your kitchen and prevent potential problems. So if your kitchen sink tile is worn or outdated, consider replacing it to create a beautiful and functional space in your home.