Installing a kitchen sink drain may seem like a daunting task, but with the right tools and knowledge, it can be a simple DIY project. A properly installed kitchen sink drain ensures efficient drainage and prevents clogs, making it an essential part of your kitchen plumbing. In this article, we will guide you through the process of installing a kitchen sink drain step-by-step.
How to Install a Kitchen Sink Drain


How to Install a Kitchen Sink Drain


:max_bytes(150000):strip_icc()/how-to-install-a-sink-drain-2718789-04-5715d67f5b7d41429d42bf705bb70e2c.jpg)
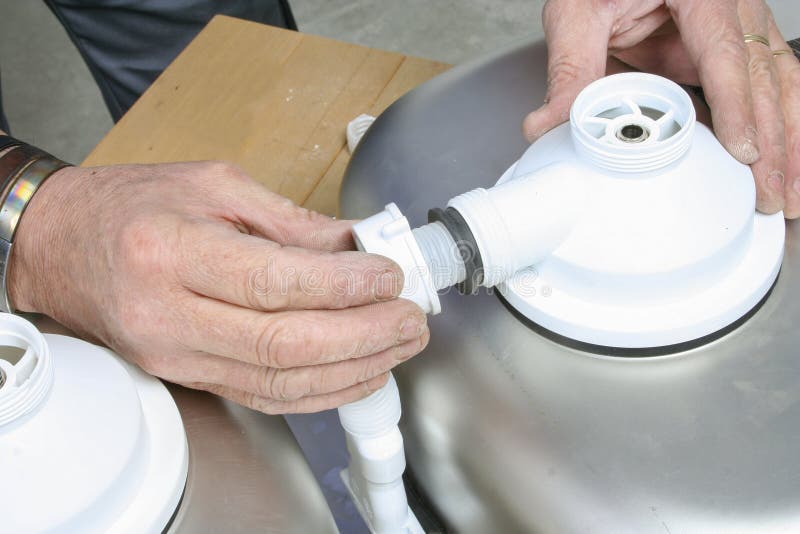
The first step in installing a kitchen sink drain is to install the drain basket. This is the part that sits inside the sink and collects food debris and other waste. To install the drain basket, start by placing a bead of plumber's putty around the bottom edge of the basket flange. Then, insert the basket into the sink's drain hole and press down firmly to create a seal.
How to Install a Kitchen Sink Drain Basket


How to Install a Kitchen Sink Drain Basket


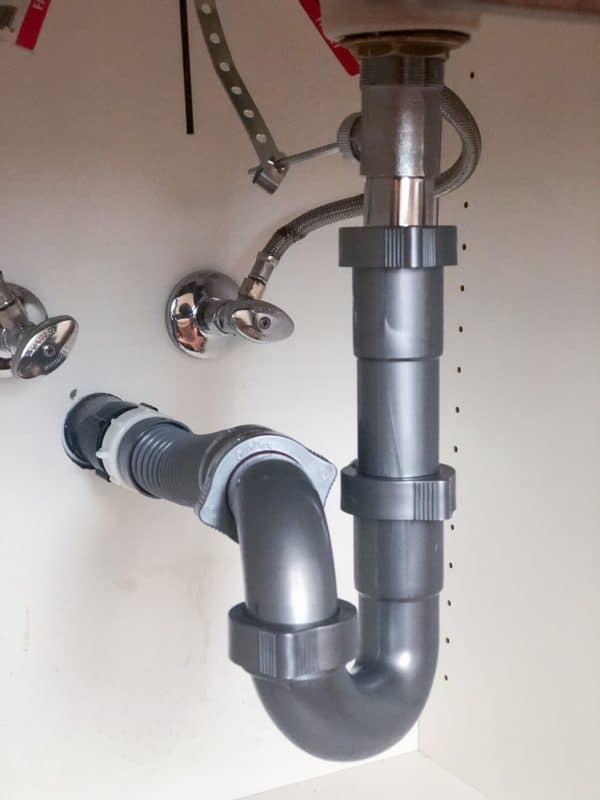
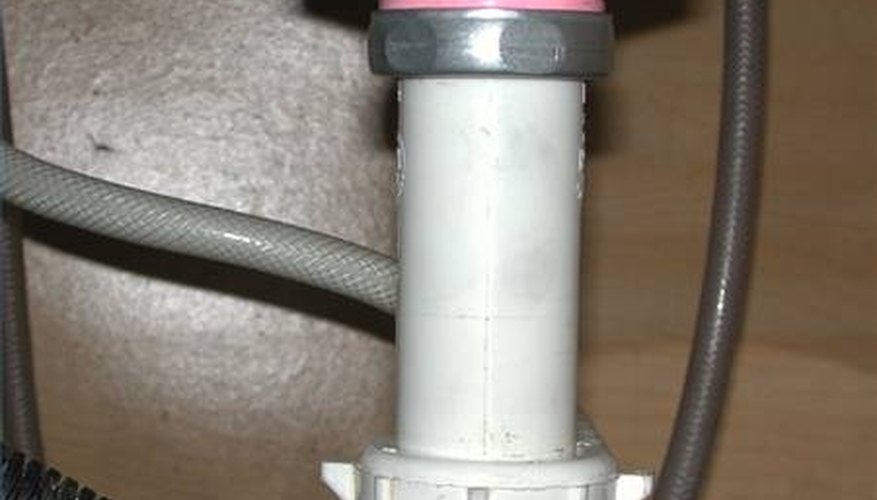
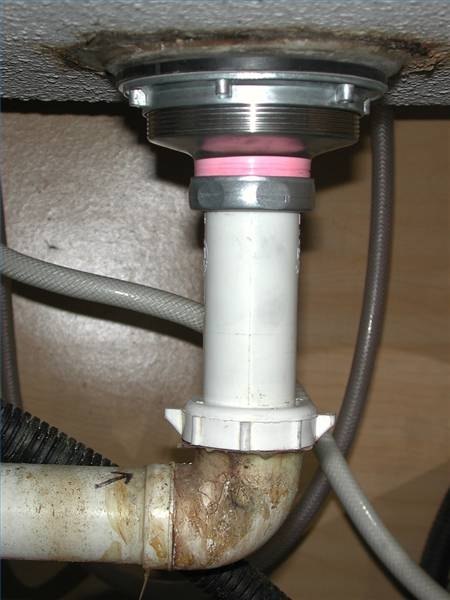
Installing a kitchen sink drain yourself can save you money and give you a sense of accomplishment. To install a kitchen sink drain, you will need a few tools such as a wrench, pliers, and a screwdriver. Begin by removing the old drain and cleaning the sink's drain hole. Then, follow the steps for installing the drain basket as mentioned above. Next, you will need to connect the drain pipes to the basket using slip nuts and washers. Finally, tighten all connections and test for any leaks.
DIY Kitchen Sink Drain Installation


DIY Kitchen Sink Drain Installation


/how-to-install-a-sink-drain-2718789-hero-24e898006ed94c9593a2a268b57989a3.jpg)
To help you visualize the process, here is a step-by-step guide for installing a kitchen sink drain:
Step 1: Gather all necessary tools and materials.
Step 2: Remove the old drain and clean the sink's drain hole.
Step 3: Apply plumber's putty to the bottom of the drain basket flange.
Step 4: Insert the drain basket into the sink's drain hole and press down firmly.
Step 5: Attach the drain pipes to the basket using slip nuts and washers.
Step 6: Tighten all connections and test for leaks.
Step-by-Step Guide for Installing a Kitchen Sink Drain


Step-by-Step Guide for Installing a Kitchen Sink Drain


To successfully install a kitchen sink drain, you will need the following tools:
Wrench: Used to tighten and loosen connections.
Pliers: Used to hold and manipulate pipes and fittings.
Screwdriver: Used to tighten screws on the drain basket and pipes.
Tools Needed for Installing a Kitchen Sink Drain


Tools Needed for Installing a Kitchen Sink Drain


While installing a kitchen sink drain may seem like a simple task, there are some common mistakes that can lead to issues down the line. Here are a few mistakes to avoid when installing a kitchen sink drain:
Using too much plumber's putty: Excess putty can squeeze out and create a messy, ineffective seal.
Not tightening connections enough: Loose connections can lead to leaks and poor drainage.
Not cleaning the sink's drain hole: Any debris or residue can prevent a proper seal.
Common Mistakes to Avoid When Installing a Kitchen Sink Drain


Common Mistakes to Avoid When Installing a Kitchen Sink Drain


To ensure a successful kitchen sink drain installation, here are a few tips to keep in mind:
Measure and plan: Measure and plan the placement of your drain pipes before beginning the installation.
Use Teflon tape: Wrapping Teflon tape around pipe threads can create a tighter seal and prevent leaks.
Test for leaks: Before finishing the installation, test for any leaks by running water through the drain.
Tips for a Successful Kitchen Sink Drain Installation

Tips for a Successful Kitchen Sink Drain Installation


If you are not confident in your DIY skills or simply don't have the time to install a kitchen sink drain, you can always hire a professional. Professional plumbers have the necessary skills and experience to install a kitchen sink drain efficiently and effectively. They also have access to specialized tools and can troubleshoot any issues that may arise during the installation process.
Professional Kitchen Sink Drain Installation Services


Professional Kitchen Sink Drain Installation Services


The cost of installing a kitchen sink drain can vary depending on factors such as the complexity of the installation and the location. On average, a DIY installation can cost anywhere from $50-$150, while hiring a professional can cost between $200-$500. It is always best to get quotes from multiple plumbers to find the best deal for your specific installation needs.
Cost of Installing a Kitchen Sink Drain

Cost of Installing a Kitchen Sink Drain

Even with proper installation, issues with a kitchen sink drain can still occur. Here are some common issues and how to troubleshoot them:
Leaking connections: If you notice a leak, try tightening the connection. If that doesn't work, you may need to replace the slip nuts and washers.
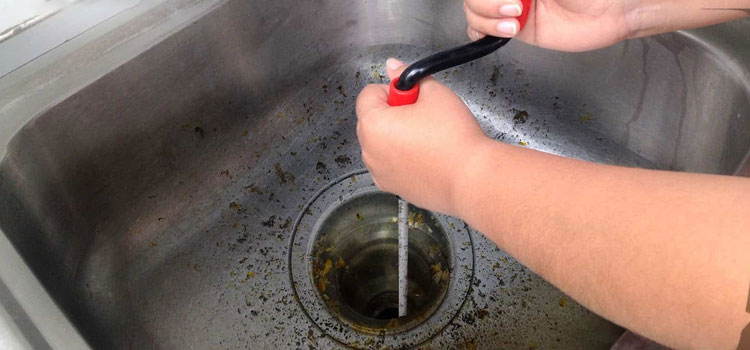
Slow draining: This could be caused by a clog in the drain pipes. Try using a plunger or a drain snake to clear the clog.
Unpleasant odors: A common cause of odors is a buildup of food debris and grease in the drain. Regularly cleaning your drain can prevent this issue.
How to Troubleshoot Common Issues with Kitchen Sink Drain Installation


How to Troubleshoot Common Issues with Kitchen Sink Drain Installation


Installing a Kitchen Sink Drain: A Step-by-Step Guide

Materials Needed:
:max_bytes(150000):strip_icc()/how-to-install-a-sink-drain-2718789-hero-24e898006ed94c9593a2a268b57989a3.jpg)
- Kitchen sink drain kit
- Plumber's putty
- Adjustable wrench
- Pipe wrench
- Pipe cutter
- Teflon tape
- PVC glue
- Rags or towels
Are you tired of dealing with a slow or clogged kitchen sink drain? Installing a new one may seem like a daunting task, but with the right tools and a little know-how, you can easily do it yourself. Not only will it improve the functionality of your sink, but it can also add a fresh and updated look to your kitchen. Follow these steps for a successful kitchen sink drain installation.
Step 1: Prepare the Sink and Drain

Before you begin the installation process, make sure to remove any old drain and clean the sink thoroughly. Use a putty knife to scrape away any old plumber's putty or debris around the drain hole. This will ensure a clean and smooth surface for the new drain to seal properly.
Step 2: Assemble the Drain Kit

Most kitchen sink drain kits come with all the necessary parts and hardware for installation. Start by assembling the pieces according to the manufacturer's instructions. This usually involves attaching the strainer basket, rubber gasket, and locknut to the bottom of the sink.
Step 3: Apply Plumber's Putty

Take a small amount of plumber's putty and roll it into a thin rope. Place it around the underside of the strainer basket to create a watertight seal. Make sure to evenly distribute the putty and press it firmly against the sink.
Step 4: Install the Drain

Place the strainer basket into the drain hole from above the sink. Underneath, secure it in place by twisting on the locknut with your hands. Use an adjustable wrench to tighten it further, if needed. Wipe away any excess putty that may have squeezed out from the sides.
Step 5: Connect the Drain Pipes
/how-to-install-a-sink-drain-2718789-hero-b5b99f72b5a24bb2ae8364e60539cece.jpg)
Using a pipe cutter, cut the drain pipe to the appropriate length for your sink. Wrap Teflon tape around the threads and connect the pipe to the strainer basket. Secure it in place with a pipe wrench. Repeat this step for the other end of the pipe, connecting it to the drain outlet under the sink.
Step 6: Apply PVC Glue

If your drain kit includes PVC pipes, use PVC glue to connect the pipes and fittings together. Apply the glue according to the manufacturer's instructions and hold the pieces together for a few seconds to allow it to set.
Step 7: Test the Drain

Before using your new sink, run some water to test the drain for any leaks. If you notice any water dripping, tighten the connections or add some more plumber's putty, if necessary.
Congratulations, you have successfully installed a kitchen sink drain! With a little patience and the right tools, you can easily tackle this DIY project and upgrade your kitchen. Now, you can enjoy a fully functioning sink and a clean and modern look in your kitchen.