Are you tired of unpleasant odors and clogged drains in your kitchen sink? It may be time to install a kitchen sink air vent. This simple addition to your plumbing system can make a big difference in the functionality and cleanliness of your kitchen. Here's a step-by-step guide for installing a kitchen sink air vent in your home.How to Install a Kitchen Sink Air Vent


How to Install a Kitchen Sink Air Vent


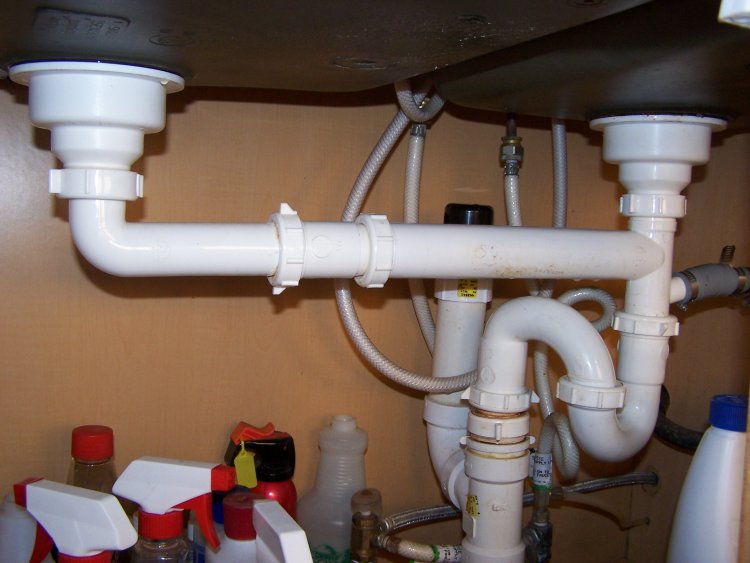
/sink-vent-installing-an-auto-vent-2718828-05-ca0dcb2915be457b9693ccd2655e6c21.jpg)
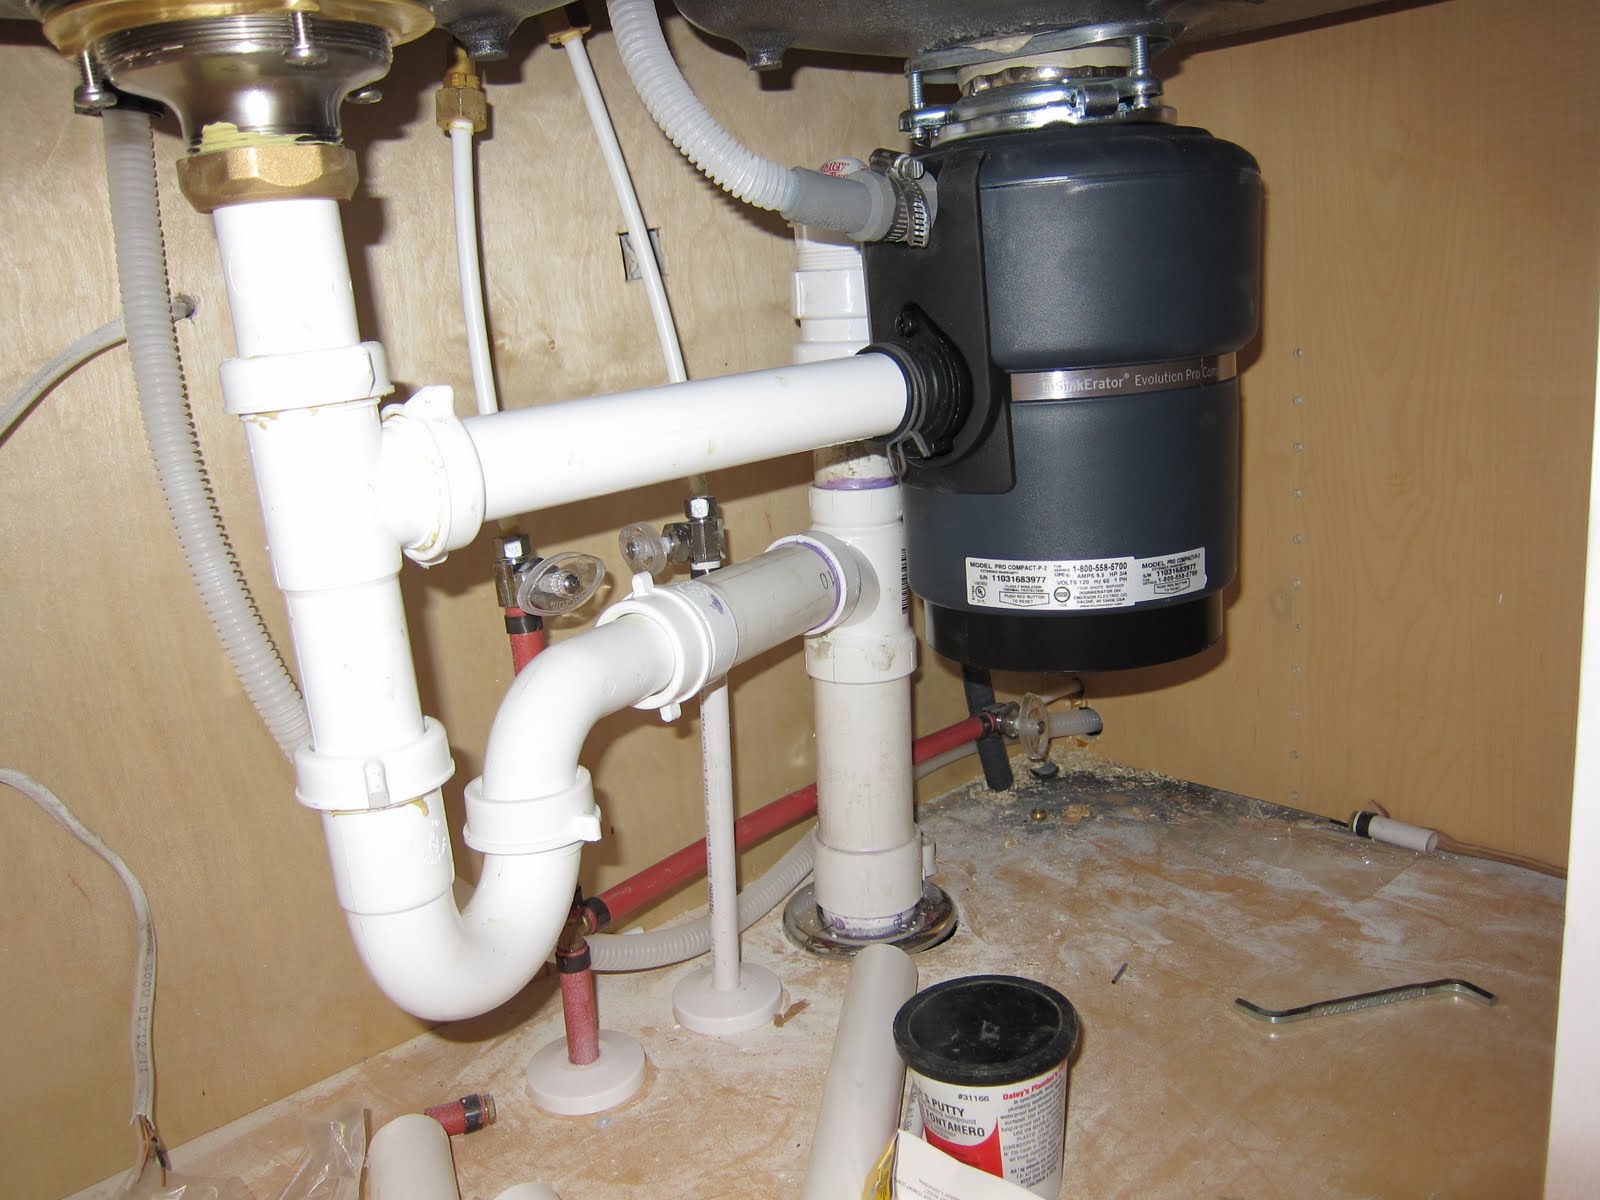
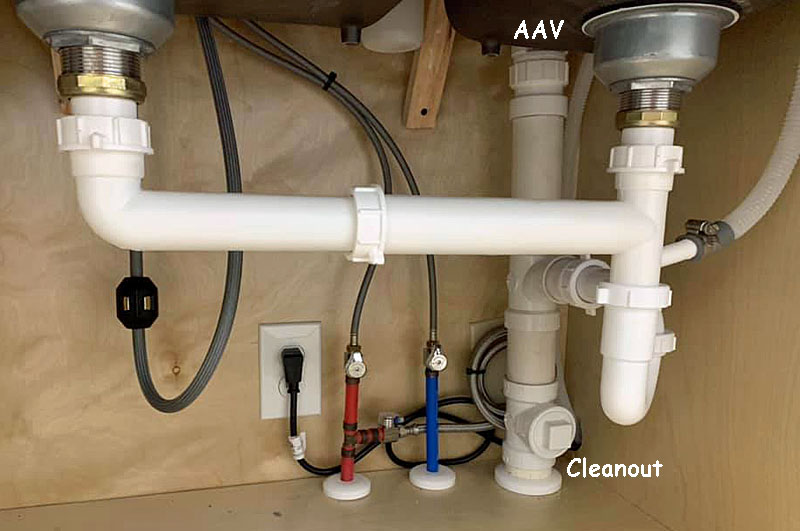
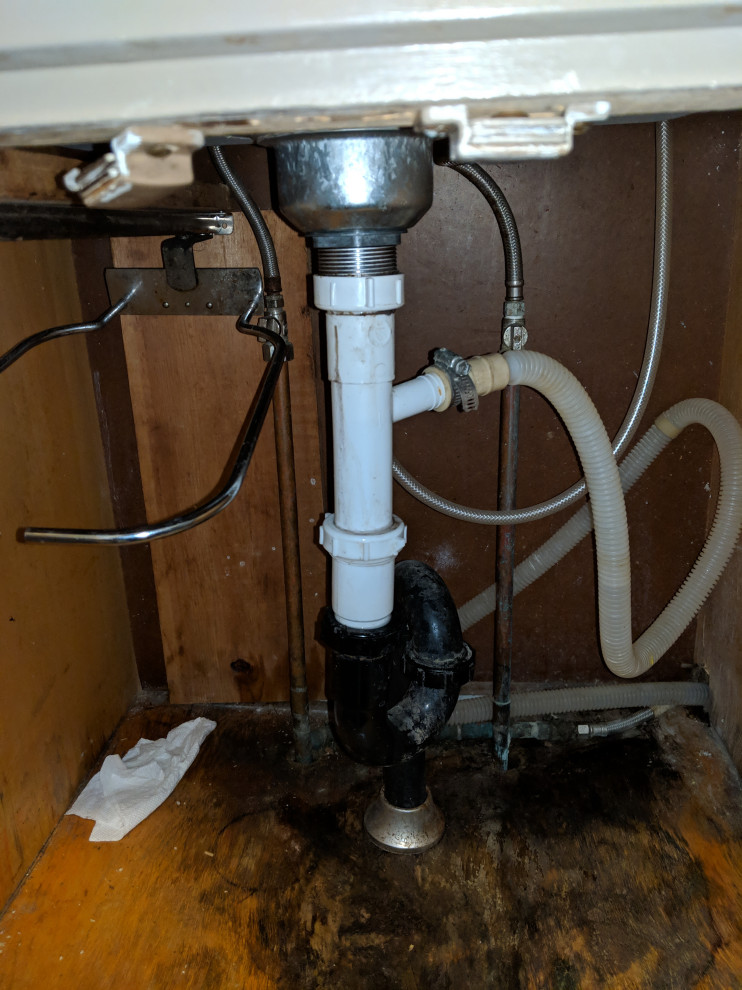
Before beginning the installation process, make sure you have all the necessary tools and materials. You will need a drill, a jigsaw, a pipe wrench, plumber's putty, and the specific air vent model you have chosen. Once you have everything ready, follow these steps: Step 1: Turn off the water supply to your kitchen sink and remove the sink drain. Step 2: Use a drill to create a hole in the back of your cabinet where the air vent will be installed. Step 3: Measure the length of the pipe from the drain to the wall and cut it to fit using a jigsaw. Step 4: Apply plumber's putty around the edges of the air vent and insert it into the hole you drilled. Step 5: Connect the pipe to the air vent and secure it with a pipe wrench. Step 6: Reattach the sink drain and turn the water supply back on. With these simple steps, you will have successfully installed a kitchen sink air vent in your home.Installing a Kitchen Sink Air Vent: A Step-by-Step Guide


Installing a Kitchen Sink Air Vent: A Step-by-Step Guide


If you're a handy person, you may be tempted to take on the installation process yourself. While it can save you some money, it's important to note that plumbing can be tricky and mistakes can lead to costly repairs. It's always best to consult a professional before attempting a DIY installation. However, if you're confident in your skills, make sure to follow the manufacturer's instructions carefully and double-check your work before turning on the water supply.DIY Kitchen Sink Air Vent Installation


DIY Kitchen Sink Air Vent Installation


Here are a few tips and tricks to keep in mind when installing a kitchen sink air vent: Tip 1: Choose a high-quality air vent that is compatible with your plumbing system to ensure proper functioning. Tip 2: Make sure to properly seal all connections with plumber's putty or a sealant to prevent leaks. Tip 3: Double-check the measurements before cutting any pipes to avoid having to redo the installation.Installing a Kitchen Sink Air Vent: Tips and Tricks

Installing a Kitchen Sink Air Vent: Tips and Tricks

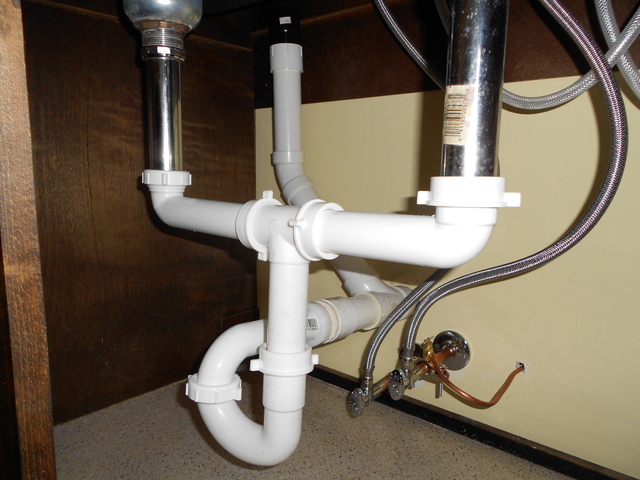
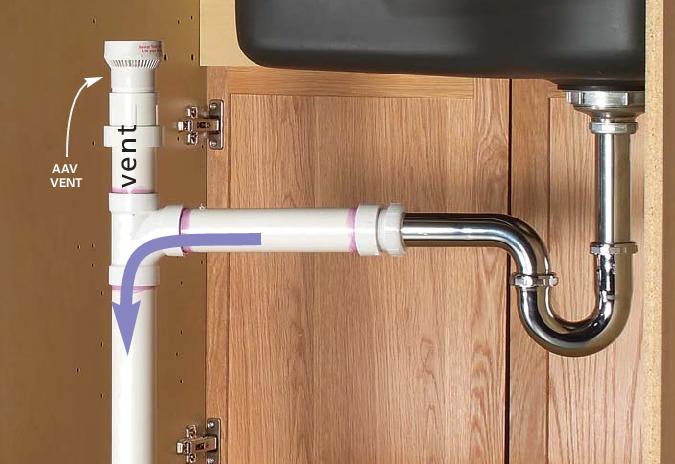
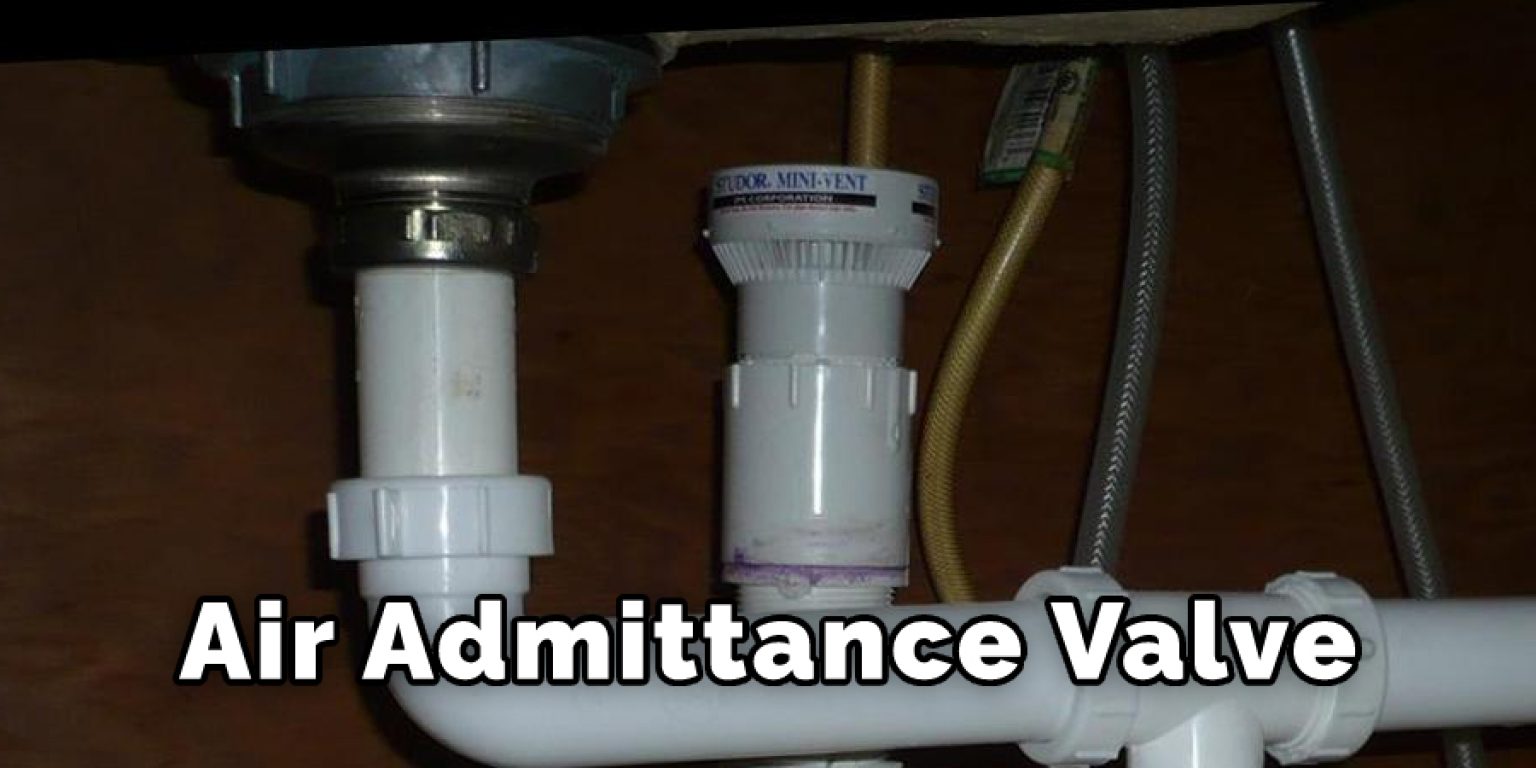
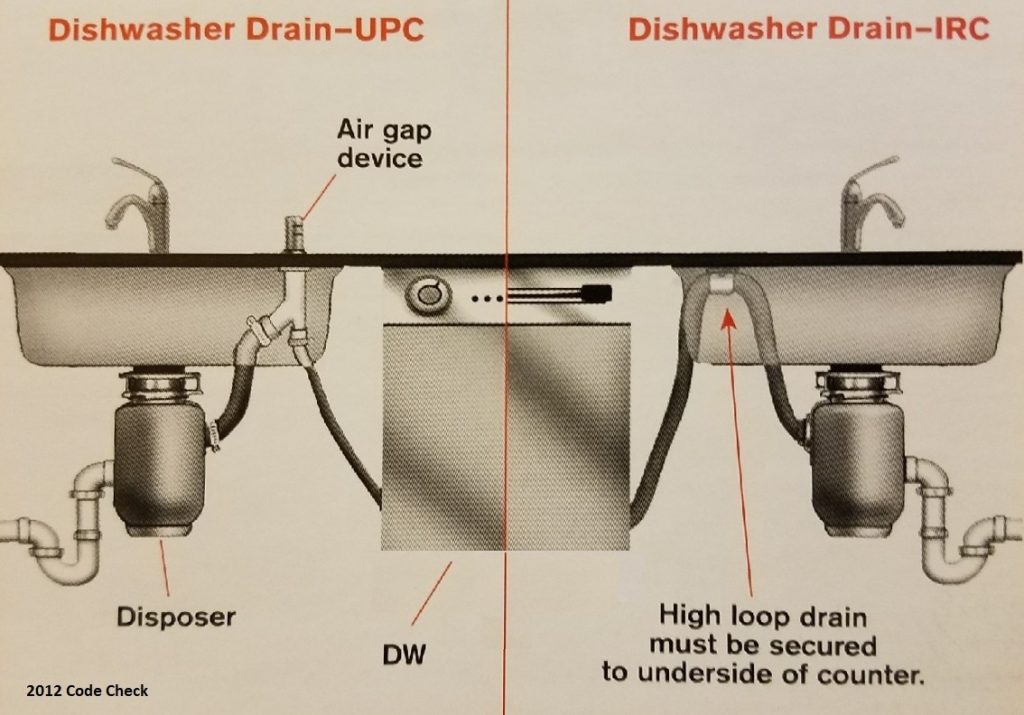
A kitchen sink air vent is an essential component of your plumbing system. It helps to regulate air pressure, preventing water from getting trapped in the pipes and causing clogs. It also allows for proper drainage and reduces the risk of sewer gas entering your home. Without a functioning air vent, you may experience slow draining, gurgling sounds, and unpleasant odors coming from your kitchen sink.The Importance of a Kitchen Sink Air Vent


The Importance of a Kitchen Sink Air Vent


When choosing a kitchen sink air vent, it's important to consider the specific needs of your home. Factors such as the size of your plumbing system, the layout of your kitchen, and the type of sink you have should all be taken into account. It's best to consult a professional plumber who can help you choose the right air vent for your home.Choosing the Right Kitchen Sink Air Vent for Your Home


Choosing the Right Kitchen Sink Air Vent for Your Home
While installing a kitchen sink air vent may seem like a simple task, there are some common mistakes that can be easily avoided: Mistake 1: Not turning off the water supply before beginning the installation process. Mistake 2: Choosing the wrong size or type of air vent for your plumbing system. Mistake 3: Forgetting to properly seal all connections, leading to leaks and potential water damage.Common Mistakes to Avoid When Installing a Kitchen Sink Air Vent


Common Mistakes to Avoid When Installing a Kitchen Sink Air Vent


As mentioned earlier, you will need a few tools and materials to successfully install a kitchen sink air vent. Here's a list to help you get prepared: Tools: Drill, jigsaw, pipe wrench. Materials: Plumber's putty, sealant, and the specific air vent model you have chosen.Tools and Materials Needed for Installing a Kitchen Sink Air Vent


Tools and Materials Needed for Installing a Kitchen Sink Air Vent

If you notice any issues with your kitchen sink air vent, such as slow draining or foul odors, it's important to address them promptly. Here are a few troubleshooting steps you can take: Step 1: Check for any clogs in the pipes and remove them if necessary. Step 2: Inspect the air vent for any damage or blockages and clean it out if needed. Step 3: If the issue persists, consult a professional plumber for further assistance.How to Troubleshoot Common Issues with Kitchen Sink Air Vents


How to Troubleshoot Common Issues with Kitchen Sink Air Vents


When it comes to installing a kitchen sink air vent, it's important to weigh the pros and cons of hiring a professional or doing it yourself. While hiring a professional can ensure a proper and efficient installation, it may also come at a higher cost. On the other hand, a DIY installation can save you money, but it also comes with the risk of making mistakes that could lead to further expenses. Ultimately, the decision depends on your personal skills and budget.Professional vs. DIY Kitchen Sink Air Vent Installation: Which is Right for You?

Professional vs. DIY Kitchen Sink Air Vent Installation: Which is Right for You?
Why Installing a Kitchen Sink Air Vent is Essential for Your House

What is a Kitchen Sink Air Vent?
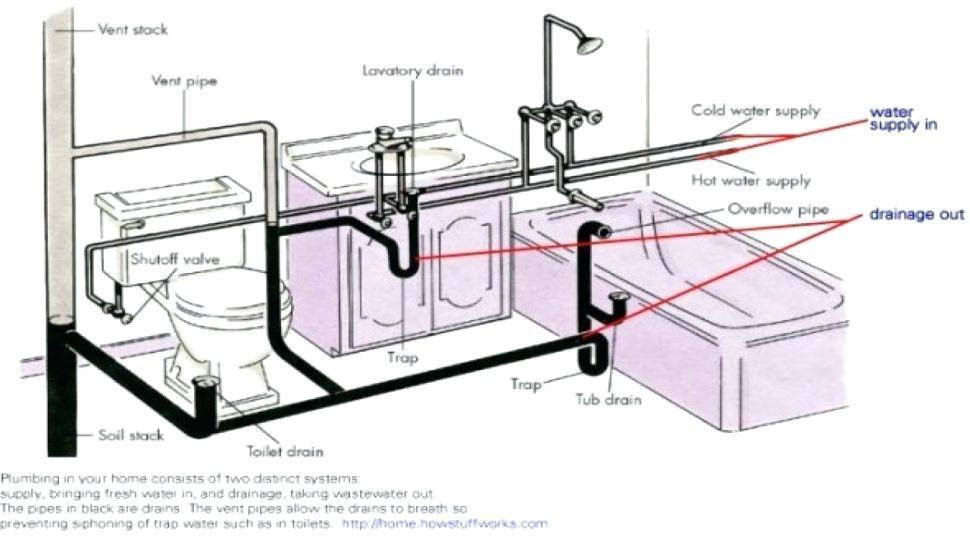
 A kitchen sink air vent is a small, inconspicuous device that is installed in your kitchen sink's drain line. It's designed to allow air to flow into the plumbing system, preventing air pressure from building up and causing issues with water flow. Essentially, it helps to equalize the pressure and keep your sink draining smoothly.
The Benefits of Installing a Kitchen Sink Air Vent
 Installing a kitchen sink air vent may seem like a small and insignificant task when it comes to house design, but it can actually have a big impact on the functionality and longevity of your plumbing system. Here are some of the top benefits of installing a kitchen sink air vent:
1. Improved Drainage Efficiency:
By allowing air to flow into the plumbing system, a kitchen sink air vent helps to prevent air locks and water from backing up in your sink. This results in improved drainage efficiency and prevents clogs from occurring.
2. Reduces Unpleasant Odors:
Without proper ventilation, sewer gases can build up in your plumbing system and escape through your sink. Installing a kitchen sink air vent helps to prevent these gases from escaping, keeping your kitchen smelling fresh and clean.
3. Protects Your Plumbing System:
Without a kitchen sink air vent, air pressure can build up in your plumbing system, putting unnecessary strain on your pipes and potentially causing damage. By equalizing the pressure, a kitchen sink air vent helps to protect your plumbing system and prevent costly repairs.
Installing a kitchen sink air vent may seem like a small and insignificant task when it comes to house design, but it can actually have a big impact on the functionality and longevity of your plumbing system. Here are some of the top benefits of installing a kitchen sink air vent:
1. Improved Drainage Efficiency:
By allowing air to flow into the plumbing system, a kitchen sink air vent helps to prevent air locks and water from backing up in your sink. This results in improved drainage efficiency and prevents clogs from occurring.
2. Reduces Unpleasant Odors:
Without proper ventilation, sewer gases can build up in your plumbing system and escape through your sink. Installing a kitchen sink air vent helps to prevent these gases from escaping, keeping your kitchen smelling fresh and clean.
3. Protects Your Plumbing System:
Without a kitchen sink air vent, air pressure can build up in your plumbing system, putting unnecessary strain on your pipes and potentially causing damage. By equalizing the pressure, a kitchen sink air vent helps to protect your plumbing system and prevent costly repairs.
How to Install a Kitchen Sink Air Vent
 Installing a kitchen sink air vent is a relatively simple process that can be done by most homeowners. Here are the basic steps to follow:
1. Gather Your Materials:
You will need a kitchen sink air vent, a hacksaw, and plumber's tape.
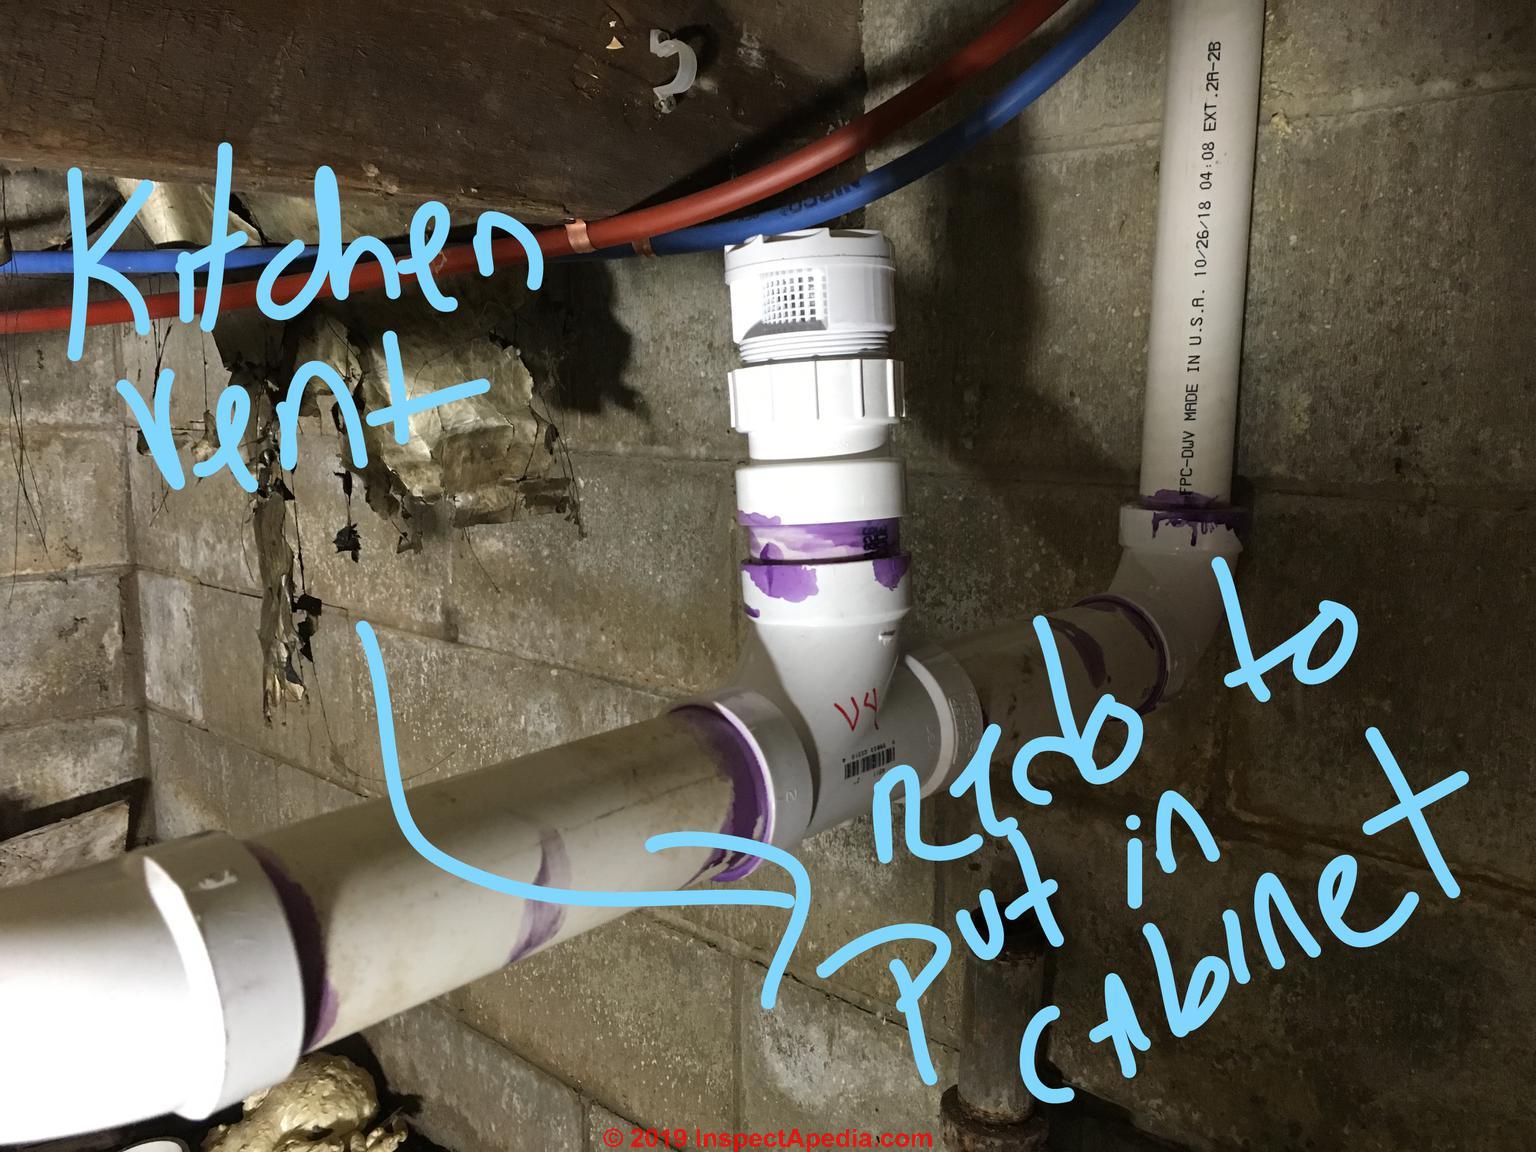
2. Locate the Drain Line:
Find the drain line of your kitchen sink and determine where you want to install the air vent. This is typically near the bottom of the sink, behind the wall.
3. Cut the Drain Line:
Use a hacksaw to make a small cut in the drain line where you want to install the air vent.
4. Install the Air Vent:
Insert the air vent into the cut in the drain line and secure it with plumber's tape.
5. Test the Vent:
Turn on your kitchen sink's water and check that the air vent is working properly by observing the water flow.
Installing a kitchen sink air vent is a relatively simple process that can be done by most homeowners. Here are the basic steps to follow:
1. Gather Your Materials:
You will need a kitchen sink air vent, a hacksaw, and plumber's tape.
2. Locate the Drain Line:
Find the drain line of your kitchen sink and determine where you want to install the air vent. This is typically near the bottom of the sink, behind the wall.
3. Cut the Drain Line:
Use a hacksaw to make a small cut in the drain line where you want to install the air vent.
4. Install the Air Vent:
Insert the air vent into the cut in the drain line and secure it with plumber's tape.
5. Test the Vent:
Turn on your kitchen sink's water and check that the air vent is working properly by observing the water flow.
Conclusion
 In conclusion, installing a kitchen sink air vent may seem like a small detail, but it can have a big impact on the functionality and longevity of your plumbing system. By allowing air to flow and equalizing pressure, a kitchen sink air vent helps to prevent clogs, reduce odors, and protect your plumbing system. With its relatively simple installation process, it's a small but essential addition to any well-designed kitchen. So don't overlook this important component and ensure that your kitchen sink is equipped with a proper air vent.