If you're looking to upgrade your bathroom with a sleek and modern touch, installing an undermount sink is the way to go. Not only does it add a touch of elegance to your space, but it also makes cleaning easier as there are no edges or crevices for dirt to accumulate. If you're a DIY enthusiast, this step-by-step guide will walk you through the process of installing an undermount bathroom sink.Undermount Bathroom Sink Installation Guide


Undermount Bathroom Sink Installation Guide


The first step in installing an undermount sink is to choose the right vanity. Make sure the vanity has enough space to accommodate the sink and the necessary plumbing. It's also important to choose a sink that complements the style of your bathroom. Once you have the sink and vanity, you're ready to begin the installation process.How to Install an Undermount Sink in a Bathroom Vanity


How to Install an Undermount Sink in a Bathroom Vanity


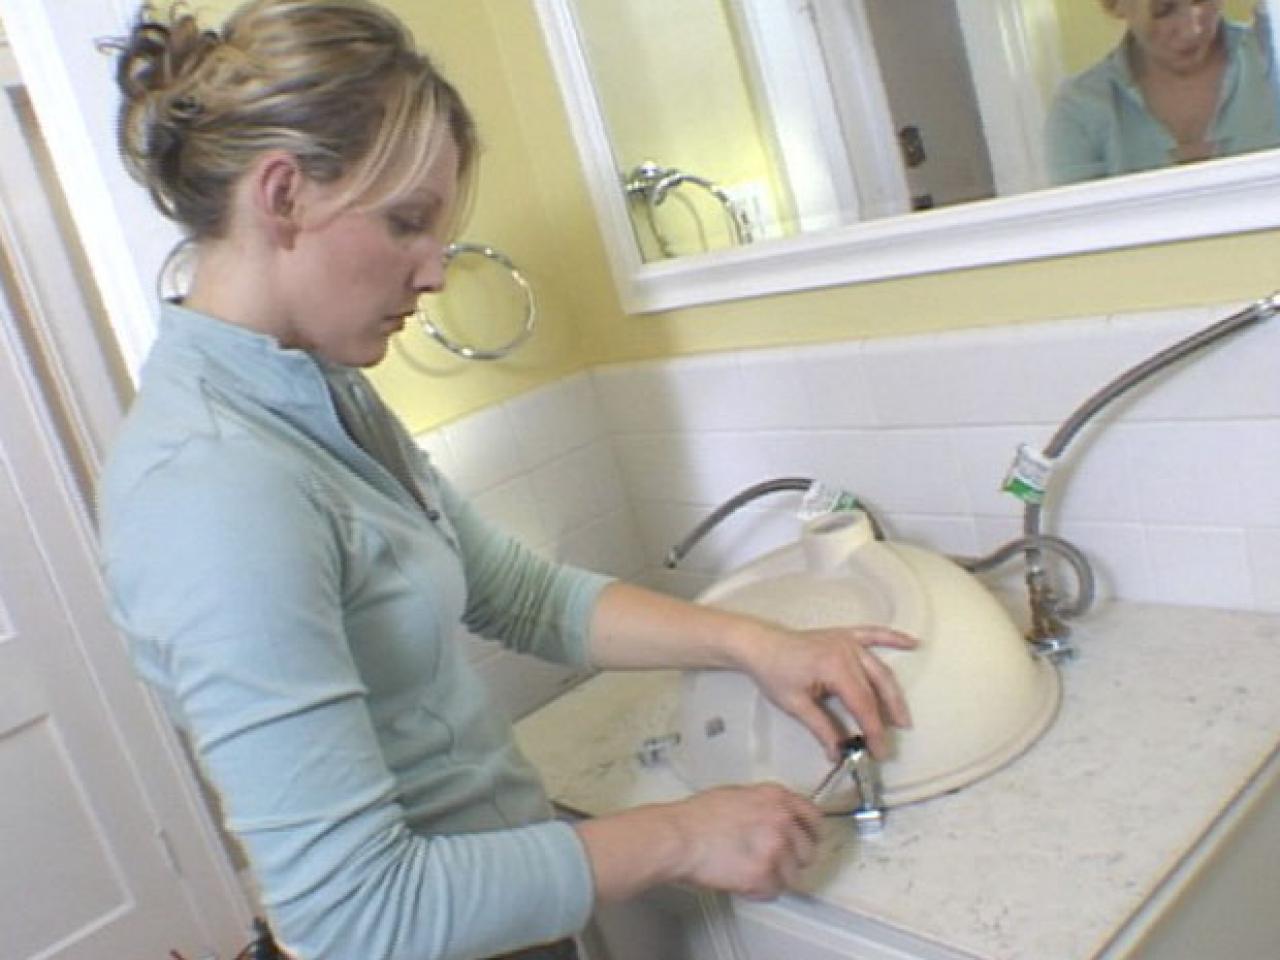
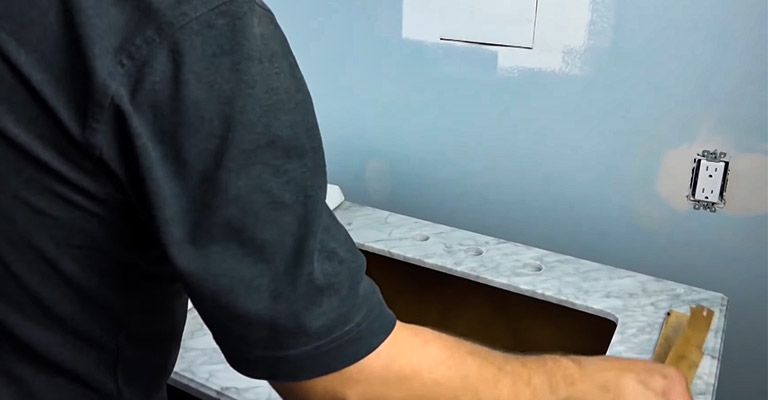
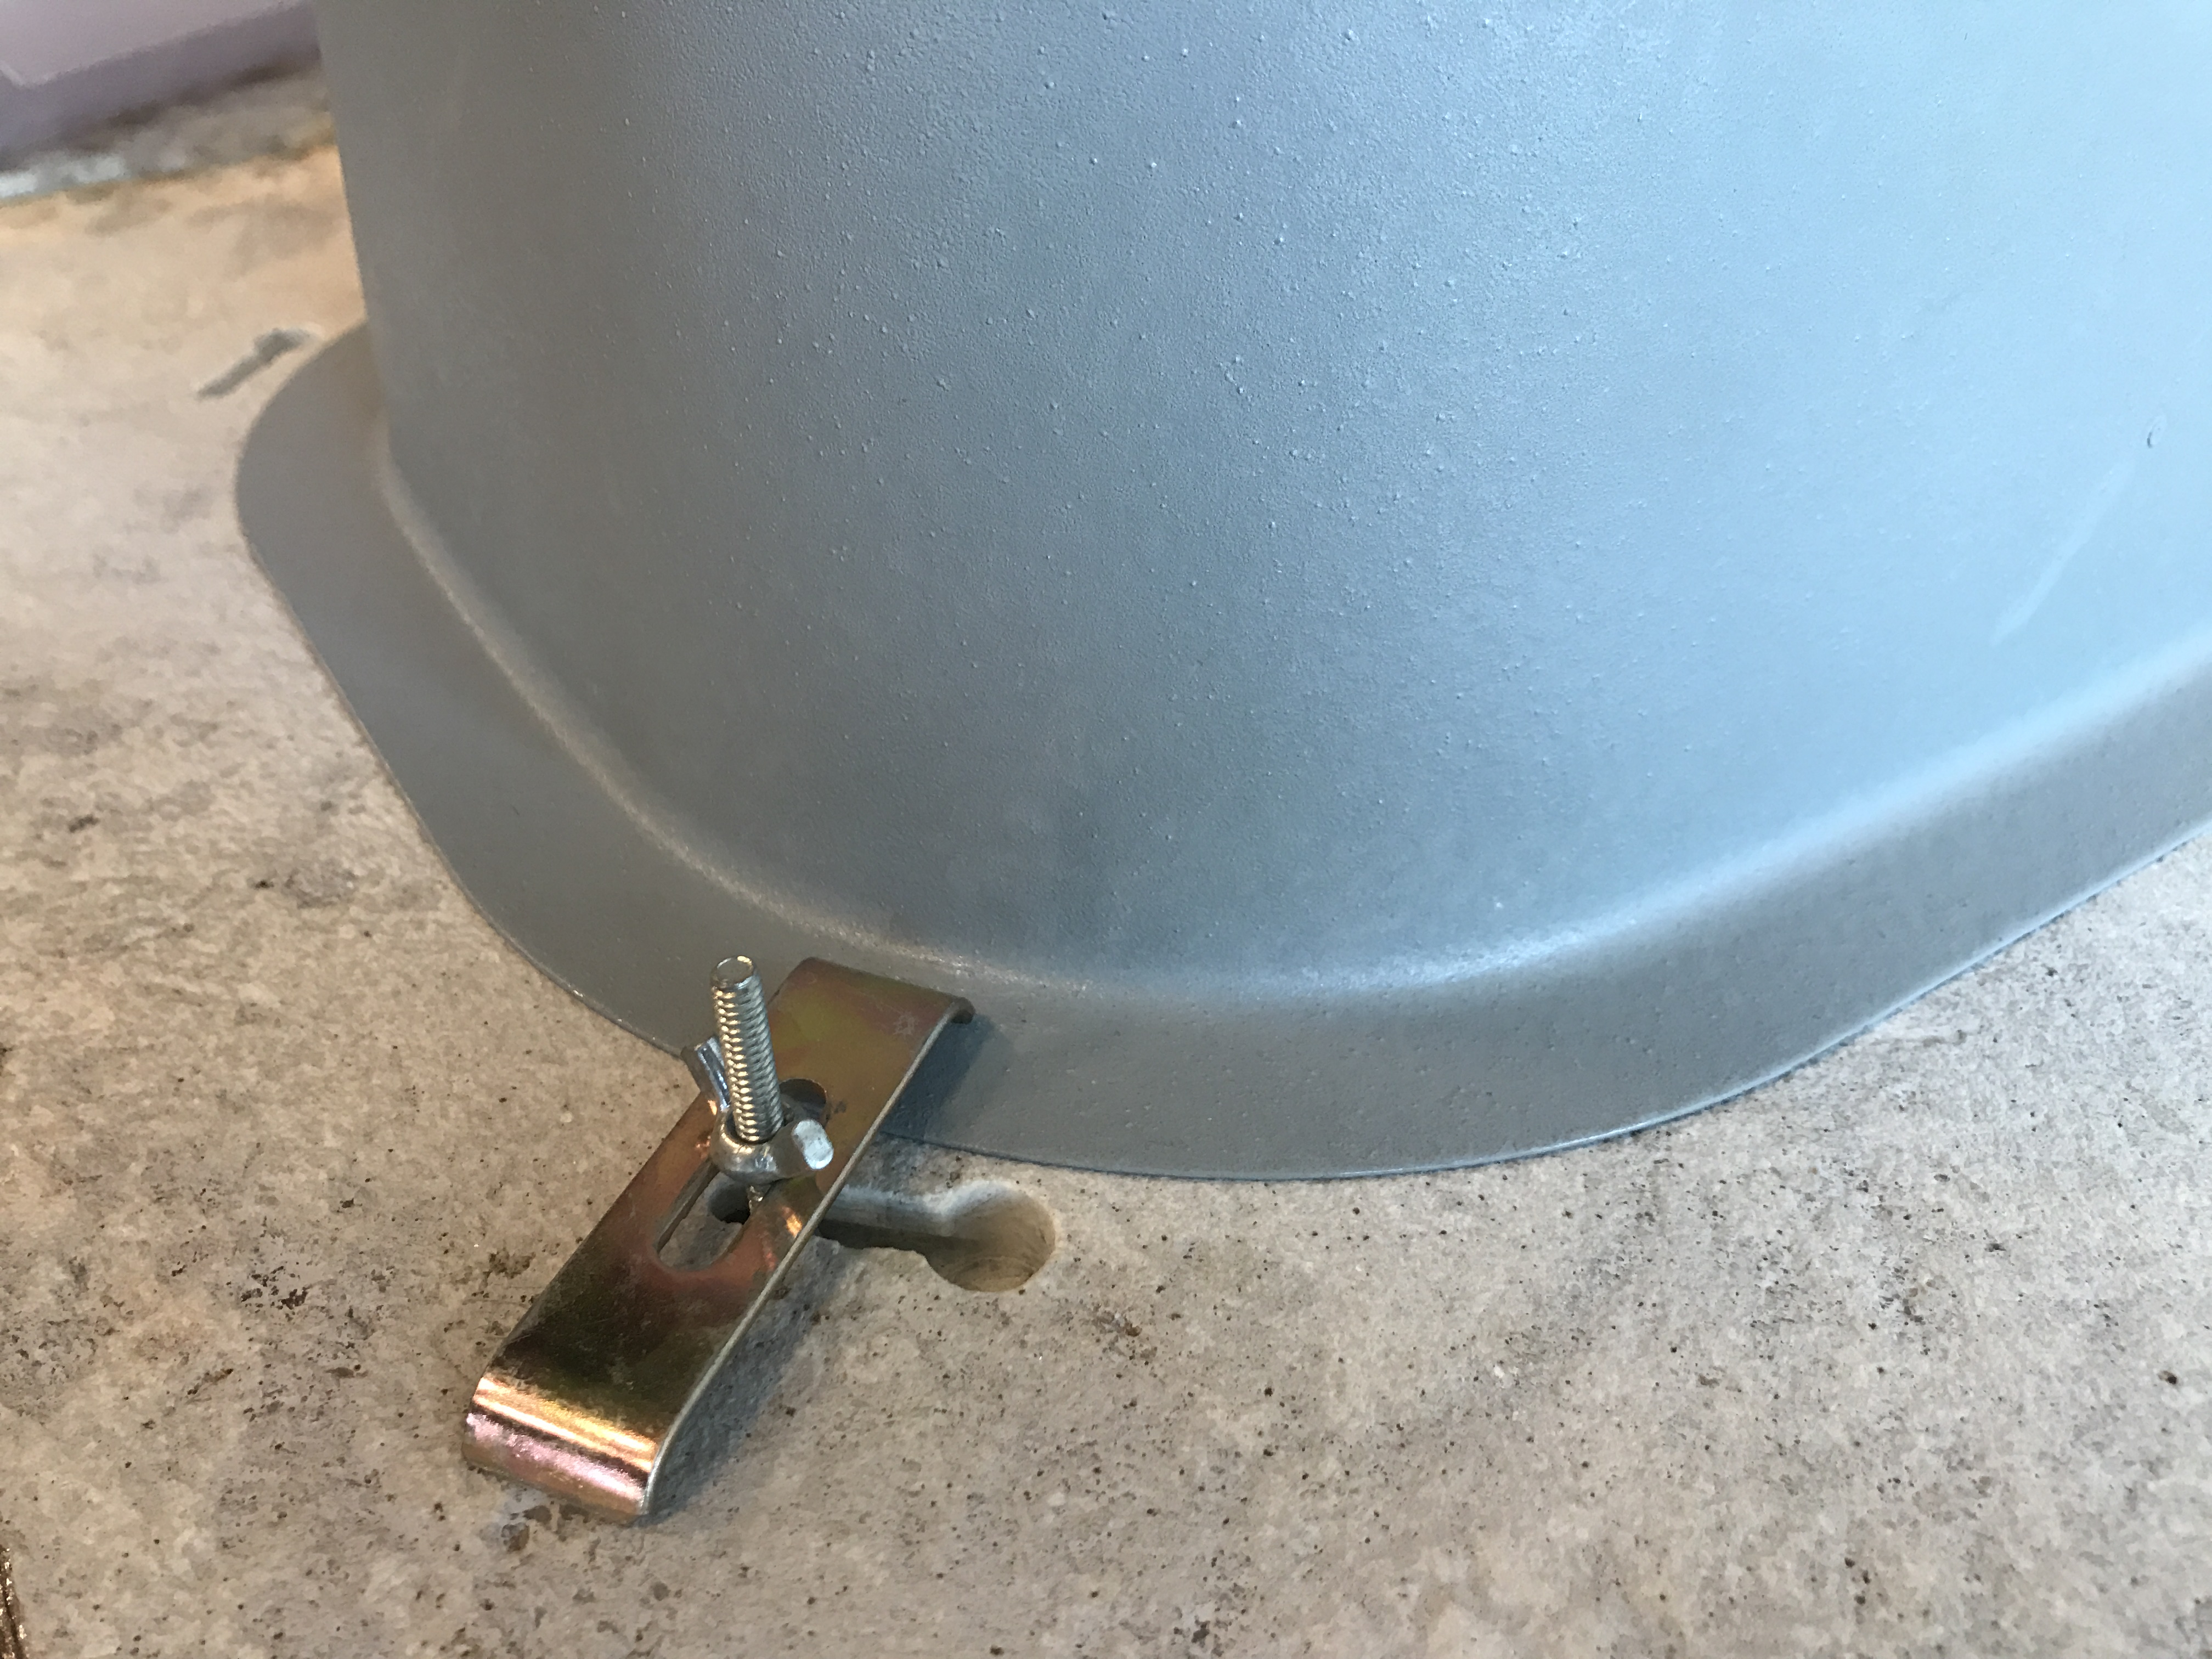
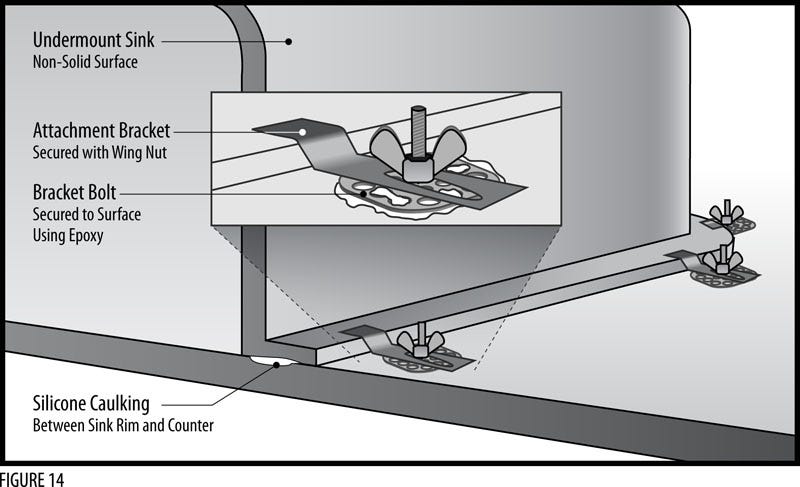
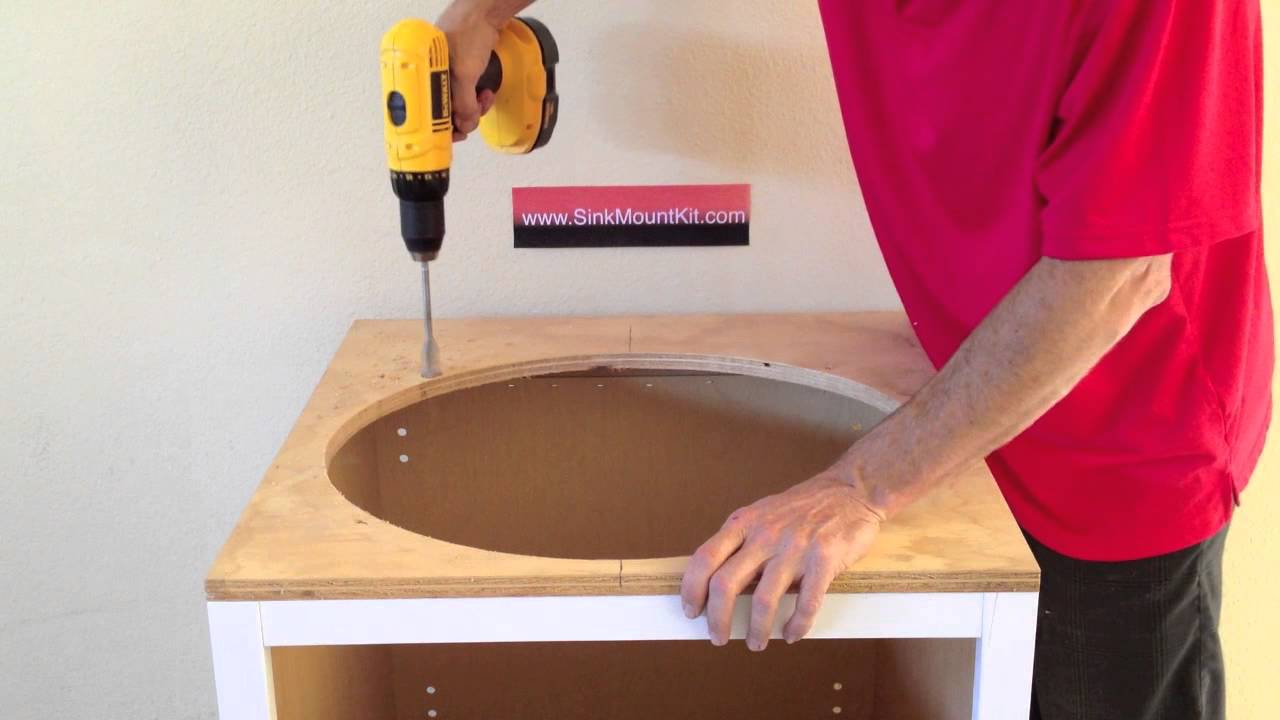
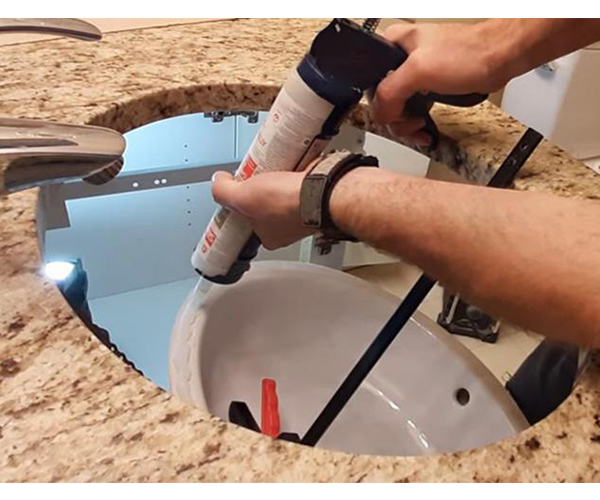
Step 1: Start by turning off the water supply to your bathroom. This will prevent any accidents while you're working on the sink. Then, disconnect the plumbing from the old sink. Step 2: Carefully remove the old sink from the vanity. If it's a drop-in sink, it will be held in place by caulk. Use a putty knife to gently remove the caulk and lift the sink out. Step 3: Clean the area where the old sink was installed. Remove any remaining caulk and make sure the surface is smooth and dry. Step 4: Place the template that came with your undermount sink on the vanity. Use a pencil to trace the outline of the sink onto the vanity. Step 5: Use a jigsaw to cut along the traced outline. Be sure to wear safety goggles and follow the manufacturer's instructions for using the jigsaw. Step 6: Test fit the sink in the cutout to make sure it fits properly. If it doesn't, use the jigsaw to make any necessary adjustments. Step 7: Once the sink fits correctly, use a silicone adhesive to secure it to the underside of the vanity. Be sure to follow the manufacturer's instructions for using the adhesive. Step 8: Connect the plumbing to the sink, making sure all connections are tight and secure. Then, turn the water supply back on and test for any leaks. Step 9: Apply a bead of caulk around the edge of the sink to seal it to the vanity. Step 10: Finally, clean up any excess caulk and let it dry completely before using the sink.Step-by-Step Guide for Installing an Undermount Bathroom Sink


Step-by-Step Guide for Installing an Undermount Bathroom Sink


Installing an undermount sink is a perfect DIY project for those looking to save money on a bathroom renovation. It may seem like a daunting task, but with the right tools and instructions, it can be done easily and efficiently. Plus, you'll have the satisfaction of knowing you did it yourself.DIY Bathroom Renovation: Installing an Undermount Sink


DIY Bathroom Renovation: Installing an Undermount Sink


Tip 1: Make sure to measure your vanity and sink before purchasing to ensure they are compatible. Tip 2: Use a jigsaw with a fine-tooth blade for a clean and precise cut. Tip 3: Be patient and take your time when cutting the hole for the sink. It's better to make small adjustments than to end up with a hole that's too big. Tip 4: Use a level to make sure the sink is installed evenly. Tip 5: Let the adhesive and caulk dry completely before using the sink.Tips for Installing an Undermount Bathroom Sink


Tips for Installing an Undermount Bathroom Sink


Installing an undermount bathroom sink may seem intimidating, but it's a straightforward process that can be completed in a few simple steps. With the right tools and patience, you can have a beautiful and functional undermount sink in your bathroom in no time.The Process of Installing an Undermount Bathroom Sink

The Process of Installing an Undermount Bathroom Sink
Before starting your undermount sink installation, there are a few things you need to know. First, make sure you have all the necessary tools and materials, including a jigsaw, silicone adhesive, and caulk. It's also important to follow the manufacturer's instructions for your specific sink and vanity. And don't forget to turn off the water supply before starting any work.Undermount Bathroom Sink Installation: What You Need to Know


Undermount Bathroom Sink Installation: What You Need to Know
This comprehensive guide has covered all the steps and tips you need to successfully install an undermount bathroom sink. From choosing the right vanity to connecting the plumbing, you now have all the information you need to complete this DIY project with confidence.Installing an Undermount Sink in a Bathroom: A Comprehensive Guide


Installing an Undermount Sink in a Bathroom: A Comprehensive Guide

Proper installation is key to ensuring your undermount bathroom sink looks and functions as it should. By following the step-by-step guide and using the right tools and materials, you can ensure your sink is installed correctly and will last for years to come.How to Properly Install an Undermount Bathroom Sink


How to Properly Install an Undermount Bathroom Sink


To recap, the steps for installing an undermount bathroom sink are: 1. Turn off water supply and disconnect plumbing from old sink. 2. Remove old sink and clean the area. 3. Trace the template onto the vanity and cut along the outline. 4. Test fit the sink and make any necessary adjustments. 5. Secure the sink with silicone adhesive. 6. Reconnect plumbing and turn on water supply. 7. Apply caulk around the edge of the sink. 8. Let caulk dry completely before using the sink.Step-by-Step Instructions for Installing an Undermount Bathroom Sink


Step-by-Step Instructions for Installing an Undermount Bathroom Sink

Why Choose an Undermount Sink for Your Bathroom?
Efficient Use of Space
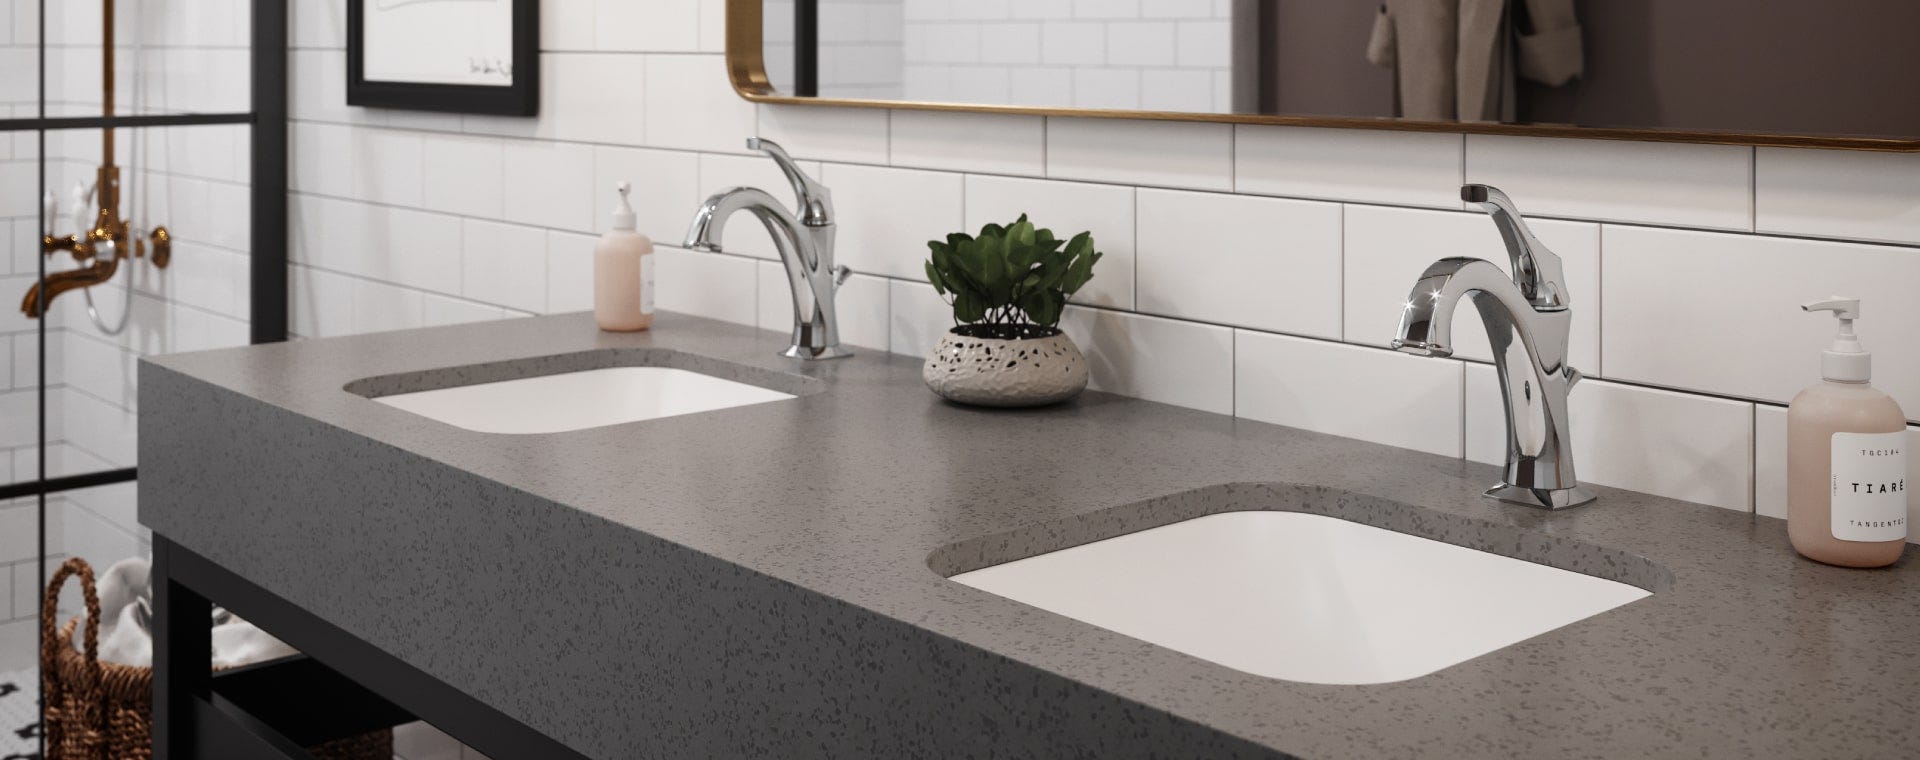
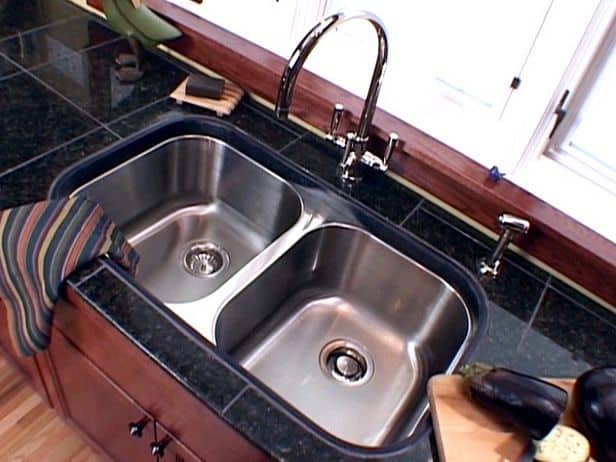
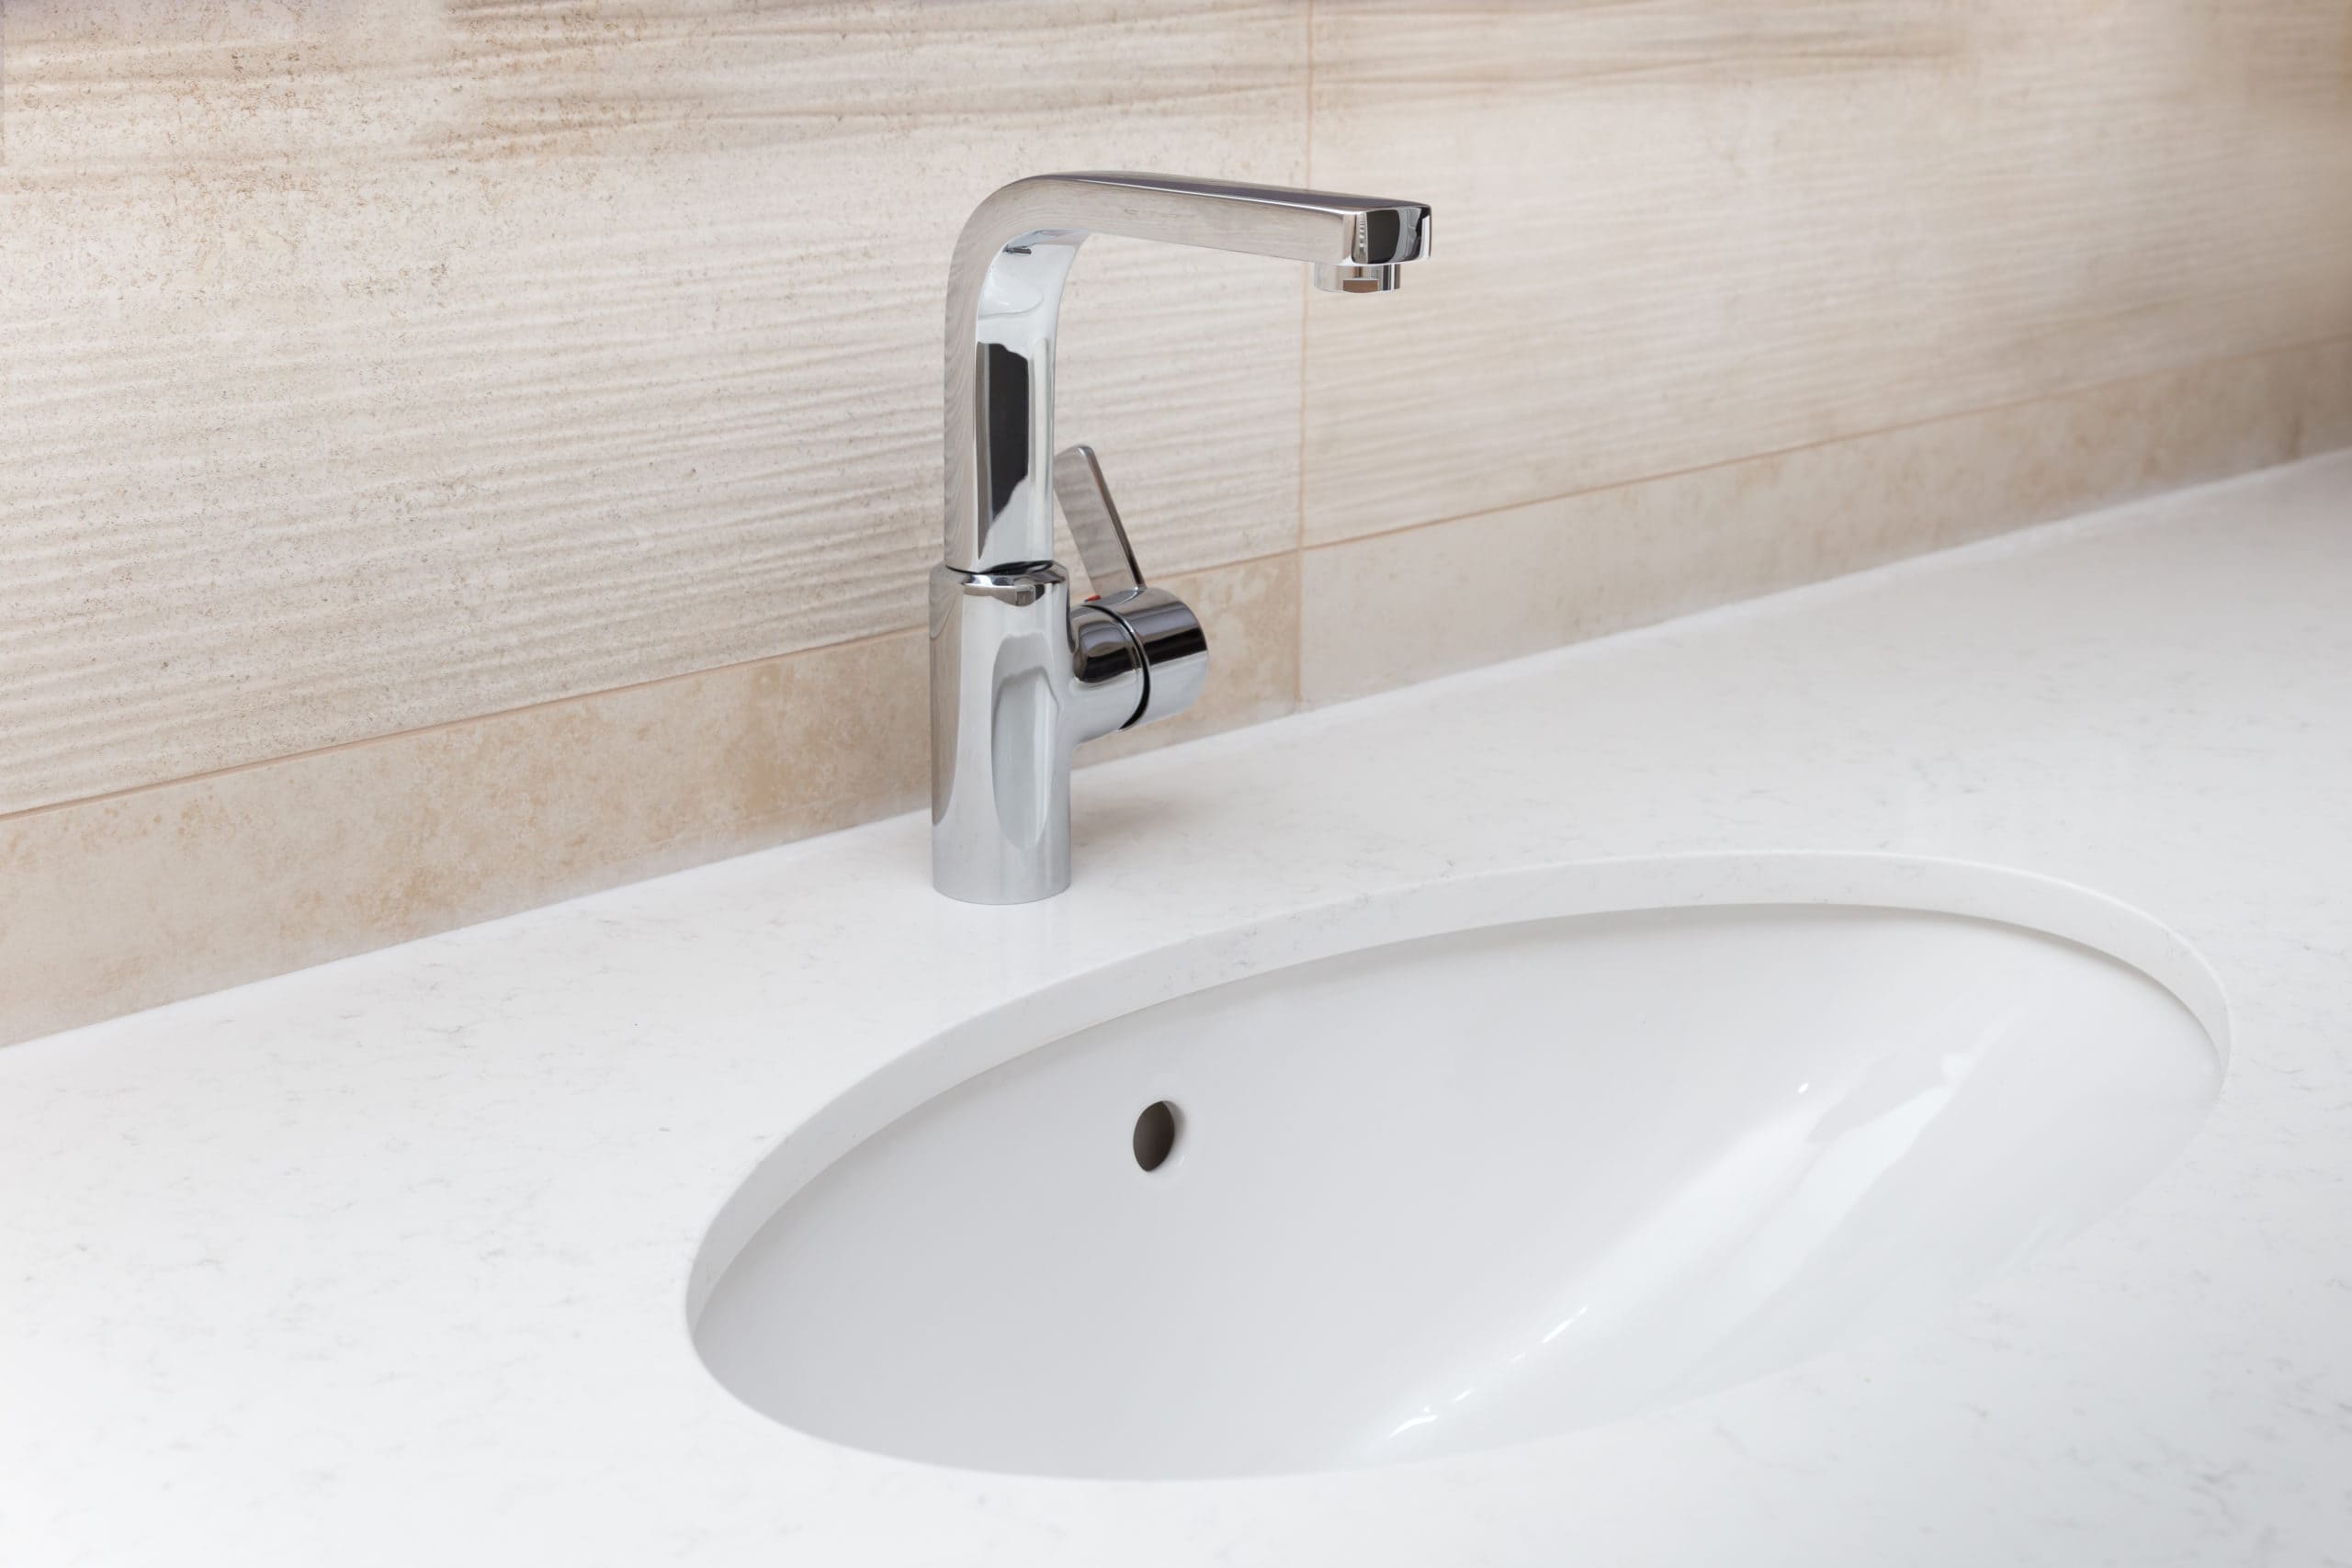
 One of the main reasons to choose an undermount sink for your bathroom is its efficient use of space. Unlike traditional drop-in sinks, undermount sinks are installed underneath the countertop, allowing for more counter space. This is especially beneficial in smaller bathrooms where every inch counts. With an undermount sink, you can have a sleek and modern look without sacrificing functionality.
undermount sink
Easy to Clean
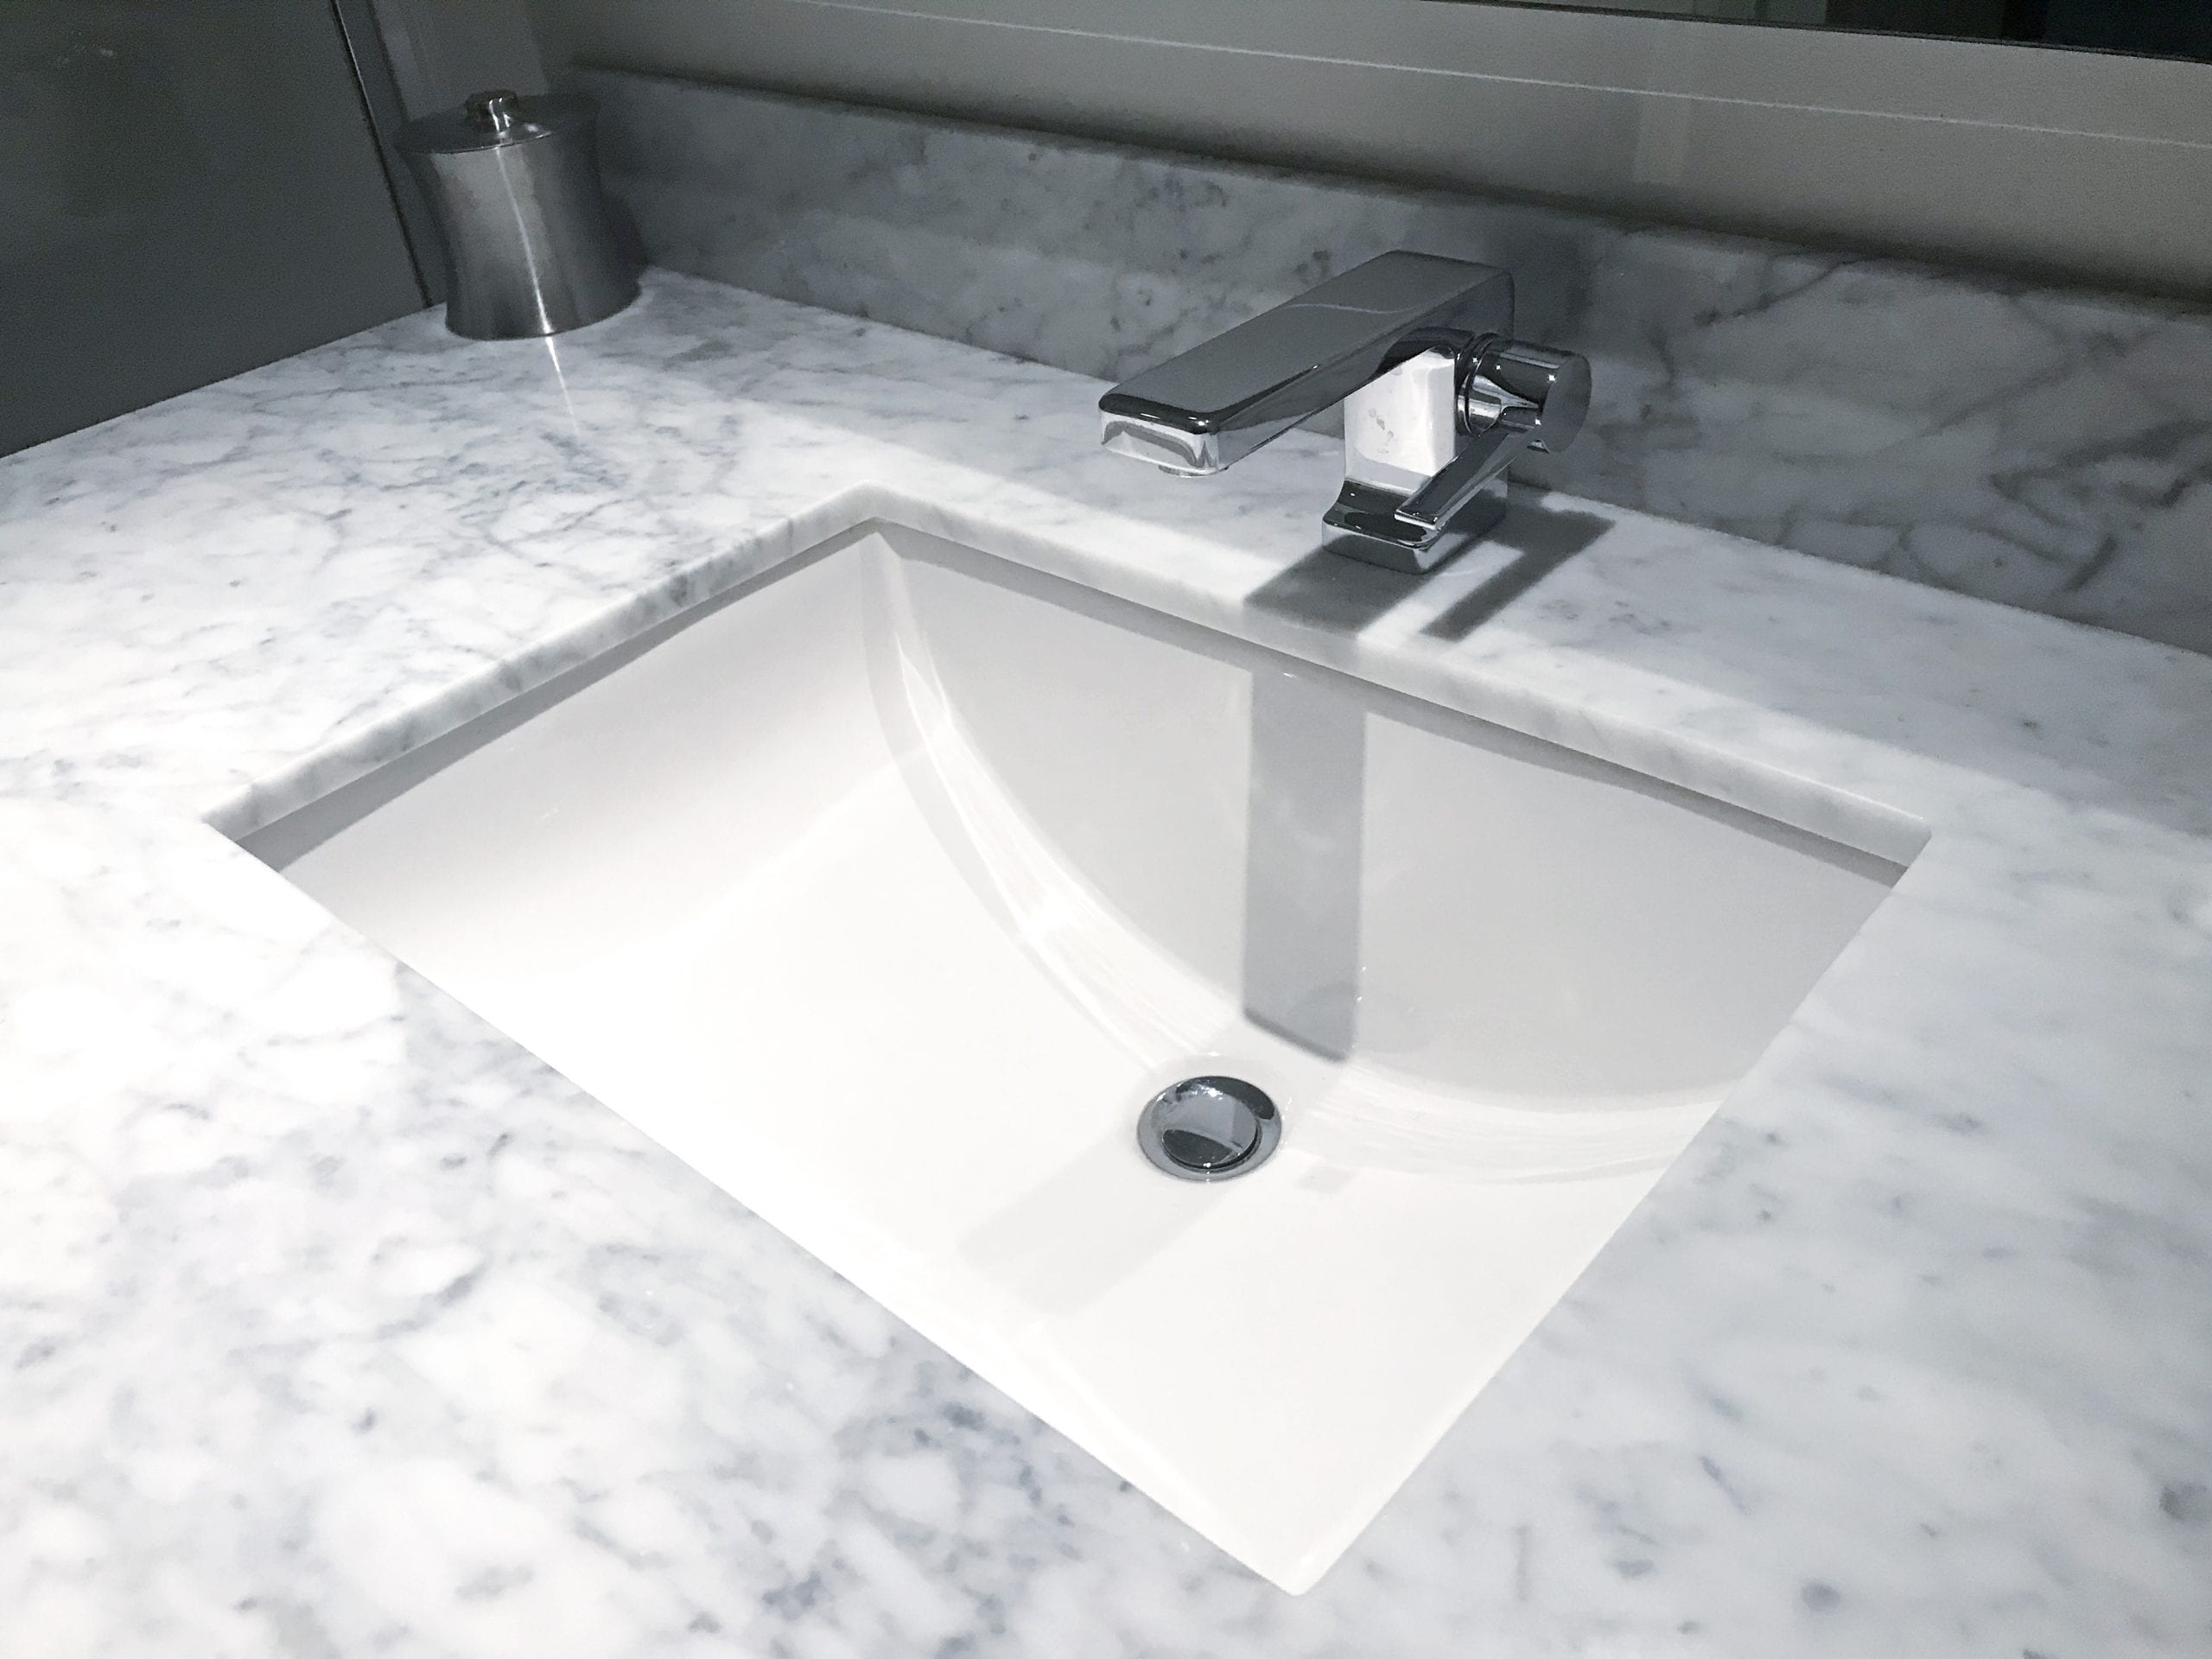
 Another advantage of undermount sinks is that they are easier to clean compared to traditional sinks. Since the sink is mounted underneath the countertop, there is no rim or lip where dirt and grime can accumulate. This makes cleaning a breeze, as you can simply wipe any debris directly into the sink. Additionally, the lack of crevices and edges also prevents the growth of bacteria and mold, making it a more hygienic option for your bathroom.
cleaning
Enhances the Aesthetics of Your Bathroom
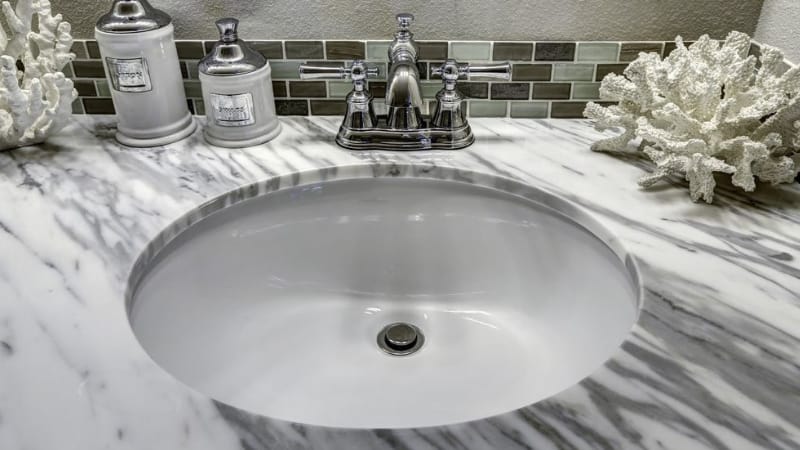
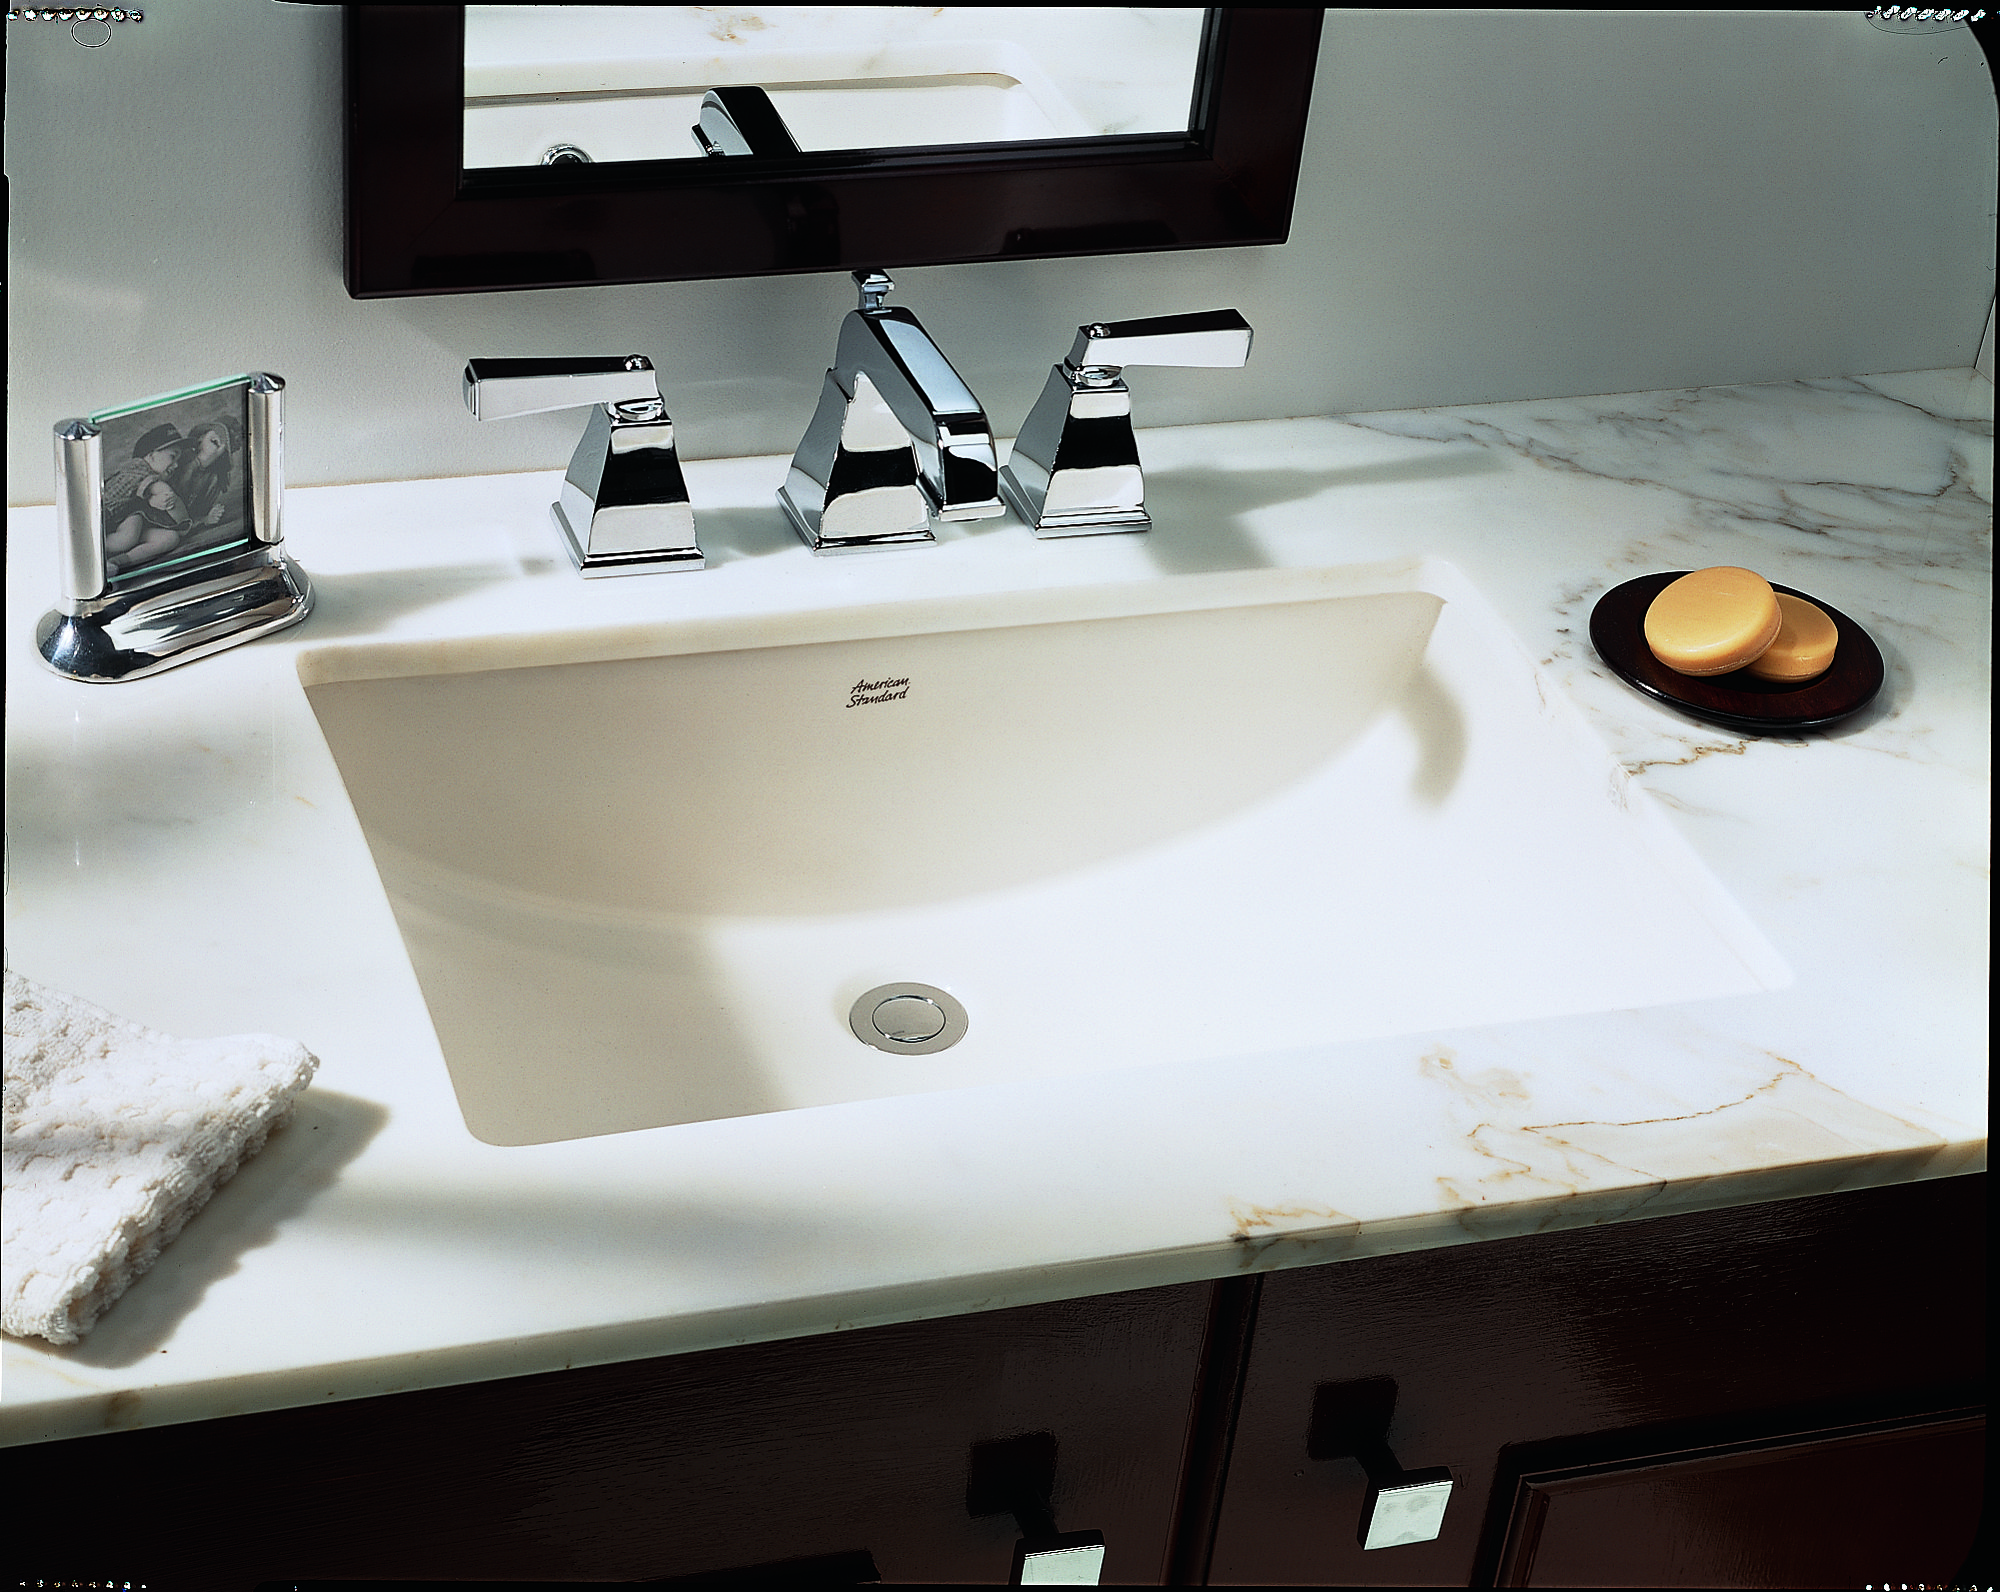
 Undermount sinks are known for their sleek and modern look, making them a popular choice among homeowners who want to elevate the design of their bathroom. With no visible edges or seams, undermount sinks seamlessly blend in with the countertop, creating a clean and seamless appearance. This not only adds a touch of sophistication to your bathroom, but it also makes it easier to match with different styles and designs.
design
Durable and Long-Lasting
 Undermount sinks are typically made of high-quality materials such as porcelain, ceramic, or stone, making them durable and long-lasting. They are also less prone to chipping or cracking compared to traditional sinks, which are exposed to more wear and tear. Investing in an undermount sink for your bathroom means you won't have to worry about constantly replacing or repairing it, saving you time and money in the long run.
durability
Conclusion
 In conclusion, an undermount sink is a practical and stylish choice for your bathroom. Its space-saving design, easy maintenance, and aesthetic appeal make it a popular option among homeowners. When properly installed, an undermount sink can add value to your home and enhance the overall look of your bathroom. So if you're looking to upgrade your bathroom, consider installing an undermount sink for a modern and functional touch.