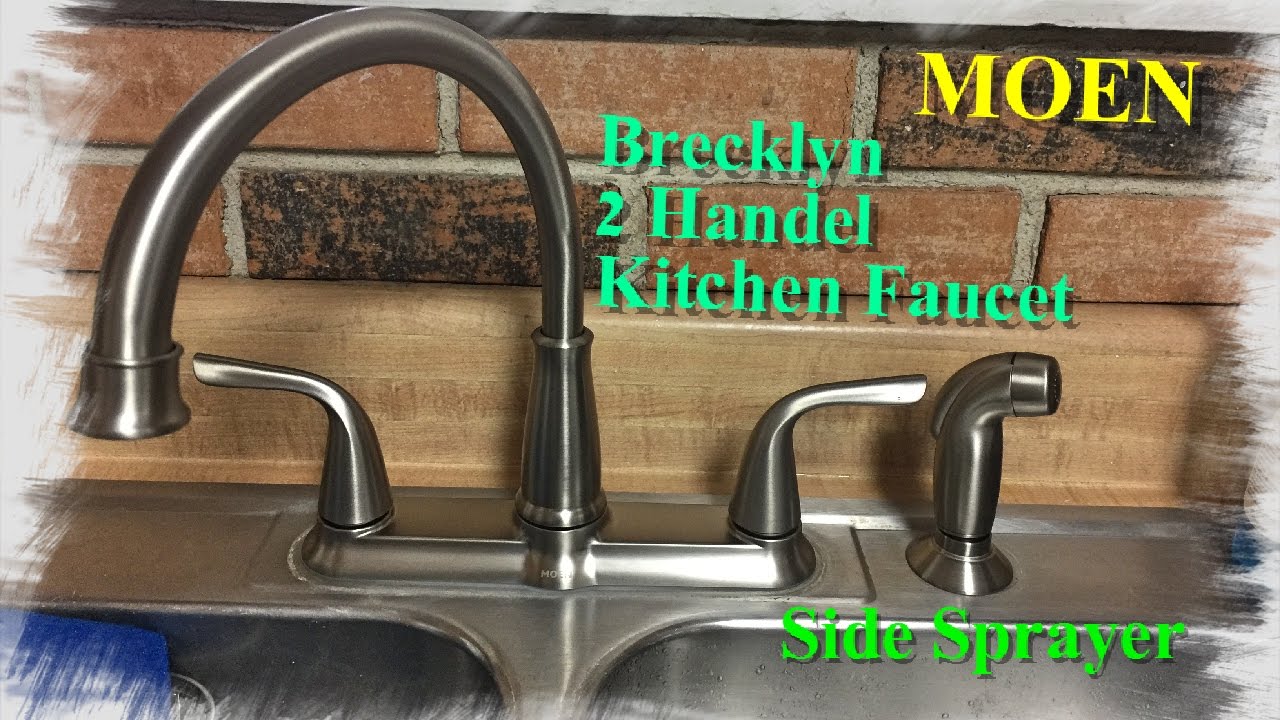
Installing a Moen kitchen sink faucet may seem like a daunting task, but with the right tools, materials, and instructions, it can be a relatively simple DIY project. Before you begin, make sure you have all the necessary tools and read through the instructions carefully. Let's get started!1. How to Install a Moen Kitchen Sink Faucet


1. How to Install a Moen Kitchen Sink Faucet


/installing-a-moen-kitchen-faucet-2718847-05-18a8625ea2ea4e04a984f3df633399cc.jpg)
:max_bytes(150000):strip_icc()/installing-a-moen-kitchen-faucet-2718847-hero-80764e1087fc4d26919082f212cf3d0a.jpg)

:max_bytes(150000):strip_icc()/installing-a-moen-kitchen-faucet-2718847-03-4a9ecba0432748a19e7fc8f92f792be2.jpg)
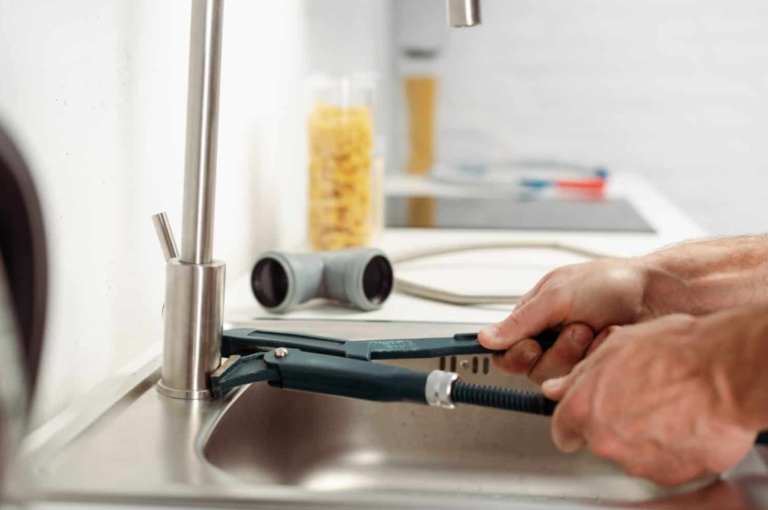
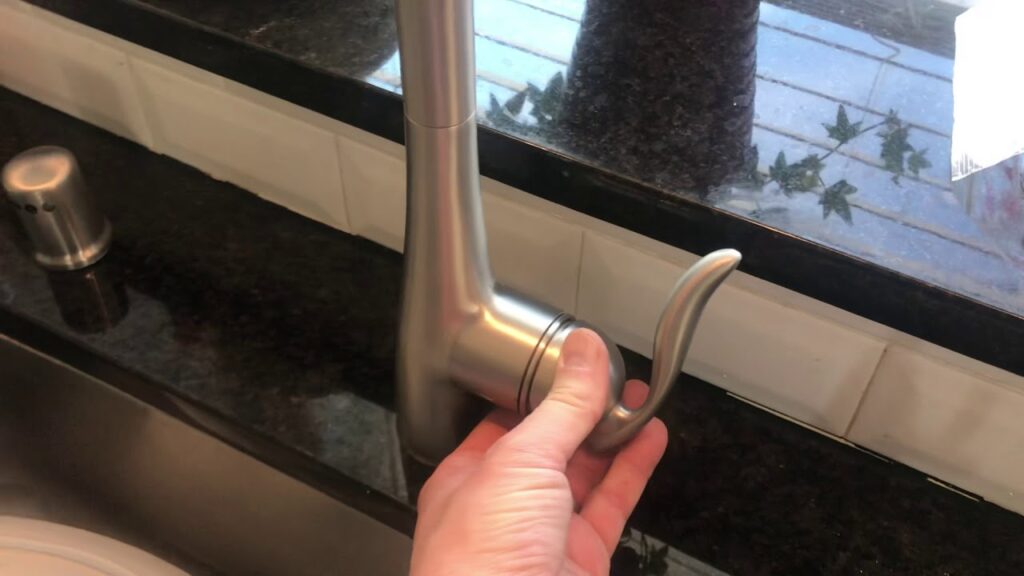
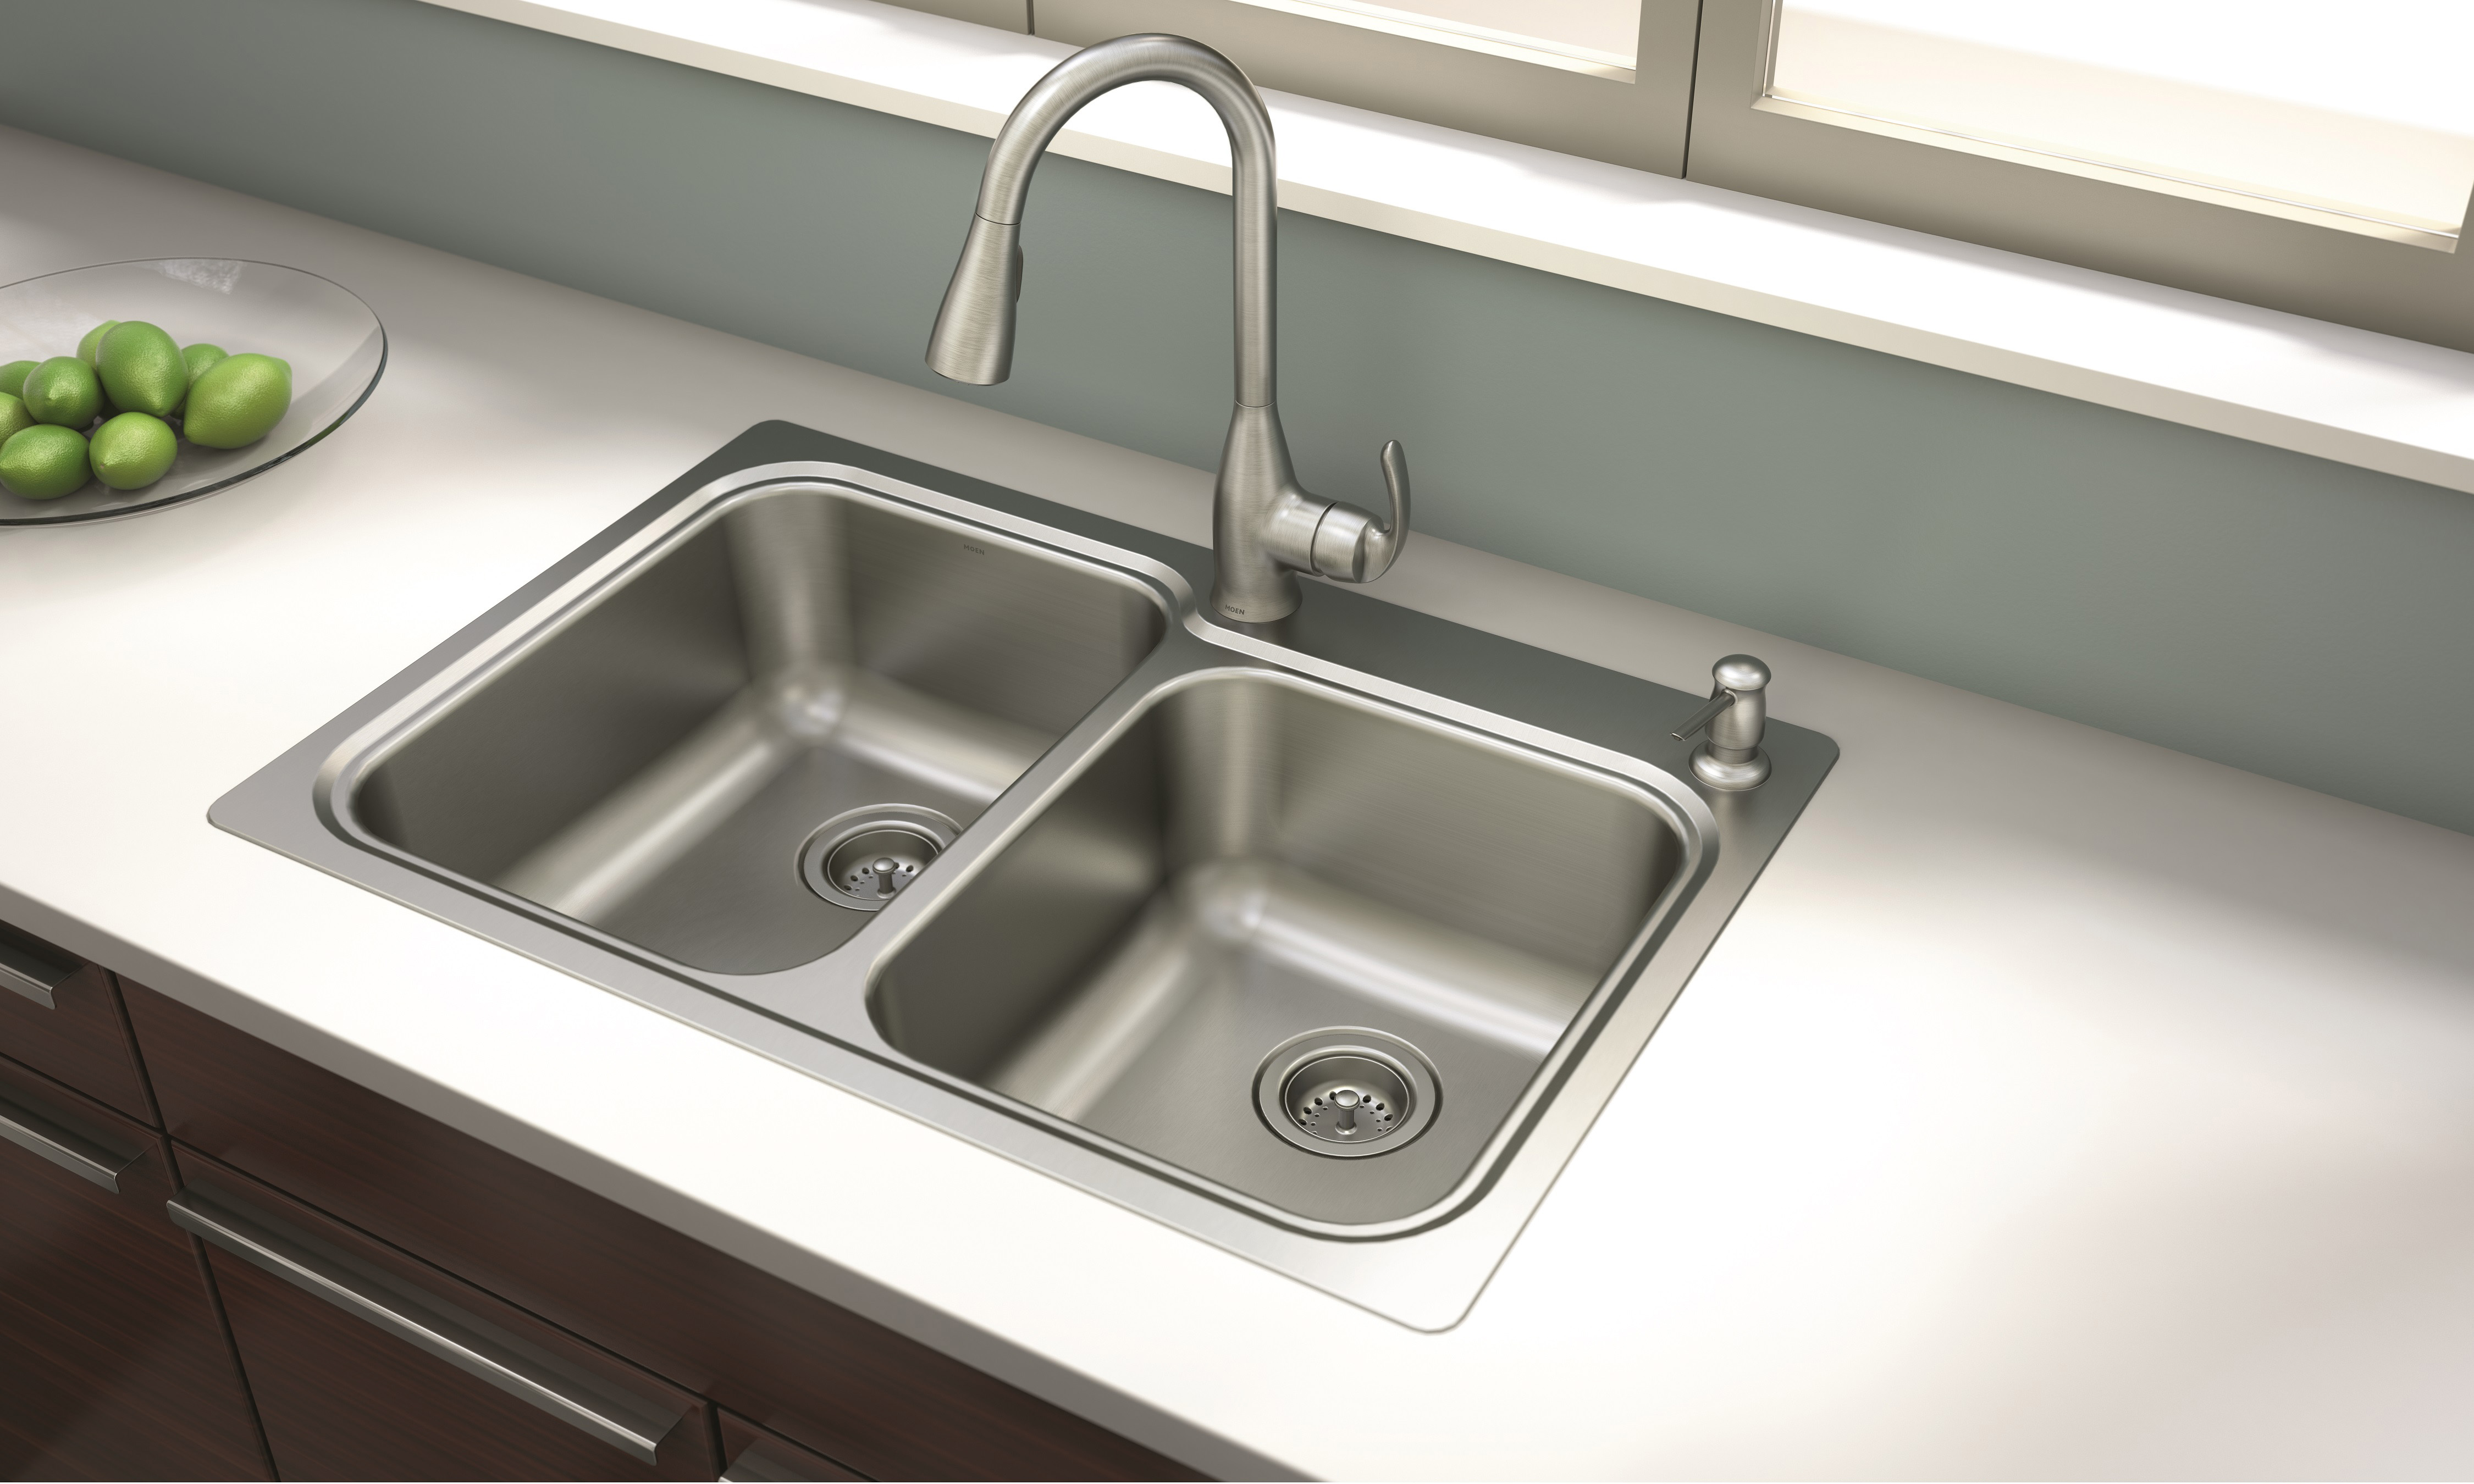
Step 1: Turn off the water supply to your kitchen sink by shutting off the valves under the sink. Make sure to test the water flow to ensure it is properly shut off. Step 2: Remove the old faucet by loosening the nuts and disconnecting the water supply lines. You may need a wrench or pliers for this step. Step 3: Clean the sink area and remove any old putty or debris. This will ensure a clean surface for the new faucet. Step 4: Place the rubber gasket and mounting brackets onto the faucet and secure them with the nuts provided. Step 5: Install the faucet into the sink by inserting the supply lines through the mounting hole, making sure the faucet is straight and aligned properly. Step 6: Tighten the mounting nut from below the sink with a wrench. Be careful not to over-tighten, as this can damage the faucet. Step 7: Connect the water supply lines to the faucet. Be sure to use Teflon tape on the threads to prevent leaks. Step 8: Turn the water supply back on and test the faucet for any leaks. If there are no leaks, you're good to go!2. Step-by-Step Guide for Installing a Moen Kitchen Sink Faucet


2. Step-by-Step Guide for Installing a Moen Kitchen Sink Faucet


Installing a Moen kitchen sink faucet yourself can save you time and money. With the right tools and a little bit of patience, you can have a beautiful new faucet in no time. Follow the step-by-step guide above for a successful installation.3. DIY: Installing a Moen Kitchen Sink Faucet


3. DIY: Installing a Moen Kitchen Sink Faucet


Still feeling unsure about installing a Moen kitchen sink faucet? Check out installation tutorials online for additional guidance. You can also contact Moen's customer service for any specific questions or concerns.4. Moen Kitchen Sink Faucet Installation Tutorial


4. Moen Kitchen Sink Faucet Installation Tutorial

When installing a Moen kitchen sink faucet, it's always helpful to have some tips and tricks up your sleeve. Remember to turn off the water supply and clean the sink area before installation. Use Teflon tape on the supply lines and tighten all nuts securely to prevent leaks.5. Tips for Installing a Moen Kitchen Sink Faucet


5. Tips for Installing a Moen Kitchen Sink Faucet

While installing a Moen kitchen sink faucet is relatively straightforward, there are some common mistakes that can be easily avoided. These include over-tightening the mounting nut, using incorrect tools, and not properly aligning the faucet. Be sure to follow the instructions carefully and take your time to ensure a successful installation.6. Common Mistakes to Avoid When Installing a Moen Kitchen Sink Faucet


6. Common Mistakes to Avoid When Installing a Moen Kitchen Sink Faucet

:max_bytes(150000):strip_icc()/installing-a-moen-kitchen-faucet-2718847-04-0e2f745a286843ea99e5f940dd988c4e.jpg)


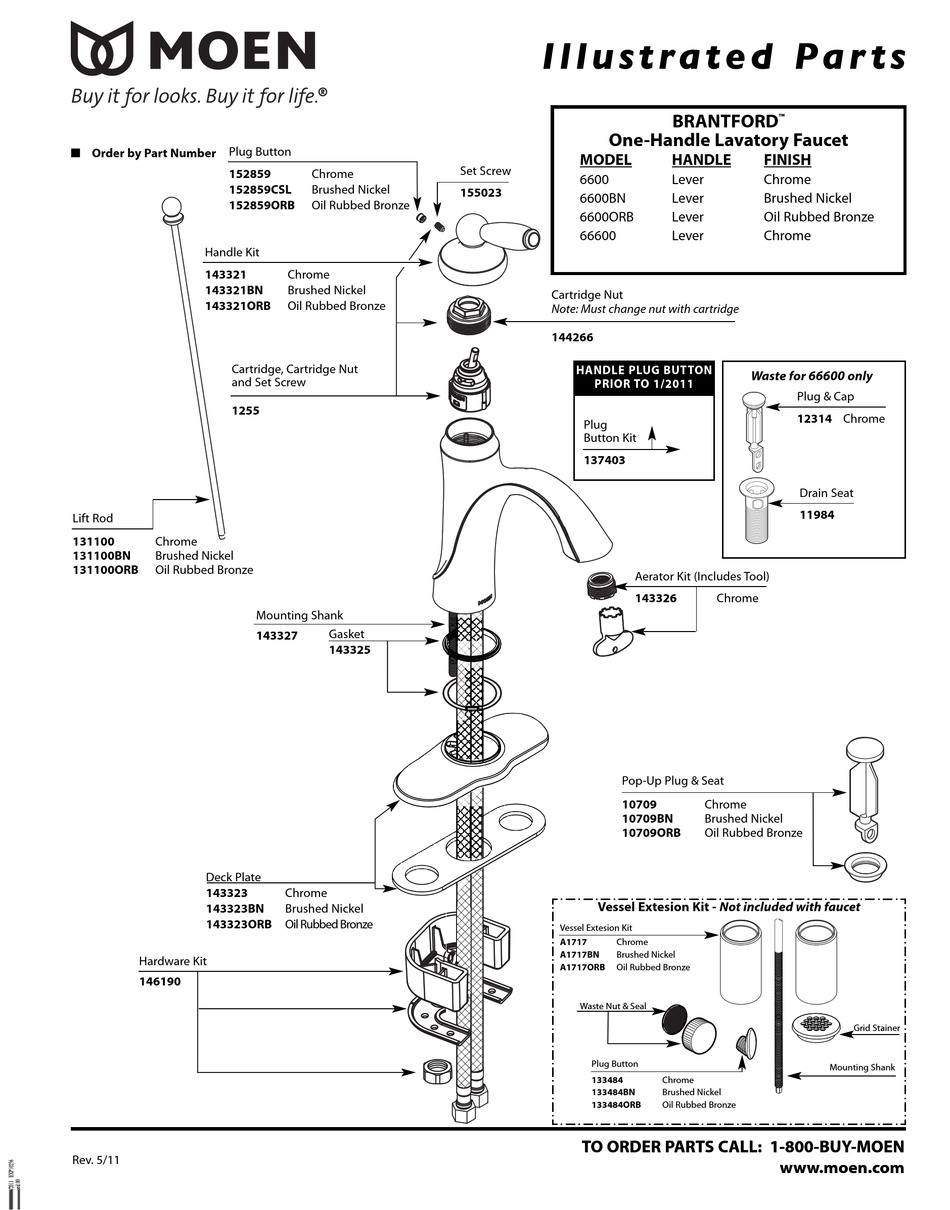
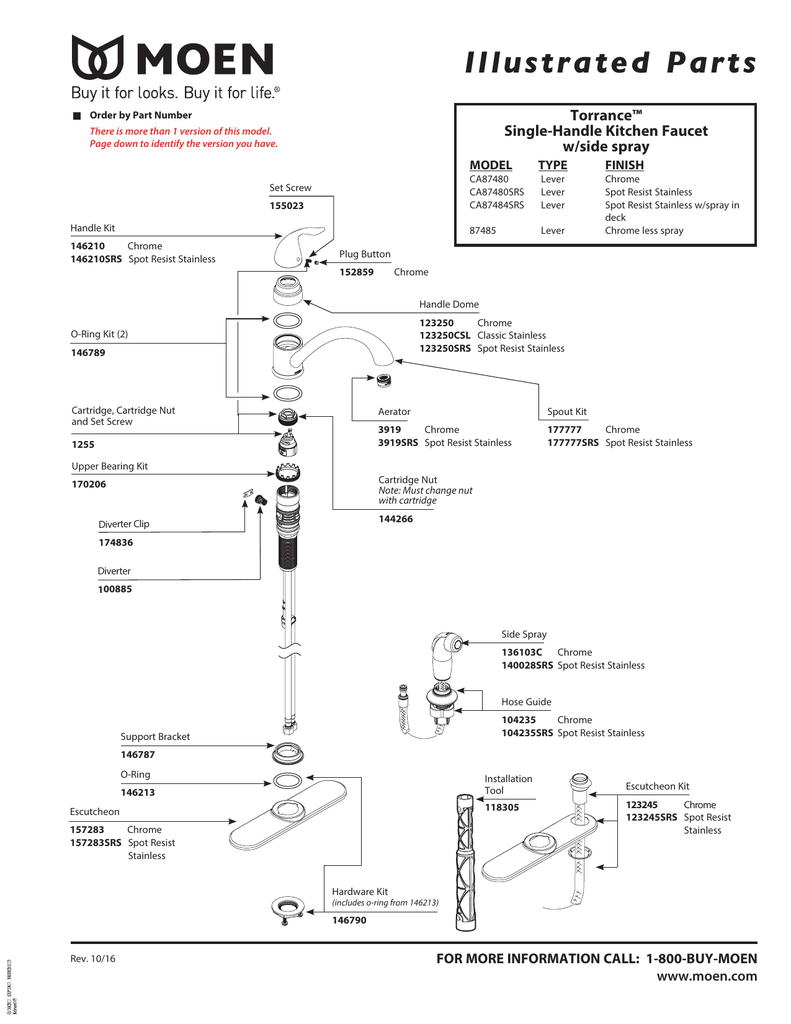
Before beginning the installation process, it's important to gather all the necessary tools and materials. These may include a wrench, pliers, Teflon tape, and of course, your new Moen kitchen sink faucet. Having everything on hand will make the installation process much smoother.7. Tools and Materials Needed for Installing a Moen Kitchen Sink Faucet


7. Tools and Materials Needed for Installing a Moen Kitchen Sink Faucet


If you're looking to upgrade your current Moen kitchen sink faucet, the process is similar to installation. You will need to remove the old faucet and clean the area before installing the new one. Follow the step-by-step guide above for a successful replacement.8. How to Remove and Replace a Moen Kitchen Sink Faucet


8. How to Remove and Replace a Moen Kitchen Sink Faucet


Even with careful preparation and following the instructions, you may encounter some issues during installation. Common problems include leaks and difficulty aligning the faucet. If you run into any problems, refer to the installation tutorial or contact Moen's customer service for assistance.9. Troubleshooting Common Issues During Moen Kitchen Sink Faucet Installation

9. Troubleshooting Common Issues During Moen Kitchen Sink Faucet Installation


While it is possible to install a Moen kitchen sink faucet yourself, some may prefer to hire a professional plumber for the job. Consider your skill level and the complexity of the installation before deciding on the best option for you. Keep in mind that hiring a professional will come at an additional cost. With these 10 heading 2s and our step-by-step guide, you should feel confident in installing your new Moen kitchen sink faucet. Just remember to take your time, follow the instructions, and don't be afraid to ask for help if needed. Happy installing!10. Professional vs. DIY: Which is the Best Option for Installing a Moen Kitchen Sink Faucet?


10. Professional vs. DIY: Which is the Best Option for Installing a Moen Kitchen Sink Faucet?


:max_bytes(150000):strip_icc()/installing-a-moen-kitchen-faucet-2718847-07-1f27cf0de8b541f285e702fa58592819.jpg)

Proper Tools and Materials Needed

Before you Begin
 When preparing to
install a Moen kitchen sink faucet
, it is important to have all the necessary tools and materials on hand. This will ensure that the installation process goes smoothly and efficiently. The first step is to read through the manufacturer's instructions carefully and gather any specific tools or materials mentioned. Generally, you will need a basin wrench, adjustable wrench, plumber's putty, Teflon tape, and a screwdriver. It is also important to have a clean and clutter-free workspace for optimal maneuverability.
When preparing to
install a Moen kitchen sink faucet
, it is important to have all the necessary tools and materials on hand. This will ensure that the installation process goes smoothly and efficiently. The first step is to read through the manufacturer's instructions carefully and gather any specific tools or materials mentioned. Generally, you will need a basin wrench, adjustable wrench, plumber's putty, Teflon tape, and a screwdriver. It is also important to have a clean and clutter-free workspace for optimal maneuverability.
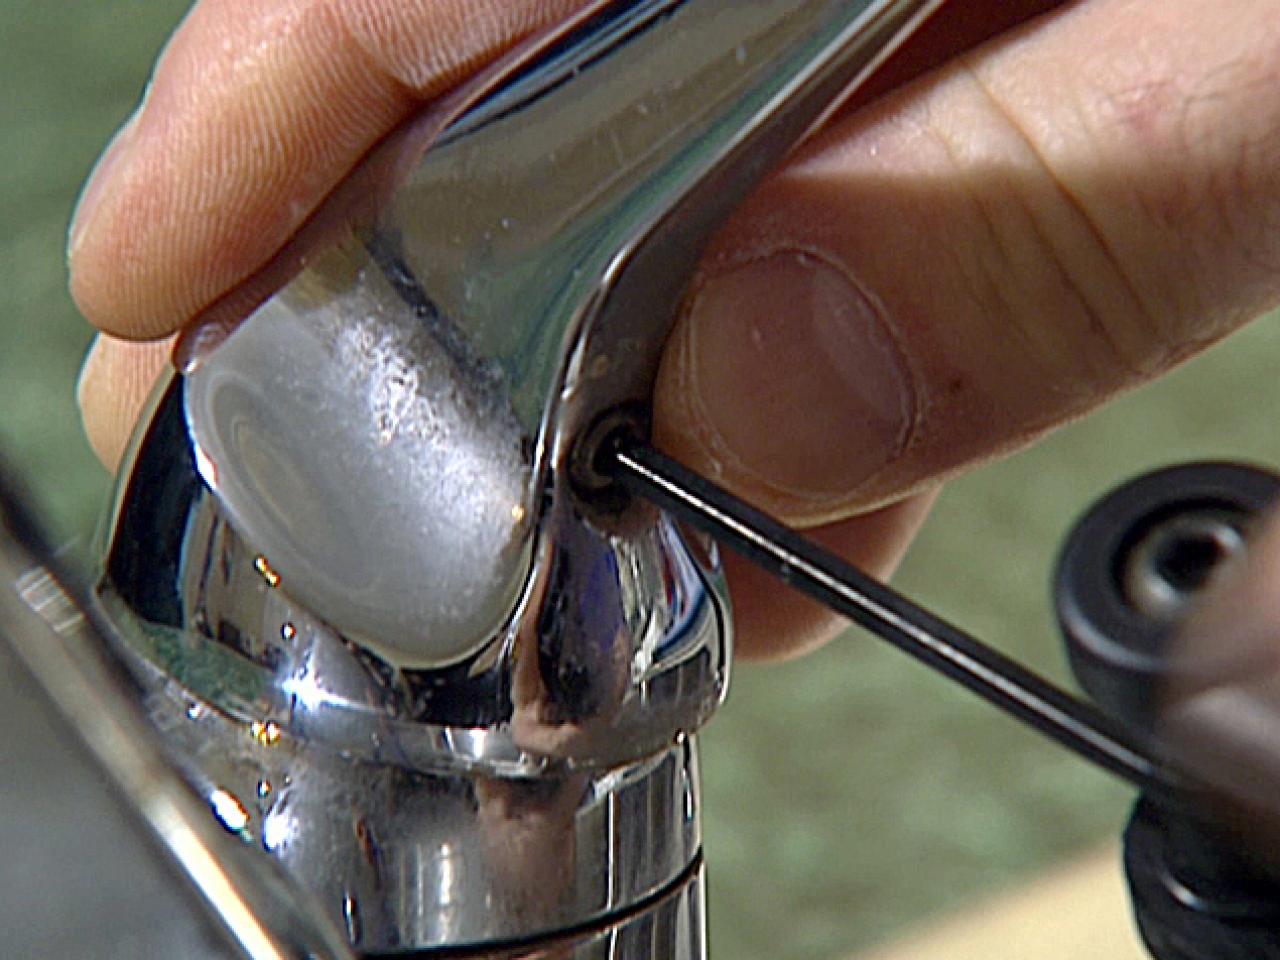
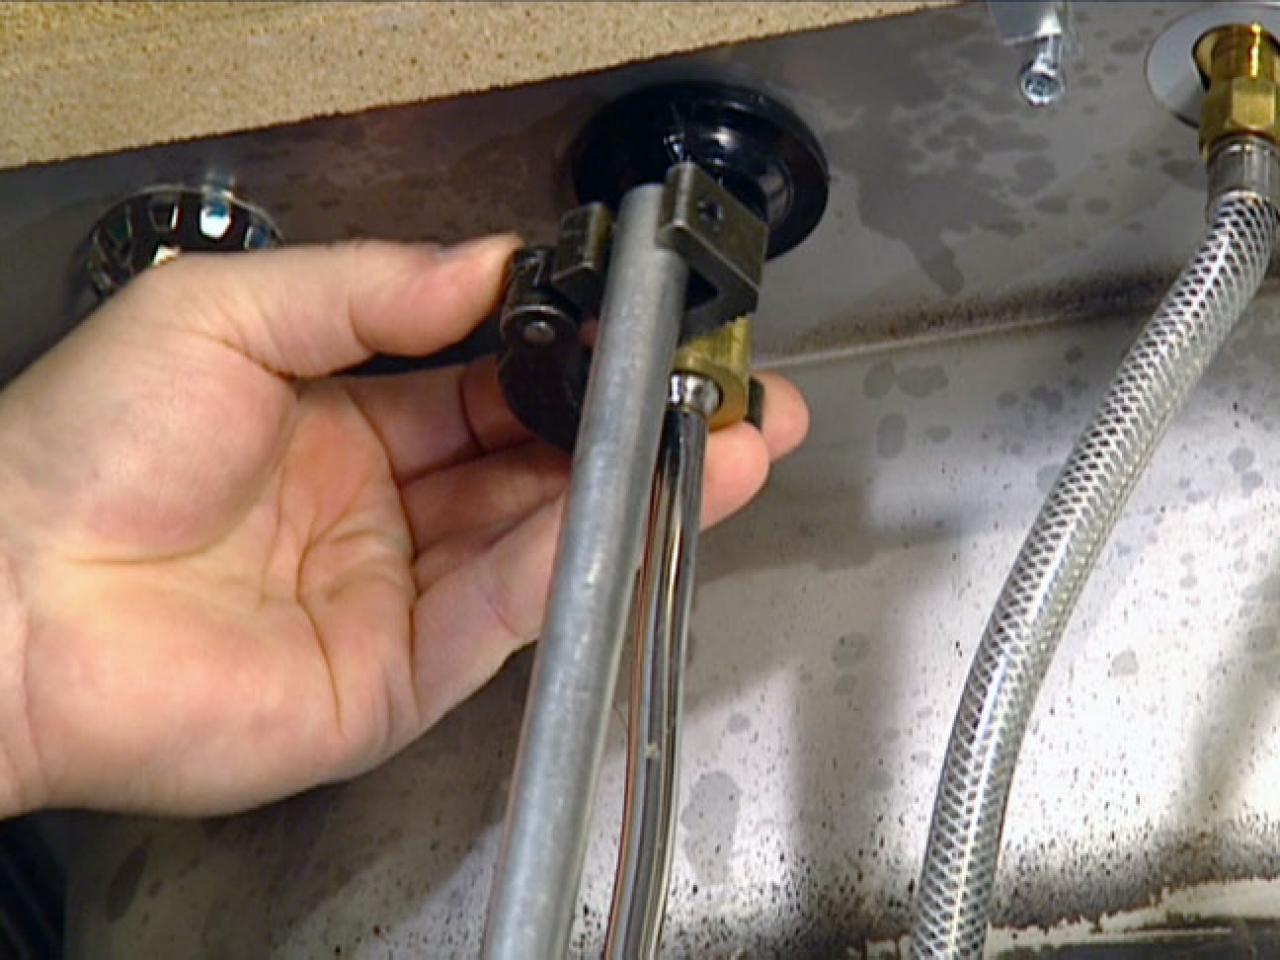
Removing the Old Faucet
 Before starting the installation process, you will need to
remove the old faucet
. Turn off the water supply to the sink and drain any remaining water. Using an adjustable wrench, loosen and remove the nuts that hold the faucet in place. Once the faucet is detached, remove any remaining sealant or putty from the sink.
Before starting the installation process, you will need to
remove the old faucet
. Turn off the water supply to the sink and drain any remaining water. Using an adjustable wrench, loosen and remove the nuts that hold the faucet in place. Once the faucet is detached, remove any remaining sealant or putty from the sink.
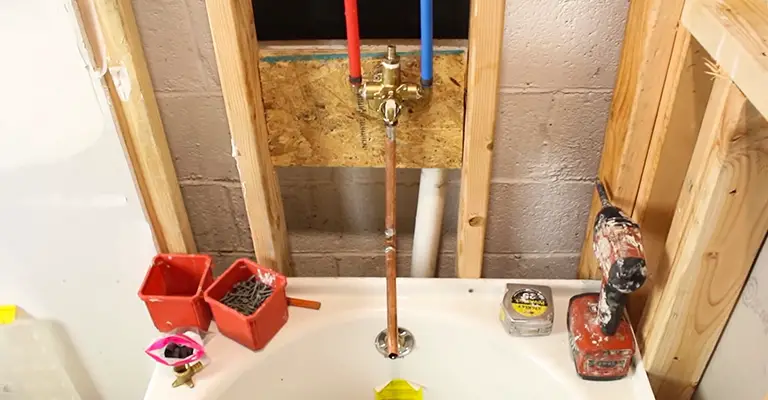
Installing the New Faucet
 With the old faucet removed, it's time to
install the new Moen kitchen sink faucet
. Begin by applying a thin layer of plumber's putty to the base of the faucet. This helps to create a watertight seal between the faucet and the sink. Next, insert the faucet into the mounting hole and secure it with the provided hardware. Use a basin wrench to tighten the nuts and ensure the faucet is firmly in place.
With the old faucet removed, it's time to
install the new Moen kitchen sink faucet
. Begin by applying a thin layer of plumber's putty to the base of the faucet. This helps to create a watertight seal between the faucet and the sink. Next, insert the faucet into the mounting hole and secure it with the provided hardware. Use a basin wrench to tighten the nuts and ensure the faucet is firmly in place.
Connecting the Water Supply
 Once the faucet is securely installed, you can
connect the water supply
. Wrap Teflon tape around the threads of the water supply lines to prevent any leaks. Then, attach the water supply lines to the corresponding hot and cold water inlets on the faucet. Use an adjustable wrench to tighten the connections and ensure they are leak-free.
Once the faucet is securely installed, you can
connect the water supply
. Wrap Teflon tape around the threads of the water supply lines to prevent any leaks. Then, attach the water supply lines to the corresponding hot and cold water inlets on the faucet. Use an adjustable wrench to tighten the connections and ensure they are leak-free.
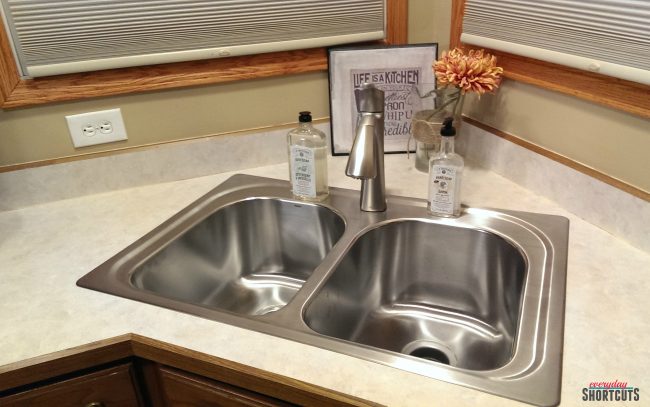
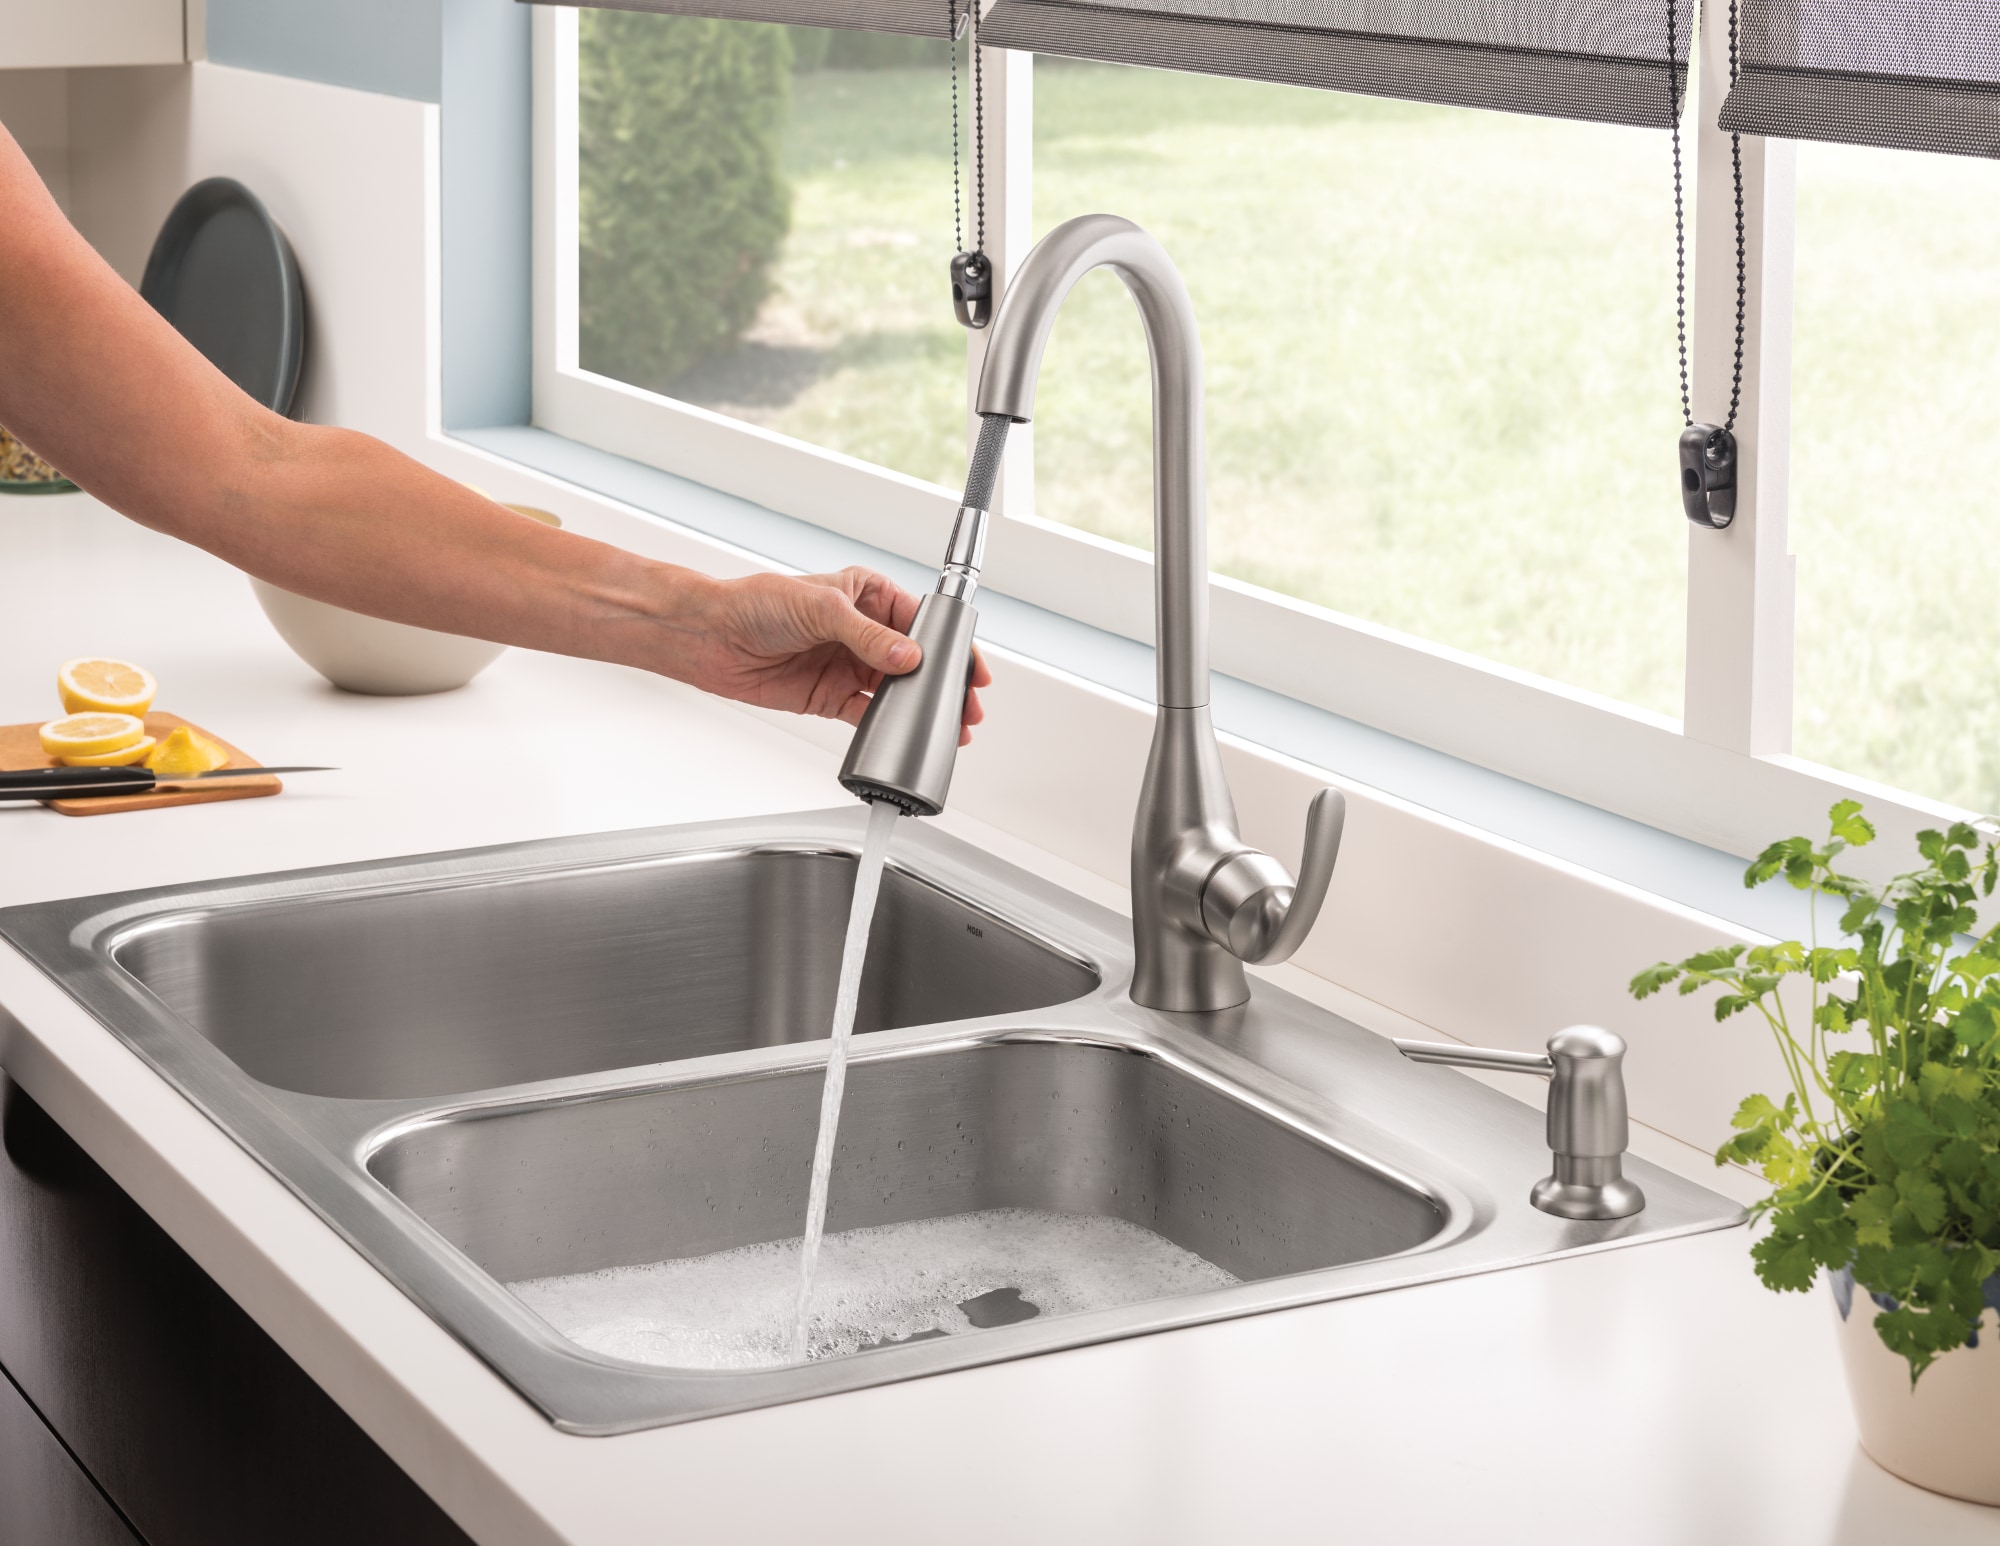
Testing and Finishing Touches
 With the faucet installed and connected, it's time to
test it for functionality
. Turn on the water supply and check for any leaks. If everything looks good, turn on the faucet and check for proper water flow and temperature. Once satisfied, you can add any finishing touches such as a decorative cover plate or aerator.
Now that you have successfully installed your new Moen kitchen sink faucet, you can enjoy its sleek design and functionality. Remember to regularly clean and maintain your faucet to keep it in optimal working condition. If you encounter any issues during installation, it is always best to consult a professional plumber for assistance.
With the faucet installed and connected, it's time to
test it for functionality
. Turn on the water supply and check for any leaks. If everything looks good, turn on the faucet and check for proper water flow and temperature. Once satisfied, you can add any finishing touches such as a decorative cover plate or aerator.
Now that you have successfully installed your new Moen kitchen sink faucet, you can enjoy its sleek design and functionality. Remember to regularly clean and maintain your faucet to keep it in optimal working condition. If you encounter any issues during installation, it is always best to consult a professional plumber for assistance.