If you have noticed a wood piece under your kitchen sink is damaged or rotting, it's important to fix it as soon as possible. Not only can it be an eyesore, but it can also lead to bigger problems like water damage and mold. With a few simple steps, you can easily fix the wood piece and prevent any further damage to your kitchen. Here's how:How to Fix a Wood Piece Under a Kitchen Sink


How to Fix a Wood Piece Under a Kitchen Sink


Repairing a wood piece under a kitchen sink may seem like a daunting task, but with the right tools and techniques, it can be a simple DIY project. The first step is to assess the damage and determine the best course of action. If the damage is minor, you may be able to repair it with a few simple steps. However, if the damage is extensive, it may be more cost-effective to replace the wood piece altogether.How to Repair a Wood Piece Under a Kitchen Sink


How to Repair a Wood Piece Under a Kitchen Sink


If you are up for a DIY challenge, fixing a wood piece under a kitchen sink is a great project to take on. Here are the steps you can follow to fix the wood piece yourself: Step 1: Gather your tools. Before you begin, make sure you have all the necessary tools for the job. You'll need a hammer, screwdriver, wood glue, clamps, and sandpaper. It's also a good idea to have some spare wood pieces on hand in case you need to replace any damaged sections. Step 2: Remove the damaged wood piece. Using a screwdriver, carefully remove the damaged wood piece from under the sink. Be sure to wear gloves to protect your hands from any sharp edges. Step 3: Clean the area. Once the damaged piece is removed, clean the area thoroughly with a damp cloth. This will remove any debris and prepare the surface for the new piece of wood. Step 4: Cut the new wood piece. Measure the space under the sink and cut the new wood piece to fit. You can use a saw or a utility knife to make the cuts. Step 5: Attach the new wood piece. Apply wood glue to the edges of the new wood piece and carefully attach it to the underside of the sink. Use clamps to hold it in place and let it dry for at least 24 hours. Step 6: Sand and seal the wood piece. Once the glue is dry, sand down any rough edges and apply a sealant to protect the wood from moisture and water damage. Allow the sealant to dry completely before using the sink.DIY: Fixing a Wood Piece Under a Kitchen Sink


DIY: Fixing a Wood Piece Under a Kitchen Sink


Here is a step-by-step guide to fixing a wood piece under a kitchen sink: Step 1: Assess the damage. Before you start the repair process, assess the damage to determine if it can be fixed or if the wood piece needs to be replaced. Step 2: Remove the damaged wood piece. Using a screwdriver, carefully remove the damaged wood piece from under the sink. Step 3: Clean the area. Clean the area thoroughly with a damp cloth to remove any debris. Step 4: Cut the new wood piece. Measure the space under the sink and cut the new wood piece to fit. Step 5: Attach the new wood piece. Apply wood glue to the edges of the new wood piece and carefully attach it to the underside of the sink. Use clamps to hold it in place and let it dry for at least 24 hours. Step 6: Sand and seal the wood piece. Once the glue is dry, sand down any rough edges and apply a sealant to protect the wood from moisture and water damage. Step 7: Reattach the plumbing. Once the wood piece is secure, reattach the plumbing and test for any leaks.Step-by-Step Guide to Fixing a Wood Piece Under a Kitchen Sink


Step-by-Step Guide to Fixing a Wood Piece Under a Kitchen Sink


Not all wood piece repairs require a full replacement. Here are some easy fixes for minor damage to a wood piece under a kitchen sink: Fill in gaps with wood filler. If there are small gaps or cracks in the wood, you can easily fill them in with wood filler. Simply apply the filler, let it dry, and sand down the excess. Treat mold and mildew. If the wood piece is showing signs of mold or mildew, use a mixture of water and bleach to clean and disinfect the area. Be sure to wear protective gear when handling bleach. Use a wood preservative. To prevent future damage, you can apply a wood preservative to the underside of the sink. This will protect the wood from moisture and water damage.Easy Fixes for a Wood Piece Under a Kitchen Sink


Easy Fixes for a Wood Piece Under a Kitchen Sink


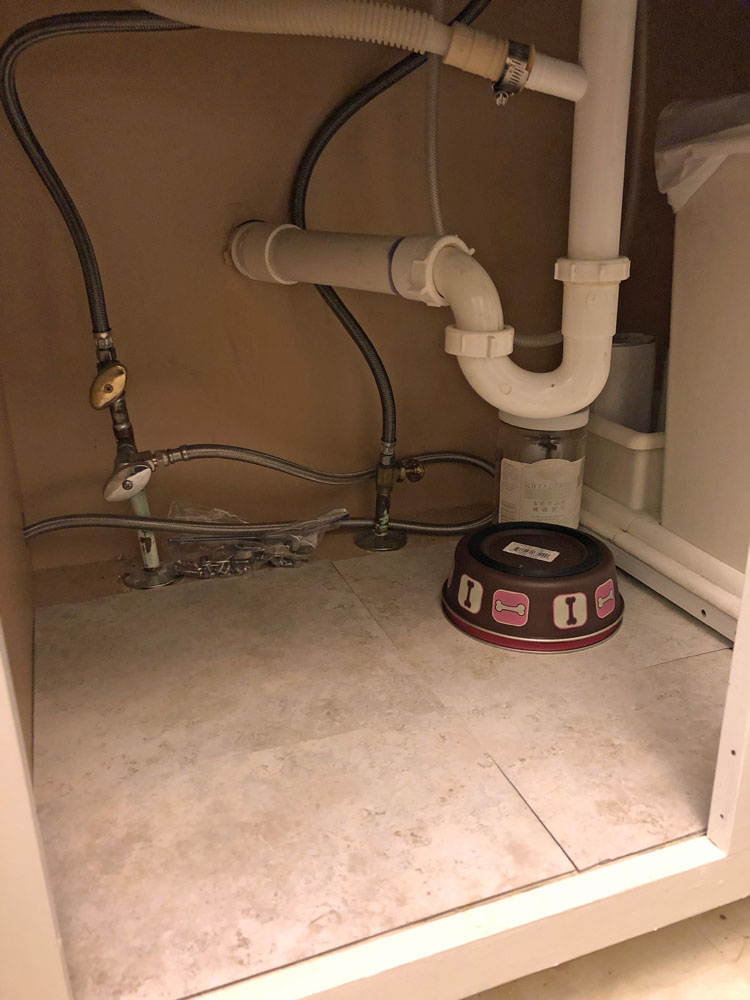
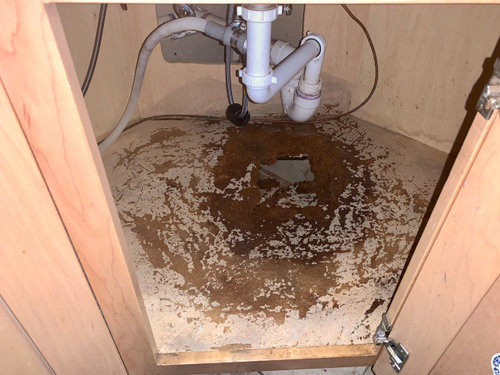
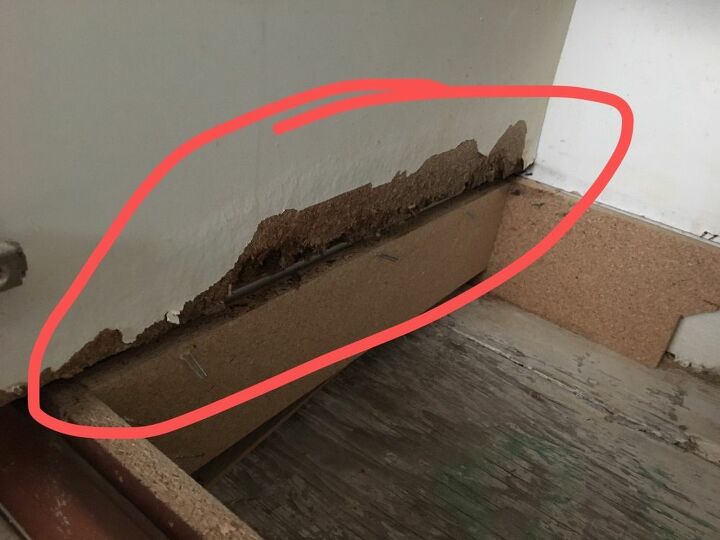
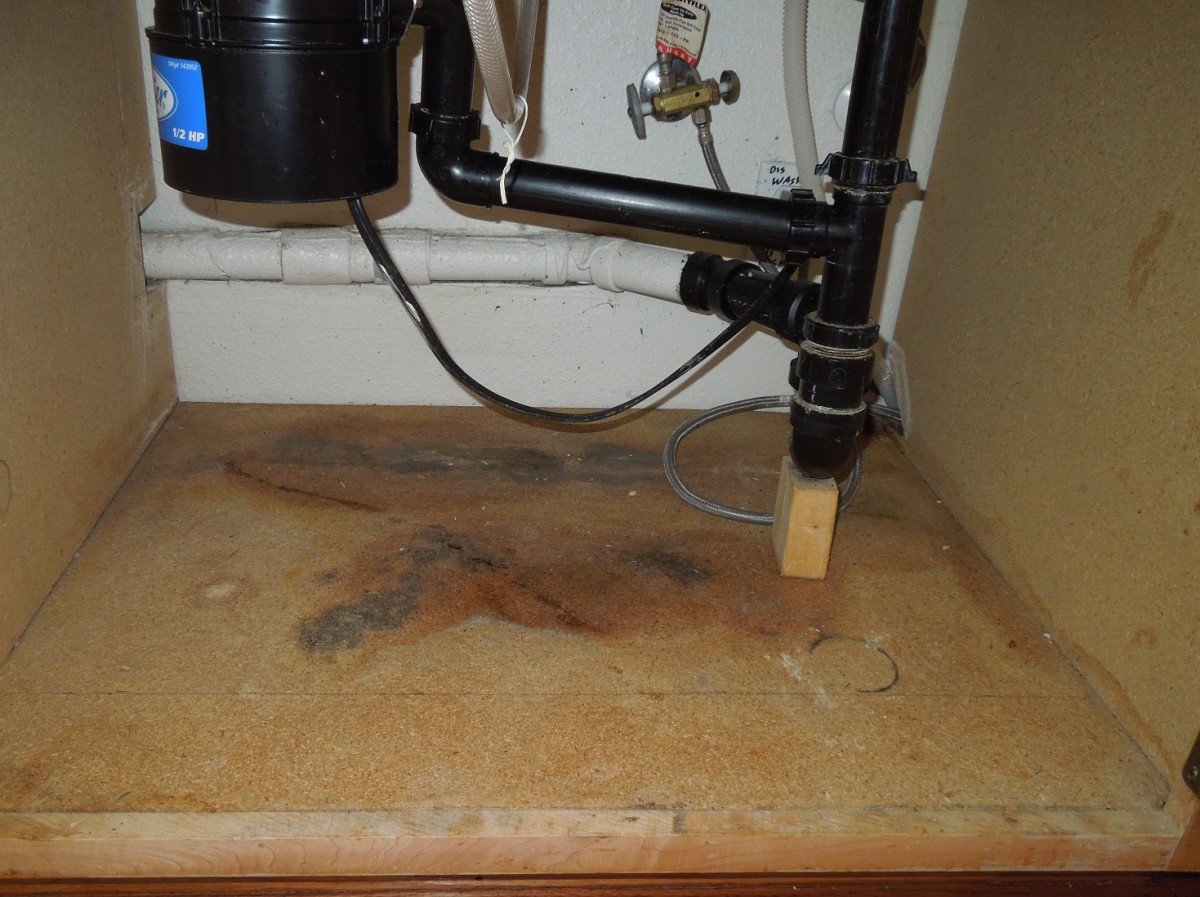
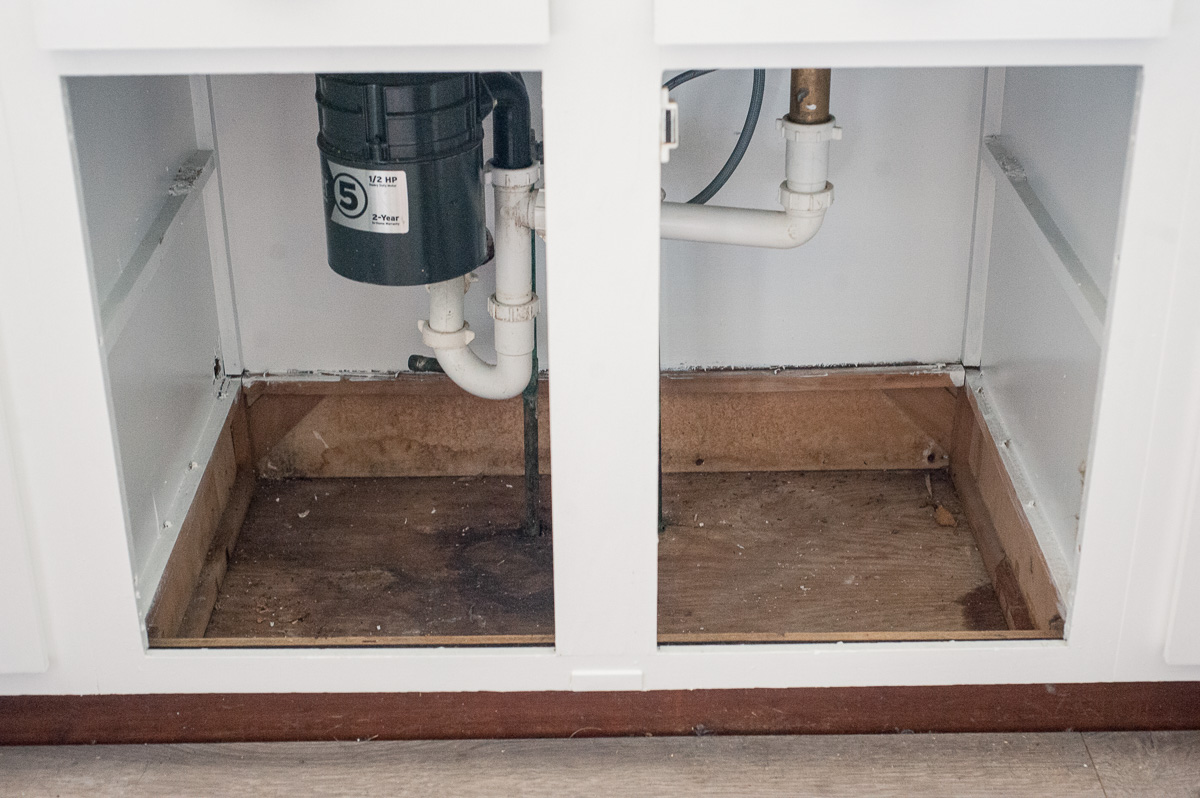
Wood pieces under kitchen sinks are prone to damage, especially in areas with high levels of moisture. Here are some common problems you may encounter: Rotting wood. Excess moisture can cause wood to rot, leading to structural damage and potential health hazards. Leaking pipes. If there is a leak in the plumbing under the sink, it can cause damage to the wood piece and surrounding areas. Mold and mildew growth. Moisture buildup can lead to the growth of mold and mildew, which can be harmful to your health.Common Problems with Wood Pieces Under Kitchen Sinks


Common Problems with Wood Pieces Under Kitchen Sinks


Here are the tools you will need to fix a wood piece under a kitchen sink: Hammer. Screwdriver. Wood glue. Clamps. Sandpaper. Saw or utility knife.Tools You'll Need to Fix a Wood Piece Under a Kitchen Sink


Tools You'll Need to Fix a Wood Piece Under a Kitchen Sink


To avoid having to fix a wood piece under your kitchen sink, here are some tips for preventing wood damage: Keep the area dry. Wipe down the area under the sink regularly to prevent moisture buildup. Fix leaks promptly. If you notice a leak in the plumbing, fix it as soon as possible to prevent water damage to the wood. Use a wood preservative. Applying a wood preservative can help protect the wood from moisture and prevent rotting.Tips for Preventing Wood Damage Under a Kitchen Sink


Tips for Preventing Wood Damage Under a Kitchen Sink


When it comes to fixing a damaged wood piece under a kitchen sink, you may be wondering if it's better to repair or replace it. Here are some factors to consider: The extent of the damage. If the damage is minor, it may be more cost-effective to repair the wood piece. However, if the damage is extensive, it may be easier and more cost-effective to replace it. Your DIY skills. If you are confident in your DIY skills, you may be able to repair the wood piece yourself. However, if you are not comfortable with DIY projects, it may be best to hire a professional to replace the wood piece. Budget. Replacing a wood piece can be more expensive than repairing it, so consider your budget when making your decision.Replacing vs. Repairing a Wood Piece Under a Kitchen Sink


Replacing vs. Repairing a Wood Piece Under a Kitchen Sink


While some wood piece repairs can be done on your own, there are times when it's best to call a professional plumber. Here are some situations where you may need to seek professional help: The damage is extensive. If the wood piece is severely damaged or has started to rot, it's best to call a plumber to assess the situation and determine the best course of action. You are not comfortable with DIY projects. If you are not confident in your DIY skills, it's best to leave the repair or replacement of a wood piece to a professional plumber. The damage is causing other problems. If the damaged wood piece is causing leaks or other issues with your plumbing, it's important to call a plumber to fix the problem before it gets worse.Professional Help: When to Call a Plumber for a Wood Piece Under a Kitchen Sink


Professional Help: When to Call a Plumber for a Wood Piece Under a Kitchen Sink


How to Fix a Wood Piece Under Your Kitchen Sink
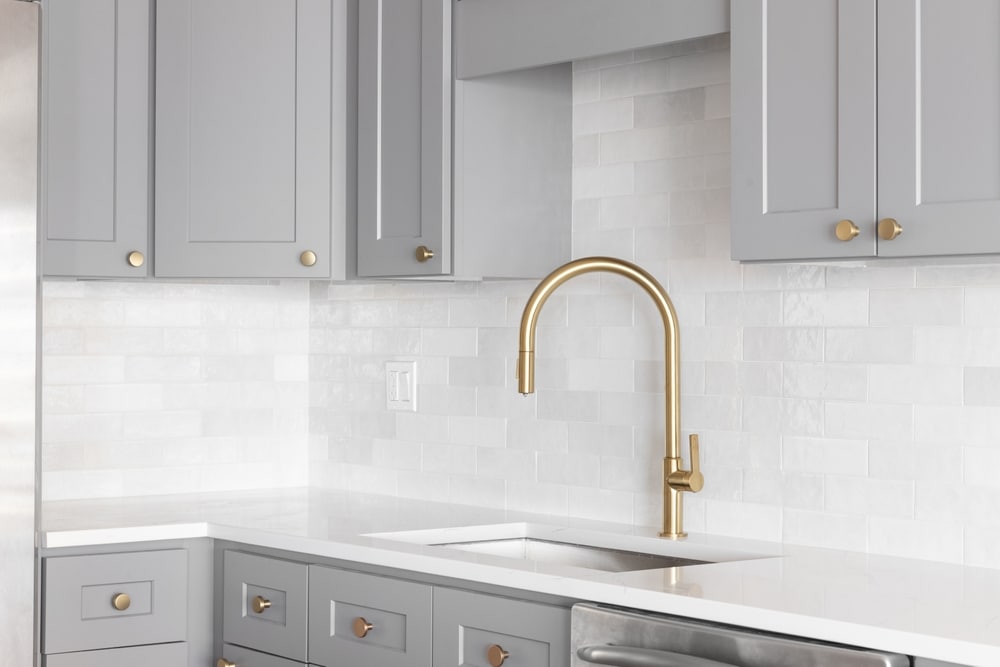
Maintaining a Functional and Stylish Kitchen
 When it comes to kitchen design, every detail matters. From the color of the walls to the type of flooring, every element plays a role in creating a functional and stylish space. One often overlooked area is the space under the kitchen sink. This area is typically used for storage, but it can also be prone to wear and tear. One common issue that homeowners face is a loose or damaged wood piece under the kitchen sink. This not only affects the aesthetic of the kitchen, but it can also lead to further damage if left unattended. In this article, we will guide you on how to fix a wood piece under your kitchen sink and ensure that your kitchen remains in top shape.
Assess the Damage
 Before you begin the repair process, it's important to assess the damage. Take a close look at the wood piece under your kitchen sink and determine if it is cracked, loose, or completely broken. This will help you determine the extent of the repair needed and the materials required.
Gather Your Tools and Materials
 Once you have assessed the damage, gather all the necessary tools and materials. This may include a hammer, nails, screws, a drill, wood glue, and a saw. It's important to have all the materials on hand before you begin the repair process to avoid any interruptions.
Remove the Damaged Wood Piece
 Using a hammer or drill, carefully remove the damaged wood piece from under the kitchen sink. Be sure to wear protective gear and follow safety precautions to avoid any injuries. Once the wood piece is removed, clean the area thoroughly to remove any debris or old adhesive.
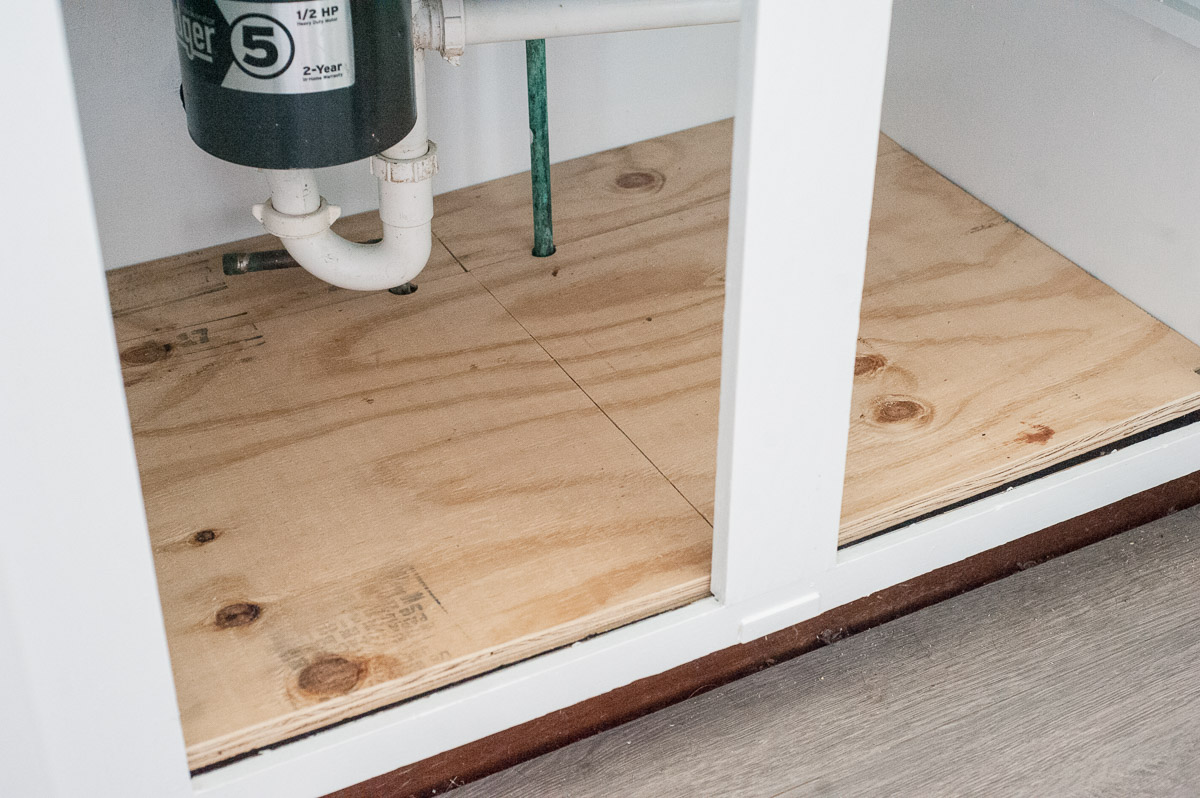
Replace with a New Wood Piece
 Measure the space under the kitchen sink and cut a new wood piece to fit. If the previous wood piece was completely broken, you may need to create a new support structure using additional wood pieces. Once the new wood piece is cut, use wood glue to secure it in place. You can also use screws for added support.
Reinstall the Sink
 Once the wood piece is securely in place, it's time to reinstall the kitchen sink. This may require some assistance, as the sink can be heavy and awkward to maneuver. Use screws to attach the sink to the new wood piece and ensure that it is securely in place.
Final Touches
 Once the sink is reinstalled, add any finishing touches to the wood piece, such as sanding or painting, to match the rest of your kitchen decor. This will not only make the repair look seamless but also add to the overall aesthetic of your kitchen.
In Conclusion
 Fixing a wood piece under your kitchen sink may seem like a daunting task, but with the right tools and materials, it can be a simple and straightforward process. By following these steps, you can ensure that your kitchen remains functional and stylish, without any loose or damaged wood pieces. Remember to regularly check the area under your kitchen sink for any signs of wear and tear, and address any issues immediately to avoid further damage.