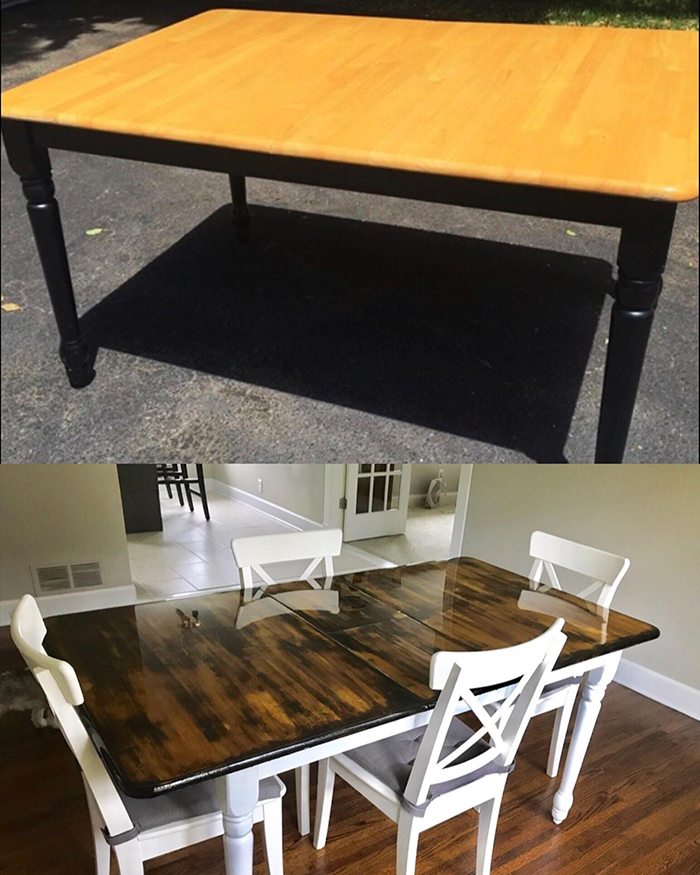
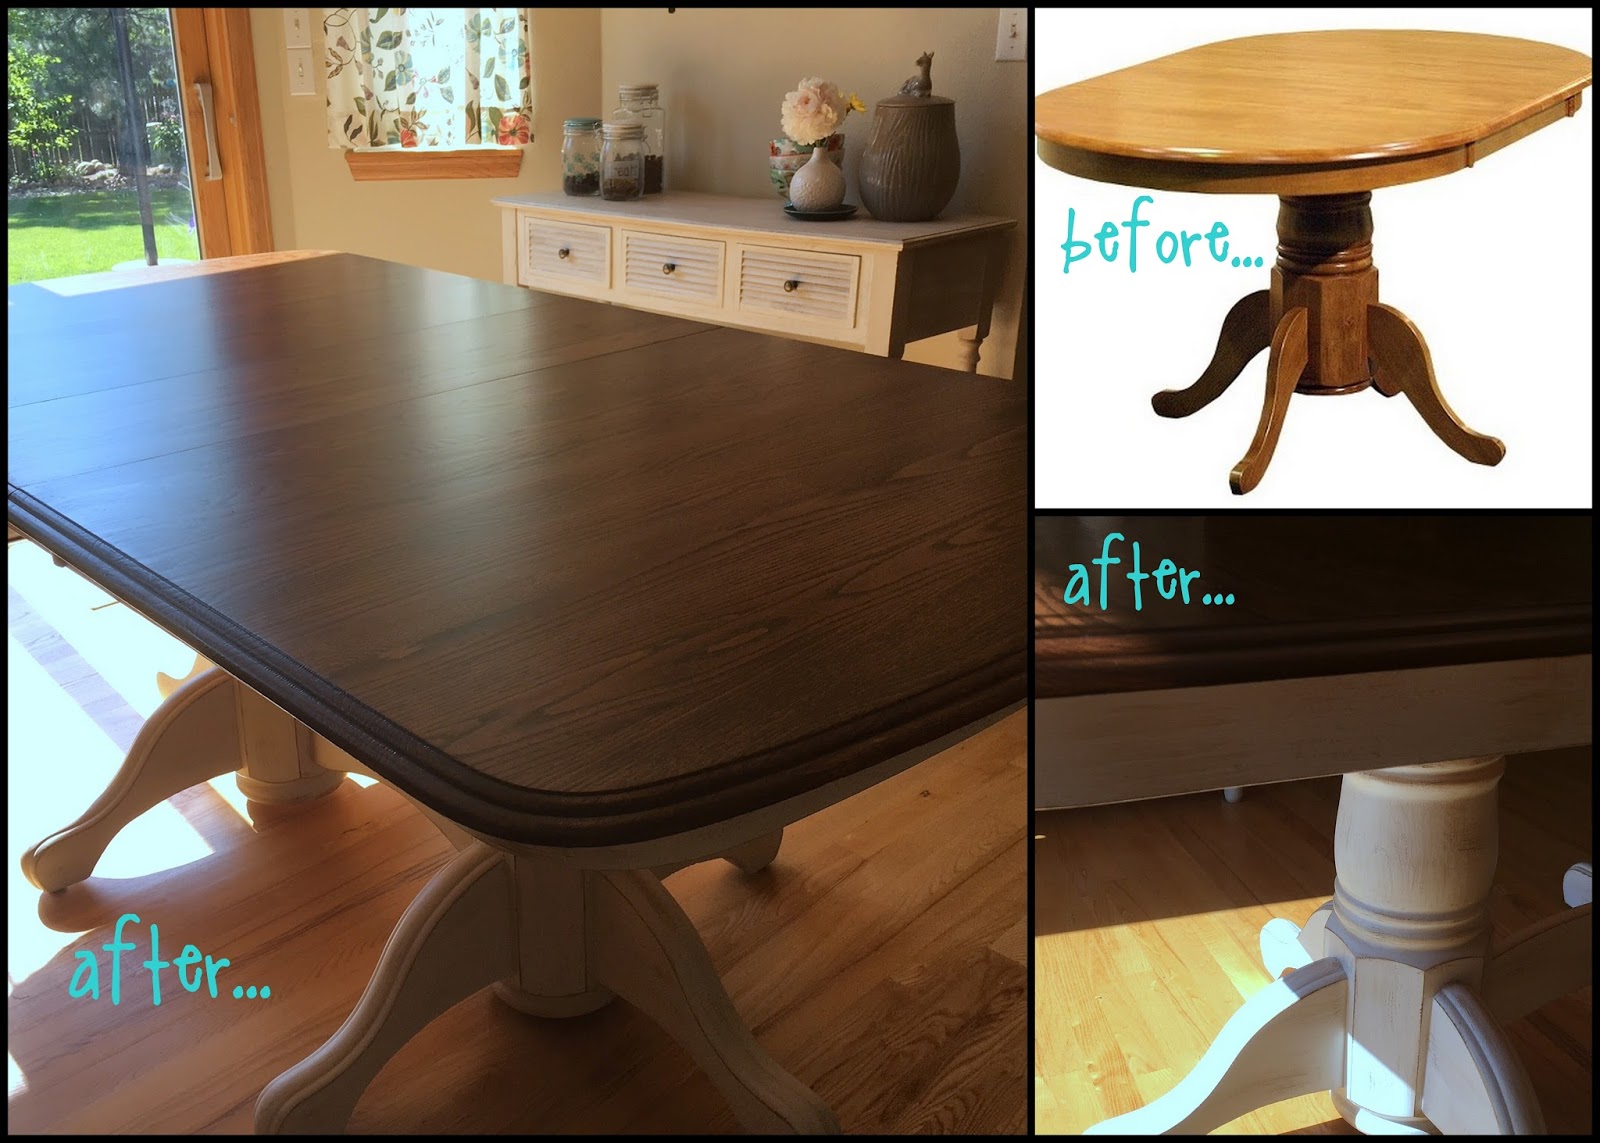
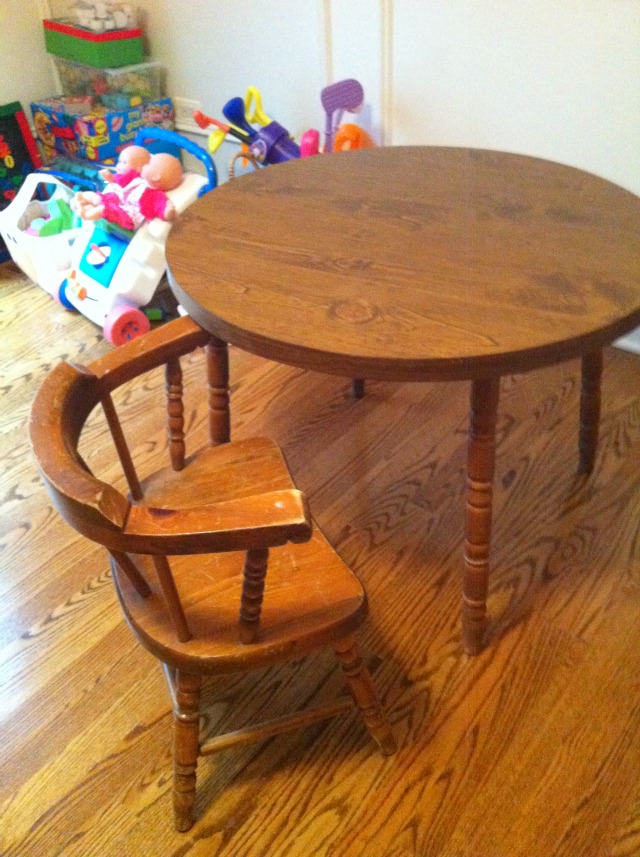
Are you tired of your old, worn out kitchen table? Do you want to give it a fresh new look without spending a fortune? Refinishing your kitchen table is the perfect solution! Not only will it save you money, but it will also give you the opportunity to get creative and add a personal touch to your dining space. Here, we'll show you how to refinish your kitchen table with pictures and ideas from HGTV. First, gather your materials. You'll need sandpaper, stain, polyurethane, paintbrushes, and tack cloths. Make sure to choose a stain color that complements your kitchen's design and theme. Start by sanding the surface of your table with a sandpaper to remove any existing finish. Make sure to sand with the grain of the wood and wipe away any dust with a tack cloth. Next, use a paintbrush to apply the stain in even strokes, following the direction of the wood grain. You can choose to apply multiple coats for a darker and richer color. Allow the stain to dry completely before moving on to the next step. Once the stain is dry, apply a coat of polyurethane to seal and protect the wood. Use long, even strokes and let it dry completely before lightly sanding the surface with a fine-grit sandpaper and applying a second coat. Repeat this step until you achieve your desired level of shine. And there you have it! Your kitchen table has been successfully refinished with a beautiful new look. You can also add a personal touch by painting a design or pattern on the tabletop before applying the polyurethane.1. How to Refinish a Kitchen Table: Pictures & Ideas | From HGTV


1. How to Refinish a Kitchen Table: Pictures & Ideas


If you're on a budget and looking for a simple yet effective way to refinish your kitchen table, this DIY project from Homemade Food Junkie is perfect for you. With just a few materials and easy-to-follow steps, you can transform your old kitchen table into a stunning centerpiece for your dining space. Start by cleaning your table with soap and water to remove any dirt or grime. Once it's dry, use a sandpaper to gently roughen the surface and prepare it for staining. Make sure to wipe away any dust with a tack cloth. Next, choose your desired stain color and apply it with a paintbrush in long, even strokes. You can also use a rag to apply the stain for a more rustic look. Let it dry completely before applying a second coat if needed. Once the stain is dry, use a polyurethane sealer to protect the wood and give it a glossy finish. Apply it in thin, even coats and sand lightly between each coat. Let it dry completely before using your newly refinished kitchen table. With just a few simple steps, you can achieve a beautiful and budget-friendly kitchen table makeover. Get creative and experiment with different stain colors and designs to make your table truly unique.2. DIY Refinished Kitchen Table - Homemade Food Junkie


From HGTV


Refinishing a table may seem like a daunting task, but it's actually extremely easy with the right tools and techniques. Follow these simple steps to give your kitchen table a brand new look. First, gather your materials. You'll need sandpaper, wood stain, polyurethane, paintbrushes, tack cloths, and drop cloths. Make sure to protect your workspace by laying down a drop cloth. Start by sanding the surface of your table with a sandpaper to remove any existing finish. Wipe away any dust with a tack cloth and protect any areas you don't want to stain with painter's tape. Next, apply the wood stain with a paintbrush in the direction of the wood grain. You can choose to apply multiple coats for a darker color, but make sure to let each coat dry completely before applying the next one. Once the stain is dry, apply a coat of polyurethane to protect the wood and give it a glossy finish. Use long, even strokes and let it dry completely before lightly sanding the surface with a fine-grit sandpaper and applying a second coat. Repeat this step until you achieve your desired level of shine. And that's it! You now have a beautifully refinished table that will add a touch of elegance to your kitchen. Don't be afraid to get creative and try different stain colors and designs to make it truly unique.3. How to Refinish a Table - It's Actually Extremely Easy


2. DIY Refinished Kitchen Table - Homemade Food Junkie


If you enjoy woodworking and want to take on a more challenging project, this DIY refinishing kitchen table tutorial is perfect for you. With a few extra steps, you can achieve a professional-looking finish that will make your table stand out. Start by sanding the surface of your table with a sandpaper to remove any existing finish. Make sure to sand with the grain of the wood and wipe away any dust with a tack cloth. Next, use a wood conditioner to prep the wood for staining. This will help the wood absorb the stain evenly and prevent blotchiness. Apply it with a paintbrush and let it dry completely. Once the wood conditioner is dry, apply the stain with a brush or rag in long, even strokes. Let it dry completely before lightly sanding the surface with a fine-grit sandpaper and applying a second coat if needed. Once the stain is dry, use a polyurethane sealer to protect the wood and give it a glossy finish. Apply it in thin, even coats and sand lightly between each coat. Let it dry completely before using your newly refinished kitchen table. This method may take a bit more time and effort, but the end result will be worth it. Your kitchen table will have a professional-looking finish that will make it the highlight of your dining space.4. DIY Refinishing Kitchen Table Tutorial - Woodworking


3. How to Refinish a Table - It's Actually Extremely Easy


If you're thinking about refinishing your kitchen table, you may be wondering about the cost, time, and materials involved. The good news is, refinishing a table is a budget-friendly and time-efficient project that can be completed with just a few materials. The cost of refinishing a kitchen table will vary depending on the materials you choose. A gallon of wood stain can range from $10 to $30, while a quart of polyurethane can cost between $10 to $20. Sandpaper and paintbrushes can be purchased for a few dollars, making this a relatively affordable project. The time it takes to refinish a kitchen table will depend on how many coats of stain and polyurethane you choose to apply, but on average, it can take about 2-3 days to complete. The actual time spent working on the table will be around 2-3 hours, with the rest of the time dedicated to drying between coats. As for materials, you'll need sandpaper, stain, polyurethane, paintbrushes, and tack cloths. These can all be purchased at a local hardware store for a reasonable price. Overall, refinishing a kitchen table is a cost-effective and time-efficient way to give your dining space a fresh new look.5. How to Refinish a Kitchen Table: Cost, Time, and Materials


4. DIY Refinishing Kitchen Table Tutorial - Woodworking


If you're on a tight budget and looking for a simple and affordable way to refinish your kitchen table, this DIY project from The Frugal Homemaker is perfect for you. With just a few materials and easy-to-follow steps, you can give your old table a new lease on life. Start by cleaning your table with soap and water to remove any dirt or grime. Once it's dry, use a sandpaper to gently roughen the surface and prepare it for staining. Make sure to wipe away any dust with a tack cloth. Next, choose your desired stain color and apply it with a paintbrush in long, even strokes. You can also use a rag to apply the stain for a more rustic look. Let it dry completely before applying a second coat if needed. Once the stain is dry, use a polyurethane sealer to protect the wood and give it a glossy finish. Apply it in thin, even coats and sand lightly between each coat. Let it dry completely before using your newly refinished kitchen table. This project is not only budget-friendly, but it also allows you to get creative and experiment with different stain colors and designs to make your table truly unique.6. DIY Refinished Kitchen Table - The Frugal Homemaker


5. How to Refinish a Kitchen Table: Cost, Time, and Materials


Refinishing a kitchen table may seem like a daunting task, but with this step-by-step guide, you'll be able to transform your old table into a stunning centerpiece for your dining space. Step 1: Gather your materials. You'll need sandpaper, stain, polyurethane, paintbrushes, and tack cloths. Make sure to choose a stain color that complements your kitchen's design and theme. Step 2: Sand the surface of your table with a sandpaper to remove any existing finish. Make sure to sand with the grain of the wood and wipe away any dust with a tack cloth. Step 3: Apply the stain with a paintbrush or rag in long, even strokes. Let it dry completely before applying a second coat if needed. Step 4: Once the stain is dry, use a polyurethane sealer to protect the wood and give it a glossy finish. Apply it in thin, even coats and sand lightly between each coat. Let it dry completely before using your newly refinished kitchen table. Following these simple steps will result in a beautifully refinished kitchen table that will add a touch of elegance to your home. Don't be afraid to get creative and try different stain colors and designs to make it truly unique.7. How to Refinish a Kitchen Table: Step-by-Step Guide


6. DIY Refinished Kitchen Table - The Frugal Homemaker


If you want to take your DIY skills to the next level, this project from The Navage Patch is perfect for you. With a few extra steps and techniques, you can achieve a professional-looking finish that will make your table stand out. Start by sanding the surface of your table with a sandpaper to remove any existing finish. Make sure to sand with the grain of the wood and wipe away any dust with a tack cloth. Next, use a wood conditioner to prep the wood for staining. This will help the wood absorb the stain evenly and prevent blotchiness. Apply it with a paintbrush and let it dry completely. Once the wood conditioner is dry, apply the stain with a brush or rag in long, even strokes. Let it dry completely before lightly sanding the surface with a fine-grit sandpaper and applying a second coat if needed. Once the stain is dry, use a polyurethane sealer to protect the wood and give it a glossy finish. Apply it in thin, even coats and sand lightly between each coat. Let it dry completely before using your newly refinished kitchen table. With a little extra effort, you can achieve a professional-looking finish that will make your kitchen table the highlight of your dining space.8. DIY Refinished Kitchen Table - The Navage Patch


7. How to Refinish a Kitchen Table: Step-by-Step Guide


Refinishing a kitchen table can be a fun and creative project, but it's important to keep a few tips and tricks in mind to ensure a successful outcome. Tip 1: Always sand with the grain of the wood to avoid scratches or damage to the surface. Tip 2: Use a tack cloth to wipe away any dust before applying stain or polyurethane. Tip 3: Apply multiple thin coats of stain and polyurethane for a more even and professional-looking finish. Tip 4: Protect your workspace with a drop cloth and your skin with gloves when handling chemicals. Tip 5: Get creative and experiment with different stain colors and designs to make your kitchen table truly unique. With these tips and tricks, you'll be able to successfully refinish your kitchen table and give it a beautiful new look.9. How to Refinish a Kitchen Table: Tips and Tricks


8. DIY Refinished Kitchen Table - The Navage Patch


If you're looking for a budget-friendly and easy way to refinish your kitchen table, this DIY project from The Budget Decorator is perfect for you. With just a few materials and simple steps, you can give your old table a fresh new look. Start by cleaning your table with soap and water to remove any dirt or grime. Once it's dry, use a sandpaper to gently roughen the surface and prepare it for staining. Make sure to wipe away any dust with a tack cloth.10. DIY Refinished Kitchen Table - The Budget Decorator


9. How to Refinish a Kitchen Table: Tips and Tricks
How to Refinish Your Kitchen Table and Give Your Home a Fresh Look

Why Refinishing Your Kitchen Table is Worth the Effort
 Refinishing your kitchen table may seem like a daunting task, but the end result is well worth the effort. Not only will it give your table a new life, but it will also give your entire kitchen a fresh look. A well-refinished table can become the centerpiece of your kitchen, adding character and charm to the space. Plus, it is a great way to save money and avoid constantly purchasing new furniture. So, if you are ready to give your kitchen a makeover, follow these simple steps to
DIY refinish your kitchen table
.
Refinishing your kitchen table may seem like a daunting task, but the end result is well worth the effort. Not only will it give your table a new life, but it will also give your entire kitchen a fresh look. A well-refinished table can become the centerpiece of your kitchen, adding character and charm to the space. Plus, it is a great way to save money and avoid constantly purchasing new furniture. So, if you are ready to give your kitchen a makeover, follow these simple steps to
DIY refinish your kitchen table
.
Gather Your Supplies and Prepare Your Workspace
 Before you start the refinishing process, it is important to gather all the necessary supplies and prepare your workspace. You will need sandpaper, a paint stripper, a paintbrush, a putty knife, wood stain, and a clear sealant. It is also essential to have a well-ventilated area and to cover your floors and surrounding furniture with drop cloths to protect them from any potential spills or splatters.
Strip the Old Finish
 The first step in refinishing your kitchen table is to remove the old finish. Using a paint stripper, apply a thick coat onto the table's surface and let it sit for the recommended amount of time. Then, using a putty knife, scrape off the old finish. If there are stubborn areas, use steel wool to gently remove them. Once the old finish is completely removed, use a damp cloth to wipe down the table and let it dry.
Sand and Stain
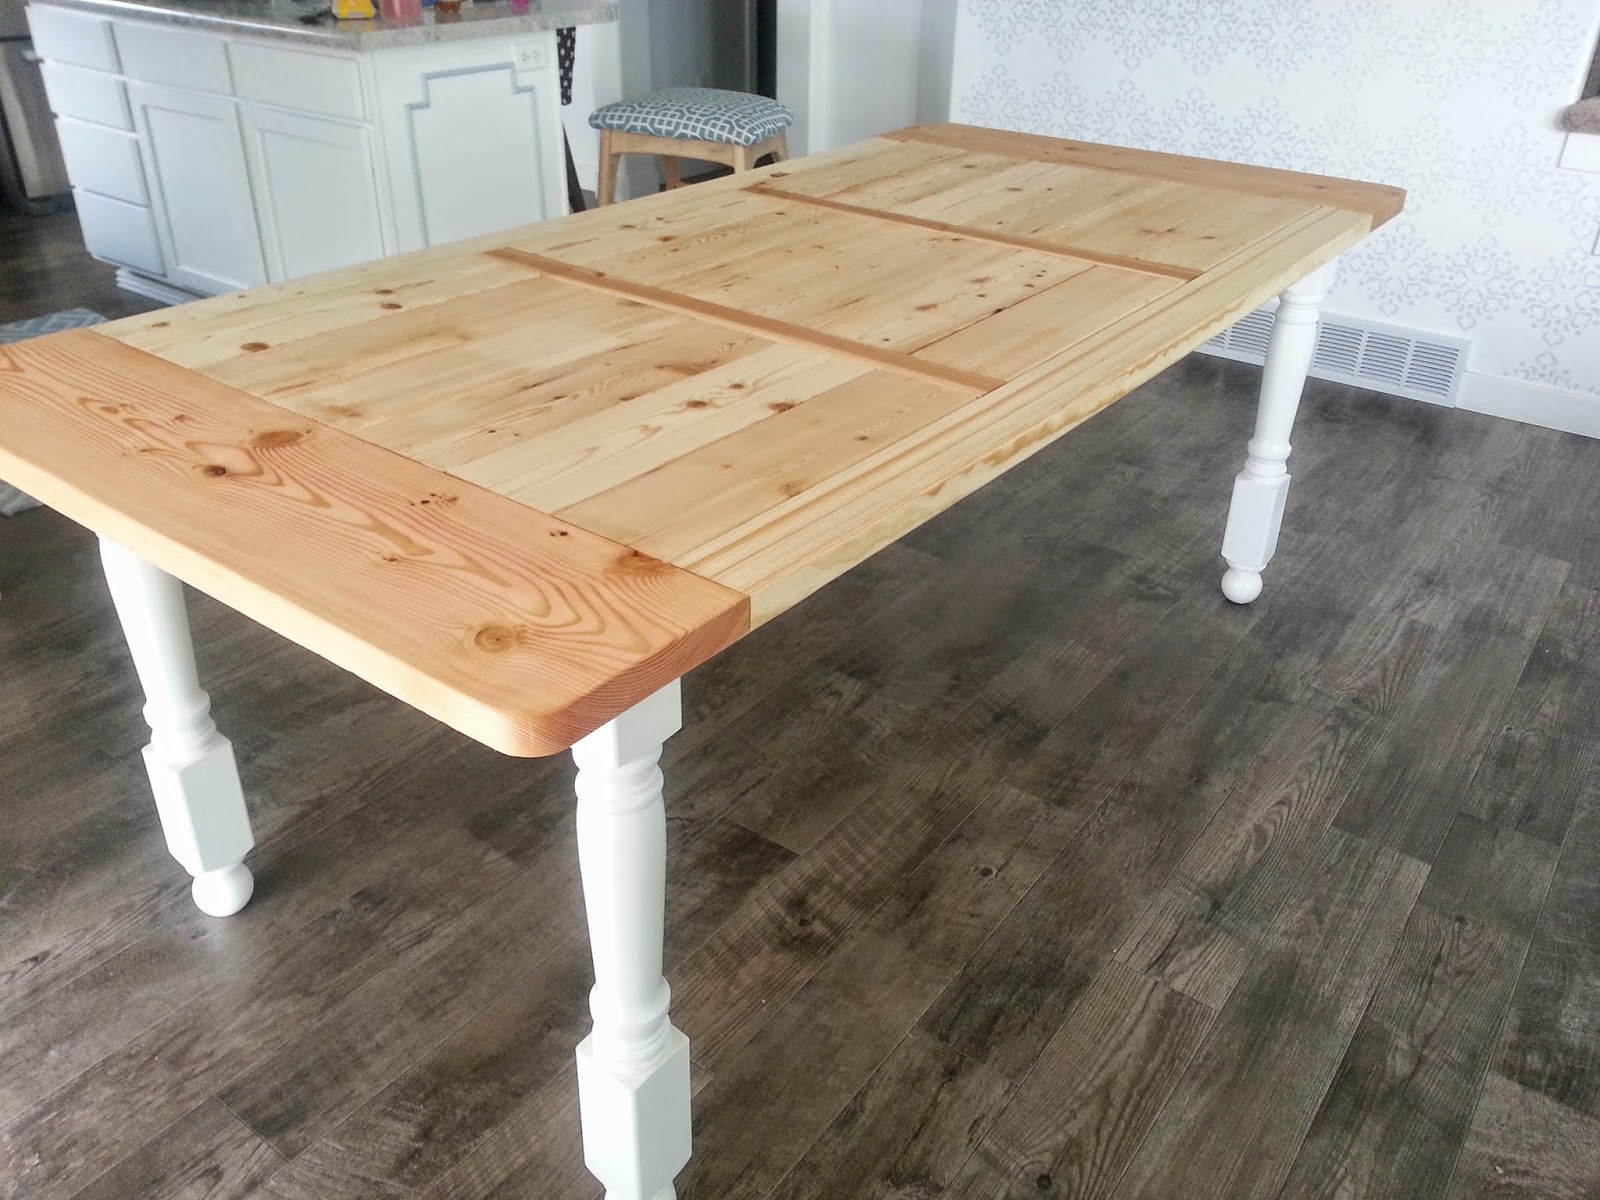
 With a smooth surface, it is now time to sand the table to prepare it for staining. Start with a coarse sandpaper and gradually move to finer grits for a smooth finish. Once the table is sanded, wipe it down with a damp cloth to remove any dust or debris. Then, using a paintbrush, apply the wood stain in the direction of the grain. Let it sit for the recommended time and then wipe off the excess with a clean cloth. Repeat this process until you achieve your desired color.
Seal and Finish
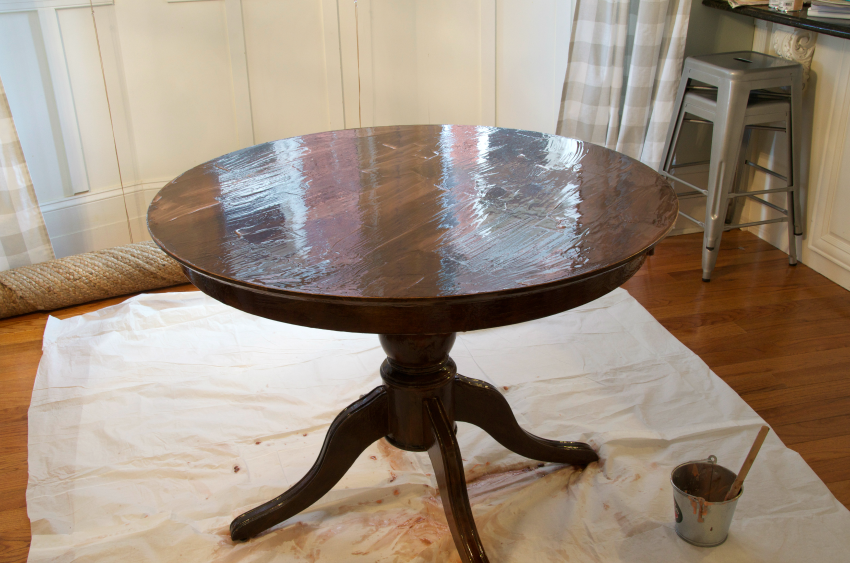
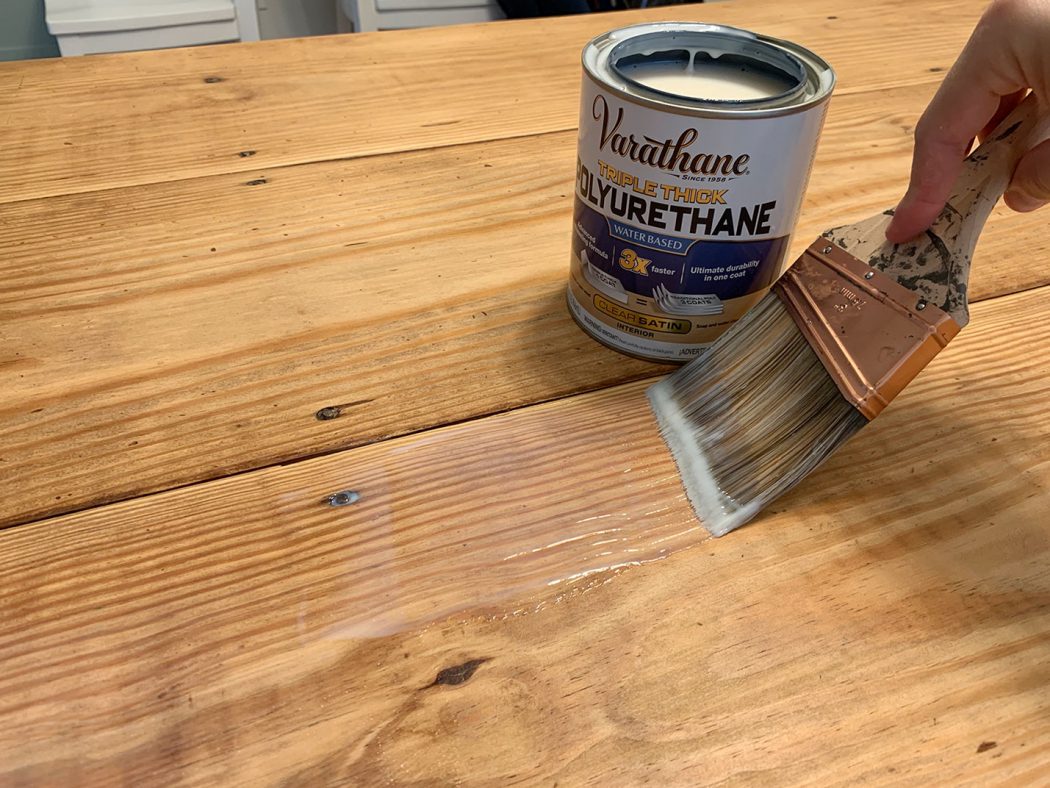
 The final step in refinishing your kitchen table is to seal and finish it. Using a clear sealant, apply a thin coat over the stained surface and let it dry completely. Then, lightly sand the table to smooth out any imperfections and apply a second coat of sealant. Let it dry for at least 24 hours before using your newly refinished kitchen table.
Conclusion
 Refinishing your kitchen table is a simple and cost-effective way to give your home a fresh new look. With a little bit of effort and the right supplies, you can transform your old, worn-out table into a beautiful centerpiece for your kitchen. So, don't be afraid to take on this
DIY project
and give your home the upgrade it deserves.
Refinishing your kitchen table is a simple and cost-effective way to give your home a fresh new look. With a little bit of effort and the right supplies, you can transform your old, worn-out table into a beautiful centerpiece for your kitchen. So, don't be afraid to take on this
DIY project
and give your home the upgrade it deserves.


