If you're experiencing a clogged sink or simply want to give your bathroom a fresh look, removing the sink drain is an essential step. While it may seem like a daunting task, with the right tools and techniques, you can easily remove a bathroom sink drain on your own. In this article, we'll guide you through the step-by-step process of taking out a bathroom sink drain.Removing a Bathroom Sink Drain


Removing a Bathroom Sink Drain


The first step to removing a bathroom sink drain is to gather all the necessary tools. You will need a pair of pliers, a screwdriver, and a drain removal tool. It's also helpful to have a bucket or towel nearby to catch any excess water that may come out during the removal process.How to Take Out a Bathroom Sink Drain


How to Take Out a Bathroom Sink Drain


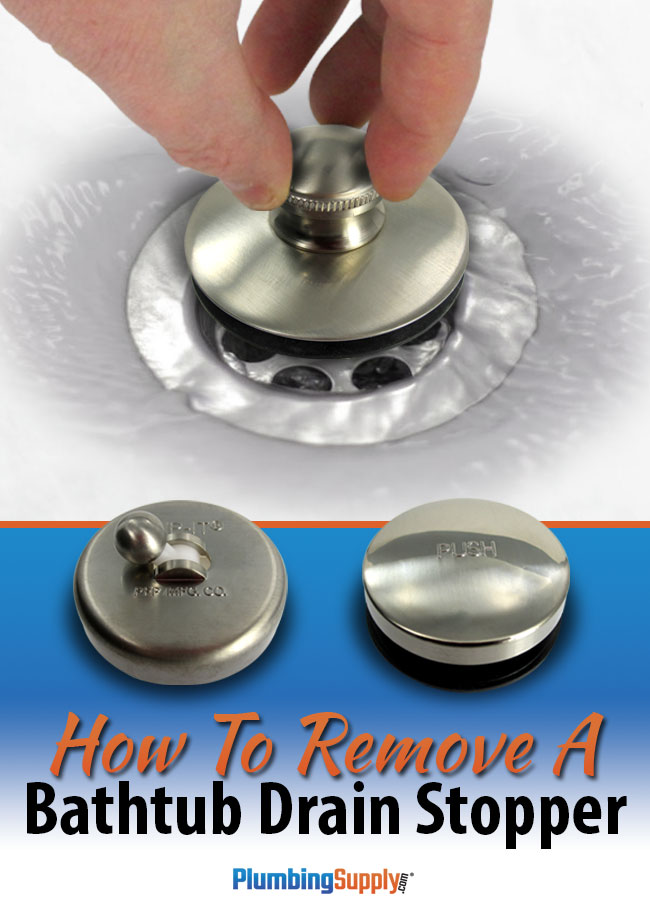
Now that you have all your tools ready, follow these steps to remove the bathroom sink drain: Step 1: Start by locating the drain plug at the bottom of the sink. This is usually a small knob or lever that you can turn or pull up to close or open the drain. Step 2: Use your pliers to loosen the drain plug by turning it counterclockwise. If it's too tight, you can use a cloth for better grip or apply a lubricant to make it easier to turn. Step 3: Once the drain plug is removed, you will see the drain flange, which is the visible part of the drain that sits on top of the sink. Use the pliers to unscrew the flange by turning it counterclockwise. Step 4: After unscrewing the flange, you should be able to pull out the entire drain assembly from the sink. Step 5: If the drain is still stuck, you can use a drain removal tool to loosen it. This tool has small teeth that grip onto the drain and allow you to turn it with more force. Step 6: Once the drain is removed, use a towel or cloth to clean any debris or gunk that may have accumulated in the drainpipe.Step-by-Step Guide for Removing a Bathroom Sink Drain


Step-by-Step Guide for Removing a Bathroom Sink Drain


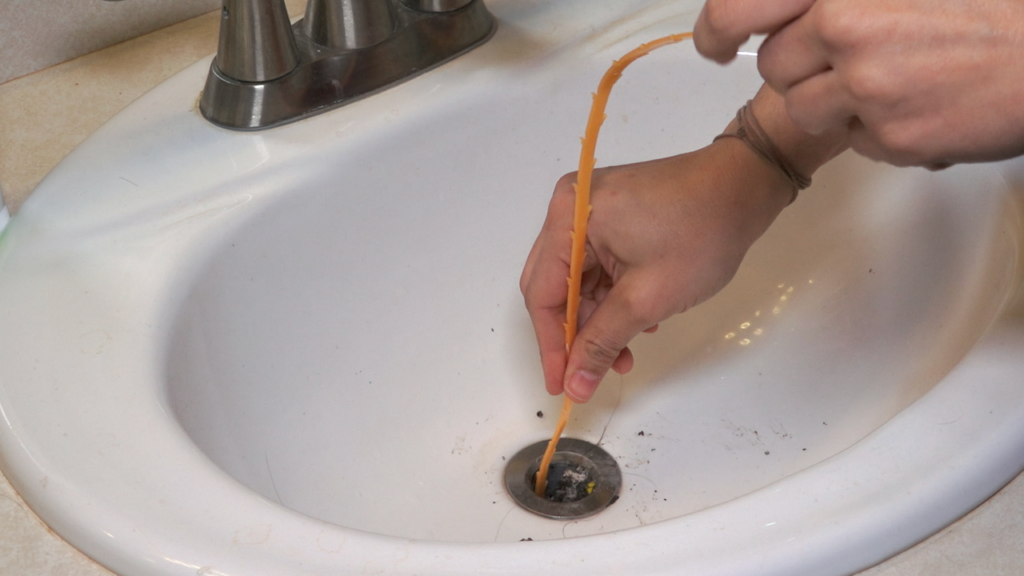
:max_bytes(150000):strip_icc()/bathroom-sink-drain-installation-2718843-02-61e5ecbee1e949be8d8f45ac4f5a6797.jpg)

Removing a bathroom sink drain is a project that can be done on your own with the right tools and knowledge. Not only will you save money on professional plumbing services, but you'll also have the satisfaction of completing the task yourself. It's important to note that if you encounter any difficulties or complications during the removal process, it's best to seek professional help to avoid causing further damage.DIY Bathroom Sink Drain Removal


DIY Bathroom Sink Drain Removal


As mentioned earlier, the tools you'll need to remove a bathroom sink drain include pliers, a screwdriver, and a drain removal tool. It's also helpful to have a bucket or towel, a cloth, and a lubricant if needed. Pro tip: Use a pair of needle-nose pliers for better grip and precision when removing the drain plug.Tools Needed for Taking Out a Bathroom Sink Drain


Tools Needed for Taking Out a Bathroom Sink Drain


In some cases, the bathroom sink drain may be stuck due to rust, debris, or old plumbing. Here are a few tips to help loosen a stubborn drain: Tip 1: Apply a lubricant such as WD-40 to help loosen the drain plug and flange. Tip 2: If the drain is still stuck, use a hammer to gently tap the flange in a counterclockwise direction to break the seal. Tip 3: If all else fails, seek professional help to avoid causing any damage to your sink or plumbing.Tips for Removing a Stubborn Bathroom Sink Drain


Tips for Removing a Stubborn Bathroom Sink Drain


While removing a bathroom sink drain may seem like a simple task, there are a few common mistakes that people make that can lead to further complications. Here are some things to avoid when removing a sink drain: Mistake 1: Using too much force when trying to loosen the drain plug or flange. This can cause damage to the plumbing or the sink itself. Mistake 2: Not using the right tools. Using the wrong tools can make the removal process more difficult and increase the risk of causing damage. Mistake 3: Not turning off the water supply before starting the removal process. This can result in a messy and flooded bathroom.Common Mistakes to Avoid When Taking Out a Bathroom Sink Drain


Common Mistakes to Avoid When Taking Out a Bathroom Sink Drain


If you're a visual learner, there are plenty of helpful video tutorials available online that can guide you through the process of removing a bathroom sink drain. Make sure to follow the steps carefully and always seek professional help if you encounter any difficulties.Video Tutorial: Removing a Bathroom Sink Drain

Video Tutorial: Removing a Bathroom Sink Drain


If you're not comfortable with DIY projects or encounter any difficulties during the removal process, it's best to seek professional plumbing services. A licensed plumber will have the necessary tools and expertise to safely and efficiently remove the sink drain without causing any damage.Professional Plumbing Services for Removing a Bathroom Sink Drain

Professional Plumbing Services for Removing a Bathroom Sink Drain


After successfully removing the bathroom sink drain, you can now clean and replace the components before reinstalling them. This is also a good opportunity to replace any old or damaged parts to ensure the proper functioning of your sink. Make sure to follow the steps in reverse order, starting with installing the drain flange, then the drain plug, and finally tightening the drain plug with your pliers. Turn on the water supply and test the sink to ensure there are no leaks. Now that you know how to take out a bathroom sink drain, you can confidently tackle this project on your own. With the right tools and techniques, you can easily remove a clogged or outdated sink drain and give your bathroom a fresh new look.Replacing a Bathroom Sink Drain After Removal


Replacing a Bathroom Sink Drain After Removal


Why It's Important to Know How to Take Out a Bathroom Sink Drain

The Importance of a Functional Bathroom Sink Drain
 A bathroom sink is an essential part of any home, providing a space to wash your hands, brush your teeth, and perform other daily tasks. However, a clogged or malfunctioning sink drain can quickly become a headache for homeowners. Not only can it lead to unpleasant odors and a buildup of bacteria, but it can also disrupt the flow of water and make it difficult to use the sink properly. That's why it's crucial to know how to take out a bathroom sink drain and address any issues that may arise.
Common Reasons for Taking Out a Bathroom Sink Drain
 There are several reasons why you may need to take out your bathroom sink drain. One of the most common is a clog, which can be caused by a buildup of hair, soap scum, or other debris. Over time, these materials can accumulate and block the drain, causing water to back up and potentially damage your sink or pipes. Another common reason is a malfunctioning drain, which may be caused by a broken or worn-out component that needs to be replaced. In either case, it's essential to know how to take out a bathroom sink drain to address the issue effectively.
Steps for Taking Out a Bathroom Sink Drain
 Taking out a bathroom sink drain may seem like a daunting task, but it can be relatively simple with the right tools and knowledge. Here are the steps you can follow to successfully remove a bathroom sink drain:
Step 1:
Gather your tools and materials, including a pair of pliers, a screwdriver, and a new drain assembly if needed.
Step 2:
Locate the drain plug and remove it by loosening the nut underneath the sink with your pliers.
Step 3:
Use your screwdriver to remove the screws holding the drain in place.
Step 4:
Carefully lift the drain out of the sink and remove any remaining debris or gunk.
Step 5:
If you're replacing the drain, follow the manufacturer's instructions to install the new one.
Step 6:
Once the new drain is in place, reattach the drain plug, and tighten the nut with your pliers.
By following these steps, you can effectively take out a bathroom sink drain and address any issues that may be causing it to malfunction. However, if you're unsure of the process or encounter any difficulties, it's always best to consult a professional plumber for assistance.
Taking out a bathroom sink drain may seem like a daunting task, but it can be relatively simple with the right tools and knowledge. Here are the steps you can follow to successfully remove a bathroom sink drain:
Step 1:
Gather your tools and materials, including a pair of pliers, a screwdriver, and a new drain assembly if needed.
Step 2:
Locate the drain plug and remove it by loosening the nut underneath the sink with your pliers.
Step 3:
Use your screwdriver to remove the screws holding the drain in place.
Step 4:
Carefully lift the drain out of the sink and remove any remaining debris or gunk.
Step 5:
If you're replacing the drain, follow the manufacturer's instructions to install the new one.
Step 6:
Once the new drain is in place, reattach the drain plug, and tighten the nut with your pliers.
By following these steps, you can effectively take out a bathroom sink drain and address any issues that may be causing it to malfunction. However, if you're unsure of the process or encounter any difficulties, it's always best to consult a professional plumber for assistance.
In Conclusion
 A functional bathroom sink drain is crucial for maintaining a clean and hygienic bathroom. By knowing how to take out a bathroom sink drain and addressing any issues that may arise, you can ensure that your sink continues to function properly and avoid potential plumbing problems in the future. Remember, if you're unsure or uncomfortable with the process, don't hesitate to seek the help of a professional for a successful and stress-free repair.