Replacing valves under your kitchen sink may seem like a daunting task, but with the right tools and knowledge, it can be a DIY project that you can easily accomplish. This step-by-step guide will walk you through the process of replacing valves under your kitchen sink, saving you time and money from hiring a professional plumber.How to Replace Valves Under Your Kitchen Sink


How to Replace Valves Under Your Kitchen Sink


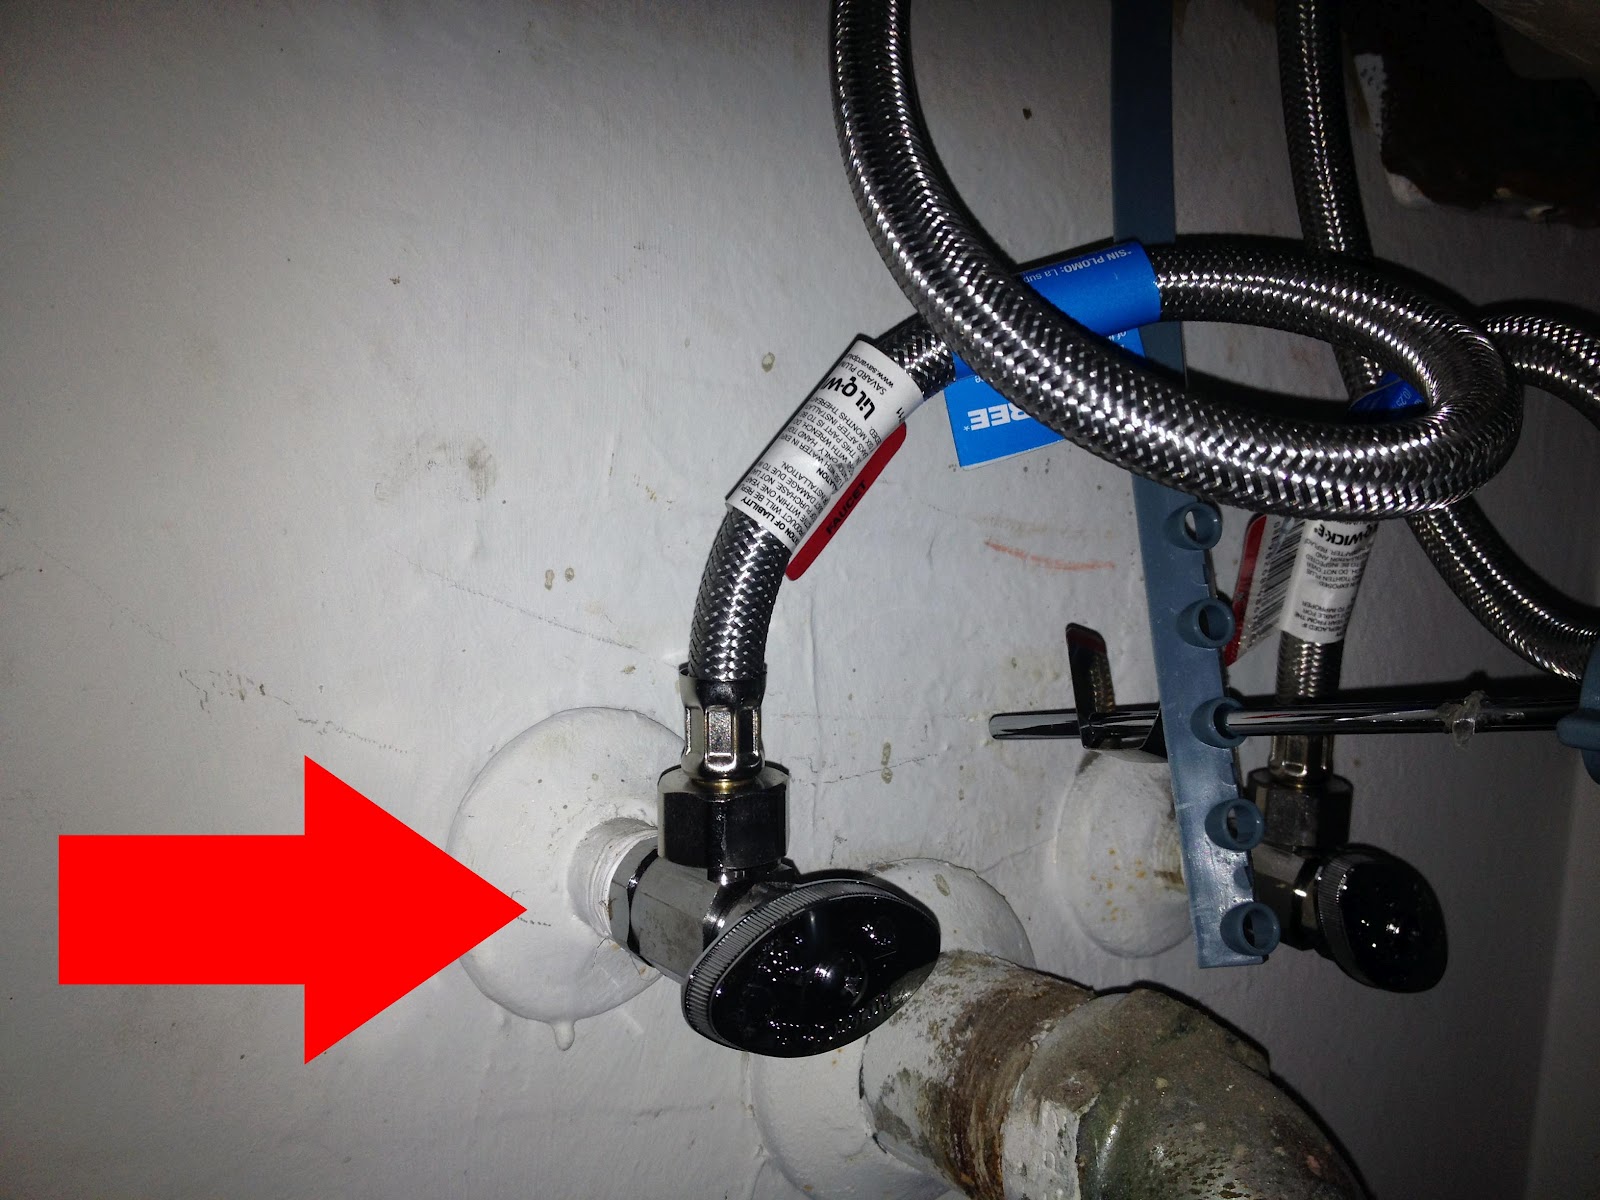

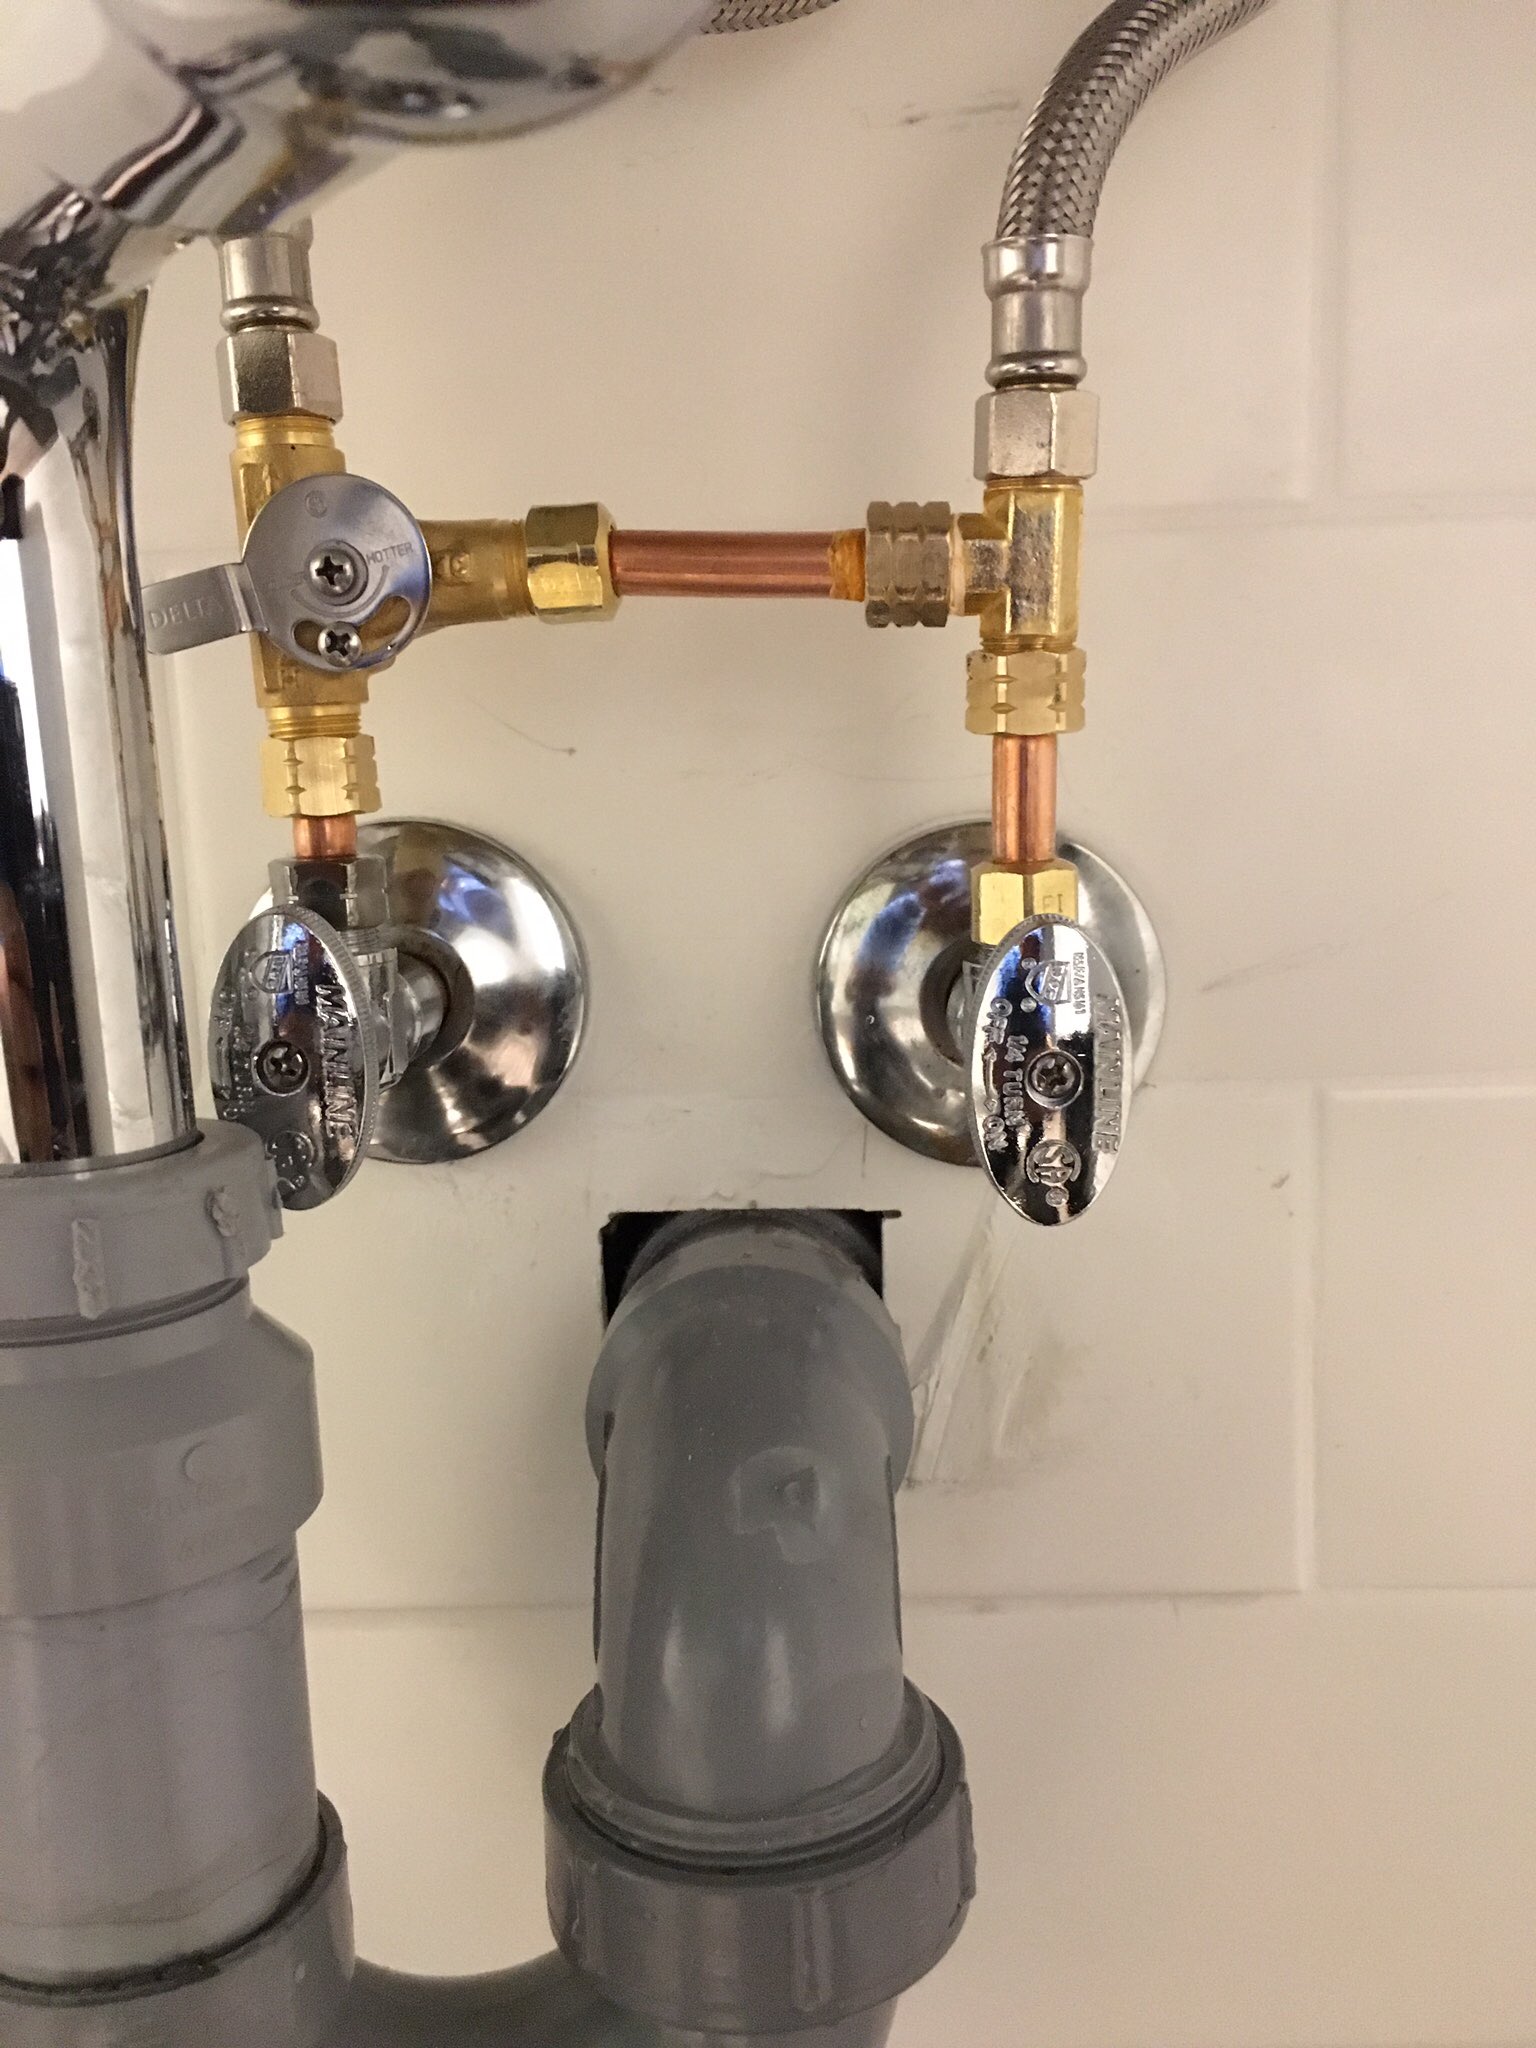
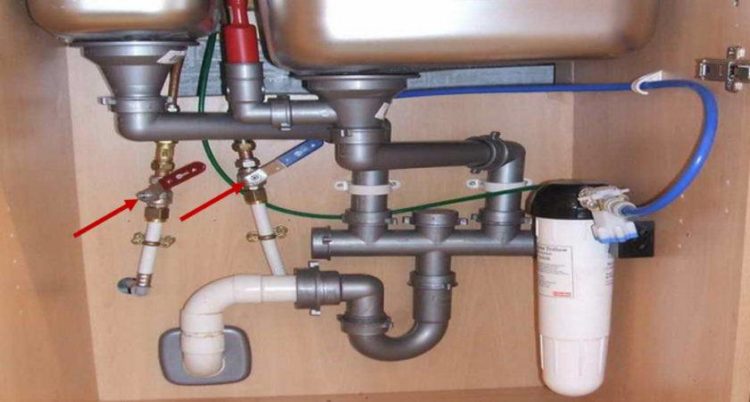
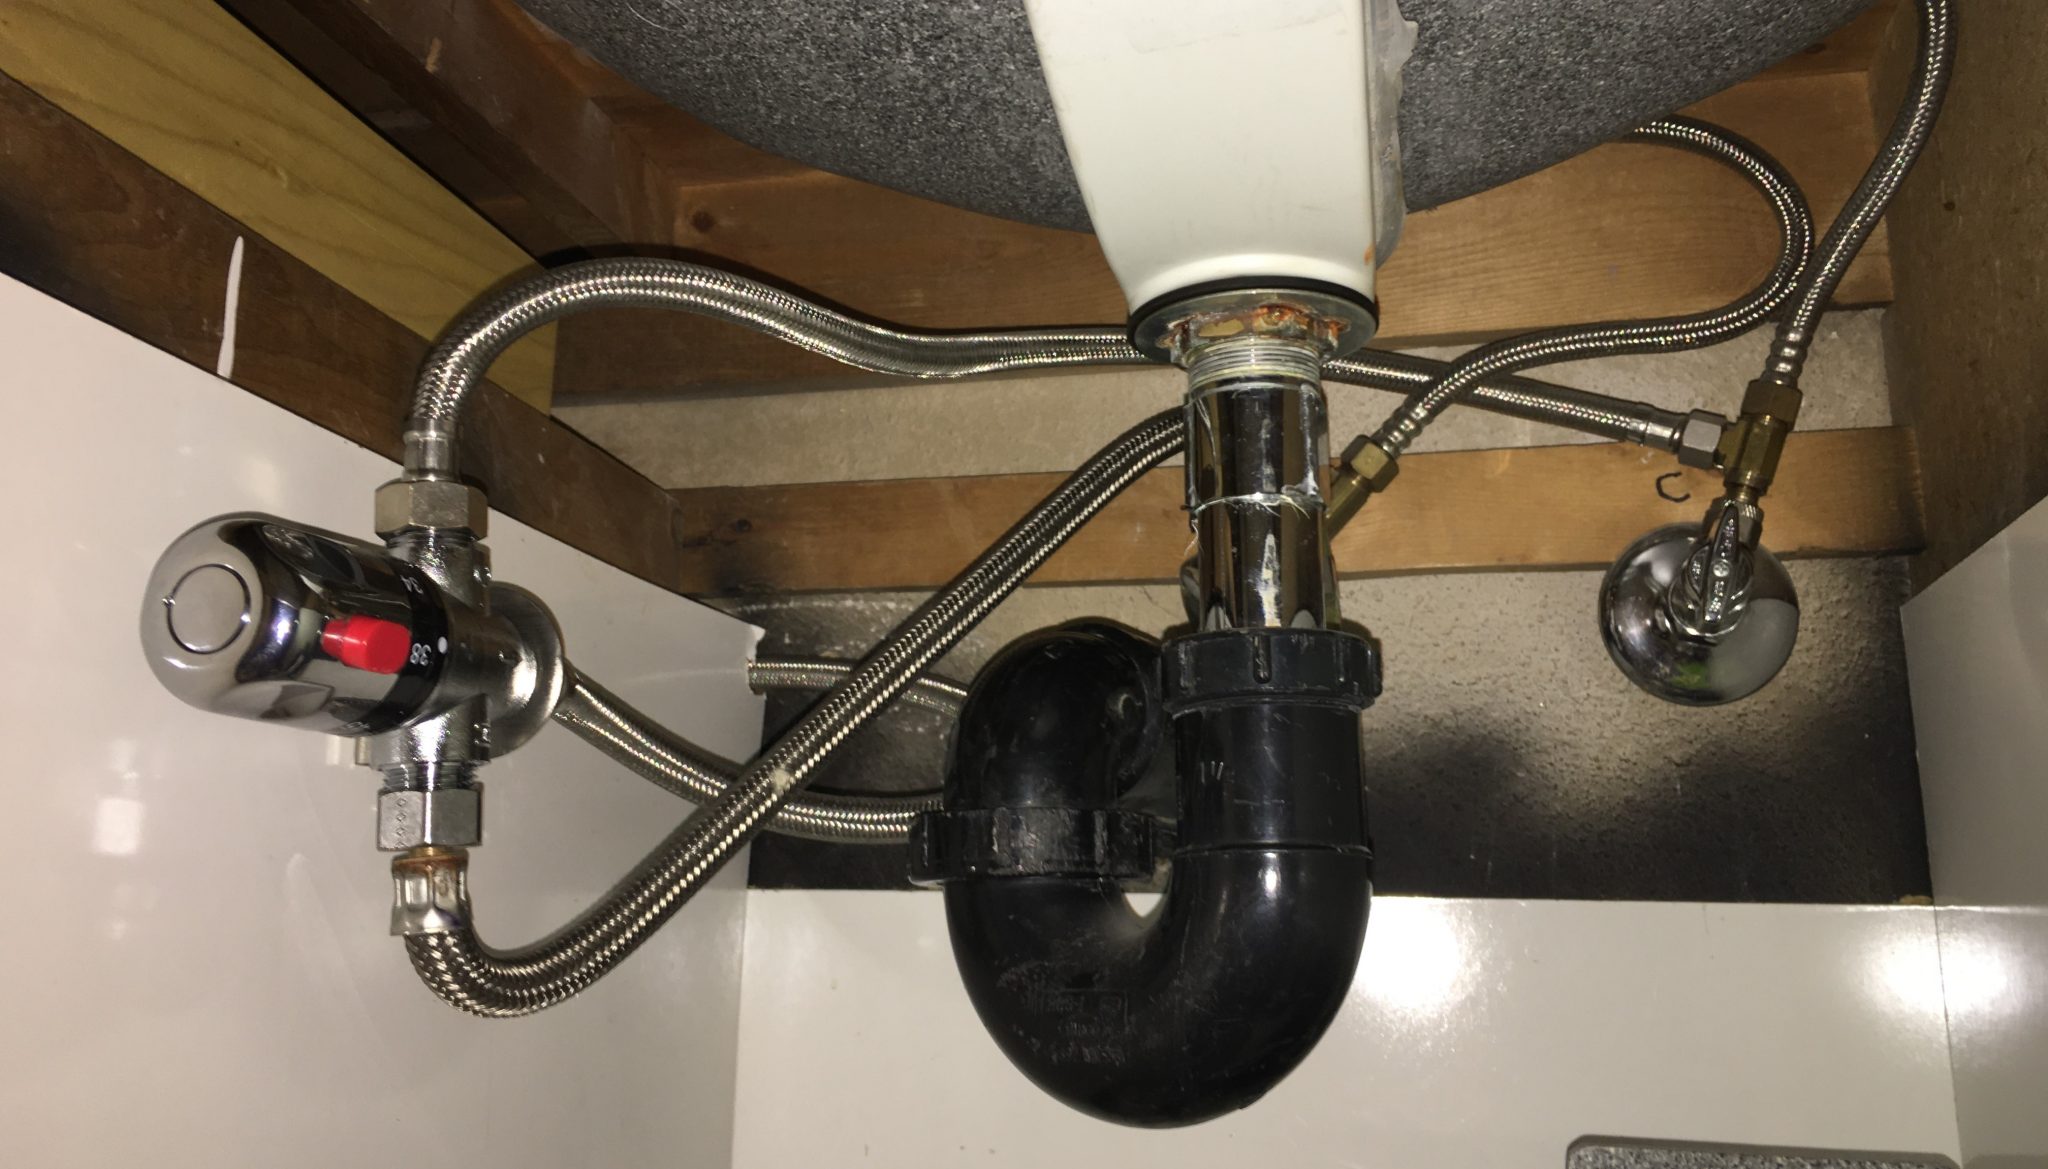
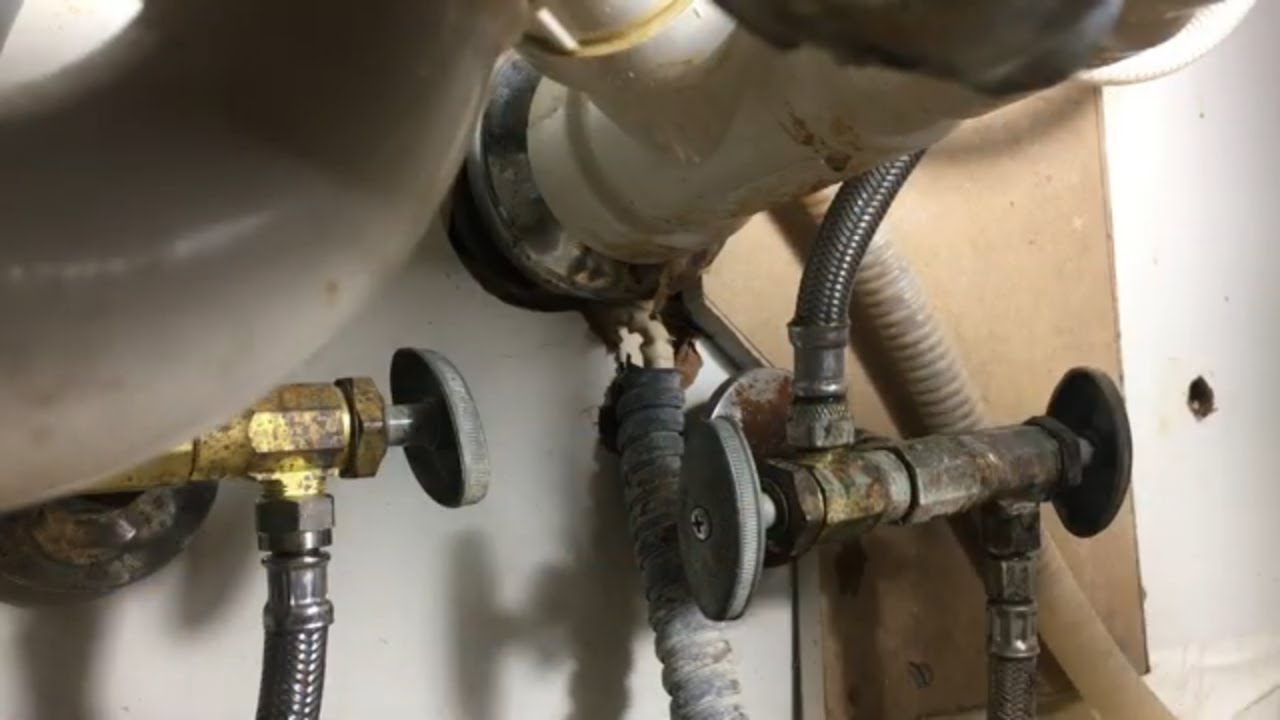
Before you begin, make sure to turn off the water supply to your kitchen sink. This can usually be done by turning the shut-off valve located under the sink clockwise. Once the water is turned off, follow these steps: Step 1: Remove the old valves by using a wrench to loosen the nuts that secure them to the pipes. Make sure to have a bucket or towel handy to catch any excess water that may come out. Step 2: Clean the area where the old valves were attached to remove any debris or corrosion. This will ensure a better seal for the new valves. Step 3: Apply plumber's tape to the threads of the new valves. This will help prevent any leaks. Step 4: Attach the new valves to the pipes and use a wrench to tighten the nuts. Make sure not to over-tighten as it can damage the valves. Step 5: Turn the water supply back on and check for any leaks. If there are no leaks, you have successfully replaced the valves under your kitchen sink.Step-by-Step Guide for Replacing Valves Under Your Kitchen Sink


Step-by-Step Guide for Replacing Valves Under Your Kitchen Sink

Replacing valves under your kitchen sink may seem intimidating, but it is a DIY project that can save you time and money. With the right tools and knowledge, you can easily replace the valves yourself without having to hire a professional plumber.Replacing Valves Under Your Kitchen Sink: A DIY Project


Replacing Valves Under Your Kitchen Sink: A DIY Project


Before starting the project, make sure to have the following tools and materials ready: Wrench - to loosen and tighten nuts Bucket or towel - to catch excess water Plumber's tape - to prevent leaks New valves - make sure to purchase the correct size and type for your pipesTools and Materials Needed for Replacing Valves Under Your Kitchen Sink

Tools and Materials Needed for Replacing Valves Under Your Kitchen Sink


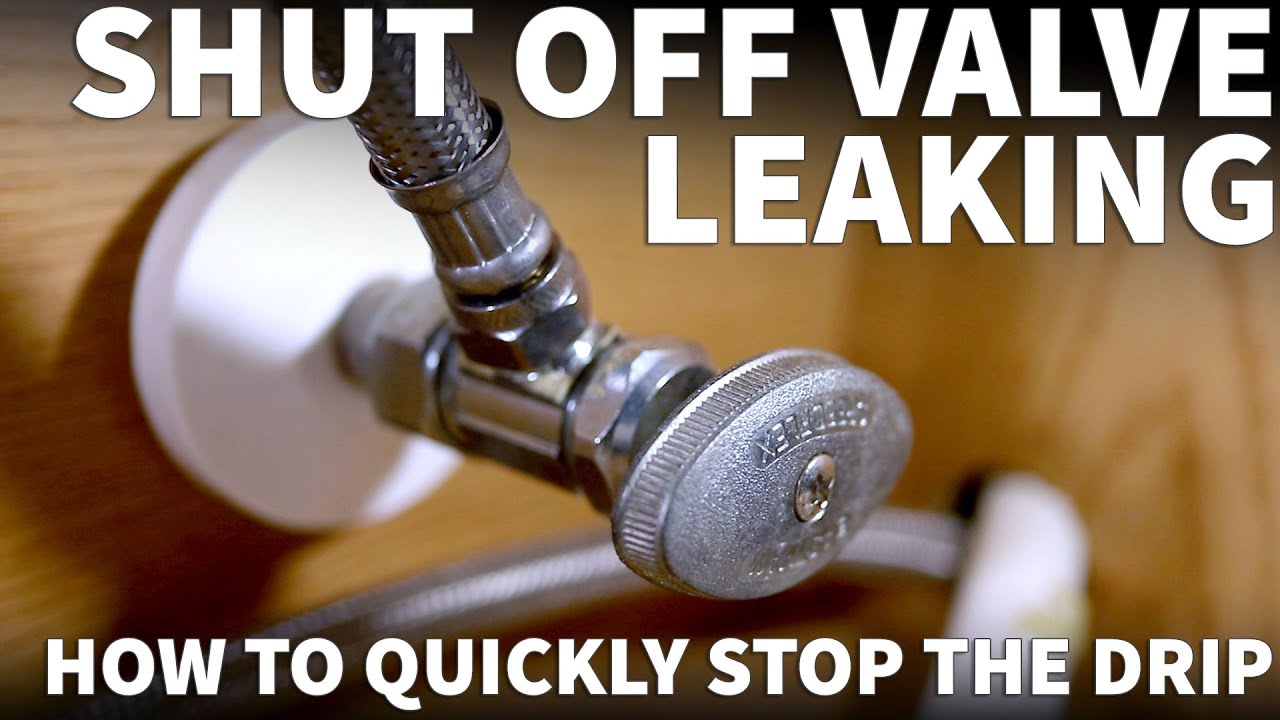
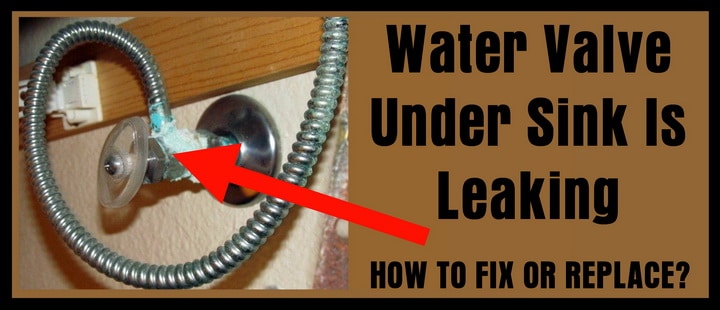
While replacing valves under your kitchen sink may seem like a straightforward task, there are some common problems that you may encounter: Difficulty loosening old valves - if the old valves are stuck, try using a lubricant to help loosen them Leaks - make sure to properly tighten the nuts and use plumber's tape to prevent leaks Incorrect size or type of valves - make sure to purchase the correct size and type of valves for your pipesCommon Problems When Replacing Valves Under Your Kitchen Sink


Common Problems When Replacing Valves Under Your Kitchen Sink
Here are some helpful tips to keep in mind when replacing valves under your kitchen sink: Check for leaks - after turning the water supply back on, check for any leaks and tighten the nuts if needed Clean the area - make sure to clean the area where the old valves were attached to ensure a better seal for the new valves Consider replacing other parts - if the pipes or other parts look old or damaged, it may be a good idea to replace them as well to prevent future issuesTips for Replacing Valves Under Your Kitchen Sink

Tips for Replacing Valves Under Your Kitchen Sink


While this is a DIY project, it is important to take the necessary safety precautions: Wear protective gear - make sure to wear gloves and safety glasses to protect your hands and eyes Turn off the water supply - before starting the project, make sure to turn off the water supply to your kitchen sink Use caution when handling tools - be careful when using tools to avoid any injuriesSafety Precautions When Replacing Valves Under Your Kitchen Sink


Safety Precautions When Replacing Valves Under Your Kitchen Sink
:max_bytes(150000):strip_icc()/sink-pipe-under-wash-basin-119001607-6f28aec4c66944efb7a9a38cb622ab8b.jpg)
If you encounter any issues while replacing valves under your kitchen sink, here are some troubleshooting tips: Leaks - make sure to properly tighten the nuts and use plumber's tape to prevent leaks Difficulty loosening old valves - try using a lubricant to help loosen them Incorrect size or type of valves - make sure to purchase the correct size and type of valves for your pipesHow to Troubleshoot Issues When Replacing Valves Under Your Kitchen Sink


How to Troubleshoot Issues When Replacing Valves Under Your Kitchen Sink
While hiring a professional plumber may seem like the easier option, replacing valves under your kitchen sink can be a DIY project that can save you time and money. With the right tools and knowledge, you can successfully replace the valves yourself. However, if you are not comfortable with DIY projects or encounter any issues, it is best to hire a professional plumber to ensure the job is done correctly and safely.Replacing Valves Under Your Kitchen Sink: Professional vs. DIY

Replacing Valves Under Your Kitchen Sink: Professional vs. DIY

The cost and time involved in replacing valves under your kitchen sink will vary depending on the type of valves and any additional parts that may need to be replaced. On average, the cost can range from $20 to $100 for the valves and materials. The time it takes to replace the valves will also vary depending on your experience and any issues that may arise. On average, it can take about 1-2 hours to complete the project. In conclusion, replacing valves under your kitchen sink may seem like a daunting task, but with the right tools and knowledge, it can be a DIY project that you can easily accomplish. By following these steps and tips, you can successfully replace the valves and save yourself time and money in the process.Costs and Time Involved in Replacing Valves Under Your Kitchen Sink

Costs and Time Involved in Replacing Valves Under Your Kitchen Sink
Why Replacing Valves is Important in Your Kitchen Sink

The Importance of Regular Maintenance
 When it comes to house design, the kitchen is often considered the heart of the home. It is where meals are prepared and memories are made. However, with frequent use, the fixtures and appliances in the kitchen can wear out and malfunction. One of the most common issues in a kitchen is a leaky faucet or a clogged sink. While these may seem like minor problems, they can actually lead to bigger issues if not addressed promptly. That's why regular maintenance and replacements, such as replacing valves under your kitchen sink, are crucial in keeping your kitchen in top shape.
Preventing Water Damage
 The main purpose of valves in a kitchen sink is to control the flow of water. Over time, these valves can become worn out or defective, causing leaks and water damage. This can not only be a nuisance, but it can also lead to costly repairs. By replacing valves at the first sign of wear and tear, you can prevent further damage and save yourself from expensive repairs down the line. Additionally, replacing valves can also help conserve water and lower your water bills, making it a practical solution for both your wallet and the environment.
Ensuring Safe and Clean Water
 Apart from controlling water flow, valves also play a crucial role in maintaining the quality of water in your kitchen. Over time, mineral deposits and debris can build up in valves, affecting the taste and cleanliness of your water. By replacing valves, you can ensure that the water coming out of your kitchen sink is safe and clean for cooking and drinking. This is especially important for households with young children or elderly members who may be more susceptible to contaminants in water.
Increasing the Lifespan of Your Sink
 Replacing valves under your kitchen sink may seem like a small task, but it can actually have a significant impact on the lifespan of your sink. When valves are worn out or malfunctioning, it can put unnecessary strain on other parts of your sink, causing them to wear out faster. By regularly replacing valves, you can prevent premature wear and tear on your sink and extend its lifespan. This will not only save you money in the long run, but it will also keep your kitchen looking and functioning at its best.
In conclusion, replacing valves under your kitchen sink is an important part of regular maintenance for any house design. It can prevent water damage, ensure safe and clean water, and increase the lifespan of your sink. Don't wait until you have a major plumbing issue to replace your valves. By taking proactive measures, you can save yourself time, money, and stress in the future.
Replacing valves under your kitchen sink may seem like a small task, but it can actually have a significant impact on the lifespan of your sink. When valves are worn out or malfunctioning, it can put unnecessary strain on other parts of your sink, causing them to wear out faster. By regularly replacing valves, you can prevent premature wear and tear on your sink and extend its lifespan. This will not only save you money in the long run, but it will also keep your kitchen looking and functioning at its best.
In conclusion, replacing valves under your kitchen sink is an important part of regular maintenance for any house design. It can prevent water damage, ensure safe and clean water, and increase the lifespan of your sink. Don't wait until you have a major plumbing issue to replace your valves. By taking proactive measures, you can save yourself time, money, and stress in the future.