When it comes to plumbing repairs, replacing a shut off valve under a kitchen sink may seem like a daunting task. However, with the right tools and knowledge, it can be a simple and straightforward process. In this article, we will guide you through the steps of replacing a shut off valve under your kitchen sink, so you can tackle this DIY project with confidence.How to Replace a Shut Off Valve Under a Kitchen Sink


How to Replace a Shut Off Valve Under a Kitchen Sink
:max_bytes(150000):strip_icc()/sink-pipe-under-wash-basin-119001607-6f28aec4c66944efb7a9a38cb622ab8b.jpg)
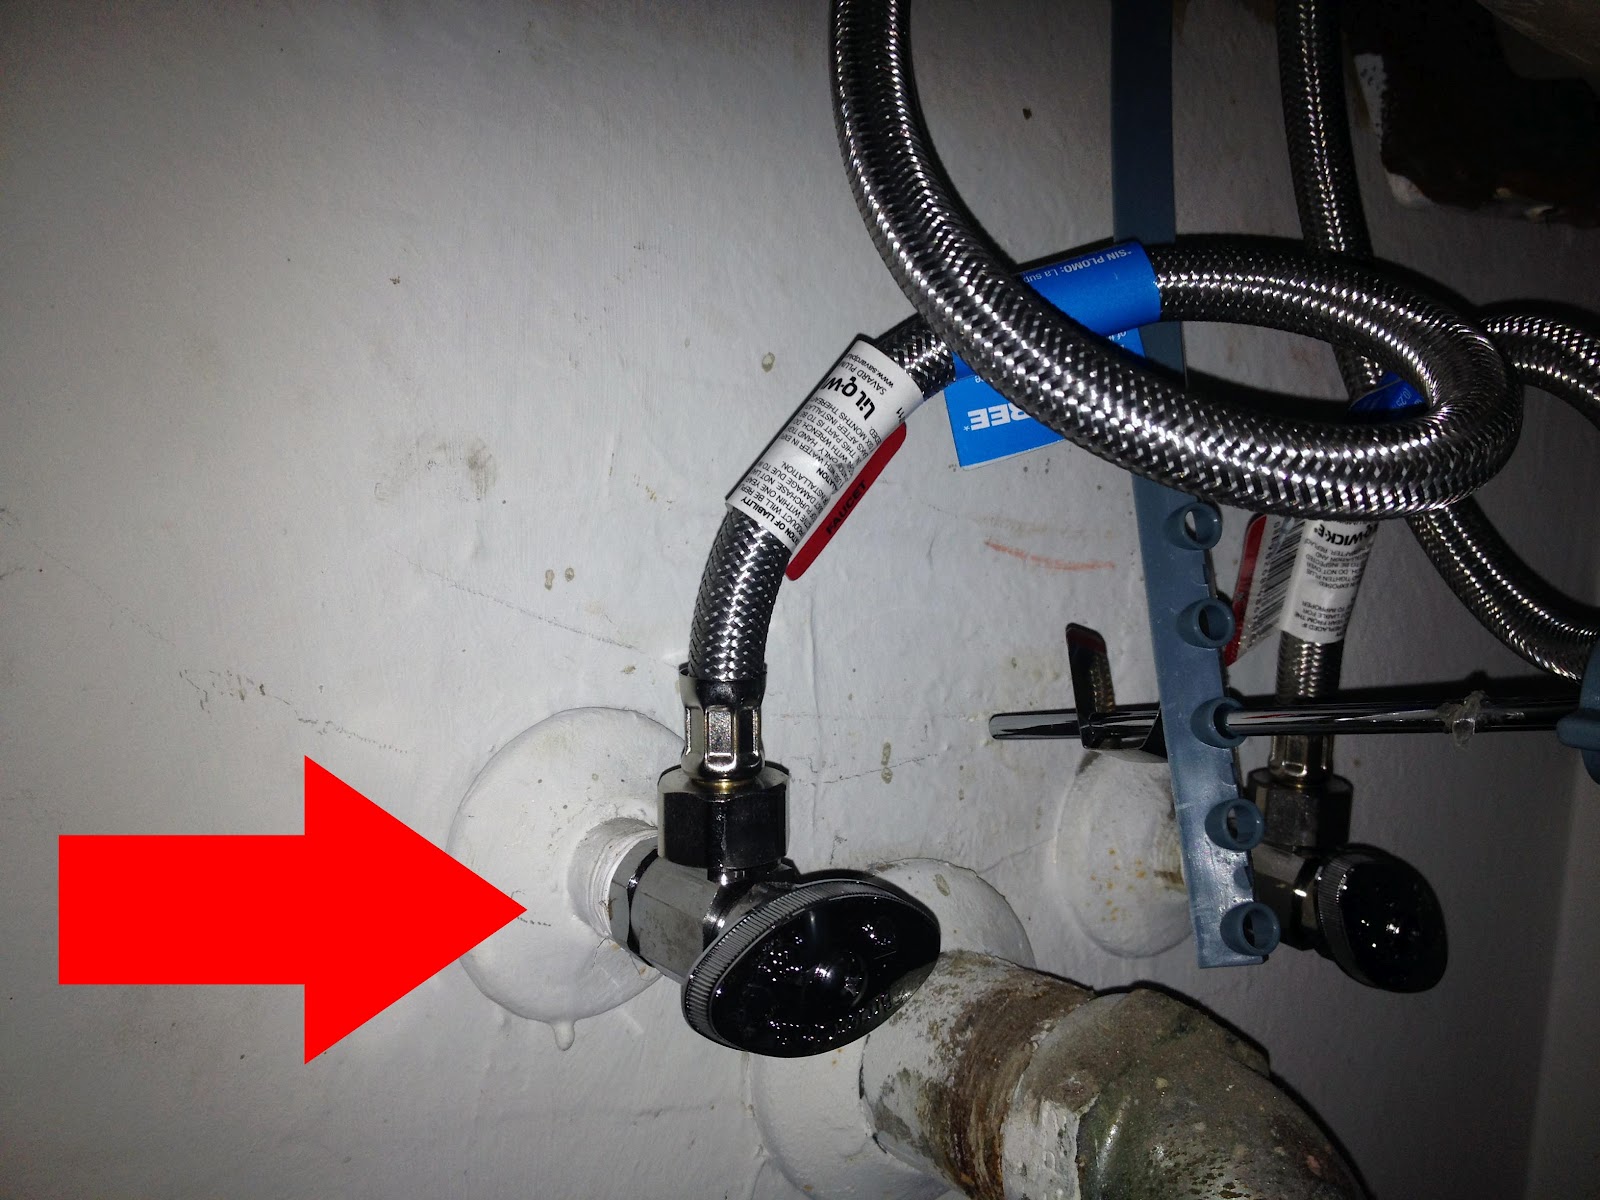


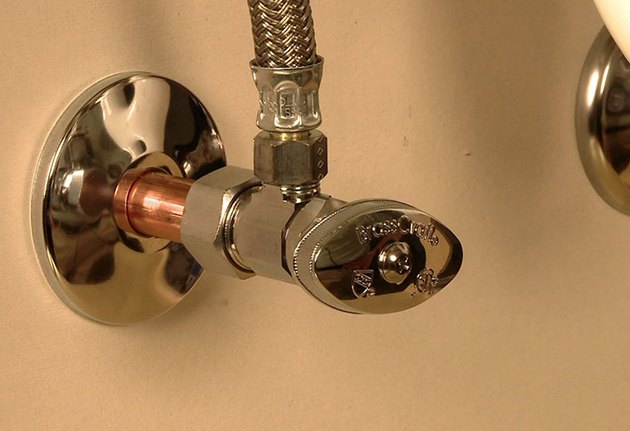
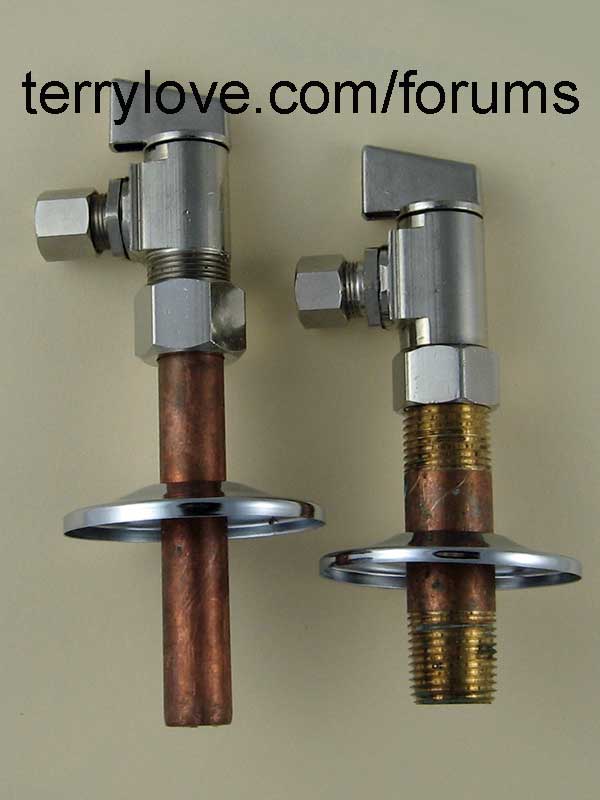
The first step in replacing a shut off valve under a kitchen sink is to identify the type of valve you have. There are two types of shut off valves commonly found under kitchen sinks - compression and ball valves. Compression valves have a handle that you turn clockwise to shut off the water, while ball valves have a lever that you turn 90 degrees to shut off the water. If you have a compression valve, you will need to turn off the main water supply to your house before beginning the replacement process. If you have a ball valve, you can simply turn off the water by turning the lever to the off position.How to Replace a Kitchen Sink Shut Off Valve


How to Replace a Kitchen Sink Shut Off Valve


Now that you have identified the type of valve you have, it’s time to start the replacement process. Step 1: Turn off the water supply to your house. This step is crucial to prevent any water from leaking while you work on replacing the shut off valve. Step 2: Drain any remaining water from the pipes by turning on the faucet and letting it run until the water stops. Step 3: Use a wrench to loosen and remove the nuts that secure the valve to the water supply pipes. Be sure to have a bucket or towel underneath to catch any excess water that may spill out. Step 4: Once the nuts are removed, you can now remove the old shut off valve from the pipes. Step 5: Clean the ends of the water supply pipes to remove any debris or corrosion. Step 6: Install the new shut off valve onto the water supply pipes and secure it with the nuts. Step 7: Turn the water supply back on and check for any leaks. If there are no leaks, you have successfully replaced the shut off valve under your kitchen sink!Replacing a Shut Off Valve Under a Kitchen Sink: Step-by-Step Guide


Replacing a Shut Off Valve Under a Kitchen Sink: Step-by-Step Guide
:max_bytes(150000):strip_icc()/under-sink-shut-off-valves-2718738-01-4584f904e3f84770bef0a44af58a73ac.jpg)


Replacing a shut off valve under a kitchen sink is a DIY project that can save you time and money. It may seem intimidating, but with the right tools and instructions, it can be a simple and satisfying task to complete on your own. Just be sure to follow the steps carefully and take your time to avoid any mistakes.DIY: Replacing a Shut Off Valve Under a Kitchen Sink

DIY: Replacing a Shut Off Valve Under a Kitchen Sink

Here are a few tips and tricks to keep in mind when replacing a shut off valve under a kitchen sink: Tip #1: Always turn off the main water supply before beginning the replacement process to avoid any water leaks. Tip #2: If you have a compression valve, be sure to have a bucket or towel underneath to catch any excess water that may spill out when removing the old valve. Tip #3: Use Teflon tape on the threads of the new valve before securing it to the water supply pipes to prevent any leaks. Tip #4: If you are unsure of the type of valve you have or how to replace it, it’s always best to consult a professional plumber.Replacing a Kitchen Sink Shut Off Valve: Tips and Tricks


Replacing a Kitchen Sink Shut Off Valve: Tips and Tricks
:max_bytes(150000):strip_icc()/sink-pipe-under-wash-basin-119001607-75542e154b364e7bb52032249f293908.jpg)

Here is a step-by-step guide for replacing a shut off valve under a kitchen sink: Step 1: Turn off the water supply to your house. Italicize water supply Step 2: Drain any remaining water from the pipes. Italicize remaining water Step 3: Loosen and remove the nuts that secure the valve to the water supply pipes. Italicize nuts Step 4: Remove the old shut off valve from the pipes. Italicize old shut off valve Step 5: Clean the ends of the water supply pipes. Italicize water supply pipes Step 6: Install the new shut off valve and secure it with the nuts. Italicize new shut off valve Step 7: Turn the water supply back on and check for any leaks. Italicize water supplyStep-by-Step Guide for Replacing a Shut Off Valve Under a Kitchen Sink

Step-by-Step Guide for Replacing a Shut Off Valve Under a Kitchen Sink

While replacing a shut off valve under a kitchen sink may seem like a simple task, there are a few common mistakes that can easily be avoided: Mistake #1: Forgetting to turn off the main water supply before beginning the replacement process. Mistake #2: Not draining the water from the pipes before removing the old valve. Mistake #3: Not using Teflon tape on the threads of the new valve, resulting in leaks.Replacing a Shut Off Valve Under a Kitchen Sink: Common Mistakes to Avoid

Replacing a Shut Off Valve Under a Kitchen Sink: Common Mistakes to Avoid
Here are the tools and materials you will need to replace a shut off valve under a kitchen sink: Tools: Wrench, Teflon tape, bucket or towel. Materials: New shut off valve.Tools and Materials Needed for Replacing a Shut Off Valve Under a Kitchen Sink
Tools and Materials Needed for Replacing a Shut Off Valve Under a Kitchen Sink

If you encounter any issues while replacing a shut off valve under a kitchen sink, here are a few troubleshooting tips to help you resolve them: Troubleshooting Tip #1: If you notice any leaks, try tightening the nuts that secure the new valve to the water supply pipes. Troubleshooting Tip #2: If you are unable to stop a leak, turn off the main water supply and consult a professional plumber.Replacing a Shut Off Valve Under a Kitchen Sink: Troubleshooting Tips

Replacing a Shut Off Valve Under a Kitchen Sink: Troubleshooting Tips
Here are some expert tips to keep in mind when replacing a shut off valve under a kitchen sink: Expert Tip #1: When purchasing a new shut off valve, make sure to get the correct size and type for your specific plumbing system. Expert Tip #2: If you have a compression valve, be sure to use two wrenches when loosening and tightening the nuts to avoid damaging the pipes. With these tips and instructions, you are now ready to replace a shut off valve under your kitchen sink. Remember to take your time, follow the steps carefully, and don’t hesitate to seek professional help if needed. Happy DIY-ing!Expert Tips for Replacing a Shut Off Valve Under a Kitchen Sink


Expert Tips for Replacing a Shut Off Valve Under a Kitchen Sink
Why Replacing a Shut Off Valve Under Kitchen Sink is Important for House Design

The Importance of a Shut Off Valve in Your Kitchen
 The shut off valve under your kitchen sink may seem like a small and insignificant component of your house design, but it plays a crucial role in the overall functionality and safety of your home. This valve controls the water flow to your kitchen sink, allowing you to turn off the water supply in case of emergencies or when performing repairs. Without a functioning shut off valve, you could be facing a major water leak, resulting in costly damages to your home.
Replacing a shut off valve under your kitchen sink can save you from potential disasters and ensure the smooth operation of your kitchen.
As a responsible homeowner, it is important to regularly check and maintain the shut off valve to avoid any unexpected issues.
The shut off valve under your kitchen sink may seem like a small and insignificant component of your house design, but it plays a crucial role in the overall functionality and safety of your home. This valve controls the water flow to your kitchen sink, allowing you to turn off the water supply in case of emergencies or when performing repairs. Without a functioning shut off valve, you could be facing a major water leak, resulting in costly damages to your home.
Replacing a shut off valve under your kitchen sink can save you from potential disasters and ensure the smooth operation of your kitchen.
As a responsible homeowner, it is important to regularly check and maintain the shut off valve to avoid any unexpected issues.
The Risks of Ignoring a Faulty Shut Off Valve
 Ignoring a faulty shut off valve can lead to serious consequences for your home.
A leaky valve can cause water damage to your cabinets, floors, and walls, leading to mold growth and structural damage.
This not only affects the aesthetics of your kitchen but also poses health risks for you and your family. In addition, a malfunctioning valve can make it difficult to perform routine maintenance or repairs on your kitchen sink, resulting in inconvenience and added expenses.
Ignoring a faulty shut off valve can lead to serious consequences for your home.
A leaky valve can cause water damage to your cabinets, floors, and walls, leading to mold growth and structural damage.
This not only affects the aesthetics of your kitchen but also poses health risks for you and your family. In addition, a malfunctioning valve can make it difficult to perform routine maintenance or repairs on your kitchen sink, resulting in inconvenience and added expenses.
Benefits of Replacing a Shut Off Valve
 Replacing a shut off valve under your kitchen sink is a simple and cost-effective solution that can prevent major problems in the future.
A new valve will ensure proper water flow control and reduce the risk of leaks or water damage. It will also make it easier for you to perform any necessary repairs or upgrades to your kitchen sink. Additionally, modern shut off valves have improved features and are more durable, providing long-term benefits for your house design.
Replacing a shut off valve under your kitchen sink is a simple and cost-effective solution that can prevent major problems in the future.
A new valve will ensure proper water flow control and reduce the risk of leaks or water damage. It will also make it easier for you to perform any necessary repairs or upgrades to your kitchen sink. Additionally, modern shut off valves have improved features and are more durable, providing long-term benefits for your house design.
Professional Help for Replacing a Shut Off Valve
 While it may seem like a simple task, it is best to seek professional help for replacing a shut off valve under your kitchen sink. Professional plumbers have the necessary skills and tools to ensure the proper installation of the new valve. They can also inspect the surrounding pipes and make any necessary repairs to prevent future issues.
In conclusion,
the shut off valve under your kitchen sink may be a small component of your house design, but it plays a crucial role in maintaining the functionality and safety of your home.
Regularly checking and replacing a faulty valve can save you from potential disasters and costly damages. Don't hesitate to seek professional help for this task and ensure the proper functioning of your kitchen.
While it may seem like a simple task, it is best to seek professional help for replacing a shut off valve under your kitchen sink. Professional plumbers have the necessary skills and tools to ensure the proper installation of the new valve. They can also inspect the surrounding pipes and make any necessary repairs to prevent future issues.
In conclusion,
the shut off valve under your kitchen sink may be a small component of your house design, but it plays a crucial role in maintaining the functionality and safety of your home.
Regularly checking and replacing a faulty valve can save you from potential disasters and costly damages. Don't hesitate to seek professional help for this task and ensure the proper functioning of your kitchen.