Replacing a kitchen sink tailpiece may seem like a daunting task, but with the right tools and knowledge, it can be a simple and straightforward process. In this guide, we will take you through the steps of replacing a kitchen sink tailpiece, sharing valuable tips and tricks along the way.How to Replace a Kitchen Sink Tailpiece


How to Replace a Kitchen Sink Tailpiece
:max_bytes(150000):strip_icc()/how-to-install-a-sink-drain-2718789-04-5715d67f5b7d41429d42bf705bb70e2c.jpg)
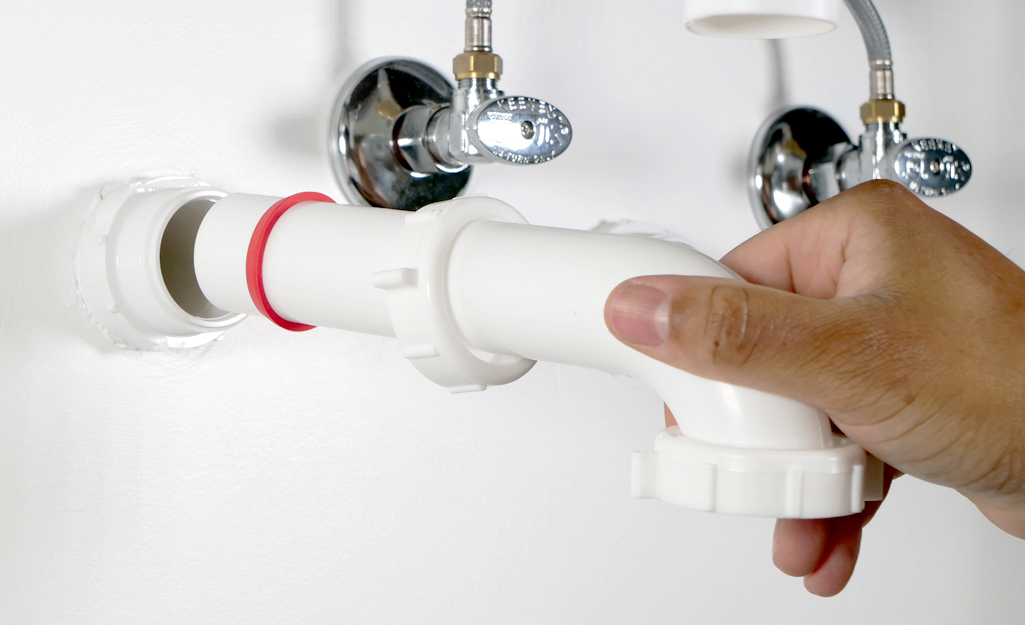


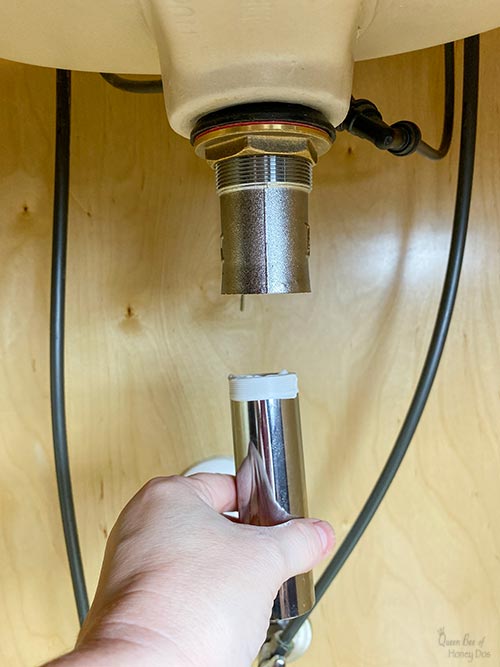
The first step in replacing a kitchen sink tailpiece is to gather all the necessary tools and materials. You will need a wrench, pliers, a bucket, plumber's tape, and the new tailpiece. Once you have everything you need, follow these steps: 1. Turn off the water supply to your sink. This can usually be done by turning off the valves located under the sink. 2. Place the bucket under the sink to catch any water that may spill out. 3. Use the wrench to loosen the slip nut connecting the tailpiece to the drain pipe. This nut is usually located just below the sink. 4. Once the slip nut is loose, you should be able to pull out the old tailpiece from the sink drain. 5. Take the new tailpiece and apply a layer of plumber's tape to the threads. This will help create a watertight seal. 6. Insert the new tailpiece into the sink drain and tighten the slip nut with the wrench. 7. Connect the other end of the tailpiece to the drain pipe and tighten the slip nut. 8. Turn on the water supply and check for any leaks. If there are any, tighten the slip nuts further.Replacing a Kitchen Sink Tailpiece: A Step-by-Step Guide


Replacing a Kitchen Sink Tailpiece: A Step-by-Step Guide


Replacing a kitchen sink tailpiece is a DIY project that can save you time and money. By following the steps above, you can easily replace a damaged or old tailpiece without the need for a professional plumber. However, if you are not confident in your DIY skills, it is always best to hire a professional.DIY Kitchen Sink Tailpiece Replacement

DIY Kitchen Sink Tailpiece Replacement


Here are a few tips and tricks to keep in mind when replacing a kitchen sink tailpiece: 1. Choose the right size: Make sure to measure the old tailpiece before purchasing a new one to ensure a proper fit. 2. Use plumber's tape: Applying plumber's tape to the threads of the tailpiece will help create a tight seal and prevent leaks. 3. Don't overtighten: It is important not to overtighten the slip nuts as this can cause damage to the pipes. 4. Check for leaks: After replacing the tailpiece, turn on the water supply and check for any leaks. If there are any, tighten the slip nuts further.Replacing a Kitchen Sink Tailpiece: Tips and Tricks

Replacing a Kitchen Sink Tailpiece: Tips and Tricks


The kitchen sink tailpiece plays a crucial role in the proper functioning of your sink. If it is damaged or worn out, it can cause leaks, clogs, and other plumbing issues. By replacing it, you can ensure that your sink operates efficiently and avoid potential problems in the future.The Importance of Replacing a Kitchen Sink Tailpiece


The Importance of Replacing a Kitchen Sink Tailpiece


While replacing a kitchen sink tailpiece is a relatively simple task, there are some common mistakes that people make. Here are a few to avoid: 1. Not turning off the water supply: It is important to turn off the water supply before starting the replacement process to avoid any water spillage. 2. Using the wrong size: Make sure to measure the old tailpiece before purchasing a new one to ensure a proper fit. 3. Forgetting the plumber's tape: Applying plumber's tape to the threads of the tailpiece is essential for creating a tight seal and preventing leaks.Common Mistakes to Avoid When Replacing a Kitchen Sink Tailpiece

Common Mistakes to Avoid When Replacing a Kitchen Sink Tailpiece


To replace a kitchen sink tailpiece, you will need the following tools and materials: 1. Wrench 2. Pliers 3. Bucket 4. Plumber's Tape 5. New TailpieceTools and Materials Needed for Replacing a Kitchen Sink Tailpiece

Tools and Materials Needed for Replacing a Kitchen Sink Tailpiece


When purchasing a new kitchen sink tailpiece, it is important to choose the right one for your needs. Consider the size, material, and type of tailpiece that will work best with your sink and plumbing system. It is also helpful to read reviews and ask for recommendations from professionals or friends.How to Choose the Right Kitchen Sink Tailpiece for Your Needs


How to Choose the Right Kitchen Sink Tailpiece for Your Needs
:max_bytes(150000):strip_icc()/Basic-kitchen-sink-types-1821207_color_rev-0b539306b9ef4236a136624ad2a89a4c.jpg)
/how-to-install-a-sink-drain-2718789-hero-24e898006ed94c9593a2a268b57989a3.jpg)
Deciding whether to hire a professional or attempt a DIY replacement can be a tough decision. While replacing a kitchen sink tailpiece is a simple task, it is always best to hire a professional if you are not confident in your DIY skills. They have the necessary experience and tools to ensure the job is done correctly and efficiently.Replacing a Kitchen Sink Tailpiece: Professional vs. DIY

Replacing a Kitchen Sink Tailpiece: Professional vs. DIY

If you encounter any issues when replacing your kitchen sink tailpiece, here are a few troubleshooting tips: 1. Leaks: If there are any leaks, check that the slip nuts are tightened properly. 2. Clogs: If your sink is clogged after replacing the tailpiece, use a plunger or a drain snake to clear the blockage. 3. Strange smells: If you notice any unpleasant smells coming from your sink, try running hot water and vinegar down the drain to eliminate any buildup. With this step-by-step guide and helpful tips, you can easily replace a kitchen sink tailpiece and keep your sink functioning properly. Remember to take your time and be cautious to avoid any potential problems. Happy DIY-ing!Troubleshooting Common Issues When Replacing a Kitchen Sink Tailpiece
Troubleshooting Common Issues When Replacing a Kitchen Sink Tailpiece

Replacing a Kitchen Sink Tailpiece: A Simple Guide for an Updated Kitchen Design

Why Replace Your Kitchen Sink Tailpiece?
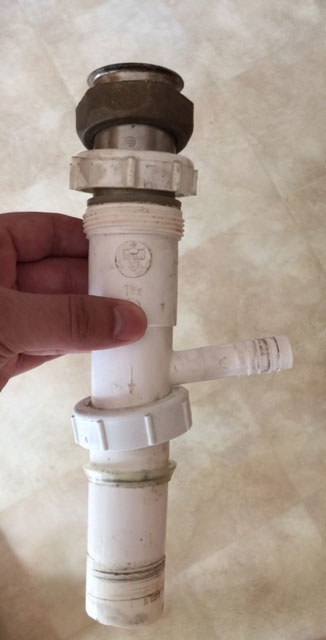
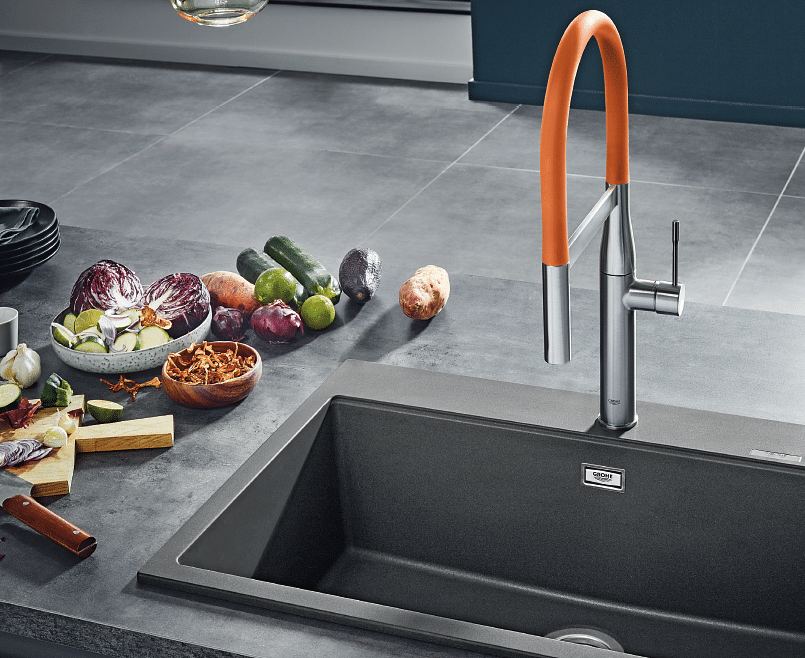
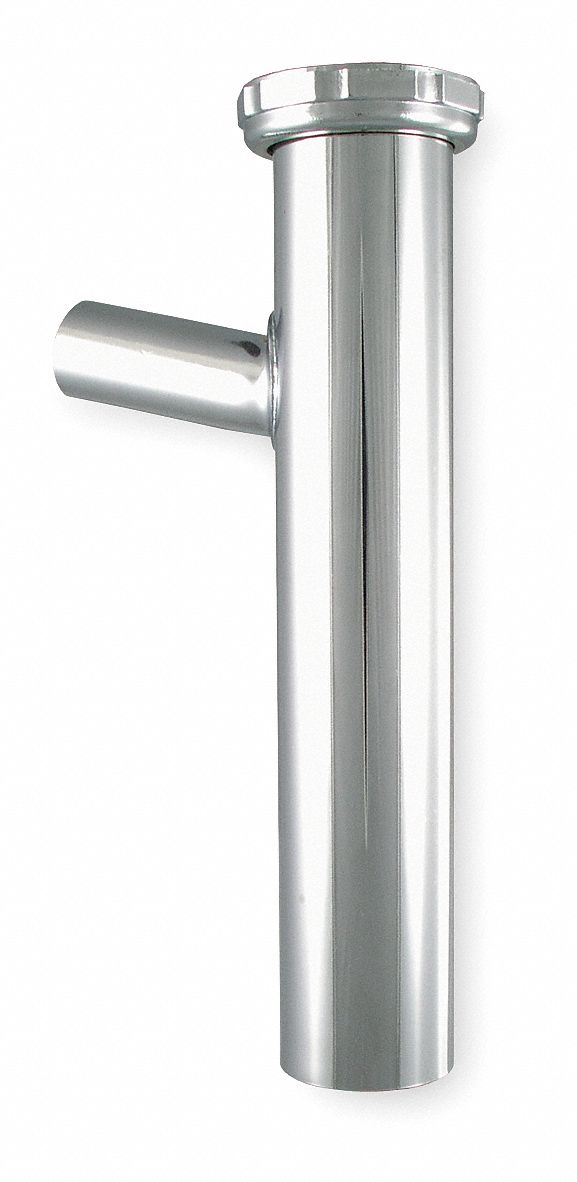
 The kitchen is often considered the heart of the home, and it's no surprise that homeowners want it to not only be functional but also visually appealing. A simple and cost-effective way to update the look of your kitchen is by replacing the kitchen sink tailpiece. The tailpiece is the pipe that connects the sink drain to the P-trap and then to the main drain line. Over time, this piece can become worn or rusty, affecting the overall look of your sink and kitchen. By replacing it, you can give your kitchen a fresh and updated look.
The Benefits of Replacing Your Kitchen Sink Tailpiece
 Replacing your kitchen sink tailpiece not only enhances the appearance of your kitchen but also has functional benefits. Here are some of the benefits of replacing your kitchen sink tailpiece:
- Improved Functionality:
A new tailpiece can improve the flow of water and prevent clogs, making your kitchen sink more efficient.
- Better Aesthetics:
As mentioned, a new tailpiece can give your kitchen sink a fresh and updated look, instantly improving the overall aesthetics of your kitchen.
- Prevent Water Damage:
A worn or damaged tailpiece can lead to leaks and water damage, which can be costly to repair. By replacing it, you can avoid these potential issues and save money in the long run.
Replacing your kitchen sink tailpiece not only enhances the appearance of your kitchen but also has functional benefits. Here are some of the benefits of replacing your kitchen sink tailpiece:
- Improved Functionality:
A new tailpiece can improve the flow of water and prevent clogs, making your kitchen sink more efficient.
- Better Aesthetics:
As mentioned, a new tailpiece can give your kitchen sink a fresh and updated look, instantly improving the overall aesthetics of your kitchen.
- Prevent Water Damage:
A worn or damaged tailpiece can lead to leaks and water damage, which can be costly to repair. By replacing it, you can avoid these potential issues and save money in the long run.
Step-by-Step Guide to Replacing Your Kitchen Sink Tailpiece
 Now that you understand the importance of replacing your kitchen sink tailpiece, let's walk through the steps to do it yourself.
Step 1: Gather Your Materials
Before starting the replacement process, make sure you have all the necessary materials, including a new tailpiece, P-trap, plumber's tape, and a wrench.
Step 2: Turn Off the Water
Before removing the old tailpiece, turn off the water supply to your kitchen sink. You can usually find the shut-off valve under the sink or in the basement.
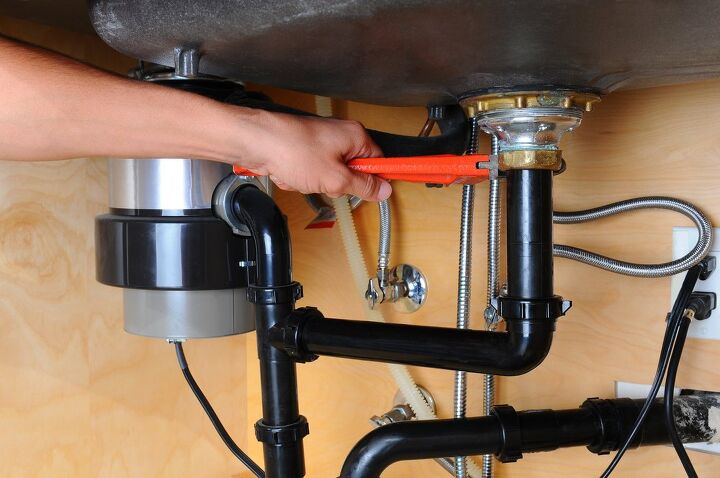
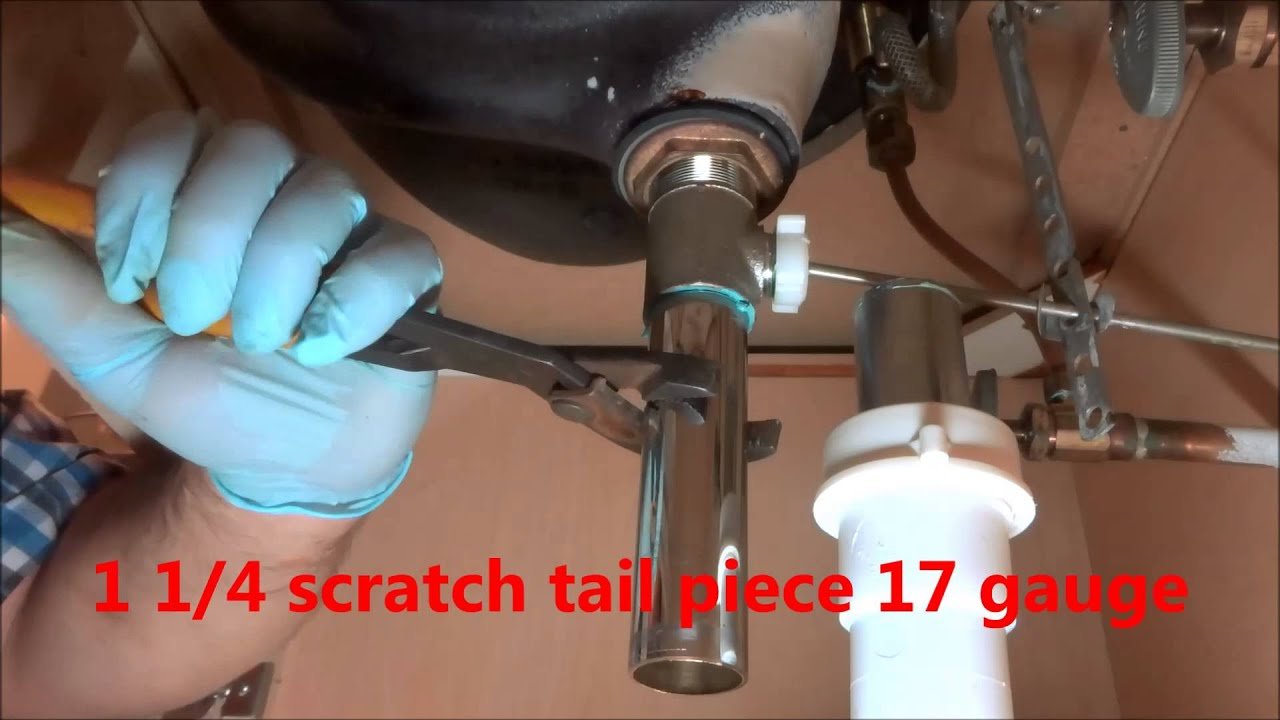
Step 3: Remove the Old Tailpiece
Using a wrench, loosen the slip nuts on both ends of the tailpiece and remove it from the sink drain and P-trap.
Step 4: Install the New Tailpiece
Apply plumber's tape to the threads of the new tailpiece and attach it to the sink drain and P-trap, tightening the slip nuts with a wrench.
Step 5: Turn the Water Back On
Once the new tailpiece is securely attached, turn the water back on and check for any leaks. If there are no leaks, you're all set with your new and improved kitchen sink tailpiece.
Now that you understand the importance of replacing your kitchen sink tailpiece, let's walk through the steps to do it yourself.
Step 1: Gather Your Materials
Before starting the replacement process, make sure you have all the necessary materials, including a new tailpiece, P-trap, plumber's tape, and a wrench.
Step 2: Turn Off the Water
Before removing the old tailpiece, turn off the water supply to your kitchen sink. You can usually find the shut-off valve under the sink or in the basement.
Step 3: Remove the Old Tailpiece
Using a wrench, loosen the slip nuts on both ends of the tailpiece and remove it from the sink drain and P-trap.
Step 4: Install the New Tailpiece
Apply plumber's tape to the threads of the new tailpiece and attach it to the sink drain and P-trap, tightening the slip nuts with a wrench.
Step 5: Turn the Water Back On
Once the new tailpiece is securely attached, turn the water back on and check for any leaks. If there are no leaks, you're all set with your new and improved kitchen sink tailpiece.
Conclusion
 Replacing your kitchen sink tailpiece is a simple and cost-effective way to update the look of your kitchen and improve its functionality. Follow these steps, and you'll have a new and improved kitchen sink in no time. Don't be afraid to tackle this DIY project and give your kitchen a fresh new look.