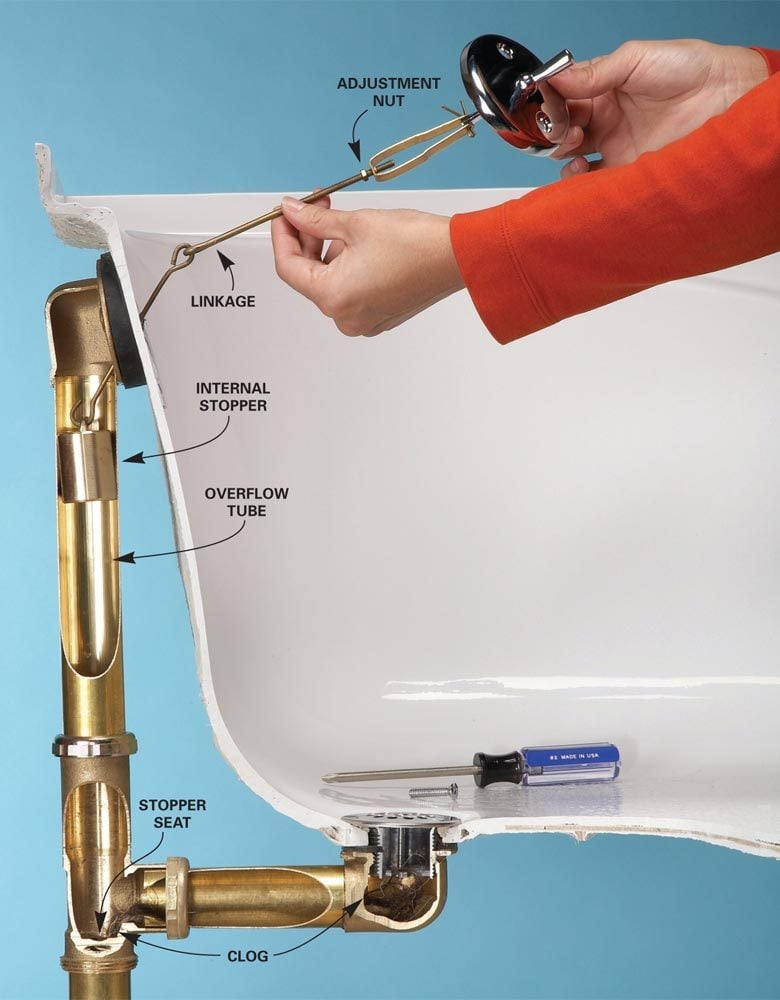
Is your bathroom sink drain not functioning properly? It may be time to replace the drain assembly. This may sound like a daunting task, but with the right tools and knowledge, you can easily replace it yourself. In this article, we will guide you through the steps to successfully replacing your bathroom sink drain assembly.How to Replace a Bathroom Sink Drain Assembly


How to Replace a Bathroom Sink Drain Assembly


The first step in replacing a bathroom sink drain assembly is to gather all the necessary materials. This includes a new drain assembly, a basin wrench, a pipe wrench, plumber's putty, and Teflon tape. Once you have all the materials, you can begin the process.Replacing a Bathroom Sink Drain Assembly: A Step-by-Step Guide


Replacing a Bathroom Sink Drain Assembly: A Step-by-Step Guide


If you are a handy person and love to take on DIY projects, then replacing a bathroom sink drain assembly should be a breeze for you. With a little bit of patience and some basic plumbing knowledge, you can easily replace the drain assembly yourself. Not only will it save you money, but it will also give you a sense of accomplishment.DIY: Replacing a Bathroom Sink Drain Assembly


DIY: Replacing a Bathroom Sink Drain Assembly


:max_bytes(150000):strip_icc()/bathroom-sink-drain-installation-2718843-02-61e5ecbee1e949be8d8f45ac4f5a6797.jpg)

Replacing a bathroom sink drain assembly may seem like a time-consuming task, but with the right approach, it can be a quick and easy process. The key is to follow the steps carefully and have all the necessary materials before starting the project. This will ensure a smooth and hassle-free replacement process.Quick and Easy Bathroom Sink Drain Assembly Replacement


Quick and Easy Bathroom Sink Drain Assembly Replacement


Replacing a bathroom sink drain assembly may seem like a straightforward task, but there are a few tips and tricks that can make the process even easier. These include using plumber's putty to create a watertight seal, using Teflon tape to prevent leaks, and using a basin wrench for hard-to-reach areas.Replacing a Bathroom Sink Drain Assembly: Tips and Tricks
Replacing a Bathroom Sink Drain Assembly: Tips and Tricks


If you are a beginner in home improvement projects, then replacing a bathroom sink drain assembly may seem like a daunting task. But fear not, we have created the ultimate guide to help you through the process. From gathering materials to the final installation, this guide will cover everything you need to know.The Ultimate Guide to Replacing a Bathroom Sink Drain Assembly


The Ultimate Guide to Replacing a Bathroom Sink Drain Assembly
While replacing a bathroom sink drain assembly may seem like a simple task, there are some common mistakes that can easily be made. These include using too much plumber's putty, not tightening the connections properly, and not aligning the drain assembly correctly. Make sure to avoid these mistakes to ensure a successful replacement.Replacing a Bathroom Sink Drain Assembly: Common Mistakes to Avoid
Replacing a Bathroom Sink Drain Assembly: Common Mistakes to Avoid

To make the process even easier, we have created a step-by-step tutorial for replacing a bathroom sink drain assembly. This tutorial will guide you through each step, from removing the old drain assembly to installing the new one. With this tutorial, you will have a visual aid to refer to throughout the process.Step-by-Step Tutorial for Replacing a Bathroom Sink Drain Assembly

Step-by-Step Tutorial for Replacing a Bathroom Sink Drain Assembly
As mentioned earlier, it is important to gather all the necessary tools and materials before beginning the replacement process. In addition to the tools mentioned earlier, you may also need a hacksaw, pliers, and a bucket to catch any water that may spill out during the process. Having everything on hand will make the process much smoother.Replacing a Bathroom Sink Drain Assembly: Tools and Materials You'll Need


Replacing a Bathroom Sink Drain Assembly: Tools and Materials You'll Need

Finally, we have some expert tips to help you through the process of replacing a bathroom sink drain assembly. These tips include using a rag to clean the old putty off the sink, making sure to tighten all connections properly, and checking for leaks before finishing the installation. These tips will ensure a successful and long-lasting replacement. With this step-by-step guide, replacing a bathroom sink drain assembly should be a breeze. Just make sure to follow the instructions carefully and take your time. Once you have successfully replaced the drain assembly, you will have a fully functioning bathroom sink once again. Happy plumbing!Expert Tips for Replacing a Bathroom Sink Drain Assembly


Expert Tips for Replacing a Bathroom Sink Drain Assembly
Replacing Your Bathroom Sink Drain Assembly: A Simple Guide to Enhancing Your Bathroom Design

Why Replace Your Bathroom Sink Drain Assembly?
 If you're looking to give your bathroom a fresh new look, one simple and often overlooked upgrade is replacing your bathroom sink drain assembly. Not only can it improve the overall aesthetic of your bathroom, but it also ensures that your sink is functioning properly and prevents potential issues down the line. Plus, with a few simple tools and some DIY know-how, you can easily replace your bathroom sink drain assembly yourself, saving you time and money.
Step-by-Step Guide to Replacing Your Bathroom Sink Drain Assembly
 The first step to replacing your bathroom sink drain assembly is to gather all the necessary tools and materials.
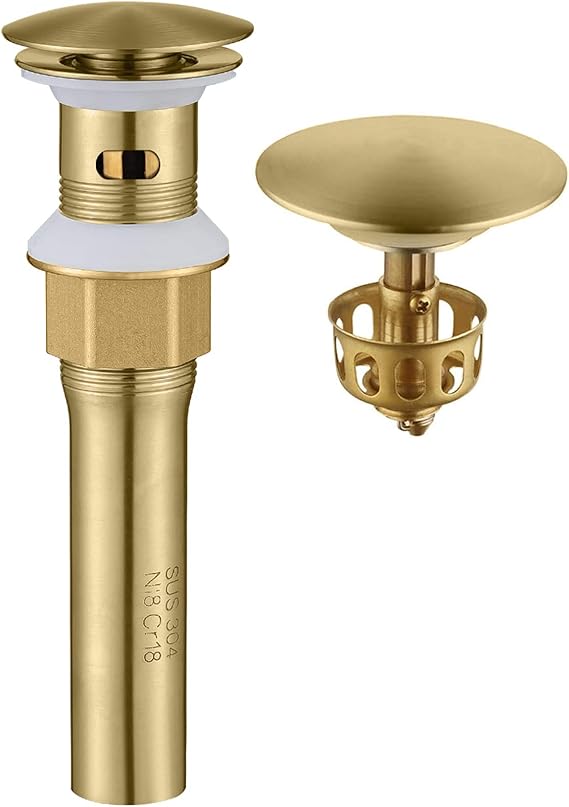
This includes a new drain assembly, a wrench, pliers, plumber's putty, and a screwdriver.
It's important to choose a drain assembly that is the right size and style for your sink, as well as made of high-quality materials to ensure durability.
Next,
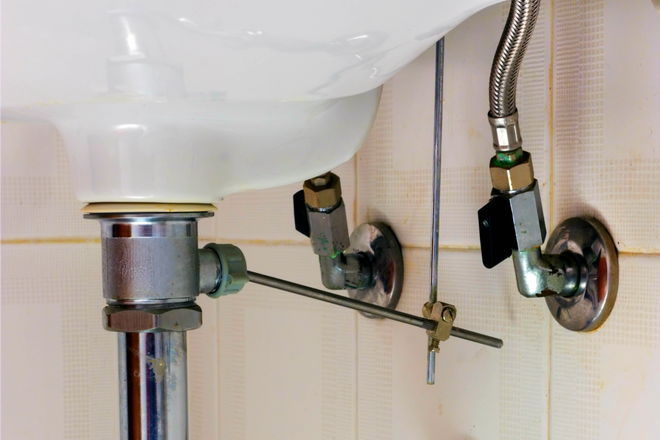
turn off the water supply to your sink by shutting off the water valves located under the sink.
This will prevent any water from leaking out while you work.
Place a bucket or towel under the sink to catch any excess water that may be in the pipes.
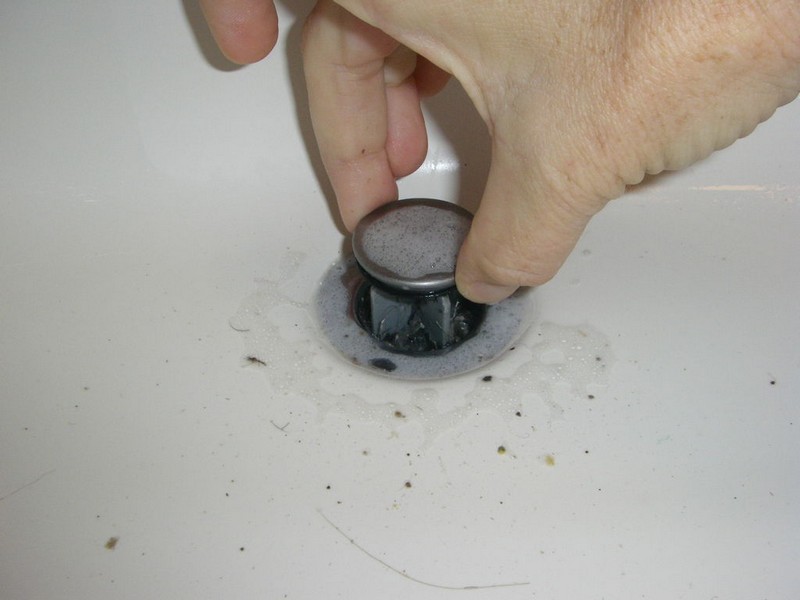
The next step is to remove the old drain assembly.
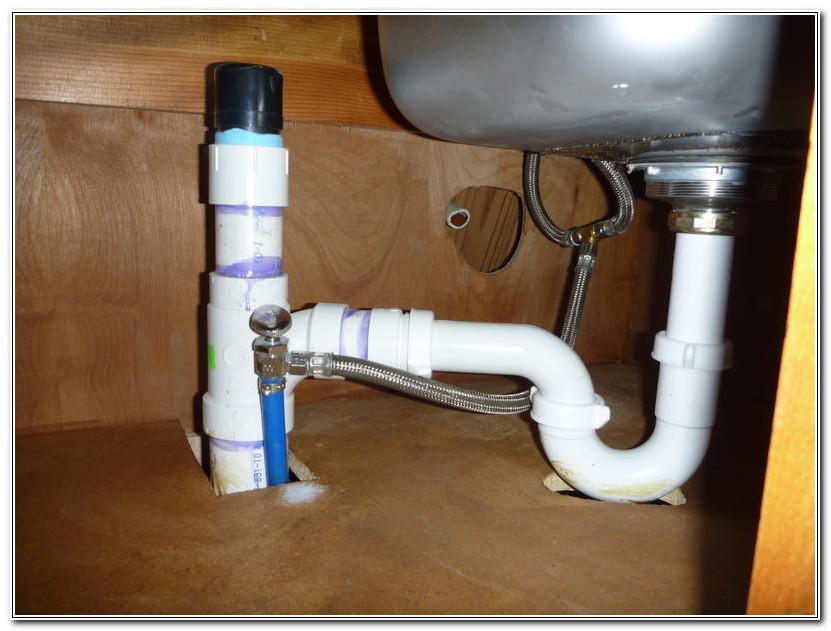
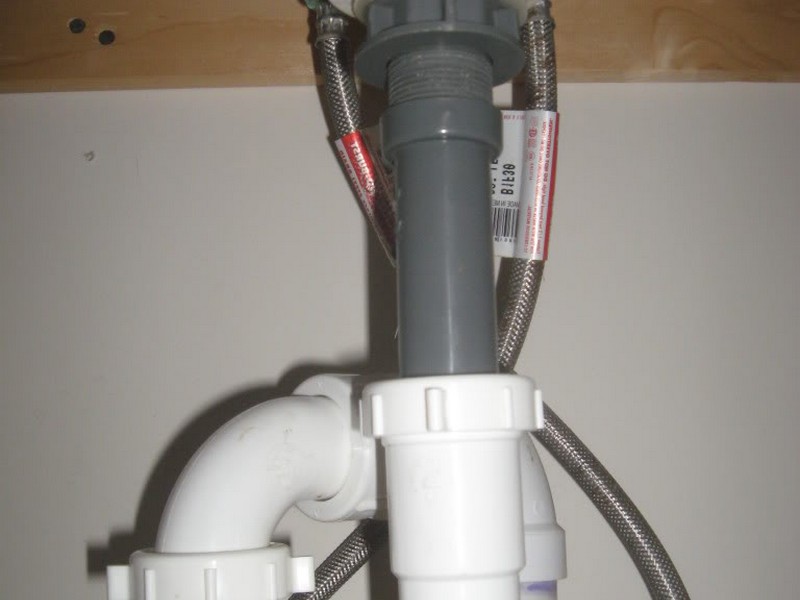
Use a wrench to loosen the nut that connects the drain pipe to the bottom of the sink. Then, use pliers to loosen the nut that connects the drain pipe to the drain tailpiece. Once both nuts are removed, you can pull out the old drain assembly.
Before installing the new drain assembly, you'll need to clean the area where the old one was removed.
Use a scraper or putty knife to remove any old plumber's putty or debris.
Then, roll the plumber's putty into a long rope and place it around the top of the drain opening.
Place the new drain assembly into the drain opening and tighten the nut underneath the sink to secure it.
You may need to use pliers to hold the drain in place while tightening the nut.
Once the drain is secure, clean off any excess putty.
Finally,
reconnect the drain pipe to the bottom of the sink and the drain tailpiece using the nuts and washers provided with the new drain assembly.
Tighten the nuts with a wrench and make sure there are no leaks by turning on the water supply and running water through the sink.
The first step to replacing your bathroom sink drain assembly is to gather all the necessary tools and materials.
This includes a new drain assembly, a wrench, pliers, plumber's putty, and a screwdriver.
It's important to choose a drain assembly that is the right size and style for your sink, as well as made of high-quality materials to ensure durability.
Next,
turn off the water supply to your sink by shutting off the water valves located under the sink.
This will prevent any water from leaking out while you work.
Place a bucket or towel under the sink to catch any excess water that may be in the pipes.
The next step is to remove the old drain assembly.
Use a wrench to loosen the nut that connects the drain pipe to the bottom of the sink. Then, use pliers to loosen the nut that connects the drain pipe to the drain tailpiece. Once both nuts are removed, you can pull out the old drain assembly.
Before installing the new drain assembly, you'll need to clean the area where the old one was removed.
Use a scraper or putty knife to remove any old plumber's putty or debris.
Then, roll the plumber's putty into a long rope and place it around the top of the drain opening.
Place the new drain assembly into the drain opening and tighten the nut underneath the sink to secure it.
You may need to use pliers to hold the drain in place while tightening the nut.
Once the drain is secure, clean off any excess putty.
Finally,
reconnect the drain pipe to the bottom of the sink and the drain tailpiece using the nuts and washers provided with the new drain assembly.
Tighten the nuts with a wrench and make sure there are no leaks by turning on the water supply and running water through the sink.
Enhance Your Bathroom Design with a New Sink Drain Assembly
 Not only does replacing your bathroom sink drain assembly improve the functionality of your sink, but it also adds a touch of style to your bathroom design. With a few simple steps, you can easily upgrade your bathroom and give it a fresh new look. So don't overlook this simple yet effective home improvement project – give your bathroom sink a makeover today!


:max_bytes(150000):strip_icc()/sealy-baby-firm-rest-waterproof-standard-toddler--baby-crib-mattress-b181afd545f04a7280b9e17d67b95910.jpg)