If you're experiencing a clogged or leaky sink, it may be time to remove the bathroom sink drain assembly. This may seem like a daunting task, but with the right tools and knowledge, you can easily remove the drain assembly yourself and save some money on hiring a plumber. Follow this step-by-step guide to learn how to remove a bathroom sink drain assembly. How to Remove a Bathroom Sink Drain Assembly


How to Remove a Bathroom Sink Drain Assembly


Before you begin, make sure you have all the necessary tools and supplies. You will need a pair of pliers, a screwdriver, a bucket, and a cloth. If your sink has a pop-up drain assembly, you will also need a new drain stopper and a drain flange. Removing a Bathroom Sink Drain Assembly


Removing a Bathroom Sink Drain Assembly


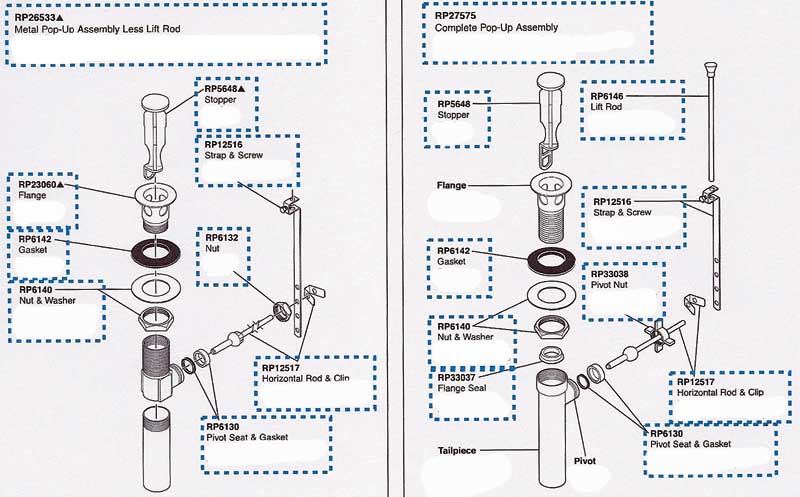
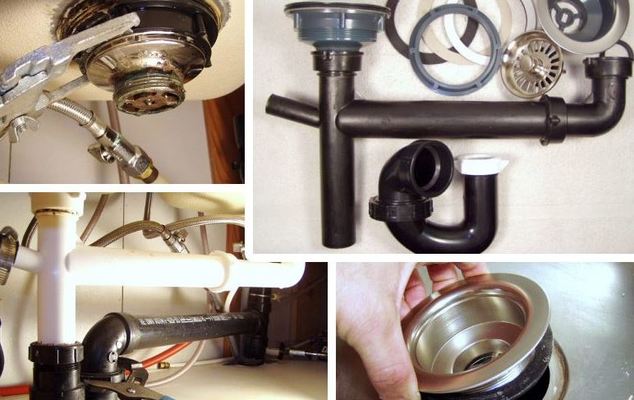
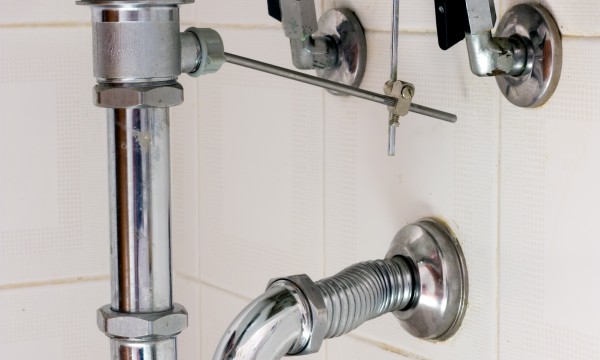
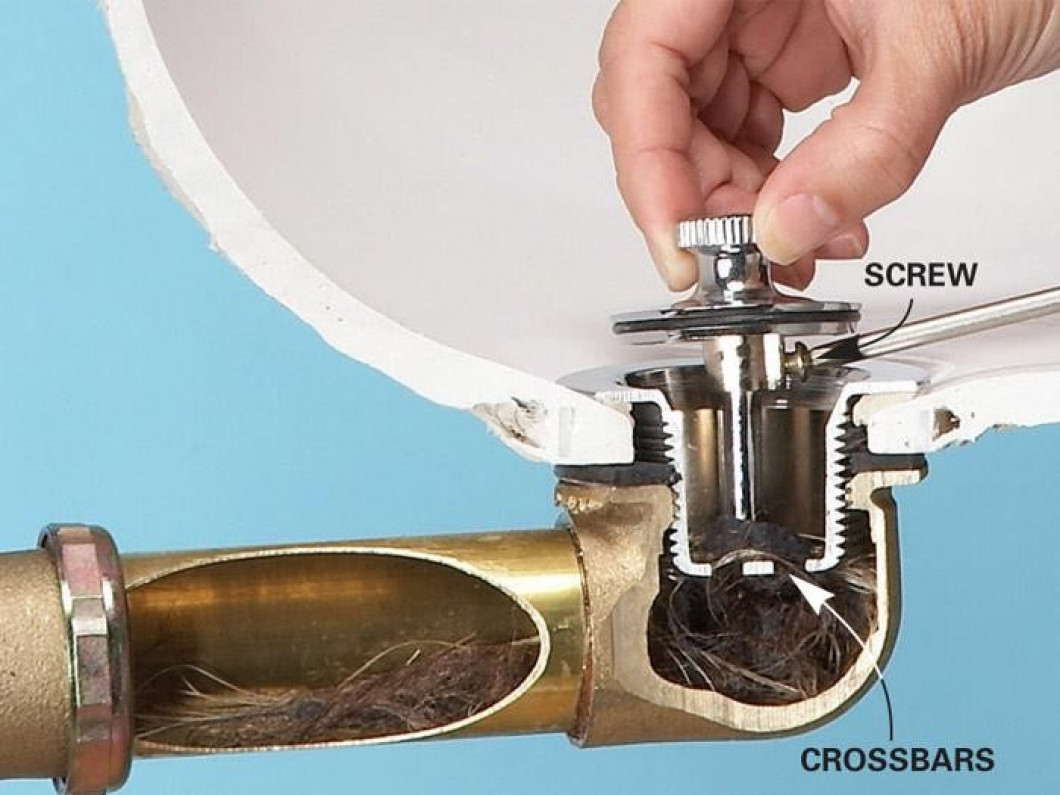
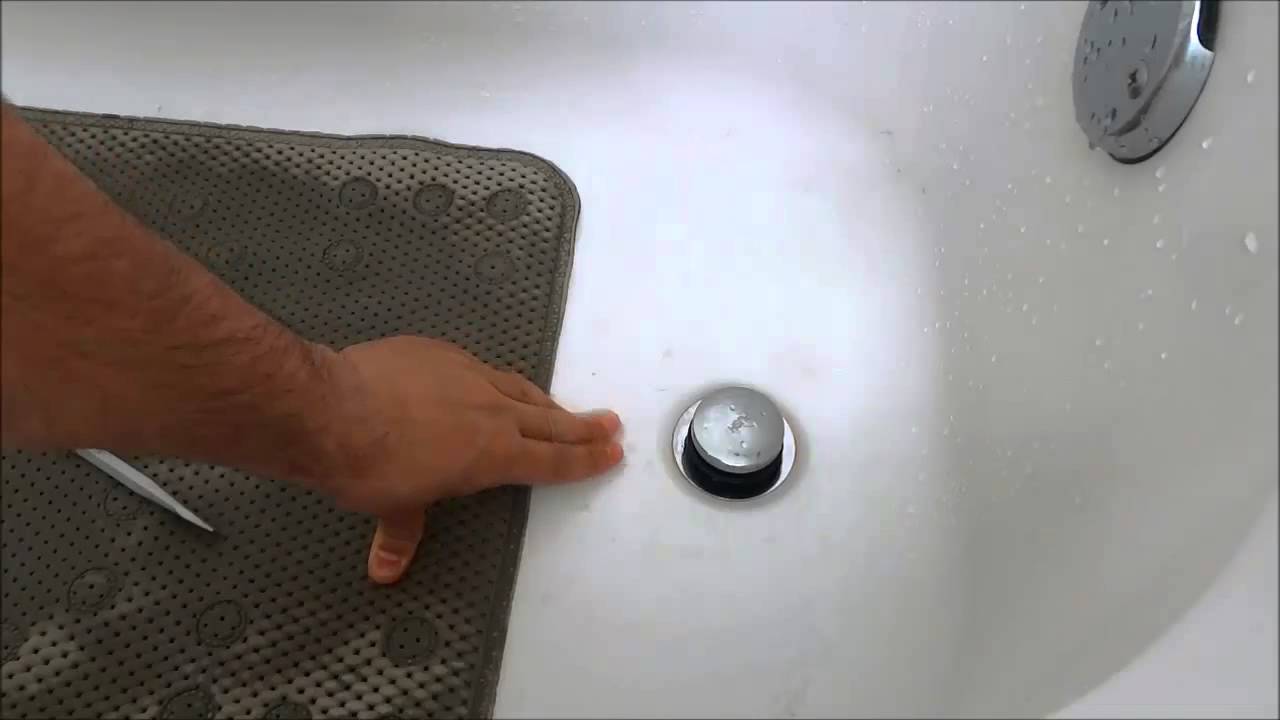
Step 1: Turn off the water supply to your sink by shutting off the valves under the sink. If your sink does not have individual valves, you will need to turn off the main water supply to your house. Step 2: Place a bucket under the sink to catch any water that may spill out. Step 3: Use pliers to loosen and remove the slip nut that connects the P-trap to the sink drain. Remove the P-trap and set it aside. Step 4: Use a screwdriver to remove the screws that hold the drain flange in place. If your sink has a pop-up drain assembly, unscrew the nut that holds the ball rod in place. Step 5: Once the screws and nut are removed, you should be able to lift the drain flange out of the sink. If it's stuck, you can use pliers to gently twist and pull it out. Step 6: If your sink has a pop-up drain assembly, you will need to disconnect the ball rod from the pop-up stopper. Carefully remove the stopper and set it aside. Step 7: Clean the area around the drain hole with a cloth or sponge to remove any debris or buildup. Step 8: Use pliers to loosen and remove the locknut that holds the drain tailpiece to the bottom of the sink. Once the locknut is removed, you can pull the drain tailpiece out of the sink. Step 9: Inspect the drain hole and remove any remaining debris or buildup. You can also use a drain snake to clear out any clogs. Step 10: Congratulations, you have successfully removed the bathroom sink drain assembly!Step-by-Step Guide for Removing a Bathroom Sink Drain Assembly


Step-by-Step Guide for Removing a Bathroom Sink Drain Assembly

:max_bytes(150000):strip_icc()/bathroom-sink-drain-installation-2718843-02-61e5ecbee1e949be8d8f45ac4f5a6797.jpg)


Removing a bathroom sink drain assembly can save you time and money, and it's a great DIY project for those who are handy around the house. Just make sure to follow the steps carefully and have all the necessary tools and supplies before you begin.DIY: Removing a Bathroom Sink Drain Assembly


DIY: Removing a Bathroom Sink Drain Assembly


Here are some helpful tips and tricks to keep in mind when removing a bathroom sink drain assembly: - Always turn off the water supply before starting the removal process. - Use a bucket to catch any water that may spill out during the removal process. - If your sink has a pop-up drain assembly, make sure to have a new drain stopper and drain flange ready to replace the old ones. - Clean the area around the drain hole thoroughly before installing the new drain assembly. - If you encounter any difficulties during the removal process, don't hesitate to call a professional plumber for help.Removing a Bathroom Sink Drain Assembly: Tips and Tricks

Removing a Bathroom Sink Drain Assembly: Tips and Tricks

There are many different methods and techniques for removing a bathroom sink drain assembly, but the best way is the one that works for you. Follow the steps in this guide, but feel free to make adjustments based on your own personal experience and preferences.The Best Way to Remove a Bathroom Sink Drain Assembly

The Best Way to Remove a Bathroom Sink Drain Assembly


Here are some common mistakes that people make when removing a bathroom sink drain assembly: - Not turning off the water supply before starting the removal process. - Forgetting to place a bucket under the sink to catch any water that may spill out. - Using the wrong tools or not having all the necessary supplies. - Not cleaning the area around the drain hole thoroughly before installing the new drain assembly. Make sure to avoid these mistakes to ensure a smooth and successful removal process.Removing a Bathroom Sink Drain Assembly: Common Mistakes to Avoid


Removing a Bathroom Sink Drain Assembly: Common Mistakes to Avoid


Removing a bathroom sink drain assembly may seem like a daunting task, but with the right tools and knowledge, it can be a quick and easy process. Just follow the steps in this guide, and you'll have your drain assembly removed in no time!Quick and Easy Method for Removing a Bathroom Sink Drain Assembly

Quick and Easy Method for Removing a Bathroom Sink Drain Assembly


Here's a list of the tools and supplies you'll need to successfully remove a bathroom sink drain assembly: - Pliers - Screwdriver - Bucket - Cloth or sponge - New drain stopper and drain flange (if your sink has a pop-up drain assembly)Removing a Bathroom Sink Drain Assembly: Tools You'll Need
Removing a Bathroom Sink Drain Assembly: Tools You'll Need


If you prefer visual instructions, you can also find many helpful video tutorials online that will guide you through the process of removing a bathroom sink drain assembly. Just make sure to follow the steps carefully and have all the necessary tools and supplies before you begin.Step-by-Step Video Tutorial for Removing a Bathroom Sink Drain Assembly

Step-by-Step Video Tutorial for Removing a Bathroom Sink Drain Assembly


Why It's Important to Properly Remove Bathroom Sink Drain Assembly

Proper Drain Assembly Removal Can Prevent Costly Plumbing Repairs
 When it comes to house design, the bathroom is often one of the most overlooked areas. However, it is also one of the most frequently used spaces in a home, making it important to maintain and keep in good condition. One crucial aspect of bathroom maintenance is properly removing the sink drain assembly. This may seem like a simple task, but it can actually have a significant impact on the overall functionality and longevity of your plumbing system. Not only that, but improper removal can lead to costly plumbing repairs down the line. Let's dive into why it's important to properly remove bathroom sink drain assembly.
Prevents Clogs and Buildup
 Bathroom sink drains are prone to clogs and buildup due to the constant flow of hair, soap residue, and other debris. When removing the drain assembly, it's essential to thoroughly clean it to prevent any buildup or clogs from forming. Neglecting to properly clean and remove the assembly can lead to slow draining and even complete blockages, which can be a headache to deal with and may require professional help to fix. By regularly removing and cleaning the drain assembly, you can prevent clogs and keep the water flowing smoothly, avoiding any potential plumbing issues.
Ensures Proper Sealing and Tightening
 Another important reason to properly remove the bathroom sink drain assembly is to ensure proper sealing and tightening. Over time, the seal between the drain assembly and the sink can become loose or damaged, leading to leaks and potential water damage. When removing the assembly, it's crucial to check the seal and replace it if necessary. Additionally, the assembly should be tightened properly to prevent any leaks or loosening over time. This simple step can save you from having to deal with water damage and costly repairs in the future.
Maintains the Aesthetic of Your Bathroom
 Last but not least, properly removing the bathroom sink drain assembly can help maintain the aesthetic of your bathroom. A worn or damaged drain assembly can be an eyesore and take away from the overall design of your bathroom. By regularly removing and cleaning the assembly, you can keep it in good condition and avoid any unsightly appearances. Additionally, if you ever decide to upgrade your bathroom with a new sink or faucet, having a properly removed and maintained drain assembly will make the installation process much smoother.
In conclusion, proper removal of the bathroom sink drain assembly is crucial for maintaining a functional and aesthetically pleasing bathroom. By regularly cleaning and checking the assembly, you can prevent clogs, ensure proper sealing and tightening, and maintain the overall look of your bathroom. So the next time you're cleaning your bathroom, don't forget to give some attention to the drain assembly for a well-maintained and worry-free plumbing system.
Last but not least, properly removing the bathroom sink drain assembly can help maintain the aesthetic of your bathroom. A worn or damaged drain assembly can be an eyesore and take away from the overall design of your bathroom. By regularly removing and cleaning the assembly, you can keep it in good condition and avoid any unsightly appearances. Additionally, if you ever decide to upgrade your bathroom with a new sink or faucet, having a properly removed and maintained drain assembly will make the installation process much smoother.
In conclusion, proper removal of the bathroom sink drain assembly is crucial for maintaining a functional and aesthetically pleasing bathroom. By regularly cleaning and checking the assembly, you can prevent clogs, ensure proper sealing and tightening, and maintain the overall look of your bathroom. So the next time you're cleaning your bathroom, don't forget to give some attention to the drain assembly for a well-maintained and worry-free plumbing system.