Removing a bathroom sink drain may seem like a daunting task, but with the right tools and knowledge, it can be a simple and straightforward process. Here are 10 results to help you successfully remove your bathroom sink drain.Removing a Bathroom Sink Drain: 10 Results


Removing a Bathroom Sink Drain: 10 Results


If you've never removed a bathroom sink drain before, it's important to familiarize yourself with the steps. Start by turning off the water supply and removing any items from under the sink. Then, follow these simple steps: Step 1: Use a screwdriver to remove the screws from the bottom of the drain flange. Step 2: Disconnect the drain from the sink by unscrewing the plastic nut that holds it in place. Step 3: Use a pair of pliers to grip the drain and twist it counterclockwise until it loosens and can be removed. Step 4: Clean any remaining residue or debris from the sink before installing a new drain.How to Remove a Bathroom Sink Drain


How to Remove a Bathroom Sink Drain


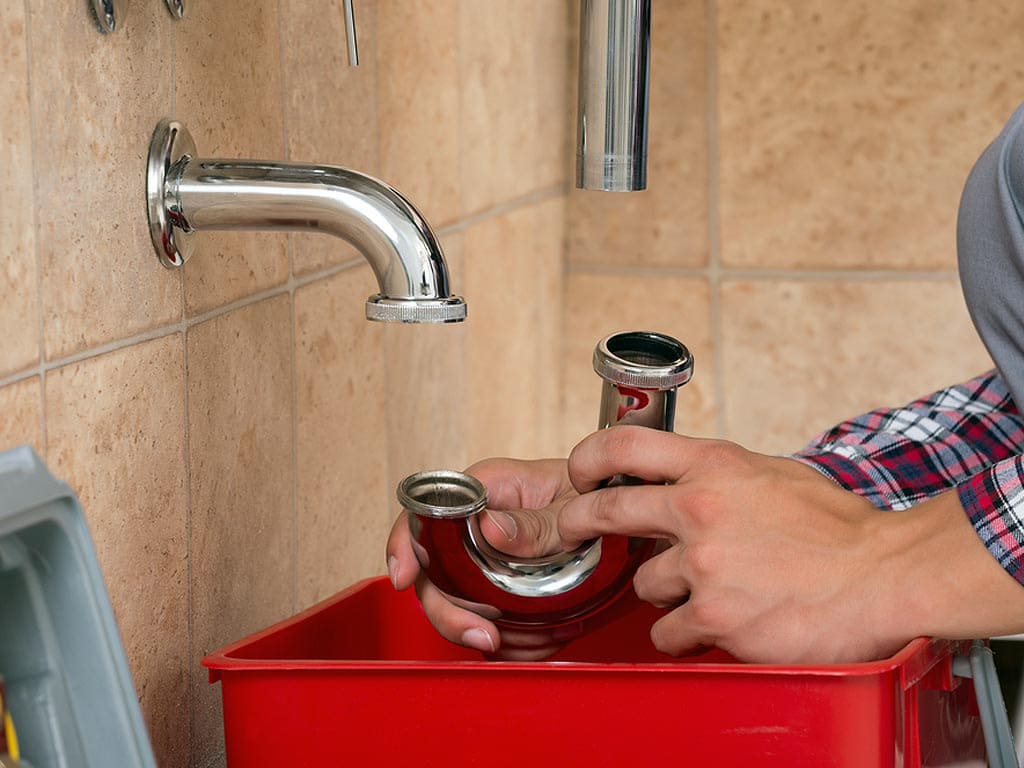
For a more detailed guide on removing a bathroom sink drain, follow these steps: Step 1: Turn off the water supply to the sink by closing the shut-off valves under the sink. Step 2: Remove any items from under the sink to give yourself room to work. Step 3: Use a pair of pliers to loosen and remove the drain trap from the tailpiece. Step 4: Use a screwdriver to remove the screws from the bottom of the drain flange. Step 5: Disconnect the drain from the sink by unscrewing the plastic nut that holds it in place. Step 6: Use a pair of pliers to grip the drain and twist it counterclockwise until it loosens and can be removed. Step 7: Clean any remaining residue or debris from the sink before installing a new drain.Step-by-Step Guide for Removing a Bathroom Sink Drain


Step-by-Step Guide for Removing a Bathroom Sink Drain


If you're a handy person and enjoy tackling DIY projects, removing a bathroom sink drain can be a satisfying task. By following the steps above and having the right tools, you can easily remove your sink drain without the help of a professional.DIY: Removing a Bathroom Sink Drain


DIY: Removing a Bathroom Sink Drain


To successfully remove a bathroom sink drain, you will need the following tools: screwdriver, pliers, adjustable wrench, pipe wrench, and a bucket or container for catching any water or debris.Tools Needed for Removing a Bathroom Sink Drain

Tools Needed for Removing a Bathroom Sink Drain
:max_bytes(150000):strip_icc()/bathroom-sink-drain-installation-2718843-02-61e5ecbee1e949be8d8f45ac4f5a6797.jpg)

:max_bytes(150000):strip_icc()/bathroom-sink-drain-installation-2718843-11-675b59e962dd4f69b510d5c9e1fd215f.jpg)

Removing a bathroom sink drain may seem like a simple task, but there are some common mistakes to avoid to ensure a smooth process: Mistake 1: Forgetting to turn off the water supply before starting the removal process. Mistake 2: Using the wrong tools, such as a regular wrench instead of a pipe wrench. Mistake 3: Not properly supporting the sink during the removal process, which can cause damage. Mistake 4: Not cleaning the sink properly before installing a new drain, which can cause leaks.Common Mistakes to Avoid When Removing a Bathroom Sink Drain

Common Mistakes to Avoid When Removing a Bathroom Sink Drain


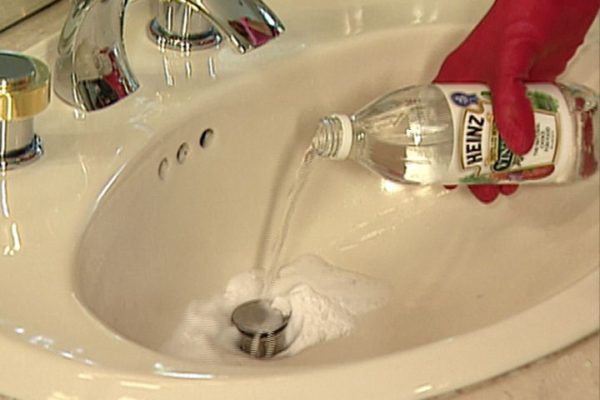
If you encounter any issues during the removal process, here are some troubleshooting tips to help: If the drain is stuck: Use a lubricant, such as WD-40, to loosen the drain and make it easier to remove. If the drain is too tight: Use a pipe wrench or pliers to get a better grip and twist it counterclockwise. If the drain is leaking: Double-check that all connections are tight and that the drain is properly installed.Removing a Bathroom Sink Drain: Troubleshooting Tips
Removing a Bathroom Sink Drain: Troubleshooting Tips

Before starting the removal process, it's important to take some safety precautions: Wear safety goggles to protect your eyes from any debris or splashing water. Make sure the water supply is turned off to avoid any accidents. Use caution when handling tools to avoid any injuries.Removing a Bathroom Sink Drain: Safety Precautions
Removing a Bathroom Sink Drain: Safety Precautions


While removing a bathroom sink drain can be a DIY project, it may be best to call a professional if you're uncomfortable or unsure of the process. A professional plumber has the experience and knowledge to get the job done correctly and efficiently.Removing a Bathroom Sink Drain: Professional vs. DIY

Removing a Bathroom Sink Drain: Professional vs. DIY
If the traditional removal method doesn't work for your sink, there are alternative methods that you can try, such as using a drain extractor tool or a plunger. These methods may be more effective for certain types of drains, so it's worth considering if you're having trouble with the traditional removal process.Removing a Bathroom Sink Drain: Alternative Methods

Removing a Bathroom Sink Drain: Alternative Methods
Why Removing a Bathroom Sink Drain is Necessary for Your House Design

The Importance of a Properly Functioning Bathroom Sink Drain
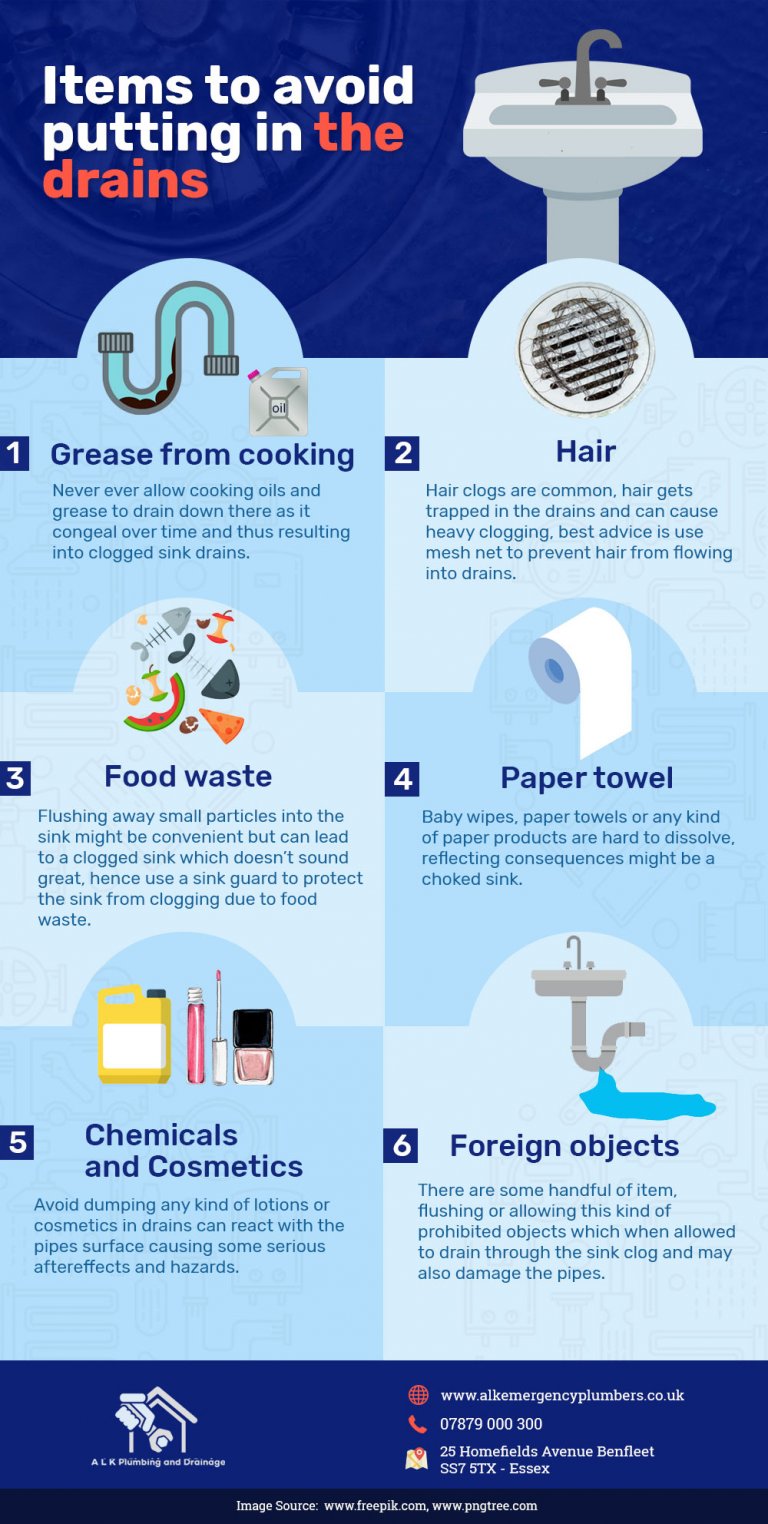
 Your bathroom sink is one of the most frequently used fixtures in your house. From brushing your teeth to washing your face, it is an essential part of your daily routine. However, over time, the drain can become clogged with hair, soap scum, and other debris, causing it to drain slowly or not at all. This can be frustrating and unsanitary, as stagnant water can harbor bacteria and unpleasant odors. Not to mention, a clogged drain can also lead to water damage and costly repairs. That is why removing a bathroom sink drain is necessary for maintaining a functional and clean house design.
How to Properly Remove a Bathroom Sink Drain
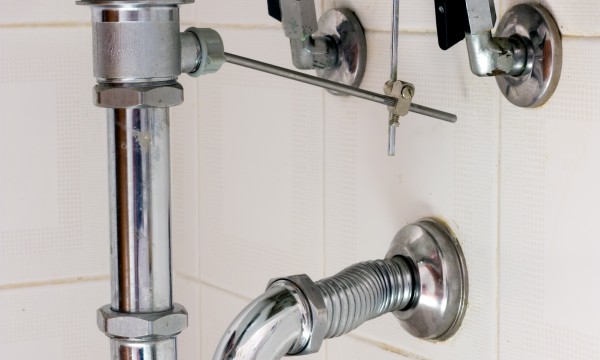
 Removing a bathroom sink drain may seem like a daunting task, but with the right tools and techniques, it can be a simple and quick process. First, gather your supplies, including a pair of pliers, a screwdriver, and a drain removal tool. Next, locate the drain underneath the sink and use the pliers to loosen the slip nuts holding the drain in place. Then, use the screwdriver to remove the screws securing the stopper and pop-up assembly. Finally, use the drain removal tool to unscrew and remove the drain from the sink. Be sure to clean the drain and surrounding area thoroughly before reassembling everything.
The Benefits of Removing a Bathroom Sink Drain
 Removing a bathroom sink drain not only improves the functionality of your sink, but it also has several other benefits. First and foremost, it can prevent clogs and potential water damage, saving you from costly repairs in the future. It also allows for easier cleaning and maintenance of your sink, keeping it hygienic and free from unpleasant odors. Additionally, removing the drain can also provide an opportunity to update your house design by replacing the old, worn-out drain with a new and stylish one.
In conclusion, removing a bathroom sink drain is a crucial step in maintaining a clean and functional house design. By following the proper techniques and using the right tools, you can easily remove the drain and reap the many benefits it offers. Don't let a clogged drain disrupt your daily routine and potentially damage your house. Take the time to remove and clean your bathroom sink drain regularly for a more pleasant and efficient experience.
Removing a bathroom sink drain not only improves the functionality of your sink, but it also has several other benefits. First and foremost, it can prevent clogs and potential water damage, saving you from costly repairs in the future. It also allows for easier cleaning and maintenance of your sink, keeping it hygienic and free from unpleasant odors. Additionally, removing the drain can also provide an opportunity to update your house design by replacing the old, worn-out drain with a new and stylish one.
In conclusion, removing a bathroom sink drain is a crucial step in maintaining a clean and functional house design. By following the proper techniques and using the right tools, you can easily remove the drain and reap the many benefits it offers. Don't let a clogged drain disrupt your daily routine and potentially damage your house. Take the time to remove and clean your bathroom sink drain regularly for a more pleasant and efficient experience.