Are you tired of dealing with a leaky or malfunctioning kitchen sink faucet valve? Removing and replacing the valve may seem like a daunting task, but with the right tools and knowledge, it can be a simple DIY project. Follow these easy steps to remove your kitchen sink faucet valve and get your sink functioning properly again.How to Remove a Kitchen Sink Faucet Valve


How to Remove a Kitchen Sink Faucet Valve


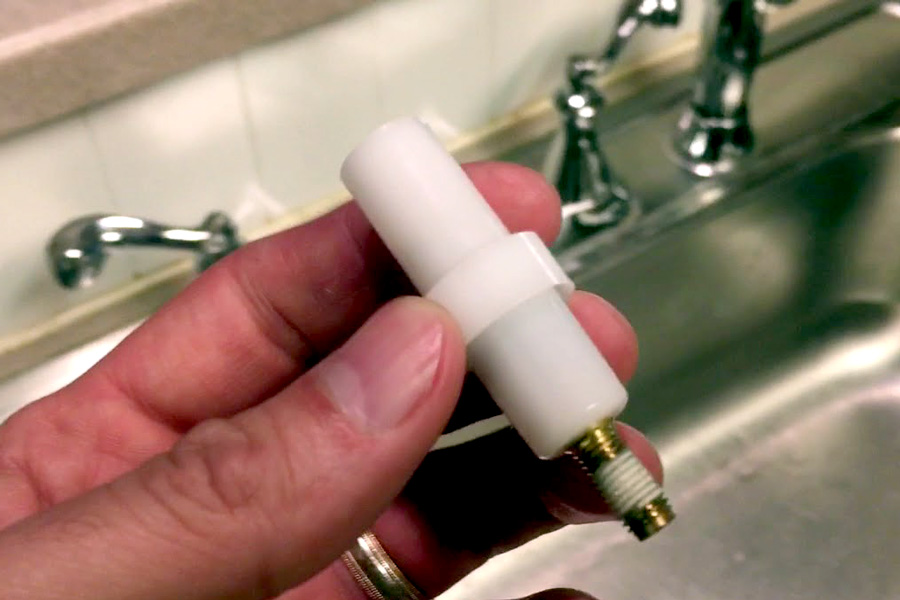


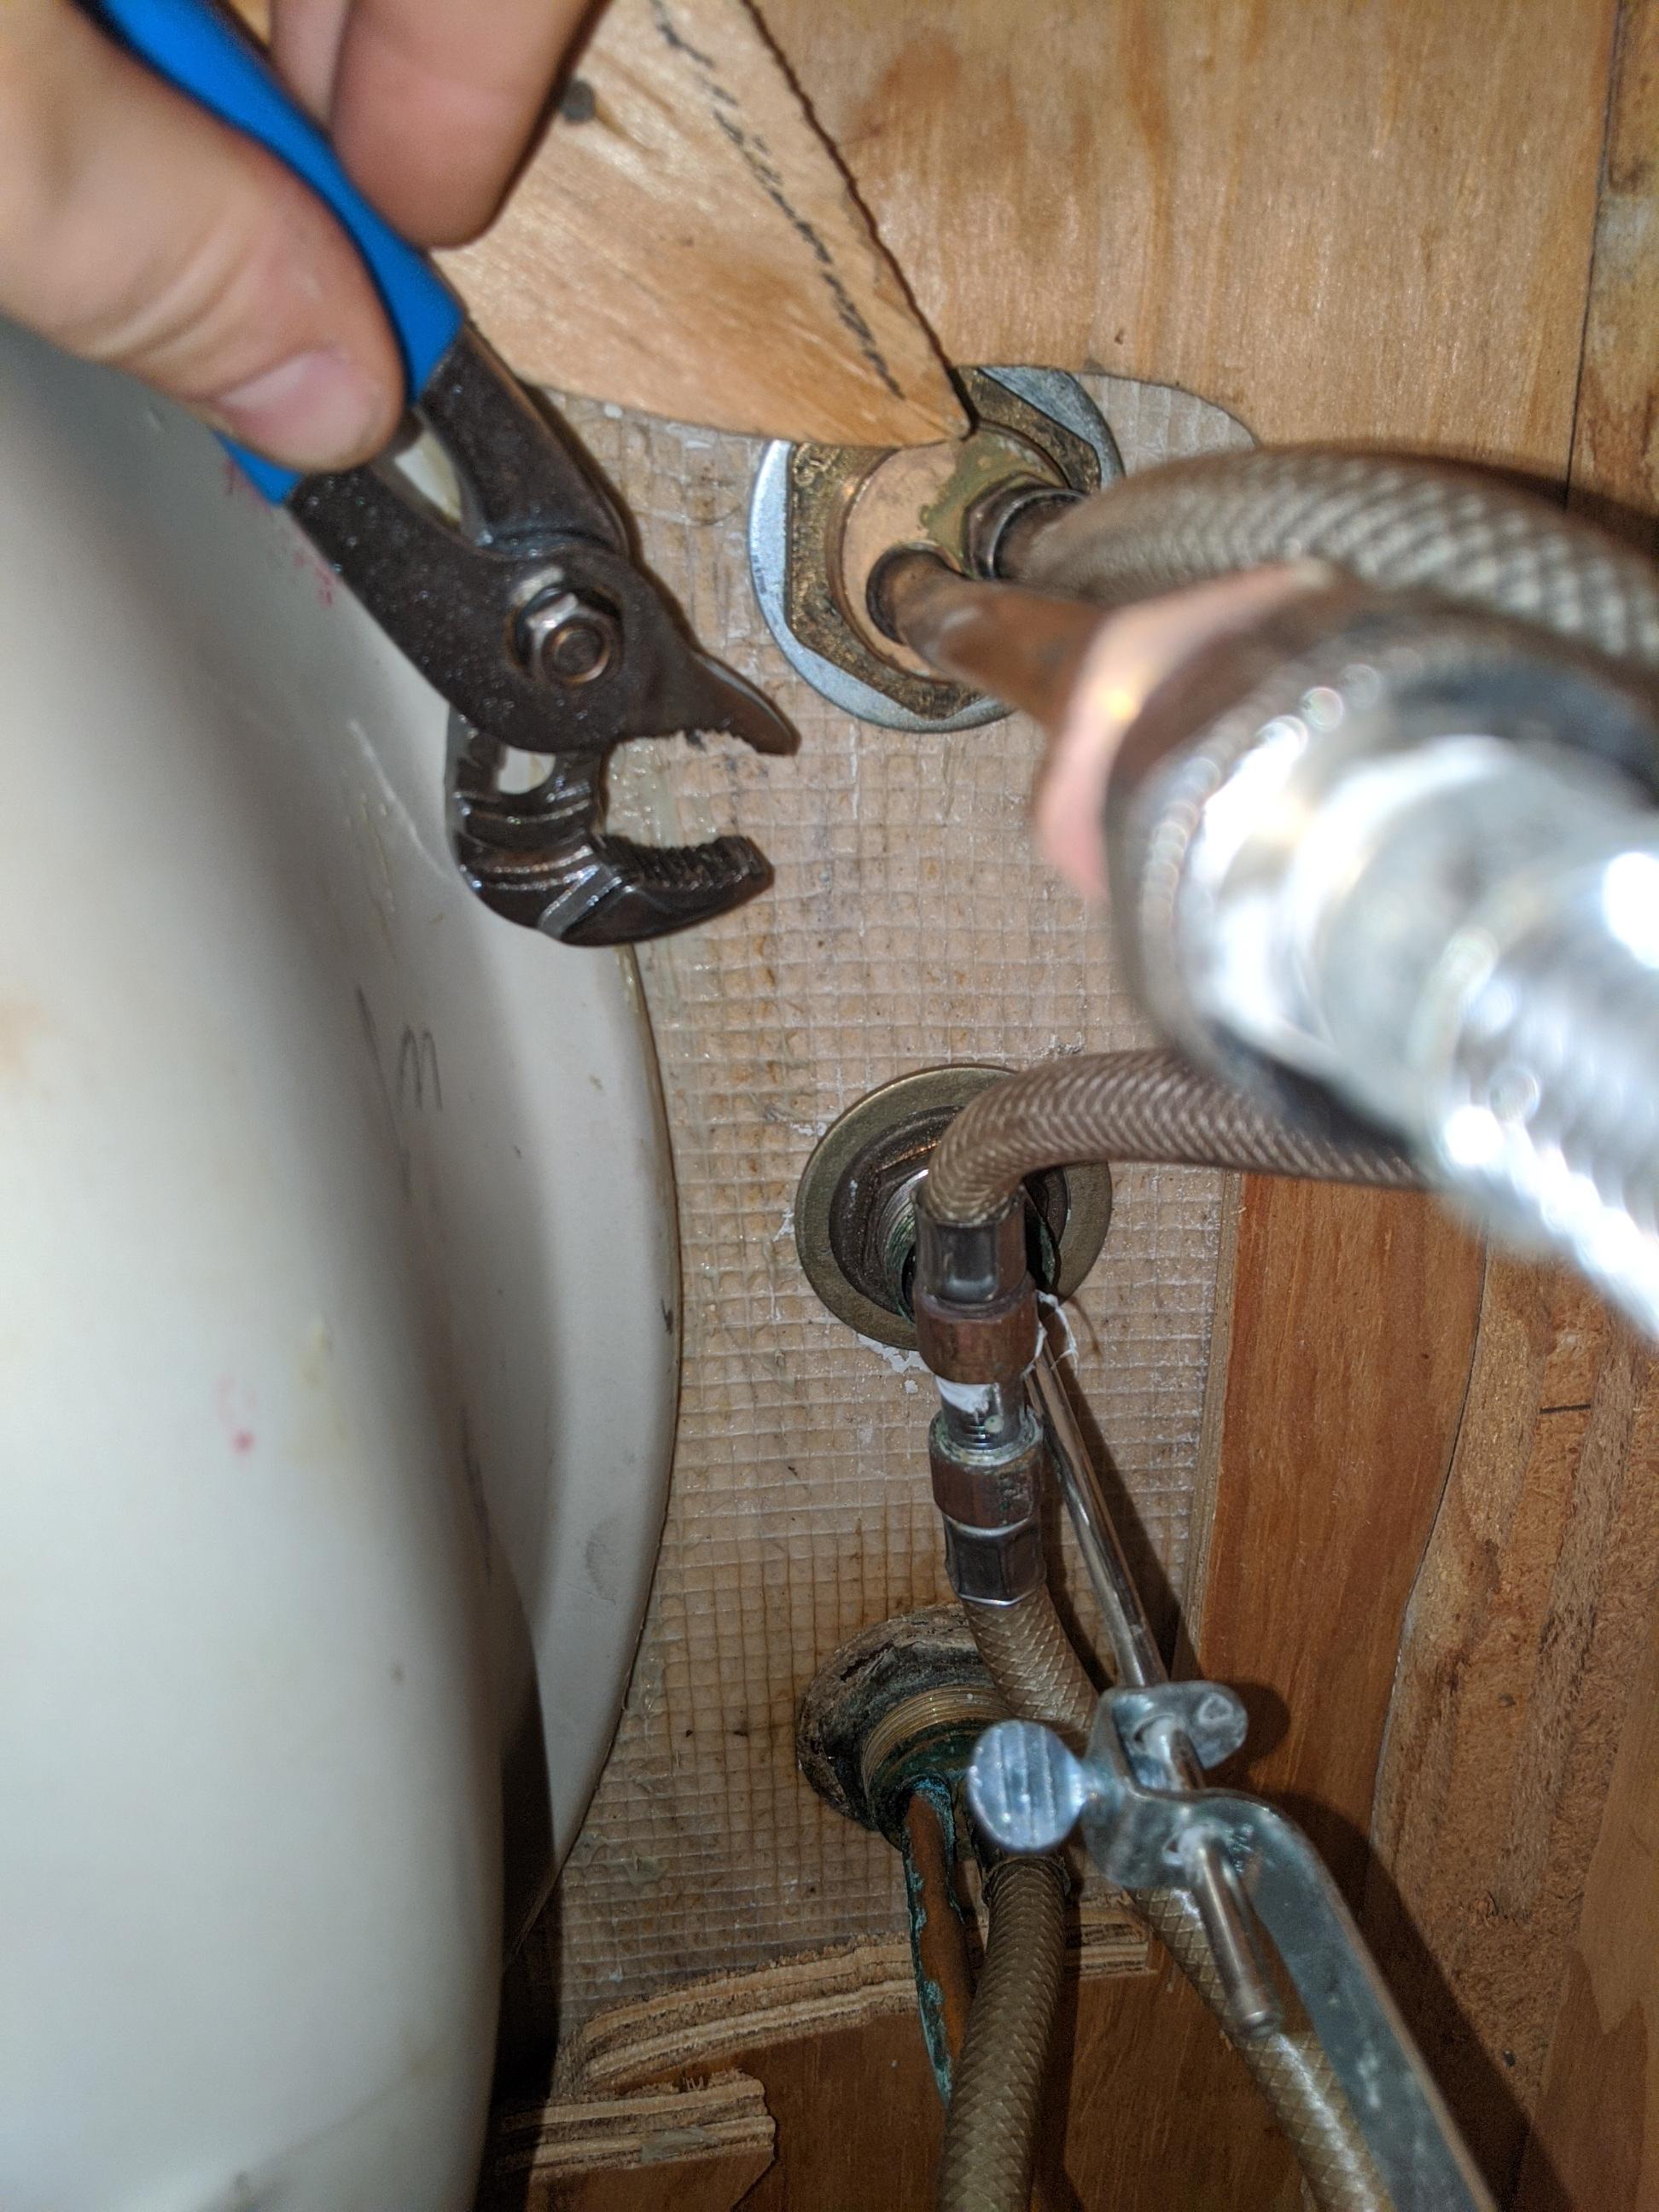
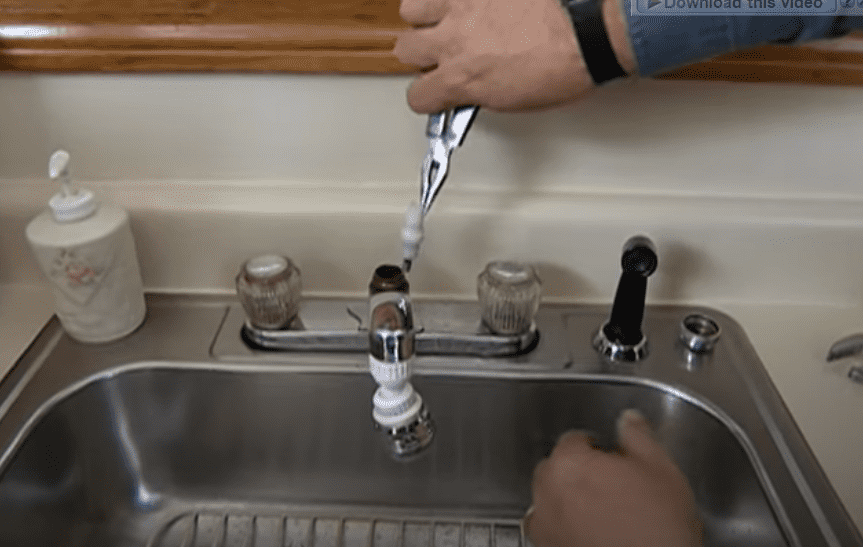
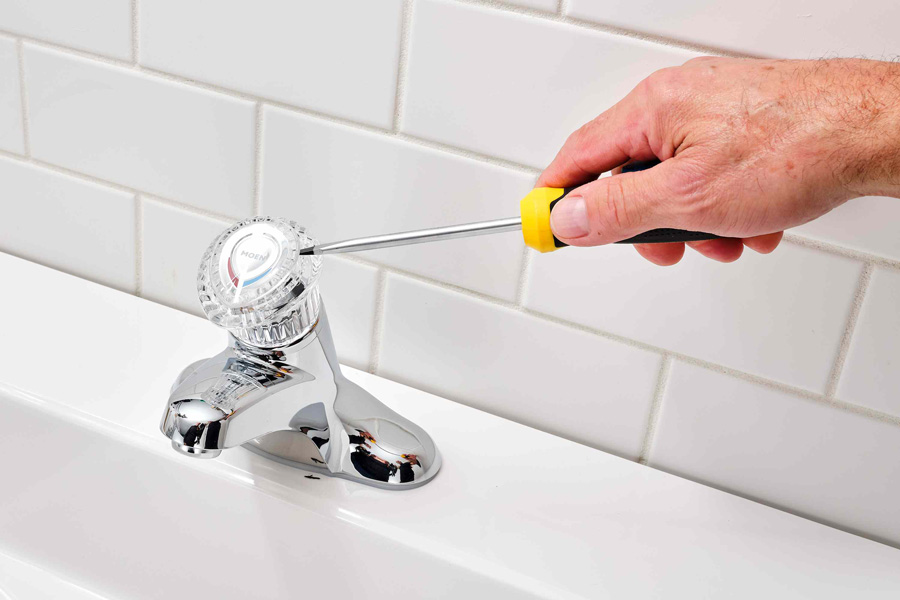
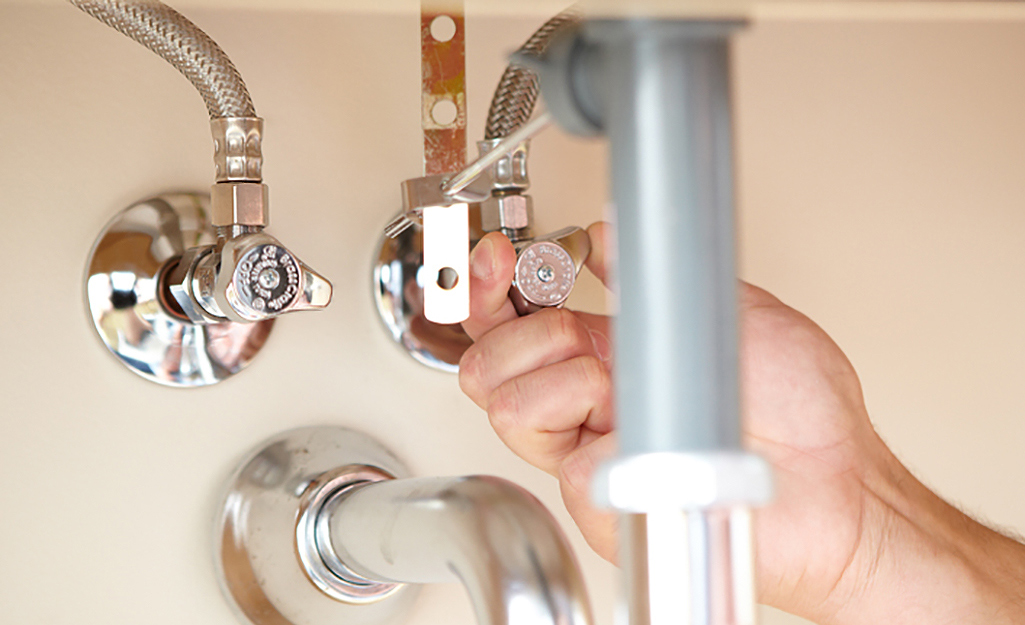
Before you begin, make sure to turn off the water supply to your kitchen sink. This can usually be done by turning off the main water valve or the valve located under the sink. Once the water is turned off, follow these steps: Step 1: Remove the handle of the faucet by unscrewing the set screw with an Allen wrench. If there is a cap covering the screw, use a flathead screwdriver to carefully pry it off. Step 2: Once the handle is removed, use adjustable pliers to loosen the packing nut located below the handle. Step 3: After loosening the packing nut, use channel lock pliers to unscrew the valve stem from the faucet body. Be sure to hold onto the valve stem as you unscrew it to prevent it from falling into the sink. Step 4: Once the valve stem is removed, you will see the valve seat and spring. Use tweezers or needle-nose pliers to remove these components. Step 5: The final step is to remove the valve body from the sink. This may require the use of a basin wrench to loosen the mounting nut. Once the nut is loosened, the valve body should easily pull out of the sink.Removing a Kitchen Sink Faucet Valve: A Step-by-Step Guide


Removing a Kitchen Sink Faucet Valve: A Step-by-Step Guide


Removing a kitchen sink faucet valve may seem intimidating, but it can be done as a DIY project with the right tools and knowledge. By following these simple steps, you can successfully remove a faulty valve and replace it with a new one.DIY: How to Remove a Kitchen Sink Faucet Valve

DIY: How to Remove a Kitchen Sink Faucet Valve

Here are a few tips and tricks to keep in mind when removing a kitchen sink faucet valve: Tip 1: It is always a good idea to have someone hold a bucket under the sink while you are working. This will catch any water that may leak out as you remove the valve. Tip 2: Before removing the valve, take a picture of the assembly or make a diagram. This will make it easier to put everything back together correctly. Tip 3: If the valve is stuck and won't come out, try using a penetrating oil such as WD-40 to loosen it.Removing a Kitchen Sink Faucet Valve: Tips and Tricks

Removing a Kitchen Sink Faucet Valve: Tips and Tricks


Follow these easy steps to successfully remove a kitchen sink faucet valve: Step 1: Turn off the water supply to the sink. Step 2: Remove the handle of the faucet. Step 3: Loosen the packing nut. Step 4: Unscrew the valve stem from the faucet body. Step 5: Remove the valve seat and spring. Step 6: Loosen the mounting nut and remove the valve body from the sink.Step-by-Step Guide to Removing a Kitchen Sink Faucet Valve


Step-by-Step Guide to Removing a Kitchen Sink Faucet Valve


Before attempting to remove a kitchen sink faucet valve, there are a few things you should know: Knowledge 1: Make sure to turn off the water supply before beginning to avoid any accidents. Knowledge 2: Different faucets may require different tools and methods for removing the valve. Research the specific type of faucet you have before starting the removal process. Knowledge 3: If you are unsure about the process or do not feel comfortable doing it yourself, it is always best to call a professional plumber.Removing a Kitchen Sink Faucet Valve: What You Need to Know

Removing a Kitchen Sink Faucet Valve: What You Need to Know


By following these easy steps and using the correct tools, you can easily remove a kitchen sink faucet valve: Step 1: Turn off the water supply. Step 2: Remove the handle of the faucet. Step 3: Loosen the packing nut. Step 4: Unscrew the valve stem from the faucet body. Step 5: Remove the valve seat and spring. Step 6: Loosen the mounting nut and remove the valve body from the sink.Easy Steps to Remove a Kitchen Sink Faucet Valve

Easy Steps to Remove a Kitchen Sink Faucet Valve
When removing a kitchen sink faucet valve, there are a few common mistakes to avoid: Mistake 1: Forgetting to turn off the water supply can result in a messy and potentially damaging situation. Mistake 2: Using the wrong tools can cause damage to the faucet or make the removal process more difficult. Mistake 3: Not properly securing the valve or valve body before turning the water back on can result in leaks.Removing a Kitchen Sink Faucet Valve: Common Mistakes to Avoid

Removing a Kitchen Sink Faucet Valve: Common Mistakes to Avoid


To properly remove a kitchen sink faucet valve, follow these simple steps: Step 1: Turn off the water supply. Step 2: Remove the handle of the faucet. Step 3: Loosen the packing nut. Step 4: Unscrew the valve stem from the faucet body. Step 5: Remove the valve seat and spring. Step 6: Loosen the mounting nut and remove the valve body from the sink.How to Properly Remove a Kitchen Sink Faucet Valve


How to Properly Remove a Kitchen Sink Faucet Valve


Here are the tools you will need to successfully remove a kitchen sink faucet valve: Tool 1: Allen wrench for removing the handle. Tool 2: Flathead screwdriver for removing the screw cap, if necessary. Tool 3: Adjustable pliers for loosening the packing nut. Tool 4: Channel lock pliers for unscrewing the valve stem. Tool 5: Tweezers or needle-nose pliers for removing the valve seat and spring. Tool 6: Basin wrench for loosening the mounting nut. Removing a kitchen sink faucet valve may seem like a complex task, but by following these steps and using the right tools, it can be done easily and efficiently. Remember to turn off the water supply and take your time to avoid any mistakes. With a new valve in place, your kitchen sink will be functioning like new in no time. Removing a Kitchen Sink Faucet Valve: Tools You'll Need


Removing a Kitchen Sink Faucet Valve: Tools You'll Need
Why Replacing Your Kitchen Sink Faucet Valve is Essential for a Functional and Stylish Kitchen

The Importance of a Kitchen Sink Faucet Valve
 When it comes to the functionality of your kitchen, the sink faucet is a vital component. It is responsible for controlling the flow of water and is used daily for tasks such as washing dishes, filling up pots, and cleaning fruits and vegetables. However, like any other mechanical part, the faucet valve can wear out over time, causing leaks and reduced water pressure. This can not only be a hassle, but it can also lead to wasted water and higher utility bills. Additionally, an outdated or damaged faucet valve can also detract from the overall aesthetic of your kitchen. For these reasons, it is important to regularly check and replace your kitchen sink faucet valve when needed.
Signs That Your Kitchen Sink Faucet Valve Needs to Be Replaced
 There are several signs that indicate it may be time to replace your kitchen sink faucet valve. The most obvious sign is a leaky faucet, which can be caused by a worn or damaged valve. If you notice water dripping from the faucet even when it is turned off, it is likely that the valve needs to be replaced. Another sign is reduced water pressure. If you have noticed that your faucet is not producing the same amount of water as before, it could be due to a malfunctioning valve. Additionally, if your faucet is difficult to turn on or off, it may be a sign that the valve is not functioning properly.
The Benefits of Replacing Your Kitchen Sink Faucet Valve
 Replacing your kitchen sink faucet valve can bring numerous benefits to your kitchen. Firstly, it will ensure that your faucet is functioning properly and will eliminate any leaks or reduced water pressure. This can save you money on your water bill and prevent any potential water damage to your kitchen. Secondly, a new and updated faucet valve can improve the overall appearance of your kitchen. With a wide variety of styles and finishes available, you can choose a faucet that matches your kitchen's design and adds a touch of elegance to the space.
In conclusion,
the kitchen sink faucet valve plays an essential role in the functionality and style of your kitchen. Regularly checking and replacing it when needed can prevent any potential issues and improve the overall look of your kitchen. So, don't hesitate to invest in a new faucet valve for a more efficient and beautiful kitchen.
Replacing your kitchen sink faucet valve can bring numerous benefits to your kitchen. Firstly, it will ensure that your faucet is functioning properly and will eliminate any leaks or reduced water pressure. This can save you money on your water bill and prevent any potential water damage to your kitchen. Secondly, a new and updated faucet valve can improve the overall appearance of your kitchen. With a wide variety of styles and finishes available, you can choose a faucet that matches your kitchen's design and adds a touch of elegance to the space.
In conclusion,
the kitchen sink faucet valve plays an essential role in the functionality and style of your kitchen. Regularly checking and replacing it when needed can prevent any potential issues and improve the overall look of your kitchen. So, don't hesitate to invest in a new faucet valve for a more efficient and beautiful kitchen.