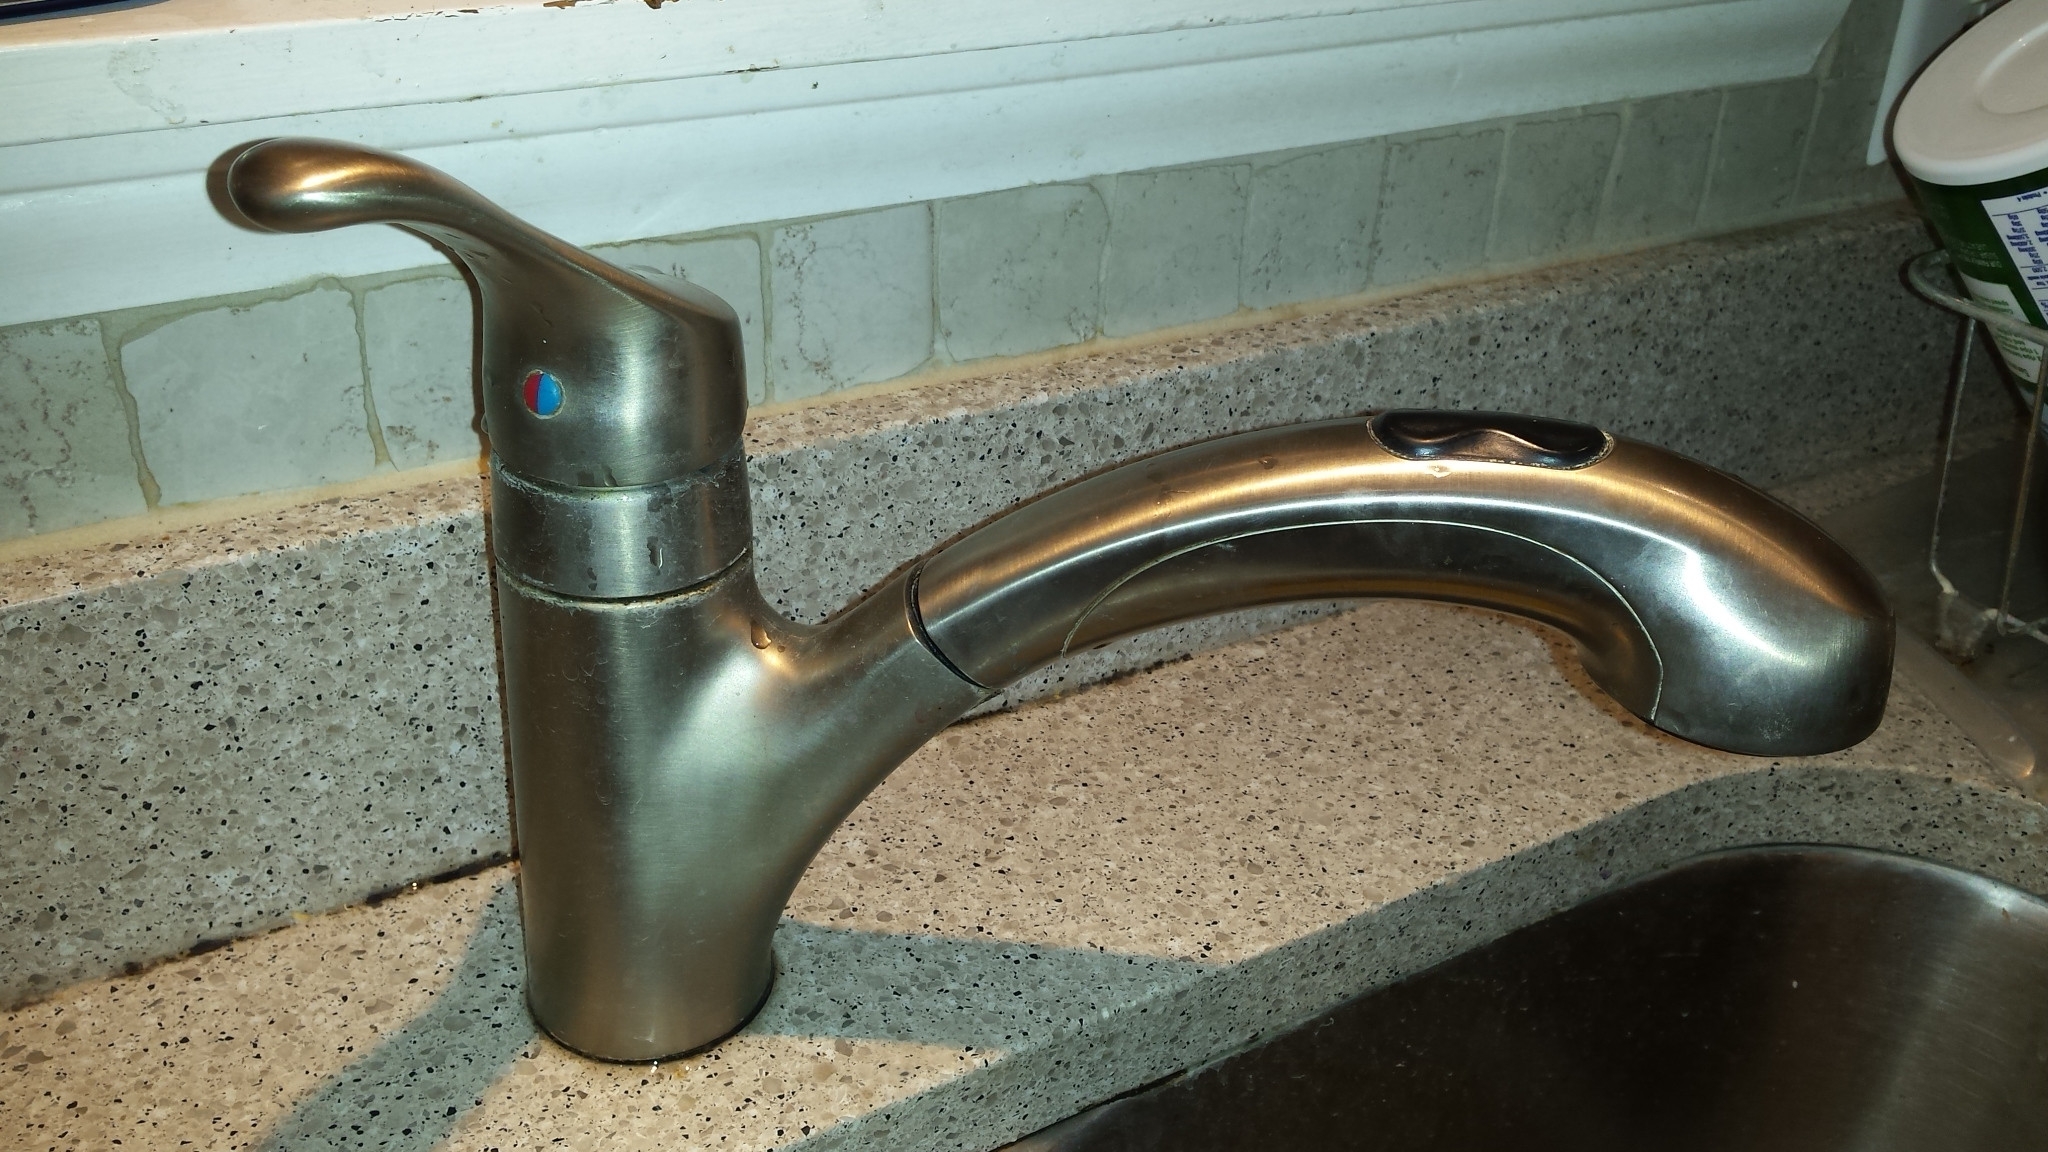
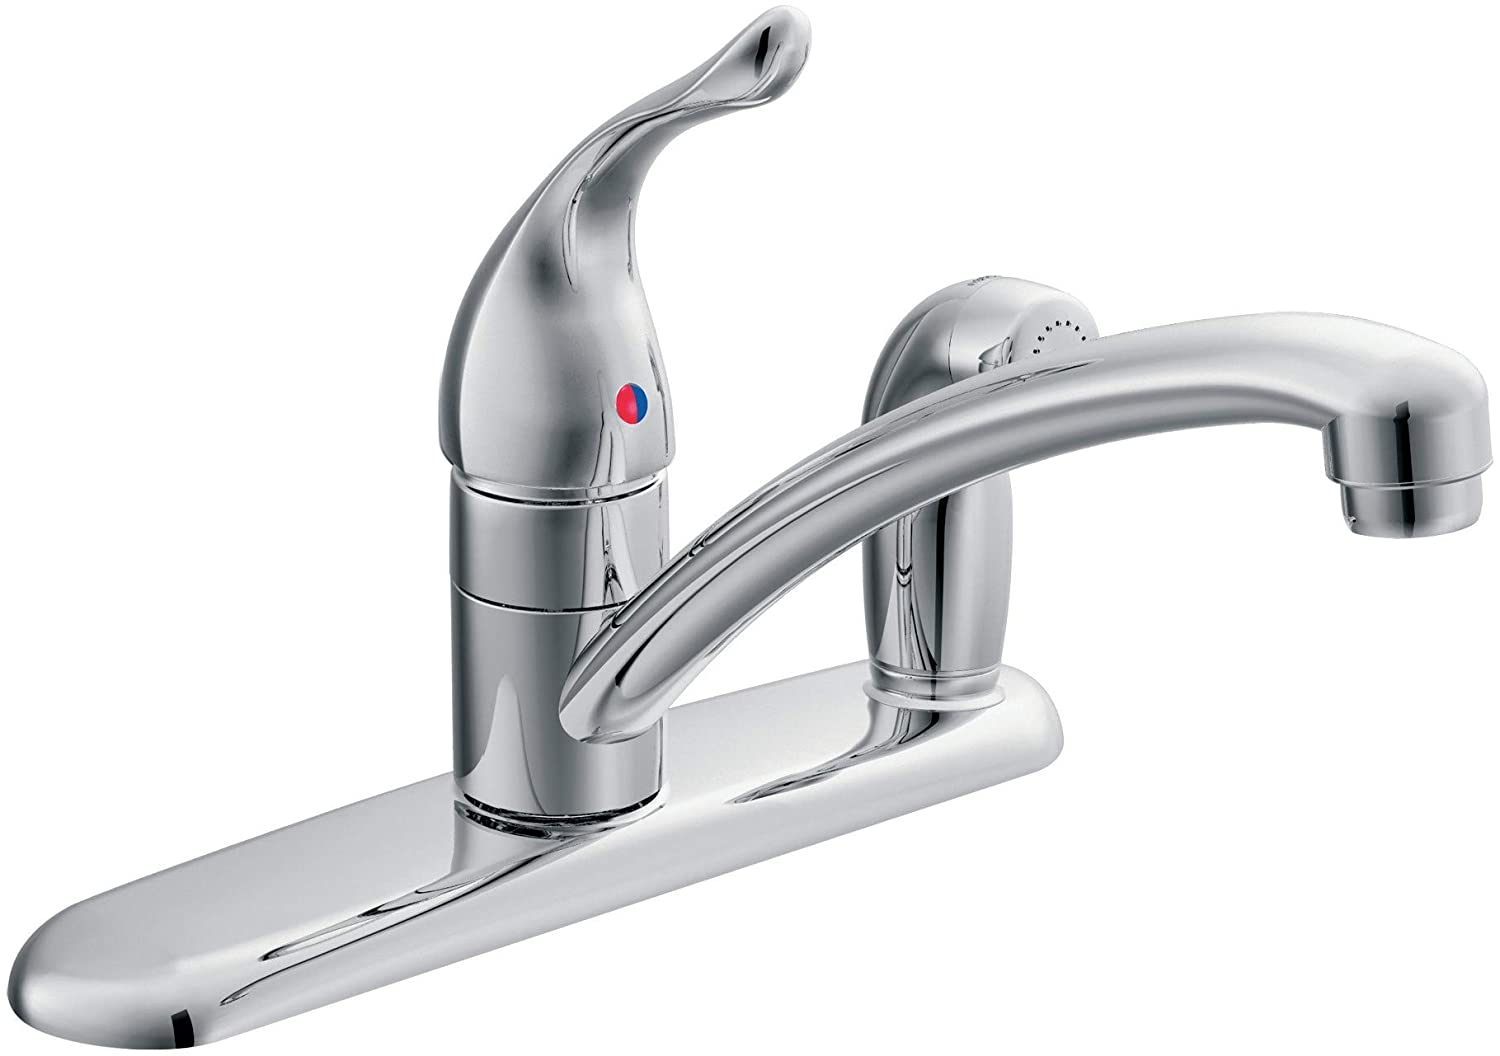
Are you tired of dealing with a leaky or malfunctioning kitchen faucet? The Moen single handle kitchen faucet is a popular choice for its sleek design and easy operation, but like any appliance, it can encounter issues over time. Instead of calling a plumber and spending a fortune on repairs, why not try fixing it yourself? In this guide, we will walk you through the steps to repair your Moen single handle kitchen faucet and have it working like new again.1. How to Repair a Moen Single Handle Kitchen Faucet


1. How to Repair a Moen Single Handle Kitchen Faucet


Before we dive into the repair process, it's important to understand how your Moen single handle kitchen faucet works. The handle controls both the temperature and flow of water, while the cartridge inside is responsible for regulating the water flow. When the handle is turned, it lifts a seal off the cartridge, allowing water to flow through. Over time, this seal can wear down, leading to leaks and other issues. Now, let's get started with the repair process.2. Moen Single Handle Kitchen Faucet Repair Guide

2. Moen Single Handle Kitchen Faucet Repair Guide


The first step in repairing your Moen single handle kitchen faucet is to troubleshoot the issue. Start by turning off the water supply to your faucet. Next, remove the handle and inspect the cartridge for any visible damage or debris that may be causing the problem. If the cartridge is damaged, you will need to replace it. If there is debris, clean it out and reassemble the faucet.3. Troubleshooting a Moen Single Handle Kitchen Faucet


3. Troubleshooting a Moen Single Handle Kitchen Faucet


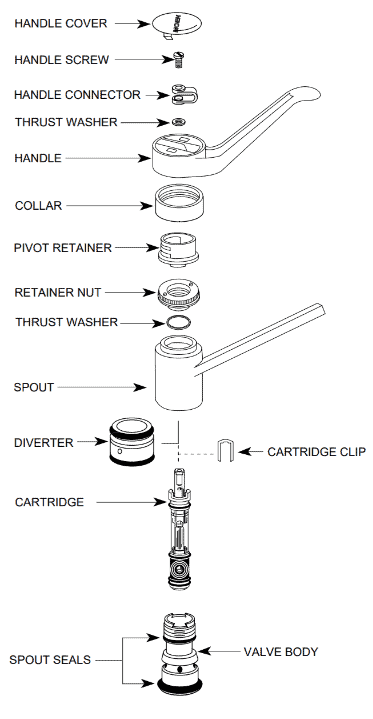
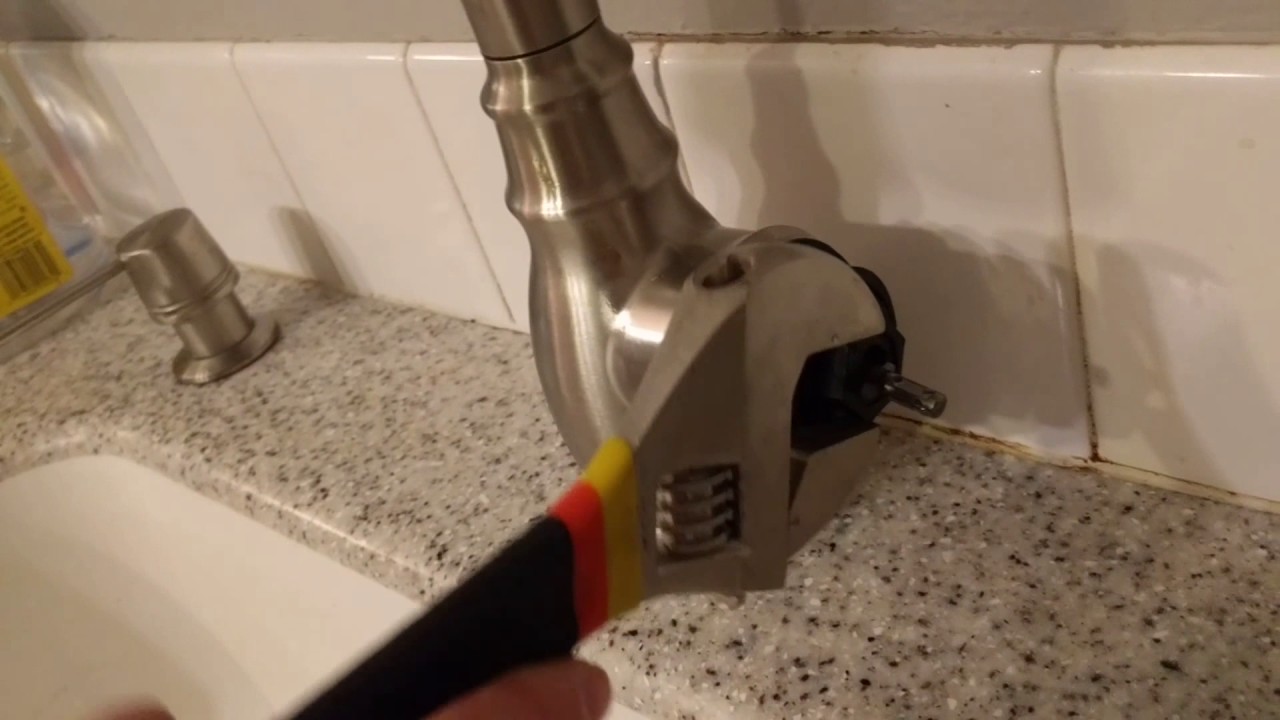
If troubleshooting doesn't solve the issue, it's time to move on to the repair process. Start by turning off the water supply and removing the handle, as mentioned before. Next, remove the cartridge using pliers or a cartridge puller. Once the old cartridge is removed, insert the new one, making sure it is properly aligned. Reattach the handle and turn the water supply back on. Test the faucet to ensure it is working properly.4. Step-by-Step Moen Single Handle Kitchen Faucet Repair

4. Step-by-Step Moen Single Handle Kitchen Faucet Repair


Some of the most common issues with Moen single handle kitchen faucets include leaks, low water pressure, and difficulty turning the handle. These issues can often be resolved with a simple repair or replacement of the cartridge. However, if your faucet is still not functioning properly, it may be time to call in a professional plumber for further assistance.5. Common Problems with Moen Single Handle Kitchen Faucets
5. Common Problems with Moen Single Handle Kitchen Faucets


Repairing your Moen single handle kitchen faucet yourself can save you time and money. However, it's important to have the right tools and knowledge to ensure the repair is done correctly. If you are unsure of your abilities, it's best to call a professional for assistance. However, with the right resources and a bit of patience, you can successfully repair your faucet on your own.6. DIY Moen Single Handle Kitchen Faucet Repair

6. DIY Moen Single Handle Kitchen Faucet Repair


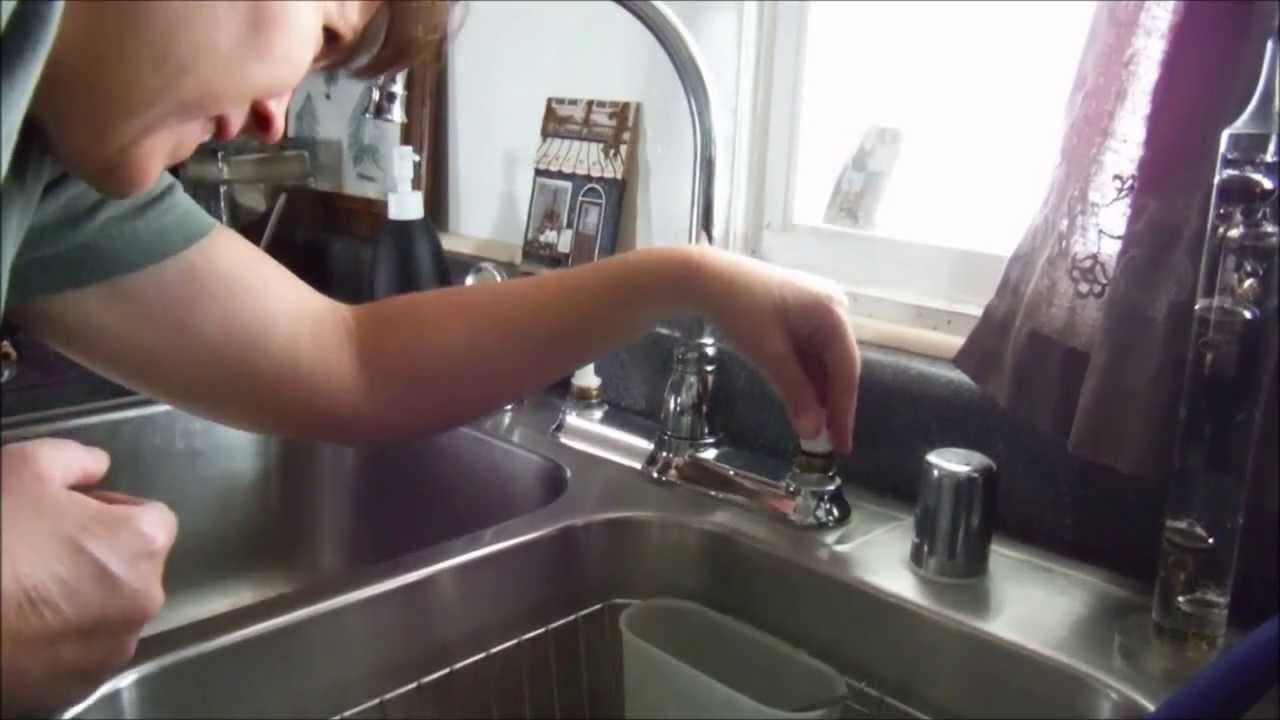
If you are a visual learner, there are plenty of video tutorials available online that can guide you through the Moen single handle kitchen faucet repair process. These videos provide step-by-step instructions and can be a helpful resource if you are struggling with any part of the repair. Just make sure to follow the instructions carefully and pause the video as needed to keep up with the repair process.7. Moen Single Handle Kitchen Faucet Repair Video Tutorial

7. Moen Single Handle Kitchen Faucet Repair Video Tutorial

A leaky faucet can be a nuisance, not to mention a waste of water. Luckily, fixing a leaky Moen single handle kitchen faucet is a relatively simple process. Start by turning off the water supply and removing the handle and cartridge. Inspect the cartridge for any damage and replace it if necessary. Reassemble the faucet and turn the water supply back on. If the leak persists, it may be due to a loose connection, in which case you may need to tighten the faucet parts or replace the O-ring.8. How to Fix a Leaky Moen Single Handle Kitchen Faucet


8. How to Fix a Leaky Moen Single Handle Kitchen Faucet


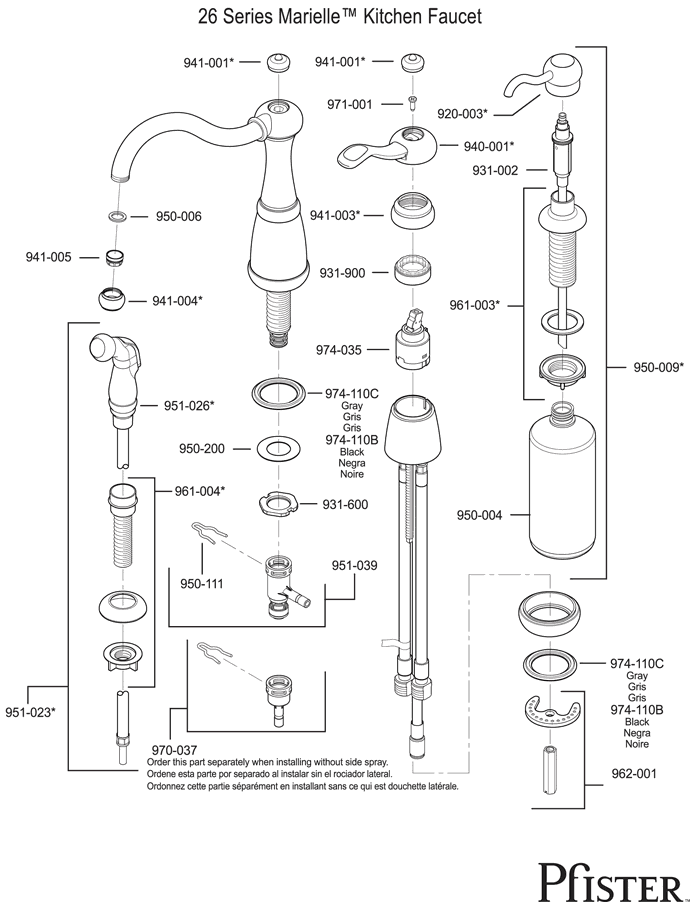
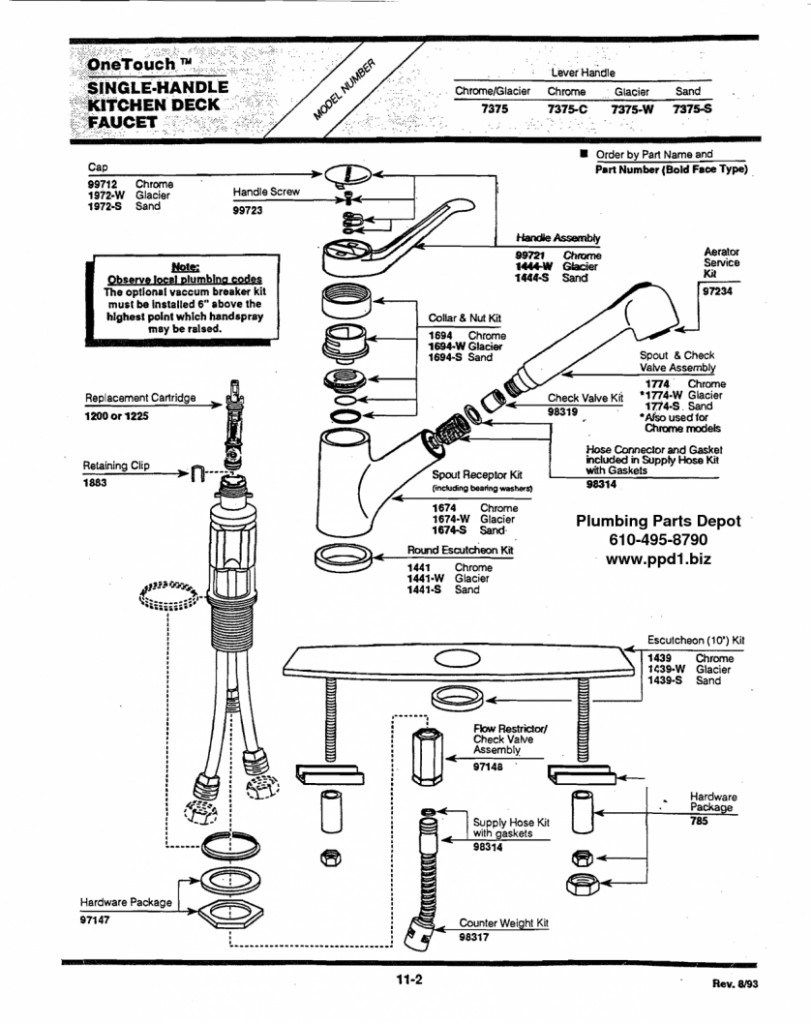
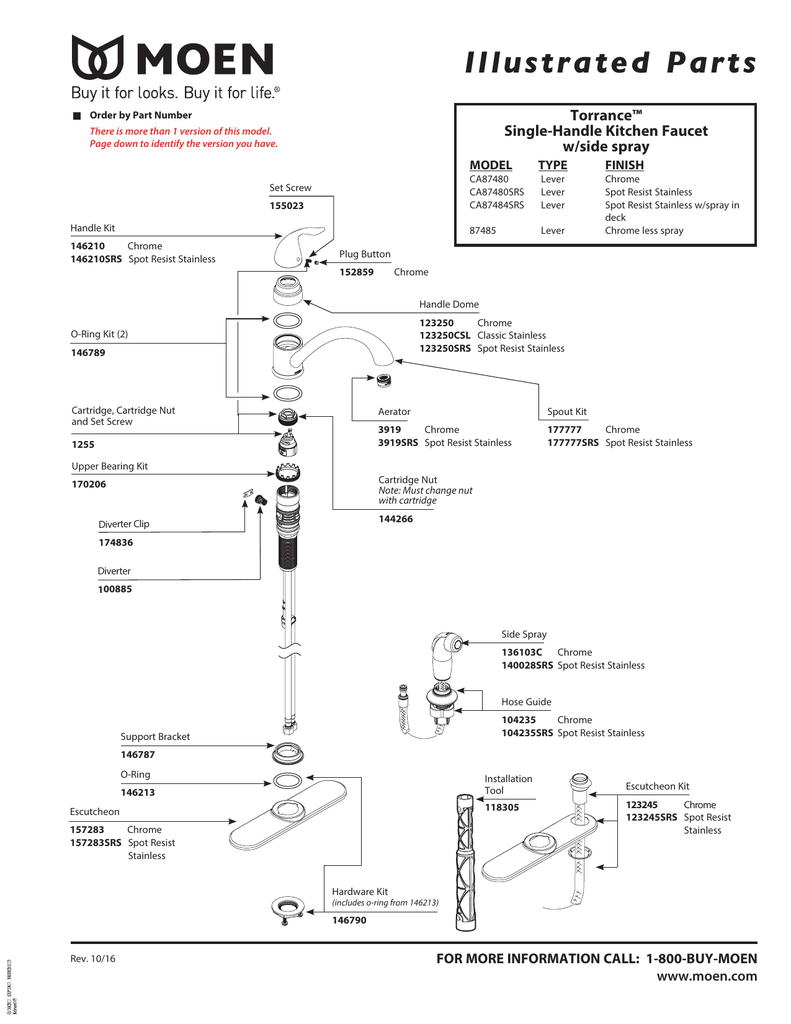
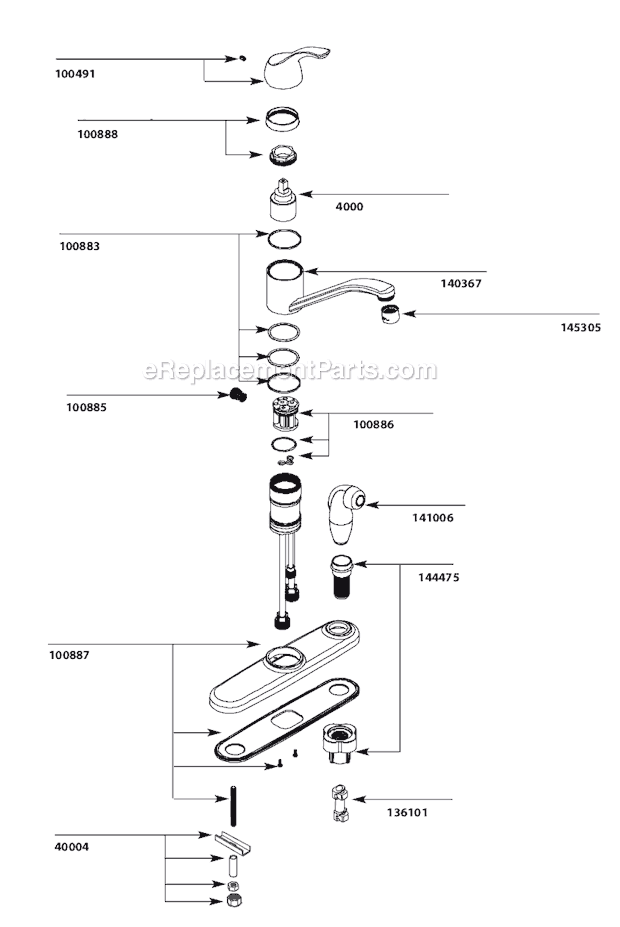
If you need to replace any parts in your Moen single handle kitchen faucet, it's important to use genuine Moen replacement parts. These parts are specifically designed for your faucet and will ensure proper functioning. You can find these parts at your local hardware store or online. Some common replacement parts include cartridges, O-rings, and handles.9. Moen Single Handle Kitchen Faucet Repair Parts


9. Moen Single Handle Kitchen Faucet Repair Parts
Prevention is always better than repair, so it's important to properly maintain your Moen single handle kitchen faucet to prevent future issues. This includes regularly cleaning the faucet to prevent buildup and inspecting it for any signs of wear and tear. Additionally, make sure to turn off the water supply and drain the faucet before leaving for an extended period to prevent any potential leaks. Now that you know how to repair your Moen single handle kitchen faucet, you can save yourself time and money by fixing any issues yourself. Just remember to approach the repair process with caution and always turn off the water supply before starting. With these tips and resources, your faucet will be back to working like new in no time.10. Tips for Maintaining Your Moen Single Handle Kitchen Faucet

10. Tips for Maintaining Your Moen Single Handle Kitchen Faucet


Tips for Choosing the Right Moen Single Handle Kitchen Sink Faucet Repair

1. Identify the Problem
 The first step in repairing any
Moen single handle kitchen sink faucet
is to identify the problem. Is the faucet leaking, not turning on, or producing low water pressure? Understanding the issue will help you determine the necessary repair or replacement parts.
The first step in repairing any
Moen single handle kitchen sink faucet
is to identify the problem. Is the faucet leaking, not turning on, or producing low water pressure? Understanding the issue will help you determine the necessary repair or replacement parts.
2. Gather Necessary Tools
 Before beginning any repair, it is important to have the right tools on hand. For a Moen
single handle kitchen sink faucet
, you will typically need a flathead screwdriver, Phillips head screwdriver, adjustable pliers, and a
faucet repair kit
that includes replacement parts such as O-rings and cartridge.
Before beginning any repair, it is important to have the right tools on hand. For a Moen
single handle kitchen sink faucet
, you will typically need a flathead screwdriver, Phillips head screwdriver, adjustable pliers, and a
faucet repair kit
that includes replacement parts such as O-rings and cartridge.
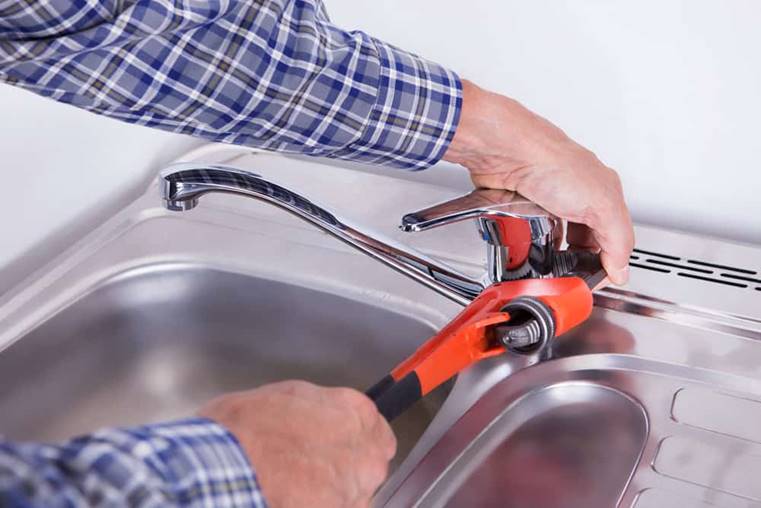
3. Turn Off Water Supply
 To prevent any accidents or water damage, make sure to turn off the water supply to the faucet before beginning any repairs. This can usually be done by turning off the shut-off valves located under the sink.
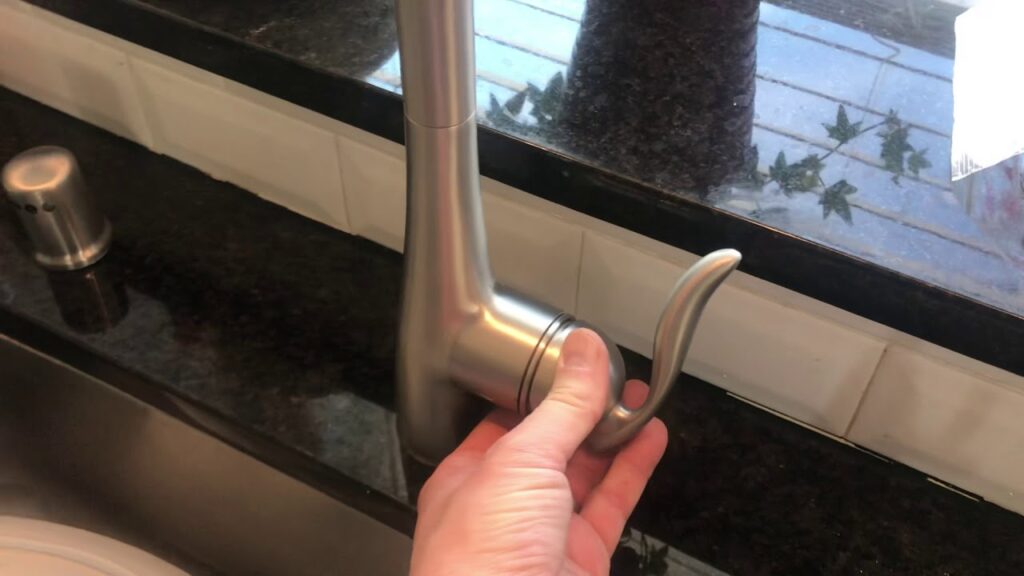
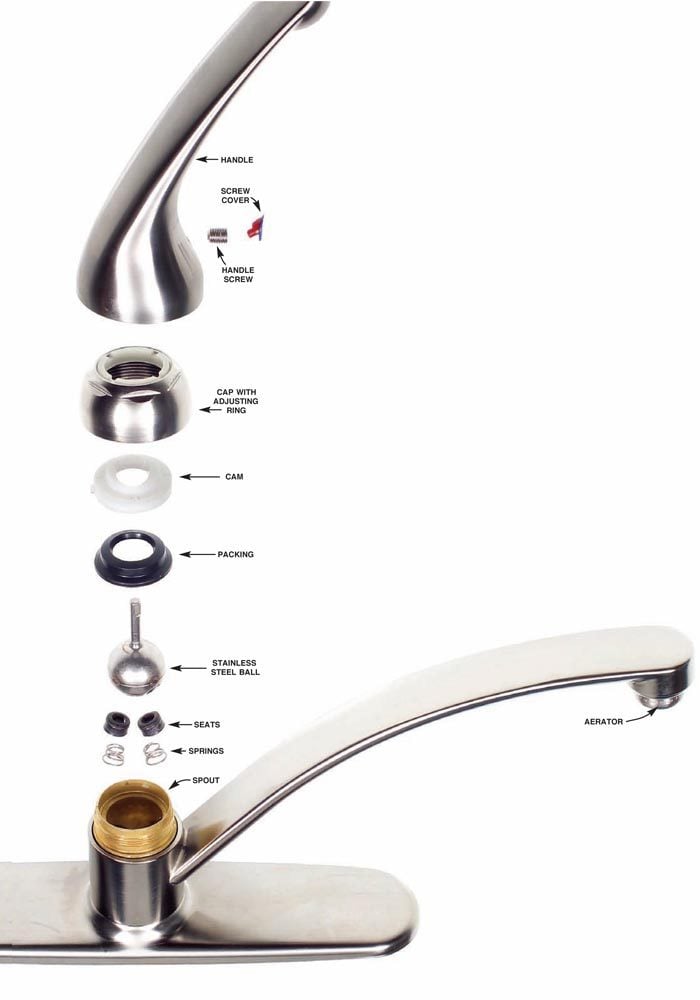
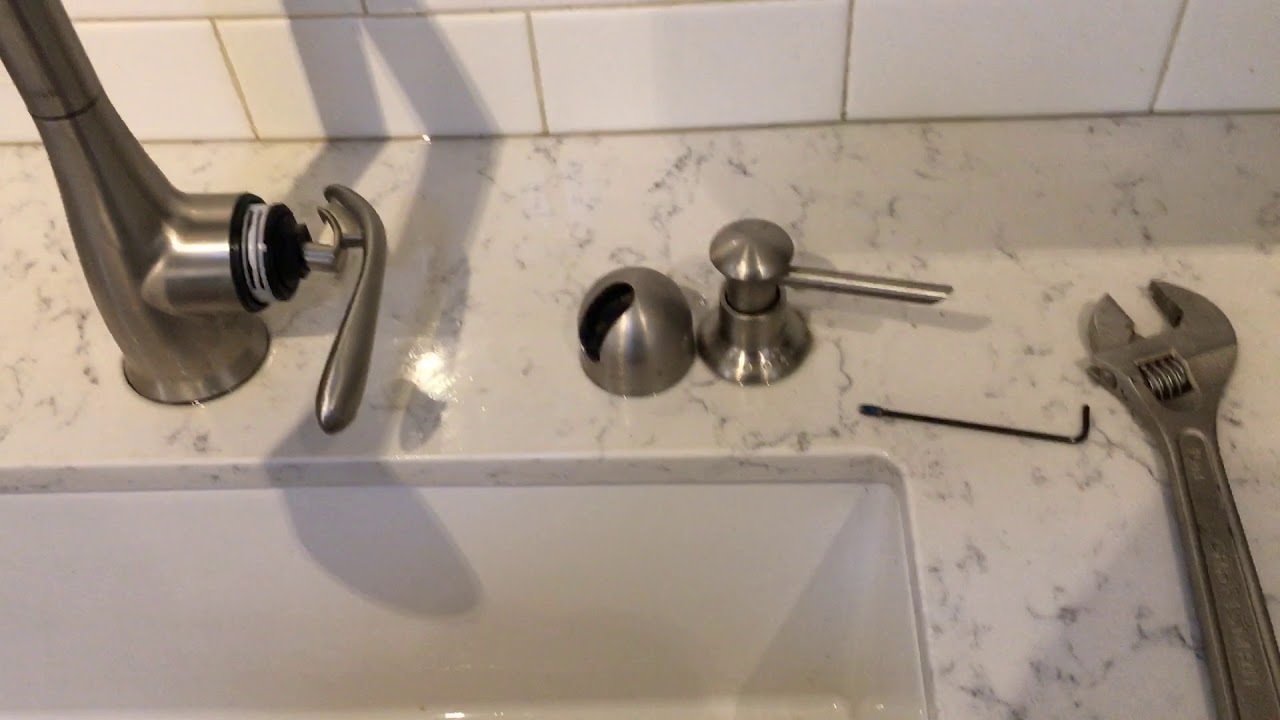
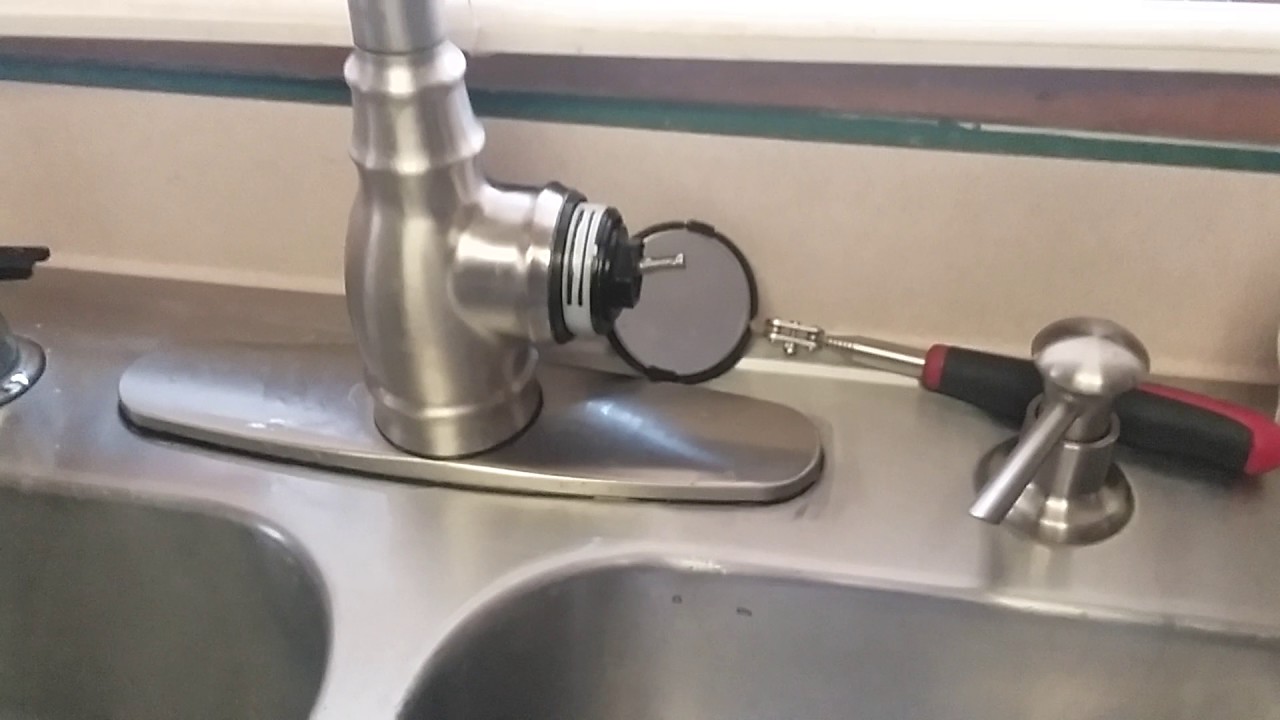
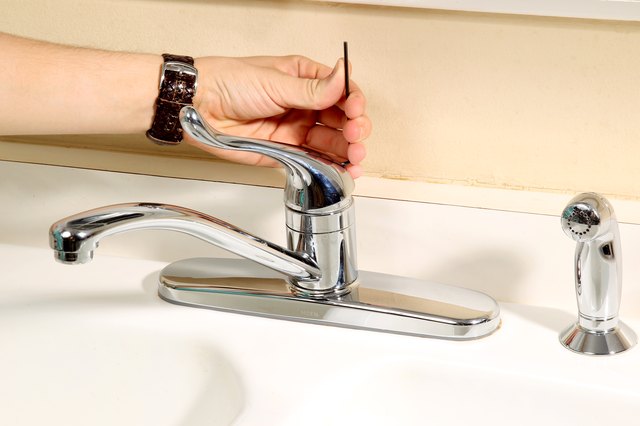
4. Remove Handle and Cartridge
 To access the inner workings of the faucet, you will need to remove the handle and cartridge. The handle can usually be unscrewed by hand or with a screwdriver. The cartridge is usually held in place by a retaining clip, which can be removed with pliers.
5. Inspect and Clean Parts
 Once the handle and cartridge are removed, inspect them for any damage or buildup. If the cartridge is damaged, it will need to be replaced. If it is just dirty or clogged, it can be cleaned with a
vinegar and water solution
.
Once the handle and cartridge are removed, inspect them for any damage or buildup. If the cartridge is damaged, it will need to be replaced. If it is just dirty or clogged, it can be cleaned with a
vinegar and water solution
.
6. Replace Necessary Parts
 If any parts are damaged beyond repair, they will need to be replaced. This is where having a
faucet repair kit
comes in handy. Make sure to use the correct replacement parts for your specific Moen single handle kitchen sink faucet model.
If any parts are damaged beyond repair, they will need to be replaced. This is where having a
faucet repair kit
comes in handy. Make sure to use the correct replacement parts for your specific Moen single handle kitchen sink faucet model.
7. Reassemble and Test
 After replacing any necessary parts, reassemble the faucet in the reverse order that you took it apart. Once everything is back in place, turn the water supply back on and test the faucet to ensure it is functioning properly.
8. Consider Upgrading
 If your Moen
single handle kitchen sink faucet
is beyond repair, it may be time to consider upgrading to a new one. Moen offers a variety of stylish and durable
kitchen sink faucets
that can enhance the look and functionality of your kitchen.
In conclusion, repairing a Moen single handle kitchen sink faucet may seem daunting, but with the right tools and some basic knowledge, it can be a simple task. By following these tips and properly maintaining your faucet, you can ensure it will continue to function efficiently for years to come. Don't hesitate to seek professional help if you are unsure or uncomfortable with any step of the repair process.
If your Moen
single handle kitchen sink faucet
is beyond repair, it may be time to consider upgrading to a new one. Moen offers a variety of stylish and durable
kitchen sink faucets
that can enhance the look and functionality of your kitchen.
In conclusion, repairing a Moen single handle kitchen sink faucet may seem daunting, but with the right tools and some basic knowledge, it can be a simple task. By following these tips and properly maintaining your faucet, you can ensure it will continue to function efficiently for years to come. Don't hesitate to seek professional help if you are unsure or uncomfortable with any step of the repair process.


.jpg)