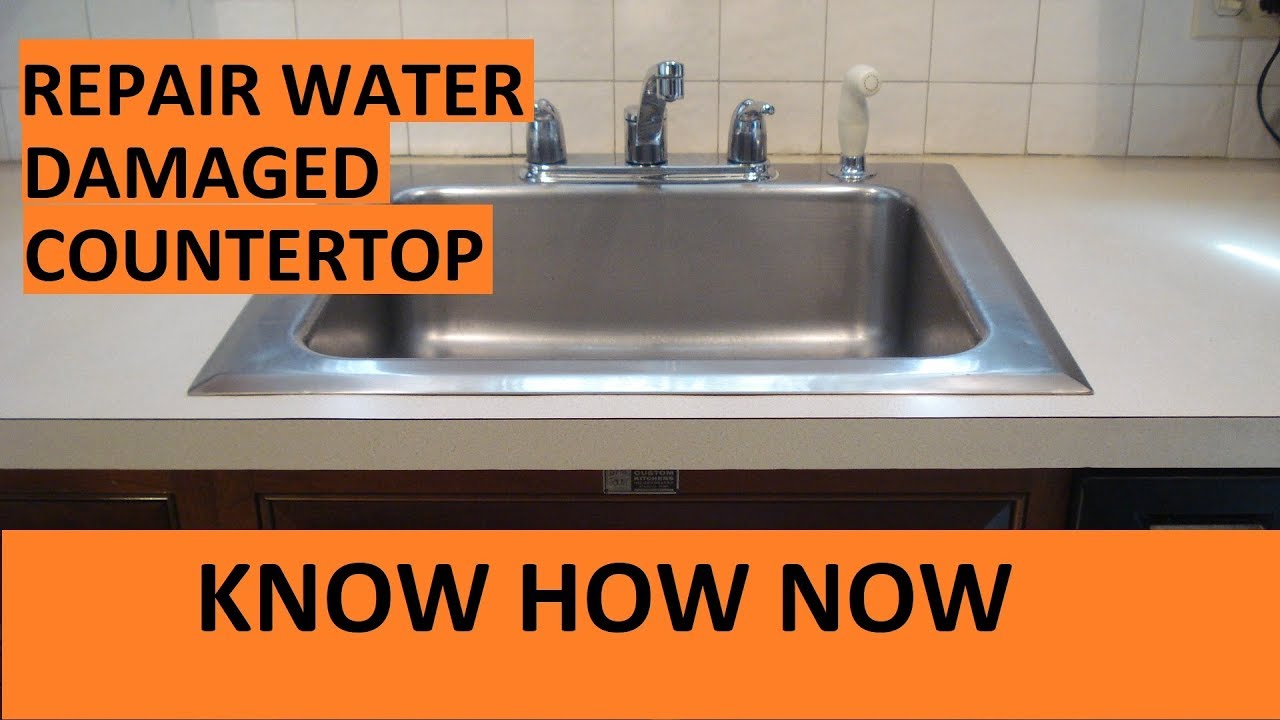
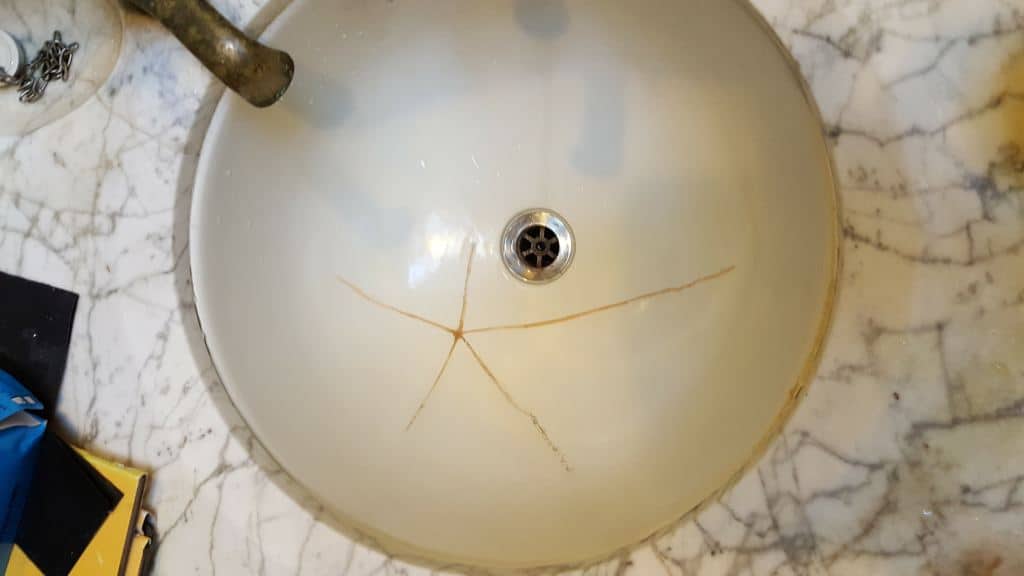
If you have ever accidentally dropped something heavy or sharp on your bathroom sink, you know the sinking feeling that comes with seeing a chip in the pristine surface. Not only is it an eyesore, but it can also lead to further damage if left untreated. But fear not, with the right tools and techniques, you can easily fix a chip in your bathroom sink and restore its beauty. Here's how:How to Fix a Chip in a Bathroom Sink


How to Fix a Chip in a Bathroom Sink


The good news is that you don't need to be a professional plumber or have extensive DIY skills to fix a chip in your bathroom sink. With some basic supplies and a little bit of patience, you can repair the chip yourself and save money on hiring a professional. Plus, you'll have the satisfaction of knowing that you fixed it on your own.DIY Bathroom Sink Chip Repair


DIY Bathroom Sink Chip Repair


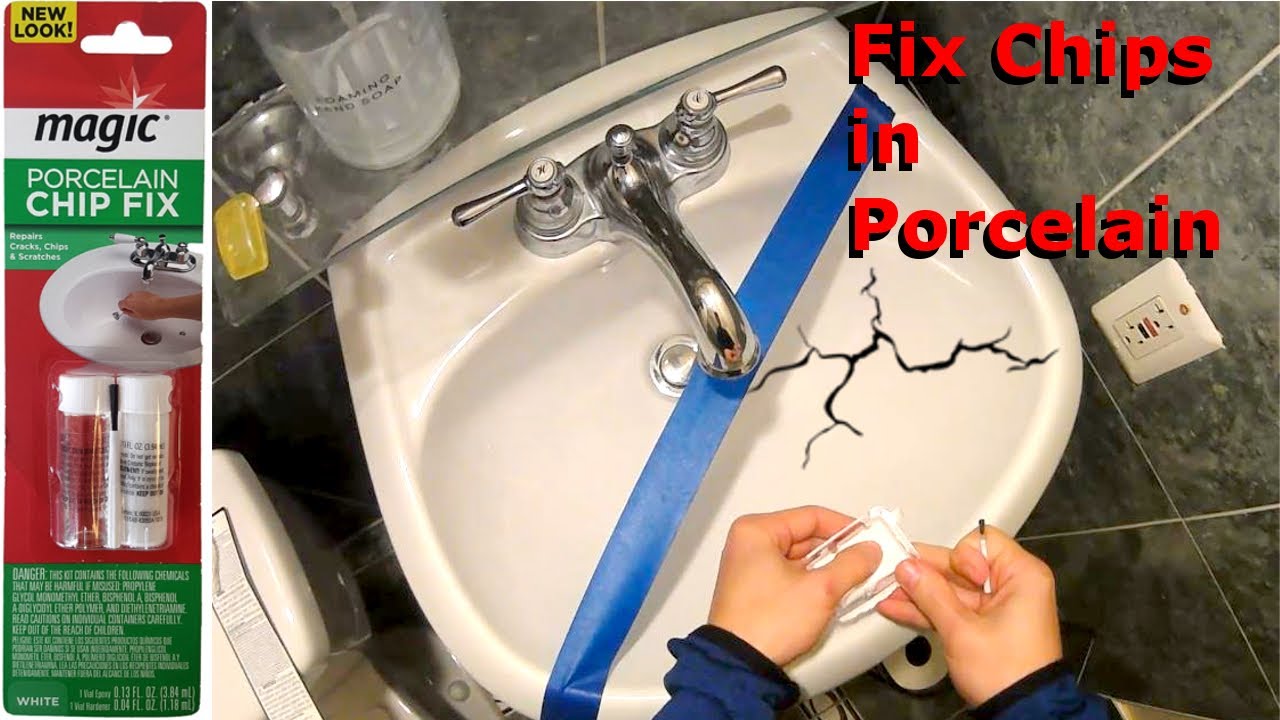
One of the quickest and easiest ways to fix a chip in your bathroom sink is by using a repair kit specifically designed for this purpose. These kits usually contain a two-part epoxy putty that you mix together and apply to the chip. Once it dries, you can sand it down to make it smooth and blend it with the rest of the sink's surface.Quick and Easy Bathroom Sink Chip Fix


Quick and Easy Bathroom Sink Chip Fix


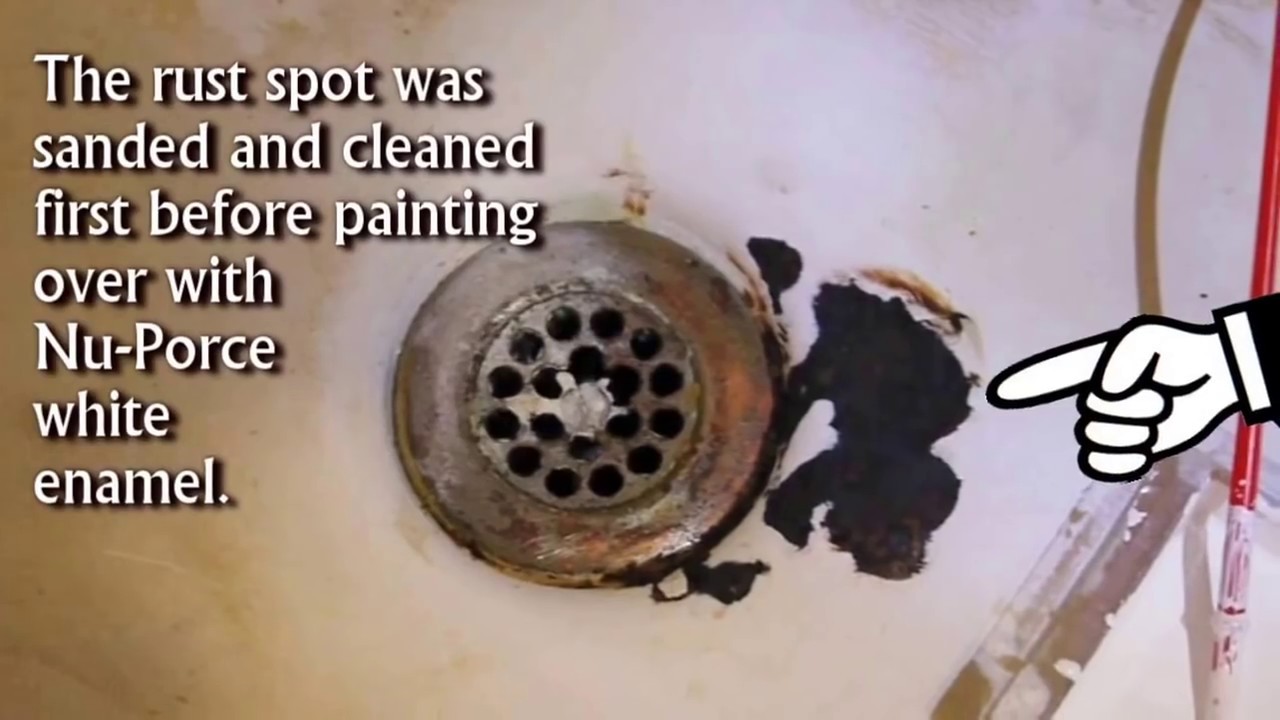

If you prefer a more hands-on approach, here is a step-by-step guide for fixing a chip in your bathroom sink: Step 1: Clean the sink thoroughly to remove any dirt or debris from the chip. You can use a mild cleanser and a soft cloth for this step. Step 2: If the chip is deep, you may need to fill it with a two-part epoxy or a porcelain repair compound. Make sure to follow the instructions on the product carefully. Once the chip is filled, let it dry completely. Step 3: Sand down the filled chip with a fine-grit sandpaper until it is smooth and level with the rest of the sink's surface. Step 4: If the chip is shallow, you can skip the filling step and jump straight to sanding. Just make sure to sand gently to avoid creating more damage. Step 5: Once the chip is sanded down, use a porcelain touch-up glaze or a porcelain paint that matches your sink's color to cover the chip. Apply a thin layer with a small brush and let it dry according to the product's instructions. Step 6: If needed, repeat the touch-up glaze or paint application until the chip is completely covered and blended with the rest of the sink's surface. Step 7: Finish off by sealing the repaired area with a clear sealant to protect it from further damage and to make it more durable.Step-by-Step Guide for Fixing a Chip in a Bathroom Sink


Step-by-Step Guide for Fixing a Chip in a Bathroom Sink


When it comes to repairing a chip in your bathroom sink, there are various products available in the market. Some popular options include: Porc-A-Fix Glaze Touch-Up - this product is specifically designed for repairing chips in porcelain surfaces, including bathroom sinks. Devcon Epoxy Bathtub Repair Kit - this two-part epoxy kit is perfect for filling deep chips and cracks in your bathroom sink. Rust-Oleum Specialty Tub and Tile Touch-Up Paint - this paint is specially formulated for use on porcelain surfaces and can easily cover shallow chips and scratches.Best Products for Repairing a Chip in a Bathroom Sink

Best Products for Repairing a Chip in a Bathroom Sink


If you want to achieve the best results when fixing a chip in your bathroom sink, here are some tips from professional plumbers: Tip 1: Use a toothpick or a small brush to apply the touch-up glaze or paint for a more precise application. Tip 2: If you're using a repair kit, make sure to mix the epoxy putty thoroughly and quickly, as it dries fast. Tip 3: Always use a fine-grit sandpaper to avoid creating more damage to the sink's surface. Tip 4: If you're not confident in your DIY skills or the chip is too large to fix on your own, it's best to call a professional plumber for expert help.Professional Tips for Fixing a Chip in a Bathroom Sink


Professional Tips for Fixing a Chip in a Bathroom Sink


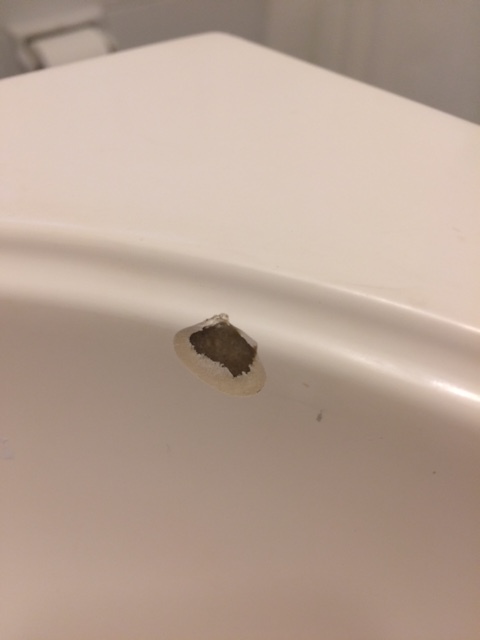
Now that you know how to fix a chip in your bathroom sink, it's essential to understand what causes these chips in the first place. Some common causes include: 1. Impact: Dropping heavy or sharp objects on the sink's surface can cause chips, especially if the sink is made of porcelain or ceramic. 2. Cleaning products: Using harsh chemicals or abrasive cleaners on your sink can damage the surface and lead to chips over time. 3. Wear and tear: Over time, constant use of the sink can cause small chips and scratches to appear, especially if the sink is made of a softer material like acrylic or plastic.Common Causes of Chips in Bathroom Sinks


Common Causes of Chips in Bathroom Sinks


While accidents can happen, there are some preventative measures you can take to avoid chips in your bathroom sink: 1. Be careful: When handling heavy or sharp objects that may come in contact with your sink, always be careful and avoid dropping them. 2. Use gentle cleaning products: Stick to mild cleansers and avoid using abrasive cleaners that can damage the sink's surface. 3. Place a protective mat: If you have a sink made of a softer material, consider using a protective mat to prevent scratches and chips from daily use.Preventing Chips in Your Bathroom Sink


Preventing Chips in Your Bathroom Sink


If you have a chip in your bathroom sink that you can't fix right away, or if it's a small one that doesn't bother you too much, you can try camouflaging it until you have time to repair it. Here are some quick and easy ways to do so: 1. Use a porcelain touch-up glaze or paint: As mentioned earlier, you can use these products to cover the chip temporarily until you have time to fix it properly. 2. Cover it with a sticker or decal: You can find adhesive stickers or decals in various designs that you can stick over the chip to hide it. 3. Place a small plant or decor item over the chip: If the chip is in a discreet location, you can place a small plant or decor item over it to camouflage it.How to Camouflage a Chip in a Bathroom Sink


How to Camouflage a Chip in a Bathroom Sink


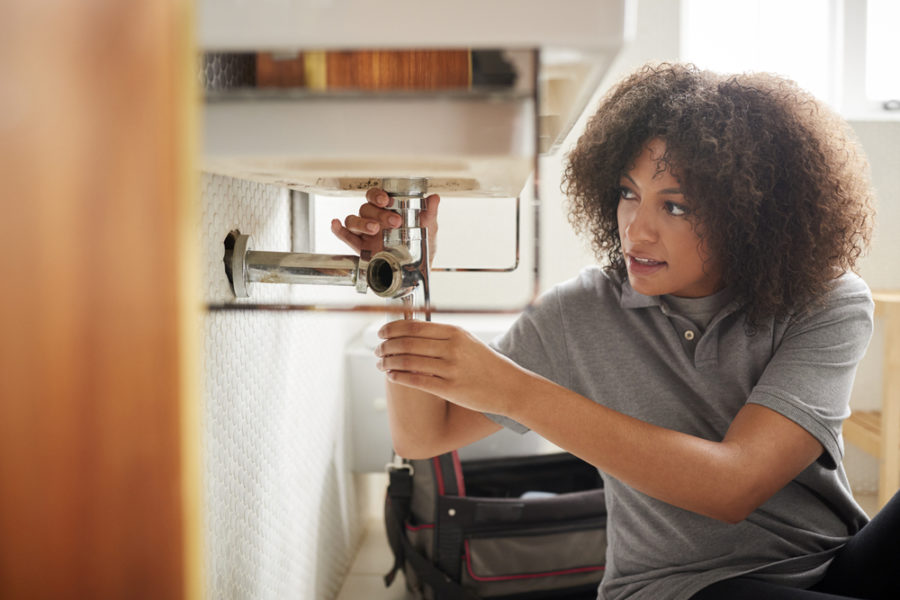
While fixing a chip in your bathroom sink may seem like a simple task, there are times when it's best to leave it to the professionals. Here are some situations where you should call a professional plumber for chip repair: 1. The chip is too large to fix on your own: If the chip is more than a few inches in diameter or is too deep, it's best to leave it to a professional to avoid causing further damage. 2. You're not confident in your DIY skills: If you're not familiar with DIY projects or don't have experience fixing chips in sinks, it's better to call a professional to avoid making the problem worse. 3. The chip is in a difficult location: If the chip is in a hard-to-reach area or near a faucet or drain, it's best to let a professional handle it to ensure the repair is done correctly.When to Call a Professional for Bathroom Sink Chip Repair


When to Call a Professional for Bathroom Sink Chip Repair


How to Fix a Chip in Your Bathroom Sink

The Importance of Maintaining Your Bathroom Sink
 Your bathroom sink is not only a functional part of your daily routine, but it also plays a major role in the overall design of your bathroom. A chipped or damaged sink can not only be an eyesore, but it can also lead to bigger problems if not fixed properly. The good news is, fixing a chip in your bathroom sink is a relatively simple and cost-effective solution that can restore the beauty and functionality of your sink. In this article, we will guide you through the process of fixing a chip in your bathroom sink, so you can maintain a beautiful and fully functional bathroom.
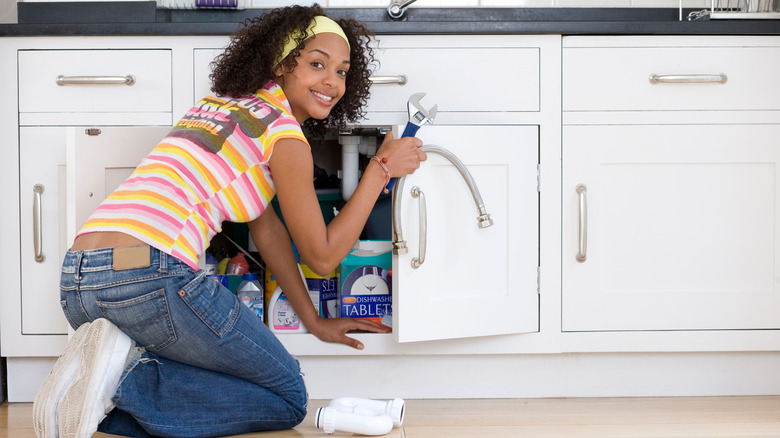
Gather the Necessary Materials
 Before you begin, it is important to gather all the necessary materials. These may include a
chip repair kit
, sandpaper, cleaning supplies, and a
sealant
. It is important to choose a repair kit that matches the color of your sink to ensure a seamless finish.
Before you begin, it is important to gather all the necessary materials. These may include a
chip repair kit
, sandpaper, cleaning supplies, and a
sealant
. It is important to choose a repair kit that matches the color of your sink to ensure a seamless finish.
Prepare the Sink
 Start by cleaning the damaged area of the sink with a mild cleaner and warm water. Rinse thoroughly and dry the area with a clean cloth. Use sandpaper to lightly sand the chipped area, being careful not to damage the surrounding surface. This will create a rough surface for the repair material to adhere to.
Apply the Repair Material
 Follow the instructions on the chip repair kit to properly mix the repair material. Using a small spatula or toothpick, carefully apply the mixture to the chipped area, filling it in and smoothing out the surface. Allow the repair material to dry completely.
Sand and Seal
 Once the repair material has dried, use sandpaper to gently sand down any excess material and create a smooth surface. Clean the area once again and allow it to dry completely. Then, apply a thin layer of sealant over the repaired area to protect it from future damage and give it a polished finish.
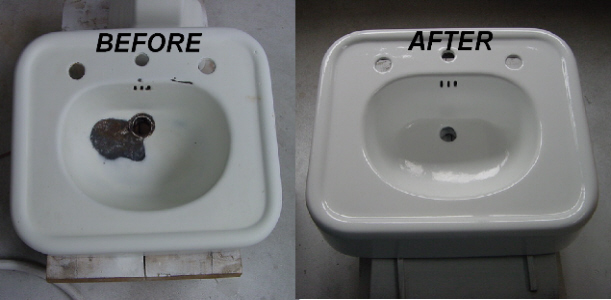
Enjoy Your Newly Repaired Sink
 Congratulations, you have successfully fixed the chip in your bathroom sink! Not only does it look as good as new, but you have also prevented any potential problems from arising. Remember to regularly clean and maintain your sink to avoid future chips and damages.
In conclusion, a chipped bathroom sink may seem like a daunting problem, but with the right materials and techniques, it can be easily fixed. By following these simple steps, you can save time and money while keeping your bathroom looking beautiful and well-maintained. So the next time you notice a chip in your sink, don't panic, just refer back to this guide to have it looking as good as new in no time.
Congratulations, you have successfully fixed the chip in your bathroom sink! Not only does it look as good as new, but you have also prevented any potential problems from arising. Remember to regularly clean and maintain your sink to avoid future chips and damages.
In conclusion, a chipped bathroom sink may seem like a daunting problem, but with the right materials and techniques, it can be easily fixed. By following these simple steps, you can save time and money while keeping your bathroom looking beautiful and well-maintained. So the next time you notice a chip in your sink, don't panic, just refer back to this guide to have it looking as good as new in no time.