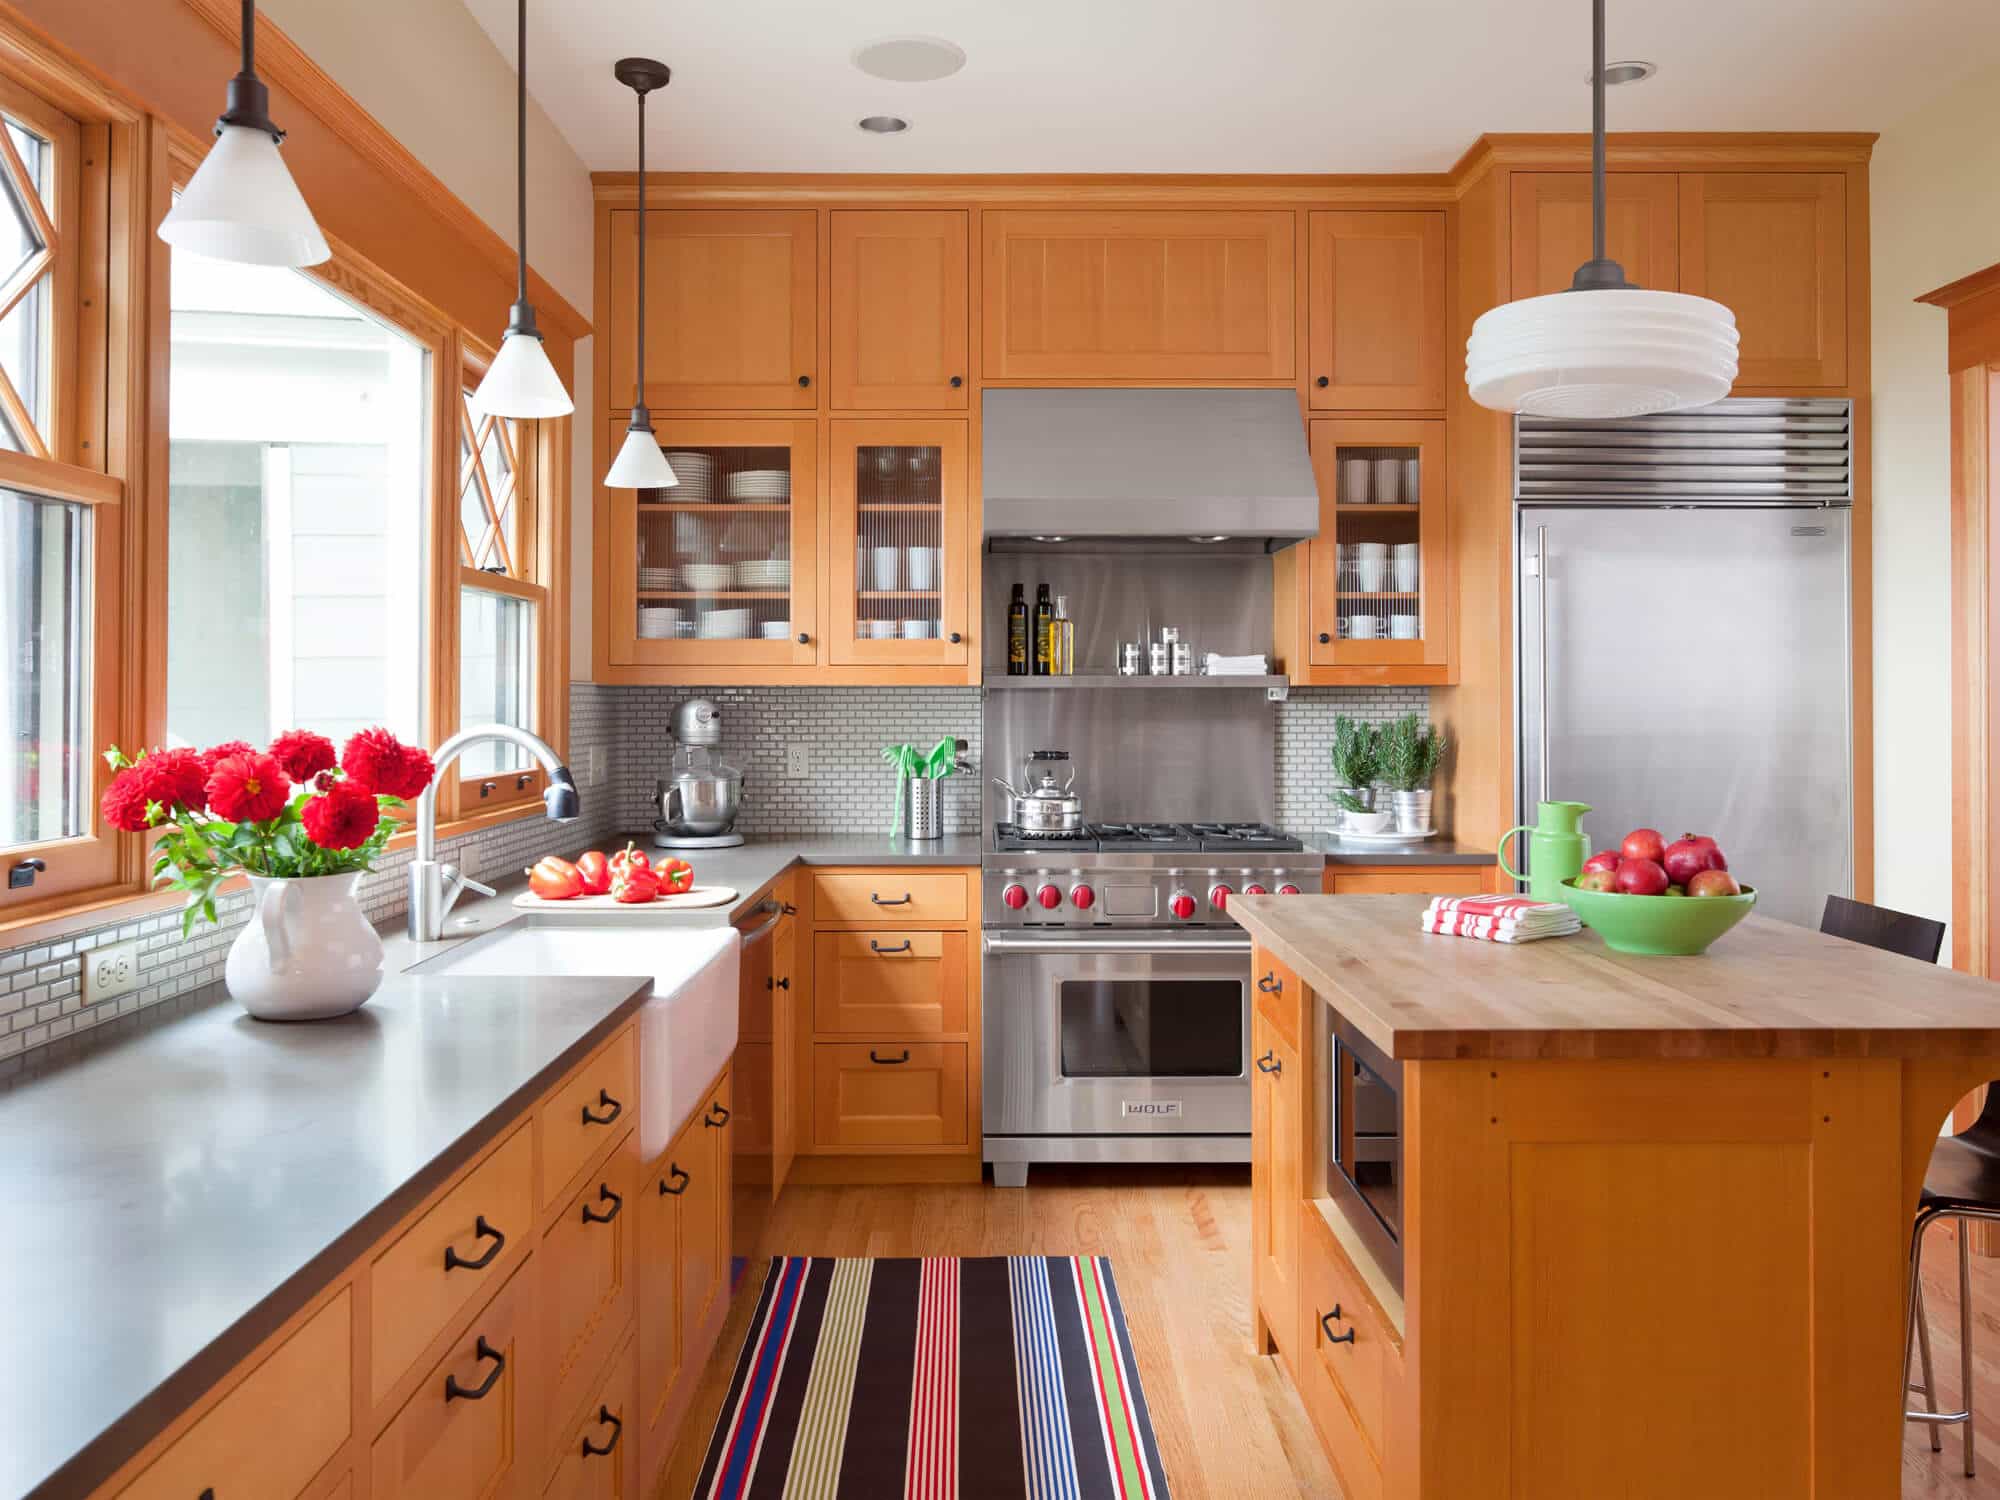
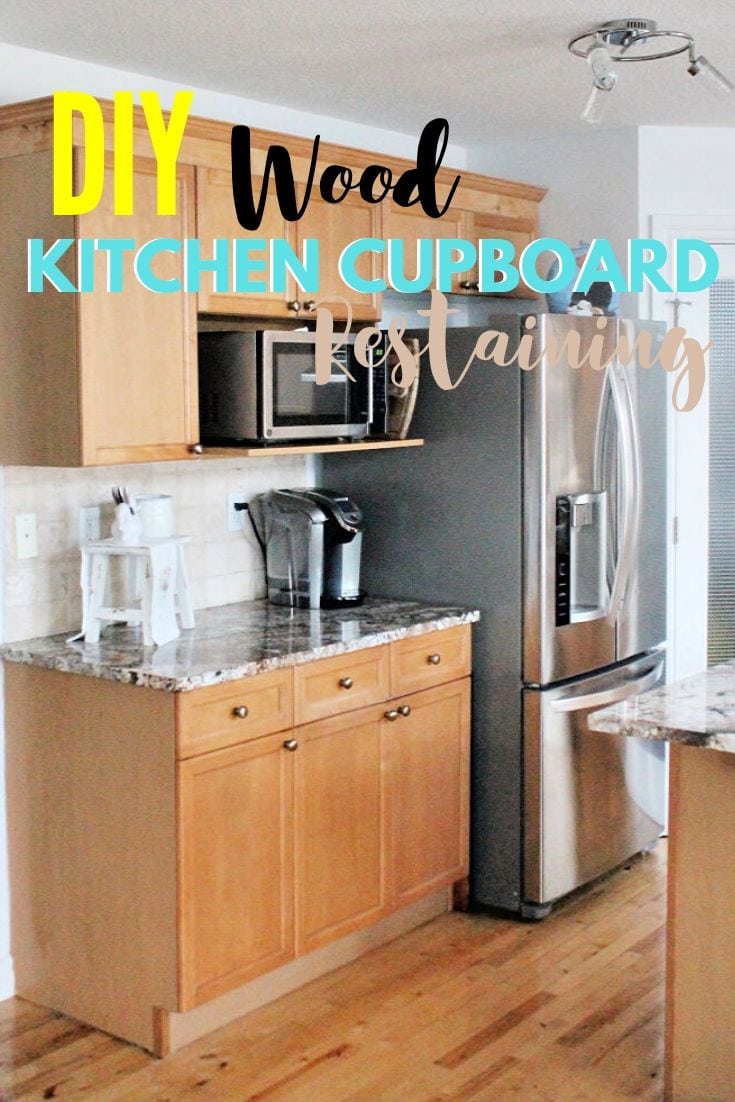
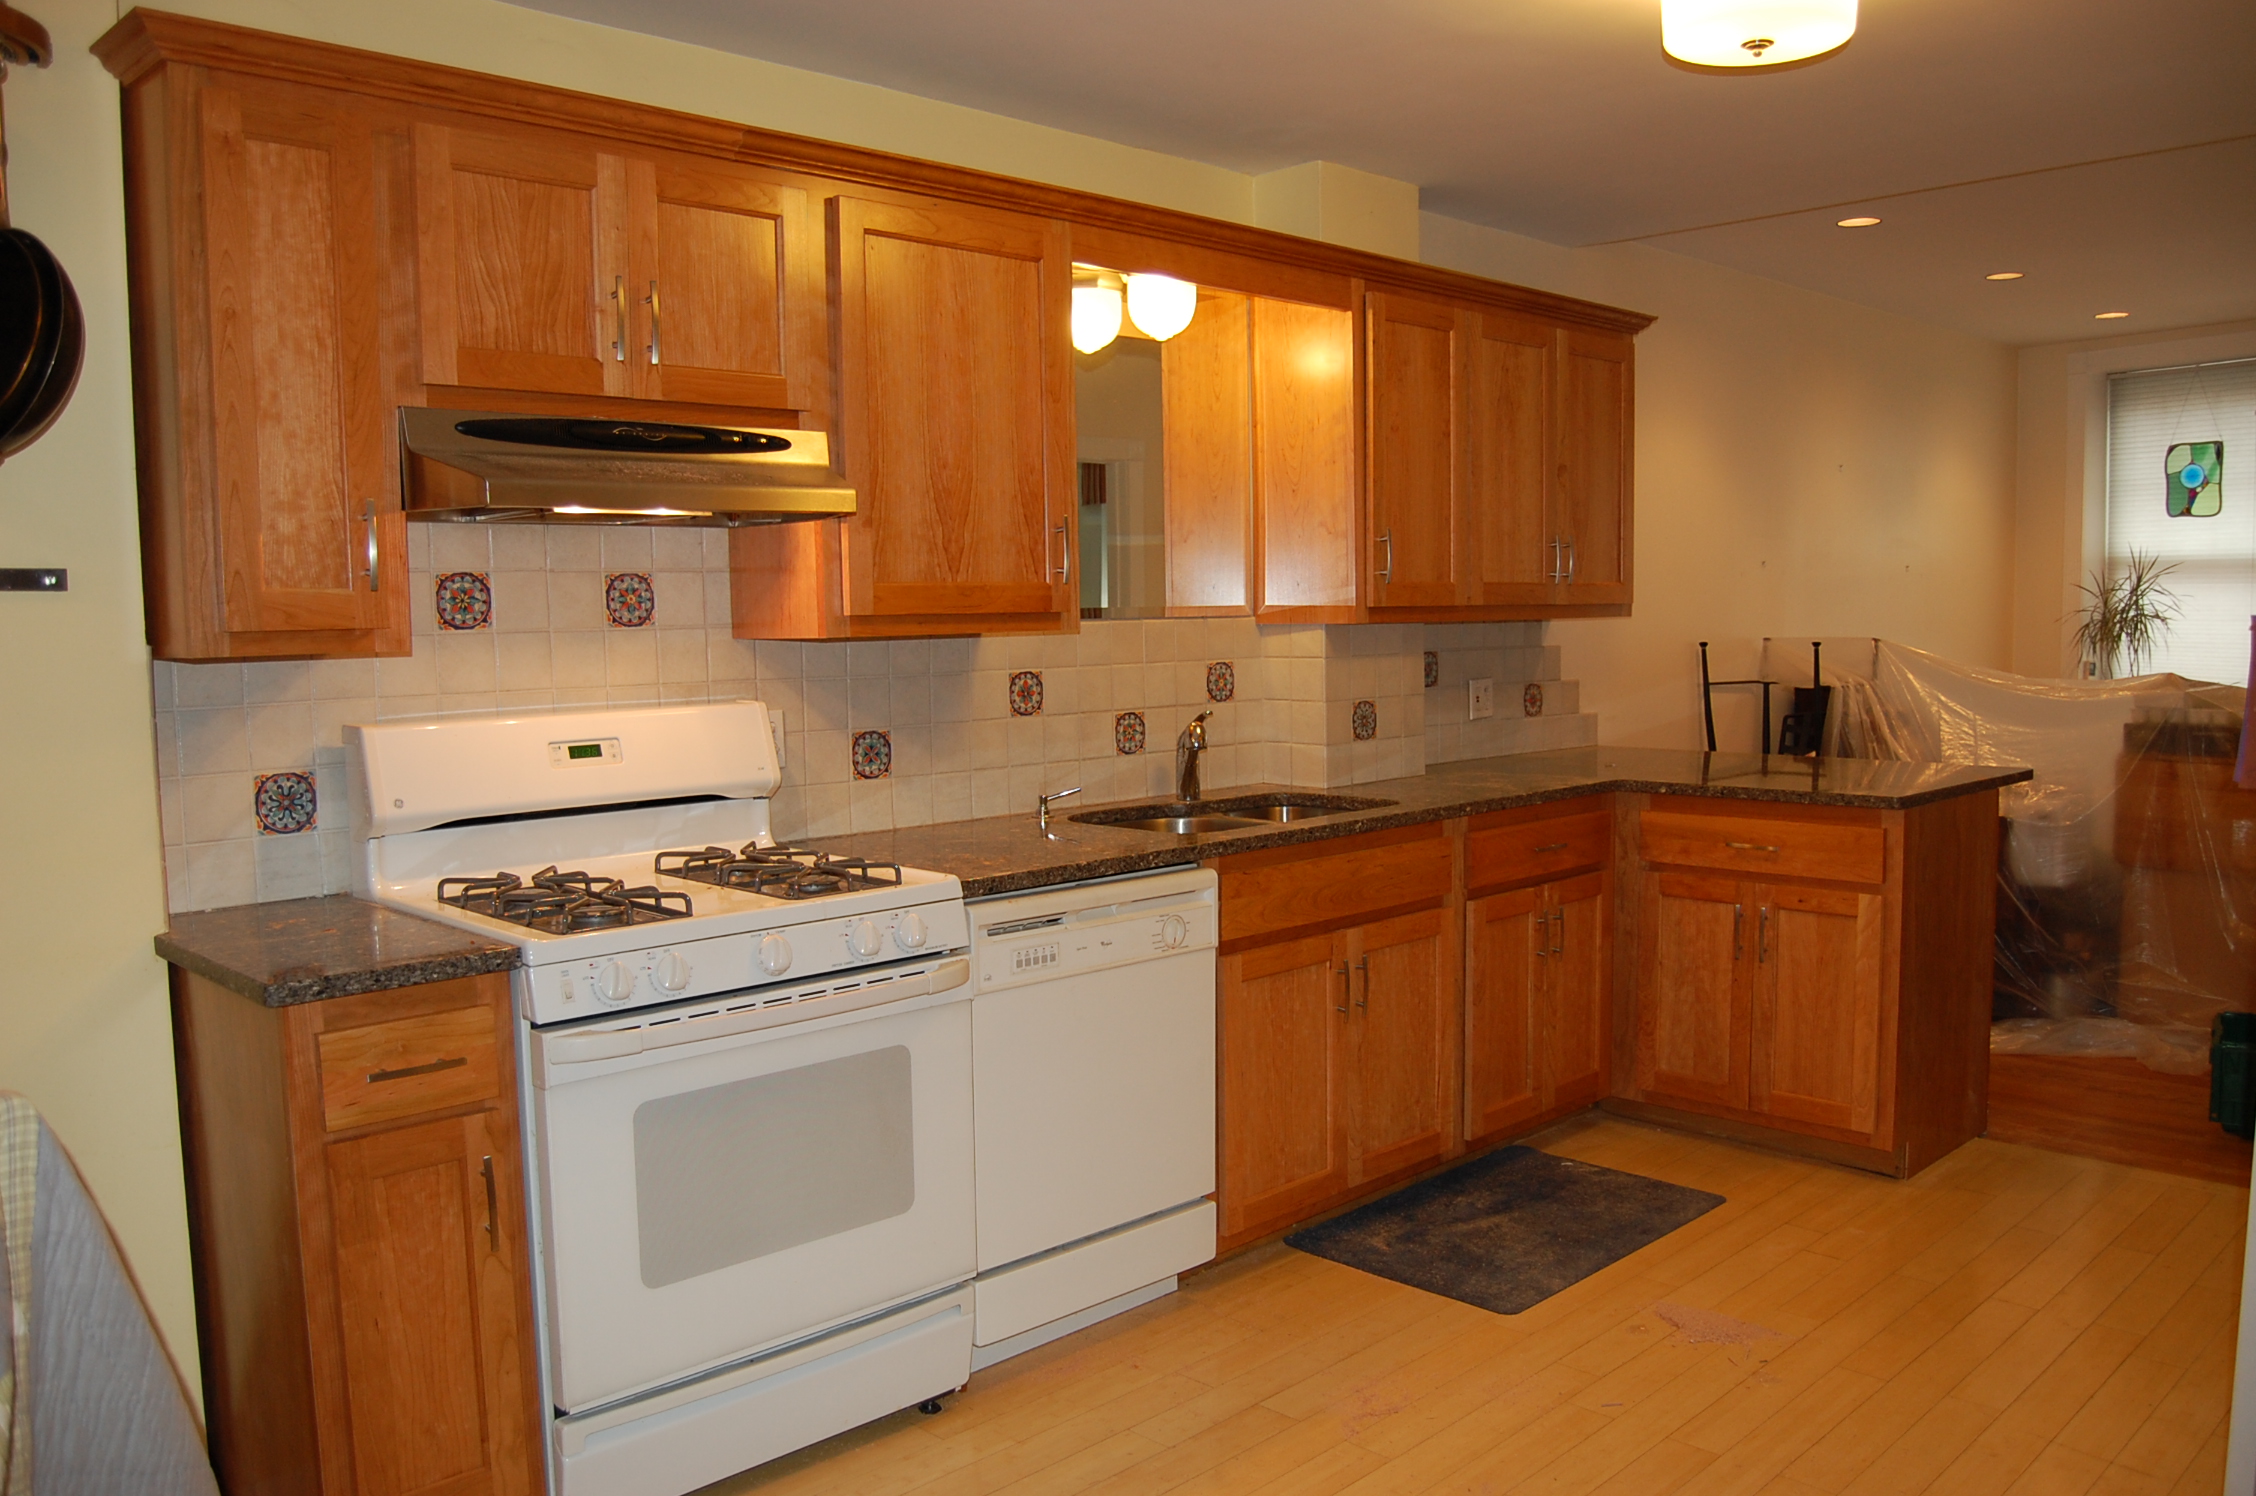
Are you tired of the boring, outdated look of your kitchen cabinets? Want to give them a fresh new look without breaking the bank? Look no further than a DIY wood finish for your kitchen cabinets. Not only is it a cost-effective option, but it also allows you to customize the look of your cabinets to your personal style. So roll up your sleeves and get ready to transform your kitchen with these simple steps. To start, remove all hardware and doors from your cabinets and clean them thoroughly with a degreaser. Sand down the surfaces to remove any old finishes and create a smooth surface for the new finish to adhere to. Next, choose your desired wood stain. Minwax offers a variety of colors to choose from that will enhance the natural beauty of the wood. Apply the stain with a brush or cloth, following the direction of the wood grain. Be sure to wear gloves and work in a well-ventilated area. Let the stain dry completely before moving on to the next step. Once the stain is dry, apply a clear protective coat to seal and protect the wood. This can be done with a polyurethane or lacquer. Apply multiple coats, sanding in between each coat, for a durable and long-lasting finish. After the protective coat has dried, reattach the hardware and doors to your cabinets. Your kitchen cabinets will now have a beautiful, new wood finish that will make your kitchen feel like new.DIY Wood Finish for Kitchen Cabinets


DIY Wood Finish for Kitchen Cabinets


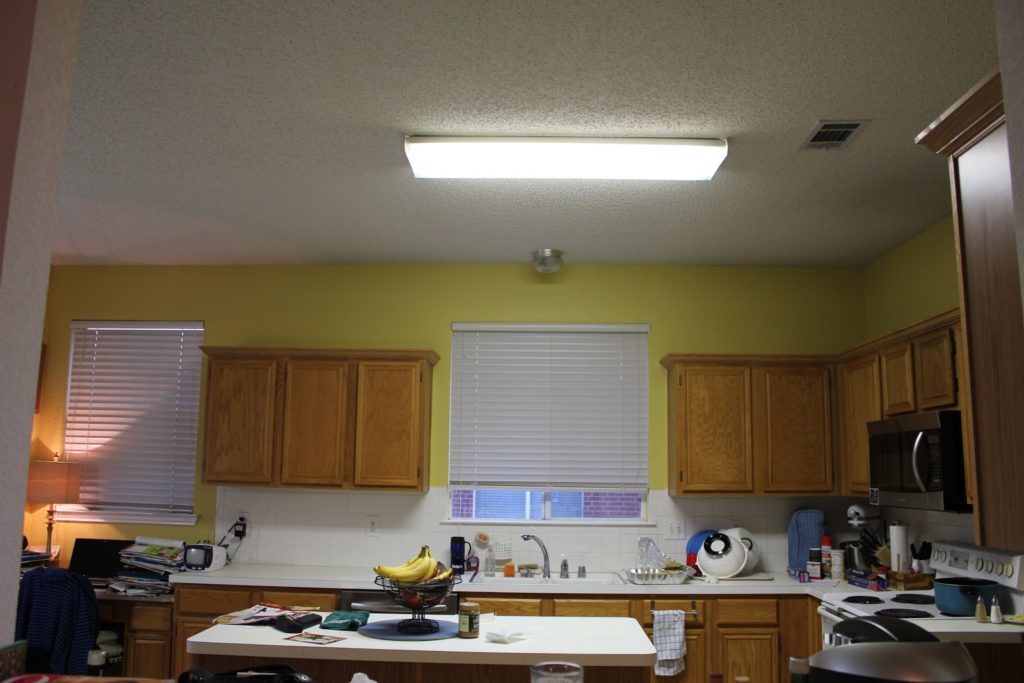
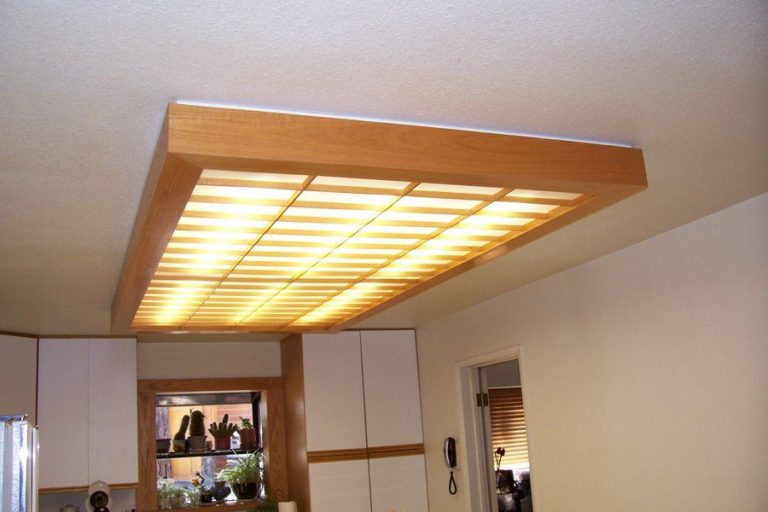
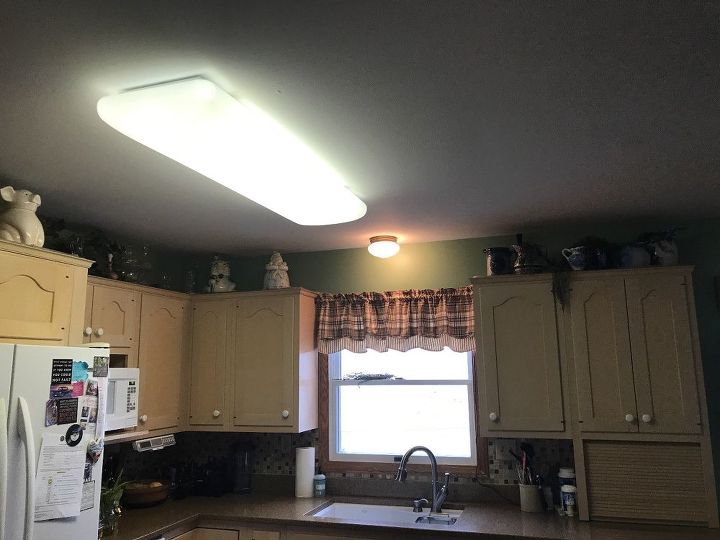
Lighting is an essential element in any kitchen, not only for functionality but also for creating ambiance. If you're looking for a bright and energy-efficient lighting option, consider fluorescent lights. Here are some creative ideas for incorporating fluorescent lighting into your kitchen design. Under Cabinet Lighting: Install fluorescent lights under your cabinets to provide task lighting for your countertop workspace. This is especially useful for food preparation and cooking, as the lights will illuminate your work surface without casting shadows. Accent Lighting: Fluorescent lights can also be used as accent lighting. Install them above or below your cabinets to highlight your backsplash or add a subtle glow to your kitchen. Choose a color temperature that compliments your kitchen's color scheme for a cohesive look. Pendant Lights: Fluorescent pendant lights are a great way to add a modern touch to your kitchen. Hang them above your kitchen island or dining table for a statement piece that also provides ample lighting for the space. Recessed Lighting: For a clean and seamless look, opt for recessed fluorescent lights in your kitchen. They provide a sleek and modern look while also providing ample lighting for the entire space. No matter how you choose to incorporate fluorescent lighting into your kitchen, it's important to choose energy-efficient bulbs to save on your electricity bill.Fluorescent Kitchen Lighting Ideas


Fluorescent Kitchen Lighting Ideas


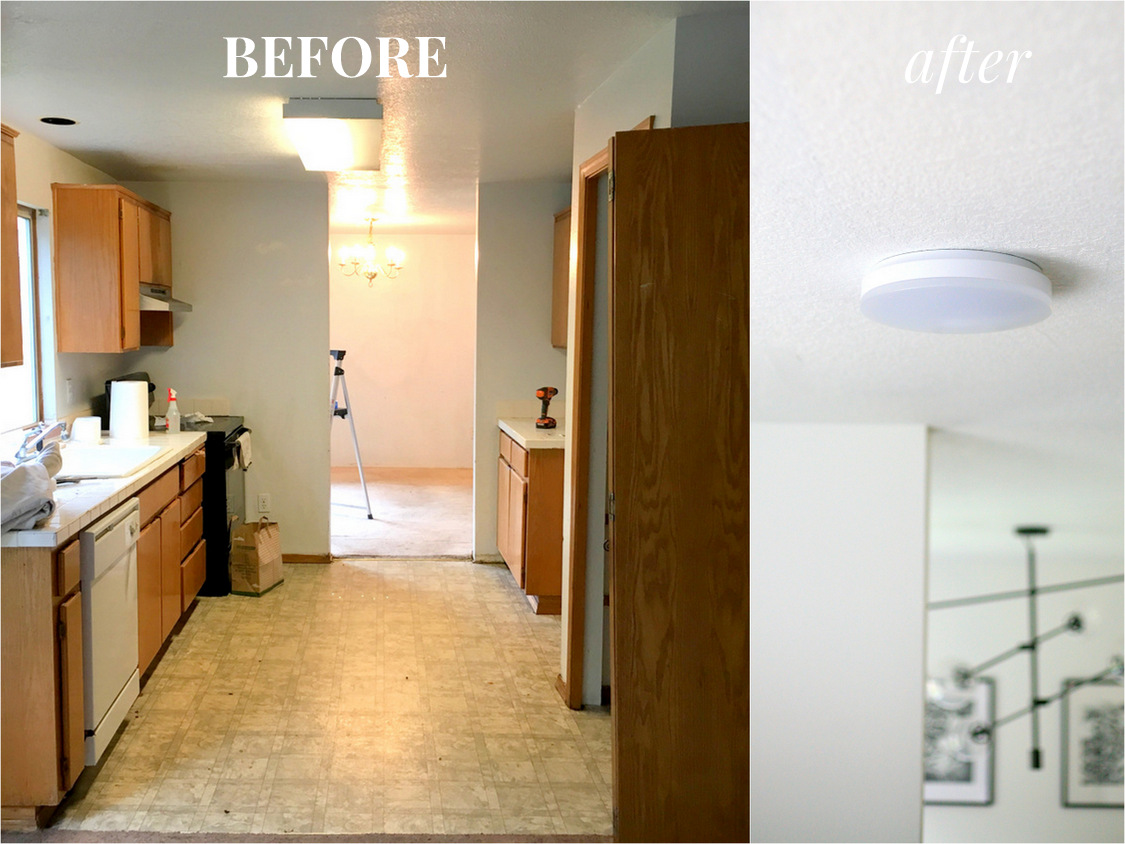
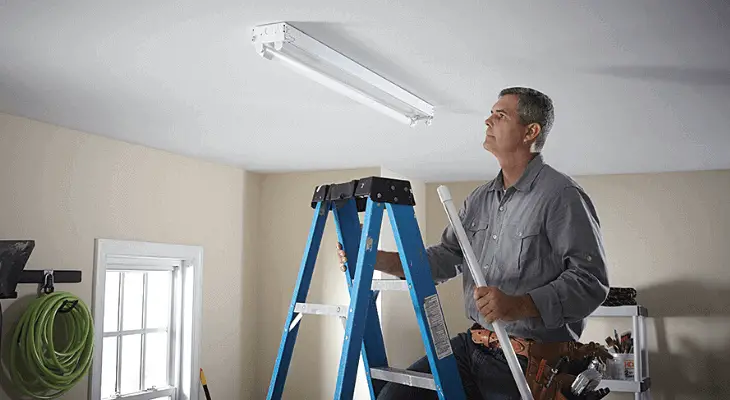
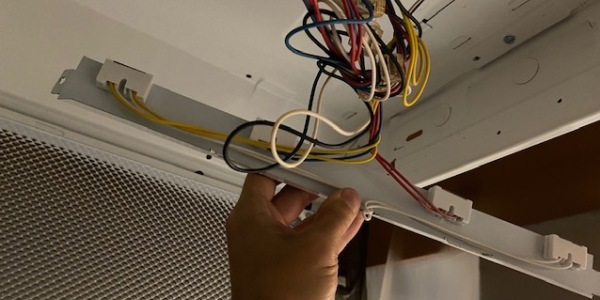
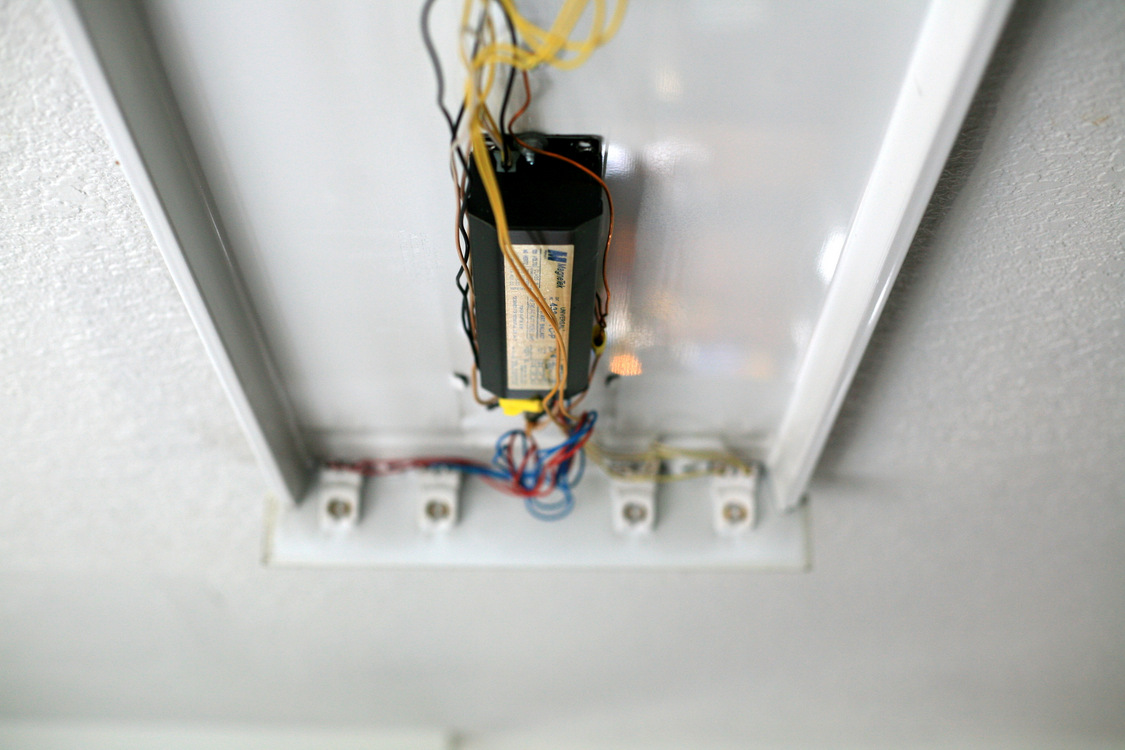
Installing a fluorescent light fixture in your kitchen may seem like a daunting task, but with the right tools and instructions, it can be a simple and straightforward process. Here's how to install a fluorescent light fixture in your kitchen. Step 1: Gather Materials Before you begin, make sure you have all the necessary materials on hand. This includes a fluorescent light fixture, wire strippers, wire nuts, a screwdriver, and a ladder. Step 2: Turn off Power Turn off the power to the kitchen at the circuit breaker to ensure your safety while working on the electrical components. Step 3: Remove Old Fixture If you have an existing light fixture in place, remove it by unscrewing it from the ceiling. Once removed, disconnect the wires and remove the mounting bracket. Step 4: Install Mounting Bracket Attach the mounting bracket to the ceiling with screws, making sure it is securely in place. This will provide support for the new light fixture. Step 5: Connect Wires Using wire nuts, connect the wires from the fixture to the corresponding wires in the ceiling. White to white, black to black, and green to green. Step 6: Attach Fixture Once the wires are connected, attach the fixture to the mounting bracket using the provided screws. Make sure it is secure before moving on to the next step. Step 7: Turn on Power Turn the power back on at the circuit breaker and test the light to ensure it is working properly. Now you have a new fluorescent light fixture in your kitchen, providing you with bright and energy-efficient lighting.How to Install a Fluorescent Light Fixture in a Kitchen


How to Install a Fluorescent Light Fixture in a Kitchen


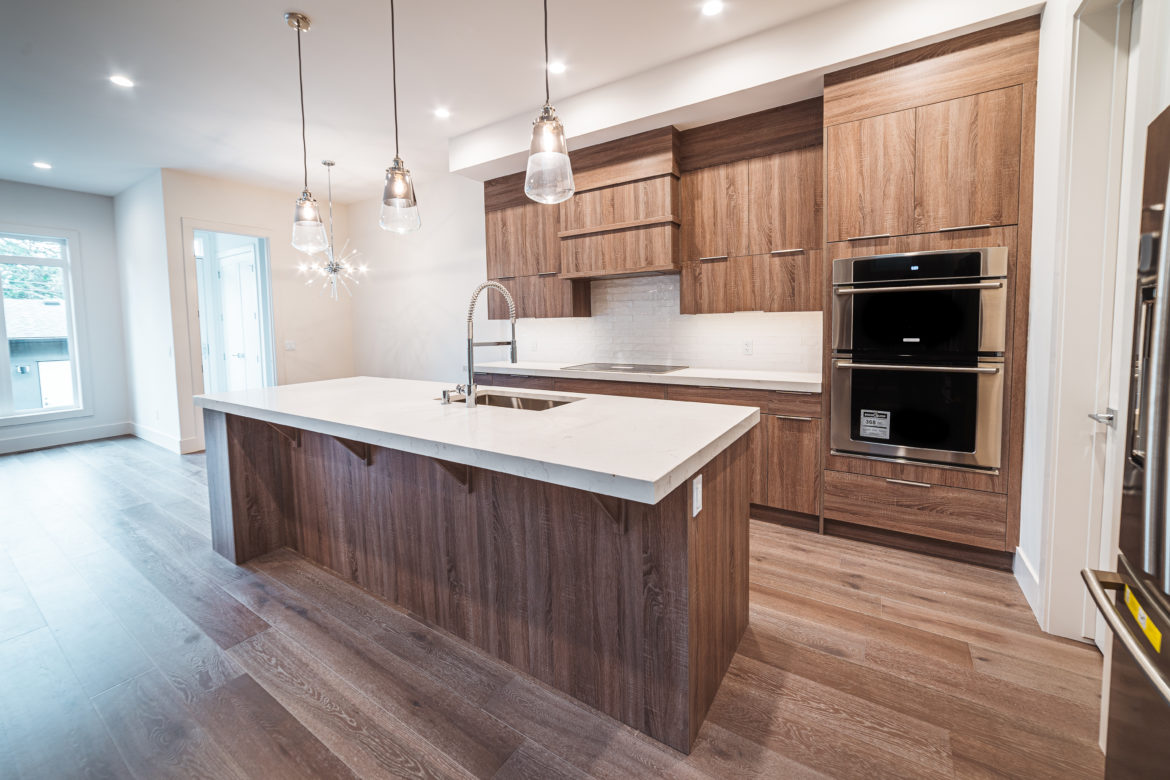
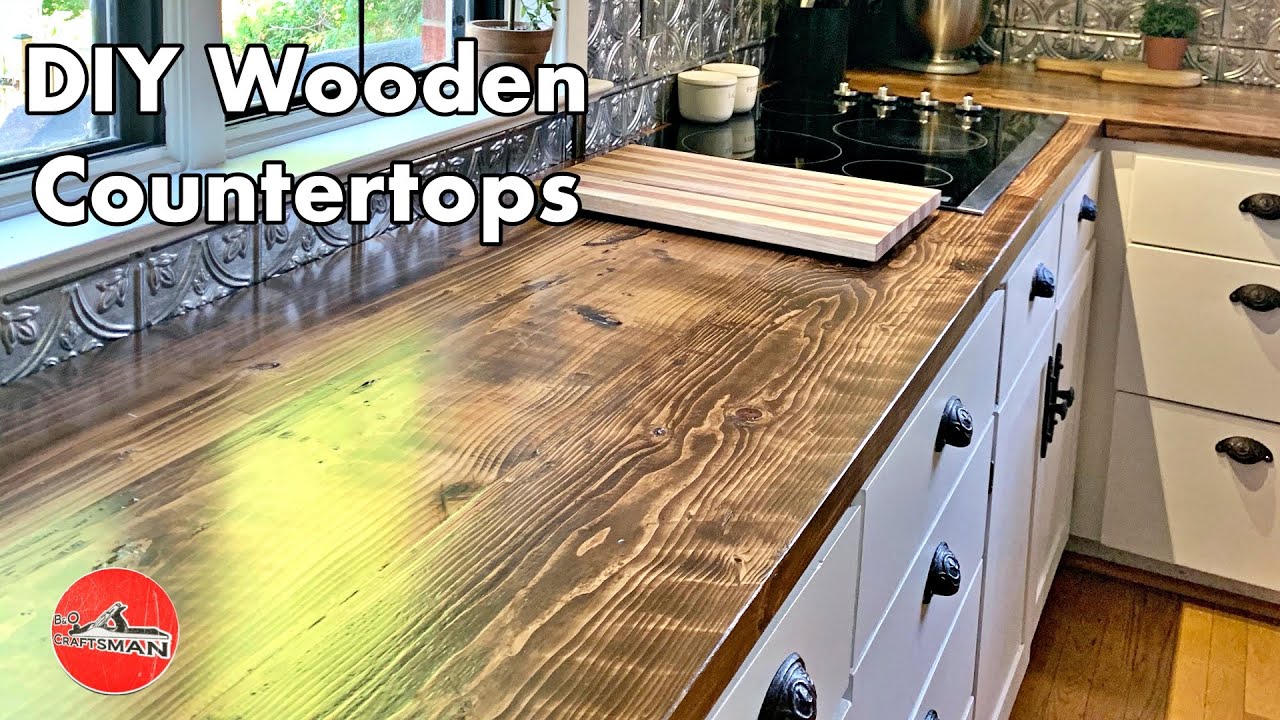
Looking for a budget-friendly and unique option for your kitchen countertops? Consider DIY wood countertops. Not only are they cost-effective, but they also add warmth and character to your kitchen. Here's how to create your own beautiful wood countertops. Step 1: Measure and Cut Measure your countertops and purchase the desired wood. Maple, cherry, and oak are popular choices for their durability and natural beauty. Cut the wood to the desired size and shape for your countertops. Step 2: Join the Pieces Using a biscuit joiner, join the pieces of wood together to create the desired width for your countertops. Apply wood glue to the edges before joining them together for added strength. Step 3: Sand and Stain Sand down the surface of your countertops to create a smooth and even surface. Then, apply your desired wood stain, following the direction of the wood grain. Let it dry completely before moving on to the next step. Step 4: Add Protective Coat Apply a clear protective coat, such as polyurethane or lacquer, to seal and protect the wood. Apply multiple coats, sanding in between each coat, for a durable and long-lasting finish. Step 5: Install Once the protective coat is dry, install your new DIY wood countertops in your kitchen. They will add a unique and beautiful touch to your space.DIY Wood Countertops for Kitchen


DIY Wood Countertops for Kitchen


:max_bytes(150000):strip_icc()/Epoxy-DIY-Countertops-Via-Smallspaces.about.com-56d33a003df78cfb37d23f47.jpg)
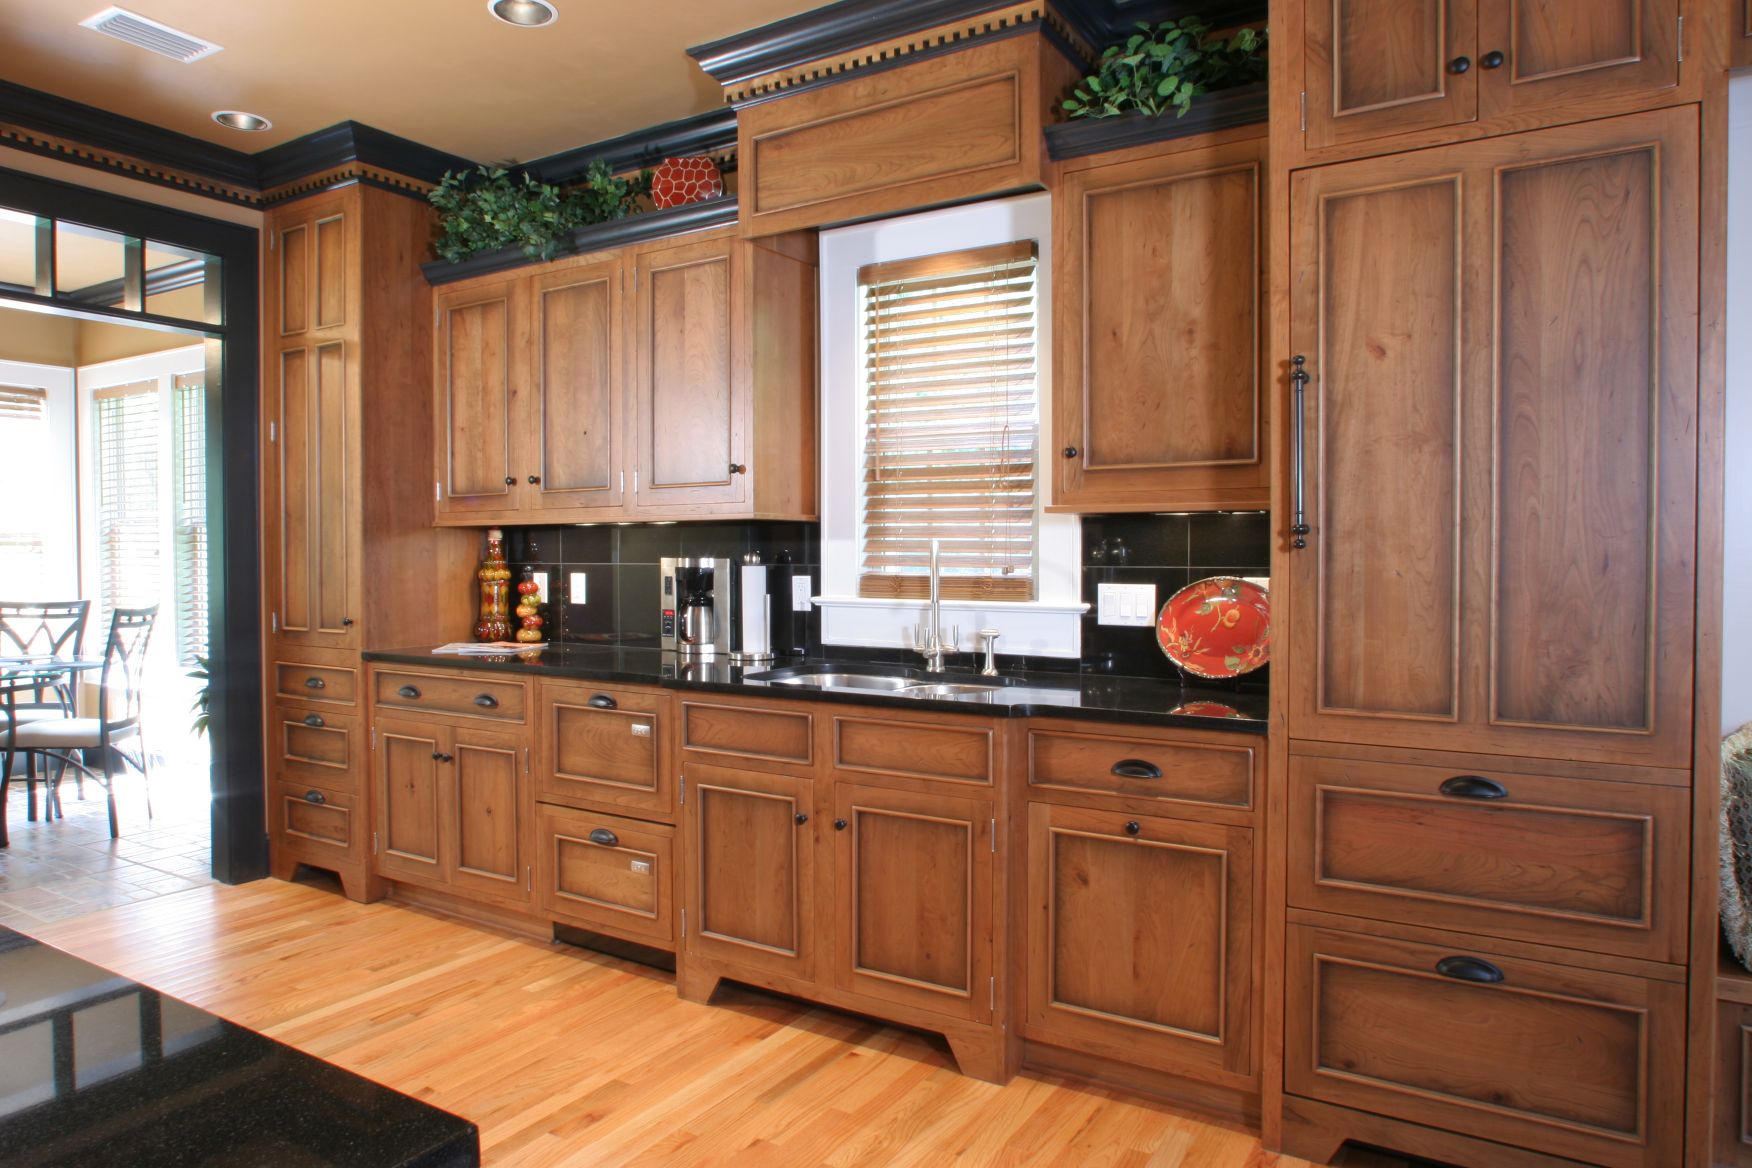
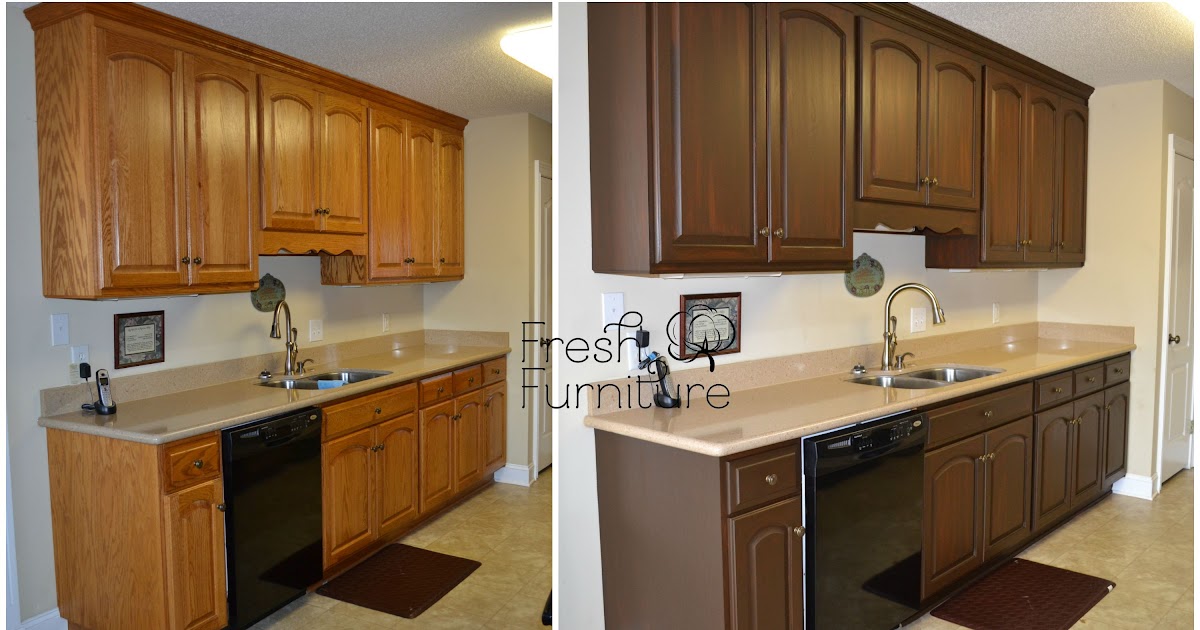
If your kitchen cabinets are looking worn and outdated, but still in good condition, consider refinishing them instead of replacing them. This is a cost-effective way to give your kitchen a fresh new look. Here's how to refinish your wood kitchen cabinets. Step 1: Remove Hardware and Clean Remove all hardware and doors from your cabinets and clean them thoroughly with a degreaser. Sand down the surfaces to remove any old finishes and create a smooth surface for the new finish to adhere to. Step 2: Apply Stripper Using a chemical stripper, remove the old finish from the cabinets. Follow the instructions on the stripper and make sure to work in a well-ventilated area. Step 3: Sand and Stain Once the old finish is removed, sand down the surfaces to create a smooth surface. Then, apply your desired wood stain, following the direction of the wood grain. Let it dry completely before moving on to the next step. Step 4: Add Protective Coat Apply a clear protective coat, such as polyurethane or lacquer, to seal and protect the wood. Apply multiple coats, sanding in between each coat, for a durable and long-lasting finish. Step 5: Reattach Hardware and Doors After the protective coat has dried, reattach the hardware and doors to your cabinets. Your kitchen will now have a fresh new look without the cost of replacing the cabinets entirely.How to Refinish Wood Kitchen Cabinets


How to Refinish Wood Kitchen Cabinets


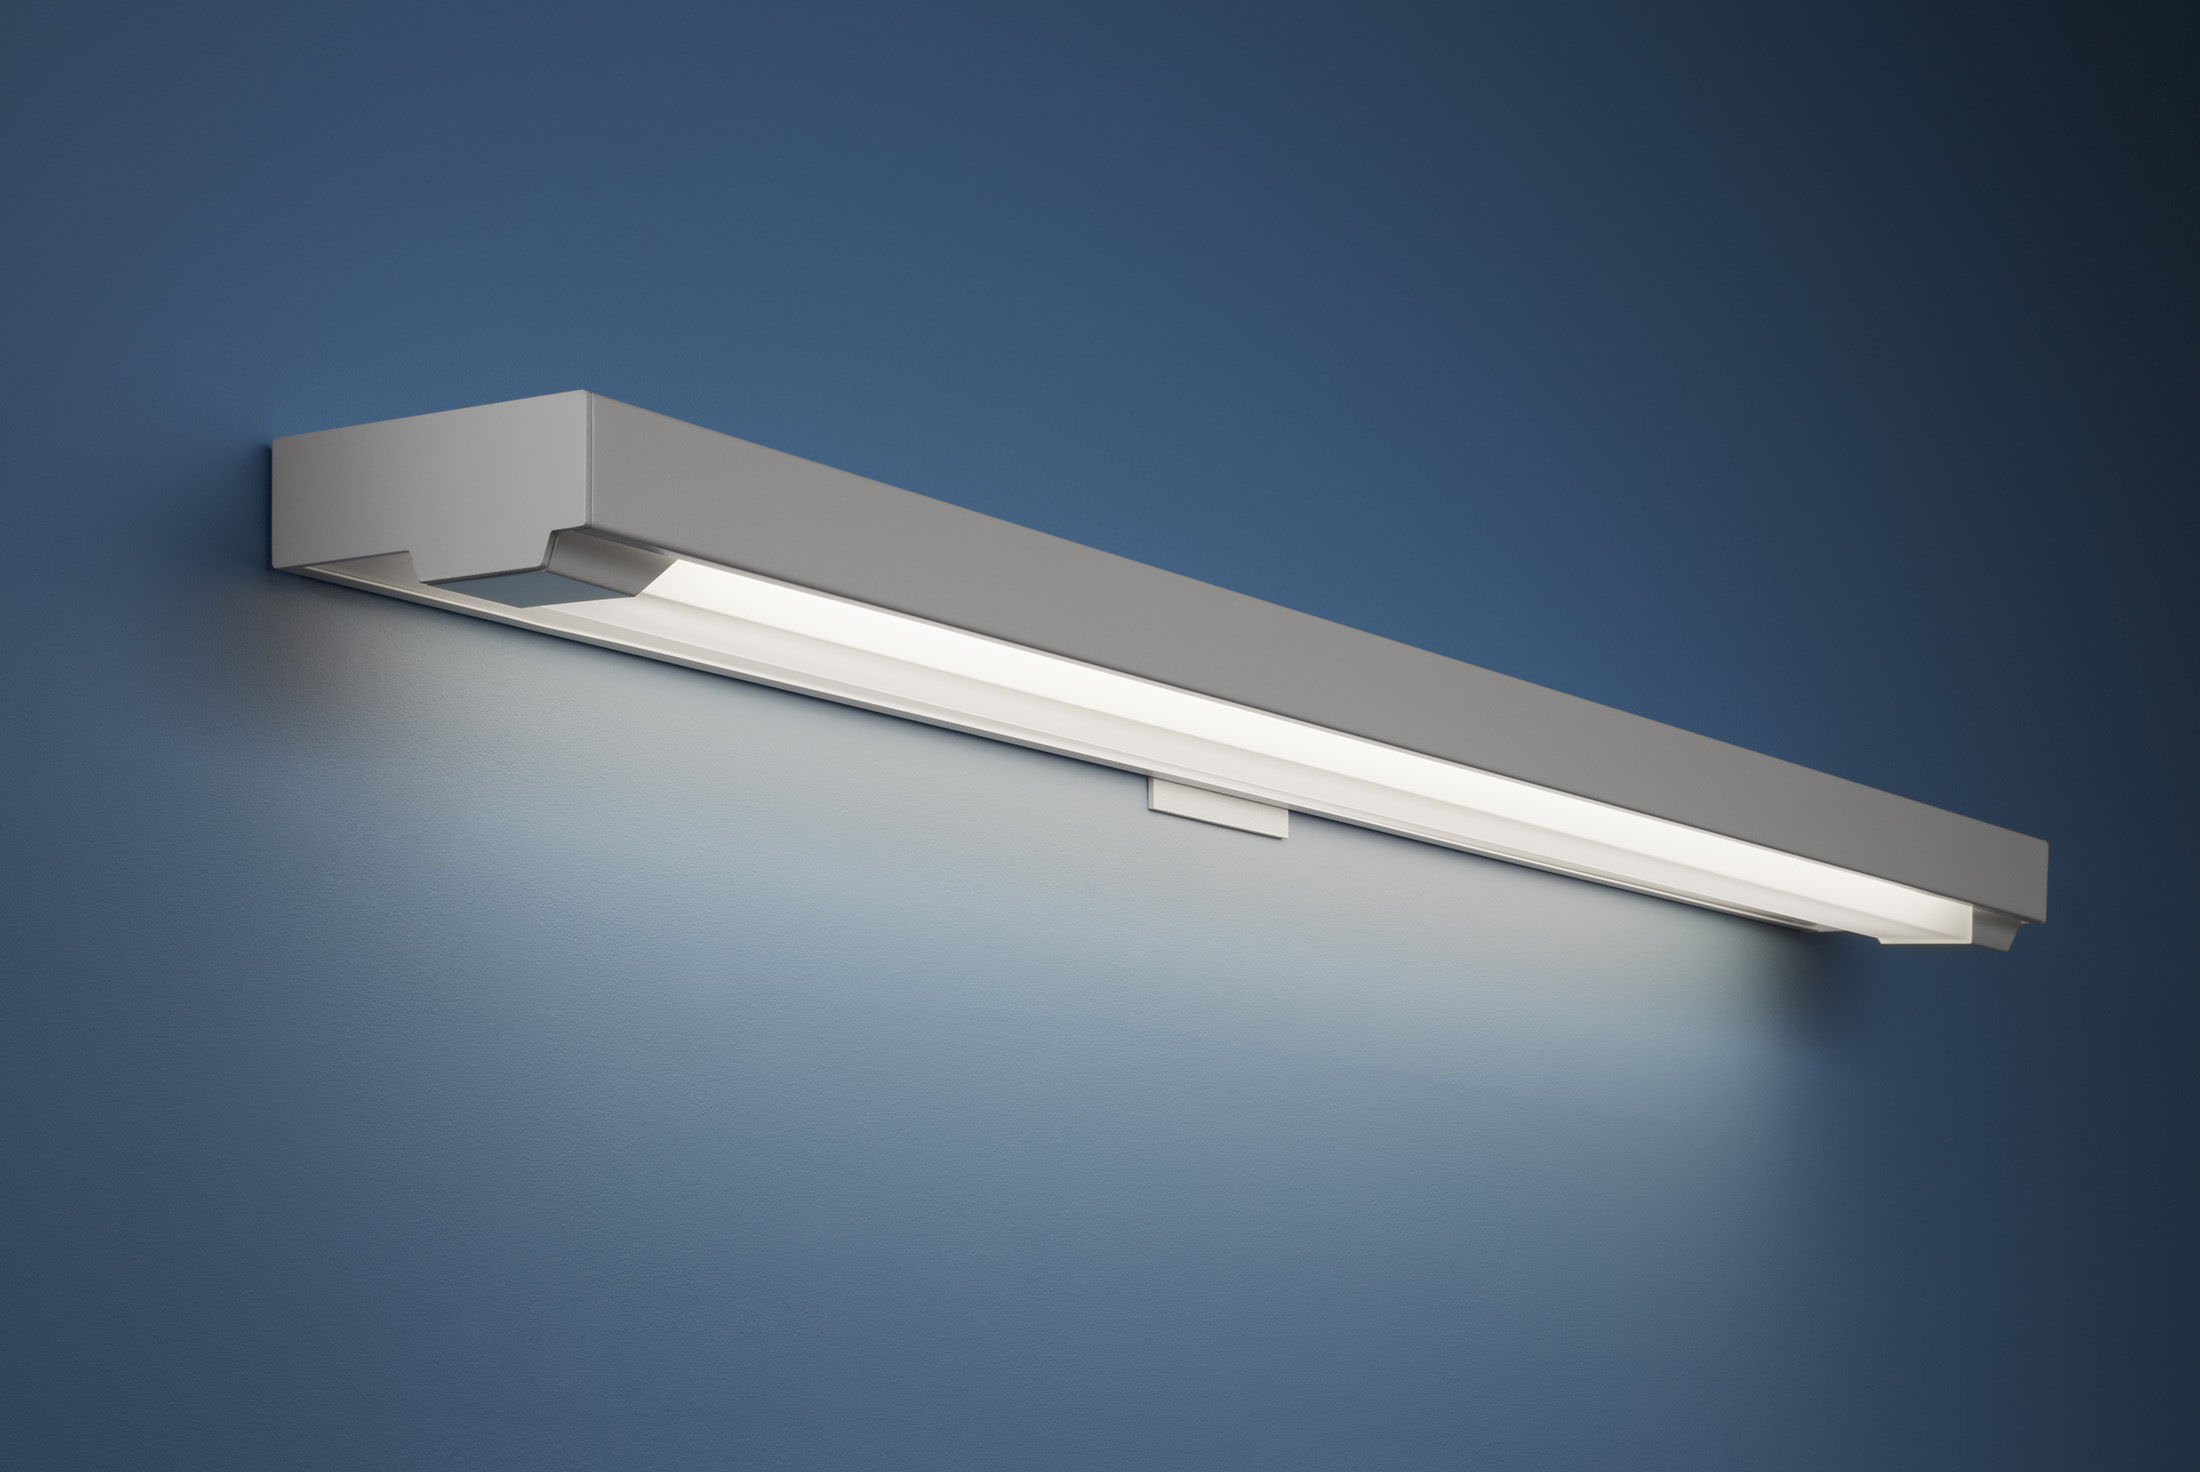
Fluorescent light covers are a great way to add a touch of style and personality to your kitchen. Not only do they come in a variety of designs and colors, but they also provide a soft and diffused light, making them a great option for kitchens. Here are some popular options for fluorescent kitchen light covers. Cloud Covers: These covers mimic the look of a bright blue sky with fluffy white clouds, giving your kitchen a whimsical and airy feel. Tree Covers: Bring the outdoors inside with tree covers that feature images of trees in various seasons. This option adds a touch of nature to your kitchen. Floral Covers: For a feminine touch, opt for floral covers that feature beautiful and colorful flowers. They will add a pop of color and a touch of elegance to your kitchen. Stained Glass Covers: For a more classic and elegant look, choose stained glass covers. They come in a variety of designs and colors, adding a touch of sophistication to your kitchen. No matter which design you choose, fluorescent light covers are an easy and affordable way to upgrade your kitchen lighting.Fluorescent Kitchen Light Covers


Fluorescent Kitchen Light Covers


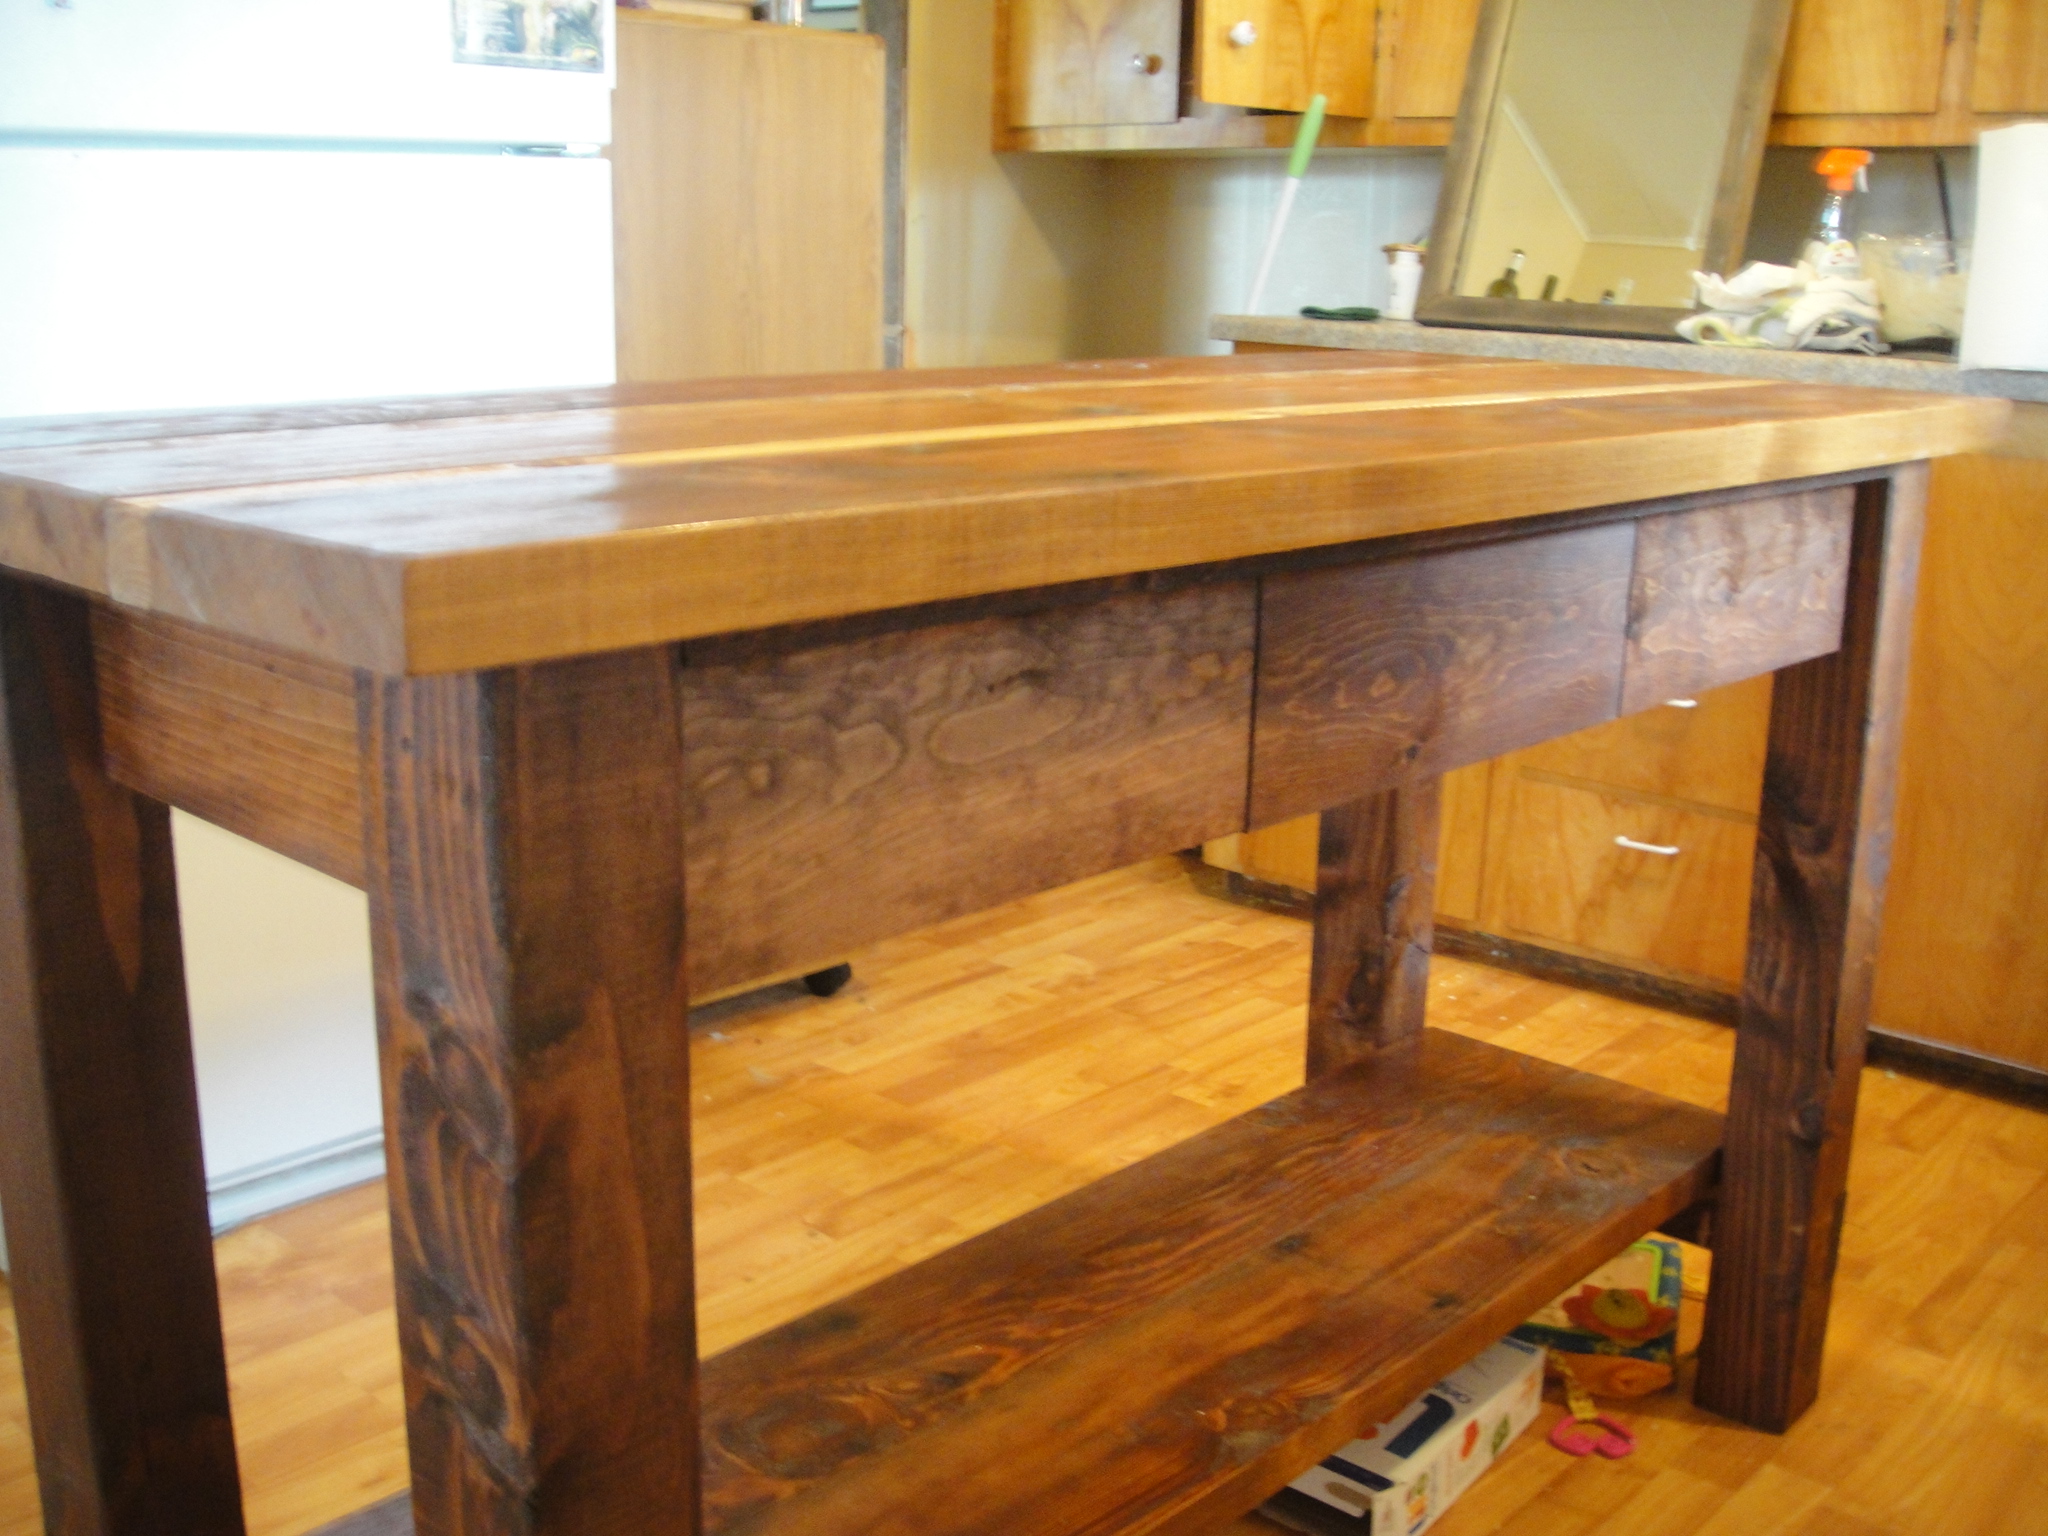
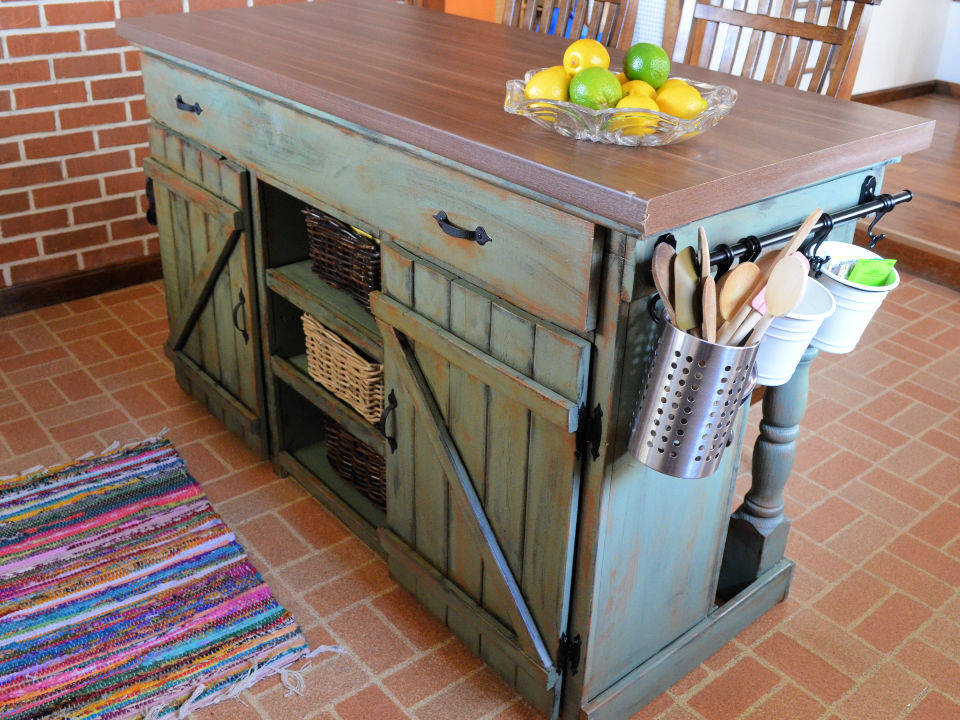
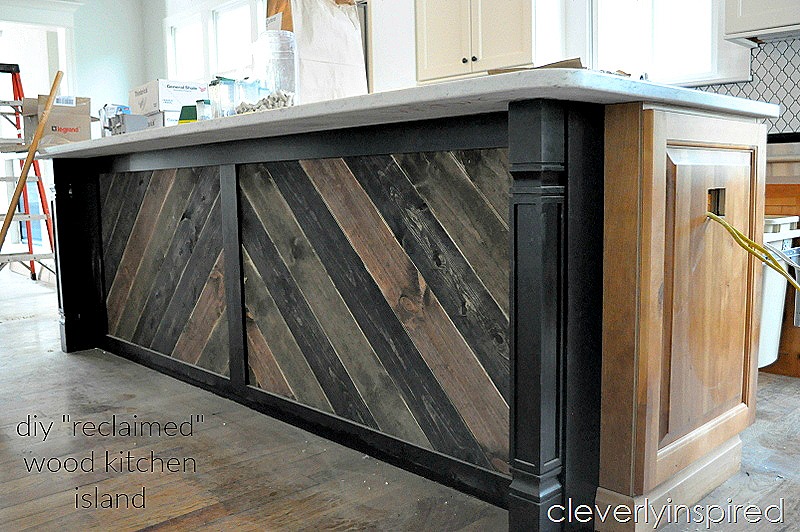
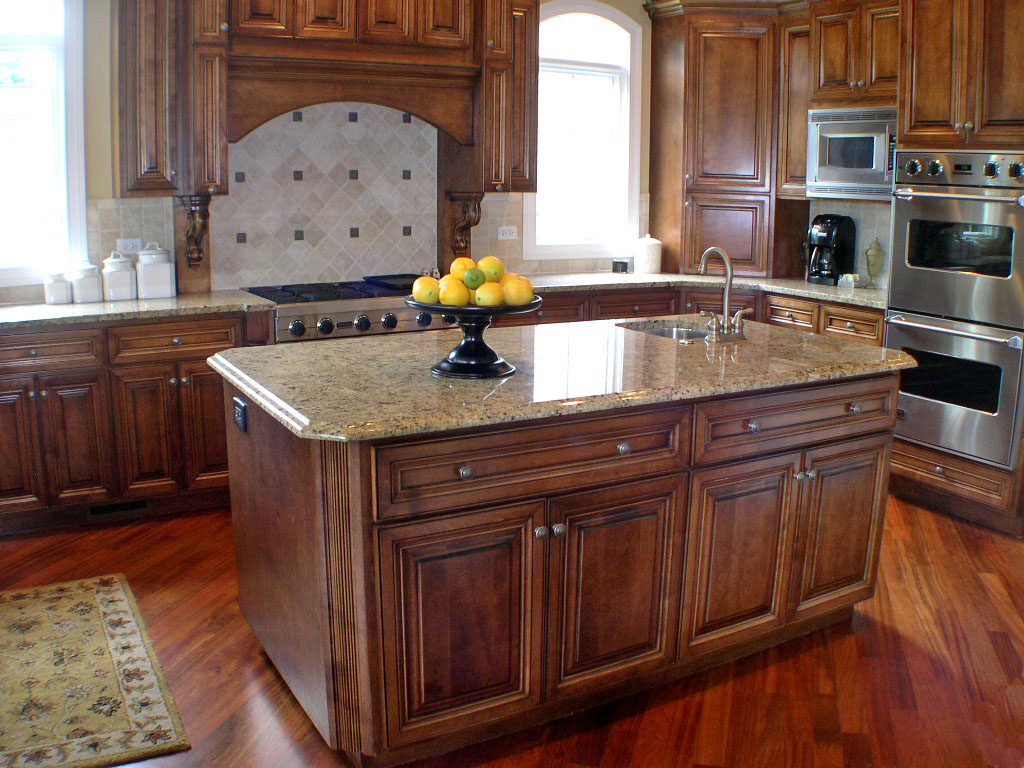
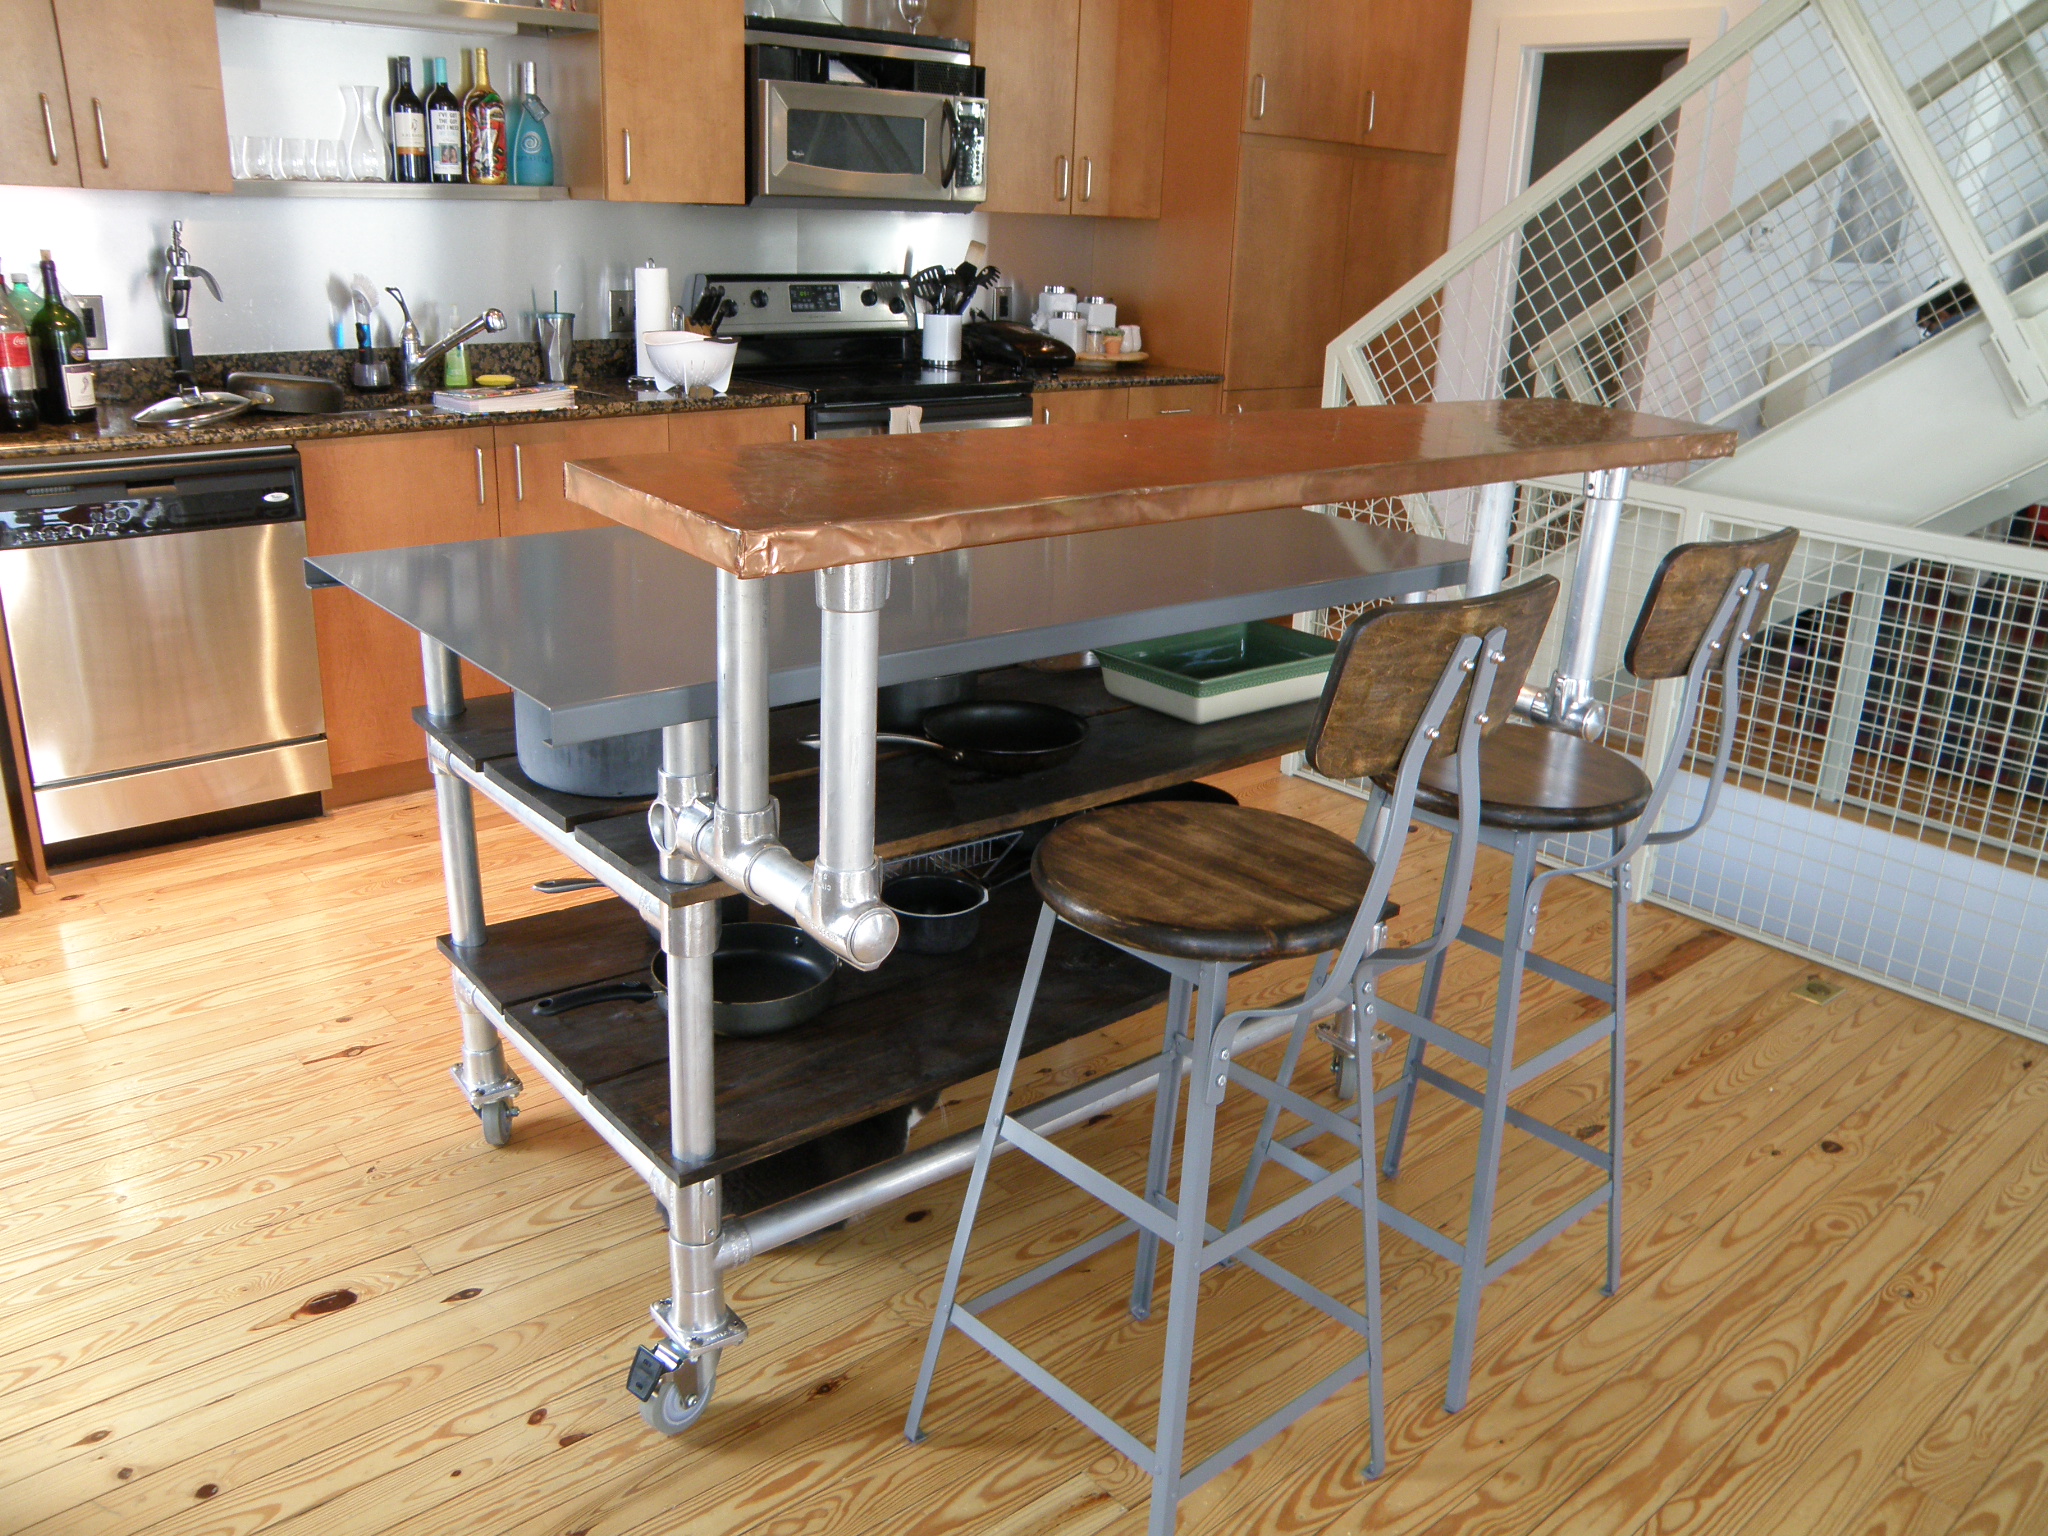
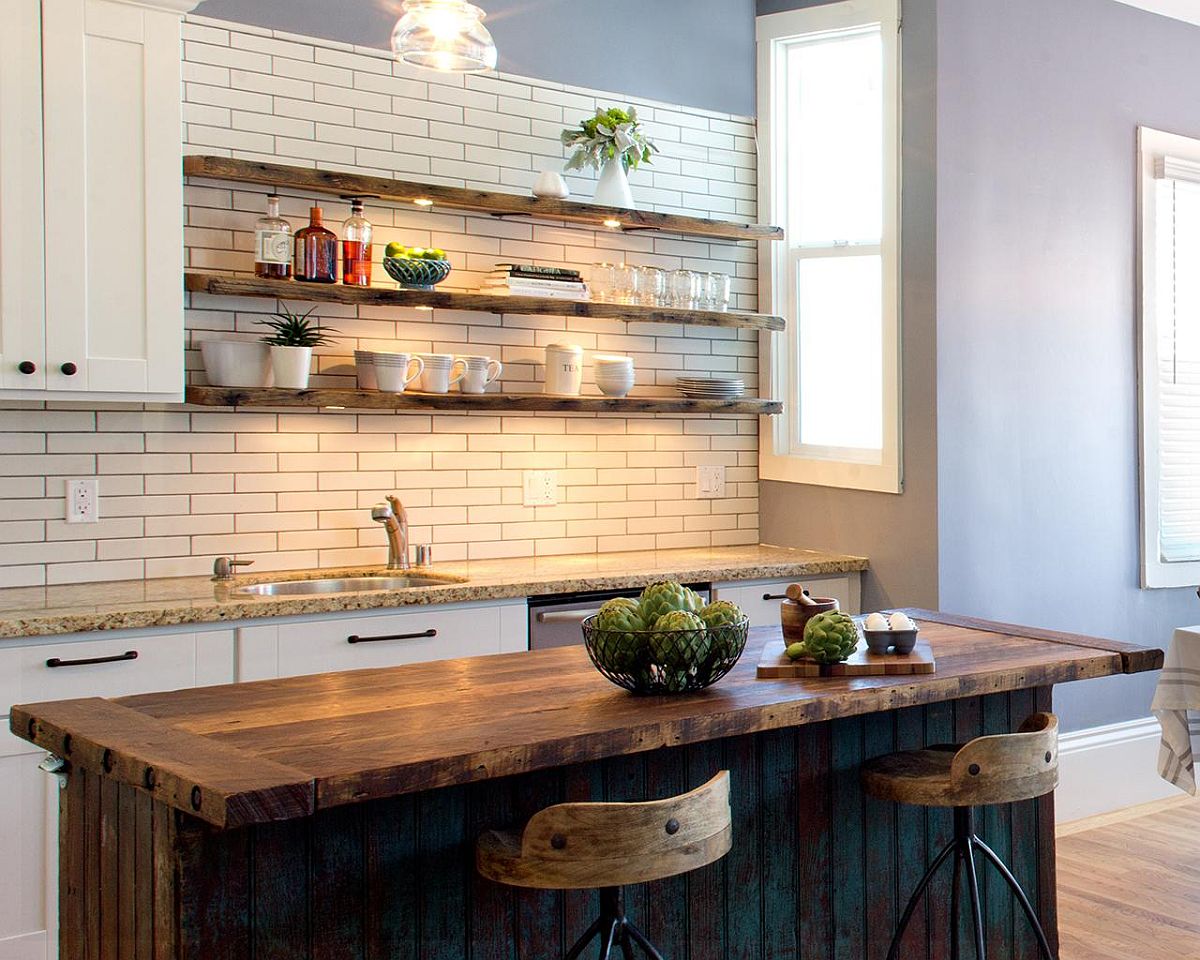
A kitchen island is not only a functional addition to your kitchen, but it also adds extra counter and storage space. Instead of purchasing an expensive pre-made island, consider making your own DIY wood kitchen island. Here's how. Step 1: Plan and Measure Determine the size and design of your desired island and measure the space where it will be placed in your kitchen. This will help you determine the amount of wood and materials needed for the project. Step 2: Build the Frame Using 2x4s, build the frame of your island. This will provide the support for the countertop and any shelves or cabinets you may want to add. Step 3: Cut and Attach Countertop Cut your wood countertop to the desired size and attach it to the frame using screws. Be sure to properly secure the countertop to the frame for stability. Step 4: Add Shelves or Cabinets If you want to add shelves or cabinets to your island, now is the time to do so. This will provide additional storage space for your kitchen. Step 5: Sand and Stain Sand down the surfaces of your island and apply your desired wood stain, following the direction of the wood grain. Let it dry completely before moving on to the next step. Step 6: Add Protective Coat Apply a clear protective coat, such as polyurethane or lacquer, to seal and protect the wood. Apply multiple coats, sanding in between each coat, for a durable and long-lasting finish. Now you have a beautiful and functional DIY wood kitchen island that will add character and style to your kitchen.DIY Wood Kitchen Island

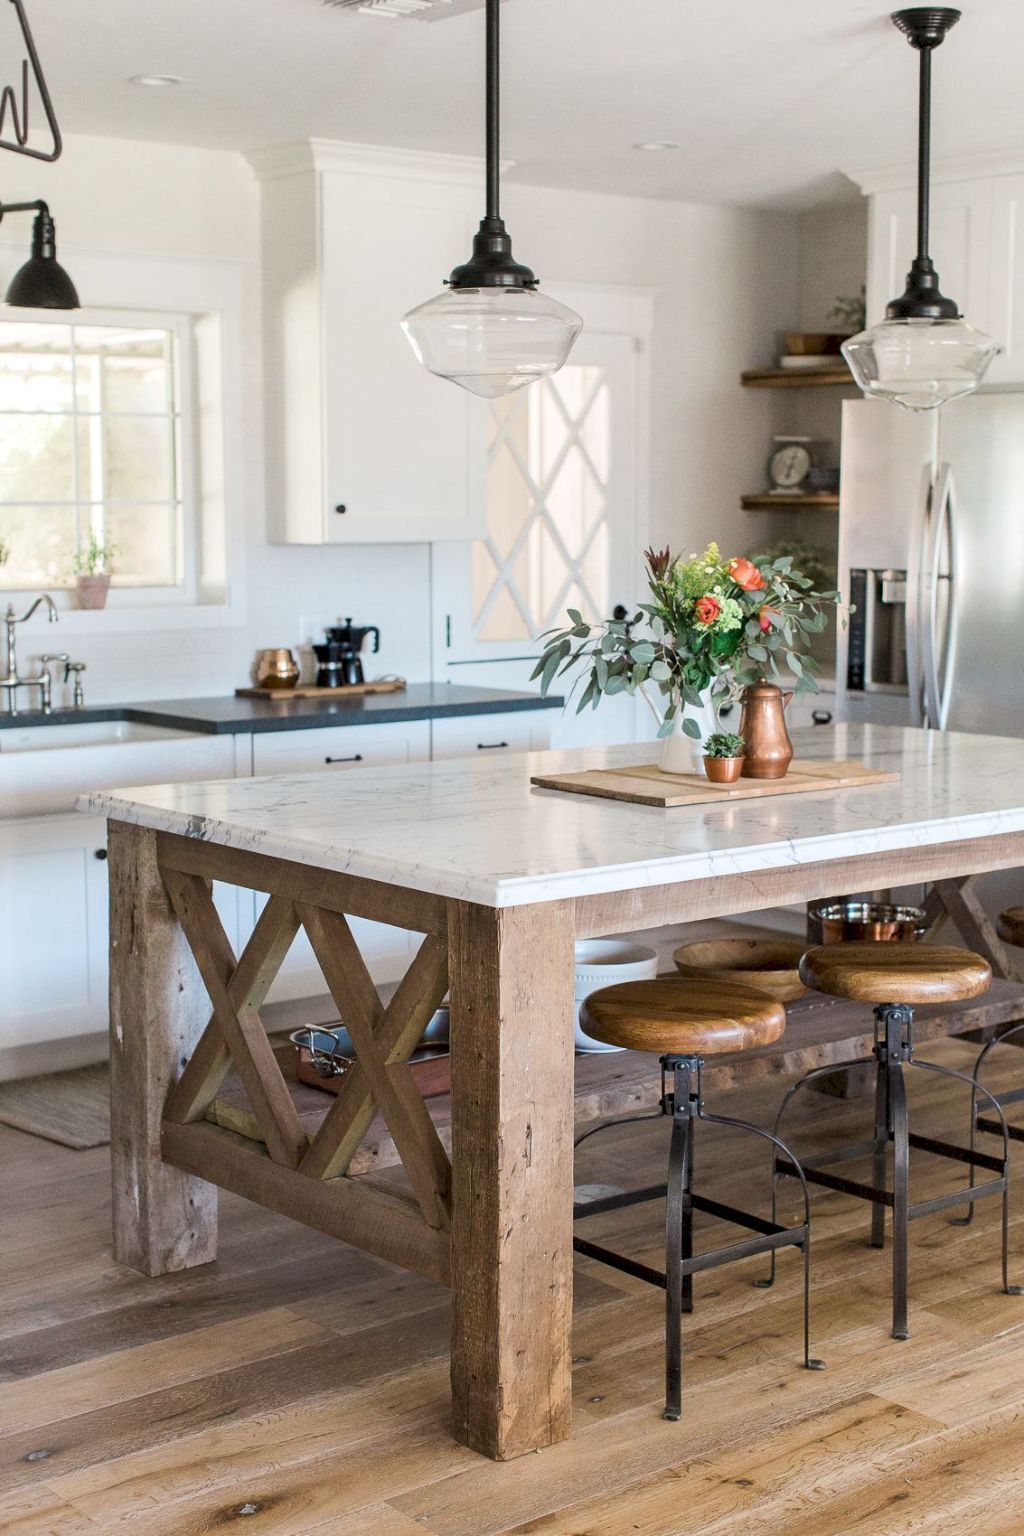

DIY Wood Kitchen Island


Replacing an old or broken fluorescent light fixture in your kitchen can seem like a daunting task, but with the right tools and instructions, it can be a simple and straightforward process. Here's how to replace a fluorescent light fixture in your kitchen. Step 1: Gather Materials Before you begin, make sure you have all the necessary materials on hand. This includes a new fluorescent light fixture, wire strippers, wire nuts, a screwdriver, and a ladder. Step 2: Turn off Power Turn off the power to the kitchen at the circuit breaker to ensure your safety while working on the electrical components. Step 3: Remove Old Fixture If you have an existing light fixture in place, remove it by unscrewing it from the ceiling. Once removed, disconnect the wires and remove the mounting bracket. Step 4: Install Mounting Bracket Attach the mounting bracket to the ceiling with screws, making sure it is securely in place. This will provide support for the new light fixture. Step 5: Connect Wires Using wire nuts, connect the wires from the fixture to the corresponding wires in the ceiling. White to white, black to black, and green to green. Step 6: Attach Fixture Once the wires are connected, attach the fixture to the mounting bracket using the provided screws. Make sure it is secure before moving on to the next step. Step 7: Turn on Power Turn the power back on at the circuit breaker and test the light to ensure it is working properly. Now you have a new fluorescent light fixture in your kitchen, providing you with bright and energy-efficient lighting.How to Replace a Fluorescent Light Fixture in a Kitchen


How to Replace a Fluorescent Light Fixture in a Kitchen


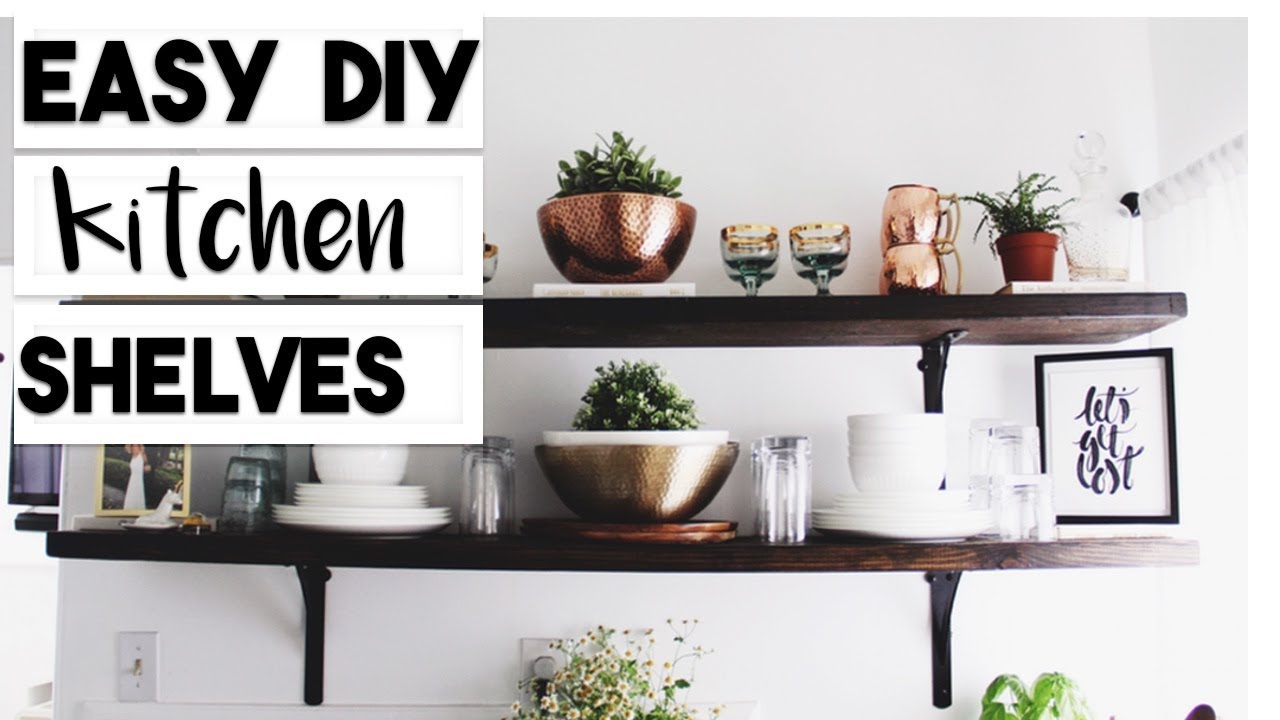
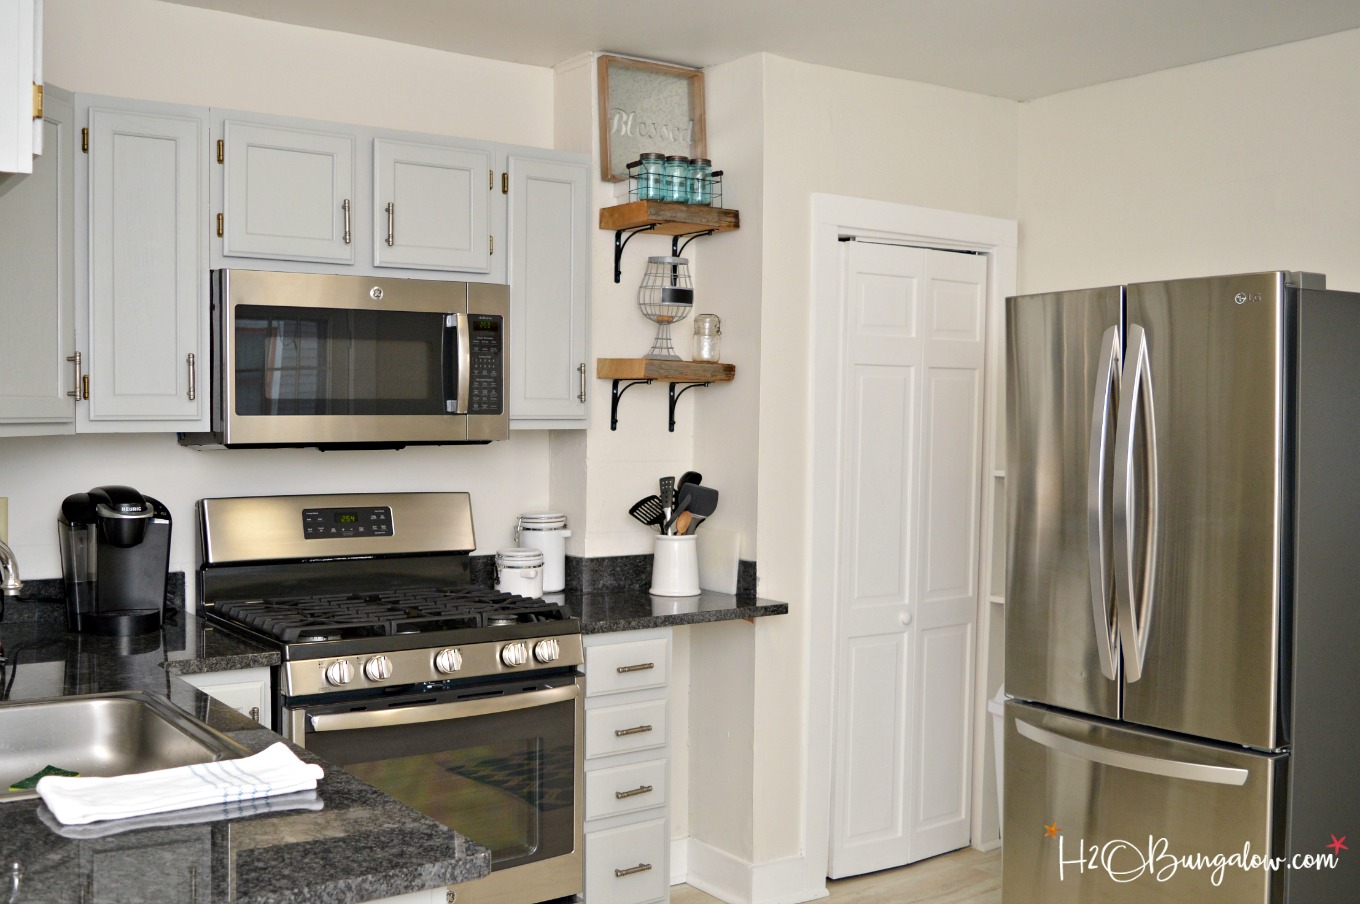
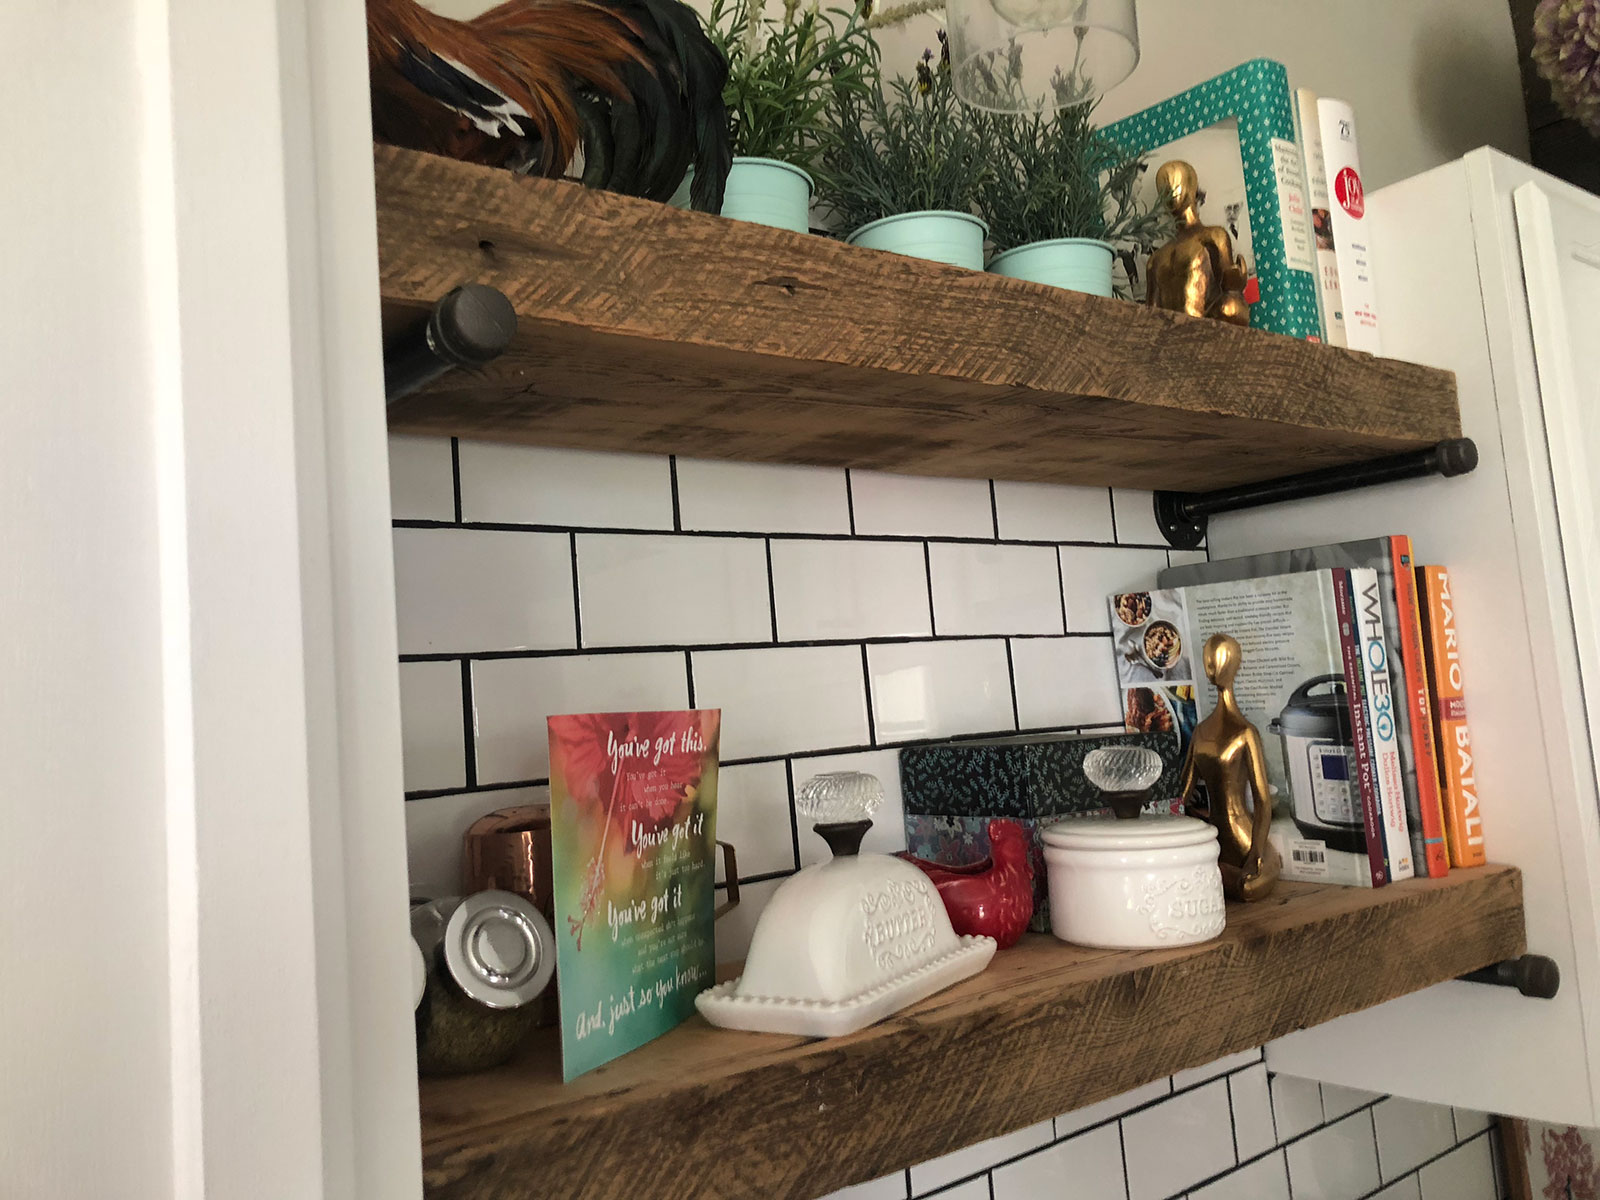
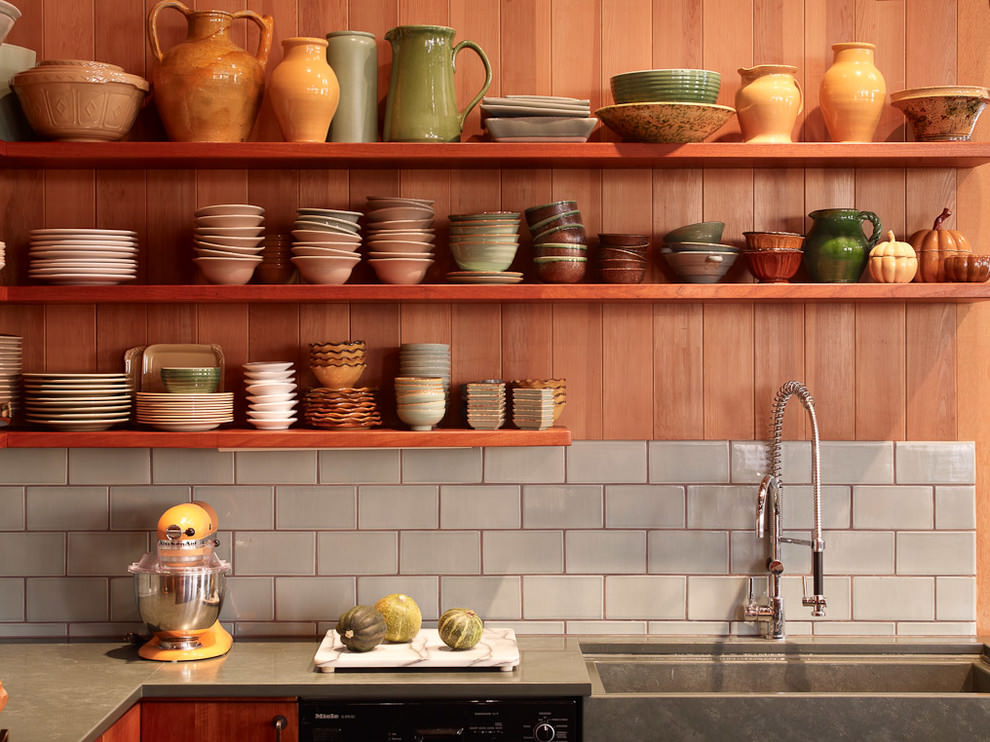
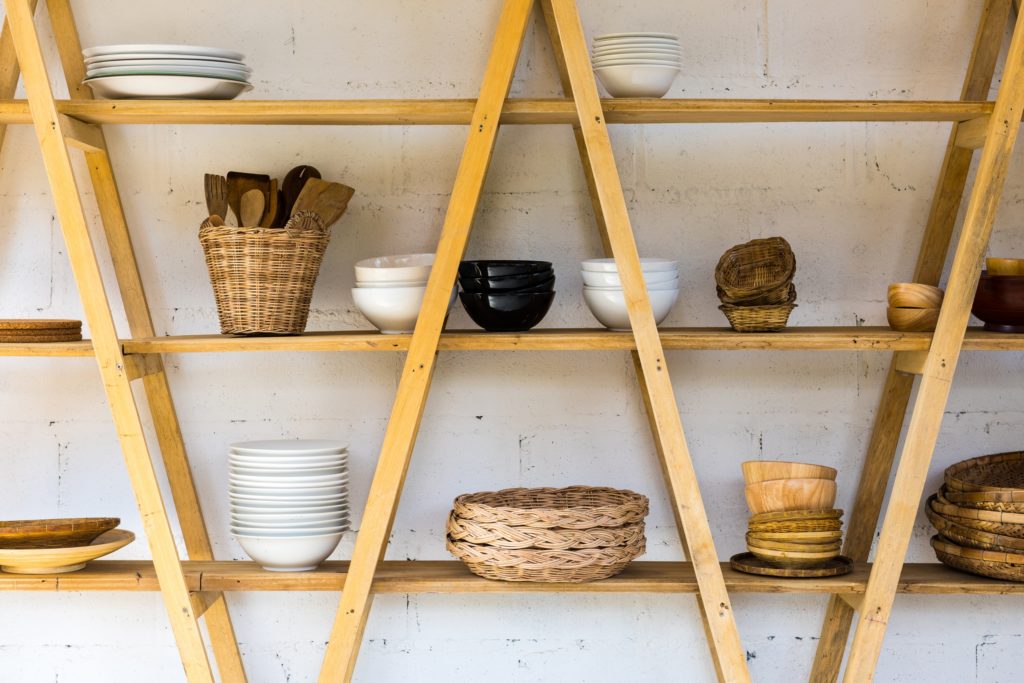
DIY Wood Kitchen Shelves
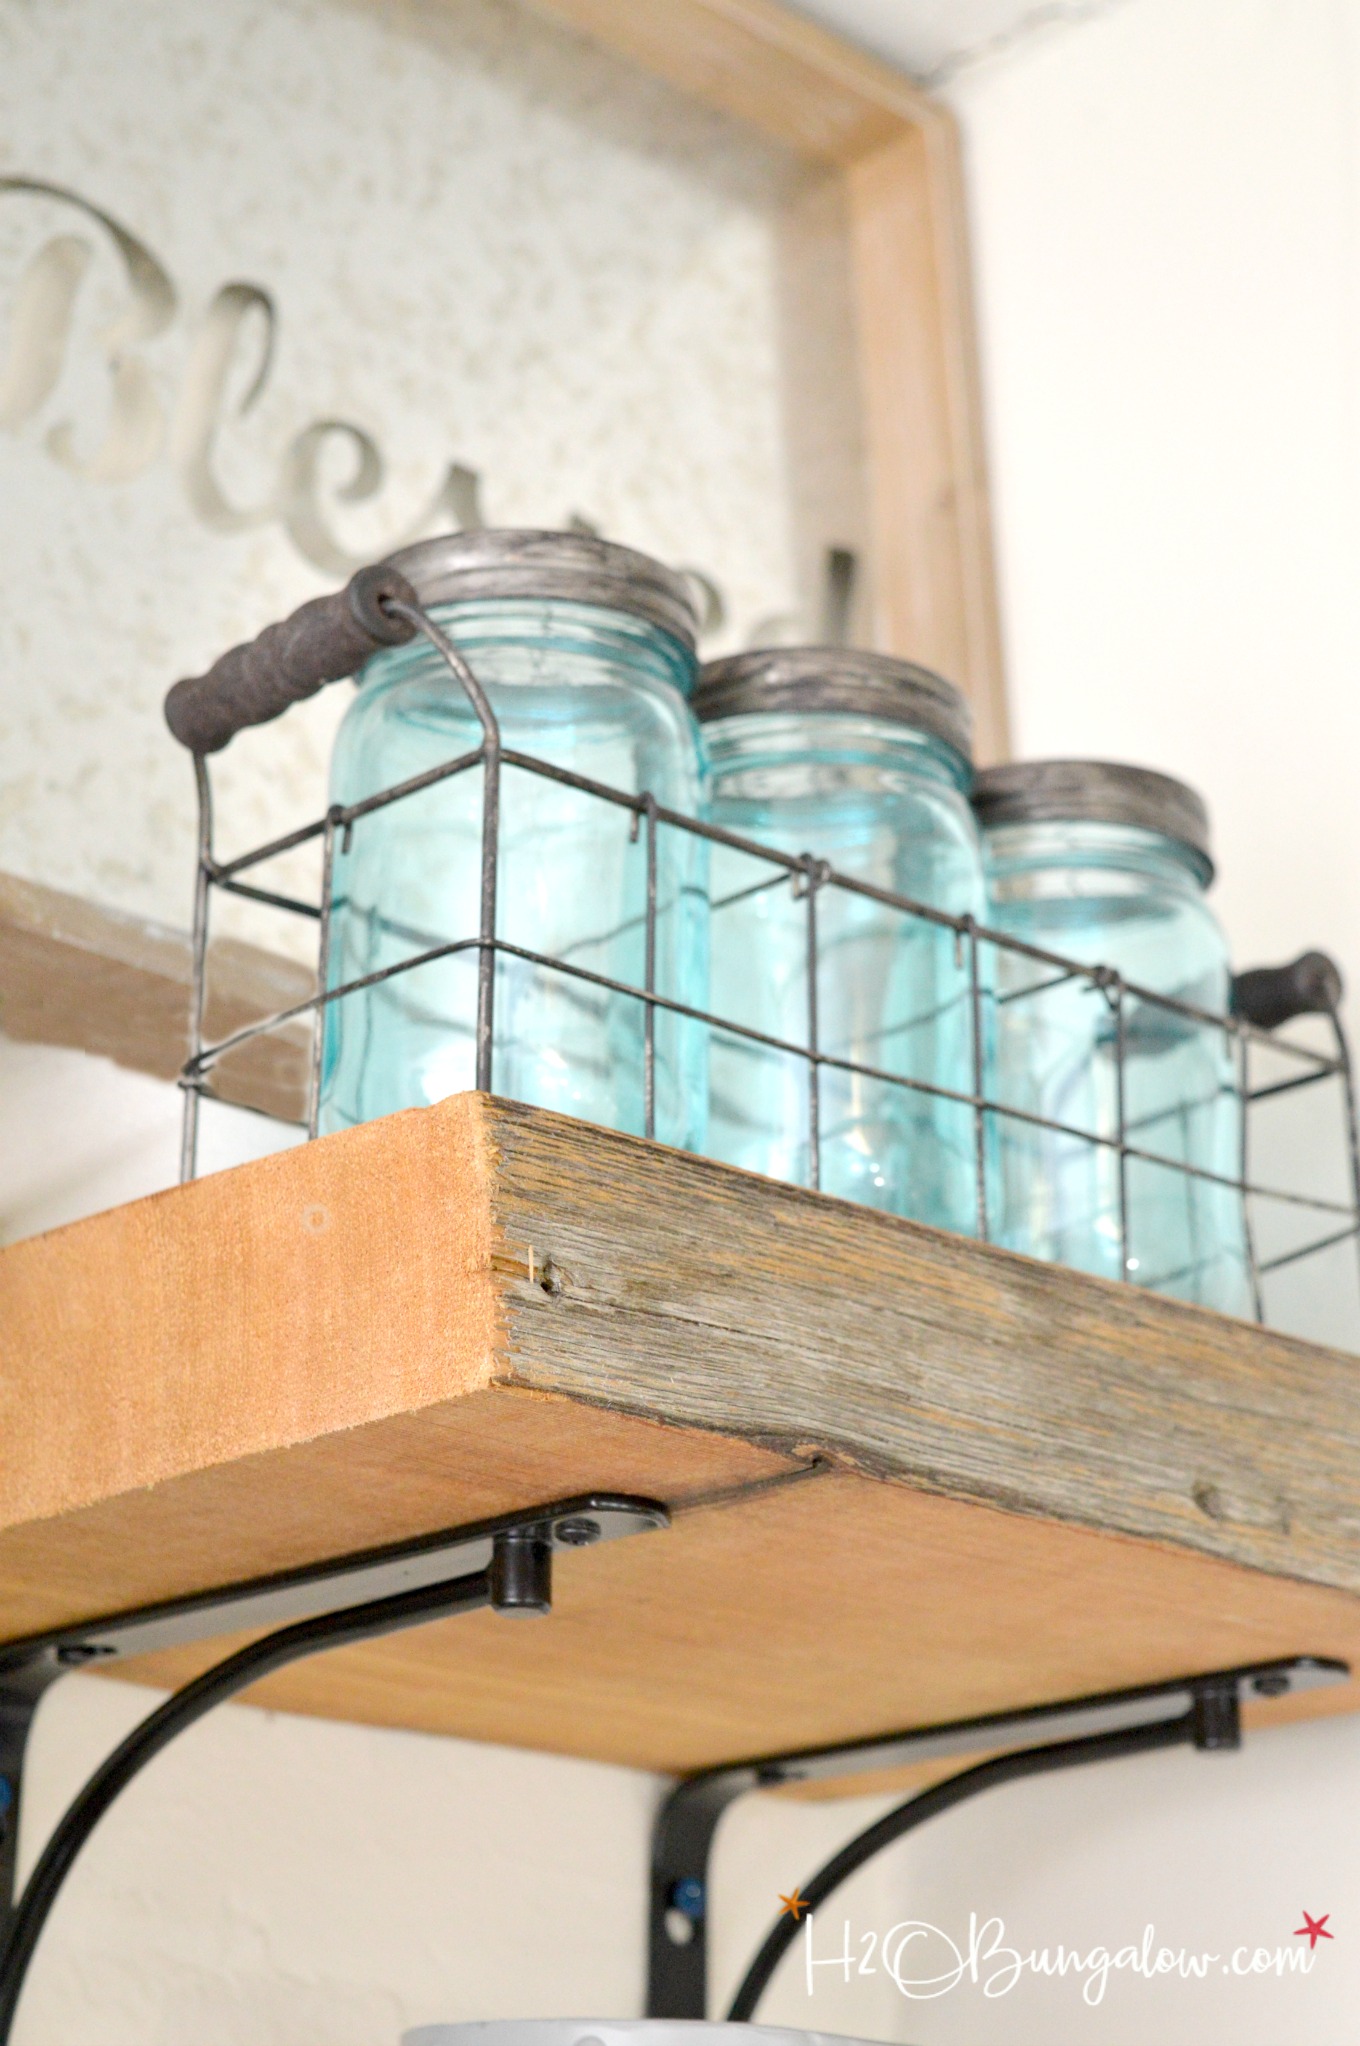
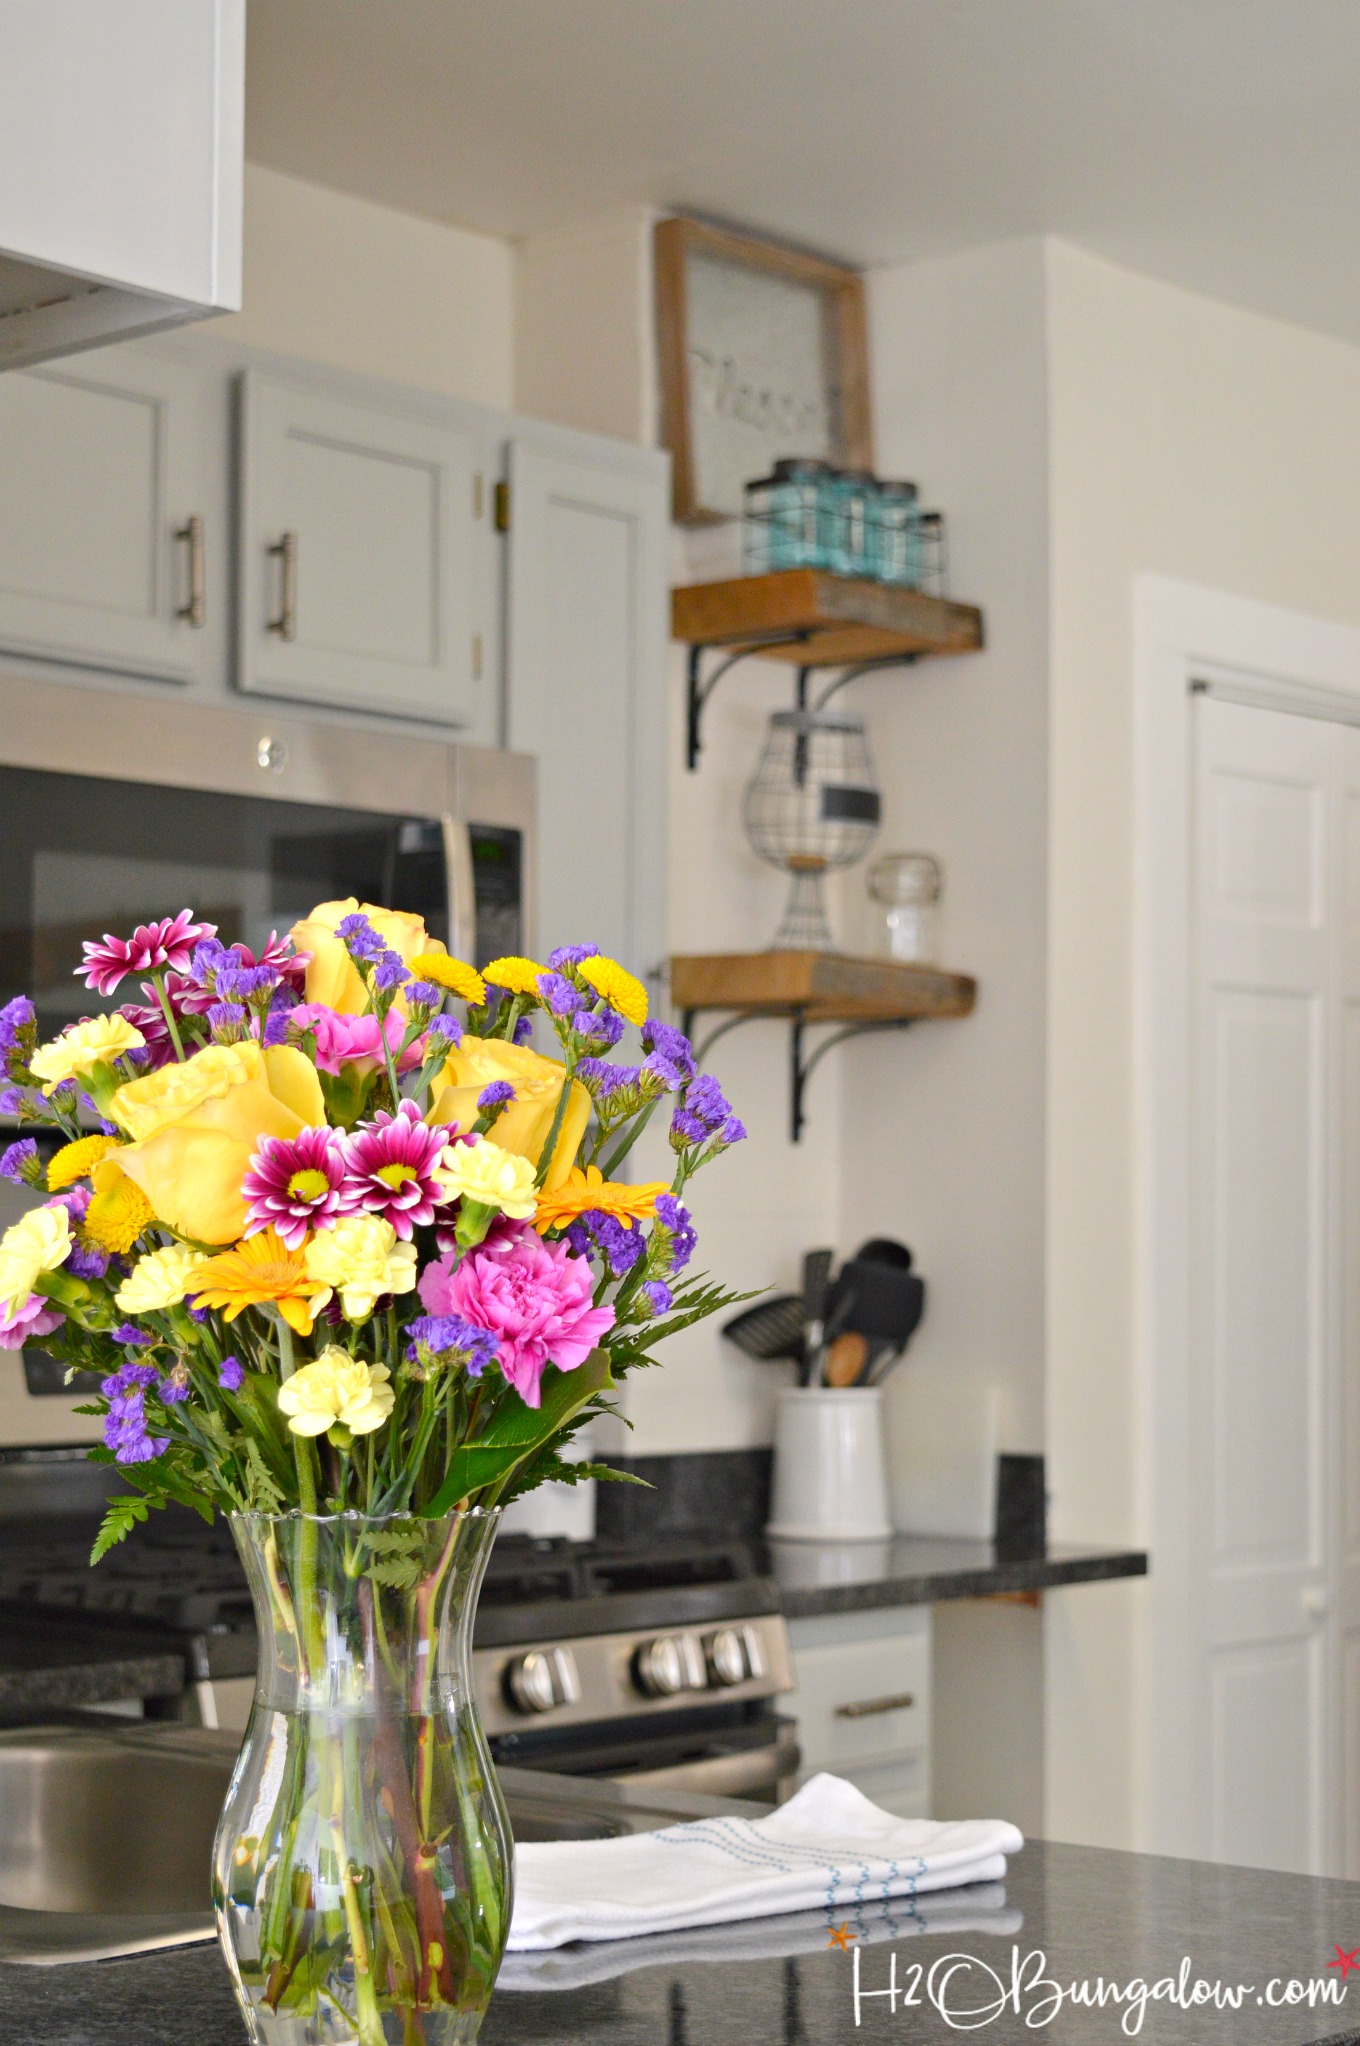
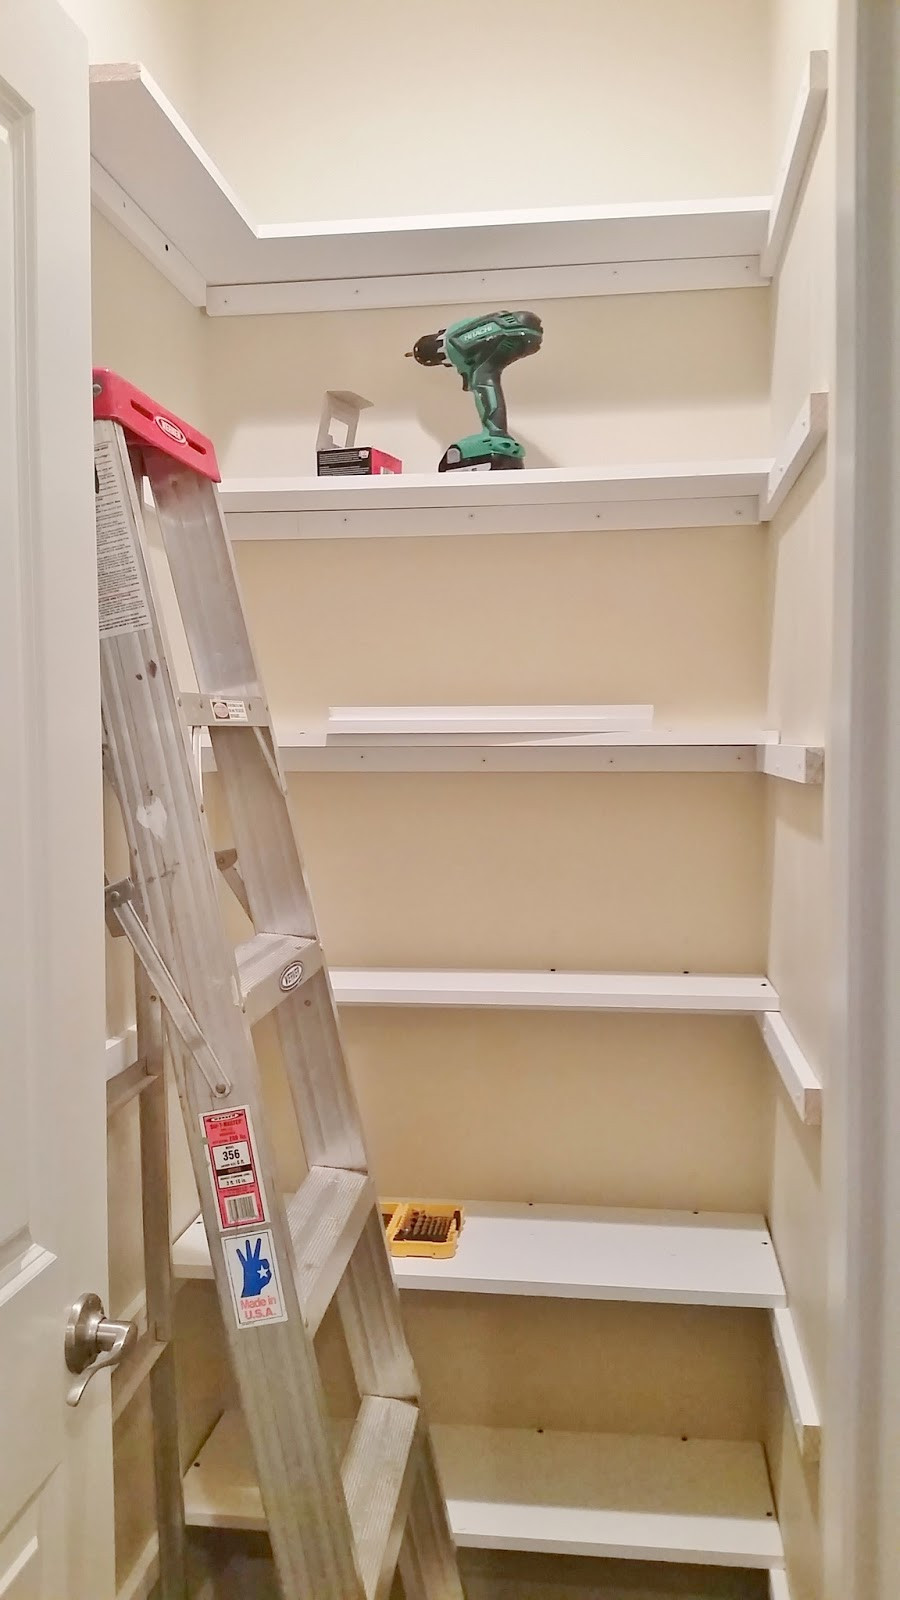
DIY Wood Kitchen Shelves


How to Brighten Up Your Kitchen with a Fluorescent Light Finish

A Guide to Transforming Your Kitchen into a Bright and Functional Space
 When it comes to kitchen design, lighting plays a crucial role in creating a welcoming and functional space. While there are various types of lighting options available, fluorescent lights are a popular choice for many homeowners. Not only do they provide bright and efficient lighting, but they also come in a variety of styles to suit different kitchen designs. In this article, we will focus on how to
finish yourself wood fluorescent kitchen light
and give your kitchen a bright and modern touch.
When it comes to kitchen design, lighting plays a crucial role in creating a welcoming and functional space. While there are various types of lighting options available, fluorescent lights are a popular choice for many homeowners. Not only do they provide bright and efficient lighting, but they also come in a variety of styles to suit different kitchen designs. In this article, we will focus on how to
finish yourself wood fluorescent kitchen light
and give your kitchen a bright and modern touch.
Why Choose a Fluorescent Light Finish?
 Before we dive into the process of finishing your kitchen light, let’s first understand why a fluorescent light is a great option for your kitchen. First and foremost, fluorescent lights are energy-efficient, meaning they consume less electricity compared to traditional incandescent bulbs. This makes them not only environmentally friendly but also cost-effective in the long run. Additionally, fluorescent lights produce bright and even lighting, which is ideal for tasks such as cooking and food preparation. They also come in a wide range of colors and designs, making it easy to find one that complements your kitchen’s overall design and color scheme.
The Process of Finishing Your Kitchen Light
 Now that you understand the benefits of a fluorescent light finish, let’s look at the steps involved in completing this project. The first step is to gather all the necessary materials, including sandpaper, wood stain, paintbrush, and clear coat sealer.
Related main keywords
to consider for your search include “
DIY kitchen light finish
” and “
fluorescent light makeover
.”
Once you have all your materials, start by sanding down your kitchen light to remove any existing finish or rough spots. This will create a smooth surface for the new finish to adhere to. Next, apply a coat of wood stain using a paintbrush, making sure to cover the entire surface evenly. Let it dry completely before applying a second coat if desired. Once the stain is dry, apply a clear coat sealer to protect the wood and give it a glossy finish.
Now that you understand the benefits of a fluorescent light finish, let’s look at the steps involved in completing this project. The first step is to gather all the necessary materials, including sandpaper, wood stain, paintbrush, and clear coat sealer.
Related main keywords
to consider for your search include “
DIY kitchen light finish
” and “
fluorescent light makeover
.”
Once you have all your materials, start by sanding down your kitchen light to remove any existing finish or rough spots. This will create a smooth surface for the new finish to adhere to. Next, apply a coat of wood stain using a paintbrush, making sure to cover the entire surface evenly. Let it dry completely before applying a second coat if desired. Once the stain is dry, apply a clear coat sealer to protect the wood and give it a glossy finish.
Additional Tips for a Successful Kitchen Light Finish
 To ensure a successful finish, here are a few additional tips to keep in mind. First, make sure to choose a wood stain color that complements your kitchen’s color scheme. This will help tie the light into the overall design of your kitchen. Additionally, consider adding a dimmer switch to your fluorescent light to adjust the brightness according to your needs. This will also help create a cozy and intimate atmosphere in the kitchen.
In conclusion, finishing your kitchen light with a fluorescent light is a simple and affordable way to transform your kitchen into a bright and functional space. By following these steps and tips, you can achieve a professional-looking finish that will enhance the overall design of your kitchen. So why wait?
Start your DIY fluorescent light finish project today
and enjoy a well-lit and beautiful kitchen!
To ensure a successful finish, here are a few additional tips to keep in mind. First, make sure to choose a wood stain color that complements your kitchen’s color scheme. This will help tie the light into the overall design of your kitchen. Additionally, consider adding a dimmer switch to your fluorescent light to adjust the brightness according to your needs. This will also help create a cozy and intimate atmosphere in the kitchen.
In conclusion, finishing your kitchen light with a fluorescent light is a simple and affordable way to transform your kitchen into a bright and functional space. By following these steps and tips, you can achieve a professional-looking finish that will enhance the overall design of your kitchen. So why wait?
Start your DIY fluorescent light finish project today
and enjoy a well-lit and beautiful kitchen!