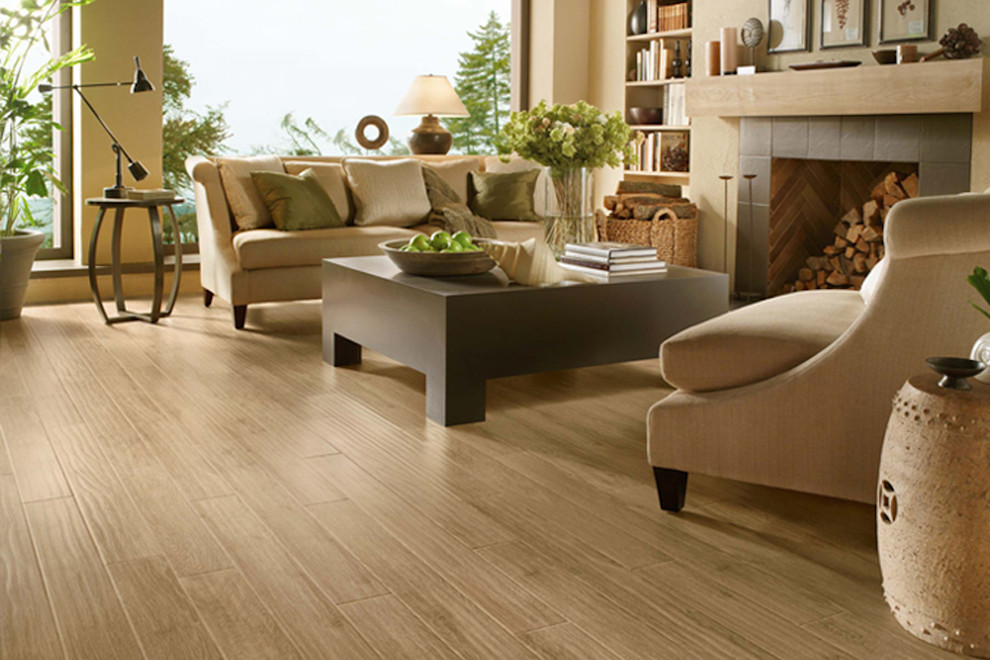
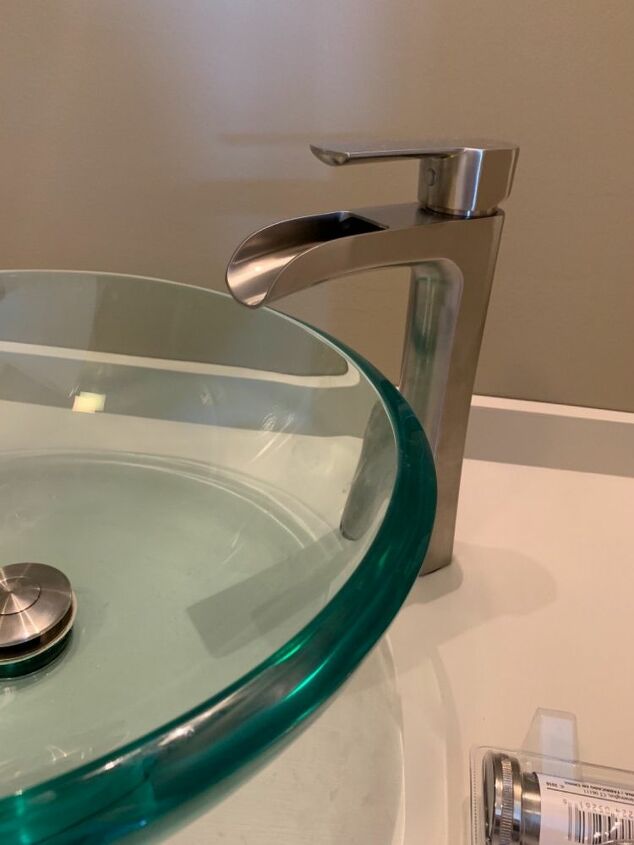
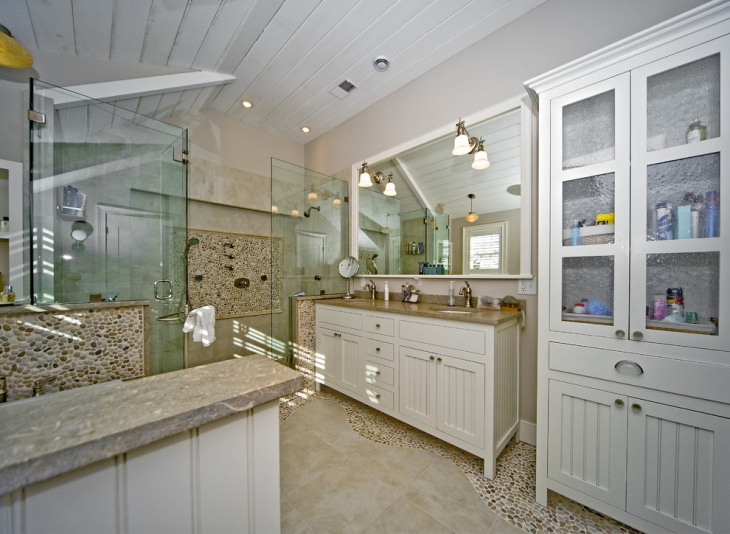
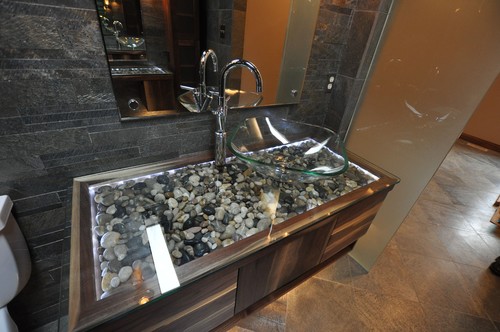
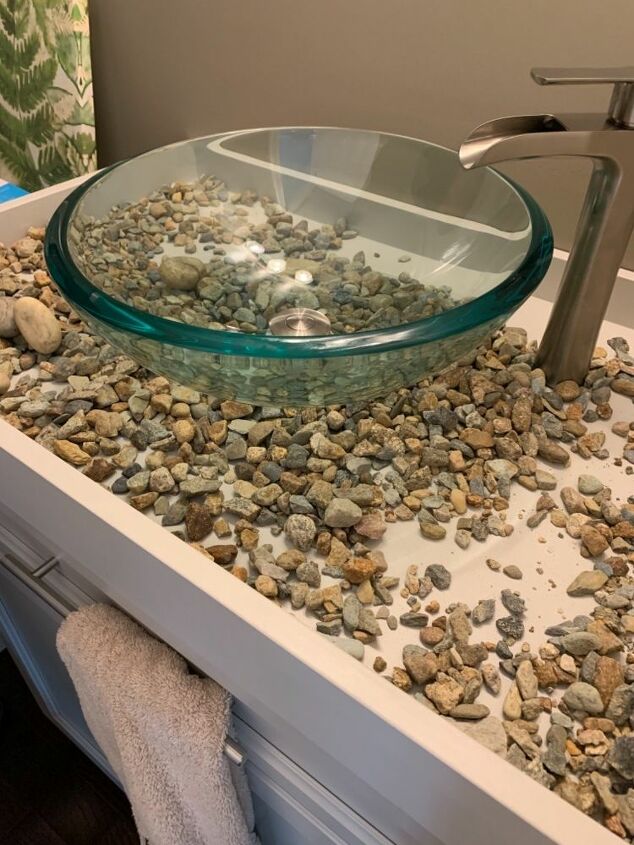
Are you looking to add a touch of nature to your bathroom? A river rock bathroom vanity top is the perfect way to achieve a rustic, yet elegant, look. Not to mention, creating your own DIY river rock vanity top is a fun and affordable project that can be completed in just a few simple steps. Let's dive in!DIY River Rock Bathroom Vanity Top Tutorial

DIY River Rock Bathroom Vanity Top Tutorial


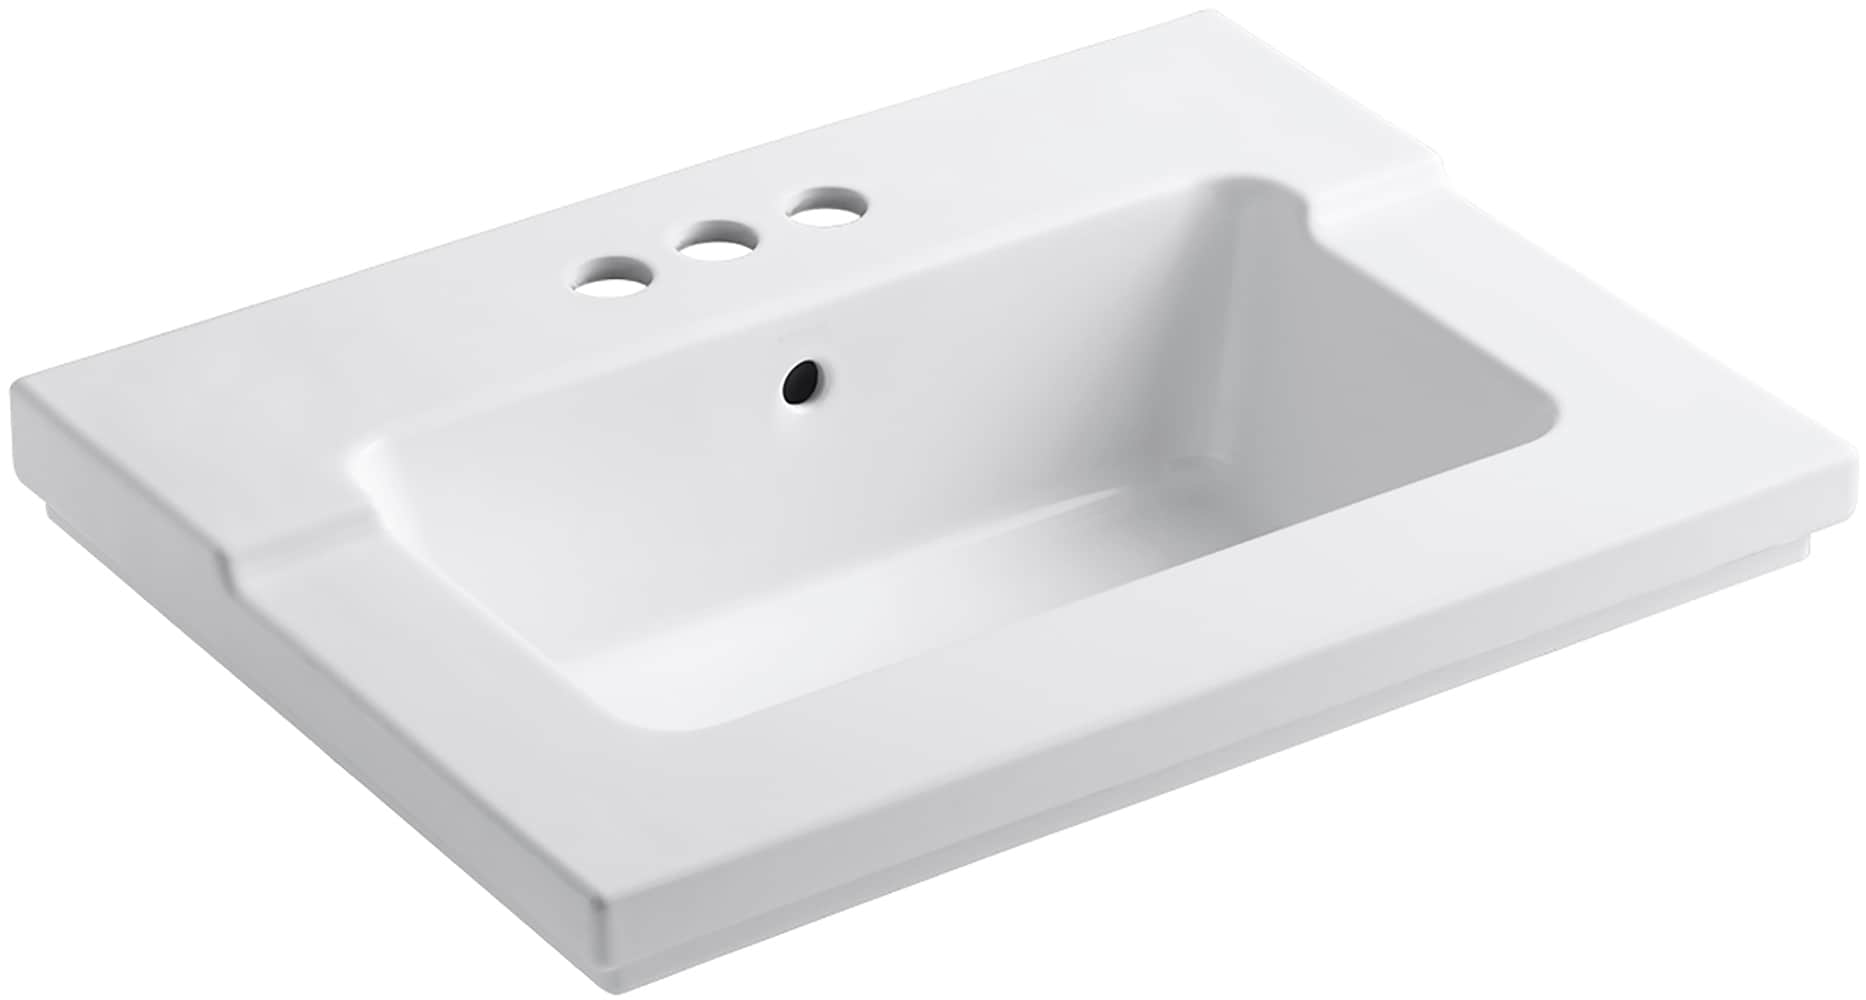
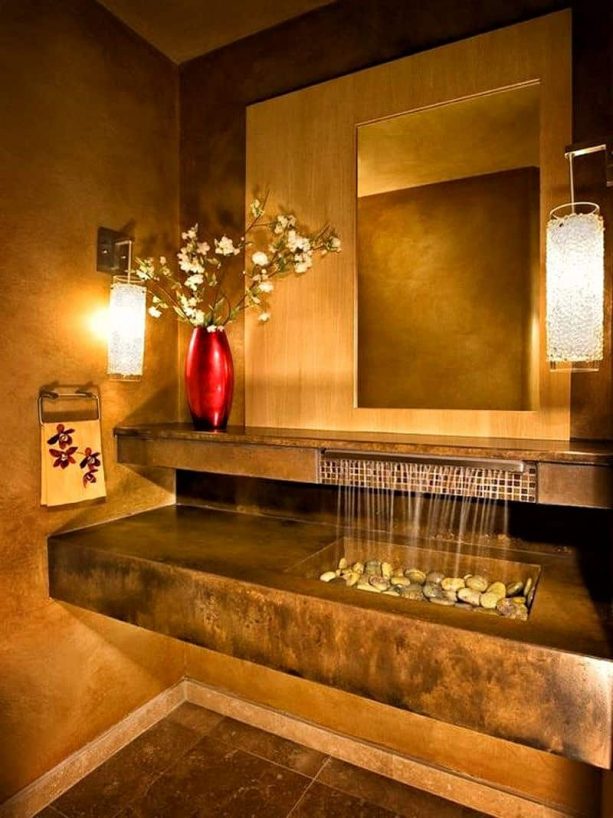
A river rock bathroom vanity top is a unique and eye-catching addition to any bathroom. The first step in creating your own is to gather your materials. You will need river rocks, a vanity top, mortar, and grout. You can choose to use natural river rocks or purchase pre-polished ones for a smoother finish.How to Create a Stunning River Rock Bathroom Vanity Top


How to Create a Stunning River Rock Bathroom Vanity Top


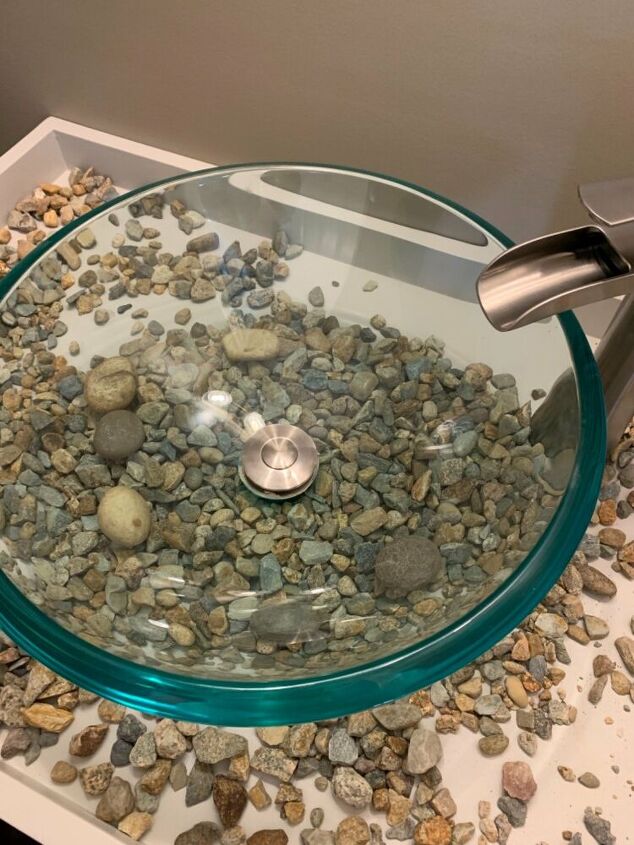
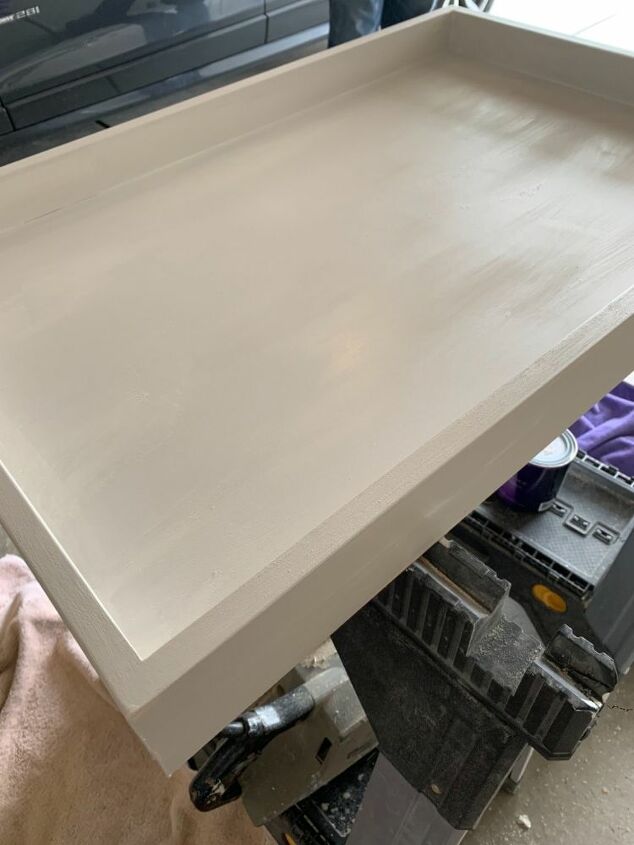
Start by laying out your river rocks on the vanity top in the pattern you desire. Once you have your design set, mix your mortar according to the package instructions. Apply a thin layer of mortar onto the vanity top, covering an area slightly larger than the size of your first rock. Gently press the rock into the mortar and hold for a few seconds. Continue this process until all of your rocks are in place. After the mortar has dried, it's time to grout. Mix your grout according to the package instructions and carefully spread it over the rocks, making sure to fill in all of the gaps. Use a damp sponge to wipe away any excess grout and smooth out the surface. Let the grout dry completely before moving on to the next step.Step-by-Step Guide to Making a River Rock Bathroom Vanity Top


Step-by-Step Guide to Making a River Rock Bathroom Vanity Top

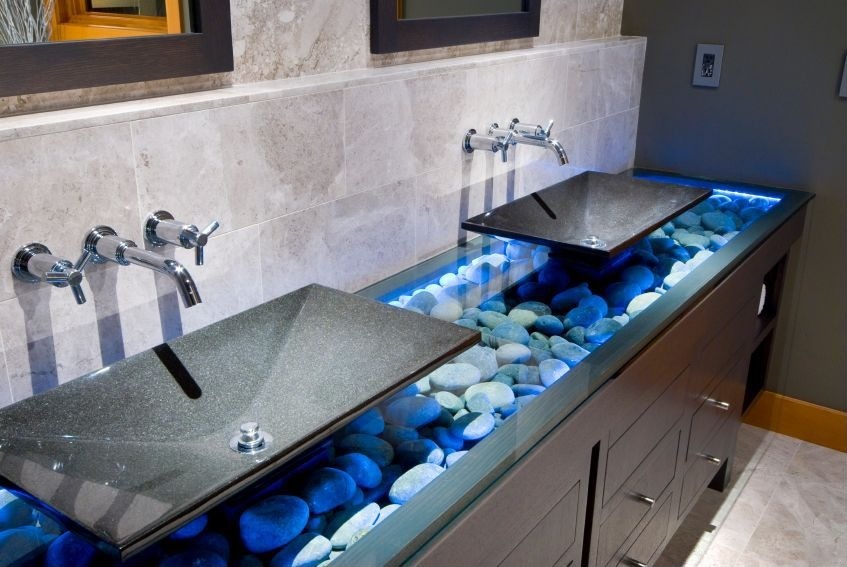
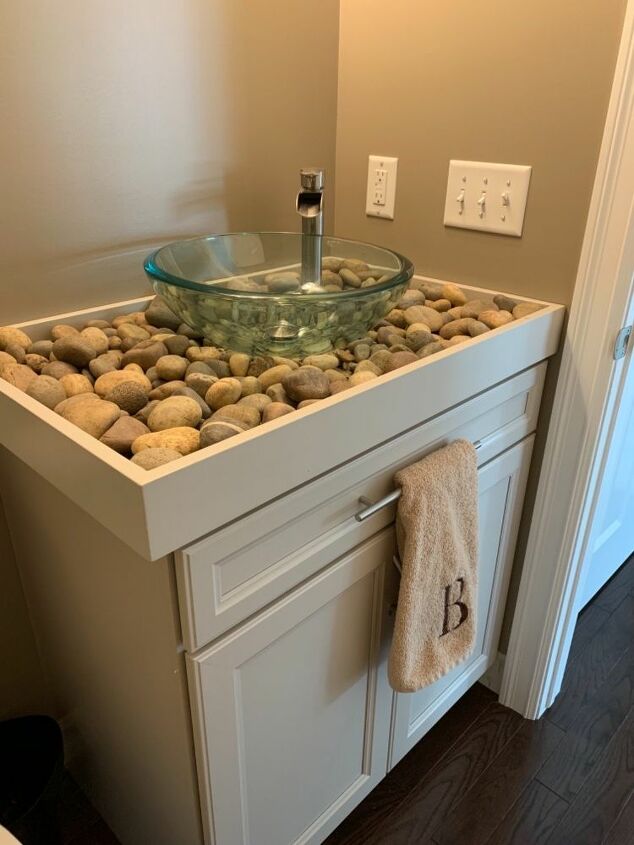
Once your grout is dry, you can add a sealant to protect your river rock vanity top from water and stains. This will also enhance the natural colors of the rocks. You can choose a glossy or matte finish, depending on your preference. Finally, install your new vanity top onto your bathroom vanity and admire your stunning creation. The natural texture and colors of the river rocks will add a unique and earthy element to your bathroom.Transform Your Bathroom with a DIY River Rock Vanity Top


Transform Your Bathroom with a DIY River Rock Vanity Top


Not only is a river rock bathroom vanity top a beautiful addition to your bathroom, but it is also a budget-friendly option. You can often find river rocks at local home improvement stores or even collect them from a nearby river or creek. And with a little bit of effort, you can create a custom vanity top that will add value to your home.Easy and Affordable DIY River Rock Bathroom Vanity Top

Easy and Affordable DIY River Rock Bathroom Vanity Top


A river rock bathroom vanity top is a perfect way to bring the beauty and tranquility of nature into your bathroom. The natural variations in color and texture of the rocks will add a unique touch to your space. You can even incorporate other natural elements, such as wood or plants, to create a cohesive and organic look.Get the Natural Look with a River Rock Bathroom Vanity Top


Get the Natural Look with a River Rock Bathroom Vanity Top
When creating your own river rock vanity top, there are a few tips and tricks to keep in mind. First, make sure to thoroughly clean and dry your rocks before starting the project. This will ensure that they adhere to the mortar properly. Also, be sure to choose a durable and waterproof sealant to protect your vanity top. If you want a more polished look, you can use a tile saw to cut the rocks into smaller, more uniform pieces. This will also make it easier to create intricate designs on your vanity top.DIY River Rock Bathroom Vanity Top: Tips and Tricks

DIY River Rock Bathroom Vanity Top: Tips and Tricks
Ready to give your bathroom a makeover? A river rock vanity top is a simple and effective way to add a touch of natural beauty to your space. Not only will it make a statement, but it will also add value to your home and provide a peaceful and serene atmosphere. And don't limit yourself to just the vanity top. You can also use river rocks to create a backsplash or accent wall for a cohesive and natural look in your bathroom.Upgrade Your Bathroom with a DIY River Rock Vanity Top


Upgrade Your Bathroom with a DIY River Rock Vanity Top


:max_bytes(150000):strip_icc()/build-something-diy-vanity-594402125f9b58d58ae21158.jpg)
With a river rock bathroom vanity top, you can transform your bathroom into a rustic oasis. The earthy tones and textures of the rocks will create a calming and inviting atmosphere. Add some candles, a wooden mirror frame, and some natural elements like bamboo or rattan to complete the look.Create a Rustic Oasis with a DIY River Rock Bathroom Vanity Top

Create a Rustic Oasis with a DIY River Rock Bathroom Vanity Top

There are endless possibilities when it comes to incorporating river rocks into your bathroom vanity top. You can choose to cover the entire surface with rocks for a bold statement, or create a border or mosaic design for a more subtle look. You can even mix and match different sizes and colors of rocks for a unique and personalized touch. In conclusion, a DIY river rock bathroom vanity top is a simple and budget-friendly way to elevate your bathroom design. With a little bit of creativity and effort, you can create a stunning and natural focal point in your space. So gather your materials and get ready to transform your bathroom into a peaceful and serene oasis.How to Incorporate River Rock into Your Bathroom Vanity Top


How to Incorporate River Rock into Your Bathroom Vanity Top


Incorporating Natural Elements into Your Bathroom Design

Transform Your Vanity with a River Rock Top
 When it comes to designing your bathroom, incorporating natural elements can add a unique and refreshing touch to the space. One way to achieve this is by using a river rock vanity top. Not only does it bring a touch of nature indoors, but it also adds a rustic and organic feel to your bathroom. In this article, we will guide you through the process of creating your own DIY river rock bathroom vanity top.
Why Choose a River Rock Vanity Top?
River rocks are smooth and rounded stones that are often found in riverbeds and can add a touch of natural beauty to any space. Using them as a vanity top not only adds a unique and eye-catching element to your bathroom, but it is also a sustainable and eco-friendly option. These rocks are naturally durable and can withstand daily wear and tear, making them a practical choice for a high-traffic area like the bathroom.
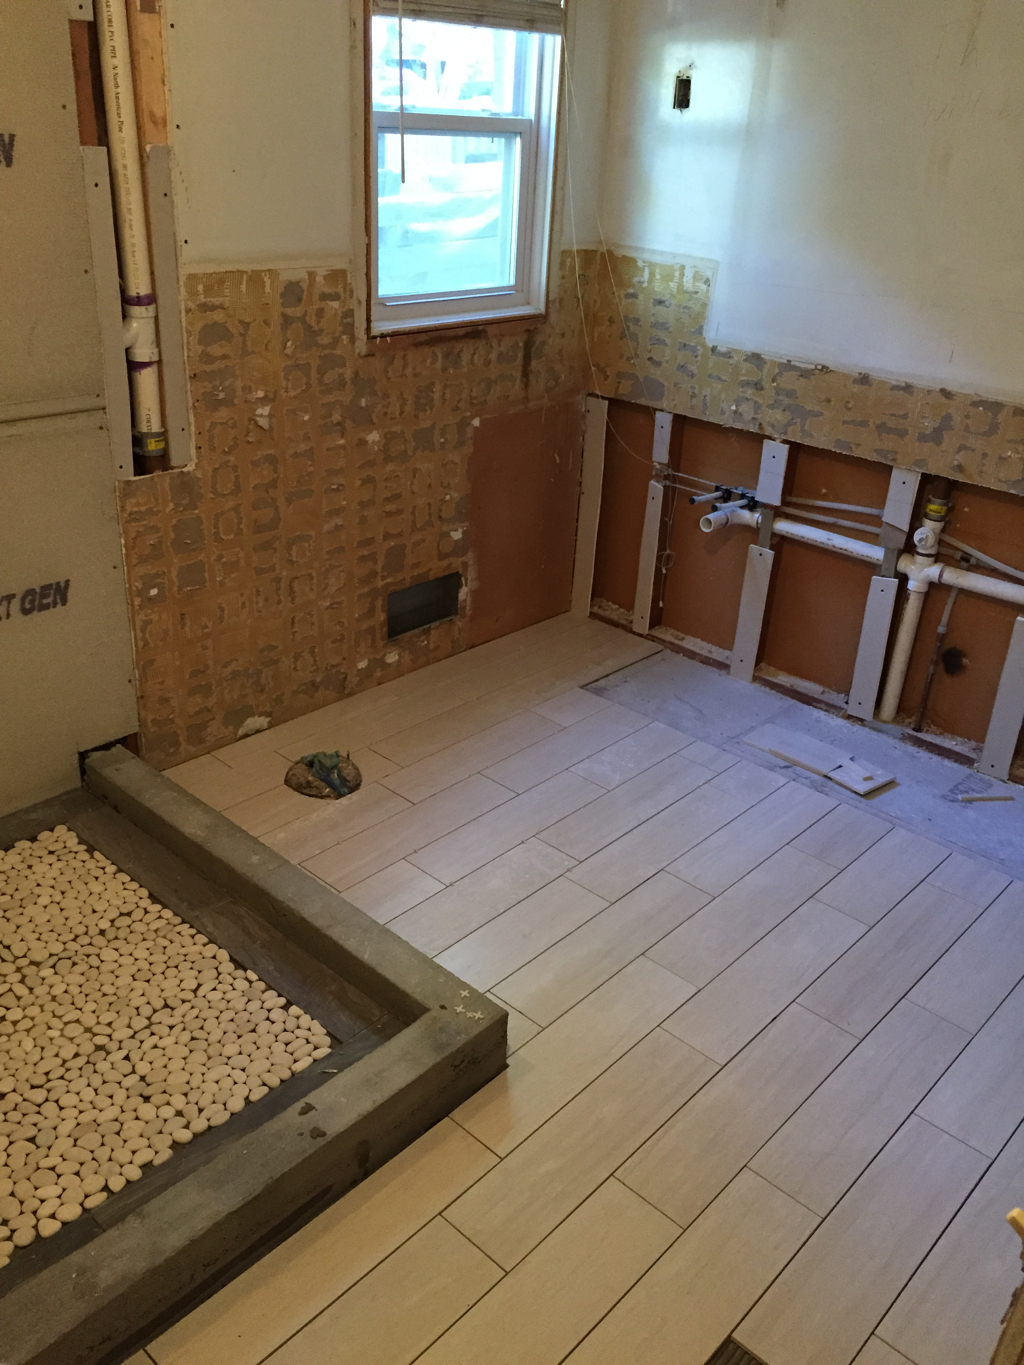
Gather Your Materials
To create your own river rock vanity top, you will need the following materials:
When it comes to designing your bathroom, incorporating natural elements can add a unique and refreshing touch to the space. One way to achieve this is by using a river rock vanity top. Not only does it bring a touch of nature indoors, but it also adds a rustic and organic feel to your bathroom. In this article, we will guide you through the process of creating your own DIY river rock bathroom vanity top.
Why Choose a River Rock Vanity Top?
River rocks are smooth and rounded stones that are often found in riverbeds and can add a touch of natural beauty to any space. Using them as a vanity top not only adds a unique and eye-catching element to your bathroom, but it is also a sustainable and eco-friendly option. These rocks are naturally durable and can withstand daily wear and tear, making them a practical choice for a high-traffic area like the bathroom.
Gather Your Materials
To create your own river rock vanity top, you will need the following materials:
- Wooden vanity top
- Large river rocks
- Epoxy adhesive
- Grout
- Waterproof sealant
- Tile saw
- Putty knife
- Sponge