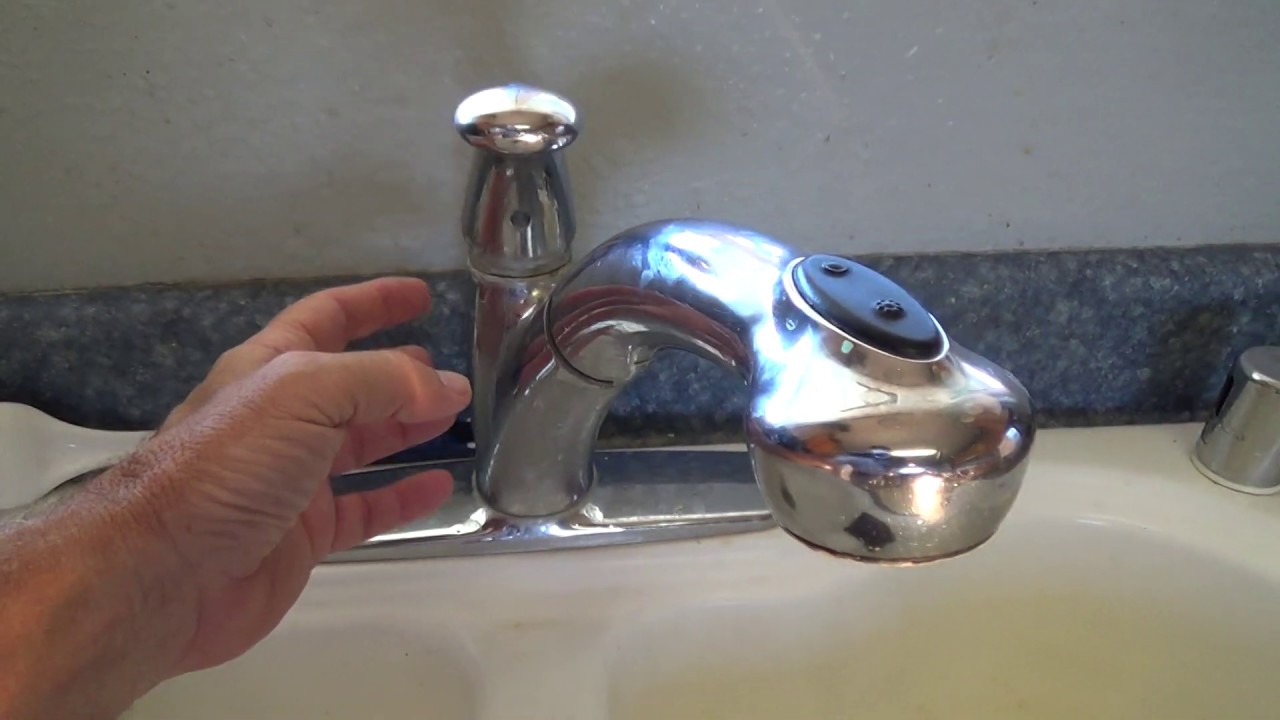
Removing a kitchen sink faucet may seem like a daunting task, but with the right tools and techniques, it can be done easily and efficiently. Whether you're looking to upgrade your faucet or simply need to replace a broken one, follow these steps to remove your kitchen sink faucet. First, gather your tools. You will need adjustable pliers, an adjustable wrench, a basin wrench, and a screwdriver. It's also a good idea to have a bucket or container handy to catch any water that may spill out during the process. Next, turn off the water supply to your kitchen sink. This is typically done by turning off the water valves located under the sink. If you can't find the valves, you may need to turn off the main water supply to your house. Once the water is turned off, disconnect the supply lines from the faucet. Use your adjustable pliers to loosen the nuts that connect the supply lines to the faucet. Then, use your adjustable wrench to remove the nuts completely. Next, remove the mounting nuts that hold the faucet in place. These are usually located underneath the sink and can be removed with a basin wrench. If the nuts are too tight, try applying some lubricant to help loosen them. Once the mounting nuts are removed, you can lift the faucet out of the sink. If the faucet is stuck, you may need to gently twist and wiggle it to loosen it from the sink. With the faucet removed, you can now clean the area and prepare for installation of your new faucet. Use a cleaning solution to remove any buildup or debris around the sink area.How to Remove a Kitchen Sink Faucet


How to Remove a Kitchen Sink Faucet


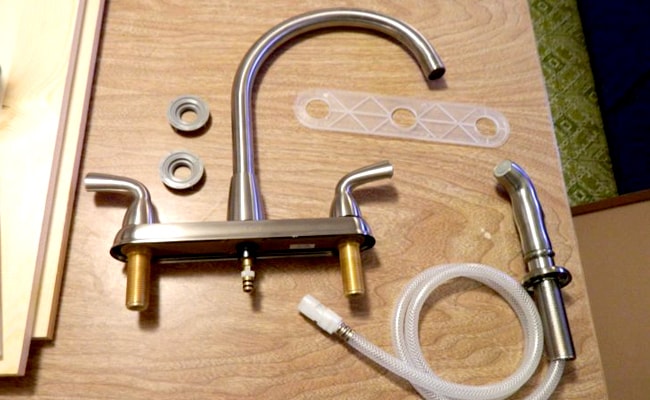
If you're replacing your kitchen sink faucet with a new one, the process is similar to removing the old faucet. Follow these steps to replace your kitchen sink faucet. First, choose your new faucet. There are many different styles and types of kitchen sink faucets available, so make sure to select one that fits your needs and preferences. Next, prepare the area for installation. Clean the sink area and remove any debris from the old faucet. You may also want to apply some plumber's putty around the base of the new faucet to help create a watertight seal. Then, position the new faucet in the sink and secure it with the mounting nuts. Use a basin wrench to tighten the nuts and make sure the faucet is securely in place. Next, attach the supply lines to the faucet. Use your adjustable pliers to tighten the nuts and make sure they are securely connected. Finally, turn on the water supply and check for any leaks. If everything looks good, you can now enjoy your new kitchen sink faucet!How to Replace a Kitchen Sink Faucet


How to Replace a Kitchen Sink Faucet


If you're removing and replacing a kitchen sink faucet, the process is a combination of both steps outlined above. Follow these steps to remove and replace your kitchen sink faucet in one go. First, turn off the water supply and disconnect the supply lines from the old faucet as outlined in the steps above. Then, remove the mounting nuts and lift the old faucet out of the sink. Next, follow the steps outlined in the "Replacing a Kitchen Sink Faucet" section above to position and secure your new faucet in place. After the new faucet is installed, reconnect the supply lines and turn on the water supply. Check for any leaks and make any adjustments if necessary. With the new faucet in place, you can now enjoy a fully functional and updated kitchen sink!Removing and Replacing a Kitchen Sink Faucet


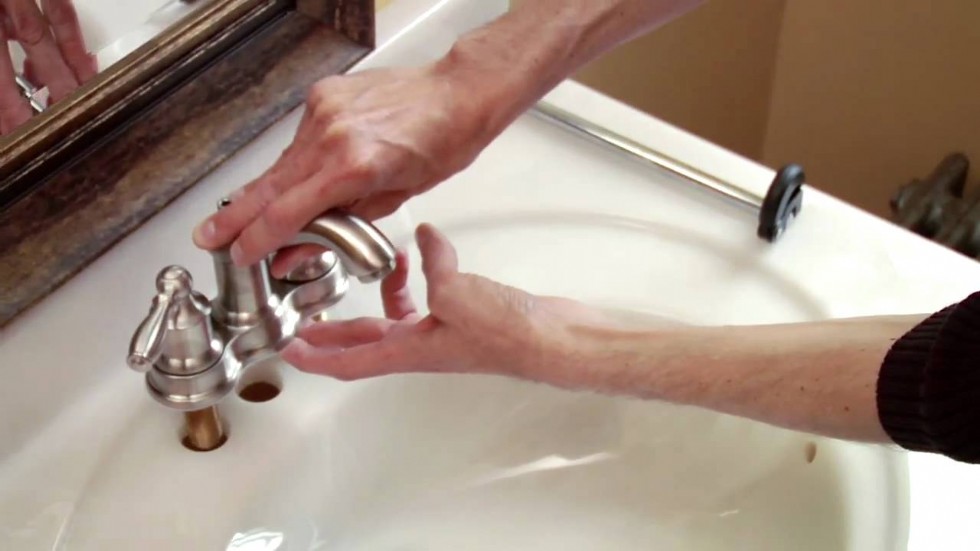
Removing a Kitchen Sink Faucet


Sometimes, a kitchen sink faucet can become stuck and difficult to remove. If this is the case, don't worry - there are a few steps you can take to help loosen the faucet and safely remove it. First, apply lubricant to the mounting nuts and let it sit for a few minutes to help loosen them. Then, use a basin wrench to gently twist and loosen the nuts. If the faucet is still stuck, you may need to use a hammer and chisel to gently tap the mounting nuts and help loosen them. Just be careful not to damage the sink or faucet in the process. Once the faucet is loosened, you can follow the steps outlined above to remove it and install a new one.Removing a Stuck Kitchen Sink Faucet


Replacing a Kitchen Sink Faucet


If you're replacing a stuck kitchen sink faucet, the process is similar to removing a stuck faucet, but with the added step of installing a new one. Follow the steps outlined in the "Removing a Stuck Kitchen Sink Faucet" section above to help loosen and remove the old faucet. Then, follow the steps outlined in the "Replacing a Kitchen Sink Faucet" section above to install a new faucet in its place.Replacing a Stuck Kitchen Sink Faucet


Removing and Replacing a Kitchen Sink Faucet


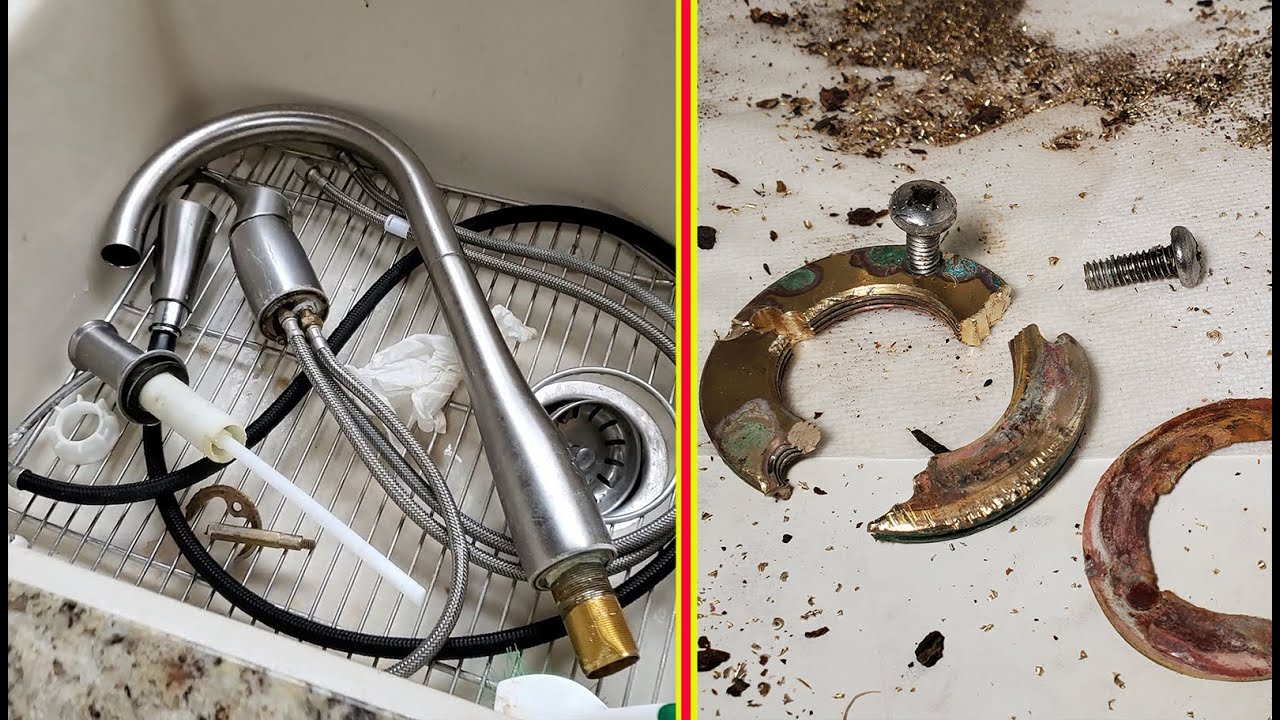
If your kitchen sink faucet has a sprayer, the process of removing it is slightly different. Follow these steps to remove a kitchen faucet with sprayer. First, turn off the water supply and disconnect the supply lines as outlined above. Then, remove the mounting nuts that hold the faucet in place. Next, remove the sprayer hose from under the sink. This is typically done by unscrewing the connection where the hose meets the faucet. You may need to use a pair of adjustable pliers to help loosen the connection. Once the sprayer hose is removed, you can lift the faucet out of the sink and clean the area to prepare for installation of a new faucet. Follow the steps outlined in the "Replacing a Kitchen Sink Faucet" section above to install a new faucet with sprayer.How to Remove a Kitchen Faucet with Sprayer


Removing a Stuck Kitchen Sink Faucet


How to Safely Remove a Kitchen Sink Faucet: A Step-by-Step Guide
:no_upscale()/cdn.vox-cdn.com/uploads/chorus_asset/file/19495086/drain_0.jpg)
Proper Tools and Preparation
 When it comes to replacing or repairing your kitchen sink faucet, the first step is to make sure you have all the necessary tools and materials. You will need a basin wrench, adjustable wrench, plumber's putty, and a new faucet. It is important to turn off the water supply to your sink before beginning any work. This can usually be done by locating the shut-off valves under your sink and turning them to the off position. Once the water supply is turned off, turn on the faucet to release any remaining water pressure. This will prevent any potential accidents or flooding during the removal process.
Removing the Old Faucet
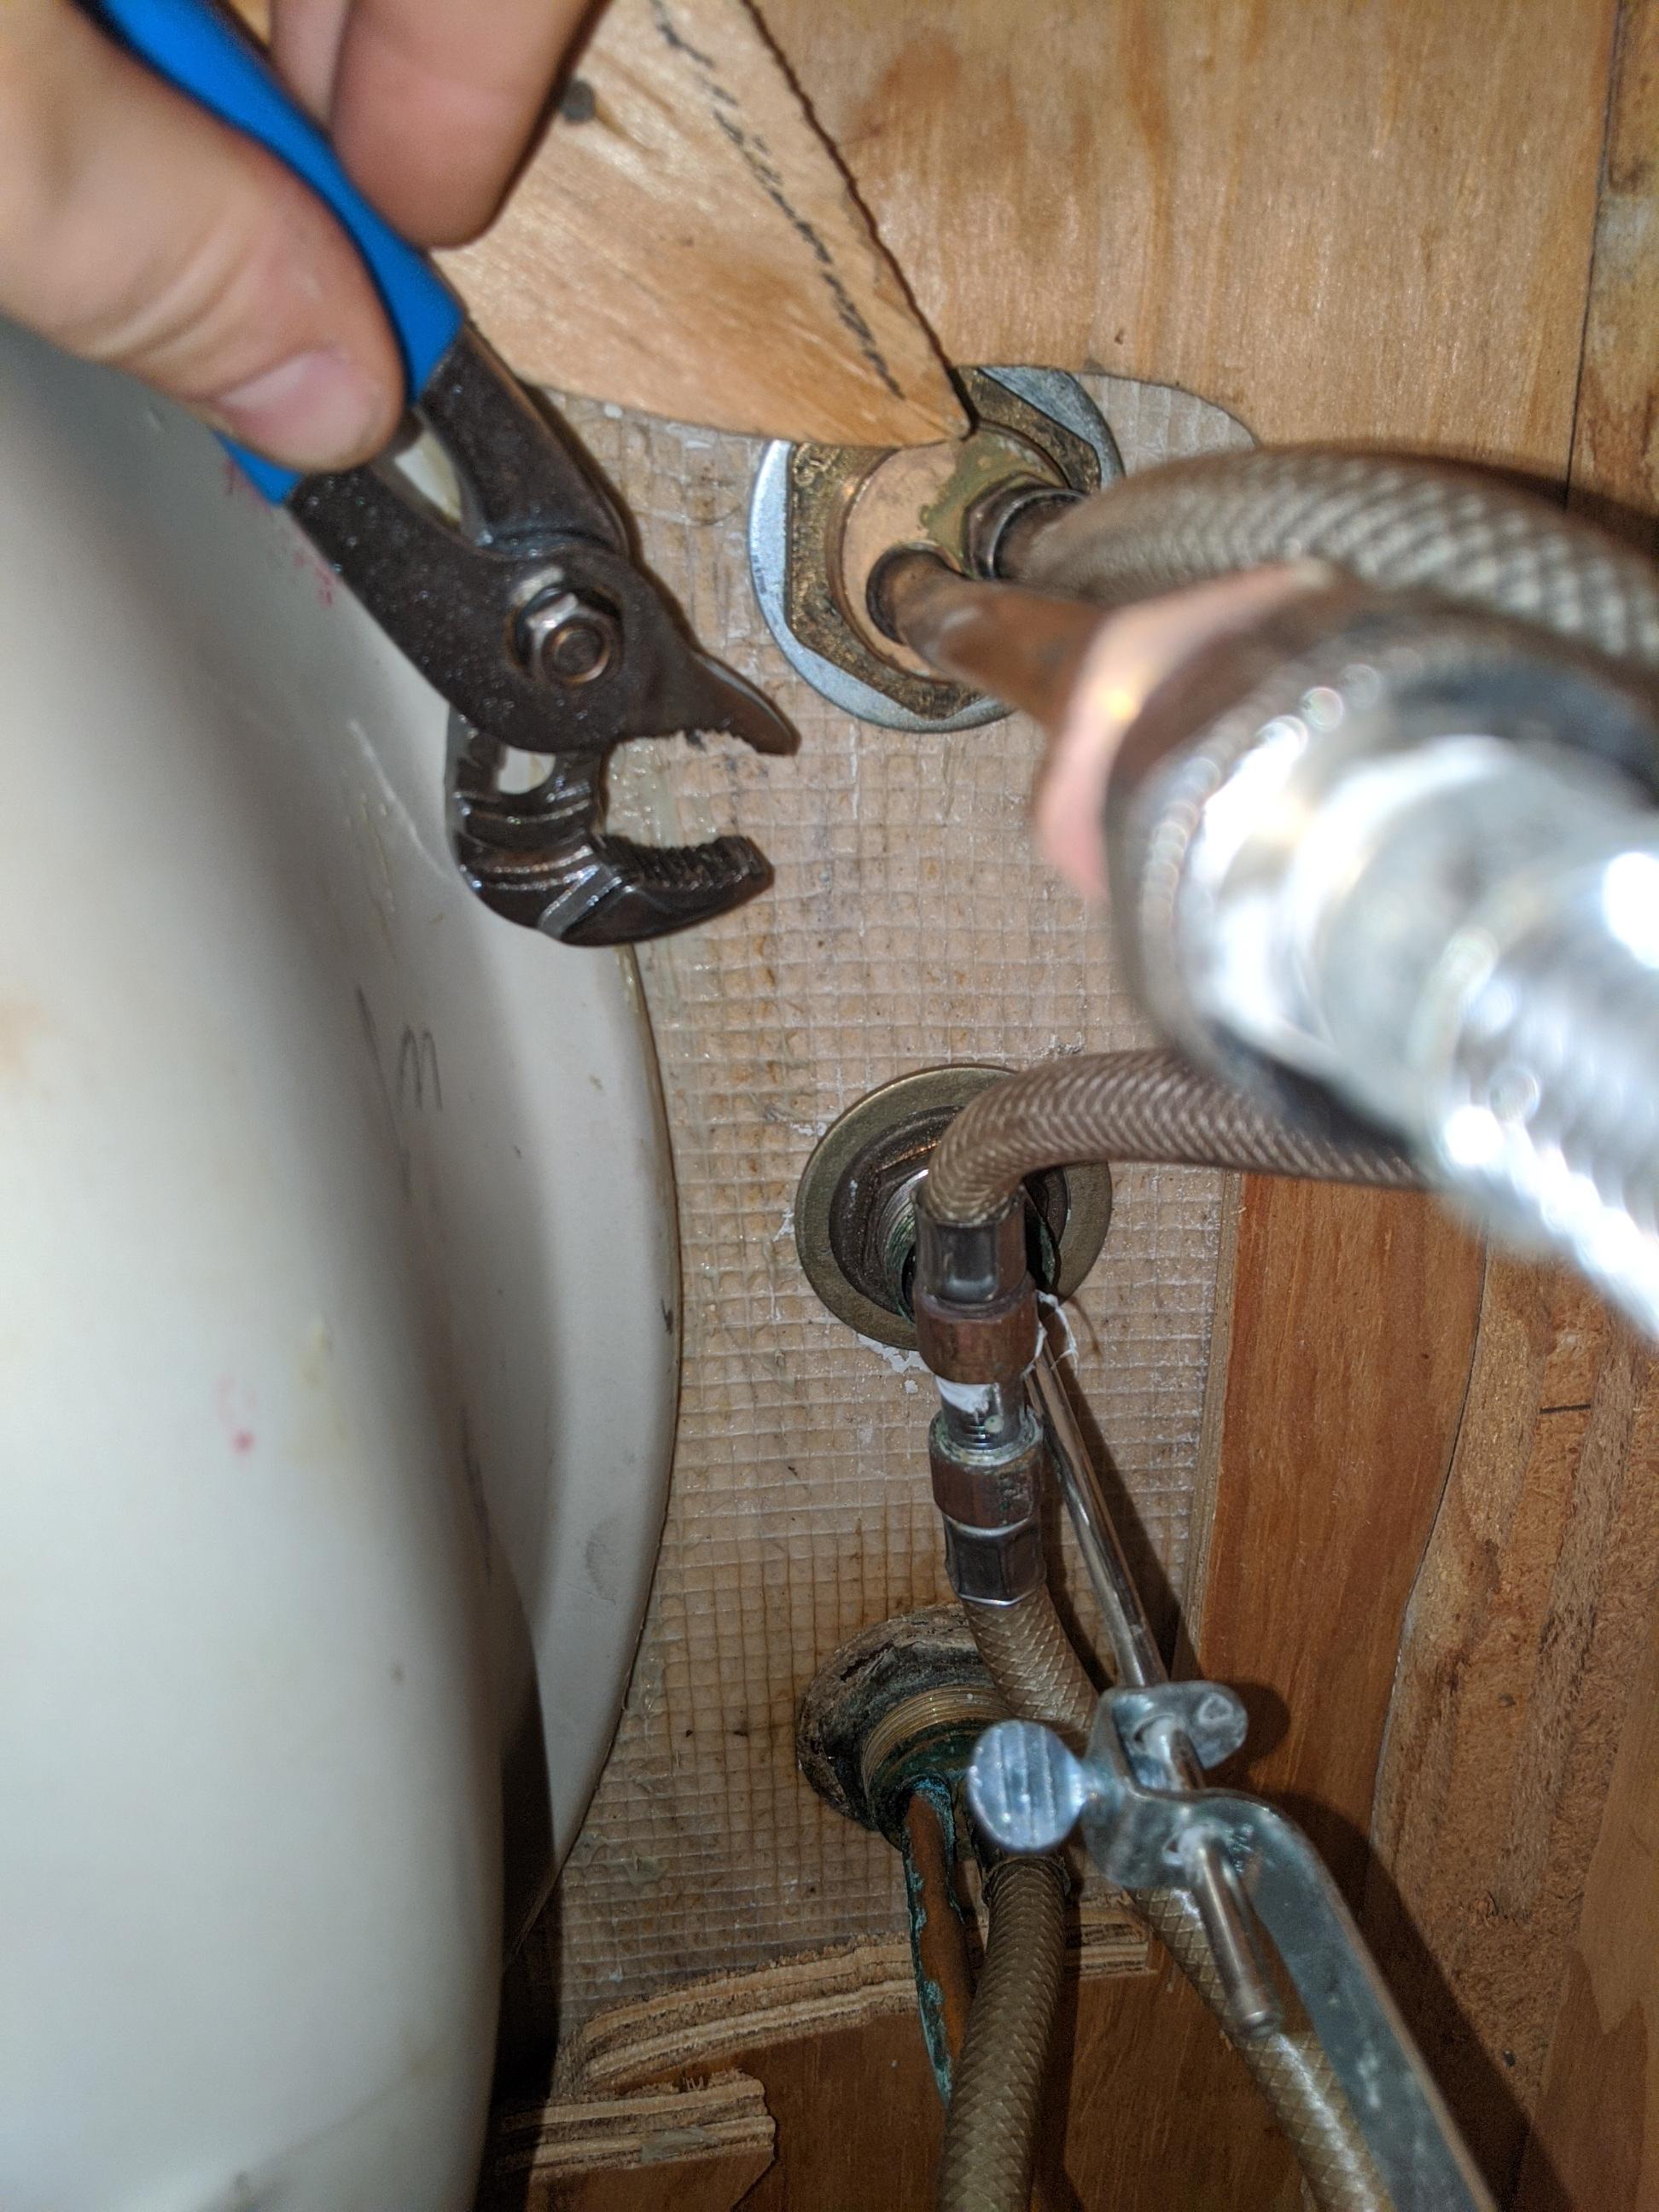
 Now that you have the proper tools and have prepared your workspace, it is time to remove the old faucet. Start by disconnecting the supply lines from the shut-off valves. Use your adjustable wrench to loosen and remove the nuts holding the supply lines in place. Next, use your basin wrench to loosen and remove the nuts holding the faucet in place. Once the nuts are removed, carefully lift the old faucet out of the sink. It may be helpful to have a friend or family member assist you in holding the faucet steady as you remove it.
Cleaning and Preparing the Sink
 With the old faucet removed, it is important to clean and prepare the sink for the new faucet. Use a putty knife to remove any old plumber's putty from around the holes in the sink. Wipe down the sink with a clean cloth to remove any debris or residue. Now is also a good time to inspect the sink for any cracks or damage that may need to be repaired before installing the new faucet.
Installing the New Faucet
 Before installing the new faucet, apply a thin layer of plumber's putty around the holes in the sink. This will help create a watertight seal for the new faucet. Carefully lower the new faucet into place, making sure it is aligned with the holes in the sink. Secure the faucet in place by tightening the nuts with your basin wrench. Next, reconnect the supply lines to the shut-off valves and tighten with your adjustable wrench. Turn the water supply back on and test the new faucet for any leaks. If there are no leaks, you have successfully installed your new kitchen sink faucet!
Removing a kitchen sink faucet may seem like a daunting task, but with the right tools and preparation, it can be done safely and efficiently. Follow these simple steps and you will have a new faucet installed in no time!
Before installing the new faucet, apply a thin layer of plumber's putty around the holes in the sink. This will help create a watertight seal for the new faucet. Carefully lower the new faucet into place, making sure it is aligned with the holes in the sink. Secure the faucet in place by tightening the nuts with your basin wrench. Next, reconnect the supply lines to the shut-off valves and tighten with your adjustable wrench. Turn the water supply back on and test the new faucet for any leaks. If there are no leaks, you have successfully installed your new kitchen sink faucet!
Removing a kitchen sink faucet may seem like a daunting task, but with the right tools and preparation, it can be done safely and efficiently. Follow these simple steps and you will have a new faucet installed in no time!