Building a drain for your kitchen sink may seem like a daunting task, but with the right tools and knowledge, it can be a relatively simple DIY project. A properly built kitchen sink drain ensures proper water flow and prevents clogs, making your kitchen tasks more efficient and hassle-free. In this article, we will guide you through the step-by-step process of building a drain for your kitchen sink.1. How to Build a Drain for a Kitchen Sink


1. How to Build a Drain for a Kitchen Sink


/how-to-install-a-sink-drain-2718789-hero-b5b99f72b5a24bb2ae8364e60539cece.jpg)


If you're looking to save some money and take on a DIY project, installing a kitchen sink drain is a great place to start. Before you get started, make sure to turn off the water supply to your sink and have all the necessary tools on hand. This includes a wrench, plumber's putty, and a drain assembly kit. Follow the instructions included in the kit for a hassle-free installation process.2. DIY Kitchen Sink Drain Installation


2. DIY Kitchen Sink Drain Installation
:no_upscale()/cdn.vox-cdn.com/uploads/chorus_asset/file/19495086/drain_0.jpg)


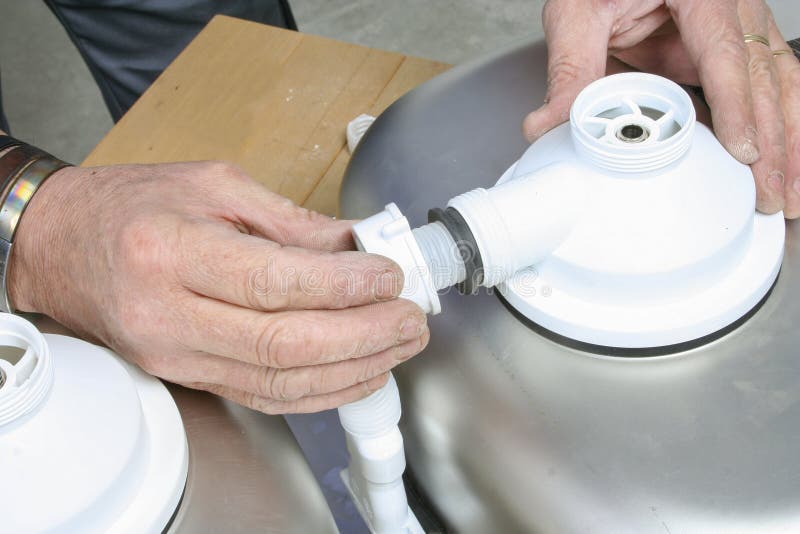
For a more detailed installation process, follow these steps: Step 1: Measure and cut the drainpipe to fit in the drain assembly. Step 2: Apply plumber's putty around the base of the drain and insert it into the sink's drain hole. Step 3: Secure the drain in place by tightening the locknut underneath the sink. Step 4: Attach the tailpiece to the bottom of the drain and connect it to the P-trap. Step 5: Attach the P-trap to the drain line coming out of the wall. Step 6: Turn on the water supply and check for any leaks. If there are any, tighten the connections as needed.3. Step-by-Step Guide to Installing a Kitchen Sink Drain


3. Step-by-Step Guide to Installing a Kitchen Sink Drain


Having the right tools is crucial for building a kitchen sink drain. Here are some essential tools you'll need: Wrench: A wrench is necessary for tightening connections and securing the drain in place. Plumber's Putty: This putty is used to create a watertight seal around the drain. Drain Assembly Kit: This kit includes all the necessary parts for a complete drain assembly.4. Essential Tools for Building a Kitchen Sink Drain


4. Essential Tools for Building a Kitchen Sink Drain


The key to preventing leaks and ensuring proper water flow is to properly seal your kitchen sink drain. Here are some tips to keep in mind: Use Plumber's Putty: Make sure to use plumber's putty to create a watertight seal around the drain. This will prevent any leaks from occurring. Properly Tighten Connections: Use a wrench to tighten all connections, but be careful not to overtighten, as this can cause damage. Check for Leaks: After installation, turn on the water supply and check for any leaks. If there are any, tighten the connections as needed.5. Tips for Properly Sealing a Kitchen Sink Drain

5. Tips for Properly Sealing a Kitchen Sink Drain
/how-to-install-a-sink-drain-2718789-hero-24e898006ed94c9593a2a268b57989a3.jpg)


Building a kitchen sink drain may seem straightforward, but there are some common mistakes that can lead to issues down the line. Here are some mistakes to avoid: Not Using Plumber's Putty: Neglecting to use plumber's putty can result in leaks and water damage. Overtightening Connections: Overly tight connections can cause damage and lead to leaks. Not Checking for Leaks: It's important to check for leaks after installation to ensure everything is properly sealed.6. Common Mistakes to Avoid When Building a Kitchen Sink Drain


6. Common Mistakes to Avoid When Building a Kitchen Sink Drain


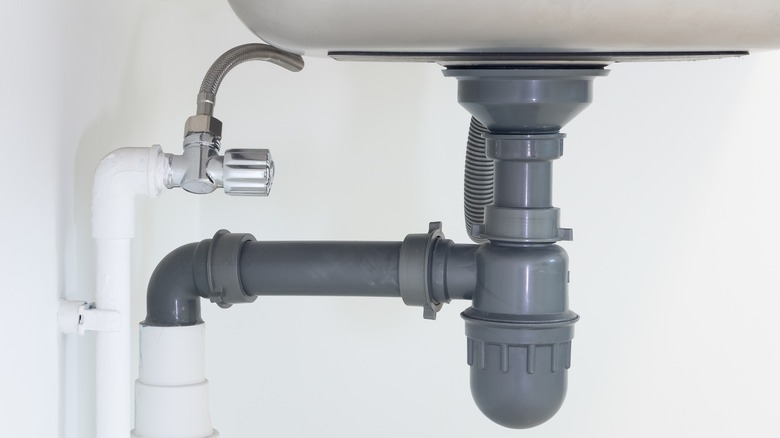
There are a few different types of kitchen sink drains to choose from, so it's important to understand the differences to choose the right one for your sink. Here are some common types: Standard Drain: This is the most common type of kitchen sink drain, with a basket strainer and a tailpiece. Disposal Drain: This type of drain is specifically designed for sinks with garbage disposals, with an extra hole for the disposal unit. Vessel Sink Drain: This type of drain is taller and designed for use with vessel sinks, which sit higher on top of the counter.7. Understanding the Different Types of Kitchen Sink Drains


7. Understanding the Different Types of Kitchen Sink Drains


:max_bytes(150000):strip_icc()/Basic-kitchen-sink-types-1821207_color_rev-0b539306b9ef4236a136624ad2a89a4c.jpg)

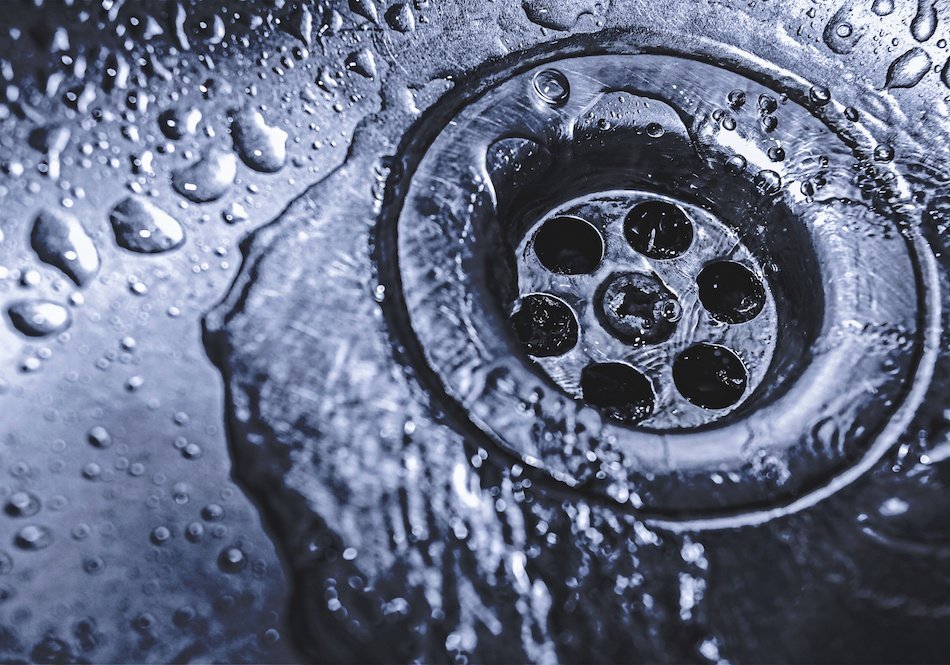
Even with proper installation and maintenance, issues with kitchen sink drains can still arise. Here are some common issues and how to troubleshoot them: Clogs: The most common issue with kitchen sink drains is clogging. To unclog a drain, try using a plunger or a drain snake. Leaks: Leaks can occur due to loose connections or damaged seals. Check all connections and tighten as needed. Slow Drainage: If your sink is draining slowly, try using a chemical drain cleaner or a homemade solution of baking soda and vinegar to break up any buildup in the pipes.8. How to Troubleshoot Common Issues with Kitchen Sink Drains


8. How to Troubleshoot Common Issues with Kitchen Sink Drains


Venting a kitchen sink drain is an important step in the installation process. Proper ventilation allows air to flow through the drain and prevents water from being siphoned out of the P-trap. Without proper ventilation, you may experience slow drainage or gurgling sounds from your sink.9. The Importance of Properly Venting a Kitchen Sink Drain


9. The Importance of Properly Venting a Kitchen Sink Drain


To keep your kitchen sink drain functioning properly, it's important to regularly clean and maintain it. Here are some tips: Regularly Use a Drain Cleaner: To prevent buildup and clogs, use a drain cleaner at least once a month. Clean the Drain Basket: Remove the drain basket and clean it with a brush to remove any buildup or debris. Flush with Hot Water: After cleaning, flush the drain with hot water to clear out any remaining residue. Building a drain for your kitchen sink may seem like a daunting task, but with the right tools and knowledge, it can be a simple and rewarding DIY project. Remember to properly seal and maintain your drain to ensure efficient water flow and prevent any issues in the future. With these tips and guidelines, you'll have a fully functional and well-built kitchen sink drain in no time.10. How to Maintain and Clean Your Kitchen Sink Drain


10. How to Maintain and Clean Your Kitchen Sink Drain


Why Building a Drain for Your Kitchen Sink is Essential for a Functional House Design

The Importance of a Properly Functioning Kitchen Sink Drain
/DrainboardSink-5b05c1f6eb97de0037dd257c.jpg) When it comes to designing a new house or renovating an existing one, the kitchen is often considered the heart of the home. It's where families gather to cook, eat, and socialize, making it one of the most frequently used spaces in a house. As such, it's important to ensure that every aspect of your kitchen is functional, including the
kitchen sink drain
. A properly functioning drain not only prevents clogs and unpleasant odors, but it also plays a significant role in maintaining the overall cleanliness and hygiene of your kitchen.
When it comes to designing a new house or renovating an existing one, the kitchen is often considered the heart of the home. It's where families gather to cook, eat, and socialize, making it one of the most frequently used spaces in a house. As such, it's important to ensure that every aspect of your kitchen is functional, including the
kitchen sink drain
. A properly functioning drain not only prevents clogs and unpleasant odors, but it also plays a significant role in maintaining the overall cleanliness and hygiene of your kitchen.
Building a Drain for Your Kitchen Sink: What You Need to Know
 Building a drain for your kitchen sink may seem like a simple task, but it requires careful planning and execution to ensure its efficiency and longevity. The first step is determining the
type of drain
that best suits your needs and the layout of your kitchen. There are several types of drains available, including traditional strainer drains, garbage disposal drains, and basket strainer drains. Each type has its own set of benefits and considerations, so it's crucial to research and consult with a professional before making a decision.
Building a drain for your kitchen sink may seem like a simple task, but it requires careful planning and execution to ensure its efficiency and longevity. The first step is determining the
type of drain
that best suits your needs and the layout of your kitchen. There are several types of drains available, including traditional strainer drains, garbage disposal drains, and basket strainer drains. Each type has its own set of benefits and considerations, so it's crucial to research and consult with a professional before making a decision.
The Benefits of a Professionally Installed Kitchen Sink Drain
 While it may be tempting to attempt a DIY installation of a kitchen sink drain, it's always best to leave it to the professionals. A professional installation not only ensures that the drain is properly connected and sealed, but it also guarantees that the plumbing is up to code and meets all safety standards. Additionally, a professional can advise you on the best materials to use for your drain, as well as provide maintenance tips to keep it in top condition.
Conclusion
:max_bytes(150000):strip_icc()/how-to-install-a-sink-drain-2718789-hero-24e898006ed94c9593a2a268b57989a3.jpg) In conclusion, building a drain for your kitchen sink is an essential aspect of a functional and hygienic house design. It not only prevents clogs and unpleasant odors, but it also contributes to the overall cleanliness and efficiency of your kitchen. When planning your house design, be sure to prioritize the installation of a properly functioning kitchen sink drain and consult with a professional for the best results.
In conclusion, building a drain for your kitchen sink is an essential aspect of a functional and hygienic house design. It not only prevents clogs and unpleasant odors, but it also contributes to the overall cleanliness and efficiency of your kitchen. When planning your house design, be sure to prioritize the installation of a properly functioning kitchen sink drain and consult with a professional for the best results.