Installing a bathroom sink flange may seem like a daunting task, but with the right tools and knowledge, it can be a simple and straightforward process. A bathroom sink flange is an essential part of any sink, as it provides a seal between the sink and the countertop, preventing water from leaking into the cabinet below. In this article, we will discuss the top 10 things you need to know about bathroom sink flange installation.Bathroom Sink Flange Installation:


Bathroom Sink Flange Installation:


Before diving into the installation process, it is crucial to have all the necessary tools and materials ready. These include a sink flange, plumber's putty, a wrench, silicone sealant, and a screwdriver. Once you have everything on hand, follow these steps to install a bathroom sink flange:How to Install a Bathroom Sink Flange:


How to Install a Bathroom Sink Flange


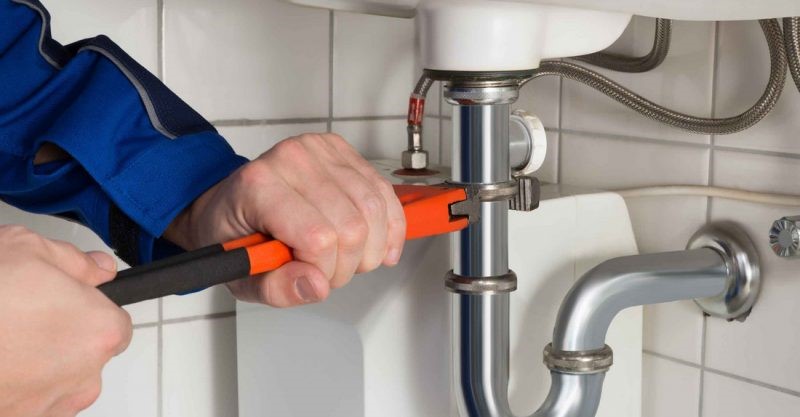
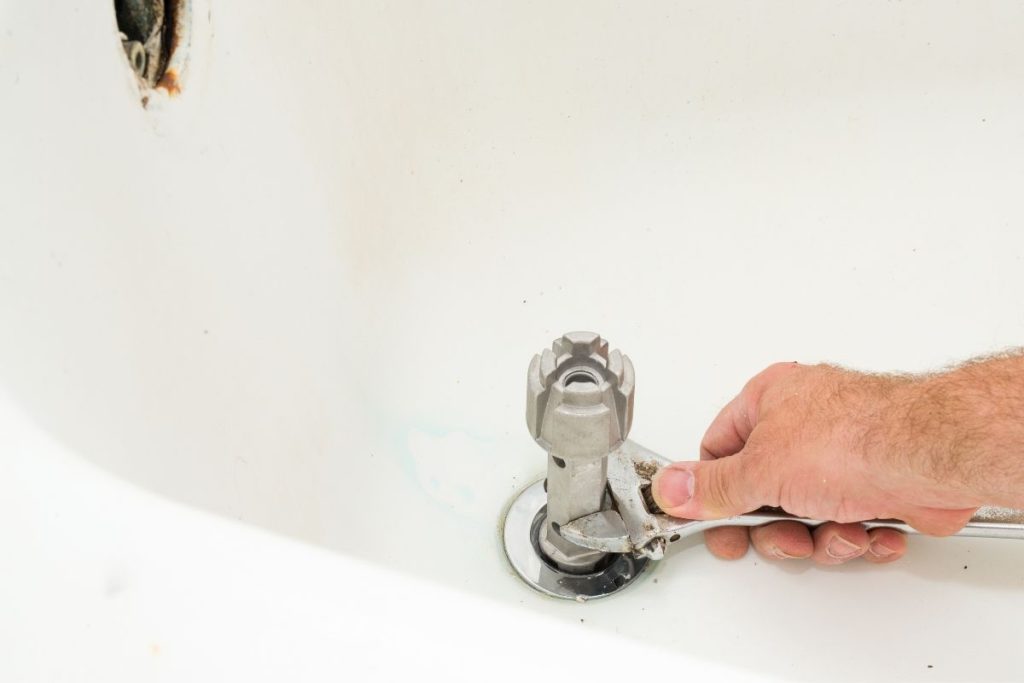
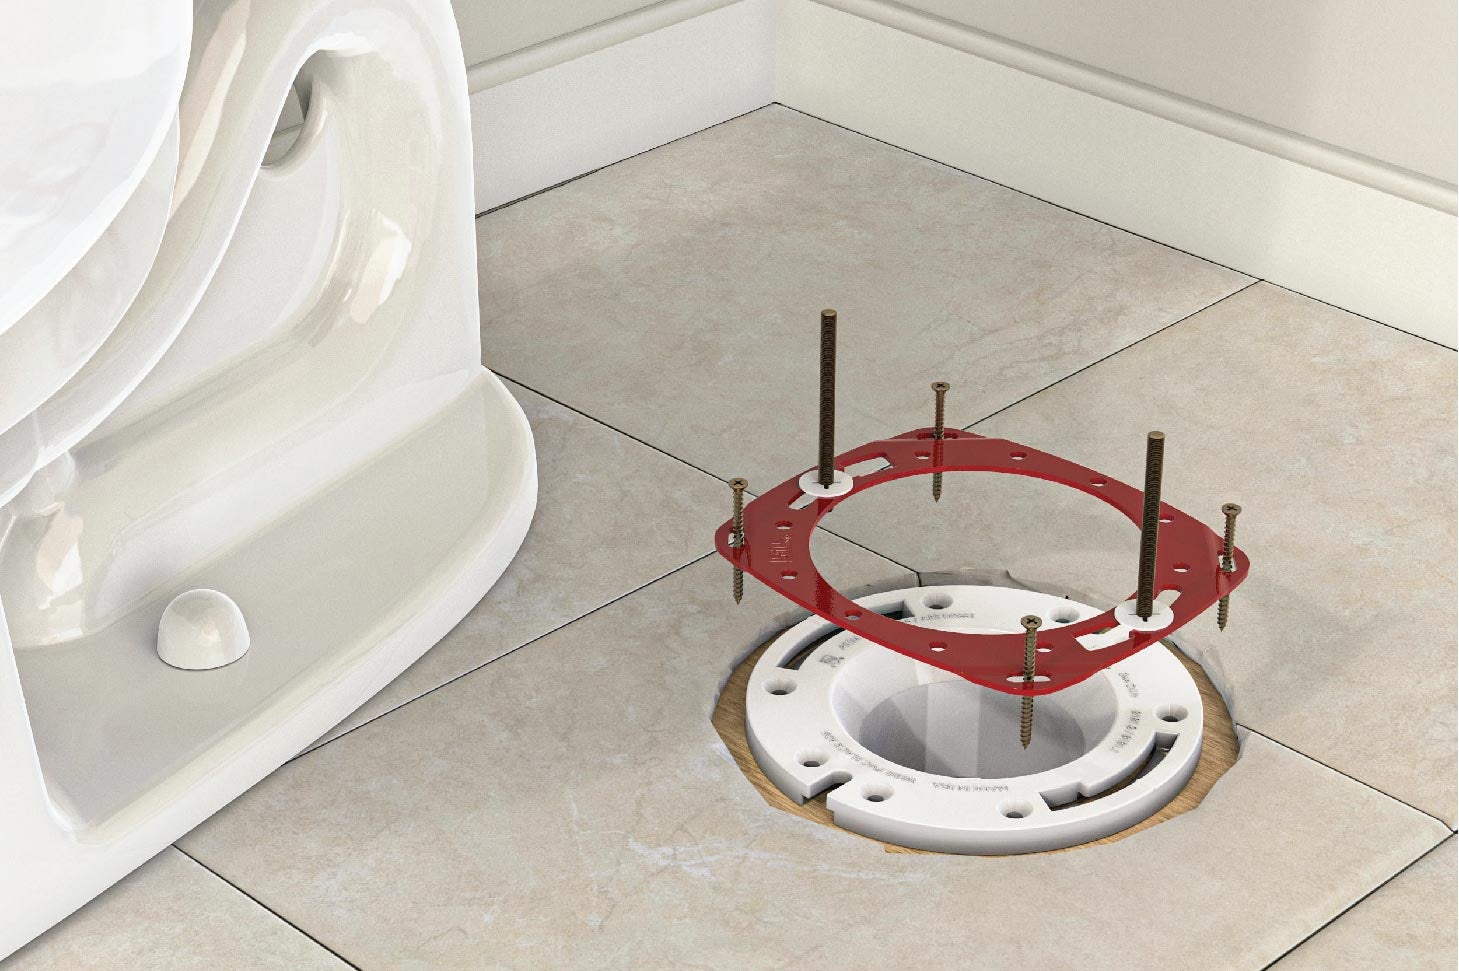
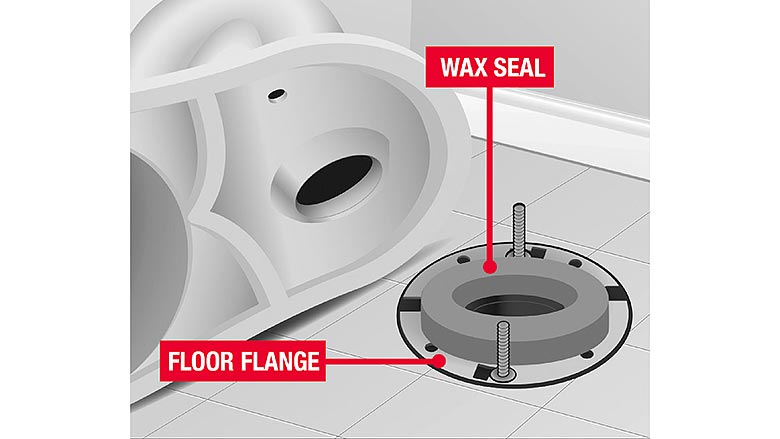
Step 1: Begin by cleaning the area around the sink hole and the bottom of the sink flange. This will ensure a clean and secure seal. Step 2: Apply plumber's putty to the bottom of the sink flange. This will act as a sealant between the sink and the countertop. Step 3: Place the sink flange into the sink hole and press down firmly to create a tight seal with the putty. Step 4: From underneath the sink, place a rubber gasket and metal washer onto the sink flange and secure it with the mounting ring. Step 5: Tighten the mounting ring using a wrench to ensure a snug fit. Step 6: Apply a bead of silicone sealant around the edge of the sink flange where it meets the countertop. This will provide additional waterproofing. Step 7: Attach the sink drain and tailpiece to the bottom of the sink flange using the included hardware. Step 8: Lastly, connect the sink drain to the plumbing and check for any leaks.Step-by-Step Guide for Installing a Bathroom Sink Flange:

Step-by-Step Guide for Installing a Bathroom Sink Flange


If you are a DIY enthusiast, you may be tempted to install a bathroom sink flange on your own. While this is possible, it is essential to have the right tools and knowledge to do it correctly. It is also crucial to follow the manufacturer's instructions carefully to avoid any mistakes.DIY Bathroom Sink Flange Installation:


DIY Bathroom Sink Flange Installation


Tip 1: Always double-check the size of the sink flange before purchasing to ensure it fits your sink. Tip 2: Use a high-quality plumber's putty for a better seal. Tip 3: Make sure to tighten all the connections properly to avoid any leaks. Tip 4: Use a silicone sealant that is specifically designed for bathroom sinks to prevent any mold or mildew growth.Tips for Installing a Bathroom Sink Flange:


Tips for Installing a Bathroom Sink Flange


Mistake 1: Not cleaning the sink and sink flange properly before installation, resulting in a weak seal. Mistake 2: Using a low-quality plumber's putty, leading to leaks. Mistake 3: Over-tightening the mounting ring, causing cracks in the sink or flange. Mistake 4: Not using a silicone sealant, resulting in water damage and mold growth.Common Mistakes to Avoid When Installing a Bathroom Sink Flange:


Common Mistakes to Avoid When Installing a Bathroom Sink Flange


1. Plumber's putty - For creating a seal between the sink and the countertop. 2. Wrench - For tightening the mounting ring. 3. Screwdriver - For attaching the sink drain and tailpiece. 4. Silicone sealant - For additional waterproofing.Tools Needed for Bathroom Sink Flange Installation:

Tools Needed for Bathroom Sink Flange Installation


Best Practice 1: Always follow the manufacturer's instructions for the specific sink flange you are installing. Best Practice 2: Use high-quality materials for a better and longer-lasting seal. Best Practice 3: Check for any leaks before using the sink regularly. Best Practice 4: Regularly clean and maintain the sink flange to prevent any issues.Best Practices for Bathroom Sink Flange Installation:


Best Practices for Bathroom Sink Flange Installation


Issue 1: Water leaking from the sink flange - This could be due to an improper seal or cracks in the sink or flange. Issue 2: Mold or mildew growth around the sink flange - This could be due to water seeping through the sealant. Reapply a new layer of sealant to prevent this issue. Issue 3: Difficulty tightening the mounting ring - This could be due to an improper fit or using the wrong tools. Make sure to check the size of the mounting ring and use a wrench that fits properly.Troubleshooting Common Issues with Bathroom Sink Flange Installation:


Troubleshooting Common Issues with Bathroom Sink Flange Installation


:max_bytes(150000):strip_icc()/what-is-under-the-bathroom-sink-3973574-03-c2c800c743054899aca9bdcc0535db34.jpg)

While it is possible to install a bathroom sink flange on your own, it may be best to leave it to the professionals. They have the experience and knowledge to do the job correctly and can also provide helpful tips and advice for maintaining the sink flange in the future. In conclusion, installing a bathroom sink flange may seem like a daunting task, but with the right tools and knowledge, it can be a simple and straightforward process. By following the steps and tips mentioned above, you can ensure a proper and long-lasting installation. Remember to regularly clean and maintain the sink flange to prevent any issues in the future. Professional vs. DIY Bathroom Sink Flange Installation:
Professional vs. DIY Bathroom Sink Flange Installation


Additional Tips for a Successful Bathroom Sink Flange Installation

Choose the Right Materials
 When it comes to installing a new bathroom sink flange, selecting the right materials is crucial. The sink flange is the part of the sink that connects to the drain and sits on top of the countertop. It needs to be durable, water-resistant, and able to withstand daily use.
Stainless steel
is a popular choice for sink flanges due to its strength and resistance to corrosion. Other materials to consider include
porcelain, ceramic, and granite.
When it comes to installing a new bathroom sink flange, selecting the right materials is crucial. The sink flange is the part of the sink that connects to the drain and sits on top of the countertop. It needs to be durable, water-resistant, and able to withstand daily use.
Stainless steel
is a popular choice for sink flanges due to its strength and resistance to corrosion. Other materials to consider include
porcelain, ceramic, and granite.
Proper Measurements are Key
 Before you begin the installation process, it's essential to take accurate measurements of your sink and countertop. This will ensure that the sink flange fits properly and creates a watertight seal.
Measure the diameter of the sink hole and the thickness of the countertop
to determine the size of the sink flange you need. It's also crucial to note the location of the faucet and handles to avoid any obstructions.
Before you begin the installation process, it's essential to take accurate measurements of your sink and countertop. This will ensure that the sink flange fits properly and creates a watertight seal.
Measure the diameter of the sink hole and the thickness of the countertop
to determine the size of the sink flange you need. It's also crucial to note the location of the faucet and handles to avoid any obstructions.
Don't Skimp on the Sealant
 One of the most critical steps in installing a sink flange is creating a watertight seal between the flange and the sink. This seal prevents leaks and water damage to your countertop.
Use a high-quality silicone caulk
to seal the edges of the flange to the sink and the countertop. Be sure to smooth out the caulk with a damp cloth to create a clean, seamless look.
One of the most critical steps in installing a sink flange is creating a watertight seal between the flange and the sink. This seal prevents leaks and water damage to your countertop.
Use a high-quality silicone caulk
to seal the edges of the flange to the sink and the countertop. Be sure to smooth out the caulk with a damp cloth to create a clean, seamless look.
Consider Hiring a Professional
 While installing a sink flange may seem like a simple task, it can quickly turn into a complicated and time-consuming project. If you're not confident in your DIY skills,
consider hiring a professional plumber
to install the sink flange for you. This will ensure that the job is done correctly and avoid any costly mistakes.
While installing a sink flange may seem like a simple task, it can quickly turn into a complicated and time-consuming project. If you're not confident in your DIY skills,
consider hiring a professional plumber
to install the sink flange for you. This will ensure that the job is done correctly and avoid any costly mistakes.
Final Thoughts
 Installing a bathroom sink flange is a necessary step in creating a functional and aesthetically pleasing bathroom. By following these tips and using high-quality materials, you can ensure a successful and long-lasting installation. Don't be afraid to seek professional help if needed, and
remember to regularly clean and maintain your sink flange
to prevent any issues in the future.
Installing a bathroom sink flange is a necessary step in creating a functional and aesthetically pleasing bathroom. By following these tips and using high-quality materials, you can ensure a successful and long-lasting installation. Don't be afraid to seek professional help if needed, and
remember to regularly clean and maintain your sink flange
to prevent any issues in the future.