Cleaning the underside of kitchen cabinets may not be the most enjoyable task, but it is an important one. The underside of cabinets can accumulate dust, grime, and even grease over time, making it a prime spot for bacteria and germs to thrive. To keep your kitchen clean and hygienic, follow these steps to clean the underside of your kitchen cabinets. Step 1: Remove all items from the underside of the cabinets. Before you begin cleaning, make sure to remove any items stored under the cabinets. This will make it easier to access and clean the entire area. Step 2: Dust the underside of the cabinets. Use a dry microfiber cloth or a dusting tool to remove any loose dust and debris from the underside of the cabinets. Be sure to reach all the corners and edges. Step 3: Wipe down with a mixture of warm water and dish soap. Mix warm water and a few drops of dish soap in a bucket or spray bottle. Dip a clean cloth in the solution and wipe down the underside of the cabinets. This will help remove any built-up grime and grease. Step 4: Rinse with clean water. Use a clean cloth dampened with water to rinse off the soap solution. Make sure to wring out the cloth well so that it is not too wet. Step 5: Dry the underside of the cabinets. Use a dry cloth or paper towels to dry the underside of the cabinets. This will prevent any water spots from forming. Step 6: Use a degreaser for stubborn grime. If there are still areas with stubborn grime or grease, you can use a degreaser to help break it down. Follow the instructions on the product and make sure to rinse and dry thoroughly afterwards. Step 7: Replace items and keep it organized. Once the underside of the cabinets is clean and dry, you can replace any items that were stored there. Take this opportunity to declutter and organize, keeping only the essentials and neatly arranging them.1. How to Clean the Underside of Kitchen Cabinets
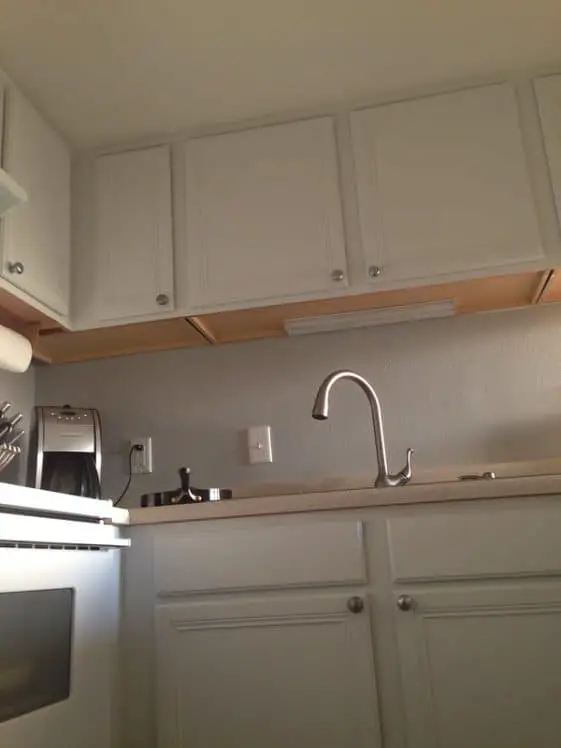


1. How to Clean the Underside of Kitchen Cabinets


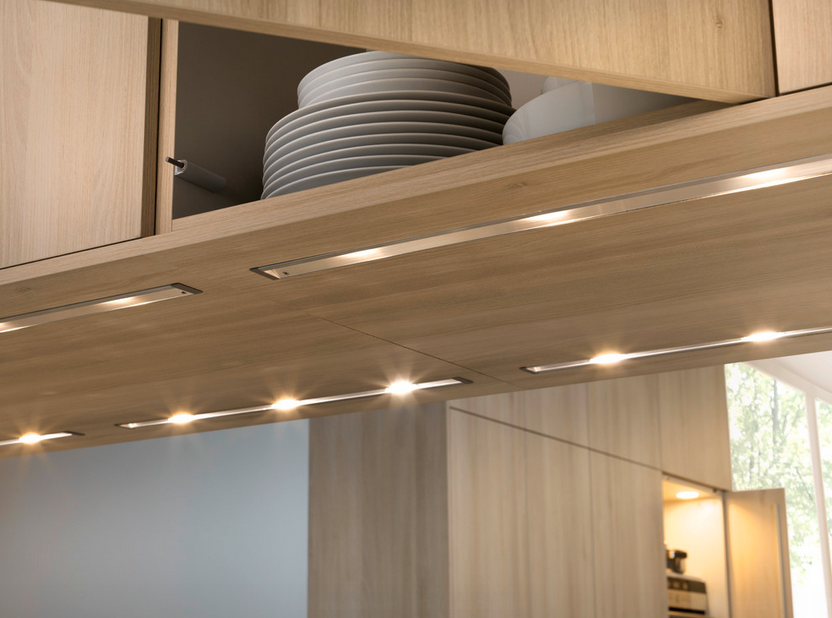
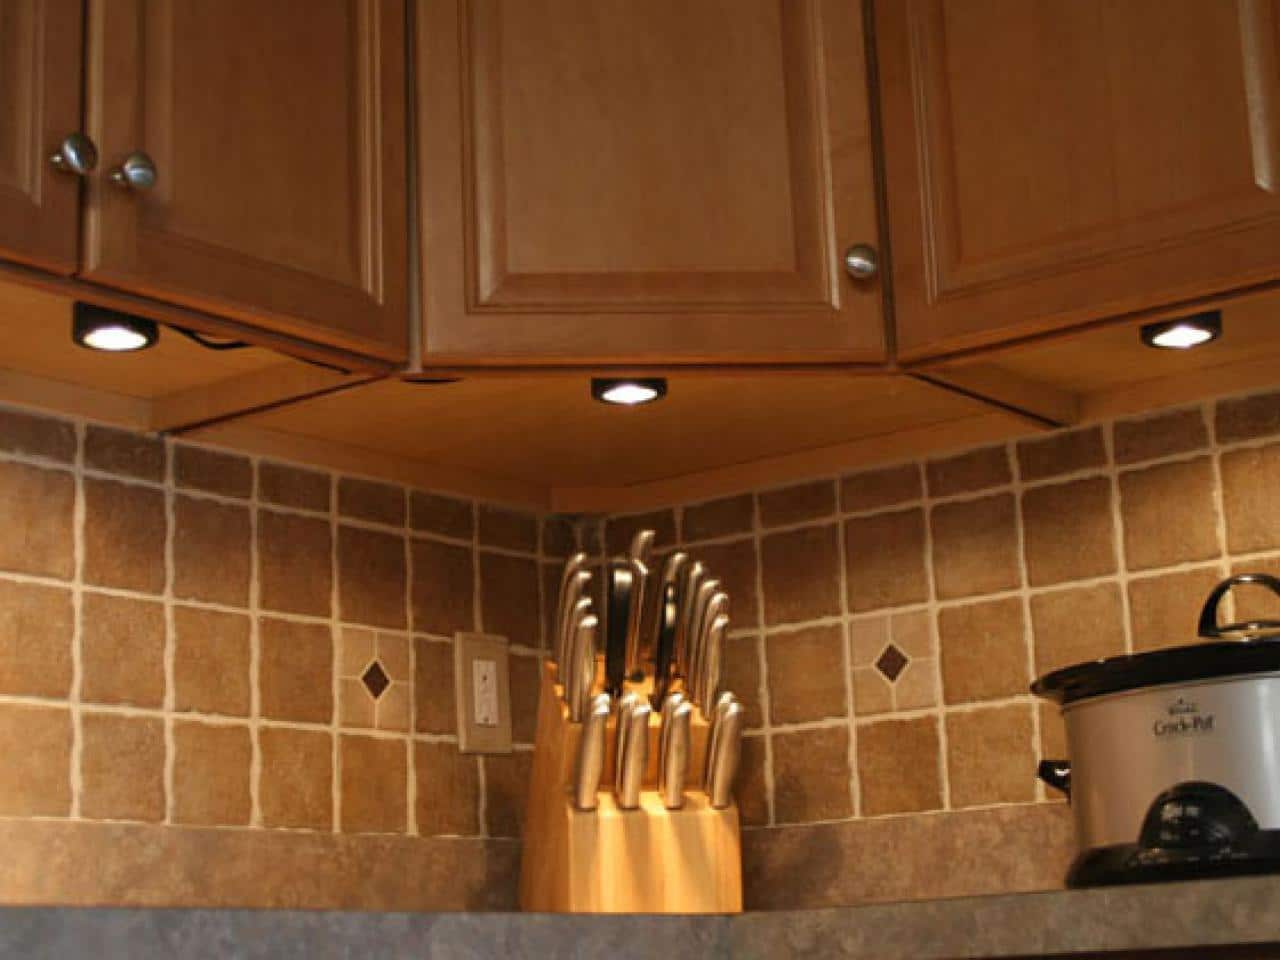
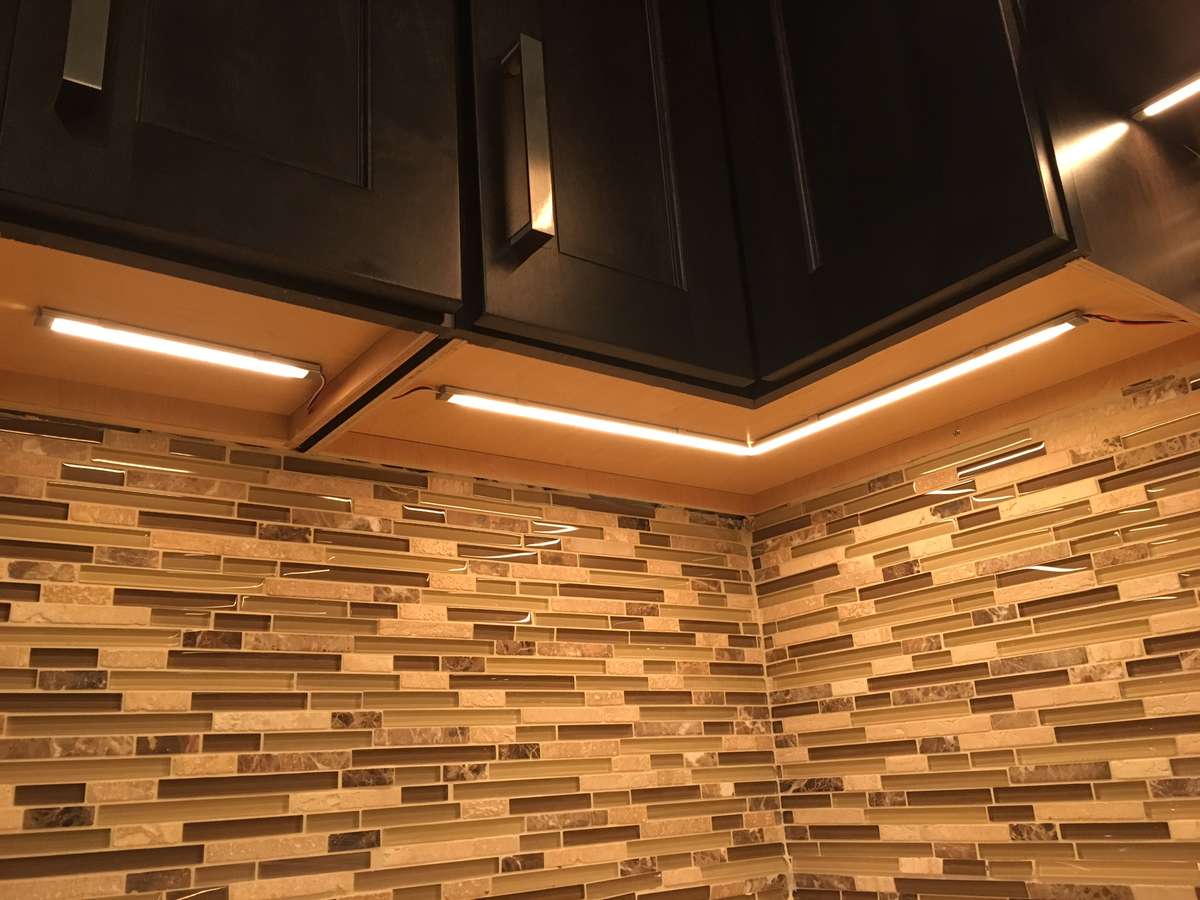
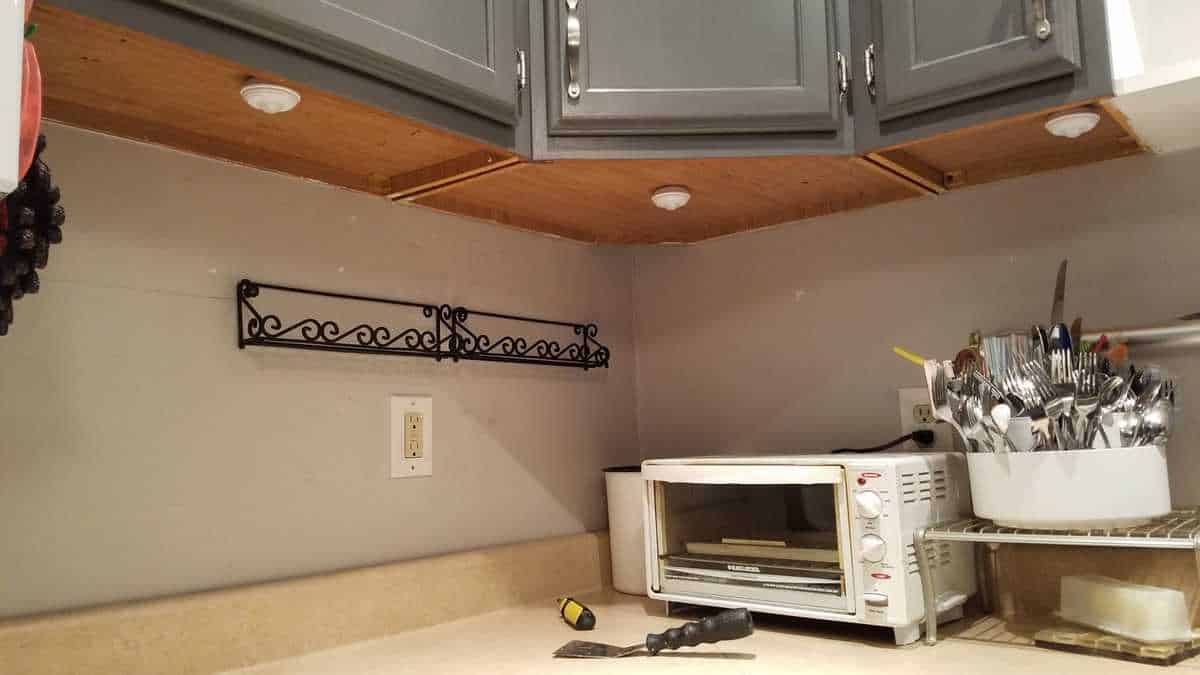
Under cabinet lighting not only adds a beautiful touch to your kitchen, but it also serves a practical purpose by providing extra lighting for your countertop workspace. Here's how you can install under cabinet lighting yourself. Step 1: Gather your materials. You will need under cabinet lighting strips, a power supply, screws, and a screwdriver. Step 2: Measure and plan. Measure the length of your cabinets and decide where you want to place the lighting strips. Make sure to leave enough space between each strip for even lighting. Step 3: Drill holes for the power supply. Use a drill to make a hole in the back of the cabinet where you want to plug in the power supply. This hole should be near an outlet. Step 4: Install the power supply. Screw the power supply into place using the holes provided. Make sure it is secure and the plug is facing the hole you drilled. Step 5: Install the lighting strips. Peel off the adhesive backing from the lighting strips and carefully stick them in place under the cabinets. Make sure the wires are hidden and the strips are evenly placed. Step 6: Connect the wires. Use the connectors provided to connect the lighting strips to the power supply. Make sure to follow the instructions carefully. Step 7: Test the lights. Plug in the power supply and turn on the lights to make sure they are working properly. Step 8: Secure the wires. Use cable clips or wire ties to secure the wires along the underside of the cabinets, keeping them neat and out of sight. Step 9: Enjoy your new under cabinet lighting! With the installation complete, you can now enjoy the added ambiance and functionality of your new under cabinet lighting.2. Installing Under Cabinet Lighting


2. Installing Under Cabinet Lighting


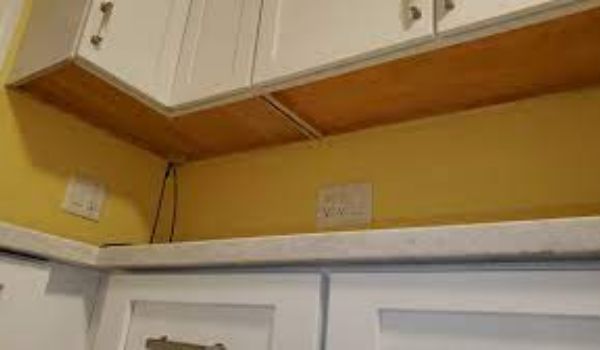
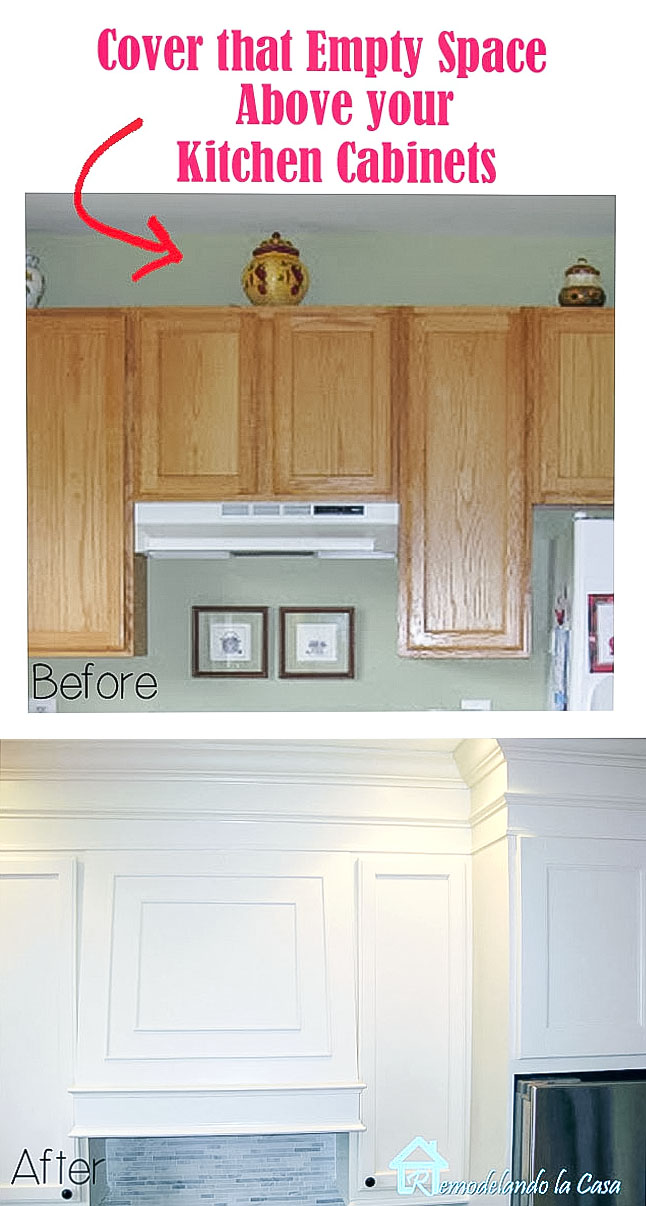
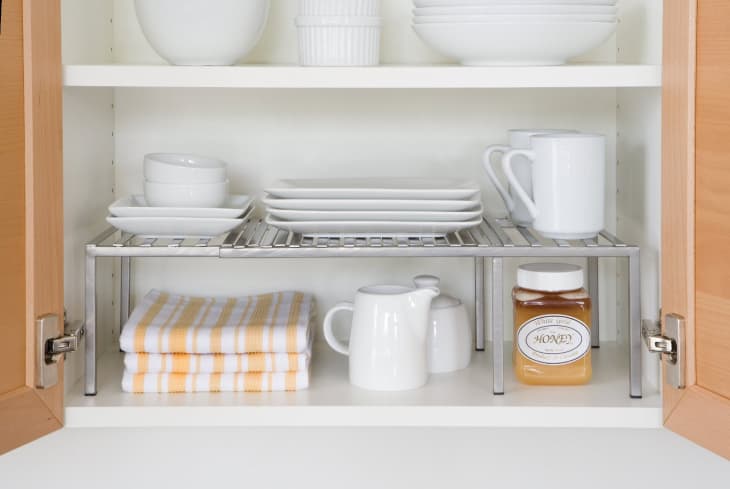
The underside of kitchen cabinets can easily become a cluttered and disorganized space. However, with a few simple tips and tricks, you can transform this area into a functional and organized storage space. Step 1: Declutter and purge. The first step to organizing any space is to declutter and get rid of any unnecessary items. Take everything out from under the cabinets and decide what you want to keep, donate, or throw away. Step 2: Install hooks or racks. Adding hooks or racks to the underside of cabinets can provide extra storage space for items such as pots, pans, and utensils. Make sure to install them securely and evenly spaced. Step 3: Use stacking shelves. Stacking shelves can help maximize vertical space under the cabinets and make it easier to access items stored there. Use them for dishes, pantry items, or even appliances. Step 4: Utilize bins and baskets. Bins and baskets can help corral smaller items and keep them organized. Use them for spices, snacks, or cleaning supplies. Step 5: Add a pull-out shelf. If you have deep cabinets, installing a pull-out shelf can make it easier to access items stored in the back. This is especially useful for heavy items or appliances. Step 6: Utilize the space above the cabinets. The space above the upper cabinets can also be utilized for storage. Use baskets or bins to store less frequently used items and keep them out of sight. Step 7: Keep it maintained. Once you have organized the underside of your cabinets, make sure to keep it maintained by regularly decluttering and putting items back in their designated spots.3. How to Organize the Underside of Kitchen Cabinets
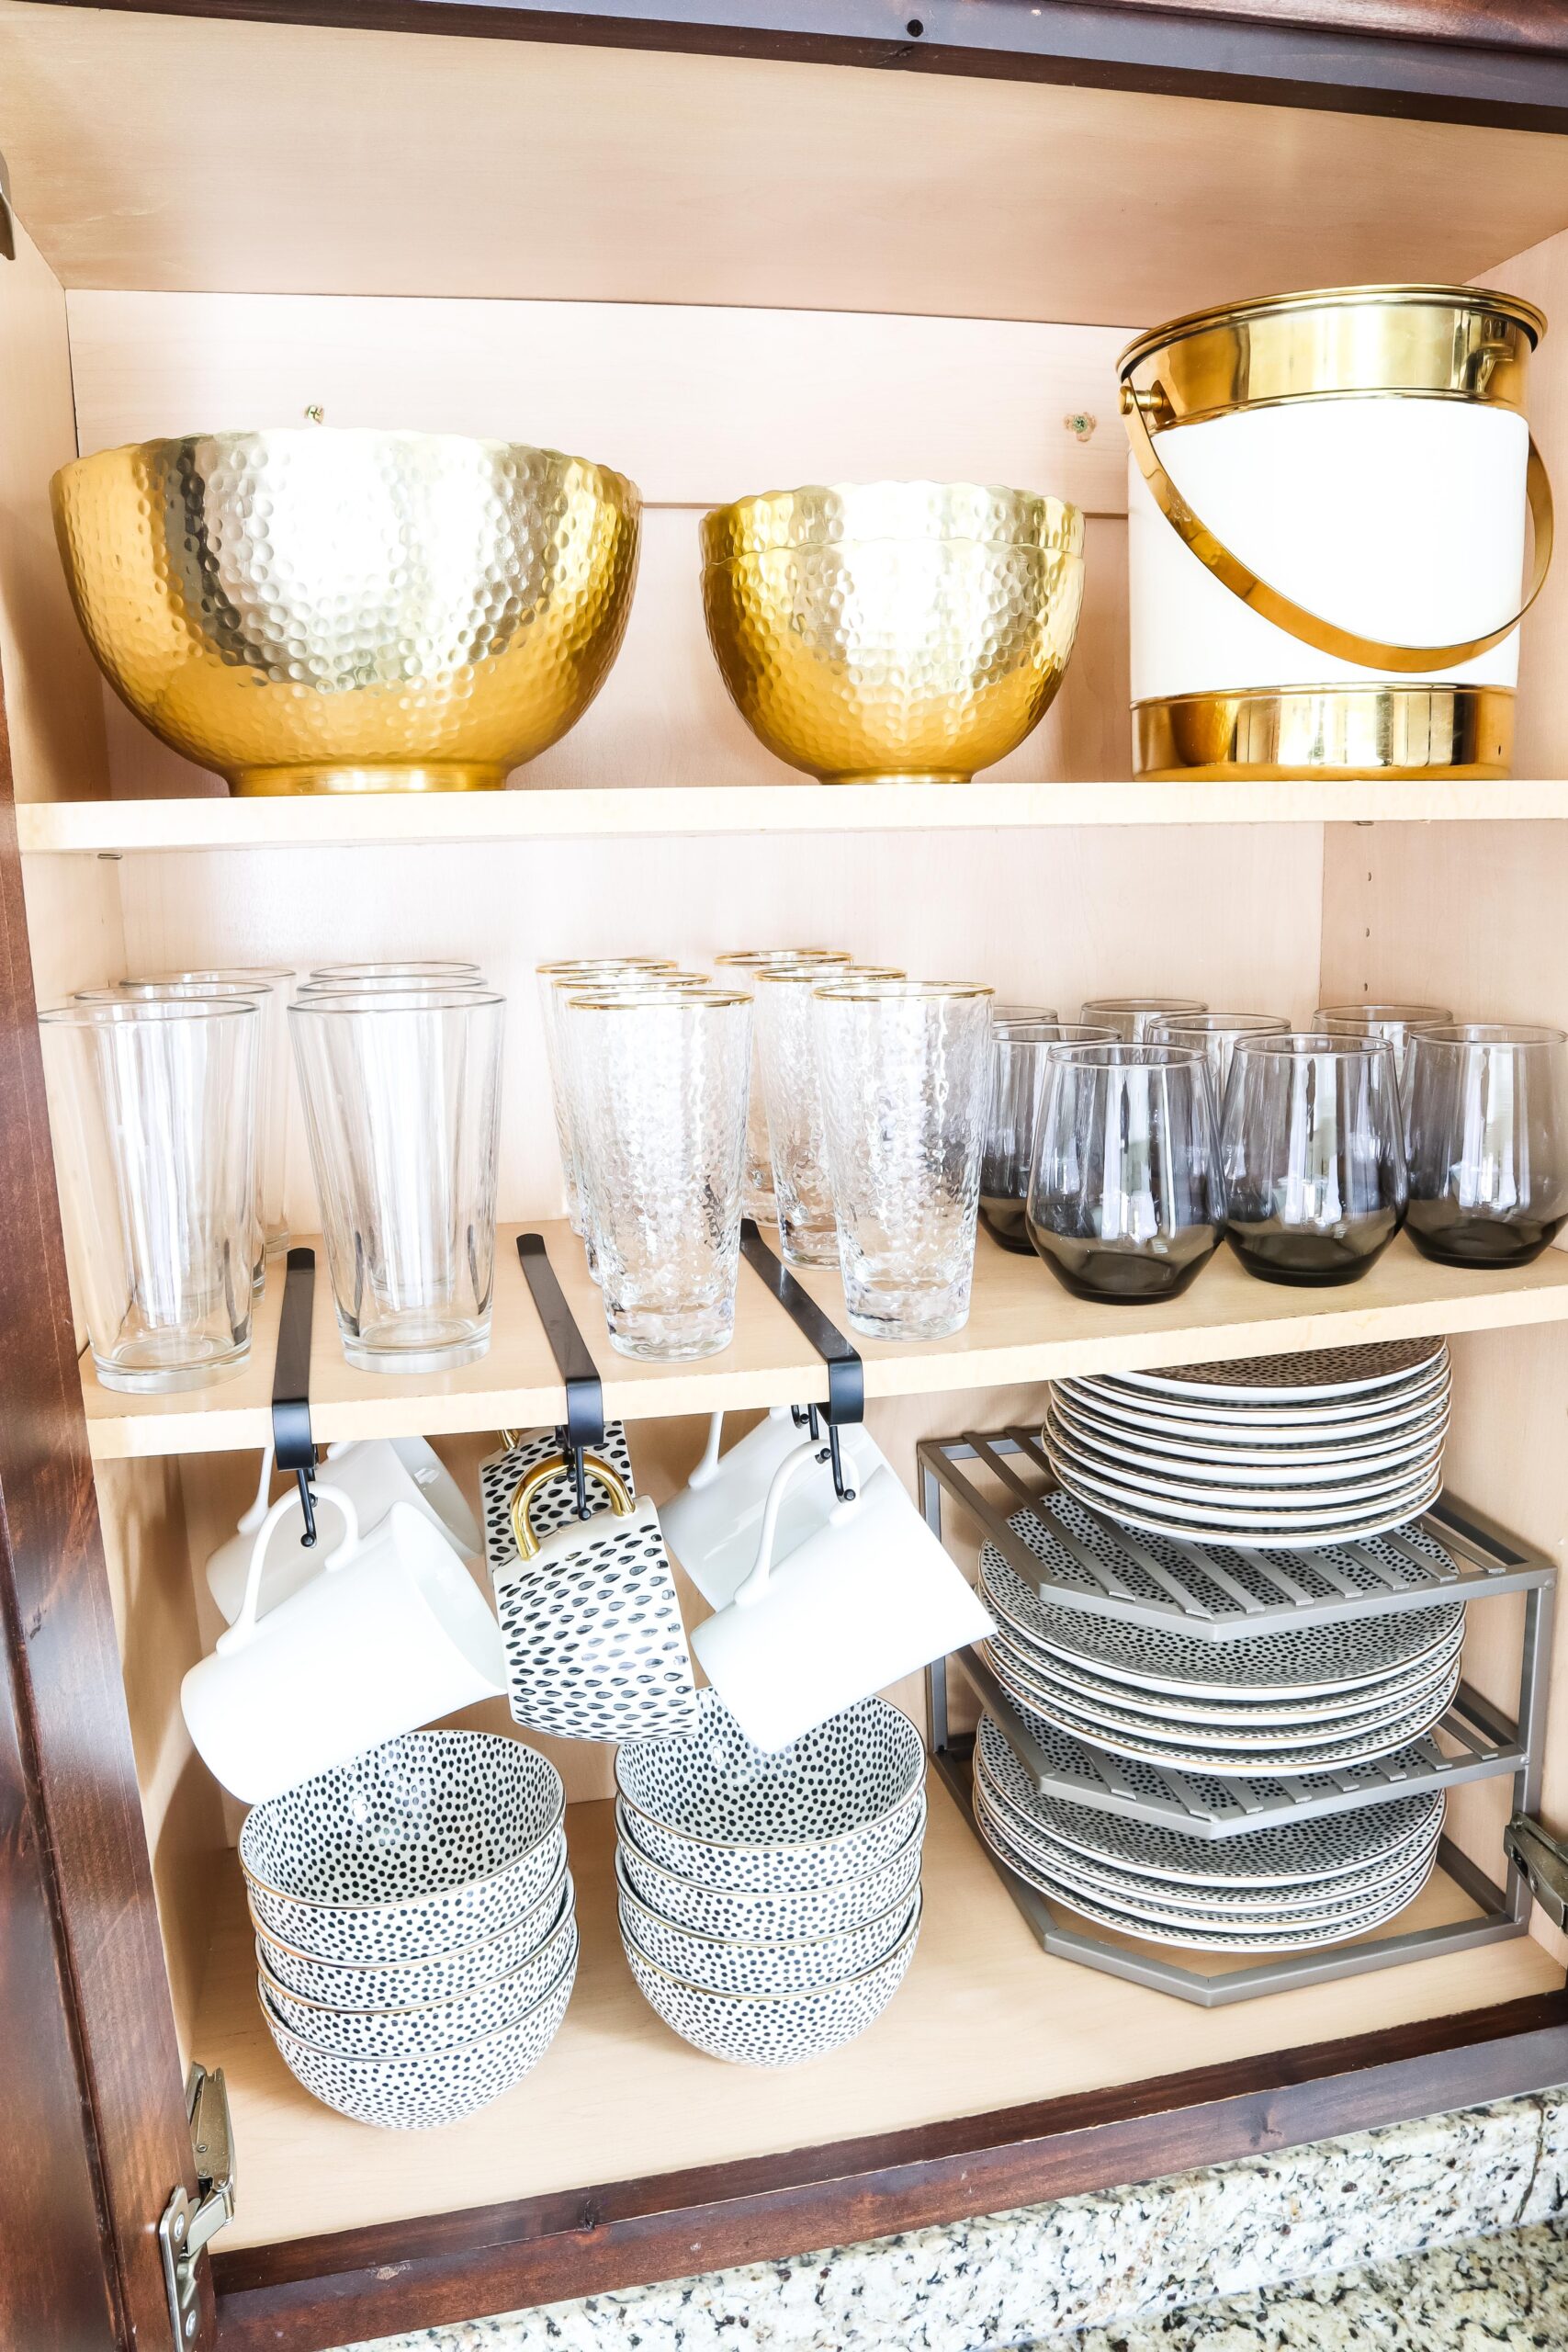
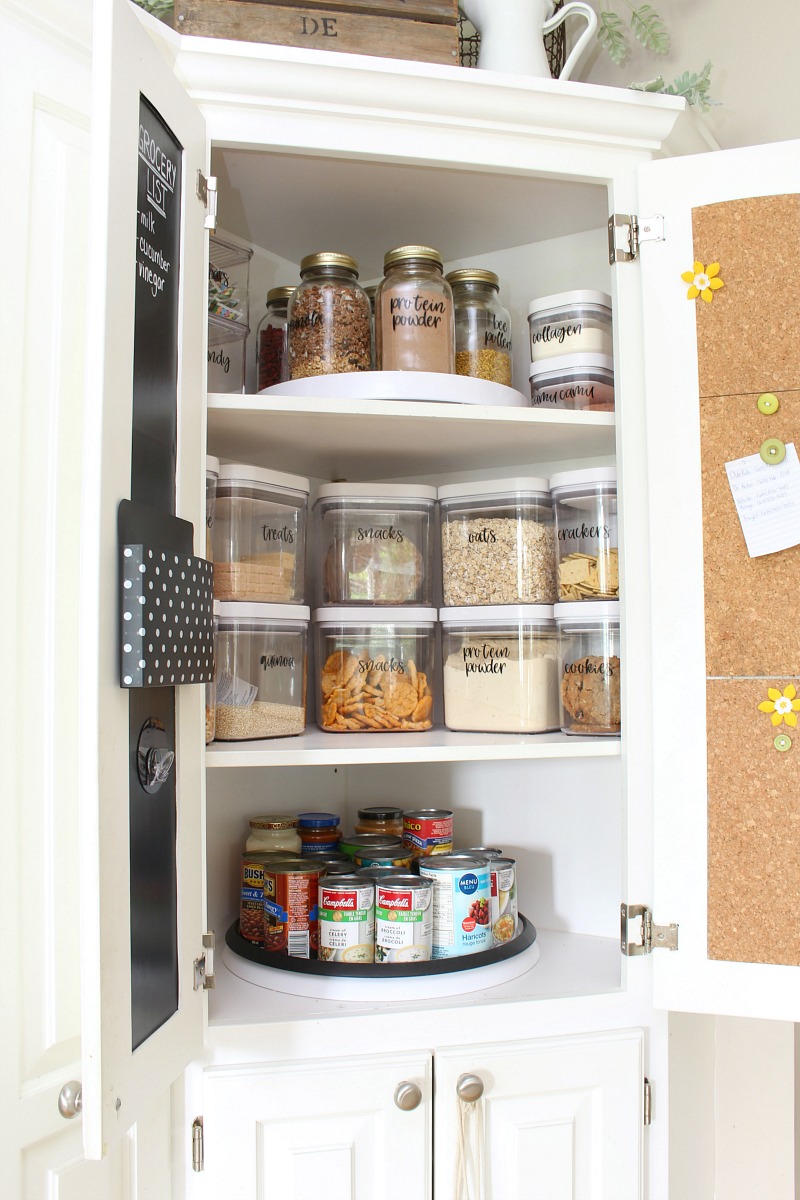
3. How to Organize the Underside of Kitchen Cabinets


If you're looking to give your kitchen a fresh new look, don't forget about the underside of your cabinets. Painting the underside of your kitchen cabinets can add a pop of color or tie in with your overall kitchen design. Here's how to paint the underside of your kitchen cabinets. Step 1: Prep the area. Make sure to remove all items from under the cabinets and cover your countertop and floor with drop cloths or newspaper to protect them from paint drips. Step 2: Clean the area. Use a degreaser or all-purpose cleaner to thoroughly clean the underside of the cabinets. This will help the paint adhere better. Step 3: Sand the surface. Use sandpaper to lightly sand the surface of the cabinets. This will create a rougher surface for the paint to stick to. Step 4: Prime the surface. Apply a coat of primer to the underside of the cabinets and allow it to dry completely. This will help the paint adhere and prevent any stains or discoloration from showing through. Step 5: Paint the cabinets. Use a paintbrush or roller to apply your desired paint color to the underside of the cabinets. Make sure to use even strokes and allow the paint to dry completely between coats. Step 6: Add a protective finish. Once the paint is dry, you can add a clear protective finish, such as polyurethane, to help protect the paint from scratches and wear. Step 7: Reinstall items. Once the paint and finish are completely dry, you can reinstall any items that were stored under the cabinets and enjoy your newly painted kitchen.4. Painting the Underside of Kitchen Cabinets


4. Painting the Underside of Kitchen Cabinets


If you find yourself lacking storage space in your kitchen, don't overlook the underside of your cabinets. With a little creativity, you can add extra storage to this often forgotten area. Step 1: Install a hanging fruit basket. Hanging a fruit basket under your cabinets can free up counter space and keep your produce easily accessible. Make sure to install it securely and regularly declutter it to prevent it from getting too heavy. Step 2: Use a tension rod. Tension rods can be used under cabinets to hang items such as cleaning supplies, dish towels, or even cooking utensils. This is a great way to utilize vertical space. Step 3: Hang a magnetic knife strip. A magnetic knife strip attached to the underside of your cabinets can keep your knives within reach and free up counter or drawer space. Step 4: Add a spice rack. Installing a spice rack under your cabinets can keep your spices organized and easily accessible while cooking. You can purchase a pre-made one or make one yourself using a small shelf and spice jars. Step 5: Use adhesive hooks or clips. Adhesive hooks or clips can be attached to the underside of cabinets to hang items such as measuring cups, oven mitts, or even coffee mugs. Step 6: Install a wire rack. Wire racks can be attached to the underside of cabinets to provide extra storage for items such as coffee pods, small jars, or cooking oils. Step 7: Think outside the box. Don't limit yourself to traditional storage solutions. Get creative and utilize items such as mason jars, hanging baskets, or even a pegboard to add storage to the underside of your cabinets.5. Adding Storage to the Underside of Kitchen Cabinets


5. Adding Storage to the Underside of Kitchen Cabinets


Over time, the underside of kitchen cabinets can suffer wear and tear, from scratches and dings to water damage. Here's how you can repair and restore the underside of your kitchen cabinets. Step 1: Assess the damage. Before you begin any repairs, make sure to thoroughly assess the damage and determine the best course of action. Step 2: Sand the damaged area. Use sandpaper to lightly sand the damaged area, making sure to smooth out any rough edges or splinters. Step 3: Fill in scratches or dings. Use wood filler or putty to fill in any scratches or dings in the wood. Follow the instructions on the product and make sure to sand it down once it is dry. Step 4: Repair water damage. If there is water damage, you may need to replace the damaged wood. Use a saw to cut out the damaged area and replace it with a new piece of wood. Sand it down and stain or paint to match the rest of the cabinet. Step 5: Sand and refinish. Once all repairs are complete, sand the entire underside of the cabinet and refinish it with stain or paint to match the rest of the cabinet. Step 6: Prevent future damage. To prevent future damage, make sure to regularly clean and maintain the underside of your cabinets, and address any issues as soon as they arise.6. Repairing Damage to the Underside of Kitchen Cabinets


6. Repairing Damage to the Underside of Kitchen Cabinets

If you have limited counter or storage space in your kitchen, making use of the area under your wall cabinets can help maximize space and keep your kitchen organized. Here are some ways to make the most of this space. Step 1: Install shelves. Adding shelves to the underside of wall cabinets can provide extra storage space for items such as dishes, glasses, or pantry items. Make sure to install them securely and evenly spaced. Step 2: Use adhesive hooks. Adhesive hooks can be attached to the underside of wall cabinets to hang items such as mugs, measuring cups, or cooking utensils. Step 3: Add a magnetic spice rack. A magnetic spice rack attached to the underside of wall cabinets can free up counter space and keep your spices easily accessible while cooking. Step 4: Utilize the space above the cabinets. The space above your wall cabinets can also be utilized for storage. Use baskets or bins to store less frequently used items and keep them out of sight. Step 5: Hang a pot rack. Hanging a pot rack under your wall cabinets can free up cabinet and counter space and keep your pots and pans easily accessible. Step 6: Use a tension rod. Installing a tension rod under your wall cabinets can provide extra storage for items such as dish towels, oven mitts, or even cooking utensils. Step 7: Get creative with storage solutions. Don't be afraid to think outside the box and use items such as hanging baskets, a pegboard, or even a mini shelf to make the most of the space under your wall cabinets.7. Maximizing Space Under Kitchen Wall Cabinets

7. Maximizing Space Under Kitchen Wall Cabinets


If you struggle with accessing items stored in the back of your lower kitchen cabinets, installing a pull-out shelf can make it easier to reach and organize your items. Here's how you can install a pull-out shelf under your kitchen cabinets. Step 1: Gather your materials. You will need a pull-out shelf kit, a drill, screws, and a screwdriver.8. How to Install a Pull-Out Shelf Under Kitchen Cabinets

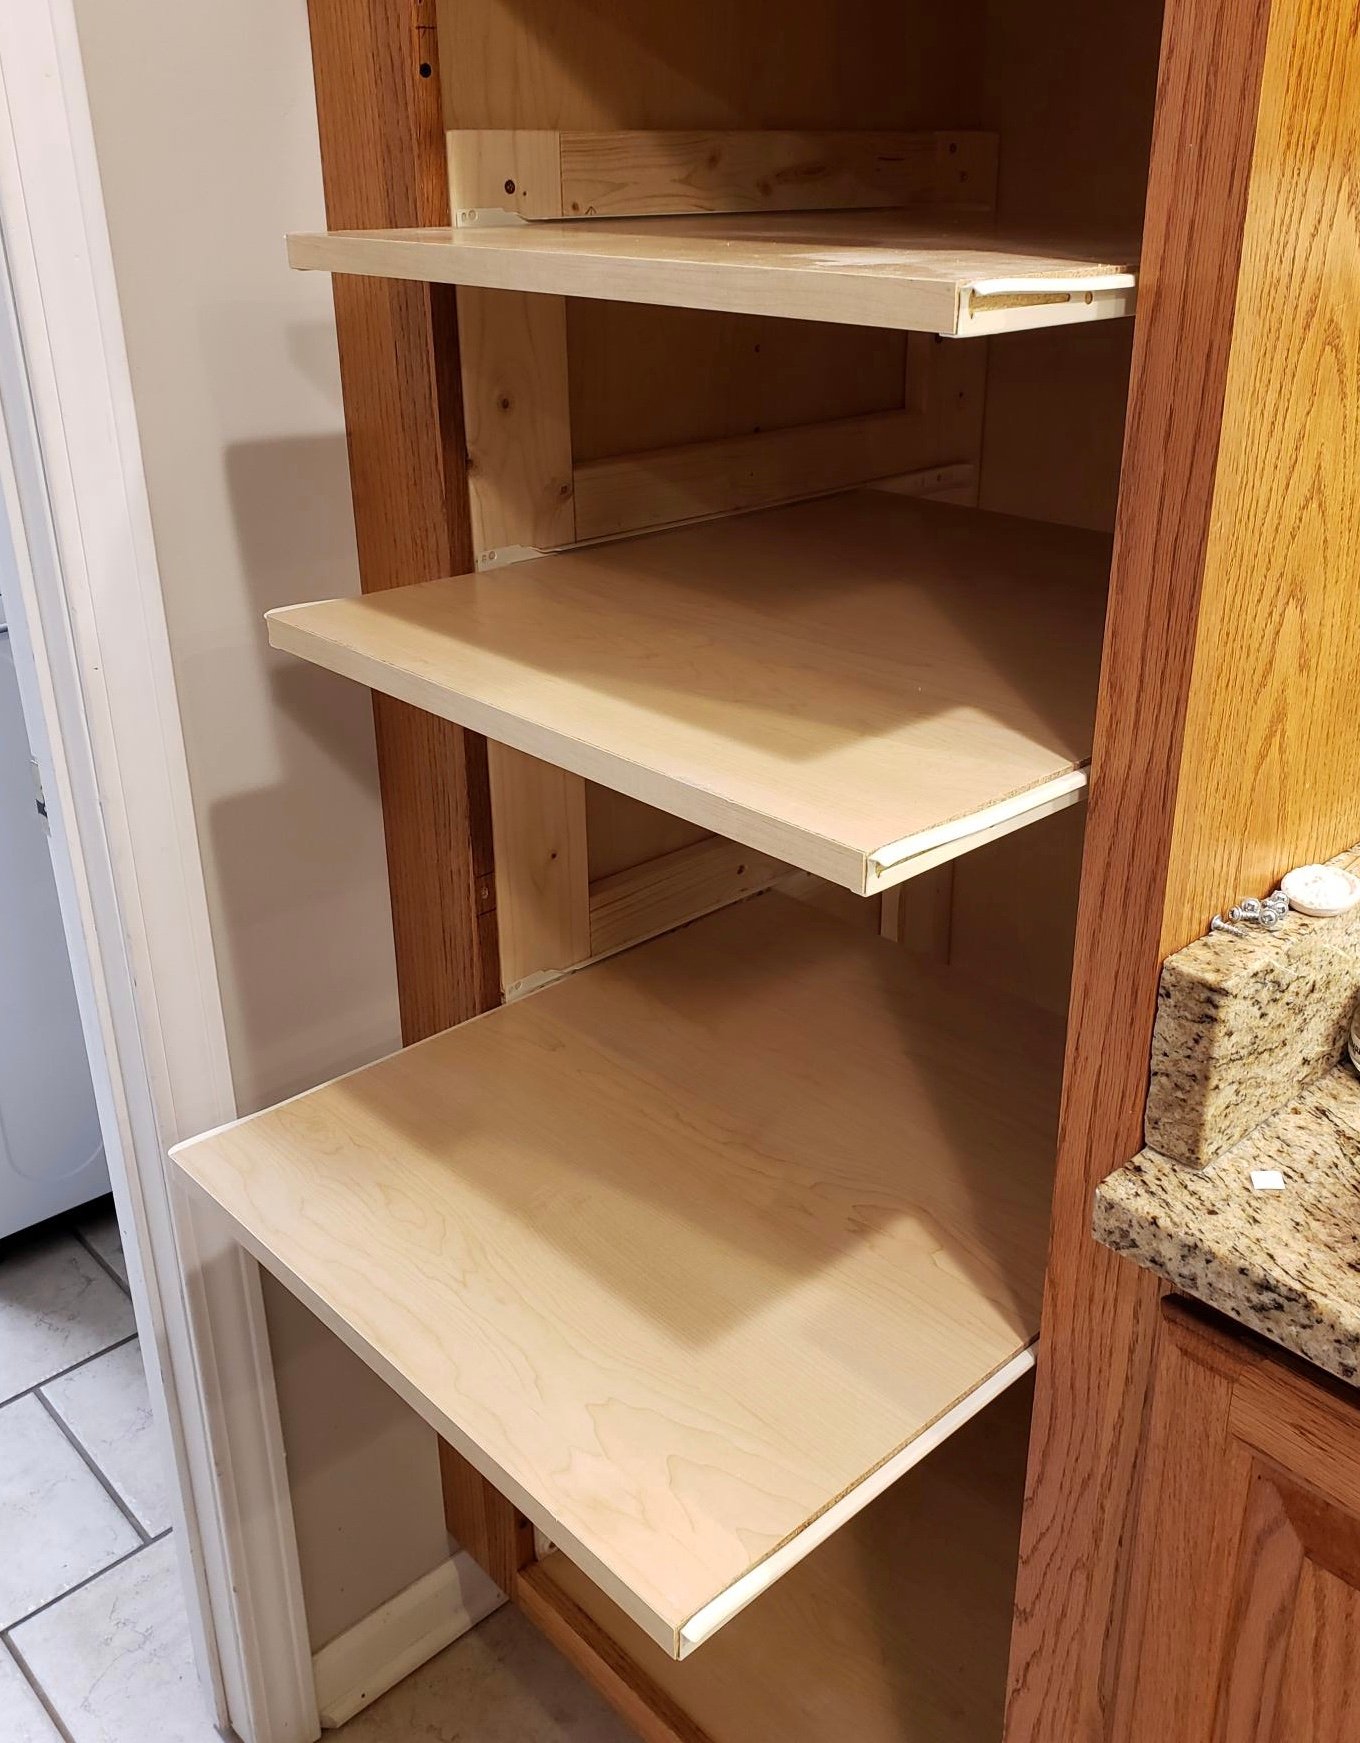

8. How to Install a Pull-Out Shelf Under Kitchen Cabinets


The Importance of the Underside of Kitchen Wall Cabinets in House Design

Creating a Functional and Aesthetically Pleasing Kitchen Space
 When designing a house, the kitchen is often considered the heart of the home. It is where meals are prepared, family and friends gather, and memories are made. With its importance in mind, every aspect of a kitchen's design should be carefully considered, including the often overlooked underside of kitchen wall cabinets.
The underside of kitchen wall cabinets is the area underneath the upper cabinets that are typically installed above countertops. This space may seem insignificant, but it plays a crucial role in both the functionality and aesthetics of a kitchen.
Functionality
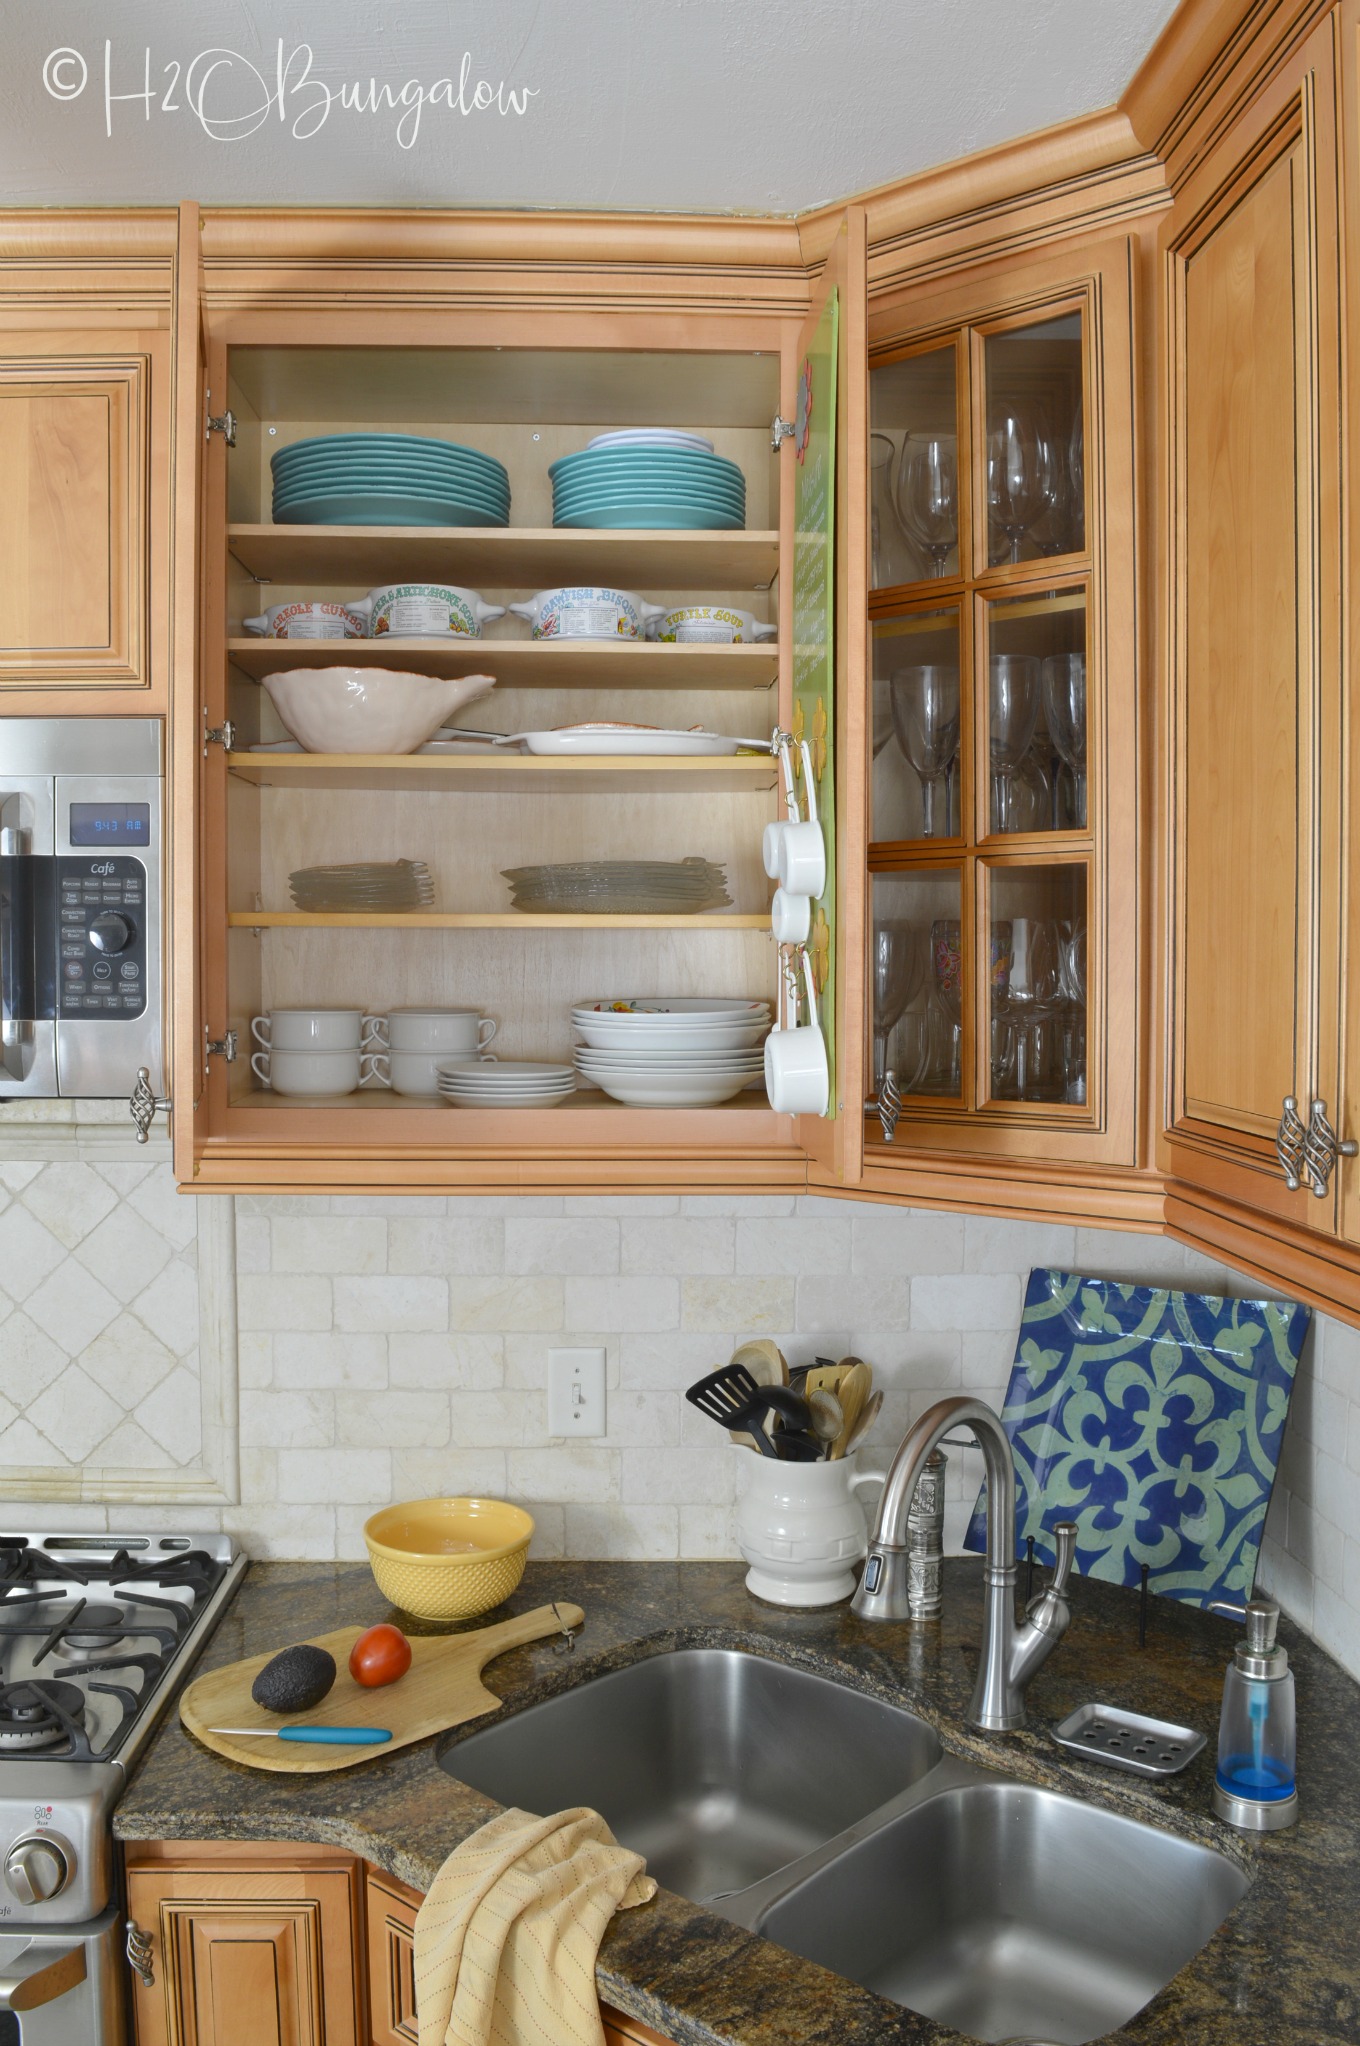
The underside of kitchen wall cabinets offers additional storage space for kitchen essentials such as spices, cooking utensils, and small appliances. By utilizing this space, homeowners can maximize their kitchen's storage capacity without taking up valuable counter or cabinet space. This is especially beneficial for smaller kitchens where space is limited.
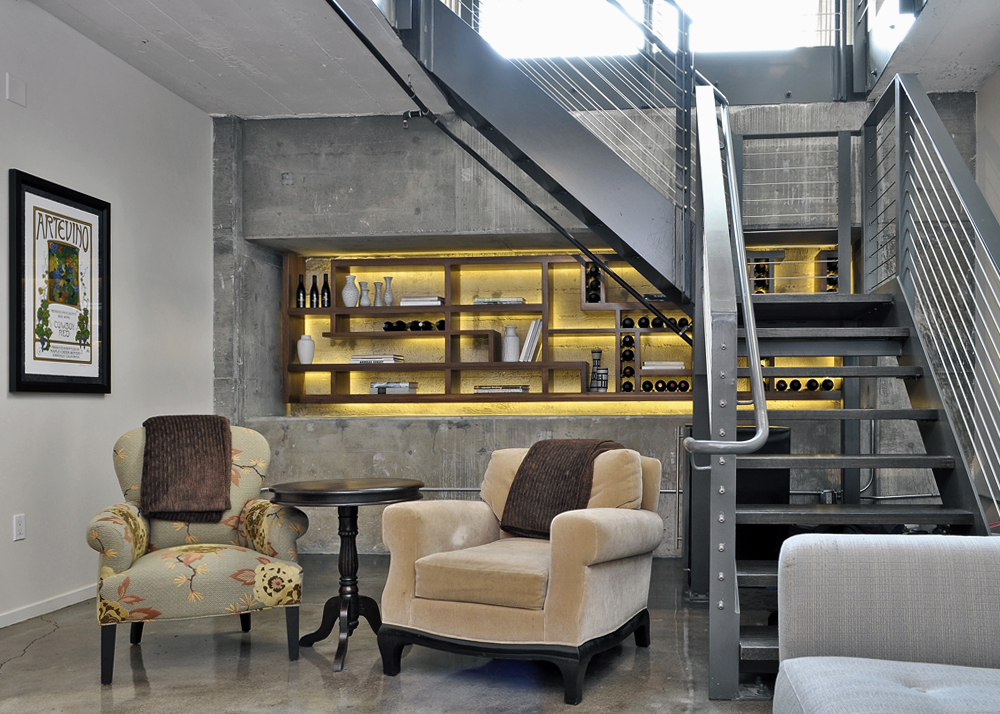
Moreover, the underside of kitchen wall cabinets can also serve as a convenient spot for installing lighting fixtures. Under-cabinet lighting not only adds a warm and welcoming ambiance to the kitchen but also provides much-needed illumination for meal preparation and cooking.
Aesthetics
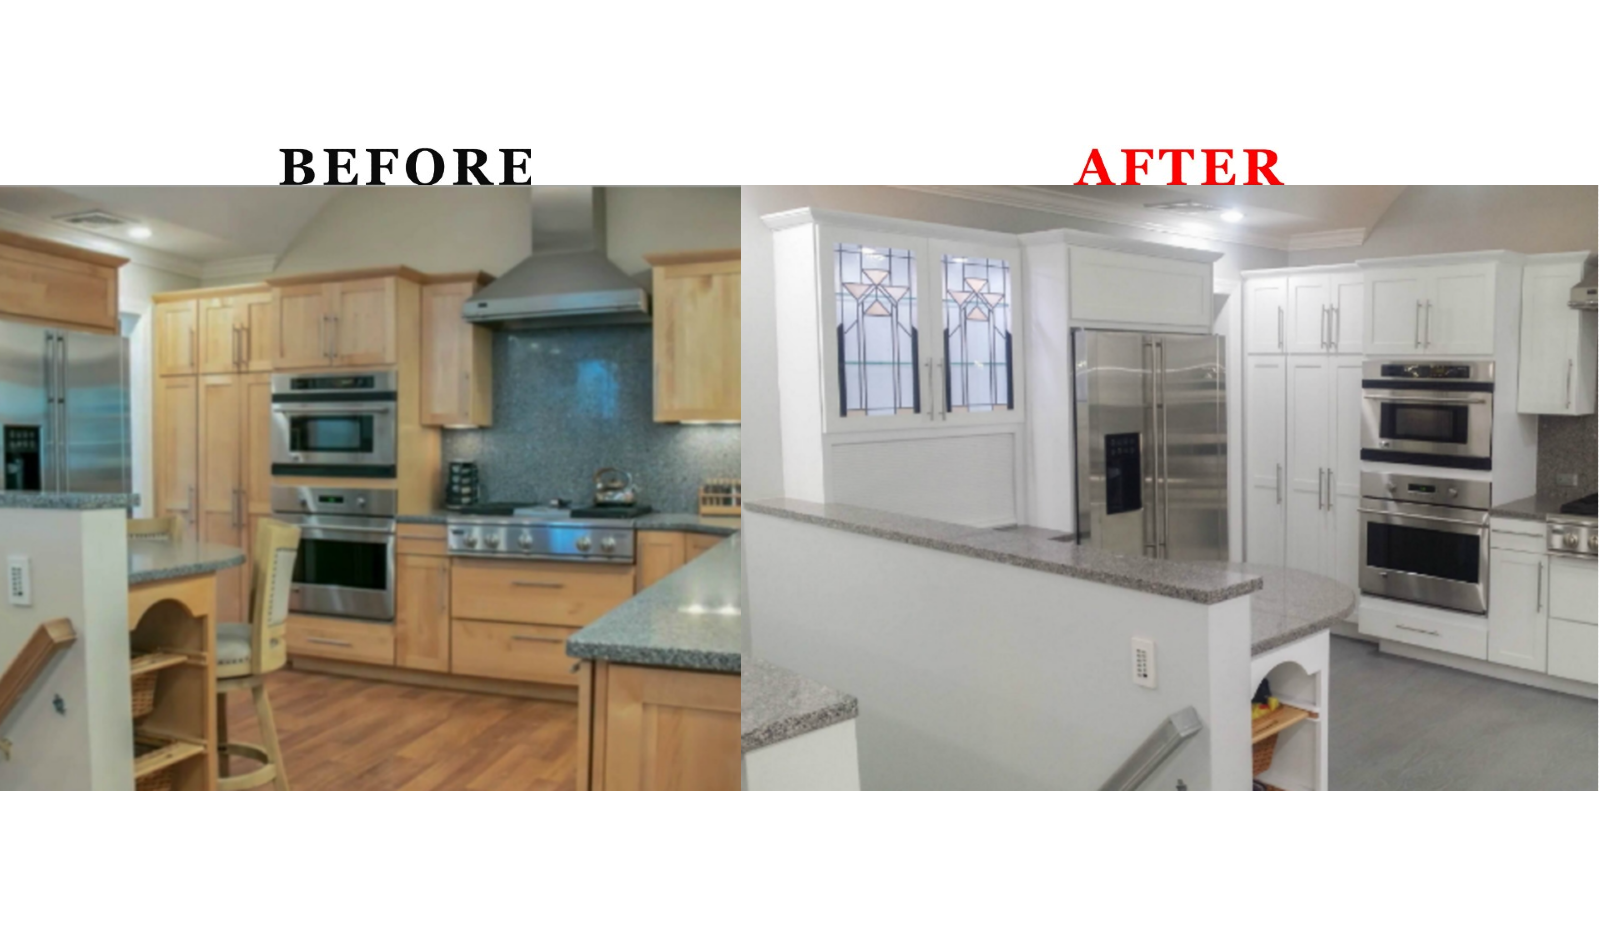
In terms of aesthetics, the underside of kitchen wall cabinets can make a significant impact on the overall look of the kitchen. This space can be left as is, painted to match the upper cabinets, or customized with decorative moldings or trim. Choosing the right design for the underside of kitchen wall cabinets can tie together the entire kitchen's look and create a cohesive and polished appearance.
Furthermore, the underside of kitchen wall cabinets can also act as a design element on its own. For instance, installing glass-front cabinets or open shelves in this space can add visual interest and allow homeowners to display their favorite dishes or decorative pieces.
Conclusion
In conclusion, the underside of kitchen wall cabinets may seem like a small and insignificant detail, but it plays a crucial role in both the functionality and aesthetics of a kitchen. By carefully considering this often overlooked space, homeowners can create a functional and aesthetically pleasing kitchen that is both practical and visually appealing. So, the next time you design a kitchen, don't forget to pay attention to the underside of the kitchen wall cabinets.
When designing a house, the kitchen is often considered the heart of the home. It is where meals are prepared, family and friends gather, and memories are made. With its importance in mind, every aspect of a kitchen's design should be carefully considered, including the often overlooked underside of kitchen wall cabinets.
The underside of kitchen wall cabinets is the area underneath the upper cabinets that are typically installed above countertops. This space may seem insignificant, but it plays a crucial role in both the functionality and aesthetics of a kitchen.
Functionality
The underside of kitchen wall cabinets offers additional storage space for kitchen essentials such as spices, cooking utensils, and small appliances. By utilizing this space, homeowners can maximize their kitchen's storage capacity without taking up valuable counter or cabinet space. This is especially beneficial for smaller kitchens where space is limited.
Moreover, the underside of kitchen wall cabinets can also serve as a convenient spot for installing lighting fixtures. Under-cabinet lighting not only adds a warm and welcoming ambiance to the kitchen but also provides much-needed illumination for meal preparation and cooking.
Aesthetics
In terms of aesthetics, the underside of kitchen wall cabinets can make a significant impact on the overall look of the kitchen. This space can be left as is, painted to match the upper cabinets, or customized with decorative moldings or trim. Choosing the right design for the underside of kitchen wall cabinets can tie together the entire kitchen's look and create a cohesive and polished appearance.
Furthermore, the underside of kitchen wall cabinets can also act as a design element on its own. For instance, installing glass-front cabinets or open shelves in this space can add visual interest and allow homeowners to display their favorite dishes or decorative pieces.
Conclusion
In conclusion, the underside of kitchen wall cabinets may seem like a small and insignificant detail, but it plays a crucial role in both the functionality and aesthetics of a kitchen. By carefully considering this often overlooked space, homeowners can create a functional and aesthetically pleasing kitchen that is both practical and visually appealing. So, the next time you design a kitchen, don't forget to pay attention to the underside of the kitchen wall cabinets.