Removing a kitchen sink handle may seem like a daunting task, but with the right tools and a little know-how, it can be a straightforward process. Whether you're replacing a broken handle or just giving your sink a facelift, removing the handle is the first step in the process. In this article, we'll guide you through the steps of removing a kitchen sink handle, so you can get your sink looking and functioning like new.How to Remove a Kitchen Sink Handle


How to Remove a Kitchen Sink Handle

The first step in removing a kitchen sink handle is to turn off the water supply to the sink. This can usually be done by turning off the shut-off valves under the sink. If your sink doesn't have shut-off valves, you'll need to turn off the main water supply to your home. Next, you'll need to remove the decorative cap on top of the handle. This can usually be done by prying it off with a flat-head screwdriver. Once the cap is removed, you should see a screw holding the handle in place. Using a screwdriver, remove the screw and set it aside. You may need to hold onto the handle as you remove the screw to prevent it from falling into the sink. Once the screw is removed, you can gently pull the handle away from the sink. If the handle doesn't come off easily, you may need to use a handle puller to remove it. This tool is specifically designed for removing stubborn handles and can be purchased at most home improvement stores. Once the handle is removed, you should see the valve stem, which is connected to the handle. Using a wrench, loosen and remove the nut that holds the valve stem in place. You may need to use a bit of force, but be careful not to damage the valve stem. With the nut removed, you can now pull the valve stem out of the sink. This may require a bit of wiggling and twisting, but it should come out relatively easily. Set the valve stem aside for now. Now that the handle and valve stem are removed, you can access the cartridge, which is responsible for controlling the flow of water in your sink. Depending on the type of sink you have, the cartridge may be held in place by a retaining clip or simply screwed into place. Use the appropriate tool to remove the cartridge and set it aside. With the cartridge removed, you can now clean and inspect the inside of the handle and sink. If there is any buildup or debris, now is a good time to clean it out before putting everything back together. Once everything is clean and inspected, you can now reverse the steps to put everything back together. Make sure to tighten all screws and nuts securely and turn the water supply back on. Test the faucet to ensure everything is working properly.Removing a Kitchen Sink Handle: Step-by-Step Guide


Removing a Kitchen Sink Handle: Step-by-Step Guide


Removing a kitchen sink handle is a DIY project that can save you time and money. With the right tools and a little patience, you can easily remove a kitchen sink handle and give your sink a fresh look. Just make sure to follow the steps carefully and take your time to avoid any mishaps.DIY: How to Remove a Kitchen Sink Handle


DIY: How to Remove a Kitchen Sink Handle


Here are some additional tips and tricks to keep in mind when removing a kitchen sink handle:Removing a Kitchen Sink Handle: Tips and Tricks


Removing a Kitchen Sink Handle: Tips and Tricks

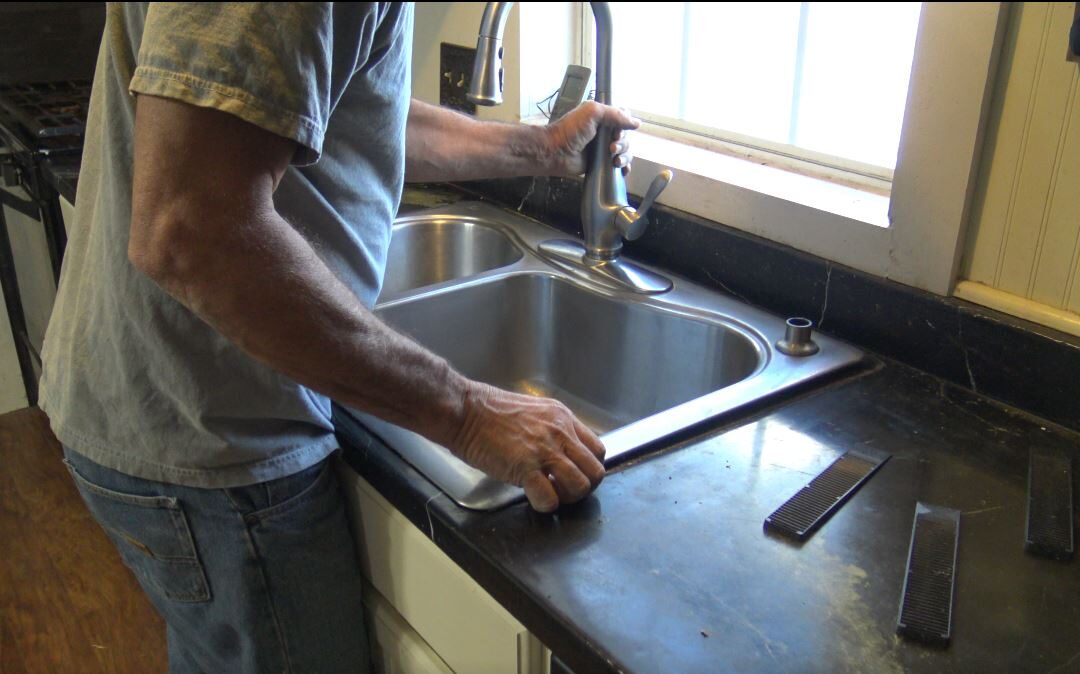
If you prefer a more visual guide, here is a step-by-step breakdown of how to remove a kitchen sink handle:Step-by-Step Guide for Removing a Kitchen Sink Handle


Step-by-Step Guide for Removing a Kitchen Sink Handle


:no_upscale()/cdn.vox-cdn.com/uploads/chorus_asset/file/19495086/drain_0.jpg)


While removing a kitchen sink handle may seem like a simple task, there are some common mistakes that can make the job more difficult. Here are a few things to avoid:Removing a Kitchen Sink Handle: Common Mistakes to Avoid
Removing a Kitchen Sink Handle: Common Mistakes to Avoid


If you're looking for a quick and easy method to remove a kitchen sink handle, here's a simple trick: use a hairdryer. By heating up the handle and valve stem, you can loosen any buildup or debris and make it easier to remove. Just be careful not to burn yourself in the process.Quick and Easy Method for Removing a Kitchen Sink Handle

/MethodKitchenCleaner-56a4e7e93df78cf772854133.jpg)
Quick and Easy Method for Removing a Kitchen Sink Handle


Before you begin, make sure you have the following tools and materials on hand:Removing a Kitchen Sink Handle: Tools and Materials You'll Need

Removing a Kitchen Sink Handle: Tools and Materials You'll Need

If you're a visual learner, you may find it helpful to watch a step-by-step video tutorial on how to remove a kitchen sink handle. There are many tutorials available online that can guide you through the process and make it easier to understand.Step-by-Step Video Tutorial: How to Remove a Kitchen Sink Handle


Step-by-Step Video Tutorial: How to Remove a Kitchen Sink Handle


If you encounter any issues while removing your kitchen sink handle, here are some common problems and solutions:Removing a Kitchen Sink Handle: Troubleshooting Common Issues

Removing a Kitchen Sink Handle: Troubleshooting Common Issues


How to Remove a Kitchen Sink Handle: A Step-by-Step Guide
Introduction
 The kitchen sink is one of the most used fixtures in any household, and its handle is the most frequently touched part. Over time, the handle may become loose or start to malfunction, making it difficult to turn the water on and off. In some cases, it may even begin to leak. If you are facing any of these issues, it may be time to remove and replace your kitchen sink handle. In this article, we will guide you through the process of removing a kitchen sink handle, so you can have a fully functioning and aesthetically pleasing kitchen.
Step 1: Gather Your Tools
 Before you begin, make sure you have all the necessary tools and materials. These may include a screwdriver, pliers, an adjustable wrench, and a replacement handle if needed. It's also a good idea to have a bucket or towel handy to catch any water that may spill during the process.
Step 2: Turn Off the Water Supply
 To avoid any potential flooding or water damage, turn off the water supply to your kitchen sink. This can usually be done by locating the shut-off valves under the sink and turning them clockwise until they are tightly closed.
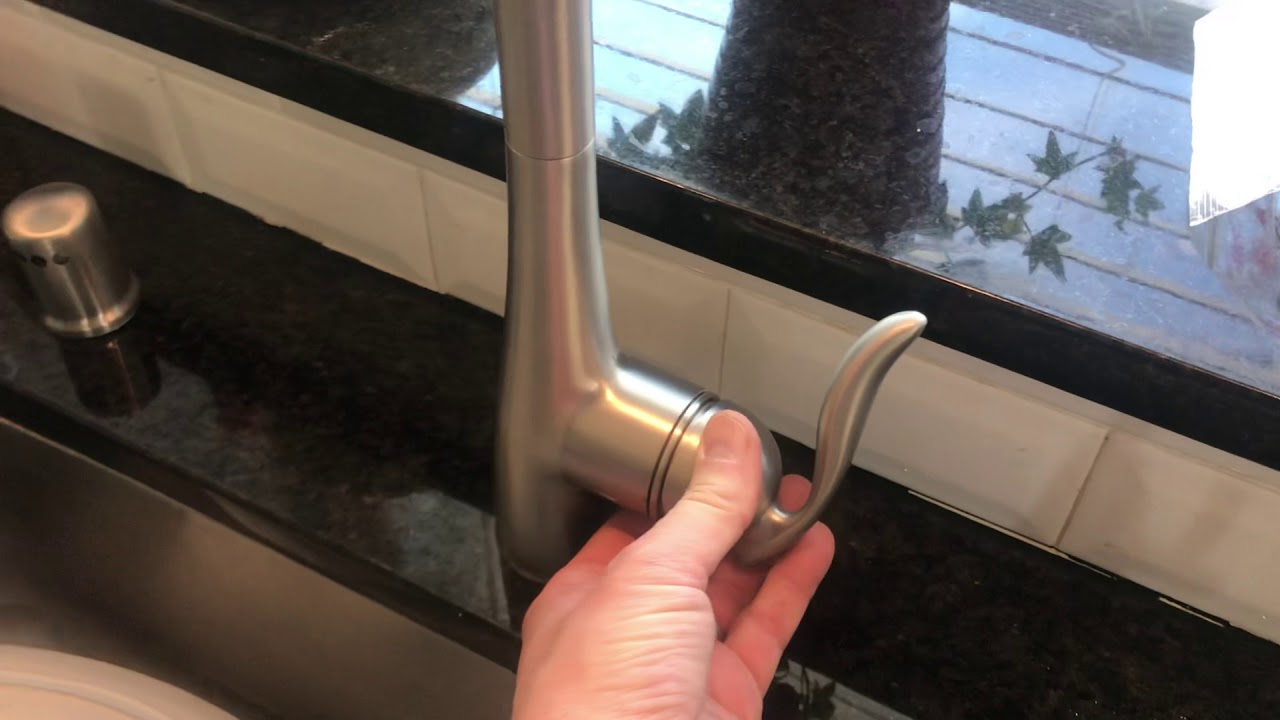
Step 3: Remove the Screws
 Using a screwdriver, carefully unscrew the screws holding the handle in place. These are typically located on the top or side of the handle. Once the screws are removed, you should be able to easily detach the handle from the sink.
Step 4: Check the Cartridge
 Underneath the handle, you will find the cartridge, which is responsible for controlling the water flow. Check for any cracks or damage that may be causing the handle to malfunction. If the cartridge is damaged, it will need to be replaced.
Step 5: Remove the Cartridge
 If the cartridge needs to be replaced, use pliers to grip and pull it out. Be gentle to avoid causing any damage to the surrounding parts.
Step 6: Install the New Cartridge
 Take your new cartridge and insert it into the same position as the old one. Make sure it is properly aligned and secure.
Step 7: Reattach the Handle
 Once the new cartridge is in place, reattach the handle by screwing it back into place. Make sure the screws are tightened but not too tight, as this could cause damage to the handle.
Step 8: Turn the Water Supply Back On
 Now that the handle is securely in place, it's time to turn the water supply back on. Check for any leaks or drips and tighten any connections if necessary.
Conclusion
 Removing a kitchen sink handle may seem like a daunting task, but with the right tools and knowledge, it can be easily done. By following these simple steps, you can have a fully functional and aesthetically pleasing kitchen sink in no time. Remember to always turn off the water supply before making any repairs and to check for any damage that may require replacement parts. With a little effort and know-how, you can keep your kitchen sink looking and functioning like new.