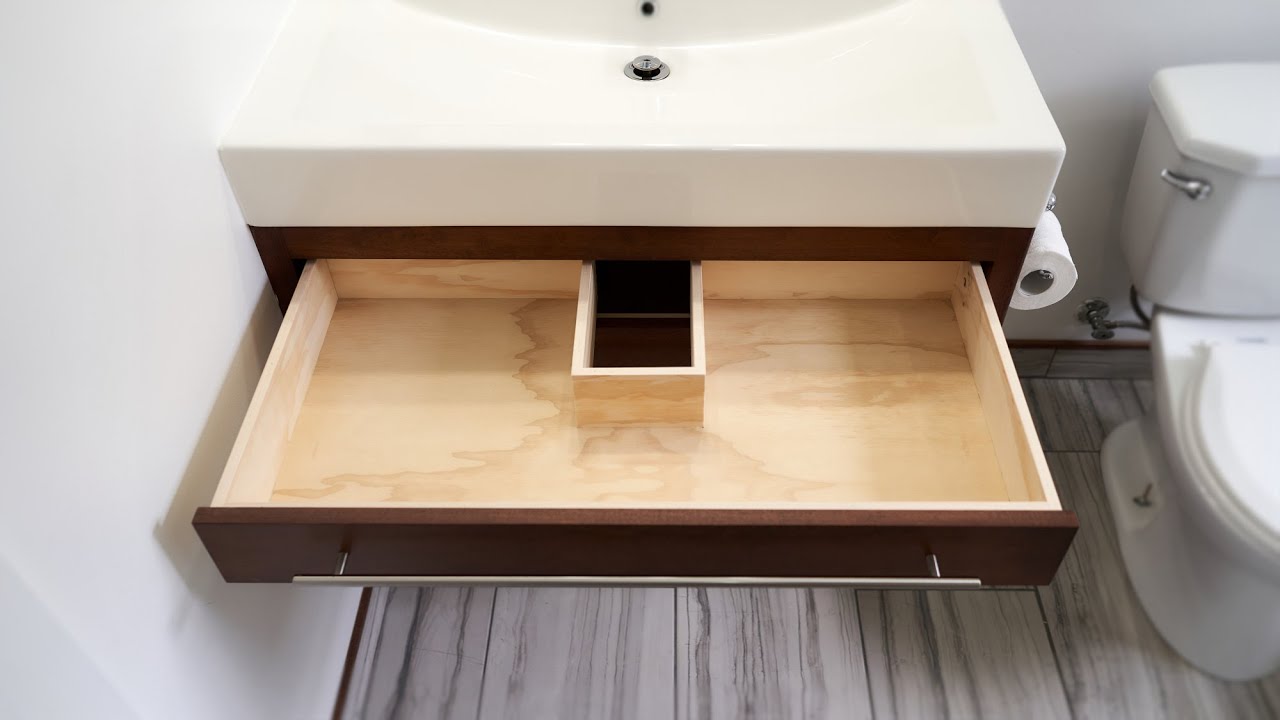
If you're experiencing a clogged drain in your bathroom sink, it may be time to remove the drain flange. This small but important part of your sink can become clogged with hair, soap scum, and other debris over time, leading to slow draining or even a complete blockage. Removing the drain flange from your bathroom sink is a fairly simple process, but it's important to do it correctly to avoid causing any damage. In this guide, we'll walk you through the steps to successfully remove the drain flange from your bathroom sink.Remove Drain Flange from Bathroom Sink


Remove Drain Flange from Bathroom Sink


The first step in removing the drain flange from your bathroom sink is to gather all the necessary tools. You'll need a pair of pliers, a screwdriver, and a drain flange remover tool. If you don't have a drain flange remover tool, you can use a pair of needle-nose pliers or a drain key (a special tool designed for removing stubborn drain flanges). Make sure to also have a bucket or towel handy to catch any water that may come out of the drain.Bathroom Sink Drain Flange Removal


Bathroom Sink Drain Flange Removal


/replace-bathtub-drain-flange-with-wrench-and-specialty-tool-533556351-5c61a9ff46e0fb000127cd5d.jpg)

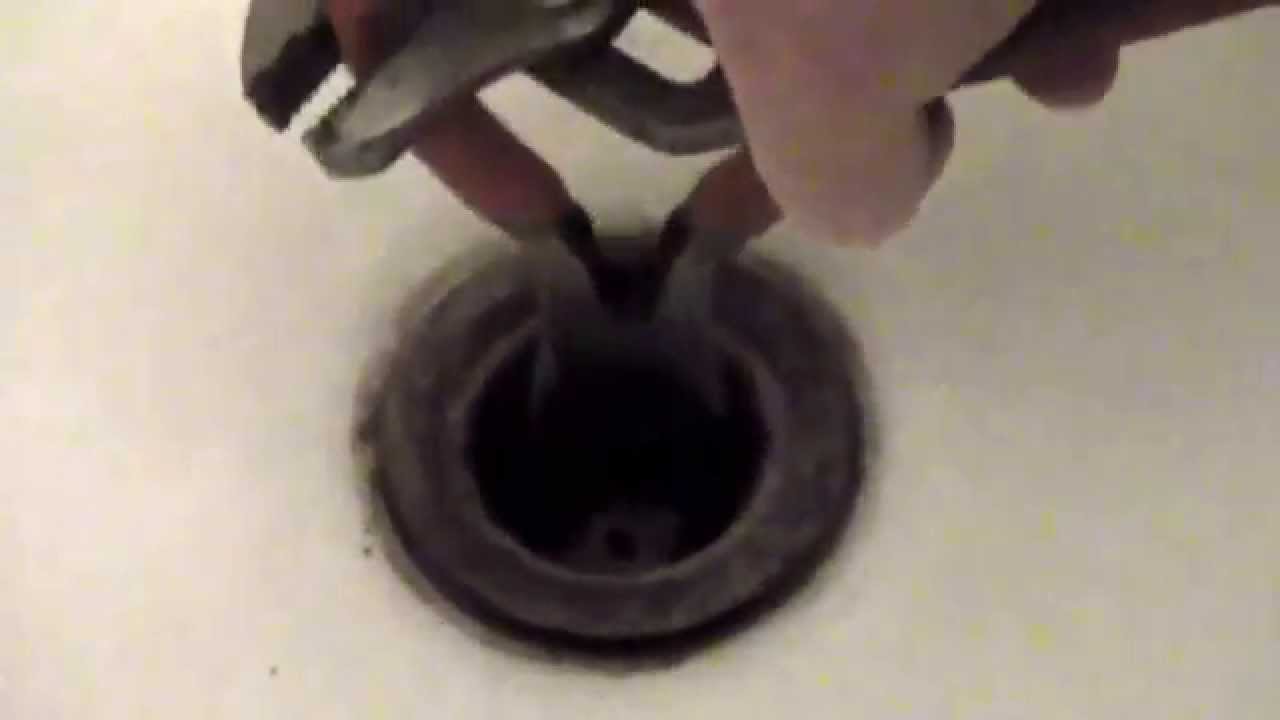
Once you have all your tools ready, it's time to start removing the drain flange. First, remove the sink stopper by unscrewing it from the drain. Next, use your pliers to remove any visible screws on the drain flange. If there are no screws, you may need to use a drain key to loosen the flange. Place the drain flange remover tool over the flange and turn it counterclockwise to loosen it. If you don't have a flange remover tool, you can use needle-nose pliers to grip the flange and turn it counterclockwise. Be careful not to apply too much pressure, as this can damage the flange or other parts of your sink.How to Remove Drain Flange from Bathroom Sink

How to Remove Drain Flange from Bathroom Sink
Once the flange is loose, you can simply lift it out of the drain. You may encounter some resistance, especially if the flange has been in place for a long time and has accumulated a lot of debris. In this case, you may need to use a bit more force or try using a lubricant to help loosen the flange. Once the flange is completely removed, clean out any debris from the drain using a small brush or old toothbrush. This will help prevent future clogs and keep your sink draining smoothly.Removing Drain Flange from Bathroom Sink


Removing Drain Flange from Bathroom Sink


When removing the drain flange from your bathroom sink, there are a few key tips to keep in mind. First, be patient and gentle. Rushing or using too much force can lead to damage to your sink or the flange itself. Also, make sure to have a good grip on the flange before attempting to turn it. Slippery or wet hands can make it difficult to get a good grip, so consider wearing gloves or using a towel to help you grip the flange securely.Bathroom Sink Drain Flange Removal Tips

Bathroom Sink Drain Flange Removal Tips


While you can always call a plumber to remove your drain flange, it's a fairly simple task that you can easily do yourself. Not only will this save you money, but it will also give you a better understanding of your sink's plumbing system. Just make sure to follow the steps carefully and take your time to avoid any mistakes.DIY Bathroom Sink Drain Flange Removal


DIY Bathroom Sink Drain Flange Removal

To summarize, here is a step-by-step guide to removing the drain flange from your bathroom sink:Step-by-Step Guide to Removing Drain Flange from Bathroom Sink


Step-by-Step Guide to Removing Drain Flange from Bathroom Sink
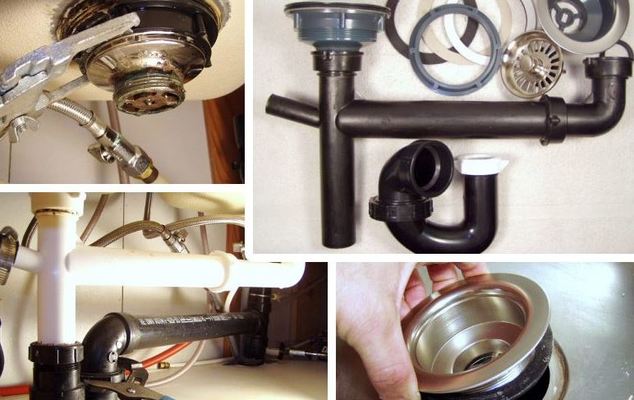
As mentioned earlier, you'll need a few tools to successfully remove the drain flange from your bathroom sink. These include pliers, a screwdriver, and a drain flange remover tool. If you don't have a flange remover tool, you can also use needle-nose pliers or a drain key. Make sure to have all your tools ready before starting the removal process.Tools Needed for Removing Drain Flange from Bathroom Sink

Tools Needed for Removing Drain Flange from Bathroom Sink
While removing the drain flange from your bathroom sink is a straightforward process, there are a few common mistakes that can happen. These include using too much force, not having a good grip on the flange, or not properly cleaning out the drain before replacing the flange. Make sure to follow the steps carefully and take your time to avoid these mistakes.Common Mistakes When Removing Drain Flange from Bathroom Sink
Common Mistakes When Removing Drain Flange from Bathroom Sink

If you encounter any difficulties while removing the drain flange, there are a few troubleshooting tips you can try. If the flange is stuck, try using a lubricant to help loosen it. If you're having trouble getting a good grip on the flange, try wearing gloves or using a towel to help you grip it more securely. If all else fails, it may be time to call a professional plumber for assistance. Removing the drain flange from your bathroom sink may seem like a daunting task, but with the right tools and a little patience, you can easily do it yourself. Just make sure to follow the steps carefully and take your time to avoid any mistakes. With a clean and functional drain flange, your bathroom sink will be back to draining smoothly in no time.Troubleshooting Tips for Removing Drain Flange from Bathroom Sink

Troubleshooting Tips for Removing Drain Flange from Bathroom Sink
Why Removing a Drain Flange from Your Bathroom Sink is Important for House Design

Protect Your Pipes and Prevent Clogs
 Removing a drain flange from your bathroom sink is an essential step in maintaining the functionality and design of your house.
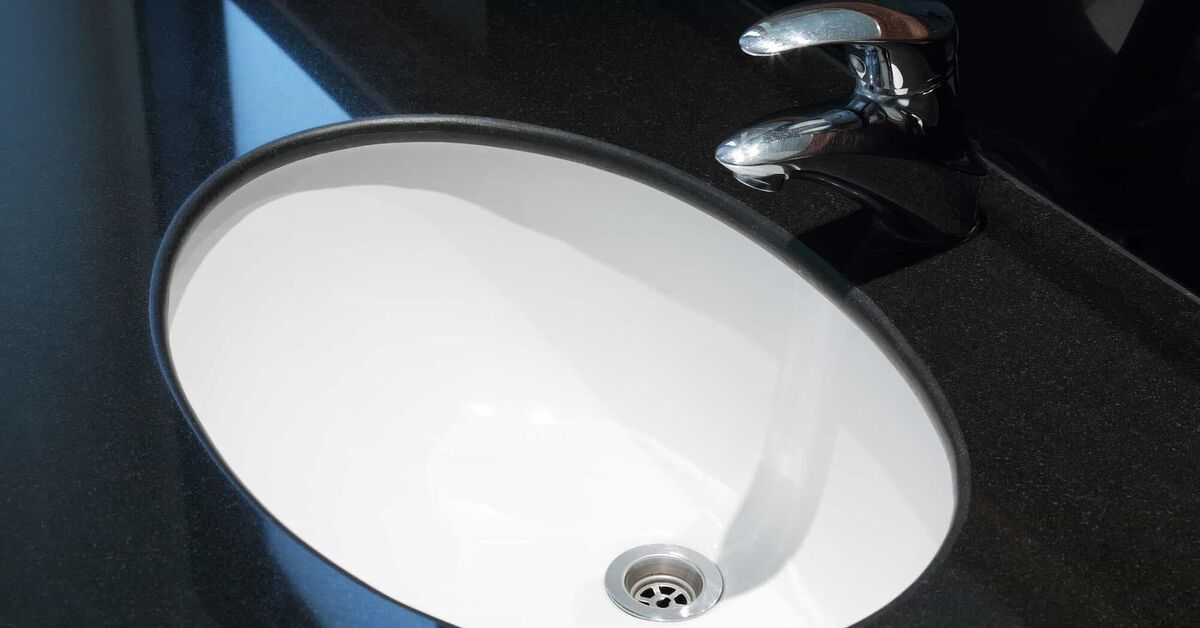
The drain flange is the circular piece that sits at the bottom of your sink and connects to the drain pipe. Over time, this piece can become clogged with hair, soap scum, and other debris, which can lead to slow draining or even complete blockage. By removing the drain flange and cleaning it regularly, you can prevent clogs and protect your pipes from potential damage.
Removing a drain flange from your bathroom sink is an essential step in maintaining the functionality and design of your house.
The drain flange is the circular piece that sits at the bottom of your sink and connects to the drain pipe. Over time, this piece can become clogged with hair, soap scum, and other debris, which can lead to slow draining or even complete blockage. By removing the drain flange and cleaning it regularly, you can prevent clogs and protect your pipes from potential damage.
Improve the Aesthetics of Your Bathroom
 Another reason to remove the drain flange from your bathroom sink is to improve the overall aesthetics of your bathroom.
The drain flange can become discolored or corroded over time, which can be unsightly and take away from the design of your bathroom. By removing the drain flange and cleaning it or replacing it with a new one, you can instantly refresh the appearance of your sink and enhance the overall look of your bathroom.
Another reason to remove the drain flange from your bathroom sink is to improve the overall aesthetics of your bathroom.
The drain flange can become discolored or corroded over time, which can be unsightly and take away from the design of your bathroom. By removing the drain flange and cleaning it or replacing it with a new one, you can instantly refresh the appearance of your sink and enhance the overall look of your bathroom.
Make Repairs and Upgrades Easier
 Removing the drain flange also makes it easier to make repairs or upgrades to your bathroom sink.
If you need to replace the drain pipe or install a new sink, it will be much simpler to do so without the drain flange in the way. It also allows for easier access to the drain pipe, making it easier to fix any potential issues that may arise in the future.
Removing the drain flange also makes it easier to make repairs or upgrades to your bathroom sink.
If you need to replace the drain pipe or install a new sink, it will be much simpler to do so without the drain flange in the way. It also allows for easier access to the drain pipe, making it easier to fix any potential issues that may arise in the future.
How to Remove a Drain Flange
 Now that you understand the importance of removing a drain flange from your bathroom sink, here is a simple step-by-step guide on how to do it:
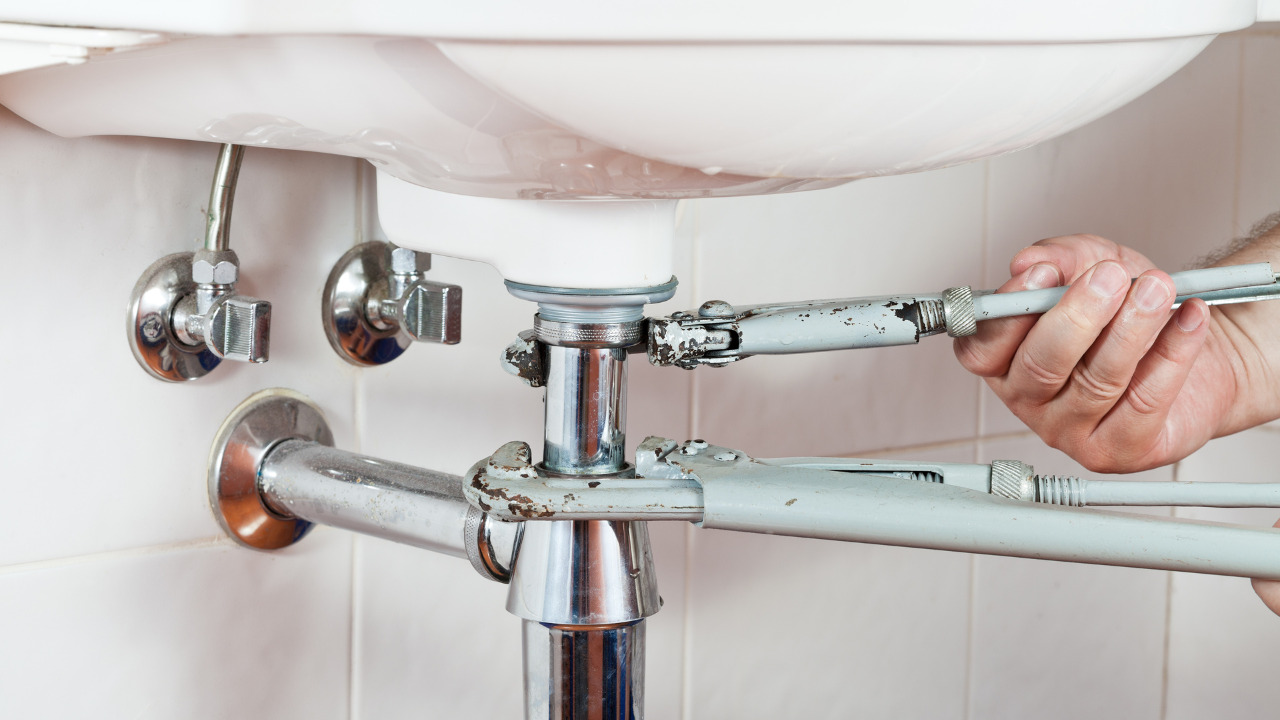
1. Start by turning off the water supply to your sink. This can usually be done by turning the shut-off valves located under the sink.
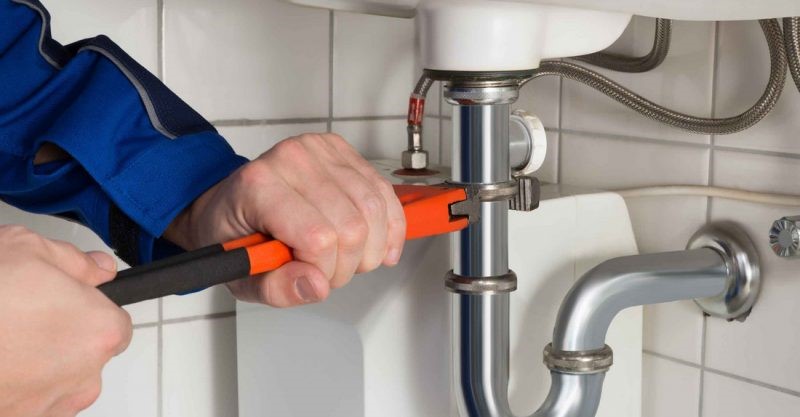
2. Use pliers or a drain key to loosen the locknut located on the bottom of the drain flange.
3. Once the locknut is loose, you can unscrew the drain flange from the sink.
4. Clean the drain flange and the surrounding area thoroughly with a mild cleaner and a brush.
5. If the drain flange is damaged or corroded, now is a good time to replace it with a new one.
6. To install a new drain flange, simply screw it into place and tighten the locknut.
7. Turn the water supply back on and test the sink to ensure it is draining properly.
By following these simple steps, you can easily remove the drain flange from your bathroom sink and keep it in top working condition. This small but important task will not only benefit the functionality and appearance of your sink, but also contribute to the overall design of your house.
So don't neglect this important maintenance task and enjoy a well-designed and functional bathroom for years to come.
Now that you understand the importance of removing a drain flange from your bathroom sink, here is a simple step-by-step guide on how to do it:
1. Start by turning off the water supply to your sink. This can usually be done by turning the shut-off valves located under the sink.
2. Use pliers or a drain key to loosen the locknut located on the bottom of the drain flange.
3. Once the locknut is loose, you can unscrew the drain flange from the sink.
4. Clean the drain flange and the surrounding area thoroughly with a mild cleaner and a brush.
5. If the drain flange is damaged or corroded, now is a good time to replace it with a new one.
6. To install a new drain flange, simply screw it into place and tighten the locknut.
7. Turn the water supply back on and test the sink to ensure it is draining properly.
By following these simple steps, you can easily remove the drain flange from your bathroom sink and keep it in top working condition. This small but important task will not only benefit the functionality and appearance of your sink, but also contribute to the overall design of your house.
So don't neglect this important maintenance task and enjoy a well-designed and functional bathroom for years to come.