If you've noticed a constant drip, drip, drip coming from your kitchen sink, it's time to take action. A leaky kitchen sink can not only be annoying, but it can also lead to bigger problems like water damage and mold growth. The good news is that fixing a leaky kitchen sink is a relatively simple task that can save you from costly repairs down the line. To fix a leaky kitchen sink, start by turning off the water supply to your sink. Then, use a wrench to tighten any loose connections around the sink, including the faucet, handles, and pipes. If the leak persists, you may need to replace worn out parts such as the O-ring or valve seat. If you're not comfortable tackling the job yourself, don't hesitate to call a professional plumber.1. How to Fix a Leaky Kitchen Sink


1. How to Fix a Leaky Kitchen Sink


Over time, the drain in your kitchen sink can become clogged or rusted, making it difficult for water to flow freely. If you've tried everything to unclog it with no luck, it may be time to replace the entire drain. This can seem like a daunting task, but with the right tools and a little know-how, you can easily replace a kitchen sink drain on your own. To replace a kitchen sink drain, start by removing the old drain with a pipe wrench. Then, clean the area around the drain and apply plumber's putty to create a seal. Next, insert the new drain and secure it with the mounting hardware provided. Finally, run water through the drain to test for any leaks. If all is well, you can now enjoy a properly functioning kitchen sink drain.2. How to Replace a Kitchen Sink Drain


2. How to Replace a Kitchen Sink Drain
:max_bytes(150000):strip_icc()/how-to-install-a-sink-drain-2718789-hero-24e898006ed94c9593a2a268b57989a3.jpg)


/how-to-install-a-sink-drain-2718789-hero-b5b99f72b5a24bb2ae8364e60539cece.jpg)


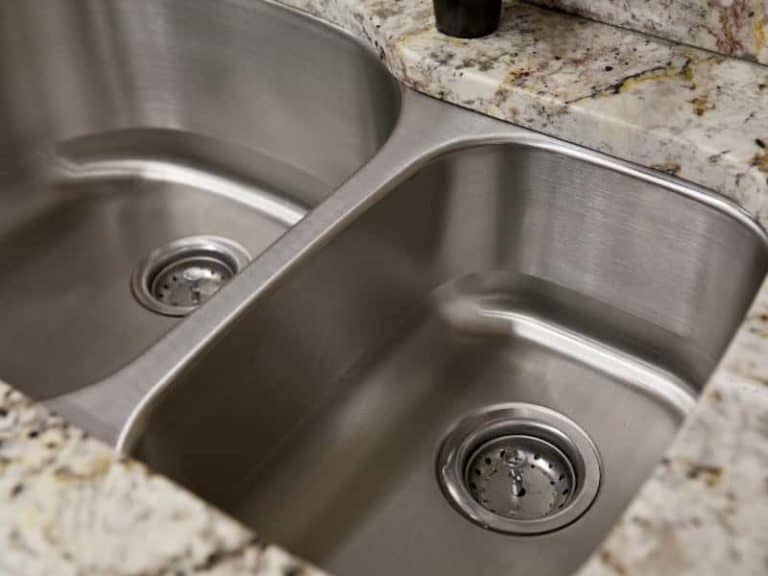
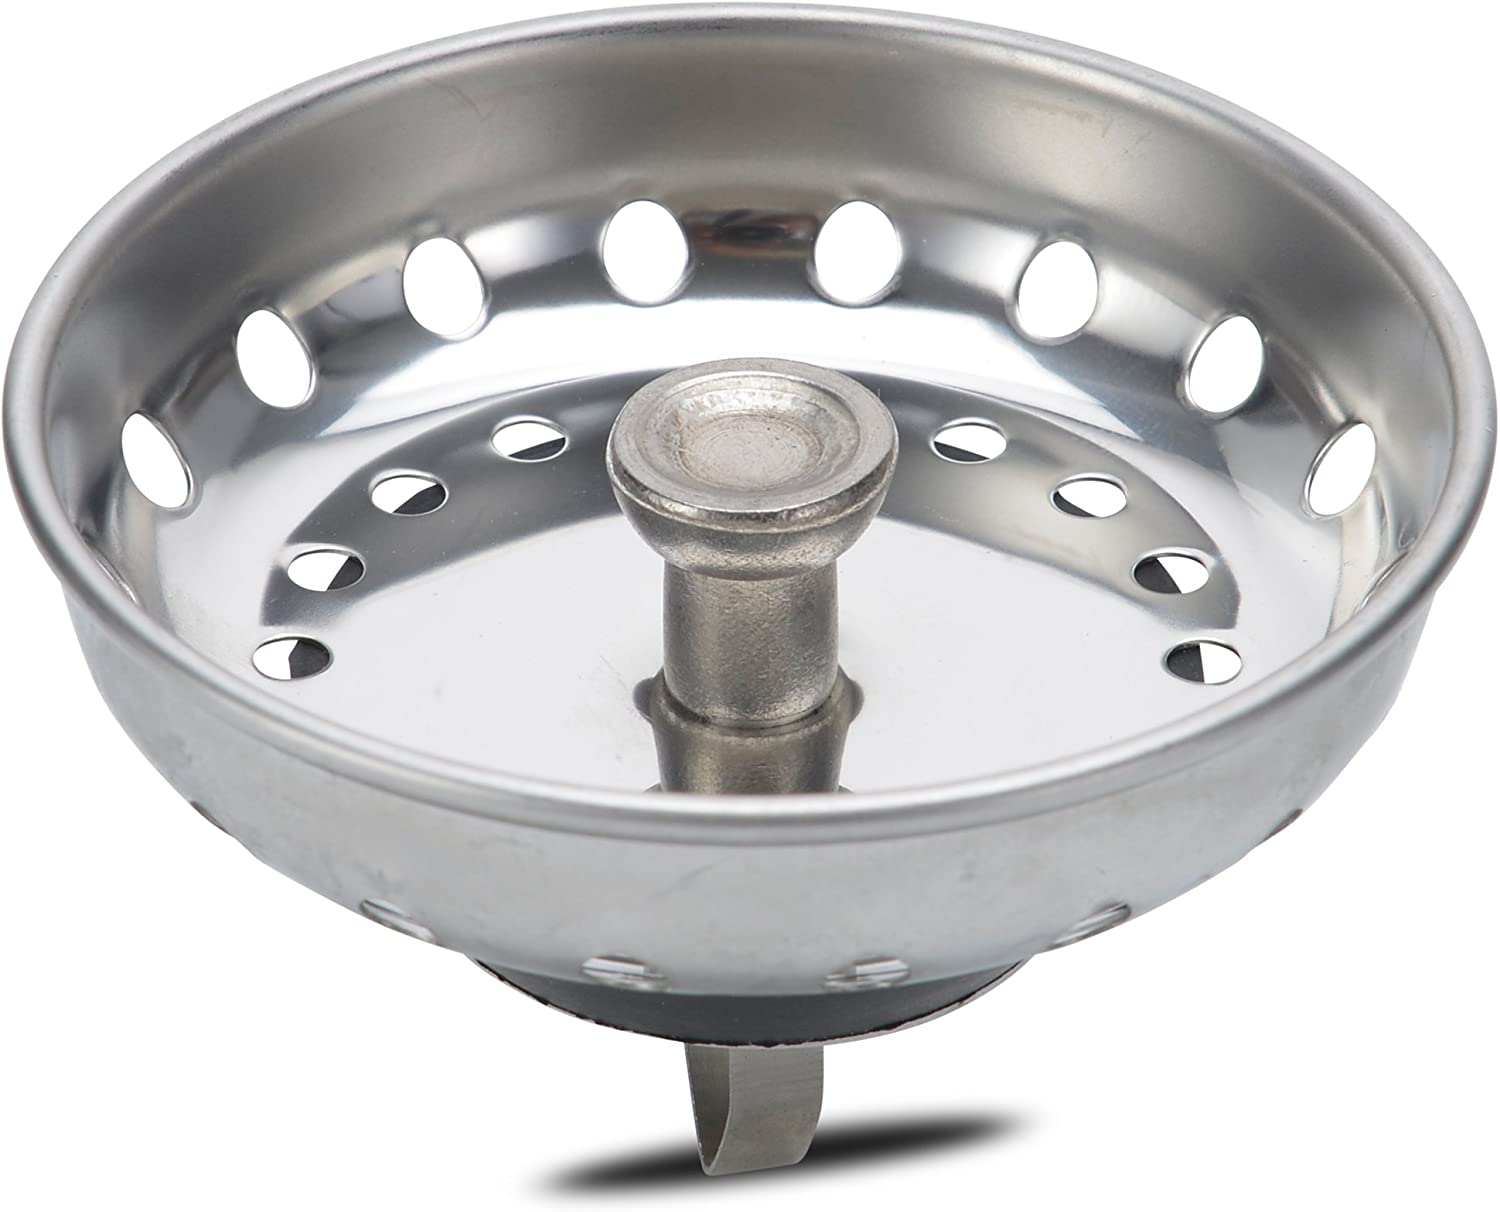
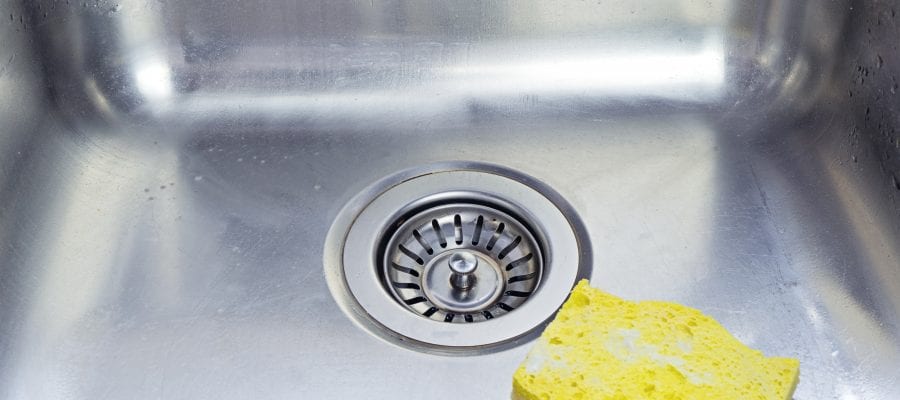
The kitchen sink strainer is an essential component of your sink that keeps food scraps and debris from clogging your pipes. However, over time, the strainer can become loose and cause water to leak. Fortunately, tightening a kitchen sink strainer is a quick and easy fix that can prevent a bigger problem from occurring. To tighten a kitchen sink strainer, start by removing the drain cover and using a screwdriver to tighten any loose screws. If the strainer is still loose, you may need to replace the rubber gasket or use plumber's tape to create a better seal. Once you've tightened everything, run water through the sink to test for any leaks.3. How to Tighten a Kitchen Sink Strainer


3. How to Tighten a Kitchen Sink Strainer


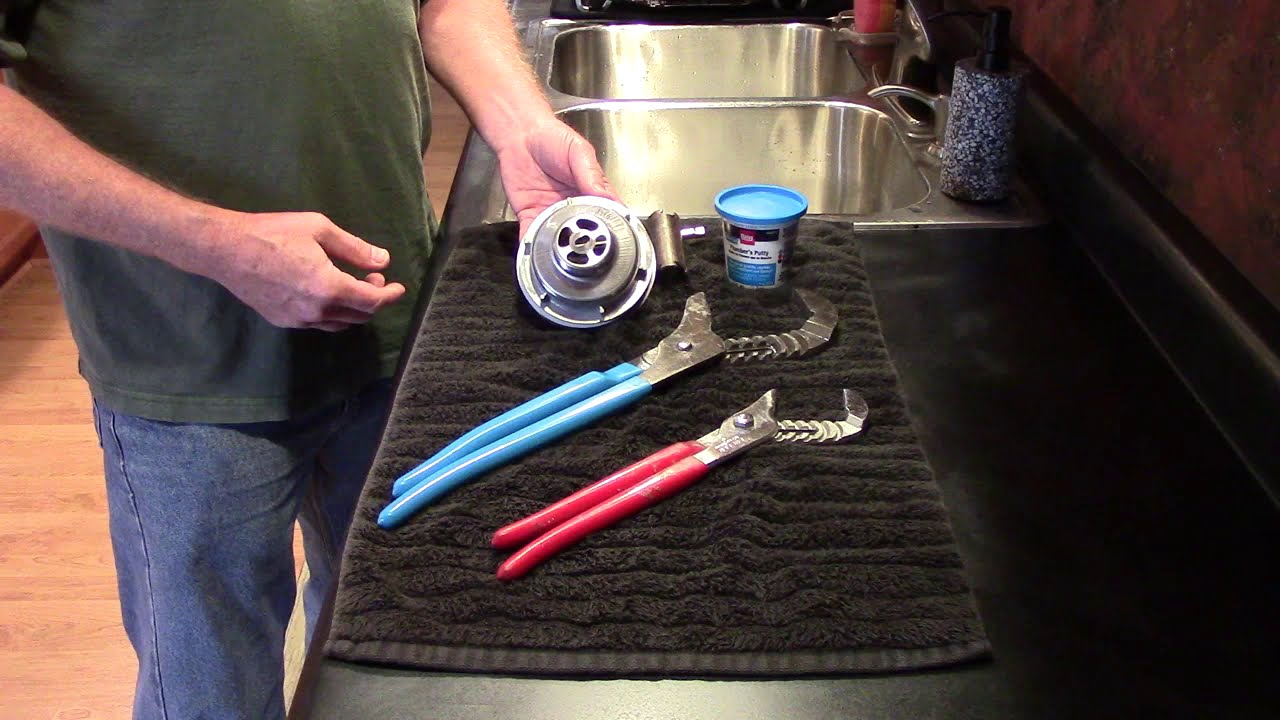
Whether you're replacing a damaged drain or simply doing some deep cleaning, knowing how to remove a kitchen sink drain is a useful skill to have. The process may vary depending on the type of sink you have, but the general steps are the same. To remove a kitchen sink drain, start by turning off the water supply and disconnecting the pipes underneath the sink. Then, use a pair of pliers to loosen and remove the locknut that holds the drain in place. Once the locknut is removed, you should be able to pull out the old drain and replace it with a new one.4. How to Remove a Kitchen Sink Drain


4. How to Remove a Kitchen Sink Drain


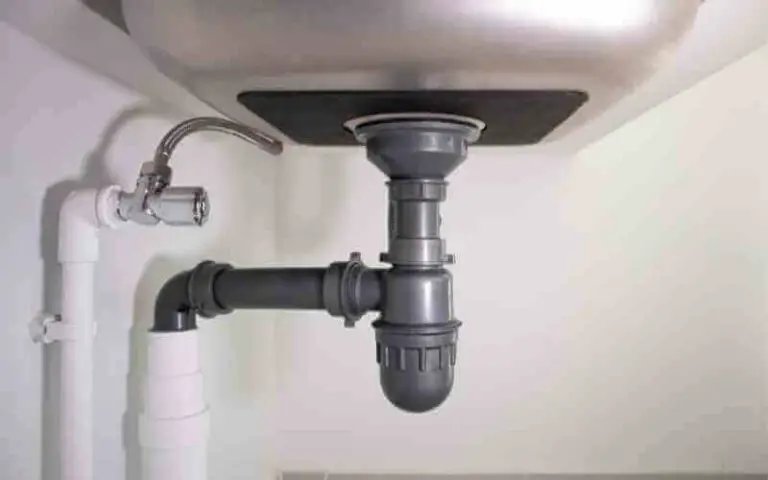
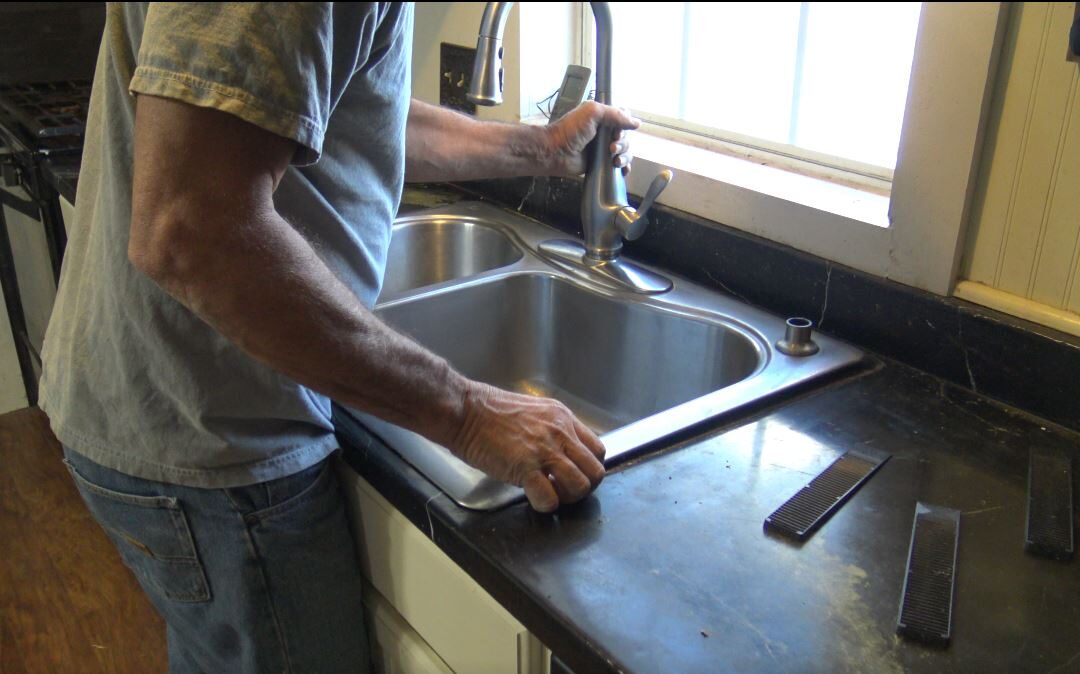
If you're installing a new kitchen sink or simply replacing an old drain, the process of installing a kitchen sink drain may seem daunting. But with the right tools and a step-by-step guide, you can easily install a kitchen sink drain on your own. To install a kitchen sink drain, start by placing the rubber gasket and cardboard washer on the bottom of the sink. Then, insert the drain through the hole in the sink and secure it with the mounting hardware provided. Finally, connect the pipes underneath the sink and run water to test for any leaks. If everything looks good, you can now enjoy a fully functioning kitchen sink.5. How to Install a Kitchen Sink Drain

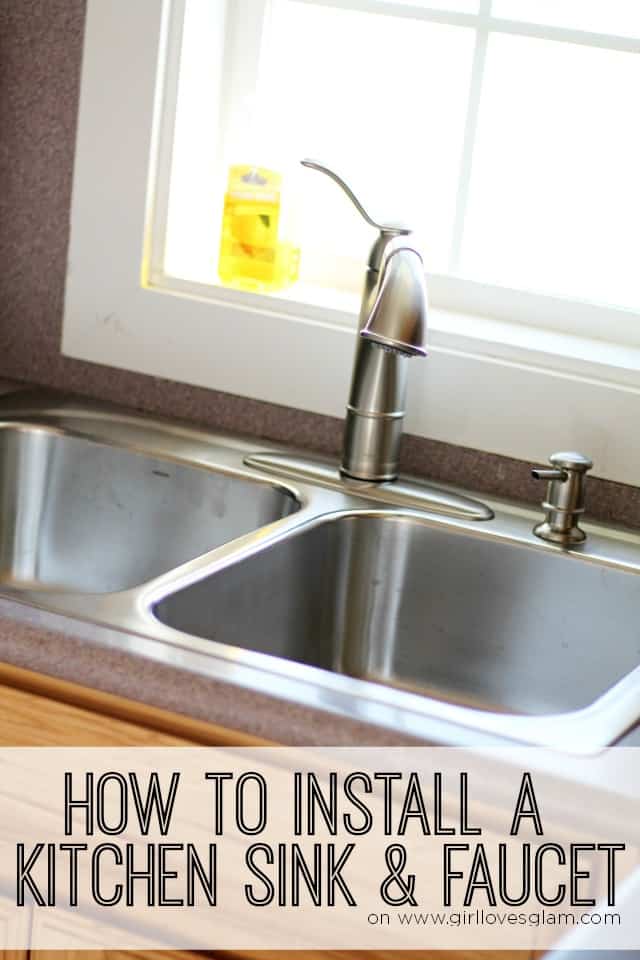

5. How to Install a Kitchen Sink Drain


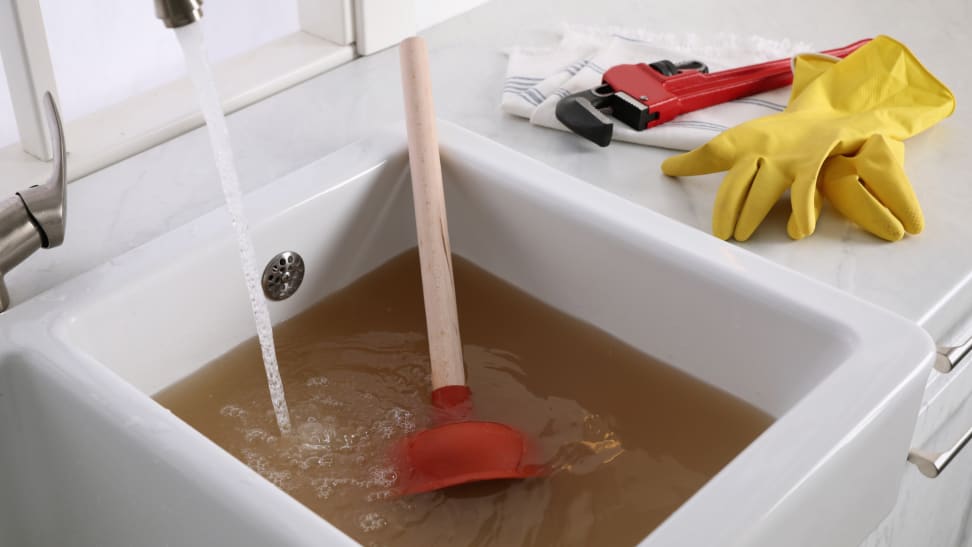
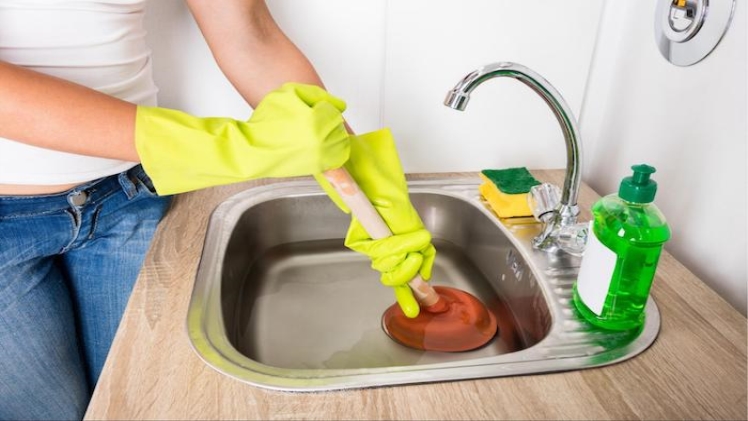
Clogged kitchen sinks are a common problem that can be caused by a buildup of food scraps, grease, and other debris. While there are many chemical drain cleaners on the market, they can be harmful to both your pipes and the environment. Luckily, there are several natural methods you can try to unclog a kitchen sink. To unclog a kitchen sink, start by using a plunger to create suction and loosen the clog. If that doesn't work, try using a mixture of baking soda and vinegar to break down the clog. You can also use a plumbing snake or remove the P-trap to physically remove the clog. Remember to always wear gloves and take precautionary measures when dealing with clogs.6. How to Unclog a Kitchen Sink
:max_bytes(150000):strip_icc()/plumber-unclogging-kitchen-sink-169270382-5810e7bb5f9b58564c5dd92b.jpg)


6. How to Unclog a Kitchen Sink

:max_bytes(150000):strip_icc()/how-to-unclog-a-kitchen-sink-2718799_sketch_FINAL-8c5caa805a69493ab22dfb537c72a1b7.png)


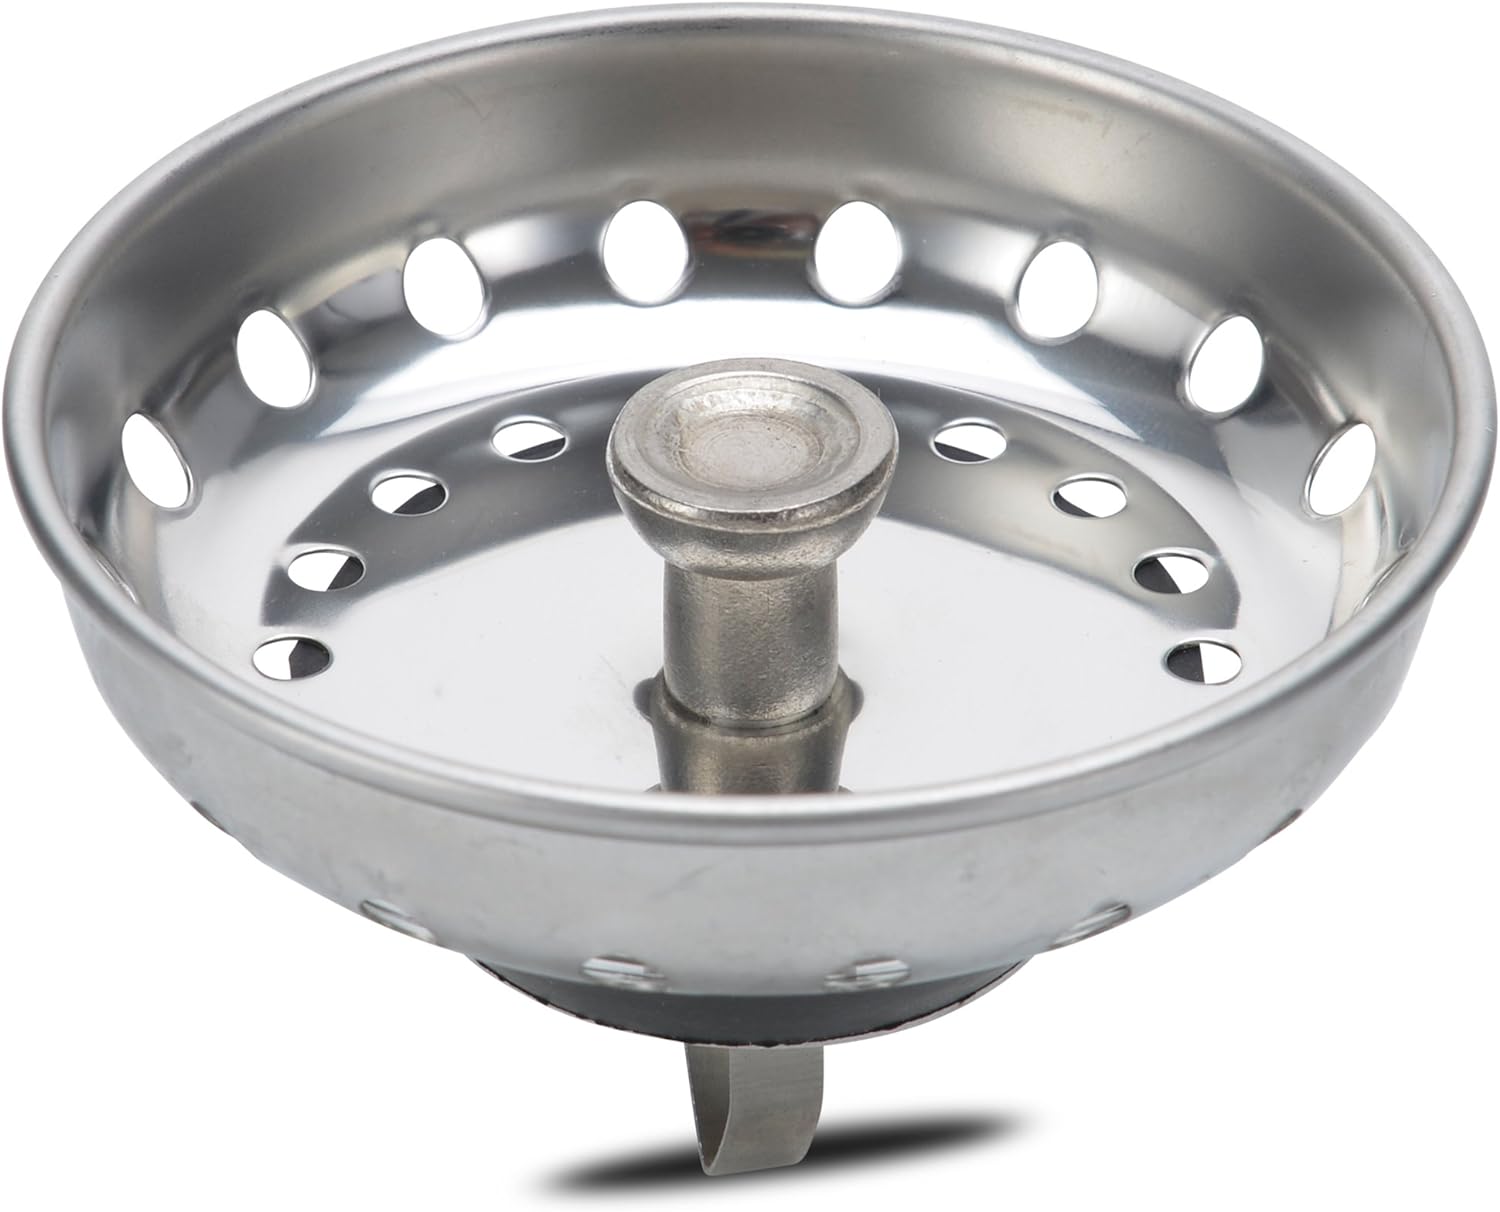
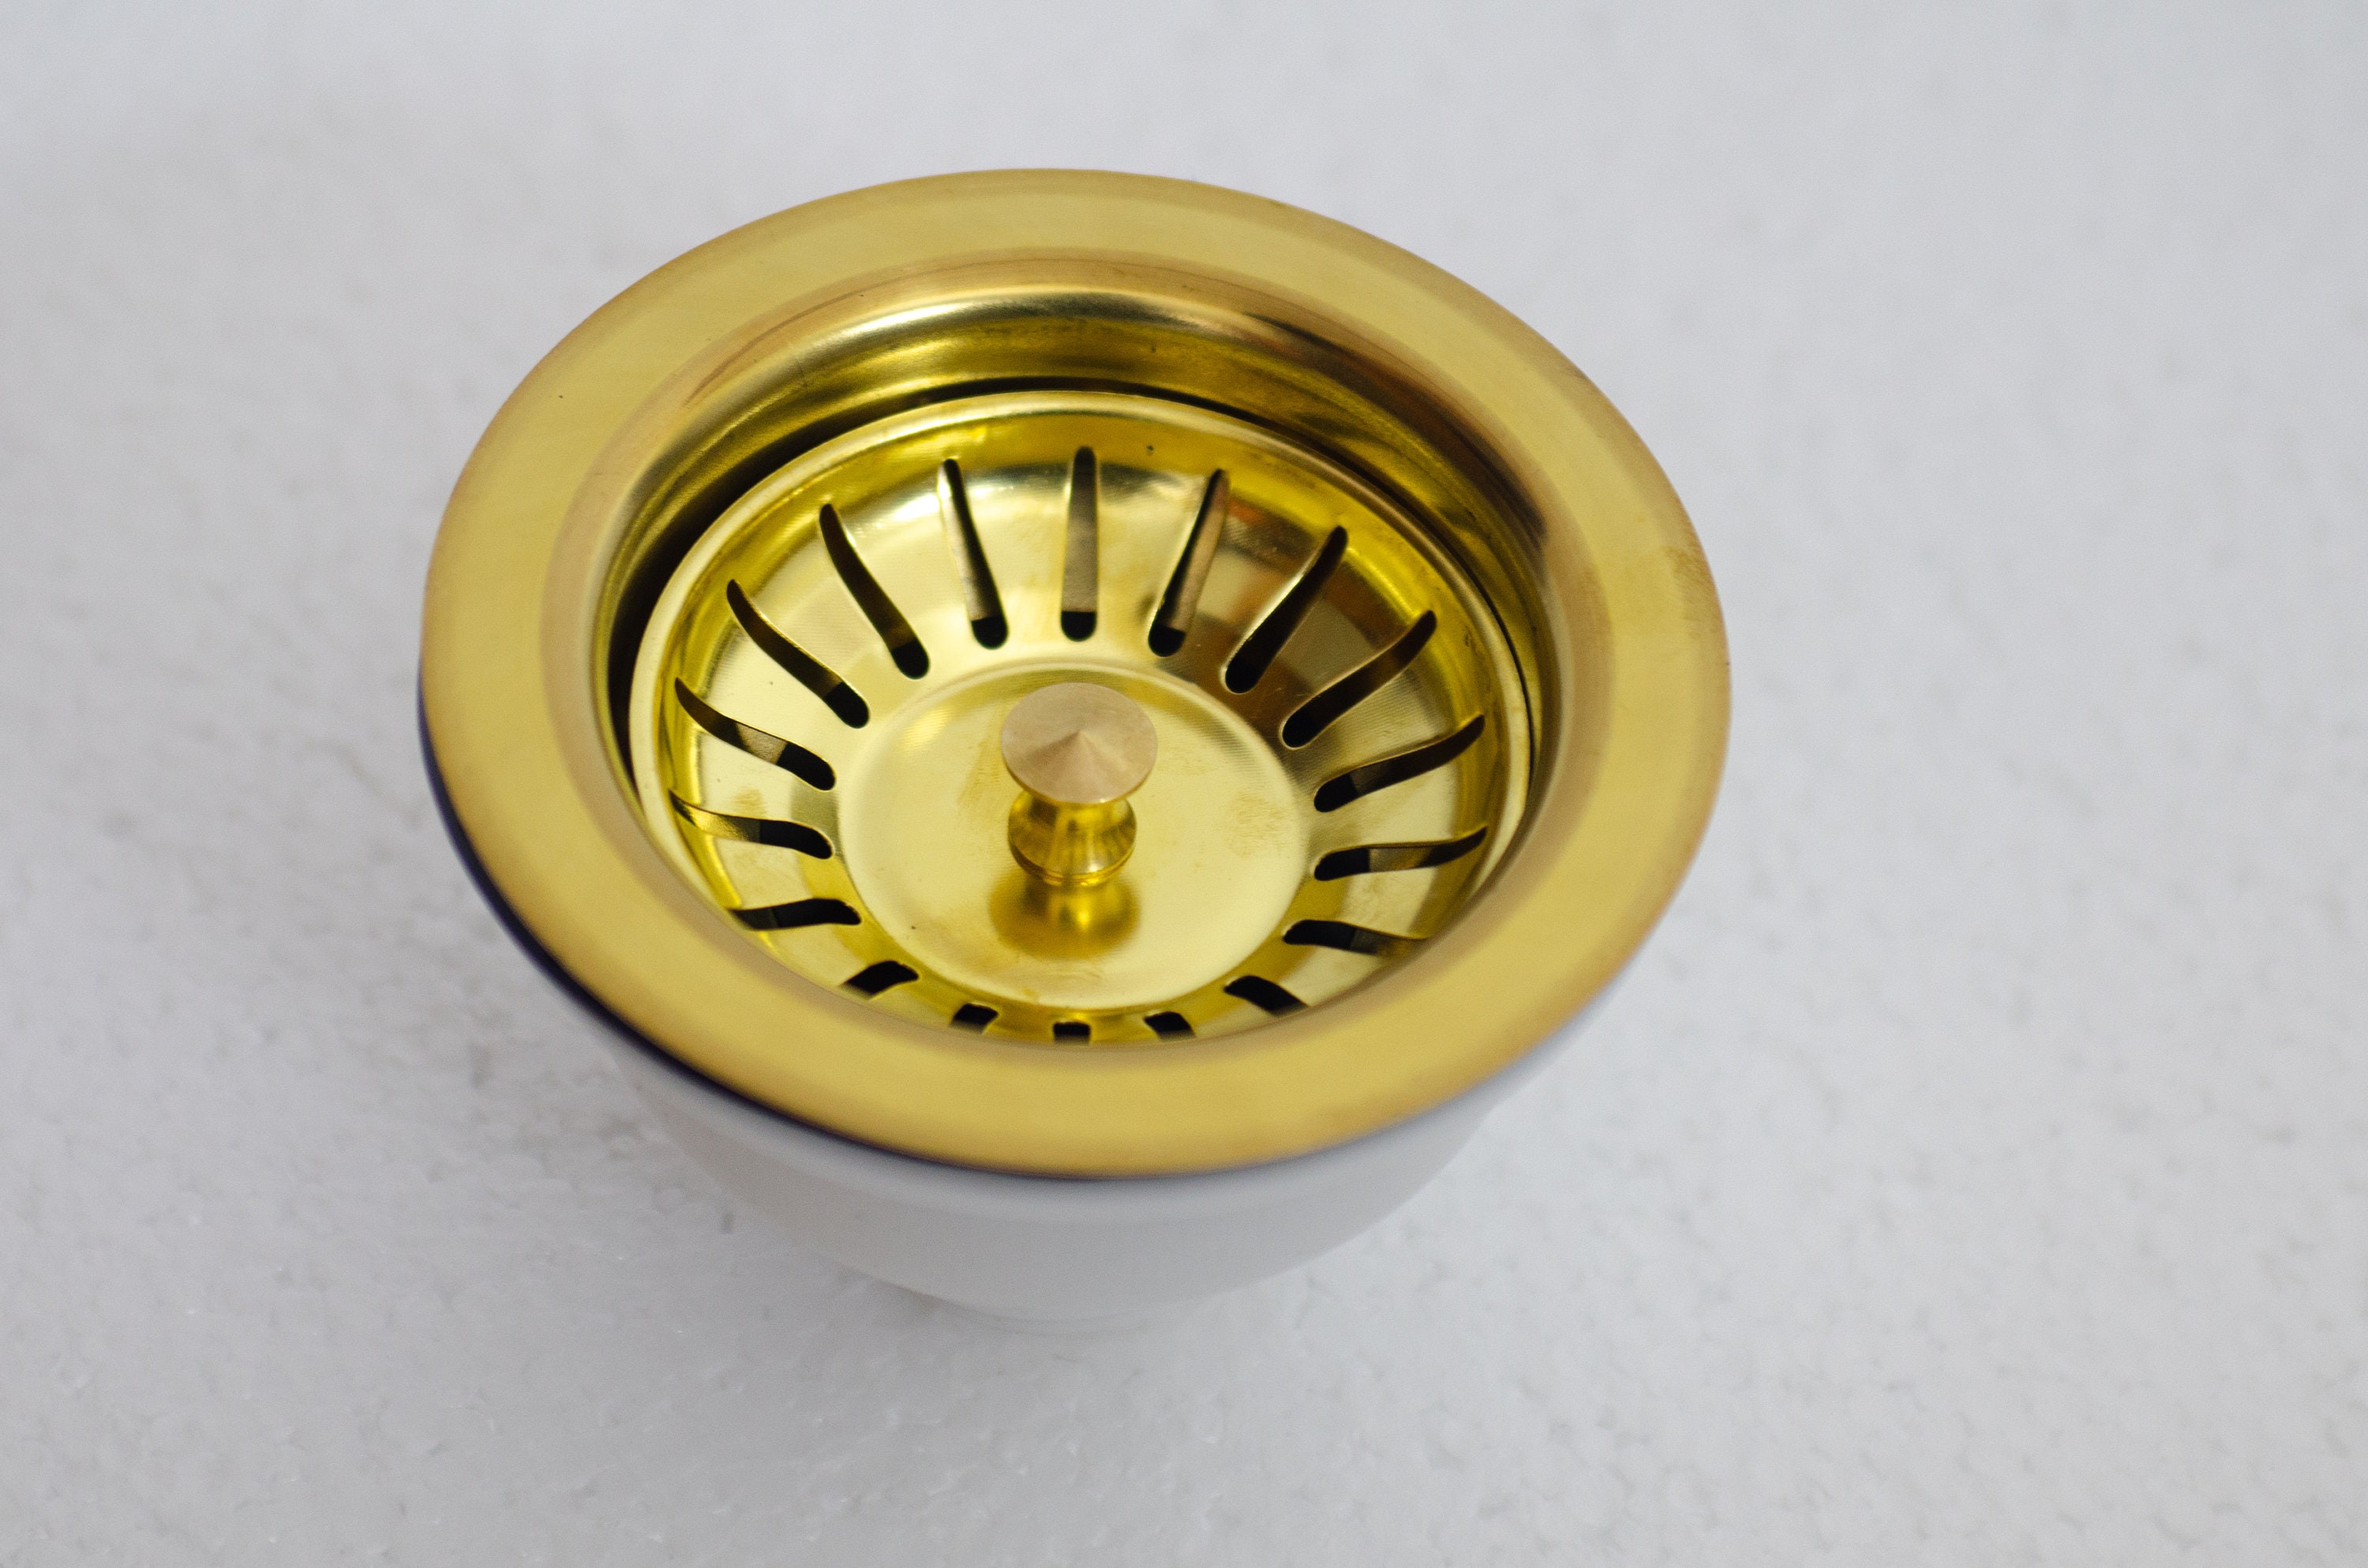
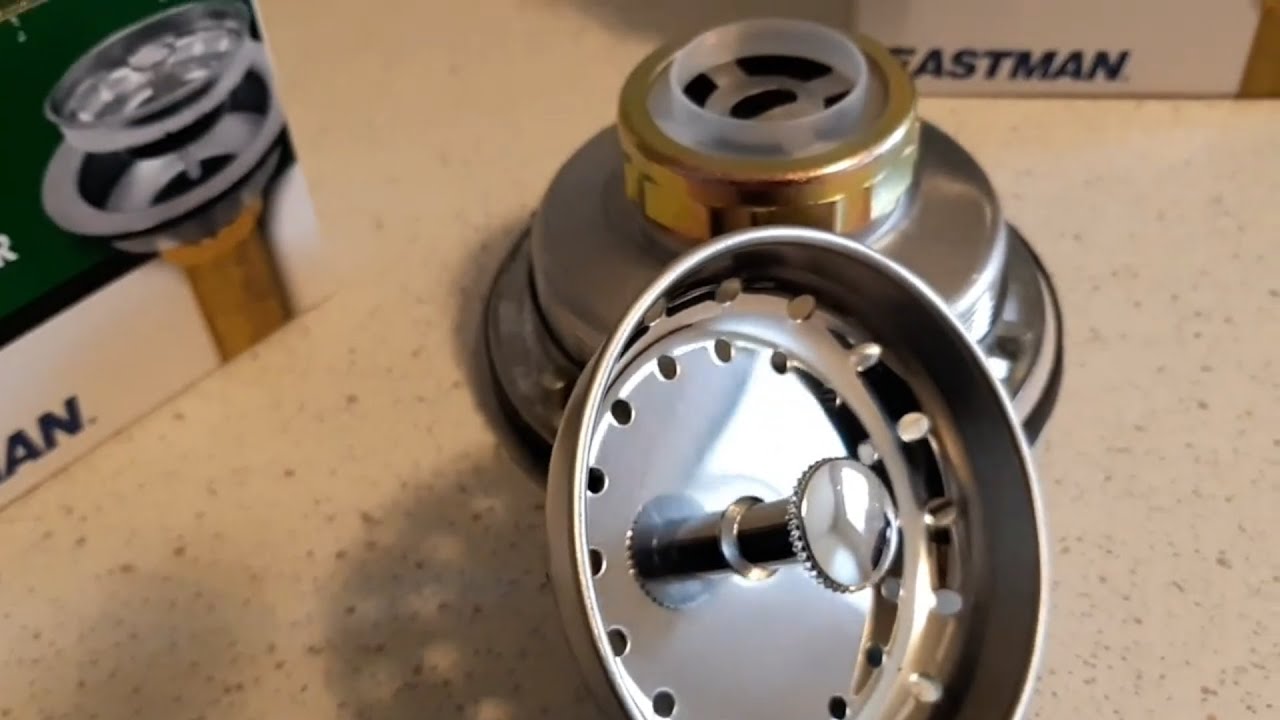
The basket strainer in your kitchen sink is responsible for catching food scraps and preventing them from clogging your pipes. Over time, the strainer can become worn out or damaged, making it less effective. If you notice your kitchen sink draining slowly or smelling foul, it may be time to replace the basket strainer. To replace a kitchen sink basket strainer, start by removing the old strainer using a wrench or pliers. Then, clean the area around the drain and apply plumber's putty to create a seal. Next, insert the new strainer and secure it with the mounting hardware provided. Finally, run water through the drain to test for any leaks.7. How to Replace a Kitchen Sink Basket Strainer


7. How to Replace a Kitchen Sink Basket Strainer


As mentioned earlier, a loose kitchen sink strainer can lead to water leaks and other problems. If you've noticed that your strainer is wobbly or not sealing properly, it's important to fix it before it causes more damage. To fix a loose kitchen sink strainer, start by turning off the water supply and removing the strainer using a wrench or pliers. Then, clean the area around the drain and apply plumber's putty to create a better seal. Finally, reattach the strainer and tighten any loose screws or fittings. If the strainer is still loose, you may need to replace the rubber gasket or use plumber's tape to create a better seal.8. How to Fix a Loose Kitchen Sink Strainer


8. How to Fix a Loose Kitchen Sink Strainer


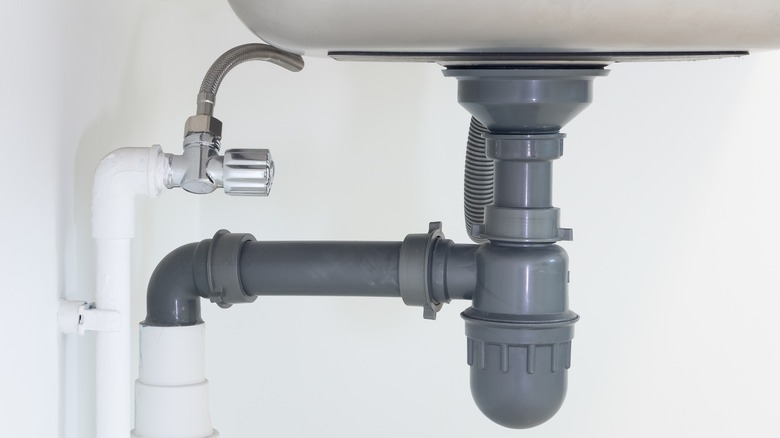
The P-trap under your kitchen sink is responsible for catching debris and preventing it from clogging your pipes. However, over time, the trap can become clogged itself, causing water to drain slowly or not at all. Knowing how to remove a kitchen sink trap can save you from calling a plumber and potentially save you money. To remove a kitchen sink trap, start by placing a bucket or container underneath the trap to catch any water. Then, use a pair of pliers to loosen and remove the slip nuts on either side of the trap. Once the trap is removed, you can clean it out and remove any debris before reattaching it to the pipes.9. How to Remove a Kitchen Sink Trap


9. How to Remove a Kitchen Sink Trap


If your kitchen sink is missing a strainer basket or if the old one is damaged, you may need to install a new one. This is a simple task that can improve the functionality and appearance of your kitchen sink. To install a kitchen sink strainer basket, start by cleaning the area around the drain and applying plumber's putty to create a seal. Then, insert the strainer basket and secure it with the mounting hardware provided. Finally, run water through the drain to test for any leaks. If all is well, you can now enjoy a fully functional and leak-free kitchen sink.10. How to Install a Kitchen Sink Strainer Basket

10. How to Install a Kitchen Sink Strainer Basket


The Importance of Properly Securing Nuts Under Your Kitchen Sink

The Kitchen Sink: A Crucial Part of Your Home's Design
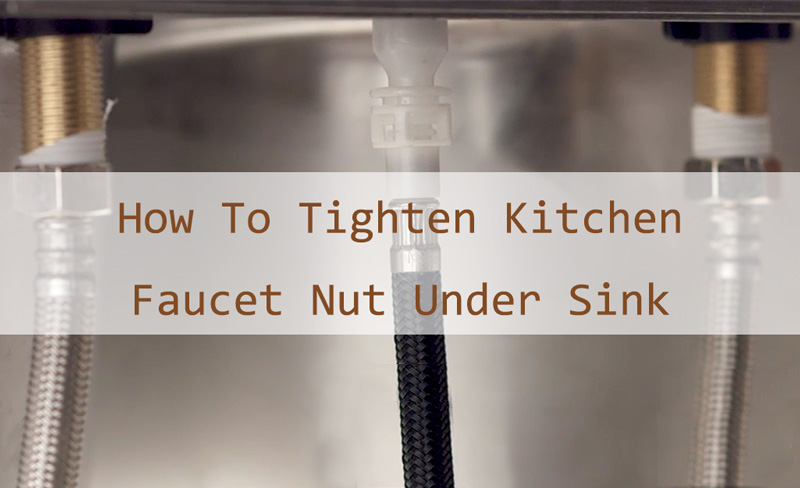 When it comes to designing your home, the kitchen is often considered the heart of the house. It is where meals are prepared, memories are made, and family and friends gather. And at the center of it all is the kitchen sink. This household fixture is used multiple times a day for various tasks such as washing dishes, filling pots with water, and sometimes even bathing children and pets. With such frequent use, it is important to ensure that every part of the sink is properly installed and secured, including the
nut under the kitchen sink
.
When it comes to designing your home, the kitchen is often considered the heart of the house. It is where meals are prepared, memories are made, and family and friends gather. And at the center of it all is the kitchen sink. This household fixture is used multiple times a day for various tasks such as washing dishes, filling pots with water, and sometimes even bathing children and pets. With such frequent use, it is important to ensure that every part of the sink is properly installed and secured, including the
nut under the kitchen sink
.
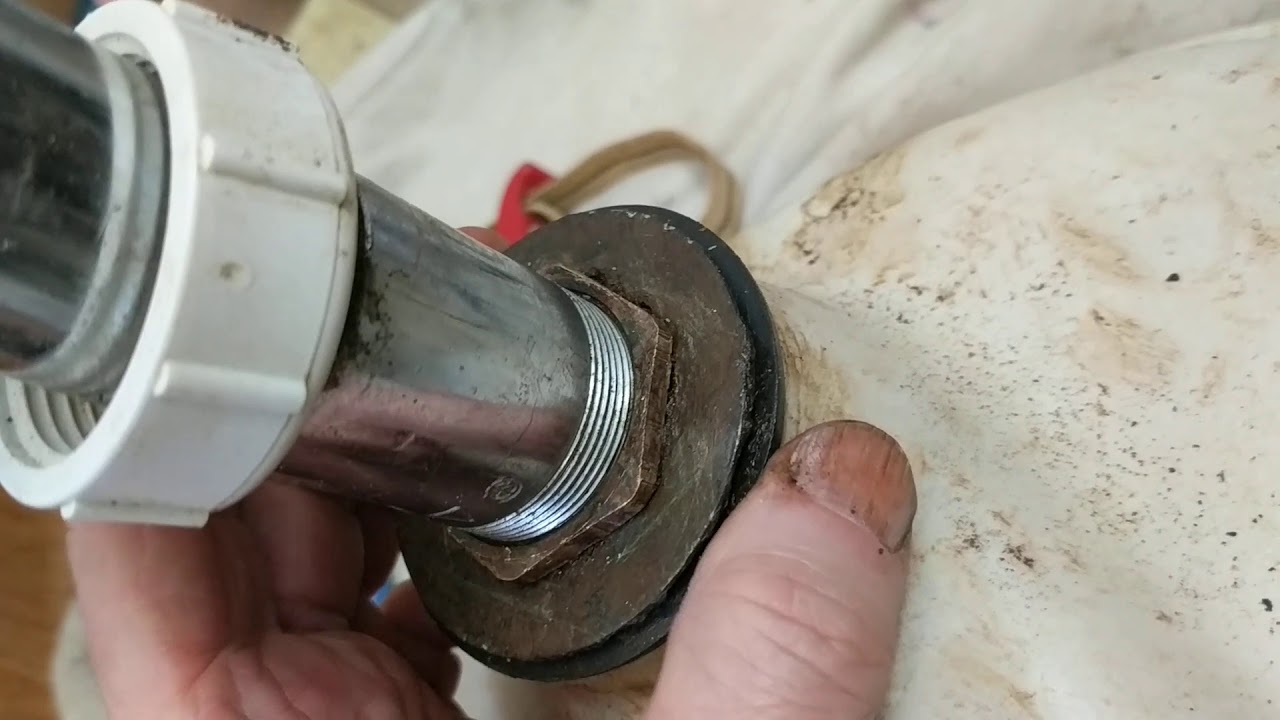
The Role of Nuts in Your Kitchen Sink
 Nuts are small, but they play a crucial role in keeping your kitchen sink functioning properly. They are used to secure the faucet and sink strainer to the sink itself, providing stability and preventing leaks. Without these nuts, your faucet could become loose and cause water to leak out, leading to potential damage to your cabinets and floors. The
nut under the kitchen sink
may seem insignificant, but it is an integral part of your sink's design and function.
Nuts are small, but they play a crucial role in keeping your kitchen sink functioning properly. They are used to secure the faucet and sink strainer to the sink itself, providing stability and preventing leaks. Without these nuts, your faucet could become loose and cause water to leak out, leading to potential damage to your cabinets and floors. The
nut under the kitchen sink
may seem insignificant, but it is an integral part of your sink's design and function.
The Dangers of Loose Nuts
 Over time, nuts can become loose due to the constant use of the sink, causing the faucet to wobble or the sink strainer to shift. This can lead to water leaks, which not only cause damage to your home but also waste water and increase your utility bills. Loose nuts can also create a breeding ground for bacteria and mold, as water can seep into the crevices and cause rotting. This can not only affect the functionality of your sink but also pose a health hazard to you and your family.
The Solution: Properly Securing Nuts Under Your Kitchen Sink
 To prevent these potential issues, it is important to regularly check and tighten the
nut under the kitchen sink
. This can be done with a wrench or pliers, ensuring that the nut is snug and secure. It is also recommended to check the nuts after any repairs or installations to ensure they are properly tightened. If you notice any signs of water leaks or loose nuts, it is important to address them immediately to avoid further damage.
To prevent these potential issues, it is important to regularly check and tighten the
nut under the kitchen sink
. This can be done with a wrench or pliers, ensuring that the nut is snug and secure. It is also recommended to check the nuts after any repairs or installations to ensure they are properly tightened. If you notice any signs of water leaks or loose nuts, it is important to address them immediately to avoid further damage.
In Conclusion
 While it may seem like a small and insignificant component of your kitchen sink, the
nut under the kitchen sink
plays a crucial role in its design and function. By regularly checking and properly securing these nuts, you can prevent potential issues and ensure that your kitchen sink continues to serve its purpose efficiently and effectively. Don't overlook the importance of this small yet essential part of your sink, and your home will thank you in the long run.
While it may seem like a small and insignificant component of your kitchen sink, the
nut under the kitchen sink
plays a crucial role in its design and function. By regularly checking and properly securing these nuts, you can prevent potential issues and ensure that your kitchen sink continues to serve its purpose efficiently and effectively. Don't overlook the importance of this small yet essential part of your sink, and your home will thank you in the long run.