Installing a PVC bathroom sink drain may seem like a daunting task, but with the right tools and knowledge, it can be a simple DIY project. By following these steps, you can have a functional and leak-free sink drain in no time.How to Install a PVC Bathroom Sink Drain


How to Install a PVC Bathroom Sink Drain


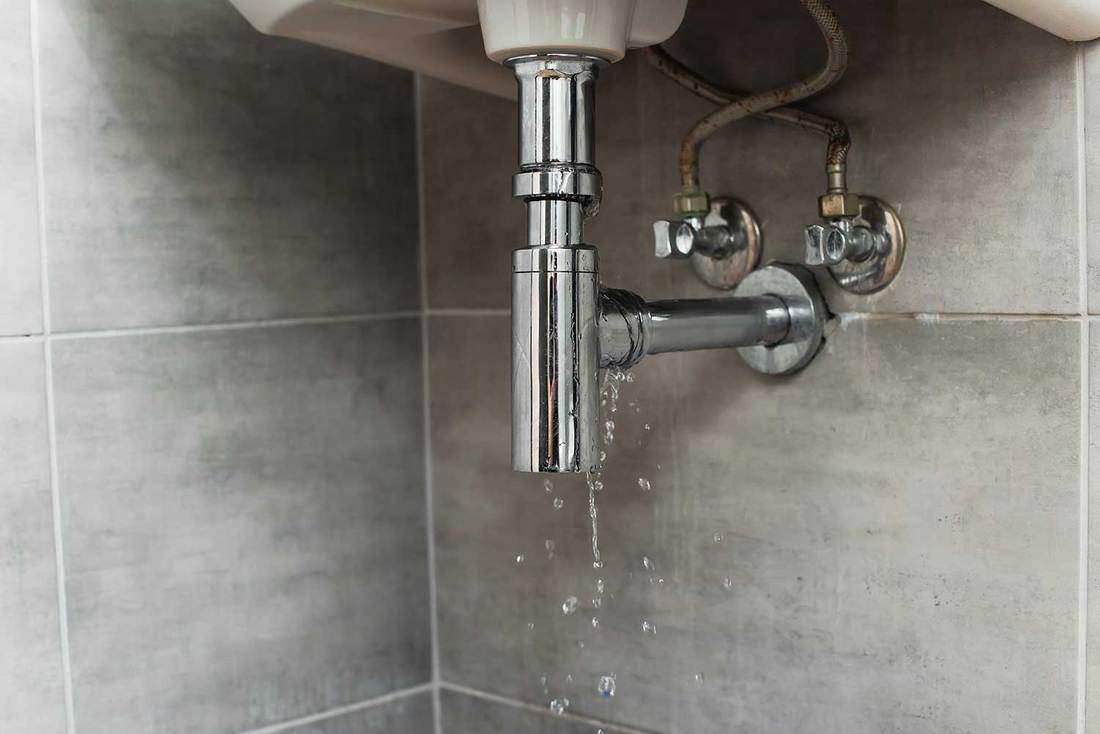
/sink-drain-trap-185105402-5797c5f13df78ceb869154b5.jpg)
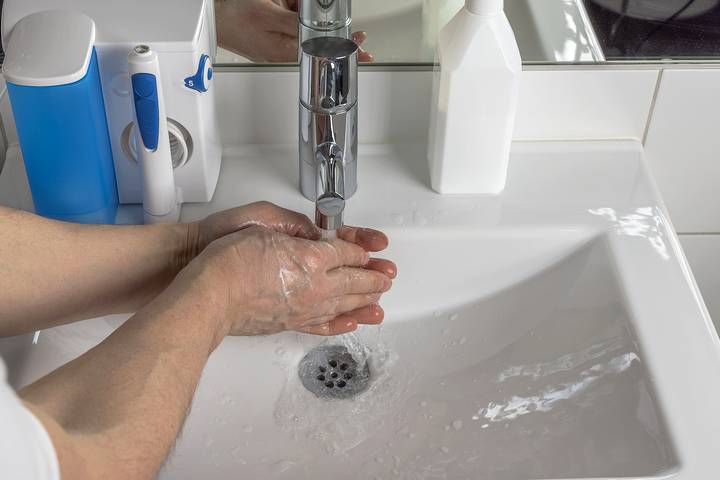
/bathroom-sink-drain-installation-2718843-01-4955fe1f576b447a91abe51c126d220b.jpg)

Before you begin, make sure you have all the necessary tools and materials, including a PVC pipe cutter, adjustable wrench, PVC primer and cement, and a drain assembly kit. 1. Start by removing the old drain assembly from your sink. Use a pair of pliers to loosen and remove the locknut and then pull out the old drain. 2. Measure and cut the PVC pipes to the appropriate lengths using a pipe cutter. Be sure to measure carefully to ensure a proper fit. 3. Next, dry fit the PVC pipes and fittings together to make sure everything aligns correctly. If any adjustments are needed, use the pipe cutter to trim the pipes accordingly. 4. Once you have a dry fit, disassemble the pipes and fittings and apply PVC primer to the outside of the pipes and the inside of the fittings. This will help the cement bond properly. 5. Apply PVC cement to the primed areas and quickly reassemble the pipes and fittings before the cement dries. Hold everything in place for a few seconds to allow the cement to set. 6. Now it's time to install the drain assembly kit. Place the rubber gasket and cardboard washer onto the bottom of the sink, followed by the drain flange. 7. Underneath the sink, place the rubber gasket, cardboard washer, and locknut onto the drain flange and tighten it using an adjustable wrench. 8. Connect the PVC pipes to the drain assembly, making sure to tighten the connections with an adjustable wrench. 9. Test the drain by running water through the sink. Check for any leaks and make adjustments as needed. 10. Once everything is secure and there are no leaks, you can install the sink stopper and enjoy your new PVC bathroom sink drain.Step-by-Step Guide for Installing a PVC Bathroom Sink Drain


Step-by-Step Guide for Installing a PVC Bathroom Sink Drain


Installing a PVC bathroom sink drain is a straightforward and cost-effective DIY project that can be accomplished with just a few tools and some basic plumbing knowledge. By following the steps outlined above, you can save money on hiring a professional and have the satisfaction of completing the project yourself.DIY: Installing a PVC Bathroom Sink Drain


DIY: Installing a PVC Bathroom Sink Drain


Having the right tools can make all the difference when it comes to installing a PVC bathroom sink drain. Some essential tools you will need include a PVC pipe cutter, adjustable wrench, PVC primer and cement, and a drain assembly kit. Having these tools on hand will make the installation process much smoother.Essential Tools for Installing a PVC Bathroom Sink Drain


Essential Tools for Installing a PVC Bathroom Sink Drain


Here are a few tips to keep in mind to ensure a successful PVC bathroom sink drain installation: - Measure carefully and accurately to ensure a proper fit. - Dry fit all pipes and fittings before applying primer and cement. - Use PVC primer and cement specifically designed for plumbing applications. - Make sure all connections are tight and secure. - Test for leaks before completing the installation.Tips for a Successful PVC Bathroom Sink Drain Installation


Tips for a Successful PVC Bathroom Sink Drain Installation


While installing a PVC bathroom sink drain may seem simple, there are a few common mistakes that can lead to leaks or other issues. These include: - Not measuring accurately, resulting in incorrect pipe lengths. - Forgetting to use primer before applying cement. - Rushing the installation process and not allowing the cement to set properly. - Not tightening connections enough, leading to leaks. By being mindful of these common mistakes, you can avoid potential problems and have a successful PVC bathroom sink drain installation.Common Mistakes to Avoid When Installing a PVC Bathroom Sink Drain


Common Mistakes to Avoid When Installing a PVC Bathroom Sink Drain


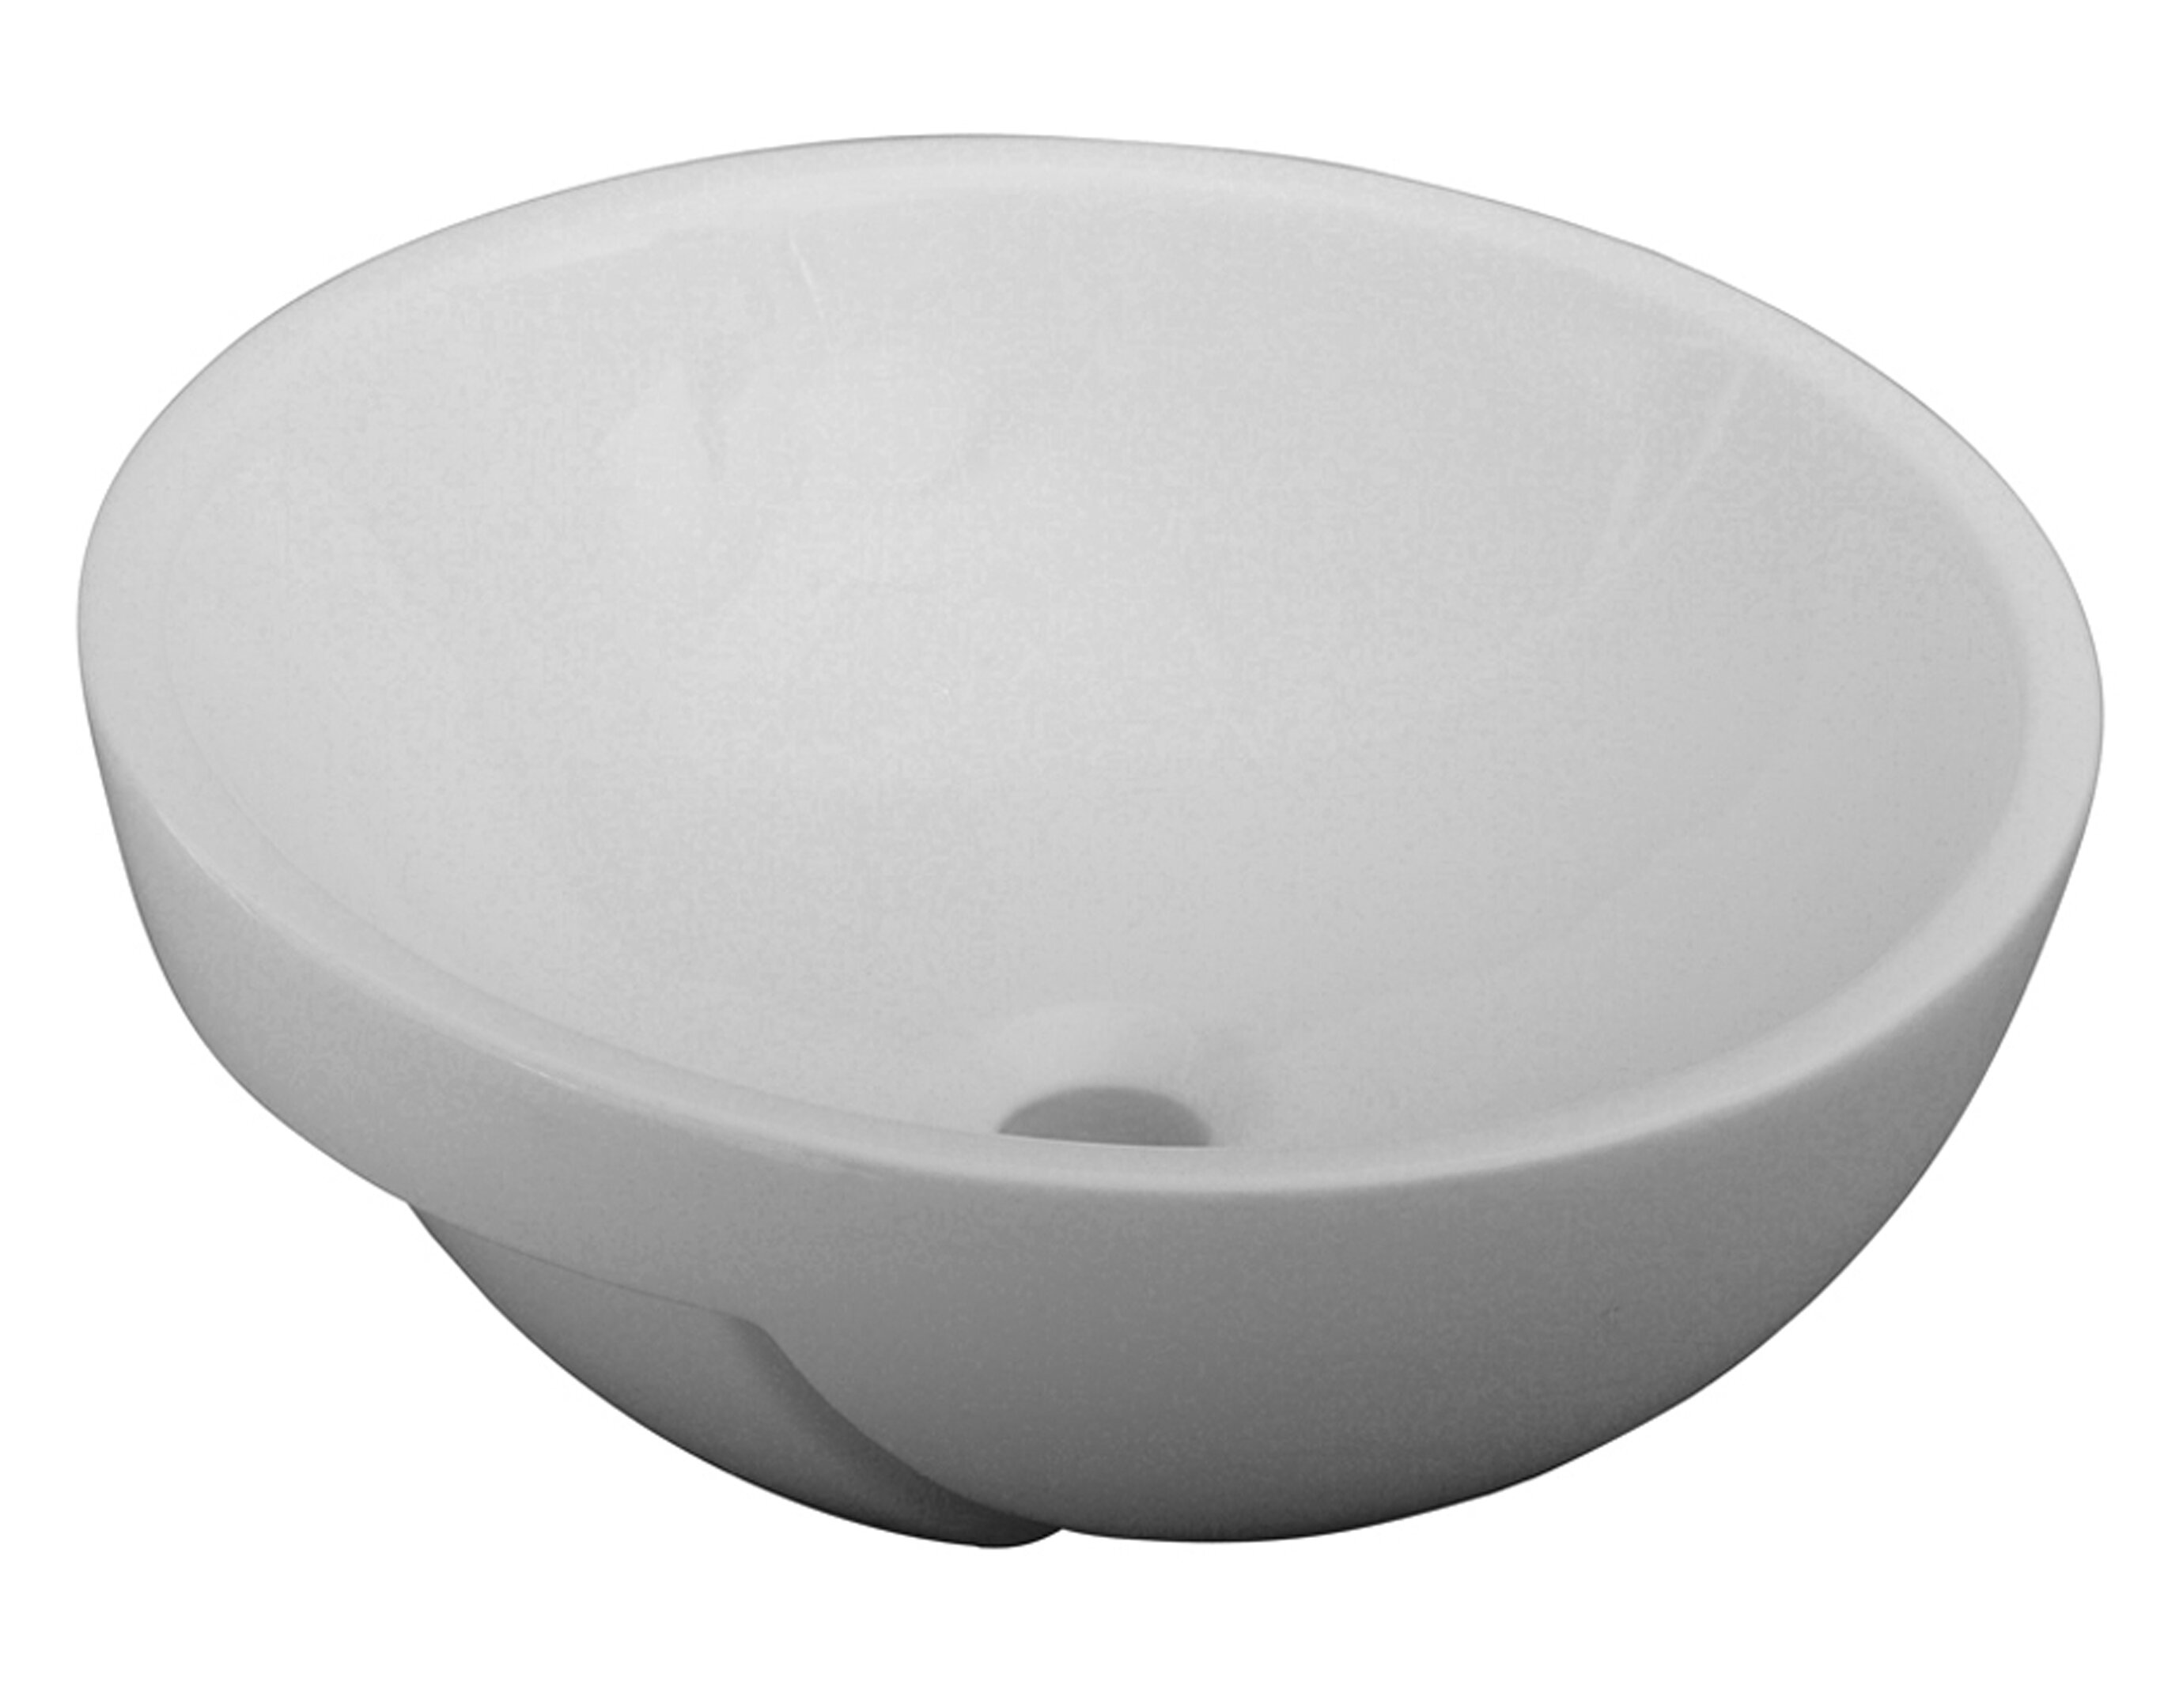
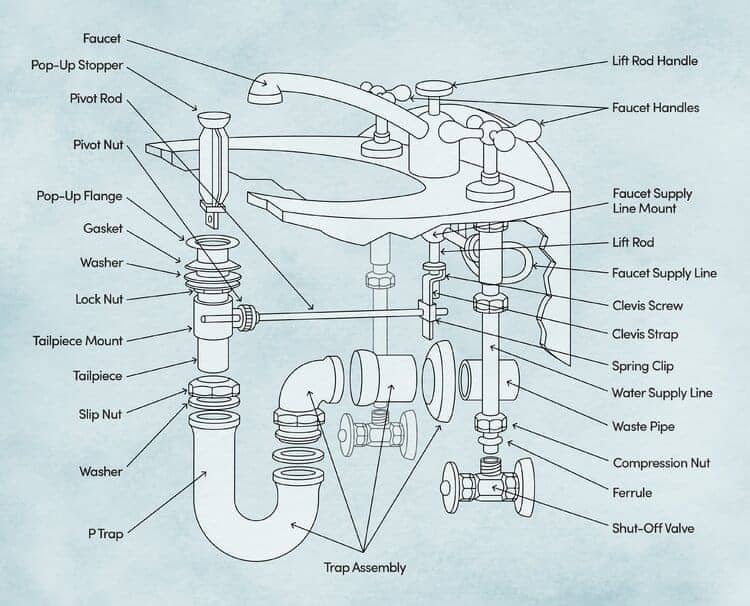
Before attempting to install a PVC bathroom sink drain, it's essential to understand its anatomy. The drain assembly consists of several parts, including the drain flange, rubber gasket, cardboard washer, locknut, and drain pipes. Knowing how these components fit together will make the installation process much easier.Understanding the Anatomy of a PVC Bathroom Sink Drain

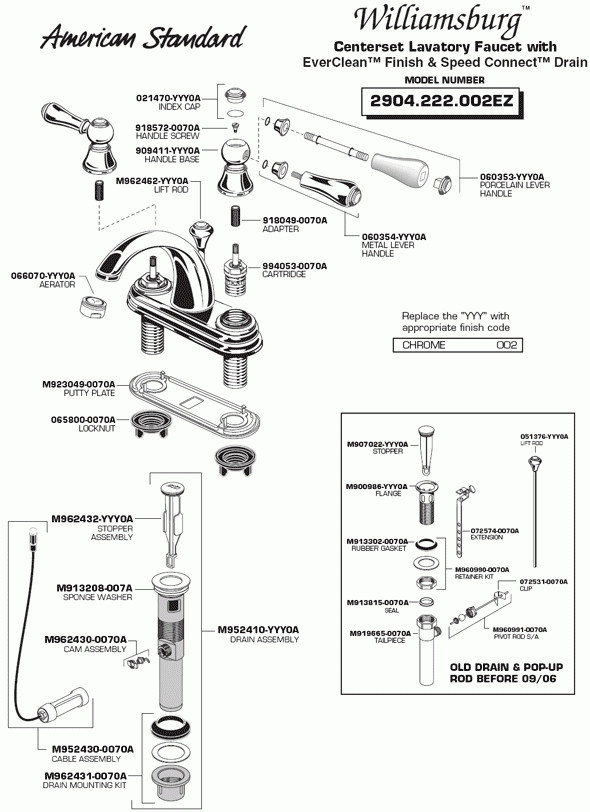
Understanding the Anatomy of a PVC Bathroom Sink Drain


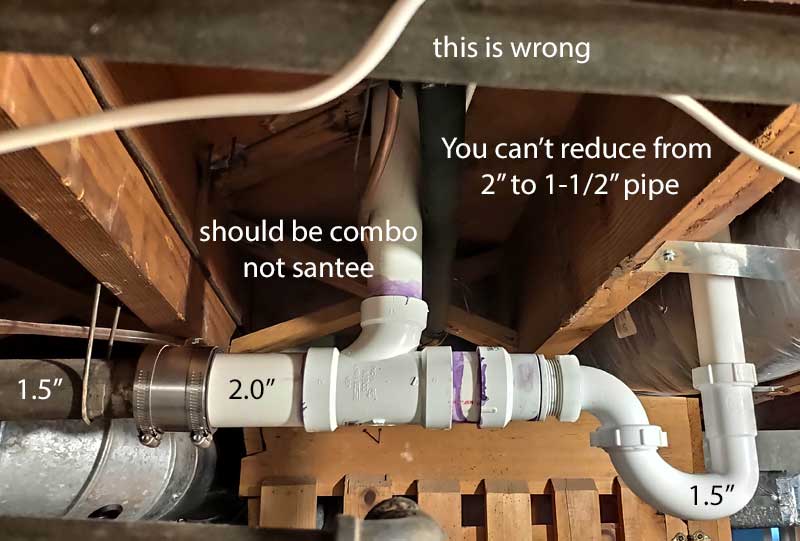
When it comes to choosing the right size and type of PVC pipe for your bathroom sink drain, there are a few factors to consider. The standard size for drain pipes is 1 1/4 inches, but depending on the size and type of sink, you may need a larger pipe. Additionally, make sure to choose pipes and fittings that are specifically designed for plumbing applications.Choosing the Right Size and Type of PVC Pipe for Your Bathroom Sink Drain


Choosing the Right Size and Type of PVC Pipe for Your Bathroom Sink Drain


Properly sealing and connecting PVC pipes is crucial for a leak-free bathroom sink drain. Before applying primer and cement, make sure all surfaces are clean and dry. Apply a generous amount of primer to the outside of the pipes and the inside of the fittings. Then, quickly apply cement, and twist the pipes and fittings together to create a tight seal.How to Properly Seal and Connect PVC Pipes for a Bathroom Sink Drain


How to Properly Seal and Connect PVC Pipes for a Bathroom Sink Drain


If you encounter any issues during the installation process, here are some common problems and how to troubleshoot them: - Leaks: Check all connections and tighten as needed. If the leak persists, you may need to disassemble and reapply primer and cement. - Pipes not aligning: Check your measurements and make sure you have the correct size pipes and fittings. If needed, trim the pipes to fit properly. - Drain not working: Make sure the stopper is properly installed and functioning correctly. You may also need to check for any clogs in the pipes.Troubleshooting Common Issues with PVC Bathroom Sink Drain Installation

Troubleshooting Common Issues with PVC Bathroom Sink Drain Installation

Ensuring Proper Drainage: Installing a PVC Bathroom Sink Drain

Why PVC is the Preferred Material for Bathroom Sink Drains
 When it comes to choosing the right material for your bathroom sink drain, PVC (polyvinyl chloride) is a popular and highly recommended choice. Known for its durability, affordability, and ease of installation, PVC has become the go-to material for many homeowners and professionals alike.
One of the main reasons PVC is preferred for bathroom sink drains is its resistance to corrosion and chemicals. In a damp and constantly wet environment like a bathroom, the risk of corrosion is high. PVC, however, is not susceptible to rust or other forms of corrosion, ensuring a longer lifespan for your sink drain.
When it comes to choosing the right material for your bathroom sink drain, PVC (polyvinyl chloride) is a popular and highly recommended choice. Known for its durability, affordability, and ease of installation, PVC has become the go-to material for many homeowners and professionals alike.
One of the main reasons PVC is preferred for bathroom sink drains is its resistance to corrosion and chemicals. In a damp and constantly wet environment like a bathroom, the risk of corrosion is high. PVC, however, is not susceptible to rust or other forms of corrosion, ensuring a longer lifespan for your sink drain.
Step-by-Step Guide to Installing a PVC Bathroom Sink Drain
 Now that you know why PVC is the best material for your bathroom sink drain, here's a step-by-step guide to help you install it:
Step 1:
Start by assembling all the necessary materials including the PVC sink drain kit, PVC cement, Teflon tape, and a hacksaw.
Step 2:
Turn off the water supply to your sink and remove the old drain assembly. This may require a wrench or pliers.
Step 3:
Measure and cut the PVC pipe to the desired length using a hacksaw. Make sure to account for any turns or bends in the pipe.
Step 4:
Apply PVC cement to one end of the pipe and insert it into the sink drain opening. Hold it in place for a few seconds to allow the cement to dry.
Step 5:
Apply Teflon tape to the threads of the PVC drain flange, which will connect the drain to the sink.
Step 6:
Place the drain flange into the sink drain opening and tighten it using a wrench or pliers.
Step 7:
Connect the PVC pipe to the drain flange using PVC cement. Again, hold it in place for a few seconds to allow it to dry.
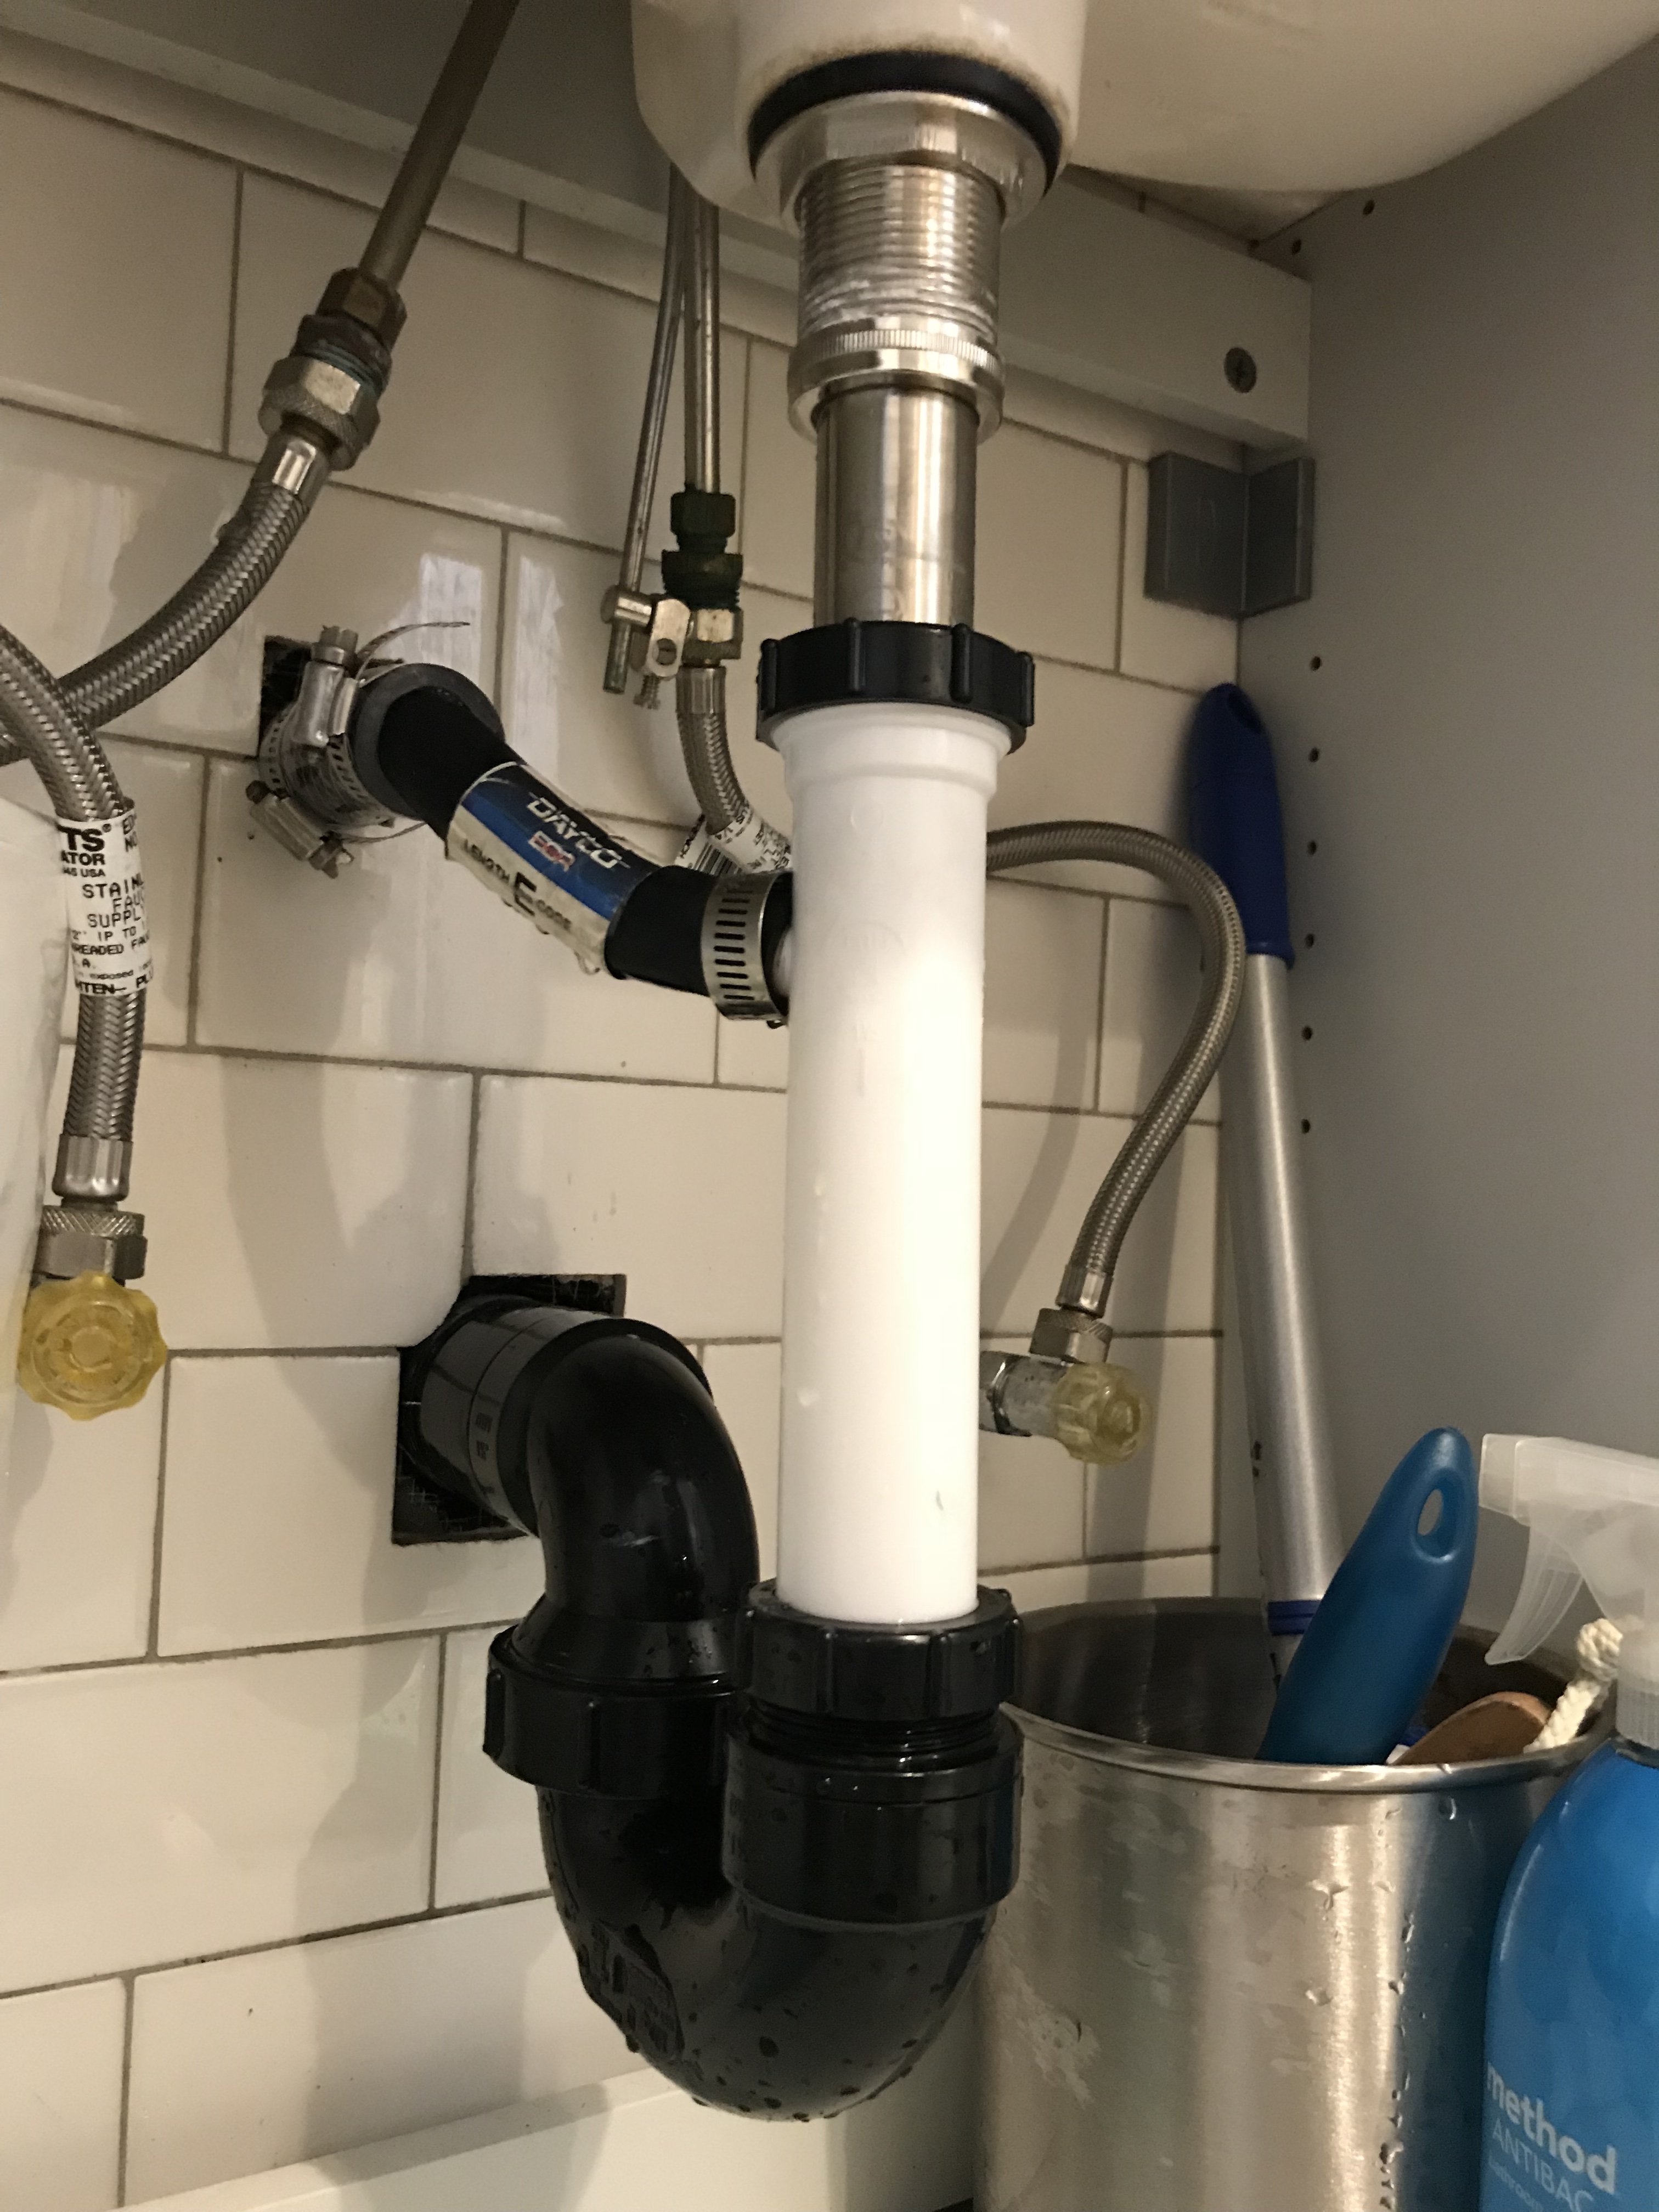
Step 8:
Install the P-trap, which will prevent sewer gases from entering your bathroom, by connecting it to the other end of the PVC pipe.
Step 9:
Turn on the water supply and check for any leaks. If there are any, tighten the connections and reapply PVC cement if necessary.
Congratulations! You have successfully installed a PVC bathroom sink drain. With its durability and resistance to corrosion, your new PVC drain will provide reliable and long-lasting drainage for your bathroom sink.
Now that you know why PVC is the best material for your bathroom sink drain, here's a step-by-step guide to help you install it:
Step 1:
Start by assembling all the necessary materials including the PVC sink drain kit, PVC cement, Teflon tape, and a hacksaw.
Step 2:
Turn off the water supply to your sink and remove the old drain assembly. This may require a wrench or pliers.
Step 3:
Measure and cut the PVC pipe to the desired length using a hacksaw. Make sure to account for any turns or bends in the pipe.
Step 4:
Apply PVC cement to one end of the pipe and insert it into the sink drain opening. Hold it in place for a few seconds to allow the cement to dry.
Step 5:
Apply Teflon tape to the threads of the PVC drain flange, which will connect the drain to the sink.
Step 6:
Place the drain flange into the sink drain opening and tighten it using a wrench or pliers.
Step 7:
Connect the PVC pipe to the drain flange using PVC cement. Again, hold it in place for a few seconds to allow it to dry.
Step 8:
Install the P-trap, which will prevent sewer gases from entering your bathroom, by connecting it to the other end of the PVC pipe.
Step 9:
Turn on the water supply and check for any leaks. If there are any, tighten the connections and reapply PVC cement if necessary.
Congratulations! You have successfully installed a PVC bathroom sink drain. With its durability and resistance to corrosion, your new PVC drain will provide reliable and long-lasting drainage for your bathroom sink.


/the-stylish-boho-compostion-at-living-room-interior-with-design-gray-sofa--wooden-coffee-table--commode-and-elegant-personal-accessories--honey-yellow-pillow-and-plaid--cozy-apartment--home-decor-1166439205-c478809c80f54cbd87668c7901a308ae.jpg)

