When it comes to installing a new kitchen sink, one of the most important steps is setting up the supply lines. These are the pipes that provide water to your sink, and they play a crucial role in the overall functionality of your kitchen. In this guide, we'll walk you through the process of installing kitchen sink supply lines so you can have a fully functioning sink in no time.Installing Kitchen Sink Supply Lines: A Step-by-Step Guide


Installing Kitchen Sink Supply Lines: A Step-by-Step Guide
:no_upscale()/cdn.vox-cdn.com/uploads/chorus_asset/file/19495086/drain_0.jpg)


Before you can install the supply lines, you'll need to install the sink drain. To do this, start by placing the sink upside down on a flat surface. Then, attach the rubber gasket and cardboard friction ring to the drain assembly. Next, insert the drain assembly into the hole at the bottom of the sink and tighten the mounting nut from below. Finally, attach the tailpiece to the drain assembly and secure it with a slip nut.How to Install a Kitchen Sink Drain


How to Install a Kitchen Sink Drain

/how-to-install-a-sink-drain-2718789-hero-b5b99f72b5a24bb2ae8364e60539cece.jpg)


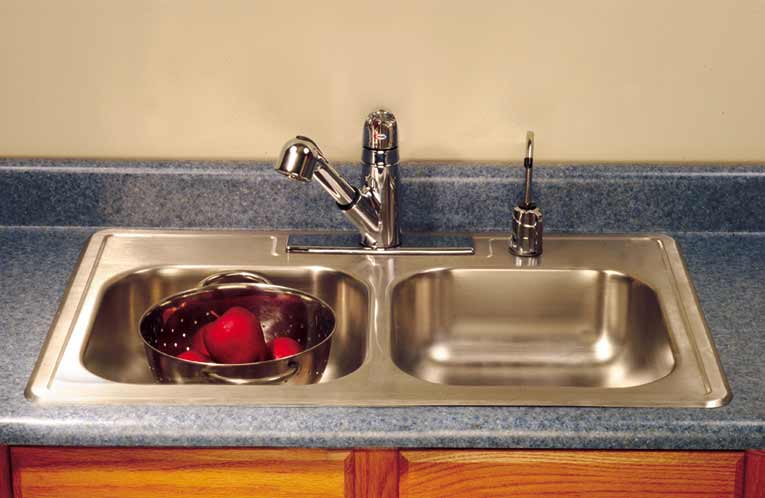
Now that the drain is in place, it's time to install the sink itself. Begin by applying a thin bead of clear silicone caulk around the edge of the sink cutout in your countertop. Then, carefully lower the sink into place and press down firmly to secure it. Once the sink is in place, wipe away any excess caulk and allow it to dry completely before moving on to the next step.How to Install a Kitchen Sink


How to Install a Kitchen Sink


The kitchen sink strainer is an important component for preventing food and debris from clogging your drain. To install it, start by placing the rubber gasket and cardboard friction ring on the strainer body. Then, insert the strainer into the drain opening and secure it from below with the mounting nut. Finally, attach the tailpiece and tighten the slip nut to secure it in place.How to Install a Kitchen Sink Strainer


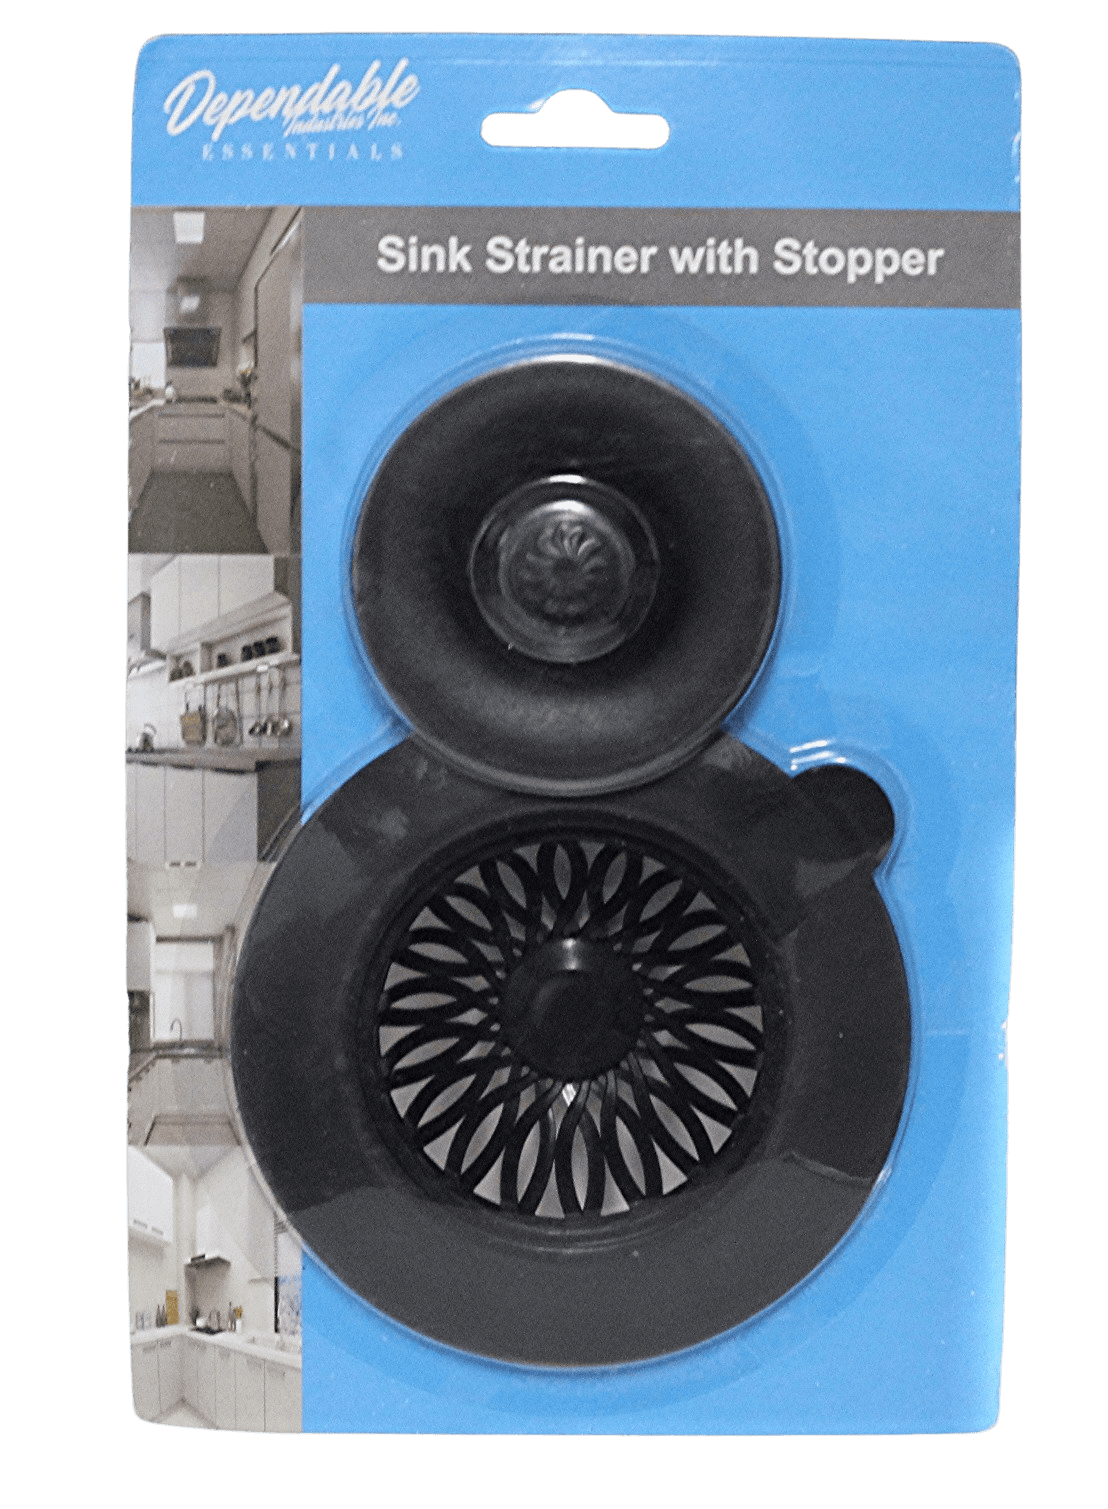
How to Install a Kitchen Sink Strainer


A basket strainer is a type of strainer that allows you to easily collect and dispose of food scraps and debris. To install it, remove the strainer body from the assembly and place the rubber gasket and cardboard friction ring on the sink drain. Then, insert the strainer body into the drain and tighten the mounting nut from below. Finally, reattach the strainer body and secure it with the locknut.How to Install a Kitchen Sink Basket Strainer

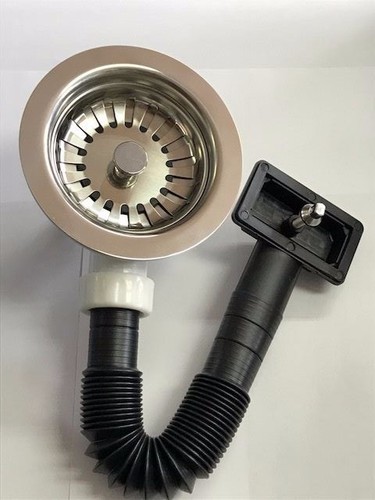

How to Install a Kitchen Sink Basket Strainer


With the strainer in place, it's time to connect the sink drain pipe to the main plumbing system. Start by attaching the trap adapter to the drain pipe, followed by the trap itself. Then, connect the other end of the trap to the branch drain pipe using a slip nut. Make sure all connections are tight and secure before moving on.How to Install a Kitchen Sink Drain Pipe


How to Install a Kitchen Sink Drain Pipe


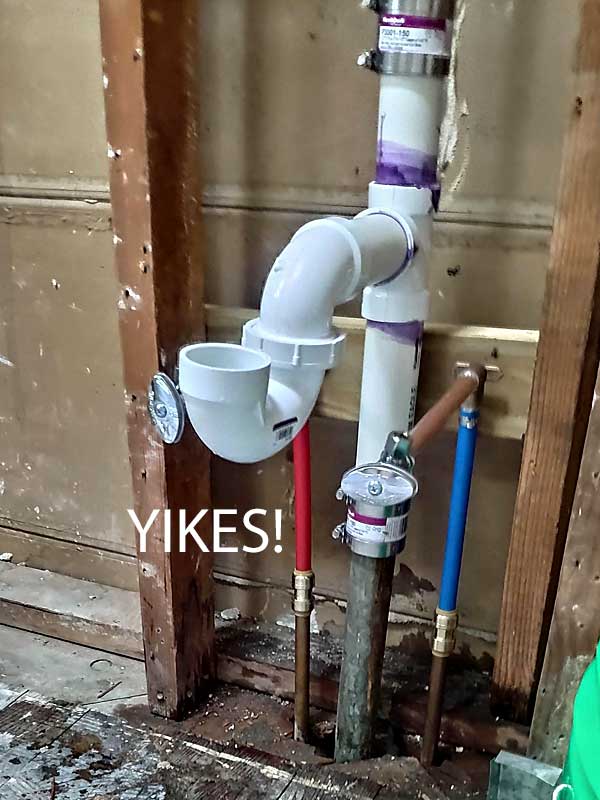
The drain trap is an essential component for preventing sewer gases from entering your home. To install it, start by attaching the trap to the bottom of the sink using a slip nut. Then, connect the other end of the trap to the drain pipe using another slip nut. Make sure the trap is level and secure before moving on.How to Install a Kitchen Sink Drain Trap


How to Install a Kitchen Sink Drain Trap

/sink-drain-trap-185105402-5797c5f13df78ceb869154b5.jpg)

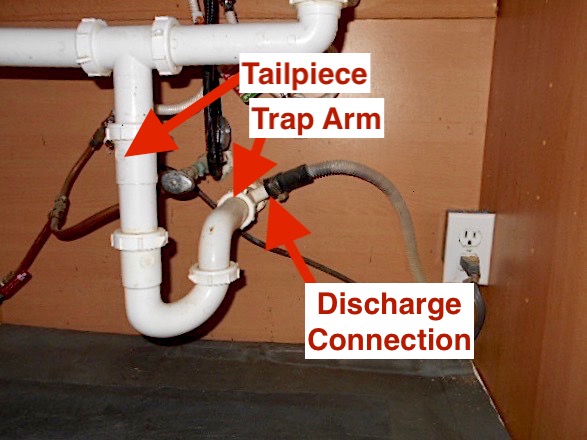
Now it's time to assemble all the components of the sink drain. Start by connecting the tailpiece to the bottom of the strainer using a slip nut. Then, connect the other end of the tailpiece to the trap using another slip nut. Finally, attach the trap arm to the branch drain pipe using a slip nut. Make sure all connections are tight and secure before moving on.How to Install a Kitchen Sink Drain Assembly
How to Install a Kitchen Sink Drain Assembly


If you have a garbage disposal, you'll need to install it before connecting the drain. Start by mounting the disposal unit to the bottom of the sink using the mounting ring and screws provided. Then, connect the discharge tube from the disposal to the drain pipe and secure it with a slip nut. Finally, connect the power supply to the disposal and test it to make sure it's working properly.How to Install a Kitchen Sink Drain with Disposal


How to Install a Kitchen Sink Drain with Disposal
/how-to-install-a-sink-drain-2718789-hero-24e898006ed94c9593a2a268b57989a3.jpg)


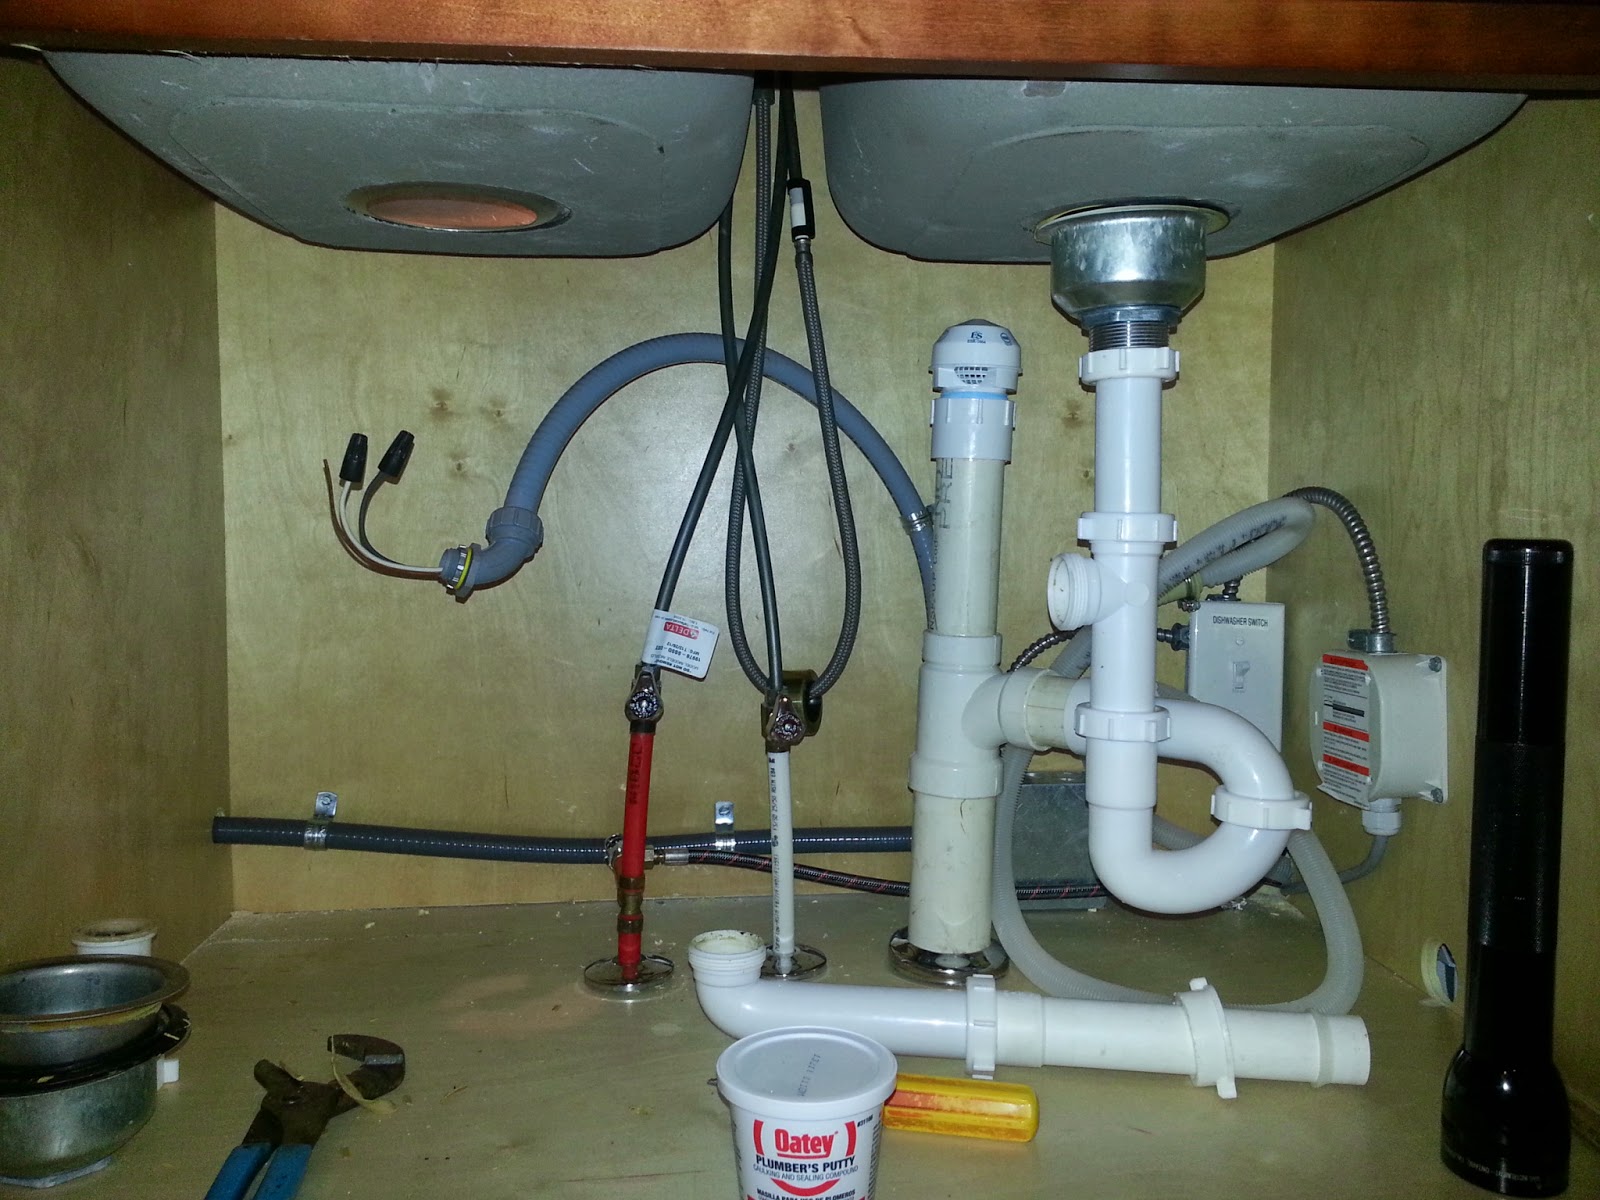
If you have a dishwasher, you'll need to connect it to the sink drain as well. Start by attaching the dishwasher drain hose to the dishwasher and securing it with a hose clamp. Then, connect the other end of the hose to the dishwasher inlet on the side of the drain trap. Finally, make sure all connections are tight and secure before testing the dishwasher to make sure it's working properly. With all of the components in place and properly connected, your kitchen sink is now ready for use. Remember to regularly check for any leaks and make any necessary adjustments to ensure your sink is functioning properly. By following these steps, you can easily install kitchen sink supply lines and have a fully functioning sink in your kitchen.How to Install a Kitchen Sink Drain with Dishwasher


How to Install a Kitchen Sink Drain with Dishwasher


Installing Kitchen Sink Supply Lines on the Floor

Why Floor Installation is a Smart Choice
 When it comes to installing
kitchen sink supply lines
, most people opt for the traditional method of connecting them to the wall. However, floor installation offers a number of advantages that make it a smart choice for any house design. Not only does it provide a clean and organized look, but it also allows for easier access to the supply lines for maintenance and repairs. Additionally, floor installation eliminates the risk of damage to the supply lines caused by drilling into walls. With proper planning and the right tools, installing kitchen sink supply lines on the floor can be a simple and efficient process.
When it comes to installing
kitchen sink supply lines
, most people opt for the traditional method of connecting them to the wall. However, floor installation offers a number of advantages that make it a smart choice for any house design. Not only does it provide a clean and organized look, but it also allows for easier access to the supply lines for maintenance and repairs. Additionally, floor installation eliminates the risk of damage to the supply lines caused by drilling into walls. With proper planning and the right tools, installing kitchen sink supply lines on the floor can be a simple and efficient process.
Step-by-Step Guide to Floor Installation
 Step 1:
Measure and mark the position of the supply lines on the floor. Make sure to leave enough space between the lines and the wall to allow for easy movement and maintenance.
Step 2:
Cut the supply lines to the desired length, leaving a few extra inches for adjustments.
Step 3:
Install a shut-off valve on each supply line. This will allow you to turn off the water supply to the sink in case of any leaks or repairs.
Step 4:
Carefully drill holes in the marked positions on the floor. Make sure the holes are slightly larger than the diameter of the supply lines to allow for easy movement.
Step 5:
Place the supply lines in the holes and secure them with pipe clamps. Make sure to tighten the clamps securely to prevent any leaks.
Step 6:
Connect the supply lines to the shut-off valves using a wrench. Make sure the connections are tight and secure.
Step 7:
Turn on the water supply and check for any leaks. If there are any leaks, tighten the connections or replace any damaged parts.
Step 1:
Measure and mark the position of the supply lines on the floor. Make sure to leave enough space between the lines and the wall to allow for easy movement and maintenance.
Step 2:
Cut the supply lines to the desired length, leaving a few extra inches for adjustments.
Step 3:
Install a shut-off valve on each supply line. This will allow you to turn off the water supply to the sink in case of any leaks or repairs.
Step 4:
Carefully drill holes in the marked positions on the floor. Make sure the holes are slightly larger than the diameter of the supply lines to allow for easy movement.
Step 5:
Place the supply lines in the holes and secure them with pipe clamps. Make sure to tighten the clamps securely to prevent any leaks.
Step 6:
Connect the supply lines to the shut-off valves using a wrench. Make sure the connections are tight and secure.
Step 7:
Turn on the water supply and check for any leaks. If there are any leaks, tighten the connections or replace any damaged parts.
Final Thoughts
:max_bytes(150000):strip_icc()/how-to-install-a-sink-drain-2718789-hero-24e898006ed94c9593a2a268b57989a3.jpg) Installing
kitchen sink supply lines
on the floor not only adds a modern touch to your house design, but it also offers practical benefits. With the proper tools and techniques, you can easily install the supply lines on your own. However, if you are not confident in your plumbing skills, it is always best to seek professional help. With proper installation, you can enjoy a clean and functional kitchen sink for years to come.
Installing
kitchen sink supply lines
on the floor not only adds a modern touch to your house design, but it also offers practical benefits. With the proper tools and techniques, you can easily install the supply lines on your own. However, if you are not confident in your plumbing skills, it is always best to seek professional help. With proper installation, you can enjoy a clean and functional kitchen sink for years to come.