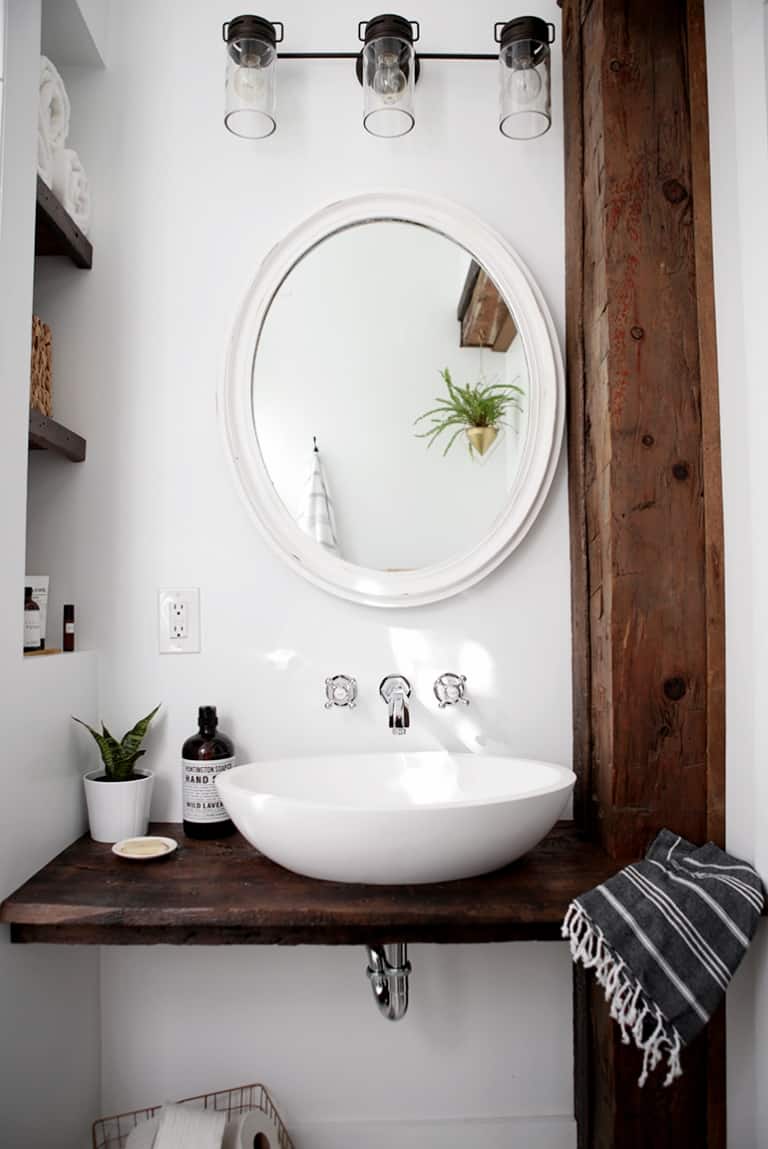
If you're looking to add a touch of elegance to your bathroom, installing a vessel sink is a great way to do so. Vessel sinks, also known as above-counter sinks, sit on top of the vanity or countertop, creating a modern and unique look. In this guide, we will walk you through the steps of installing a bathroom vessel sink to help you achieve the bathroom of your dreams.1. Bathroom vessel sink installation guide


1. Bathroom vessel sink installation guide


Before you begin, make sure you have all the necessary tools and materials. This includes the sink, faucet, drain assembly, plumber's putty, silicone sealant, adjustable wrench, and plumber's tape. Once you have everything, follow these steps: Step 1: Turn off the water supply to your bathroom sink. Step 2: Remove the existing sink and disconnect the plumbing. Step 3: Measure the opening in the countertop for the vessel sink and make any necessary adjustments. Step 4: Apply plumber's putty to the bottom of the sink and place it on the countertop. Step 5: Install the drain assembly according to the manufacturer's instructions. Step 6: Place the faucet on the sink and secure it with the mounting hardware. Step 7: Connect the plumbing to the faucet and drain assembly. Step 8: Apply a bead of silicone sealant around the edge of the sink to create a watertight seal. Step 9: Turn the water supply back on and check for any leaks. Step 10: Enjoy your newly installed bathroom vessel sink!2. Step-by-step instructions for installing a bathroom vessel sink


2. Step-by-step instructions for installing a bathroom vessel sink


If you're a handy person and enjoy taking on DIY projects, installing a bathroom vessel sink is a great option. With the right tools and instructions, you can easily complete this project on your own. However, keep in mind that if you're not comfortable with plumbing or have little experience, it's best to hire a professional to avoid any mistakes or damage.3. DIY bathroom vessel sink installation

3. DIY bathroom vessel sink installation


As mentioned earlier, make sure you have all the necessary tools and materials before starting the installation process. These include: Sink Faucet Drain assembly Plumber's putty Silicone sealant Adjustable wrench Plumber's tape4. Tools needed for installing a bathroom vessel sink

4. Tools needed for installing a bathroom vessel sink


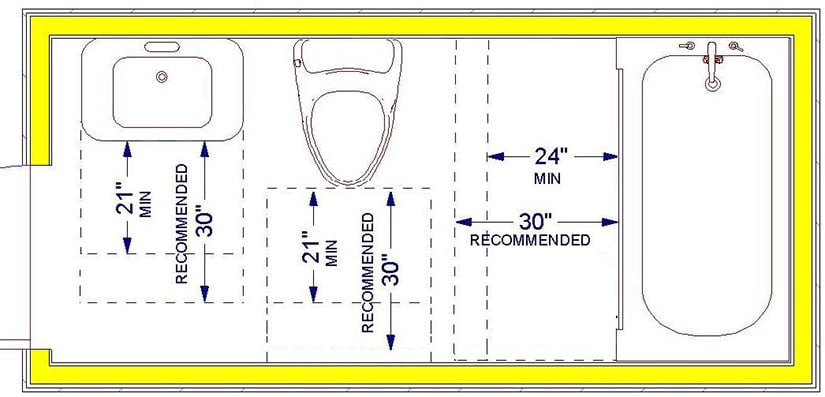
Measuring accurately is crucial for a successful bathroom vessel sink installation. Follow these steps to ensure you get the right measurements: Step 1: Measure the width and length of the sink's base. Step 2: Measure the height of the sink. Step 3: Measure the distance from the back of the sink to where the faucet will be installed. Step 4: Measure the distance from the center of the drain to the back of the sink. Step 5: Measure the distance between the holes for the faucet and ensure it matches the faucet you have chosen.5. How to properly measure for a bathroom vessel sink installation


5. How to properly measure for a bathroom vessel sink installation


To make the installation process smoother, here are some helpful tips: Make sure the sink is centered on the vanity or countertop for a balanced look. Use plumber's tape on all threaded connections to prevent leaks. Make sure the faucet is properly aligned with the sink's drain to avoid any water splashing onto the countertop. Double-check the measurements to ensure a perfect fit.6. Tips for a successful bathroom vessel sink installation


6. Tips for a successful bathroom vessel sink installation


While installing a bathroom vessel sink may seem straightforward, there are some common mistakes that can occur. Here are a few to watch out for: Not turning off the water supply before beginning the installation process. Not properly aligning the sink and faucet, resulting in water splashing onto the countertop. Not using enough plumber's putty or silicone sealant, resulting in leaks.7. Common mistakes to avoid when installing a bathroom vessel sink


7. Common mistakes to avoid when installing a bathroom vessel sink


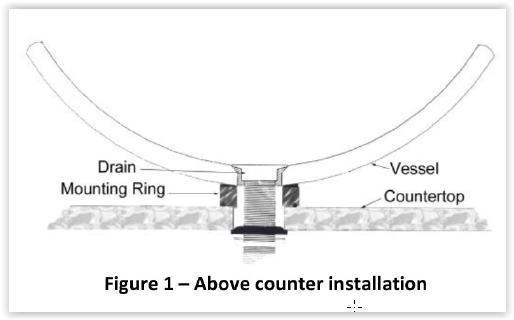
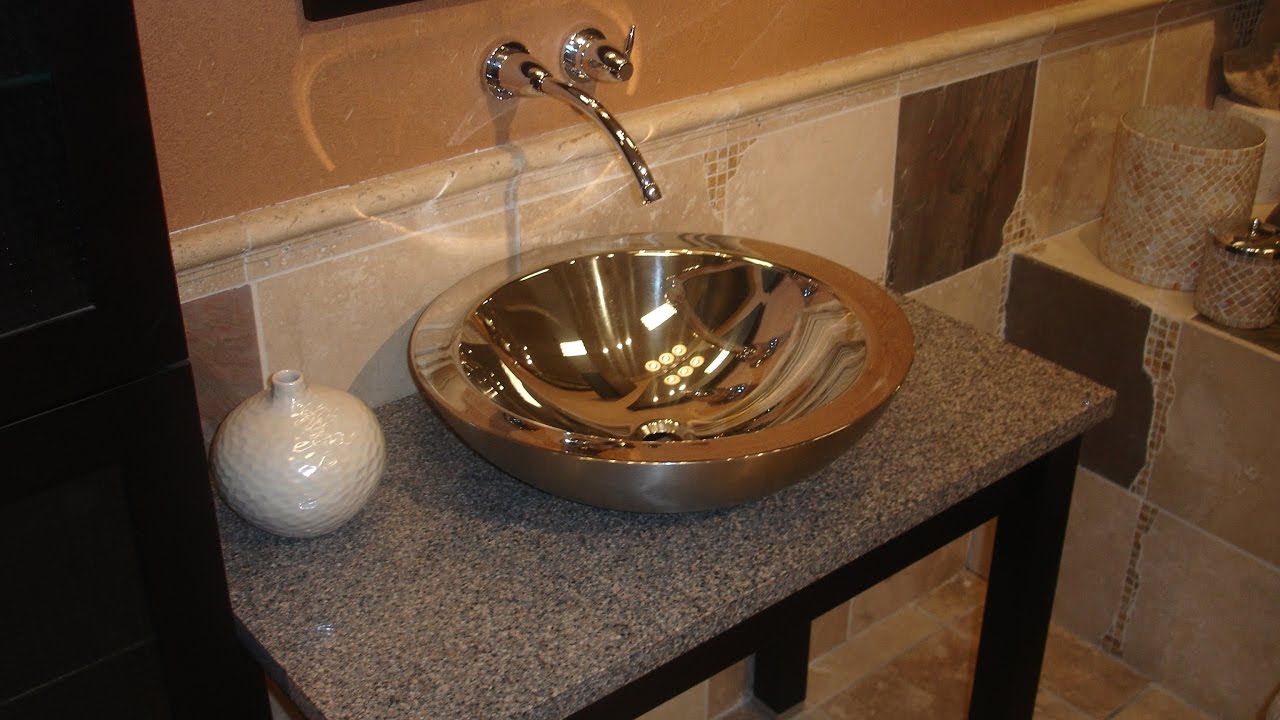
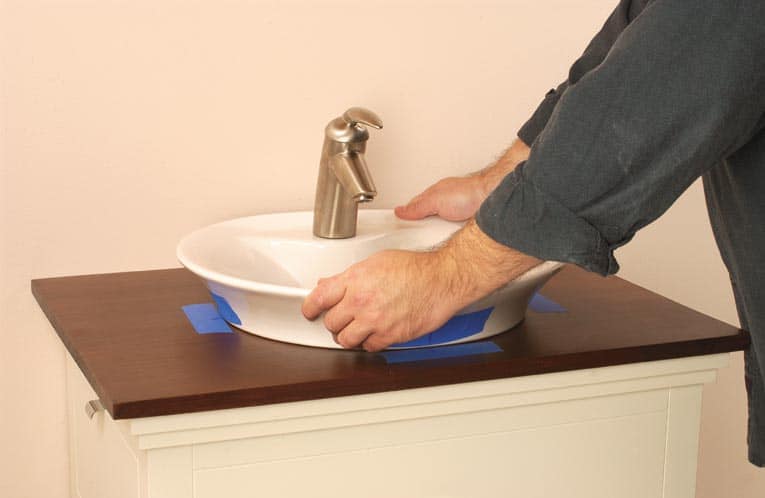
If you have a vanity with a pre-cut hole for a sink, installing a vessel sink can be a bit trickier. You will need to use a mounting ring to elevate the sink and create a seal between the sink and vanity. Follow the manufacturer's instructions and make sure the sink is properly secured before using it.8. Installing a bathroom vessel sink on a vanity


/7_IMG_3765-56a4a2743df78cf772835b6f.JPG)
8. Installing a bathroom vessel sink on a vanity


:max_bytes(150000):strip_icc()/8_IMG_3767-56a4a2753df78cf772835b72.JPG)


Connecting the plumbing for a bathroom vessel sink is relatively simple. You will need to attach the drain assembly to the sink and connect the supply lines to the faucet. Make sure all connections are tight and use plumber's tape to prevent leaks. If you're unsure, it's best to consult a professional plumber.9. How to connect plumbing for a bathroom vessel sink


9. How to connect plumbing for a bathroom vessel sink


Some common issues that may arise during a bathroom vessel sink installation include leaks and improper alignment. These can usually be fixed by tightening connections or adjusting the sink and faucet. If you encounter any other problems, it's best to consult a professional for assistance. With this guide, you should now have all the information you need to successfully install a bathroom vessel sink. Remember to take your time, follow the instructions carefully, and don't hesitate to seek help if needed. Enjoy your new, stylish bathroom addition! 10. Troubleshooting common issues during a bathroom vessel sink installation


10. Troubleshooting common issues during a bathroom vessel sink installation


Step 4: Connecting the Drain and Water Supply
Connecting the Drain
 Now that you have successfully installed the vessel sink on top of the vanity, it's time to connect the drain.
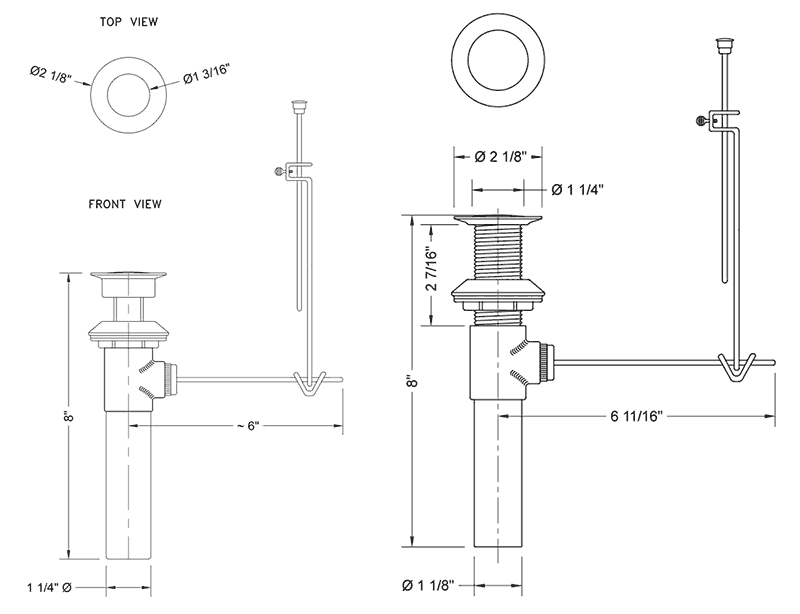
Using a drain assembly that matches the size and shape of your sink is crucial for proper installation.
Start by applying a small amount of plumber's putty to the bottom of the drain flange and insert it into the drain hole in the sink. Then, secure it in place with the rubber gasket and locknut provided with the assembly.
Make sure to tighten the locknut enough to create a watertight seal, but not too tight as to crack the sink.
Once the drain is securely in place, you can connect the P-trap to the bottom of the drain and the wall drain, making sure to use plumber's tape for a tight seal.
Now that you have successfully installed the vessel sink on top of the vanity, it's time to connect the drain.
Using a drain assembly that matches the size and shape of your sink is crucial for proper installation.
Start by applying a small amount of plumber's putty to the bottom of the drain flange and insert it into the drain hole in the sink. Then, secure it in place with the rubber gasket and locknut provided with the assembly.
Make sure to tighten the locknut enough to create a watertight seal, but not too tight as to crack the sink.
Once the drain is securely in place, you can connect the P-trap to the bottom of the drain and the wall drain, making sure to use plumber's tape for a tight seal.
Connecting the Water Supply
 Next, you will need to connect the water supply lines to the sink.
Consult the manufacturer's instructions to determine the appropriate size and type of supply lines to use.
If you have copper pipes, you will need to solder the connections. For PVC pipes, you can use compression fittings.
It's important to turn off the water supply before making any connections.
Once the connections are made, turn the water supply back on and check for any leaks.
If there are leaks, tighten the connections as needed.
Congratulations, you have successfully installed your new bathroom vessel sink! With proper installation, maintenance, and cleaning, your sink will not only add a stylish touch to your bathroom, but it will also function efficiently for years to come.
Remember to regularly clean and maintain your sink to prevent any clogs or damage.
Now, sit back, relax, and enjoy your beautiful new bathroom vessel sink.
Next, you will need to connect the water supply lines to the sink.
Consult the manufacturer's instructions to determine the appropriate size and type of supply lines to use.
If you have copper pipes, you will need to solder the connections. For PVC pipes, you can use compression fittings.
It's important to turn off the water supply before making any connections.
Once the connections are made, turn the water supply back on and check for any leaks.
If there are leaks, tighten the connections as needed.
Congratulations, you have successfully installed your new bathroom vessel sink! With proper installation, maintenance, and cleaning, your sink will not only add a stylish touch to your bathroom, but it will also function efficiently for years to come.
Remember to regularly clean and maintain your sink to prevent any clogs or damage.
Now, sit back, relax, and enjoy your beautiful new bathroom vessel sink.
:max_bytes(150000):strip_icc()/8_IMG_3767-56a4a2753df78cf772835b72.JPG)