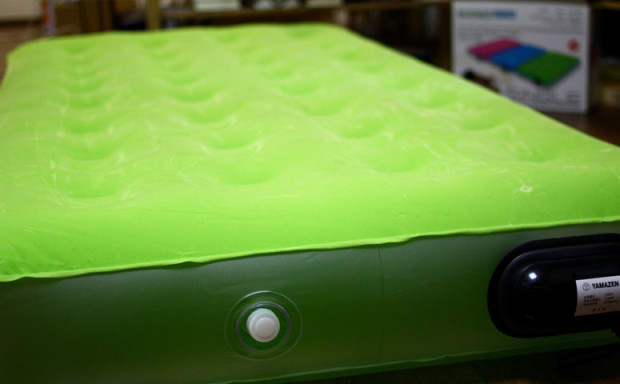
Air mattresses are a convenient and comfortable option for camping trips, unexpected guests, or even as a temporary bed at home. However, one of the biggest frustrations with air mattresses is when they develop a leak. Not only does it result in an uncomfortable sleeping surface, but it can also be a hassle to find and fix the source of the leak. If you have a Go Air Mattress and suspect it has a leak, here are 10 ways to help you locate and fix it.How to Find a Leak in a Go Air Mattress


How to Find a Leak in a Go Air Mattress


The first step in finding a leak in your Go Air Mattress is to give it a thorough inspection. Check for any visible holes, tears, or punctures on the surface of the mattress. Look closely at the seams, as they are a common area for leaks to occur. Use a flashlight to help you see any small imperfections that may be causing the leak.1. Inspect the Mattress


How to Locate a Leak in a Go Air Mattress


If you can't find any visible signs of a leak, try lying on the mattress and listening for any escaping air. If the leak is significant enough, you should be able to hear a hissing noise. This will help you narrow down the area of the leak.2. Listen for Air Escaping


Steps to Finding a Leak in a Go Air Mattress


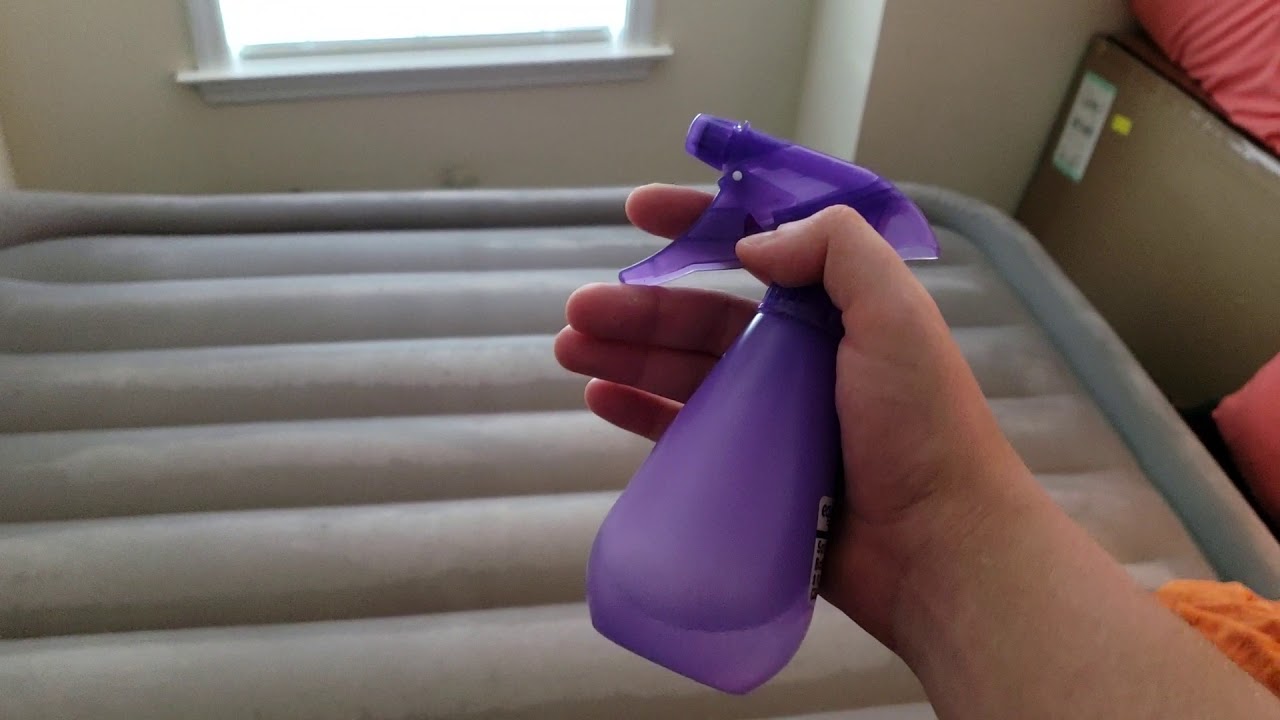
If you still can't locate the leak, try doing a water test. Fill a spray bottle with soapy water and spray it onto the surface of the mattress. If there is a leak, you will see bubbles forming at the source. This method is particularly useful for finding small leaks that may be difficult to spot with the naked eye.3. Use a Water Test


Tips for Finding a Leak in a Go Air Mattress


The valve on your Go Air Mattress is another common area for leaks to occur. Make sure the valve is tightly closed and not damaged in any way. If you find that the valve is the source of the leak, you can usually purchase a replacement valve from the manufacturer.4. Check the Valve

Methods for Finding a Leak in a Go Air Mattress

If your mattress has lost a significant amount of air, it may be difficult to locate the leak when it is completely deflated. Try inflating the mattress to its full capacity and then listen and feel for any air escaping. This will also help you pinpoint the area of the leak.5. Inflate the Mattress

Tricks for Finding a Leak in a Go Air Mattress
If you have located the source of the leak, you can use a patch kit specifically designed for air mattresses to repair it. These kits usually come with a patch and adhesive that can effectively seal the hole. Just make sure to follow the instructions carefully for the best results.6. Use a Patch Kit


Ways to Find a Leak in a Go Air Mattress


If your air mattress has multiple leaks or you are unable to locate the source, you can use a repair sealant to fix the problem. These sealants are usually a liquid that you apply to the surface of the mattress, and it will harden to create a seal. However, keep in mind that this may not be a long-term solution and may need to be reapplied over time.7. Use a Repair Sealant

Techniques for Finding a Leak in a Go Air Mattress
Sometimes, the cause of a leak in an air mattress is user error. Make sure you are not over-inflating the mattress, as this can put excess pressure on the seams and cause them to burst. Additionally, be careful when setting up the mattress on rough surfaces, as this can also cause damage.8. Check for User Error


Strategies for Finding a Leak in a Go Air Mattress

If you are using your Go Air Mattress outdoors, keep in mind that the environment can play a role in causing leaks. Sharp rocks, branches, and other debris can puncture the surface of the mattress. Always make sure to clear the area and use a protective barrier, such as a tarp, underneath the mattress.9. Consider the Environment

Tools for Finding a Leak in a Go Air Mattress

Finding Leaks in Your Go Air Mattress: Tips and Tricks
 If you own a
Go Air Mattress
, chances are you've experienced the frustration of waking up to a deflated mattress. Not only is it uncomfortable to sleep on, but constantly replacing or repairing your air mattress can be a costly and time-consuming task. Luckily, finding leaks in your Go Air Mattress doesn't have to be a daunting task. With the right tools and techniques, you can easily locate and repair any leaks, ensuring a good night's sleep on your air mattress. In this article, we'll guide you through the process of finding leaks in your Go Air Mattress, so you can quickly get back to enjoying a comfortable night's rest.
If you own a
Go Air Mattress
, chances are you've experienced the frustration of waking up to a deflated mattress. Not only is it uncomfortable to sleep on, but constantly replacing or repairing your air mattress can be a costly and time-consuming task. Luckily, finding leaks in your Go Air Mattress doesn't have to be a daunting task. With the right tools and techniques, you can easily locate and repair any leaks, ensuring a good night's sleep on your air mattress. In this article, we'll guide you through the process of finding leaks in your Go Air Mattress, so you can quickly get back to enjoying a comfortable night's rest.
Start by Gathering Your Tools
 Before you begin, make sure you have all the necessary tools on hand. This includes a pump, soapy water (dish soap works well), a sponge or spray bottle, and a patch kit. Once you have all your tools, you're ready to start the leak detection process.
Locating the Leak
 The first step in finding a leak in your Go Air Mattress is to inflate it to its maximum capacity. This will make it easier to locate the leak as the air will be escaping at a faster rate. Once the mattress is fully inflated, use your soapy water and sponge or spray bottle to carefully cover the entire surface of the mattress.
Related main keywords: air mattress repair, leak detection, patch kit
The first step in finding a leak in your Go Air Mattress is to inflate it to its maximum capacity. This will make it easier to locate the leak as the air will be escaping at a faster rate. Once the mattress is fully inflated, use your soapy water and sponge or spray bottle to carefully cover the entire surface of the mattress.
Related main keywords: air mattress repair, leak detection, patch kit
Watch for Bubbles
 As you cover the mattress with soapy water, keep an eye out for any bubbles forming on the surface. These bubbles indicate a leak and will help you pinpoint the exact location. If you don't see any bubbles, move your hands over the surface of the mattress, feeling for any escaping air. Keep in mind that the leak may be small and difficult to detect, so be patient and thorough in your search.
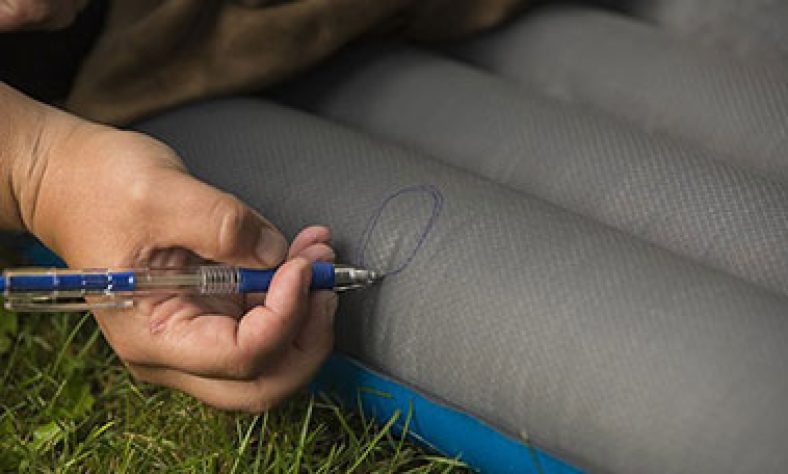
Mark the Leak and Deflate the Mattress
 Once you've located the leak, mark it with a piece of tape or a marker so you can easily find it again. Then, deflate the mattress and dry off the area around the leak. This will ensure that the patch adheres properly when you make the repair.
Make the Repair
 Using the patch kit, carefully follow the instructions to repair the leak. This usually involves cutting a patch to size, applying adhesive, and placing it over the leak. Be sure to press down firmly and let the patch dry completely before reinflating the mattress.
Prevent Future Leaks
 To prevent future leaks in your Go Air Mattress, make sure to properly store it when not in use. Avoid placing it on rough surfaces or near sharp objects. Additionally, regularly inspect your mattress for any tears or wear and tear, and make necessary repairs as soon as possible.
In Conclusion
 With these tips and tricks, finding leaks in your Go Air Mattress should be a breeze. By having the right tools and following a careful process, you can quickly locate and repair any leaks, ensuring a comfortable and restful night's sleep. Remember to properly store and maintain your air mattress to prevent future leaks, and you'll be able to enjoy many more nights of peaceful slumber on your Go Air Mattress.