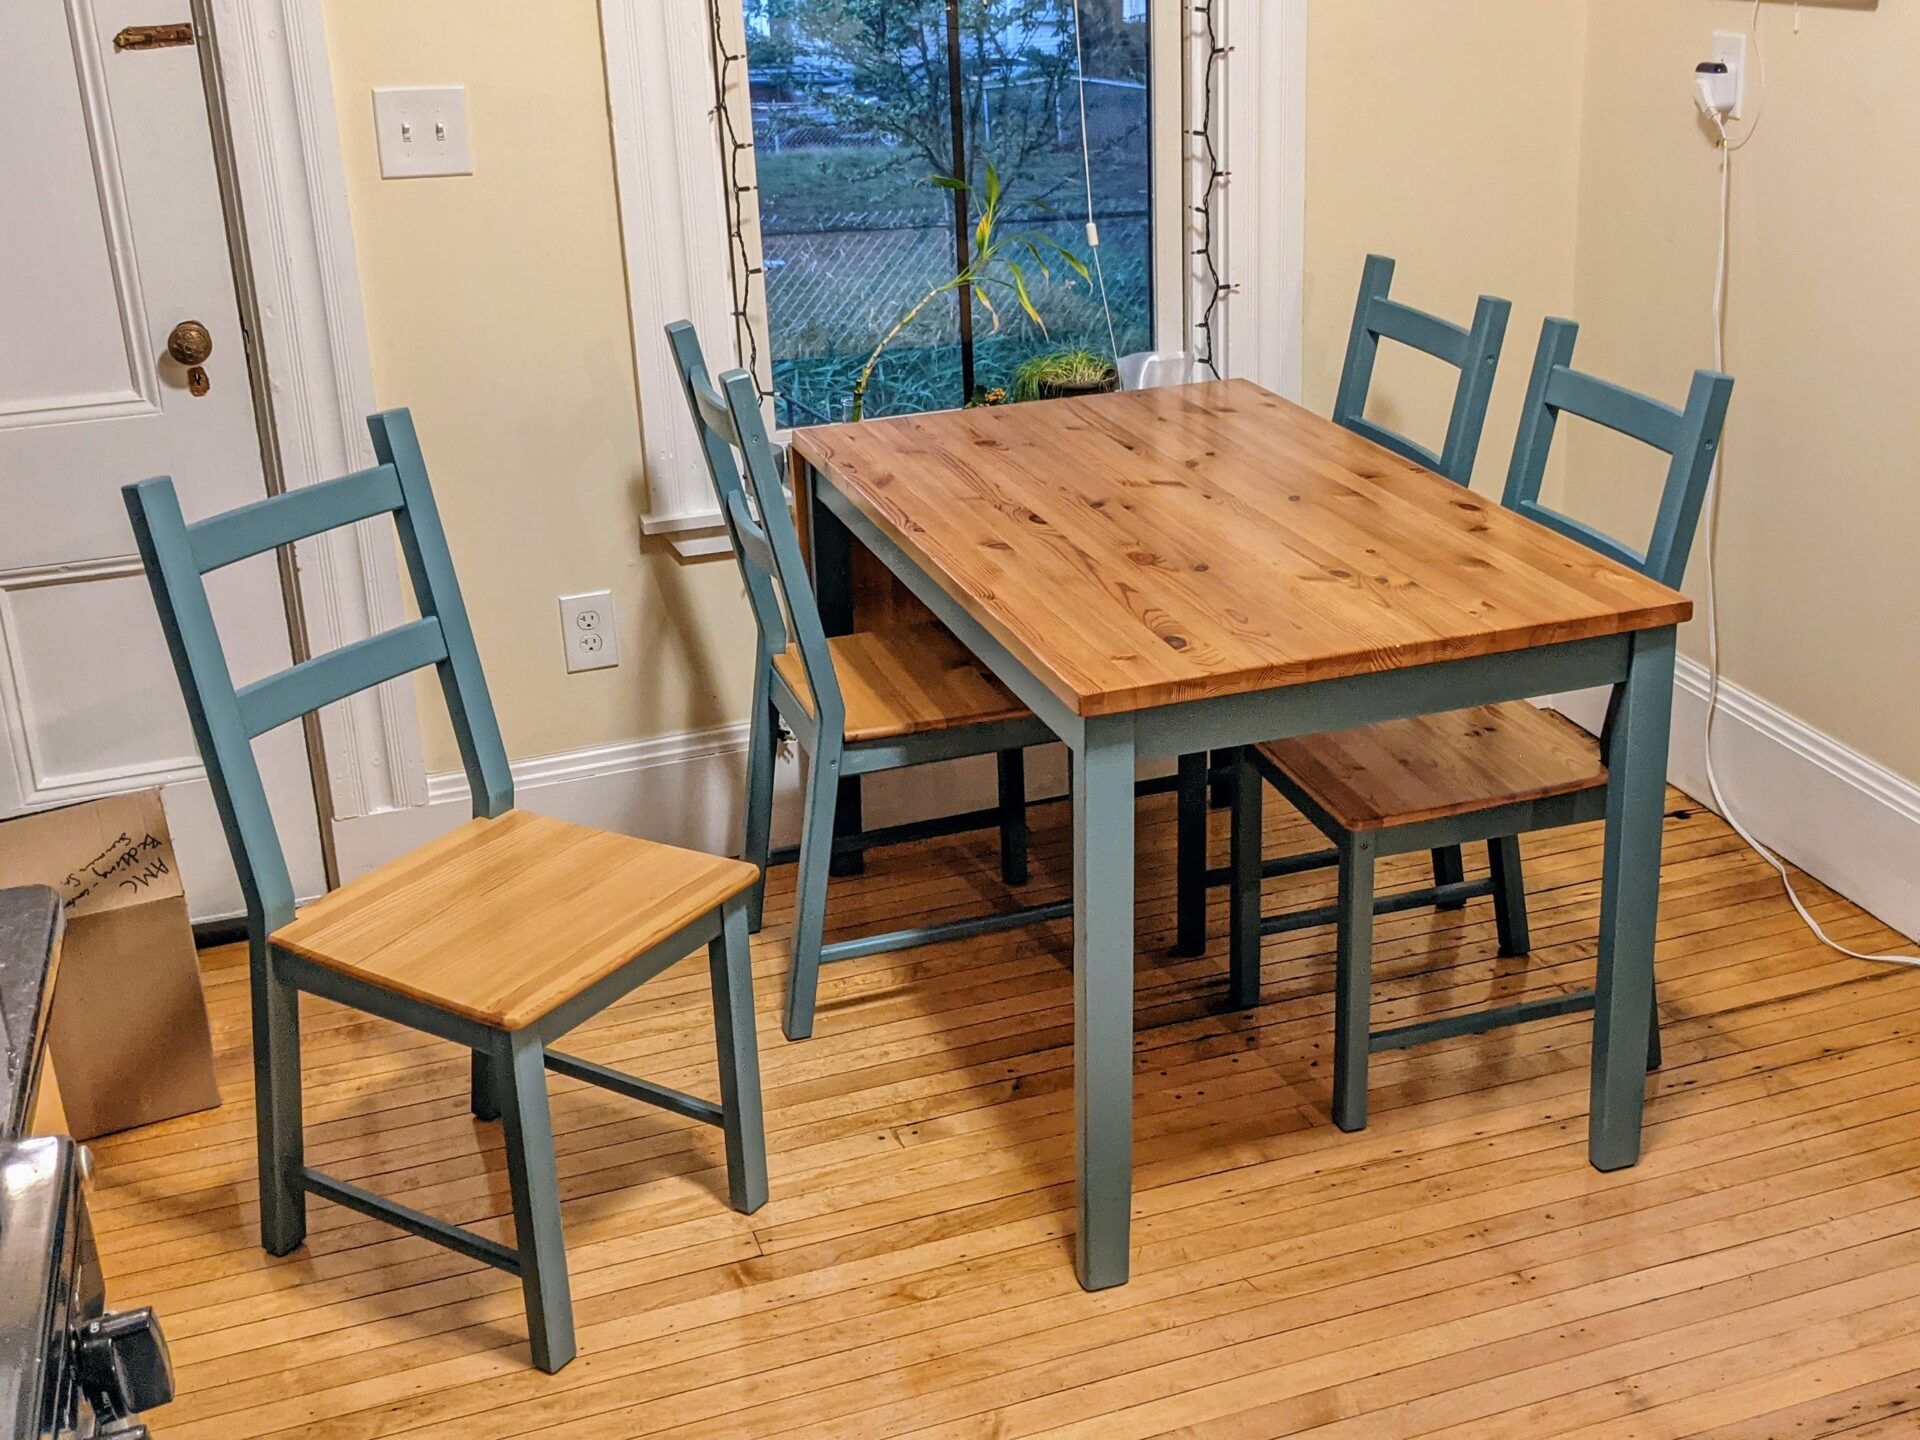
Danish oil is a popular choice for finishing wood furniture, and for good reason. Not only does it enhance the natural beauty of the wood, but it also provides a durable and protective finish. If you're looking to give your kitchen table a fresh new look, consider using Danish oil. Here's a step-by-step guide on how to apply it to your kitchen table. Main Keyword: Danish oil Related Keywords: kitchen table, finishing wood furniture, natural beauty, durable, protective finish1. How to Apply Danish Oil to a Kitchen Table


1. How to Apply Danish Oil to a Kitchen Table


There are many benefits to using Danish oil on your kitchen table. First and foremost, it is easy to apply and dries quickly, making it a convenient choice for a DIY project. It also brings out the natural color and grain of the wood, creating a beautiful and rich finish. Additionally, Danish oil is water-resistant, making it a great option for a kitchen table that may be exposed to spills and moisture. Main Keyword: Benefits of Danish oil Related Keywords: easy to apply, dries quickly, DIY project, natural color, grain of wood, water-resistant, kitchen table, spills, moisture2. The Benefits of Using Danish Oil on Your Kitchen Table


2. The Benefits of Using Danish Oil on Your Kitchen Table


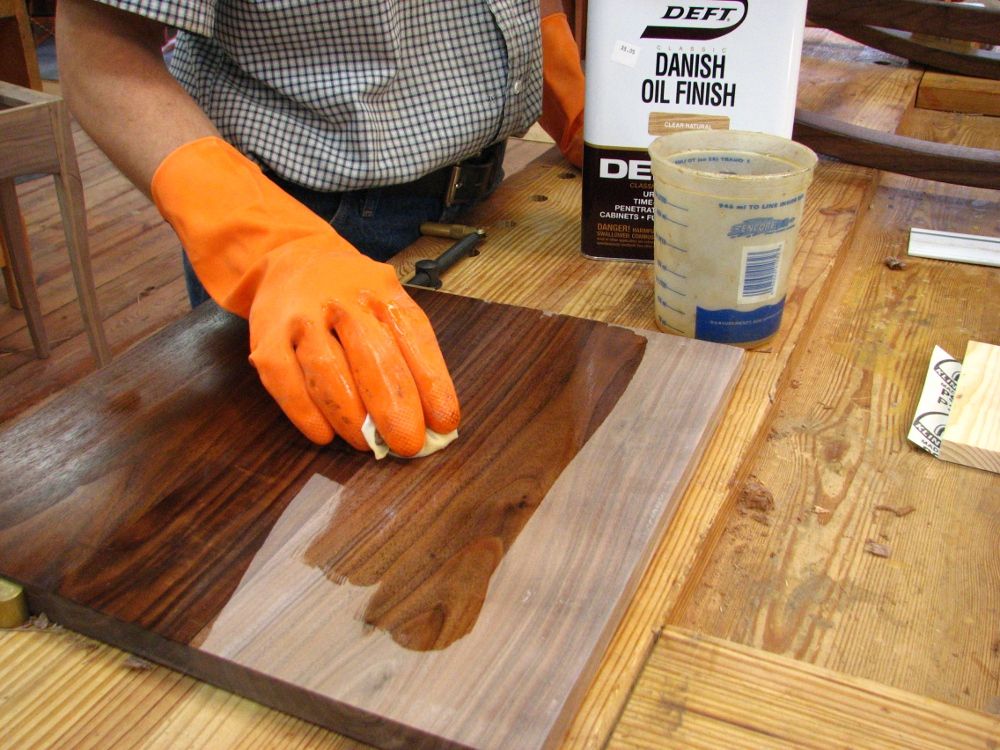
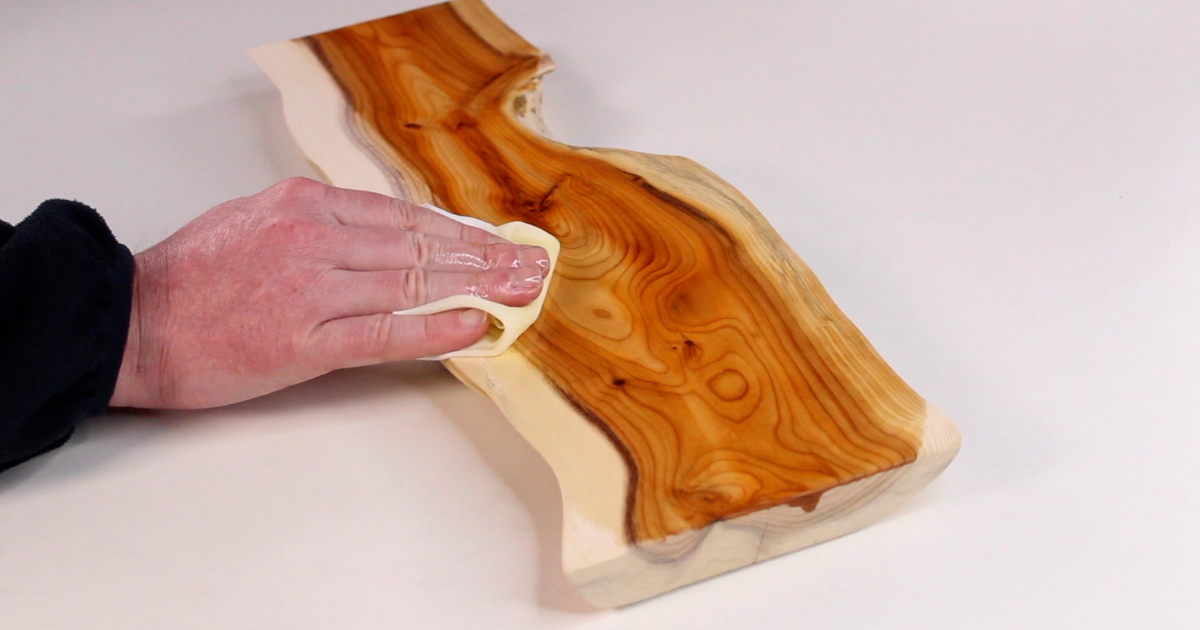
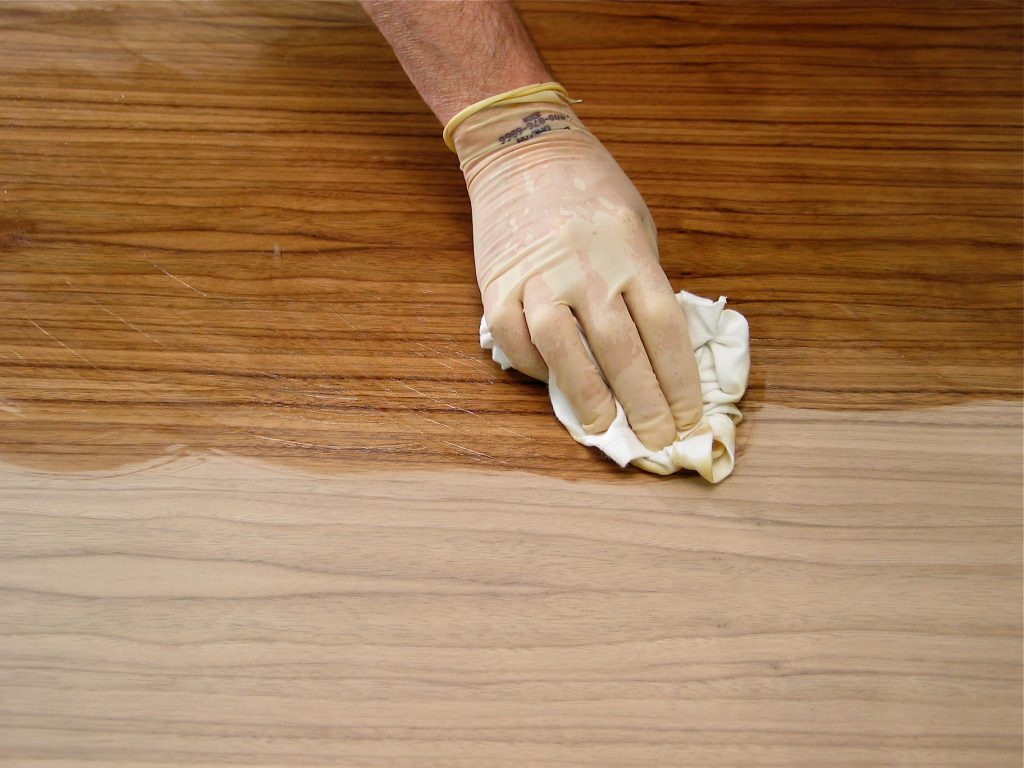
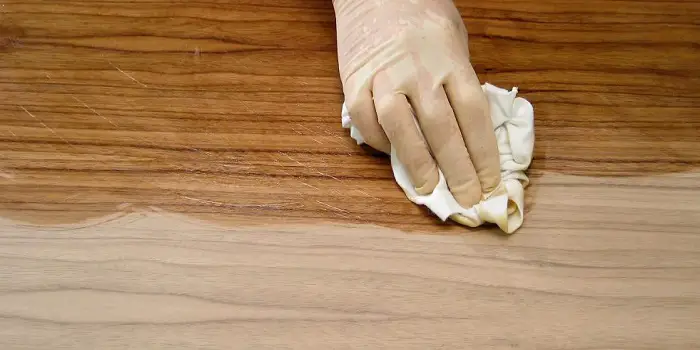
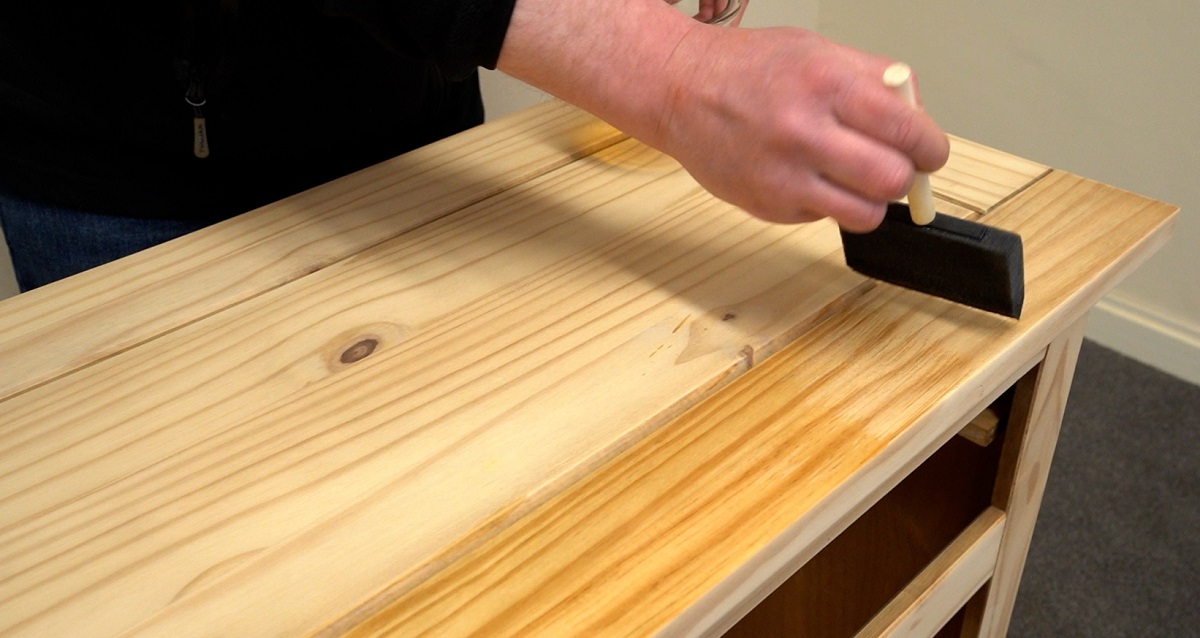
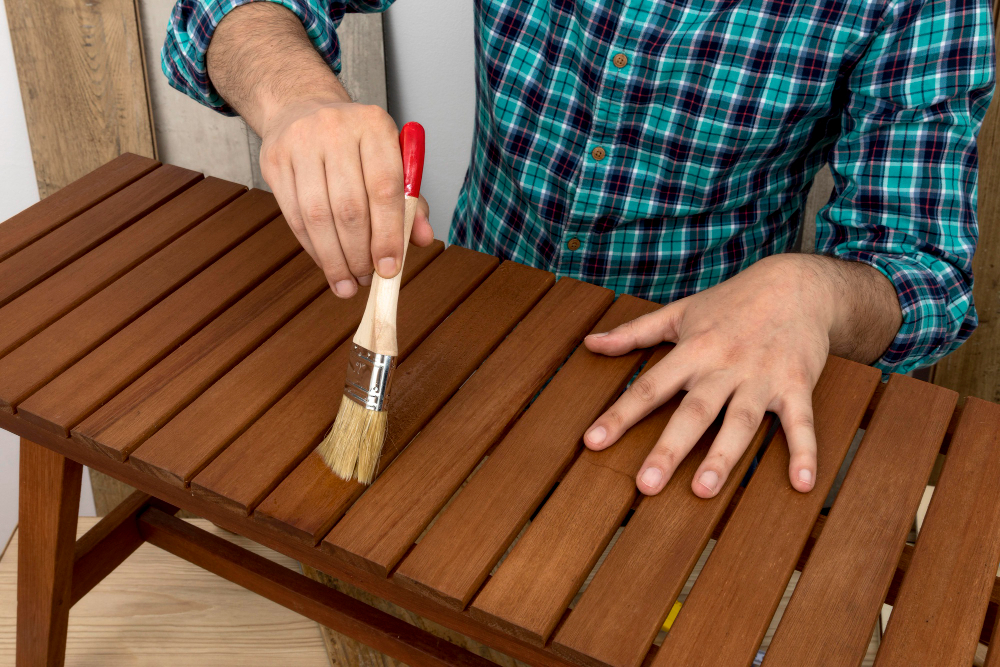
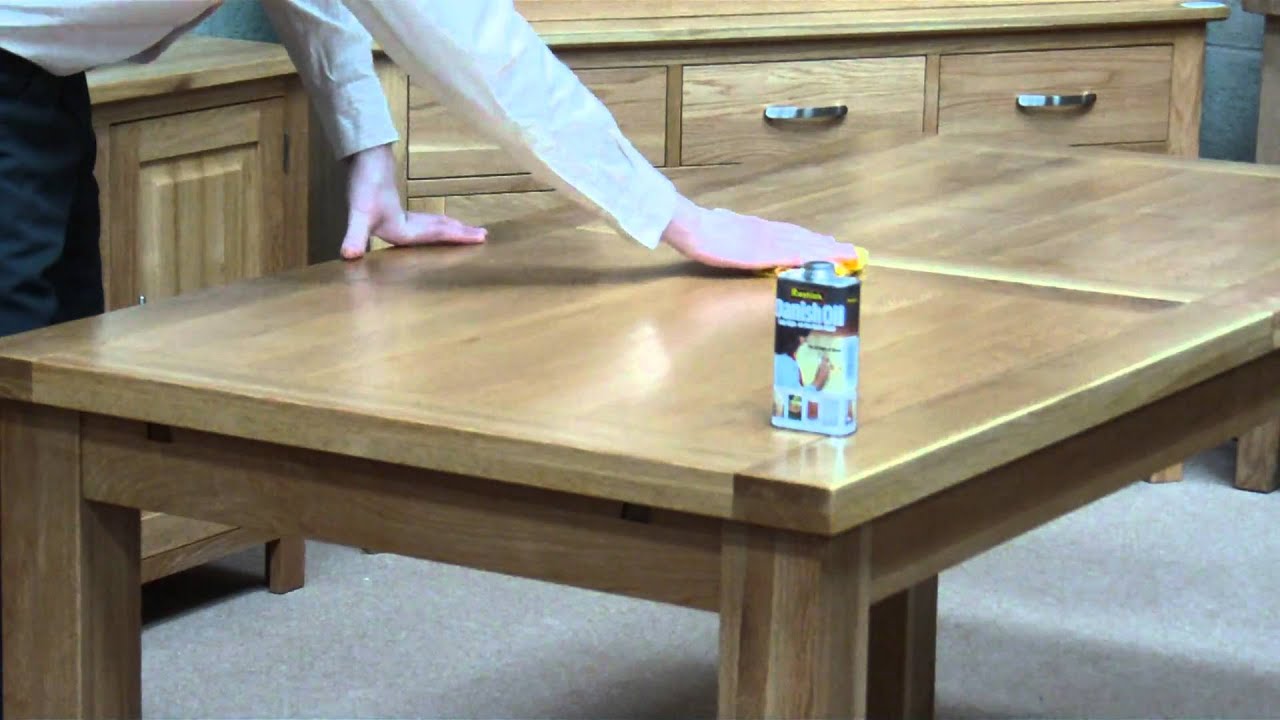
If your kitchen table is looking dull and worn, refinishing it with Danish oil can give it a new lease on life. Here's a simple guide on how to do it: Main Keyword: Refinishing a kitchen table with Danish oil Related Keywords: looking dull, worn, new lease on life, simple guide Step 1: Prepare the surface - Start by thoroughly cleaning the surface of your kitchen table. Remove any dirt, dust, or grime using a mild cleaner and a soft cloth. Allow the table to dry completely before moving on to the next step. Main Keyword: Prepare the surface Related Keywords: cleaning, dirt, dust, grime, mild cleaner, soft cloth, dry completely Step 2: Sand the table - Use a fine-grit sandpaper to lightly sand the surface of the table. This will help to smooth out any imperfections and create a better surface for the oil to adhere to. Main Keyword: Sand the table Related Keywords: fine-grit sandpaper, lightly sand, imperfections, smooth out, better surface, adhere to Step 3: Apply the oil - Using a clean cloth, apply a generous amount of Danish oil to the surface of the table. Work in small sections, rubbing the oil into the wood in a circular motion. Make sure to cover the entire surface evenly. Main Keyword: Apply the oil Related Keywords: clean cloth, generous amount, small sections, rubbing, circular motion, cover, entire surface, evenly Step 4: Let it sit - After applying the oil, let it sit for about 15-20 minutes to allow it to penetrate the wood. This will help to bring out the natural color and grain of the wood. Main Keyword: Let the oil sit Related Keywords: 15-20 minutes, penetrate, bring out, natural color, grain of wood Step 5: Wipe off excess - Using a clean cloth, wipe off any excess oil from the surface of the table. Make sure to remove any drips or puddles to avoid a sticky finish. Main Keyword: Wipe off excess oil Related Keywords: clean cloth, drips, puddles, avoid sticky finish Step 6: Repeat if needed - If you want a darker or richer finish, you can repeat the previous steps once the first coat has dried. Just make sure to lightly sand the surface again before applying the second coat. Main Keyword: Repeat the process Related Keywords: darker, richer finish, first coat, dried, lightly sand, second coat3. Step-by-Step Guide to Refinishing a Kitchen Table with Danish Oil


3. Step-by-Step Guide to Refinishing a Kitchen Table with Danish Oil


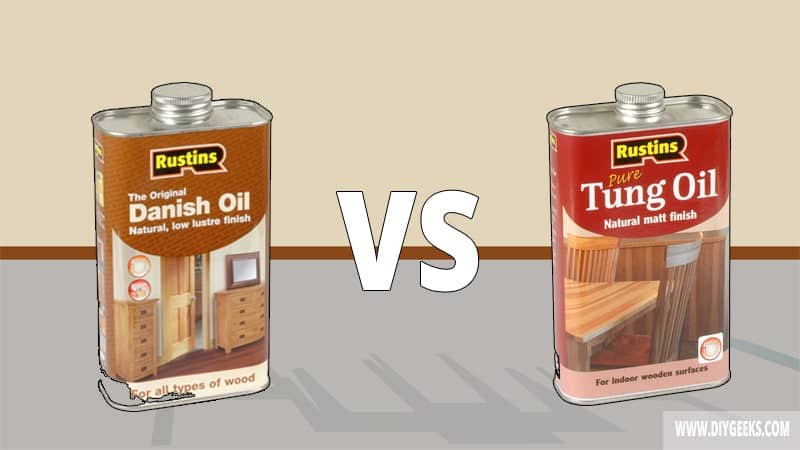
When it comes to choosing the right Danish oil for your kitchen table, there are a few top brands that stand out. Some popular options include Watco Danish Oil, Rust-Oleum Danish Oil, and Tried & True Original Wood Finish. These brands offer high-quality oils that are easy to apply and provide a beautiful finish. Main Keyword: Best brands of Danish oil Related Keywords: Watco, Rust-Oleum, Tried & True, high-quality, easy to apply, beautiful finish4. Best Brands of Danish Oil for Kitchen Tables


4. Best Brands of Danish Oil for Kitchen Tables


Accidents happen, and sometimes stains can occur on your kitchen table even if it's treated with Danish oil. The good news is, it's usually easy to remove these stains. Here's how: Main Keyword: Remove stains from a kitchen table Related Keywords: accidents, treated with Danish oil, easy to remove, good news For water-based stains: Mix equal parts vinegar and water and apply it to the stained area. Let it sit for a few minutes, then wipe it off with a clean cloth. Main Keyword: Water-based stains Related Keywords: equal parts, vinegar, water, apply, stained area, sit, few minutes, wipe off, clean cloth For oil-based stains: Use a cloth dampened with mineral spirits and gently rub the stained area. Wipe away any excess with a clean cloth. Main Keyword: Oil-based stains Related Keywords: cloth, dampened, mineral spirits, gently rub, wipe away, excess, clean cloth For tougher stains: For tough stains like ink or permanent marker, use a fine-grit sandpaper to lightly sand the surface of the stain. This will help to remove the top layer of the finish and the stain along with it. Main Keyword: Tough stains Related Keywords: ink, permanent marker, fine-grit sandpaper, lightly sand, surface, remove, top layer, finish5. How to Remove Stains from a Kitchen Table Treated with Danish Oil


5. How to Remove Stains from a Kitchen Table Treated with Danish Oil


To keep your kitchen table looking beautiful for years to come, it's important to properly maintain it. Here are a few tips for maintaining a kitchen table finished with Danish oil: Main Keyword: Tips for maintaining a kitchen table Related Keywords: looking beautiful, years to come, properly maintain, finished with Danish oil Regularly clean the surface with a mild cleaner and a soft cloth to remove any dirt or grime. Main Keyword: Regularly clean the surface Related Keywords: mild cleaner, soft cloth, remove, dirt, grime Use coasters or placemats to protect the table from heat and moisture. Main Keyword: Use coasters or placemats Related Keywords: protect, heat, moisture Reapply Danish oil every 6-12 months to maintain the finish and protect the wood. Main Keyword: Reapply Danish oil Related Keywords: maintain finish, protect wood, every 6-12 months6. Tips for Maintaining a Kitchen Table Finished with Danish Oil

6. Tips for Maintaining a Kitchen Table Finished with Danish Oil


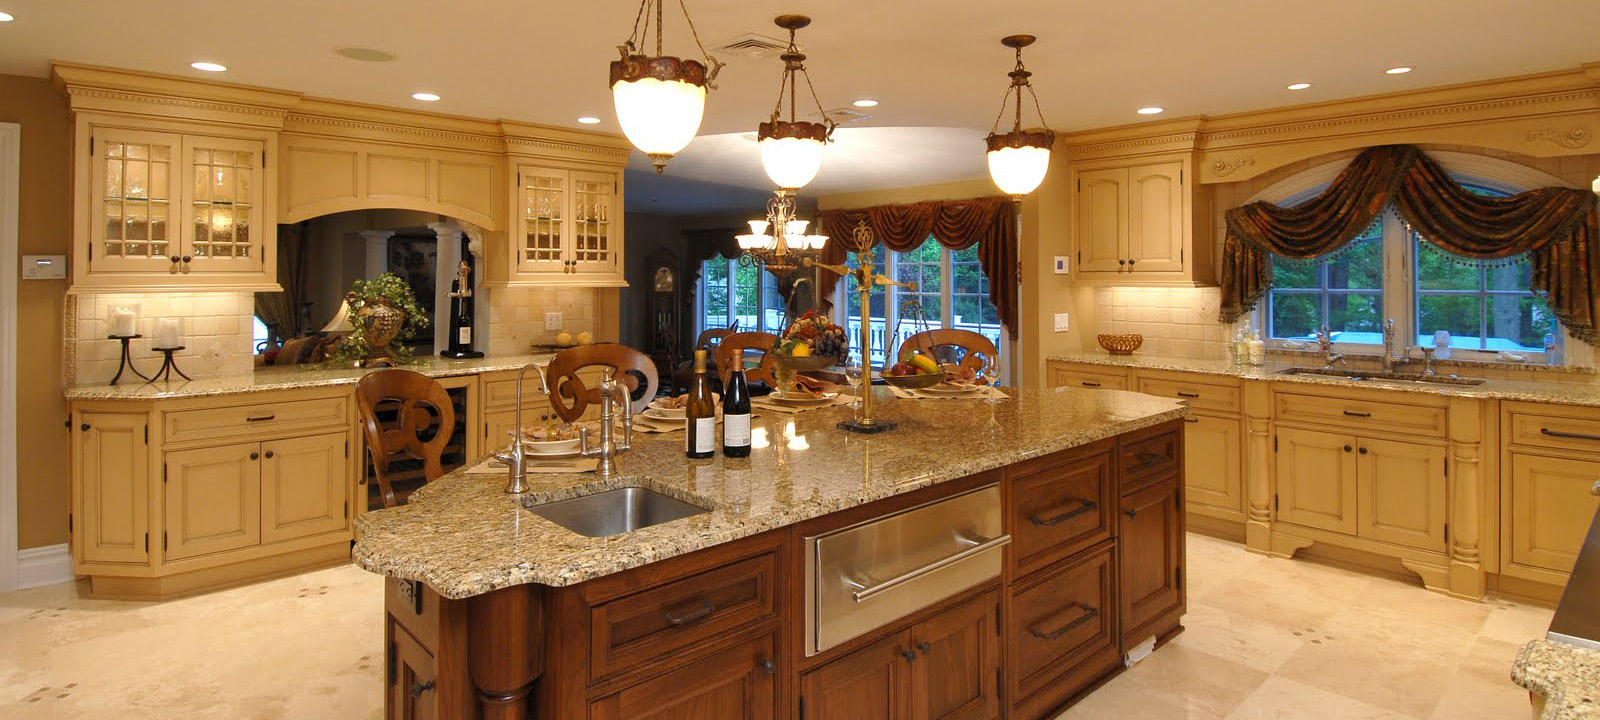
If you're looking to give your kitchen table a makeover, consider using Danish oil as a finish. It can transform the look of your table and protect it from daily wear and tear. So why not give it a try? Main Keyword: Transform your kitchen table Related Keywords: makeover, Danish oil, finish, transform, protect, daily wear and tear, give it a try7. Transform Your Kitchen Table with a Coat of Danish Oil


7. Transform Your Kitchen Table with a Coat of Danish Oil


There are many different types of wood finishes available, but Danish oil stands out for its unique characteristics. Unlike other finishes, Danish oil penetrates the wood instead of sitting on top, providing a more natural look and feel. It also offers a water-resistant and durable finish, making it a great choice for a kitchen table. Main Keyword: Difference between Danish oil and other wood finishes Related Keywords: types of wood finishes, unique characteristics, penetrates, natural look and feel, water-resistant, durable, kitchen table8. The Difference Between Danish Oil and Other Wood Finishes for Kitchen Tables


8. The Difference Between Danish Oil and Other Wood Finishes for Kitchen Tables


While applying Danish oil to a kitchen table is a fairly straightforward process, there are a few common mistakes that can easily be avoided. These include: Main Keyword: Common mistakes to avoid Related Keywords: applying Danish oil, fairly straightforward, process, easily avoided Not properly preparing the surface before applying the oil. Main Keyword: Not properly preparing the surface Related Keywords: applying oil, surface Applying too much oil, which can result in a sticky or blotchy finish. Main Keyword: Applying too much oil Related Keywords: sticky, blotchy finish Not wiping off excess oil, which can also lead to a sticky finish. Main Keyword: Not wiping off excess oil Related Keywords: excess oil, sticky finish9. Common Mistakes to Avoid When Applying Danish Oil to a Kitchen Table


9. Common Mistakes to Avoid When Applying Danish Oil to a Kitchen Table


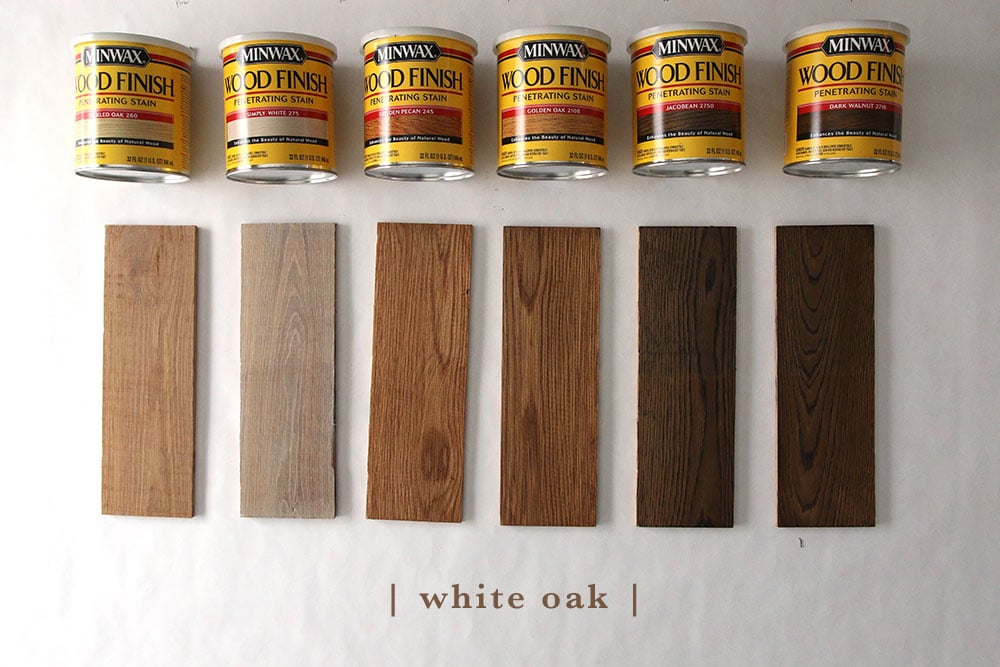
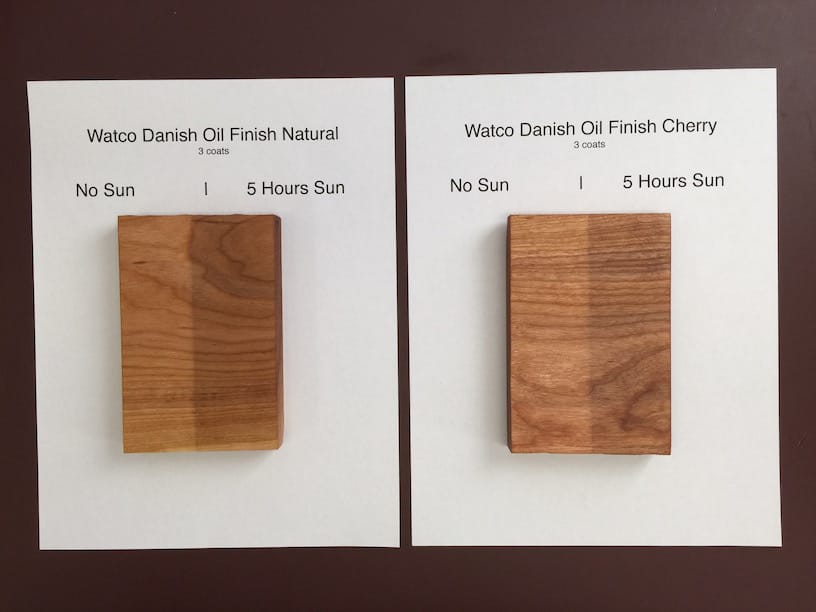
Danish oil comes in a variety of colors, from light to dark. When choosing the right color for your kitchen table, consider the color and type of wood, as well as your personal preference. It's always a good idea to test the color on a small, inconspicuous area first before applying it to the entire table. Main Keyword: Choosing the right color of Danish oil Related Keywords: variety of colors, light to dark, color and type of wood, personal preference, test, small area, inconspicuous, applying to entire table With these tips and ideas, you can confidently use Danish oil to transform your kitchen table and give it a beautiful and durable finish. Just remember to properly prepare the surface, choose the right color, and maintain it regularly for long-lasting results. Main Keyword: Using Danish oil on your kitchen table Related Keywords: confidently, transform, beautiful, durable finish, properly prepare, choose, right color, maintain regularly, long-lasting results10. How to Choose the Right Color of Danish Oil for Your Kitchen Table

10. How to Choose the Right Color of Danish Oil for Your Kitchen Table


Enhance the Durability and Aesthetic of Your Kitchen Table with Danish Oil
Why Danish Oil is the Perfect Choice for Your Kitchen Table
 If you're looking to add a touch of elegance to your kitchen table while also protecting it from everyday wear and tear,
Danish oil
is the perfect solution. This type of finish is specifically designed for wood and has been used for centuries in Scandinavian countries to preserve and beautify furniture. With its unique blend of oils and resins,
Danish oil
not only enhances the natural beauty of wood, but also provides a durable and long-lasting finish.
If you're looking to add a touch of elegance to your kitchen table while also protecting it from everyday wear and tear,
Danish oil
is the perfect solution. This type of finish is specifically designed for wood and has been used for centuries in Scandinavian countries to preserve and beautify furniture. With its unique blend of oils and resins,
Danish oil
not only enhances the natural beauty of wood, but also provides a durable and long-lasting finish.
Easy Application and Maintenance
 One of the main benefits of using
Danish oil
on your kitchen table is its ease of application. Unlike other types of finishes, you don't need any special equipment or skills to apply
Danish oil
. Simply clean your table surface and use a clean cloth or brush to apply the oil in the direction of the wood grain. Once the oil has penetrated the wood, wipe off any excess and let it dry for 24 hours. You can then apply additional coats for a deeper finish or leave it as is for a more natural look.
Not only is
Danish oil
easy to apply, but it also requires minimal maintenance. Unlike traditional varnishes or lacquers, which can crack or peel over time,
Danish oil
will not flake or chip. This makes it perfect for high-traffic areas like the kitchen, where spills and scratches are common. All you need to do to maintain the beauty of your kitchen table is to periodically wipe it down with a damp cloth and reapply a coat of
Danish oil
every few years.
One of the main benefits of using
Danish oil
on your kitchen table is its ease of application. Unlike other types of finishes, you don't need any special equipment or skills to apply
Danish oil
. Simply clean your table surface and use a clean cloth or brush to apply the oil in the direction of the wood grain. Once the oil has penetrated the wood, wipe off any excess and let it dry for 24 hours. You can then apply additional coats for a deeper finish or leave it as is for a more natural look.
Not only is
Danish oil
easy to apply, but it also requires minimal maintenance. Unlike traditional varnishes or lacquers, which can crack or peel over time,
Danish oil
will not flake or chip. This makes it perfect for high-traffic areas like the kitchen, where spills and scratches are common. All you need to do to maintain the beauty of your kitchen table is to periodically wipe it down with a damp cloth and reapply a coat of
Danish oil
every few years.
A Versatile Finish for Any Style
 Whether your kitchen has a modern, rustic, or traditional design,
Danish oil
can complement any style. It comes in a variety of shades, from light to dark, allowing you to choose the perfect tone to match your kitchen décor. Additionally,
Danish oil
can be used on all types of wood, including oak, pine, and cherry, giving you the flexibility to use it on any type of kitchen table.
In conclusion, if you want to protect and enhance the beauty of your kitchen table,
Danish oil
is an excellent choice. Its easy application and maintenance, along with its versatility, make it a top choice for homeowners looking to add a touch of elegance to their kitchen. So why wait? Give your kitchen table the treatment it deserves and enjoy its beauty and durability for years to come.
Whether your kitchen has a modern, rustic, or traditional design,
Danish oil
can complement any style. It comes in a variety of shades, from light to dark, allowing you to choose the perfect tone to match your kitchen décor. Additionally,
Danish oil
can be used on all types of wood, including oak, pine, and cherry, giving you the flexibility to use it on any type of kitchen table.
In conclusion, if you want to protect and enhance the beauty of your kitchen table,
Danish oil
is an excellent choice. Its easy application and maintenance, along with its versatility, make it a top choice for homeowners looking to add a touch of elegance to their kitchen. So why wait? Give your kitchen table the treatment it deserves and enjoy its beauty and durability for years to come.