Installing a new bathroom sink drain assembly may seem like a daunting task, but with the right instructions, it can be a simple DIY project. By following these step-by-step instructions, you can have your new bathroom sink drain assembly up and running in no time.How to Install a Bathroom Sink Drain Assembly


How to Install a Bathroom Sink Drain Assembly


Before you begin, make sure you have all the necessary tools and materials. You will need a new bathroom sink drain assembly, plumber's putty, a wrench, and plumber's tape. Once you have everything ready, you can begin the installation process.Bathroom Sink Drain Assembly Instructions


Bathroom Sink Drain Assembly Instructions


Step 1: Start by removing the old drain assembly from your sink. Use a wrench to loosen and remove the nut that holds the drain in place. Once the nut is removed, you can pull out the old drain assembly from the sink. Step 2: Clean the area where the old drain was removed. Use a rag to wipe away any debris or old plumber's putty. This will ensure a clean surface for the new drain assembly. Step 3: Take your new bathroom sink drain assembly and apply plumber's putty around the flange. Make sure the putty is evenly distributed and covers the entire flange. Step 4: Insert the drain assembly into the drain hole in the sink. Press down firmly to ensure a tight seal with the plumber's putty. Step 5: Underneath the sink, attach the washer and nut to the drain assembly. Use a wrench to tighten the nut and secure the drain in place. Make sure not to over-tighten as this can cause damage to the sink. Step 6: Wrap plumber's tape around the threads of the drain tailpiece. This will help create a watertight seal once the tailpiece is connected to the drain assembly. Step 7: Connect the tailpiece to the drain assembly and tighten with a wrench. Again, be careful not to over-tighten. Step 8: Once the drain assembly is securely in place, turn on the water and check for any leaks. If there are any leaks, tighten the connections as needed.Step-by-Step Guide for Installing a Bathroom Sink Drain Assembly

Step-by-Step Guide for Installing a Bathroom Sink Drain Assembly


With these simple instructions, you can easily install a new bathroom sink drain assembly on your own. This not only saves you money but also gives you the satisfaction of completing a DIY project.DIY Bathroom Sink Drain Assembly Installation


DIY Bathroom Sink Drain Assembly Installation

The process of installing a bathroom sink drain assembly may seem intimidating, but it is actually quite simple. By following these easy instructions, you can have your new drain assembly installed in no time.Easy Bathroom Sink Drain Assembly Instructions


Easy Bathroom Sink Drain Assembly Instructions


Installing a bathroom sink drain assembly doesn't have to be a time-consuming task. With these quick and simple instructions, you can have your new drain assembly installed and ready to use in just a few steps.Quick and Simple Bathroom Sink Drain Assembly Installation

Quick and Simple Bathroom Sink Drain Assembly Installation

Whether you're a seasoned DIYer or a beginner, this complete guide will walk you through the process of installing a bathroom sink drain assembly. From start to finish, you'll have all the information you need to successfully complete this project.Complete Guide to Installing a Bathroom Sink Drain Assembly

Complete Guide to Installing a Bathroom Sink Drain Assembly


Here are a few tips and tricks to keep in mind while installing a bathroom sink drain assembly: - Always read the instructions that come with your new drain assembly before beginning the installation process. - Make sure to turn off the water supply before starting any work on the sink. - Use plumber's putty or silicone caulk to create a watertight seal around the drain flange. - Don't over-tighten any connections as this can cause damage to the sink or drain. - If you encounter any issues, don't hesitate to consult a professional plumber.Bathroom Sink Drain Assembly Installation Tips and Tricks
Bathroom Sink Drain Assembly Installation Tips and Tricks
By following these instructions, you can easily install a new bathroom sink drain assembly without any hassle. With the right tools and a little bit of patience, you can have your new drain assembly up and running in no time.Effortless Bathroom Sink Drain Assembly Instructions

Effortless Bathroom Sink Drain Assembly Instructions


With these instructions, you can become a master at installing a bathroom sink drain assembly. Impress your friends and family with your DIY skills by successfully completing this project on your own.Mastering the Installation of a Bathroom Sink Drain Assembly

Mastering the Installation of a Bathroom Sink Drain Assembly


How to Install a Bathroom Sink Drain Assembly: A Step-by-Step Guide

Introduction
 When it comes to bathroom design, every detail matters. From the tiles on the floor to the fixtures on the wall, everything should come together to create a functional and aesthetically pleasing space. One important aspect of bathroom design is the sink and its drain assembly. While it may seem like a small and insignificant part, the drain assembly plays a crucial role in keeping your sink functioning properly. In this article, we will walk you through the steps on how to install a bathroom sink drain assembly, so you can have a beautiful and fully functional bathroom.
Step 1: Gather Your Materials
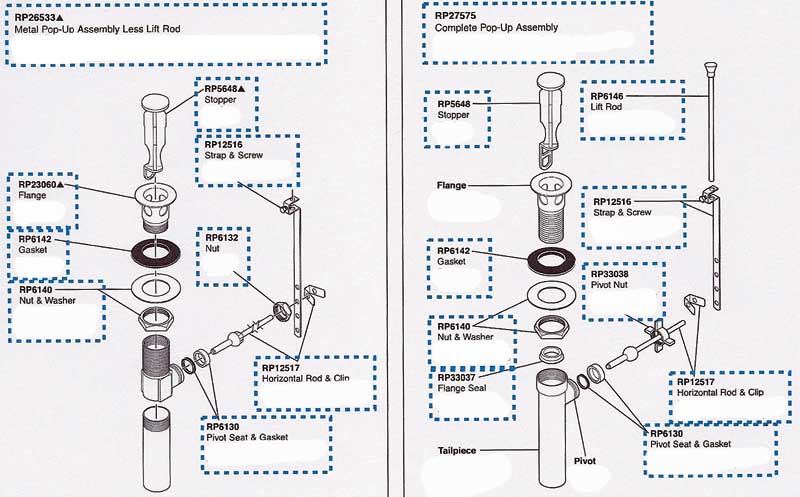
 Before you begin the installation process, make sure you have all the necessary materials on hand. This includes the sink drain assembly kit, plumber's putty, adjustable pliers, a screwdriver, and a bucket or towel to catch any water that may spill during the installation process. It's always a good idea to read through the instructions provided with your drain assembly kit to familiarize yourself with the parts and tools needed.
Step 2: Prepare the Sink
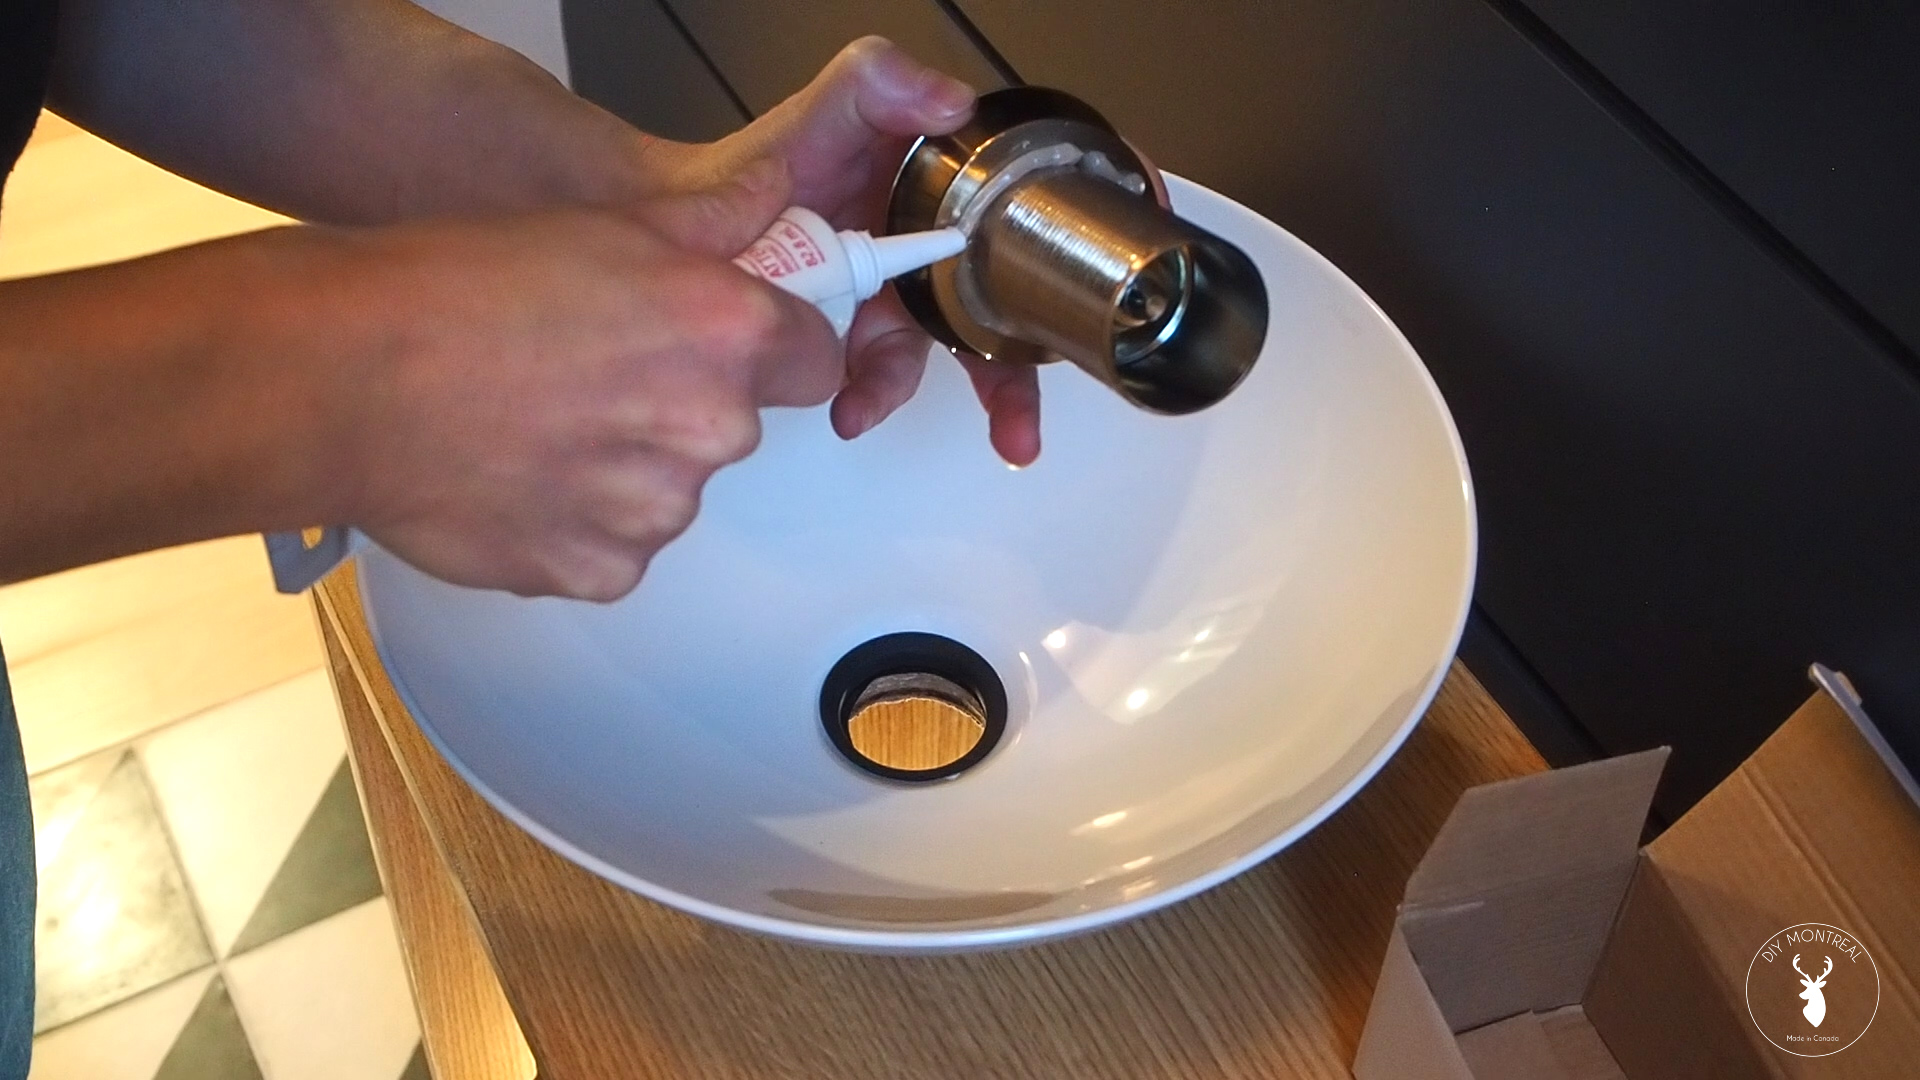
 To start, turn off the water supply to the sink and place a towel or bucket underneath the sink to catch any water that may drip. You can then remove the old drain and clean the sink thoroughly with soap and water. Next, apply a thin layer of plumber's putty around the opening of the sink drain.
Step 3: Install the Drain Flange
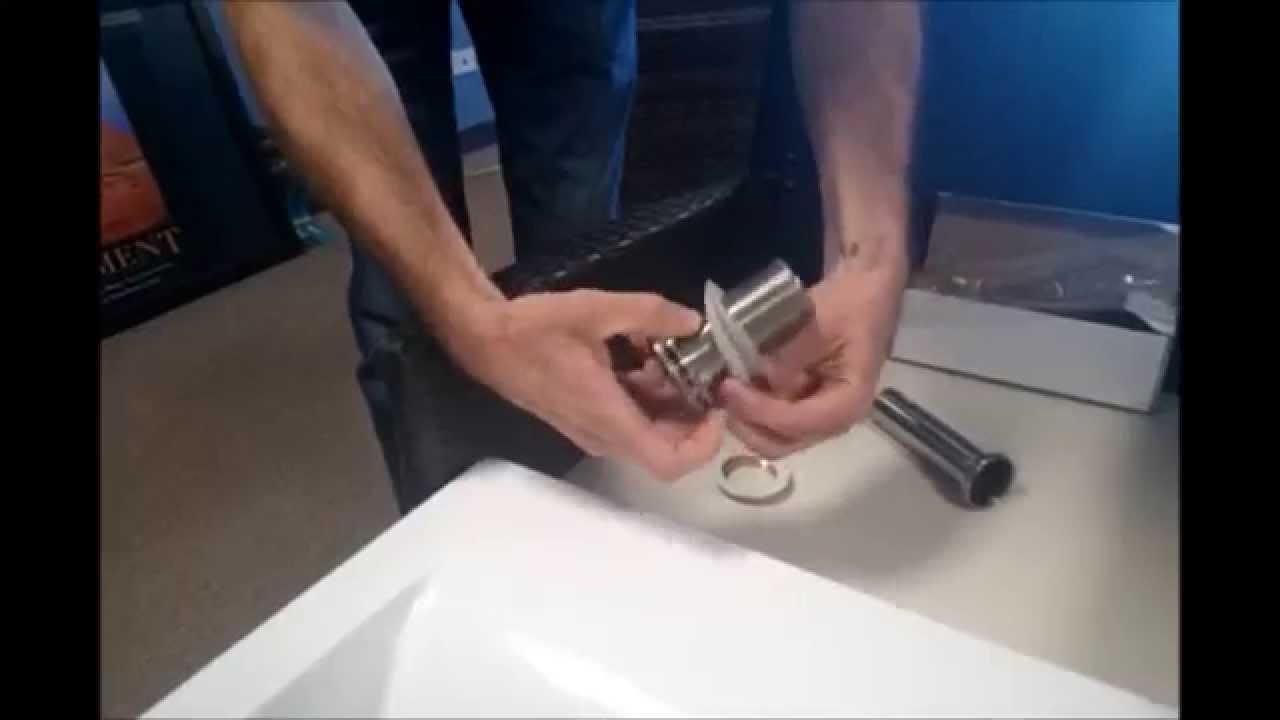
 Take the drain flange and insert it into the sink drain opening, making sure it is properly aligned. From underneath the sink, place the rubber gasket and then the cardboard friction ring over the flange. Secure them in place by screwing on the locknut and tightening it with adjustable pliers.
Step 4: Install the Drain Tailpiece
 Next, attach the drain tailpiece to the drain flange and secure it with the slip nut. You may need to trim the tailpiece to fit your specific sink. Check the manufacturer's instructions for the correct length. Once the tailpiece is attached, you can connect the P-trap to the tailpiece and the sink's drain pipe.
Step 5: Test and Adjust
 Before finishing up, turn the water supply back on and test the sink to make sure there are no leaks. If there are any leaks, make adjustments to the connections as needed. Once everything is secure and there are no leaks, you can clean up any excess putty and reattach the sink to the countertop.
Conclusion
 Installing a bathroom sink drain assembly may seem like a daunting task, but with the right tools and instructions, it can be a simple and straightforward process. By following these steps, you can ensure that your sink is not only functional but also adds to the overall design of your bathroom. Remember to always consult the manufacturer's instructions and make any necessary adjustments to achieve the best results. With a little patience and care, your bathroom sink drain assembly will be installed and ready to use in no time.