Nothing announces Halloween season quite like a well-decorated front yard. It's the decor that greets trick-or-treaters, wows the neighborhood, and turns an ordinary porch into something people slow down to look at. But outdoor decorating comes with its own set of challenges that indoor decor doesn't — weather, wind, visibility at night, and the need for decorations that survive being outside for weeks at a time.
This guide covers it all: creative yard and porch ideas organized by style, step-by-step DIY projects you can build this weekend, complete materials lists, honest price breakdowns, and the pro tips that separate a Pinterest-worthy display from a decoration that blows away in the first storm. Let's get your outdoor space ready for the spookiest month of the year.
Why Outdoor Decor Is Its Own Challenge
Decorating outside isn't just "indoor decor, but bigger." It comes with real constraints:
- Weather exposure — wind, rain, and sun fading are daily concerns for weeks at a time
- Scale — a yard or porch needs bigger, bolder elements to read well from the street or sidewalk
- Nighttime visibility — most of the "show" happens after dark, so lighting is non-negotiable
- Durability — decorations need to survive being touched, bumped, or blown around, especially with foot traffic on Halloween night
- Neighborhood impact — outdoor decor is public-facing, which makes it both more fun to go big on and more important to get right
Because of these differences, outdoor Halloween decor really deserves its own planning approach — different materials, different anchoring methods, and a different mindset than decorating a bedroom or living room.
Choosing Your Outdoor Halloween Aesthetic
Just like indoor decor, picking a direction first makes everything else easier to shop and build for.
Classic Spooky

Cobwebs, pumpkins, skeletons, and fog — the timeless, universally recognizable Halloween look. Easy to execute at any budget and instantly recognizable to trick-or-treaters.
Haunted House

Fog machines, eerie lighting, tattered fabric, creepy props (zombies, ghosts, tombstones), and sound effects. Built for maximum scare factor and best suited to yards with space to create a "walk-through" feel.
Harvest & Fall Charm

Hay bales, corn stalks, pumpkins of all sizes, and warm-toned lighting. Family-friendly and welcoming rather than scary — great for households with young trick-or-treaters.
Elegant Gothic

Black and purple color schemes, urns, candelabras, faux ravens, and dramatic uplighting. A more grown-up, refined take on spooky season, often popular for adult-hosted parties.
Whimsical & Family-Friendly

Friendly ghosts, smiling jack-o'-lanterns, string lights, and pastel-accented pumpkins. Perfect for households prioritizing a fun, non-scary experience for small children.
Minimalist Modern

A few oversized, high-quality pieces (a giant inflatable, uplighting, one statement wreath) rather than dozens of small props scattered everywhere. Clean, high-impact, and easy to maintain.
Tip: Just like indoors, limit your color palette (black, orange, purple, and one accent) and stick to one overarching theme. A porch with 15 different unrelated props tends to look cluttered even if each individual piece is great.
Halloween Outdoor Decor Ideas by Area
Front Porch

- A tiered pumpkin display on the steps, mixing real and faux pumpkins in varying sizes
- A Halloween wreath on the door, made from black ribbon, faux spiders, or mini pumpkins
- String lights woven along the porch railing or roofline
- A pair of skeleton or scarecrow figures flanking the door
- A doormat with a Halloween message or design
- Hanging lanterns or string-light jars along the porch ceiling
Front Yard / Lawn

- A "graveyard" scene with tombstone props and fog rising from the ground
- Pathway lighting using small lanterns or stake lights leading to the door
- Giant inflatable decorations (a pumpkin, ghost, or spider) as a focal point
- Scarecrows tucked among fall foliage or cornstalks
- Spiderwebs stretched across bushes or between trees, with oversized spider props
Windows

- Silhouette decals (witches, bats, cats) applied to window glass
- Colored LED lights placed behind curtains for an eerie glow
- Fake cobwebs draped in window corners
- Paper or fabric ghost cutouts taped inside the glass
Trees & Shrubs

- Ghost decorations made from fabric or cheesecloth, hung from branches
- String lights wrapped around trunks and branches
- Cobweb material stretched between branches
- Painted or carved pumpkins nestled at the base of trees
Driveway & Walkway

- Luminaries (paper bags with candles or battery lights) lining the walkway
- Painted rocks or stones with Halloween designs as path markers
- A row of small pumpkins or gourds along the driveway edge
- Chalk art (spiderwebs, bats, "Boo!") on the floor
Mailbox & Fence

- A small wreath or bow on the mailbox
- Fabric ghosts or bats tied along a fence line
- String lights woven through fence slats or a hedge
DIY Outdoor Halloween Decor Projects (Step-by-Step)
1. DIY PVC Pipe Tombstones

What you'll need: Foam board or thin plywood, a marker, a craft knife or jigsaw, gray and black spray paint, wooden stakes, a hot glue gun.
Steps:
- Sketch a tombstone shape (rounded top, rectangular base) onto foam board or plywood.
- Cut out the shape using a craft knife (for foam) or jigsaw (for wood).
- Spray paint the front and edges gray, then lightly dry-brush or spray black in patches for a weathered, aged texture.
- Once dry, write or stencil a spooky epitaph ("RIP", "Here Lies...") in black paint.
- Attach a wooden stake to the back with hot glue and extra support tape.
- Push stakes into the ground to display in a cluster for a graveyard scene.
Estimated cost: $8–15 per tombstone if using foam board; slightly more for plywood.
2. DIY Milk Jug Ghosts

What you'll need: Empty plastic milk jugs (cleaned), black permanent marker or black electrical tape, battery tea lights or string lights, scissors.
Steps:
- Rinse and dry empty milk jugs, removing labels.
- Draw or apply black tape "eyes" and a mouth on the front of each jug.
- Cut a small slit near the base if inserting a battery tea light, or drop a mini string light strand inside through the spout opening.
- Turn on the light inside — the jug diffuses it into a soft glow.
- Line jugs along a walkway or porch step at night for a classic glowing-ghost effect.
Estimated cost: $5–12, mostly for battery lights if you don't already have them (jugs are typically free/reused).
3. DIY Fabric Ghosts for Trees

What you'll need: Cheesecloth or thin white fabric, a foam ball or balloon, string or fishing line, black fabric paint or a marker.
Steps:
- Inflate a balloon (or use a foam ball) to form the "head" shape.
- Drape cheesecloth or fabric over the ball, allowing extra fabric to hang down as the "body."
- Tie string or fishing line snugly around the neck area to define the head shape, leaving enough line to hang the ghost from a branch.
- Once positioned, use fabric paint or a marker to add simple eyes.
- If using a balloon, it can be popped and removed once the fabric holds its shape, or left in air-filled for a fuller look.
- Hang from tree branches using the string, adjusting height for a floating effect.
Estimated cost: $6–15 depending on fabric quantity needed.
4. DIY Painted Pumpkin Pathway Markers

What you'll need: Small to medium pumpkins or gourds (real or fake), acrylic paint, paintbrushes, clear sealant spray (for real pumpkins).
Steps:
- Clean and dry pumpkins thoroughly.
- Paint simple designs — faces, stripes, spiderwebs, or solid colors matching your palette.
- Let paint dry fully between coats.
- For real pumpkins displayed outside for multiple weeks, apply a clear sealant spray to slow rotting.
- Line pumpkins along the walkway, porch steps, or driveway edge.
Estimated cost: $10–25 depending on pumpkin size and quantity; less if reusing fake pumpkins year to year.
5. DIY Spooky Luminaries

What you'll need: Small paper bags, a craft knife or scissors, a pencil, sand or small stones (for weight), battery tea lights.
Steps:
- Sketch a simple design on the front of each bag — bats, a moon, a jack-o'-lantern face, or simple dots.
- Carefully cut out the design with a craft knife, leaving the bag structurally intact.
- Add a few inches of sand or small stones to the bottom of each bag for stability and to prevent tipping in wind.
- Place a battery tea light inside each bag.
- Line the walkway or driveway with the lit luminaries at dusk.
Estimated cost: $8–15 for a set of 10–12 bags and lights.
6. DIY Giant Spider & Web

What you'll need: Black yarn or rope (for the web), a pool noodle or foam balls (for the spider body), black spray paint, black pipe cleaners or foam tubing (for legs), black paint or fabric for detailing.
Steps:
- Create the web by stretching black yarn or rope between two anchor points (a porch railing, a tree, or stakes), forming a radial pattern with connecting strands.
- Build the spider body using a large foam ball or a section of pool noodle, spray-painted black.
- Attach 8 legs using bent pipe cleaners or foam tubing, securing with hot glue or wire.
- Add small white or red dots for eyes using paint or stickers.
- Attach the finished spider to the center of the web using wire or strong glue.
Estimated cost: $12–25 depending on the size of your spider and web.
7. DIY Corn Stalk & Hay Bale Display

What you'll need: Dried corn stalks (from a farm stand or craft store), a hay bale, twine, pumpkins or gourds for accenting.
Steps:
- Bundle 3–5 corn stalks together and secure with twine near the base and middle.
- Prop bundles against a porch railing, wall, or lean them against a stake pushed into the ground.
- Place the hay bale nearby as a base element, and top it with a few pumpkins or gourds.
- Add string lights or a lantern nearby for evening visibility.
Estimated cost: $15–35 depending on local pricing for corn stalks and hay bales (often available at farm stands or garden centers each fall).
Materials & Supplies Shopping List
Basic supplies
- Black, orange, and purple spray paint
- Wooden stakes and garden stakes
- Hot glue gun and heavy-duty glue sticks
- Zip ties, wire, and outdoor-rated tape
- Twine and rope
Decor-specific items
- Battery-operated string lights and tea lights (rated for outdoor use)
- Stretch cobweb material (outdoor-rated holds up better than indoor versions)
- Fake and real pumpkins/gourds
- Foam board or plywood for tombstones and props
- Fabric (cheesecloth, muslin) for ghosts
- Inflatable decorations
- Fog machine or fog fluid (optional)
Anchoring & weatherproofing
- Ground stakes and sandbags for securing lightweight props
- Clear waterproof sealant spray
- Outdoor extension cords and timers
- Zip ties or twist ties for securing items against wind
Buying core supplies in bulk (stakes, spray paint, lights) across multiple DIY projects is more cost-effective than purchasing separately for each individual idea.
Price Breakdown: What Outdoor Halloween Decor Really Costs
Budget Tier ($20–50 total)
- A pumpkin or two, a simple wreath, and one string of lights
- DIY projects using primarily reused materials (milk jugs, cardboard, paper bags)
- Best for: renters, first-time decorators, or smaller porches/yards
Mid-Range Tier ($75–200 total)
- A mix of store-bought statement pieces (a wreath, a few props, quality string lights) and DIY accents (tombstones, luminaries)
- A modest graveyard scene or themed vignette near the entrance
- Best for: most households wanting a full, cohesive display without a major investment
Splurge Tier ($250–600+)
- Large inflatables, animatronic props, or a fog machine setup
- Professional-grade string lighting across the entire house exterior
- Multiple themed zones (yard, porch, walkway, windows) fully coordinated
- Best for: Halloween enthusiasts, households known for "the best house on the block," or displays built to be reused and expanded on for years
Reality check: A well-lit, well-composed budget or mid-range display often draws just as much attention as an expensive one — lighting and cohesive placement matter more than total spend.
Budget vs. Splurge: Where to Spend and Where to Save
Worth Splurging On
- Outdoor-rated string lights — cheap, non-weatherproof lights fail quickly outside; a quality strand lasts for several seasons
- One large focal piece — a big inflatable, an animatronic prop, or a large lit archway anchors the whole display
- Anchoring supplies — sturdy stakes and sandbags prevent decor from blowing away, which saves money on replacements long-term
Where to Save
- Small filler props — plastic spiders, small pumpkins, and bats are nearly identical in quality regardless of price
- Tombstones and signage — these are simple and cheap to DIY with foam board and paint
- Pathway lighting — DIY luminaries or budget solar stake lights work almost as well as premium versions
Weatherproofing Your Decorations
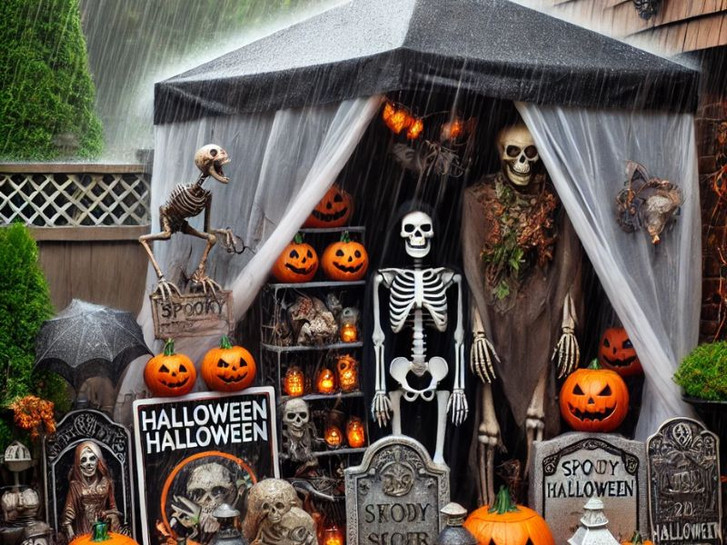
Outdoor decor has to survive weeks of exposure, so weatherproofing is essential:
- Seal painted wood and foam props with a clear outdoor sealant to prevent water damage and paint chipping.
- Choose outdoor-rated lights and extension cords — indoor-only electronics can be a fire or shock hazard when exposed to moisture.
- Anchor lightweight decorations with stakes, sandbags, or fishing line tied to a fixed point to prevent wind damage.
- Avoid paper-based decor in wet climates unless it's fully protected under a covered porch — cardboard and untreated paper degrade quickly in rain.
- Bring in delicate items overnight if heavy weather is expected, especially anything battery-powered or fabric-based.
- Check real pumpkins regularly for soft spots or mold, and remove them promptly once they begin to decay to avoid pest issues.
Lighting Your Yard for Maximum Spooky Impact
Since most outdoor Halloween decor is seen after dark, lighting is arguably the single highest-impact investment you can make.
- Uplighting — placing lights at the base of trees, columns, or props pointing upward creates dramatic, eerie shadows
- Color choice matters — orange and warm white feel classic and welcoming; purple, green, and blue feel eerier and more haunted-house
- Layer your lighting — combine pathway lights, string lights, and a few spotlighted focal pieces rather than one flat light source
- Use timers — a timer ensures lights turn on at dusk automatically, which is especially useful if you're out during trick-or-treating hours
- Don't forget the walkway — well-lit paths are both a safety necessity and a decor opportunity (luminaries, stake lights, or lanterns)
- Test at night before the big night — daytime setup can look completely different once it's dark; do a nighttime walkthrough a few days early to adjust placement
Decorating by Space Type
Small Porch or Apartment Balcony
Focus on a wreath, a small pumpkin display, and one string of lights. A single well-placed prop (a friendly ghost or a small skeleton) reads clearly without overcrowding a small space.
Suburban Front Yard
This is where a graveyard scene, pathway lighting, and a mix of props really shine — there's enough space for a layered display with a clear focal point near the door and smaller accents leading up to it.
Large Property / Acreage
Consider zone-based decorating — a haunted section near the road to catch attention from a distance, a family-friendly zone near the door, and lighting that guides visitors clearly from the street to the entrance.
Shared or HOA-Restricted Spaces
Stick to freestanding, easily removable decor (potted mums with mini pumpkins, a door wreath, battery-operated lights) that won't violate typical restrictions on permanent alterations, staking into shared lawns, or oversized displays.
Safety Tips for Outdoor Halloween Decor
- Keep walkways clear and well-lit. With trick-or-treaters moving through your yard at night, tripping hazards (cords, low props, uneven luminaries) are a real risk.
- Use outdoor-rated electrical equipment only. Indoor extension cords and lights aren't built for moisture exposure and can pose a shock or fire hazard.
- Secure heavy or tall props. Inflatables and standing figures should be staked or weighted so they don't tip over in wind or when bumped by visitors.
- Avoid open flames near high-traffic areas. Battery-operated candles are safer than real ones, especially near paper luminaries or dry seasonal decor.
- Check cords for tripping hazards. Run extension cords along the edge of walkways, not across them, and tape down any unavoidable crossings.
- Inspect decor regularly. Wind and weather can loosen stakes or shift props over several weeks — do periodic check-ins to make sure everything is still secure.
Pet & Wildlife-Friendly Decorating Tips
- Avoid small, ingestible props (small plastic spiders, confetti-style decor) in areas pets can access, as they can be chocking or digestion hazards.
- Keep fog machine fluid and fake blood out of reach — some formulations can irritate pets if ingested or licked.
- Use pet-safe, non-toxic paint on any props pets might come into contact with.
- Secure cords and cables to prevent pets from chewing on them.
- Be mindful of wildlife — real pumpkins and gourds left out too long can attract rodents or other animals; remove decaying produce promptly.
Sustainable & Reusable Outdoor Decor
- Invest in weatherproof, reusable pieces. Quality inflatables, sturdy props, and well-made string lights can last for many Halloween seasons if stored properly.
- Store seasonally, not permanently. Keep decor in labeled, weatherproof bins in a garage or shed rather than leaving it exposed year-round, which extends its lifespan significantly.
- Compost real pumpkins and gourds after the season instead of sending them to landfill — many municipalities offer compost pickup, or you can compost at home.
- Repurpose fall decor into winter decor. Neutral elements like corn stalks, hay bales, and string lights can transition into a Thanksgiving or early-winter display with small tweaks.
- Buy secondhand or swap with neighbors. Yard sales, thrift stores, and neighborhood swaps are great sources for gently-used outdoor decor at a fraction of retail cost.
Common Mistakes to Avoid
- Skipping weatherproofing. Non-sealed paint, indoor-only lights, and untreated paper decor rarely survive multiple weeks outside.
- Underestimating scale. Decor that looks great up close can disappear entirely from the street — outdoor pieces generally need to be bigger and bolder than indoor equivalents.
- Ignoring nighttime lighting. A daytime-only display misses the majority of visitors, since most Halloween foot traffic happens after dark.
- Overcrowding a small space. Too many props in a small yard or porch can look chaotic rather than intentional — prioritize a few well-placed statement pieces.
- Forgetting to anchor decorations. Wind is one of the most common causes of damaged or displaced outdoor decor — always stake, weight, or secure lightweight items.
- Leaving real pumpkins out too long. Once they start to soften or mold, replace or remove them — decaying produce can attract pests and looks worse than an empty spot.
FAQs About Halloween Outdoor Decor
How much does outdoor Halloween decor typically cost? A basic setup can cost $20–50 using DIY projects and a few store-bought basics, while a fuller, coordinated yard and porch display generally falls between $75–200. Large-scale setups with inflatables or animatronics can run $250 and up.
What's the easiest DIY outdoor Halloween decoration for beginners? Milk jug ghosts and paper bag luminaries are among the simplest projects — they use inexpensive, often already-owned materials and take under an hour to make.
How do I keep outdoor Halloween decorations from blowing away? Use ground stakes, sandbags, or fishing line anchored to a fixed point for lightweight items like inflatables and fabric decor, and avoid paper-based decor in exposed, windy areas.
What lighting works best for outdoor Halloween decor? Warm orange and white lighting feels classic and welcoming, while purple, green, or blue lighting creates a more haunted, eerie effect. Layering pathway lights, string lights, and uplighting generally produces the best overall effect.
Is it safe to use real candles outdoors for Halloween? Battery-operated candles and lights are generally safer than real flames, especially near paper luminaries, dry leaves, or fabric decor, which can pose a fire risk outdoors.
How do I decorate for Halloween without violating HOA rules? Stick to freestanding, non-permanent decor like potted displays, wreaths, and battery-operated lights, and avoid staking into shared lawns or anything requiring structural alteration — check your specific HOA guidelines beforehand.
Final Thoughts
Great outdoor Halloween decor comes down to three things: a clear aesthetic direction, decorations built (or bought) to survive the elements, and lighting that makes everything pop after dark. You don't need a splurge-tier budget to create a display people remember — a few well-anchored, well-lit, cohesive pieces will always outperform a crowded yard with mismatched props.
Start with your porch and walkway, since that's what most visitors will actually walk past, then expand outward into the yard as your budget and ambition allow. Whatever your style — whimsical, gothic, or full haunted house — the goal is the same: a display that makes people slow down, smile, and maybe get just a little spooked.