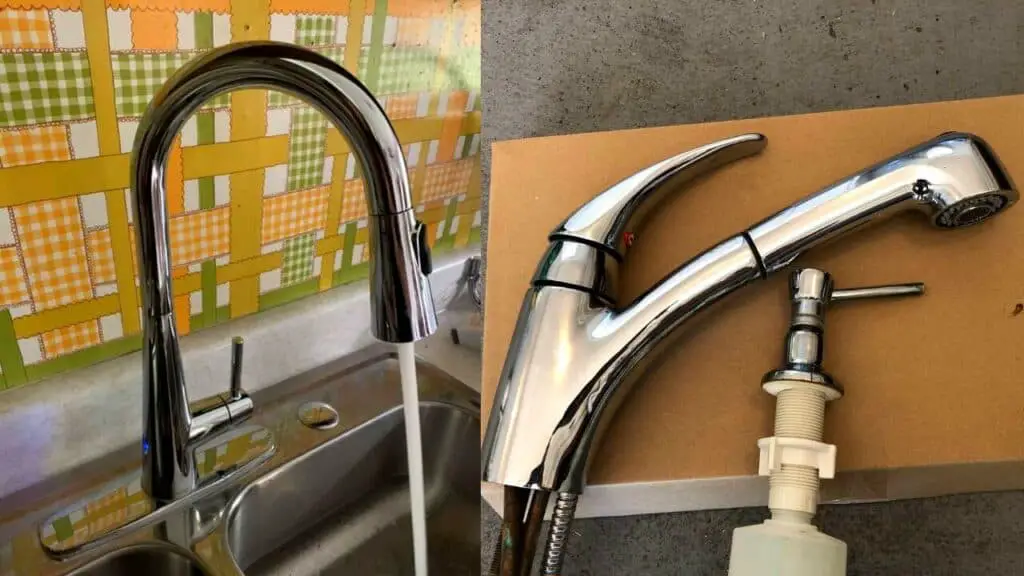
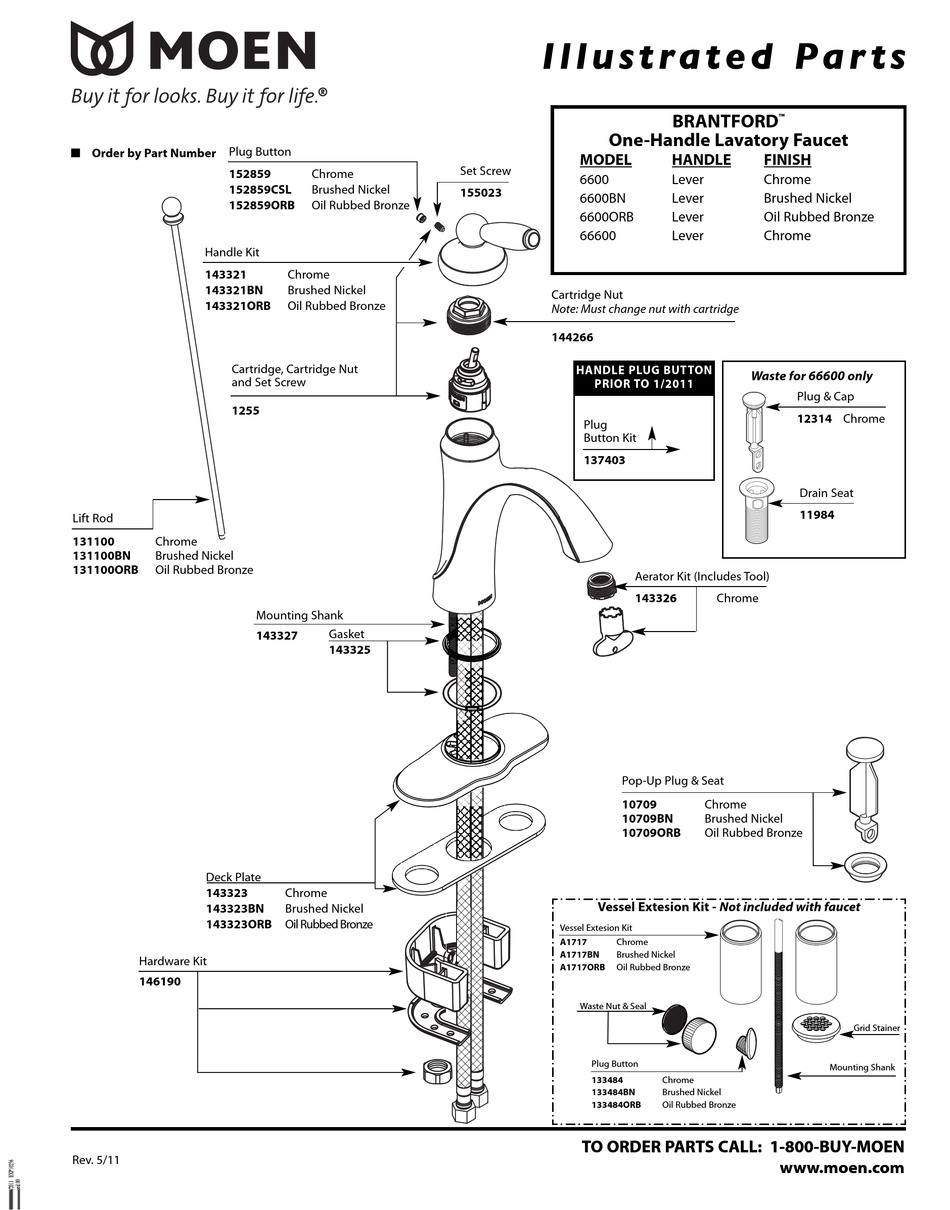
If you're experiencing issues with your Moen kitchen sink spray handle, it may be necessary to take it apart for cleaning or repairs. While this may seem like a daunting task, it can easily be done with the right tools and techniques. In this guide, we'll take you through the steps of dismantling a Moen kitchen sink spray handle. How to Take Apart a Moen Kitchen Sink Spray Handle


How to Take Apart a Moen Kitchen Sink Spray Handle


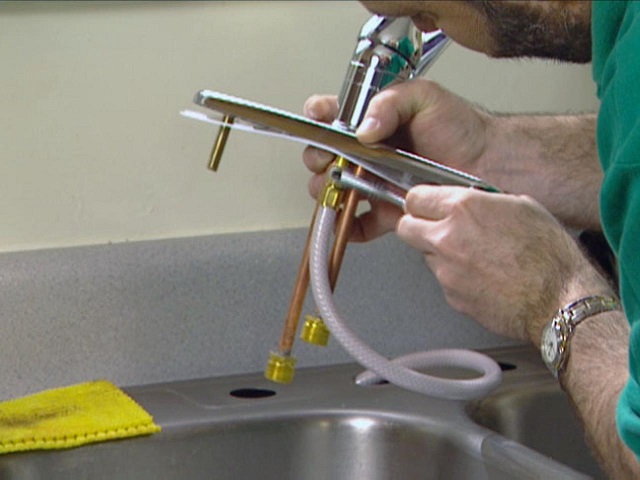
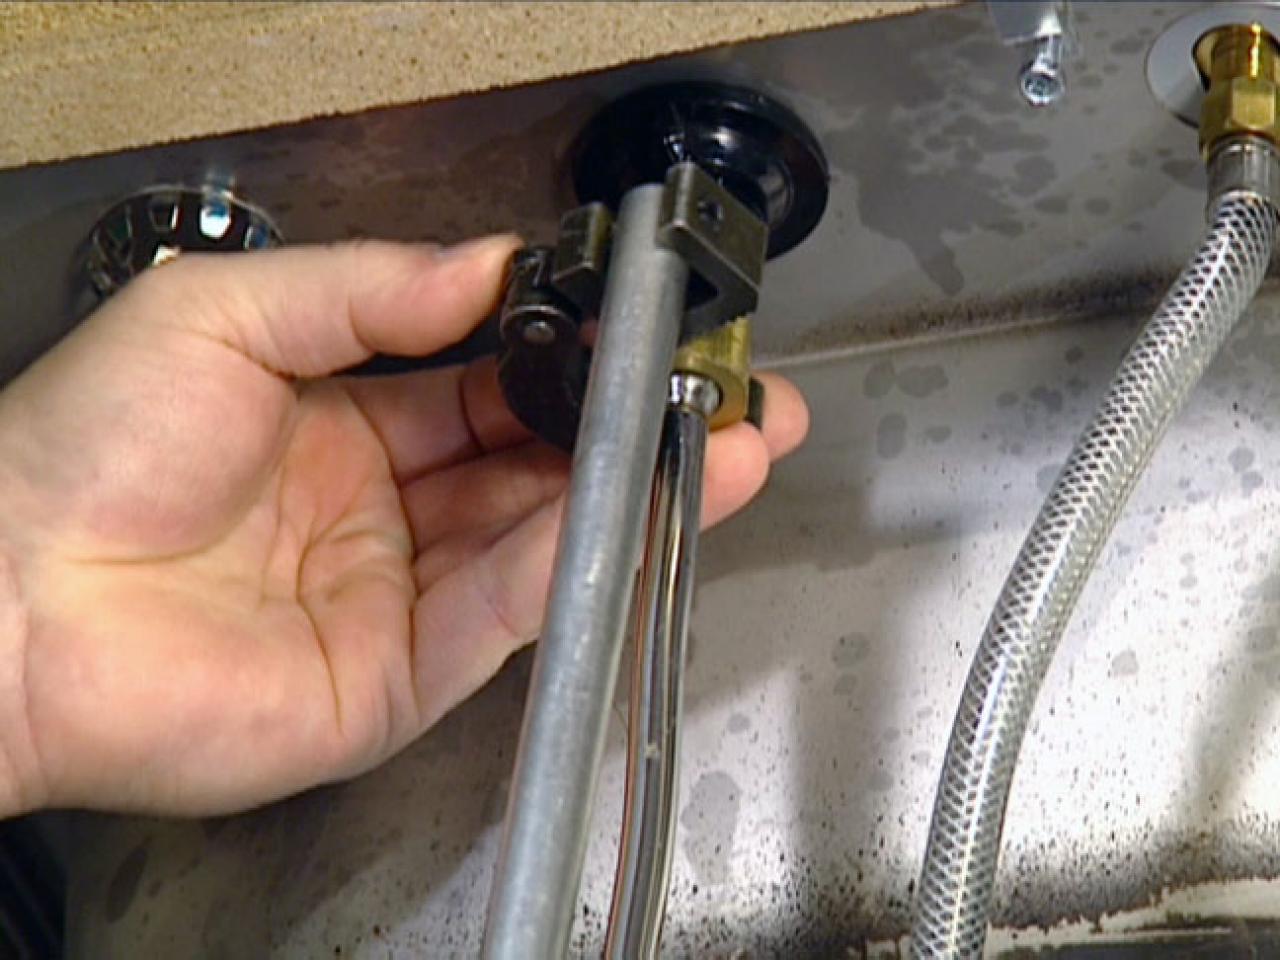
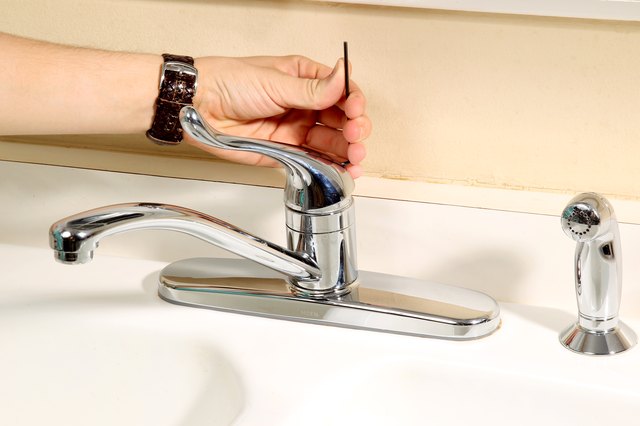
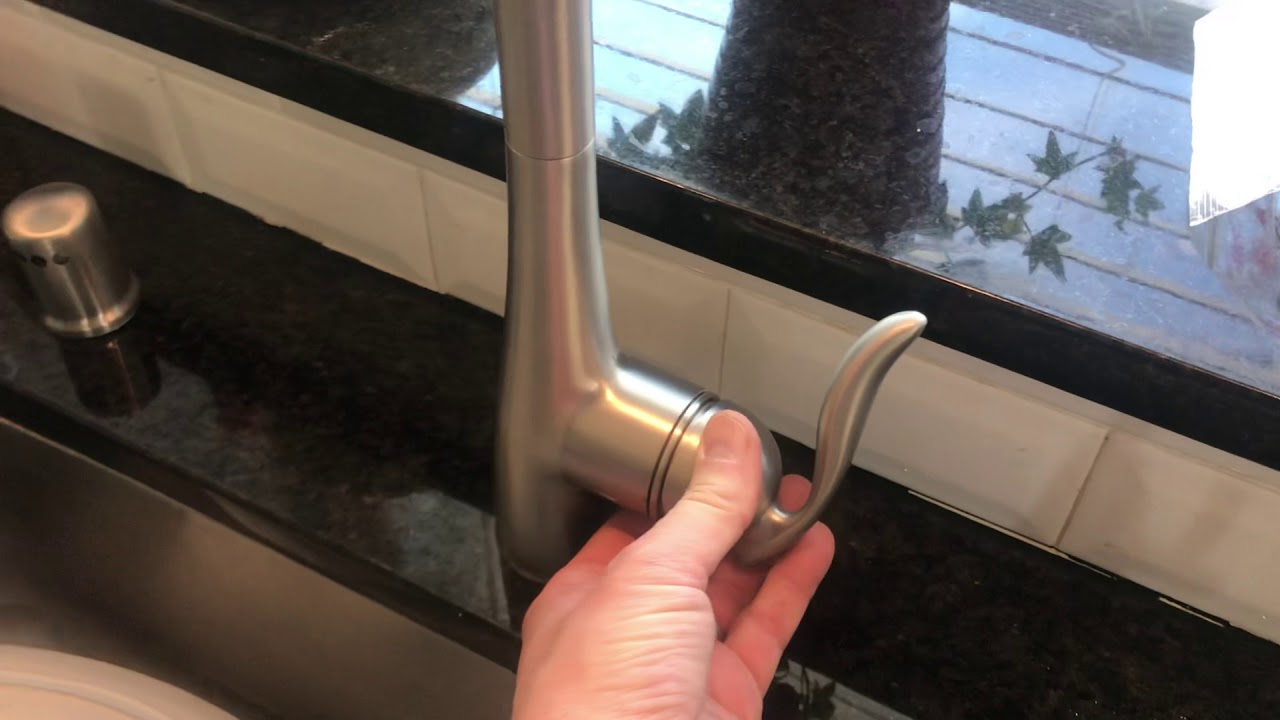
Before you begin, make sure to turn off the water supply to your sink. This will prevent any accidental spraying or leaking while you work on the spray handle. Next, you'll need to locate the set screw on the handle. This is usually located on the back or underside of the handle. Use an Allen wrench to loosen and remove the set screw.Removing a Moen Kitchen Sink Spray Handle


Removing a Moen Kitchen Sink Spray Handle


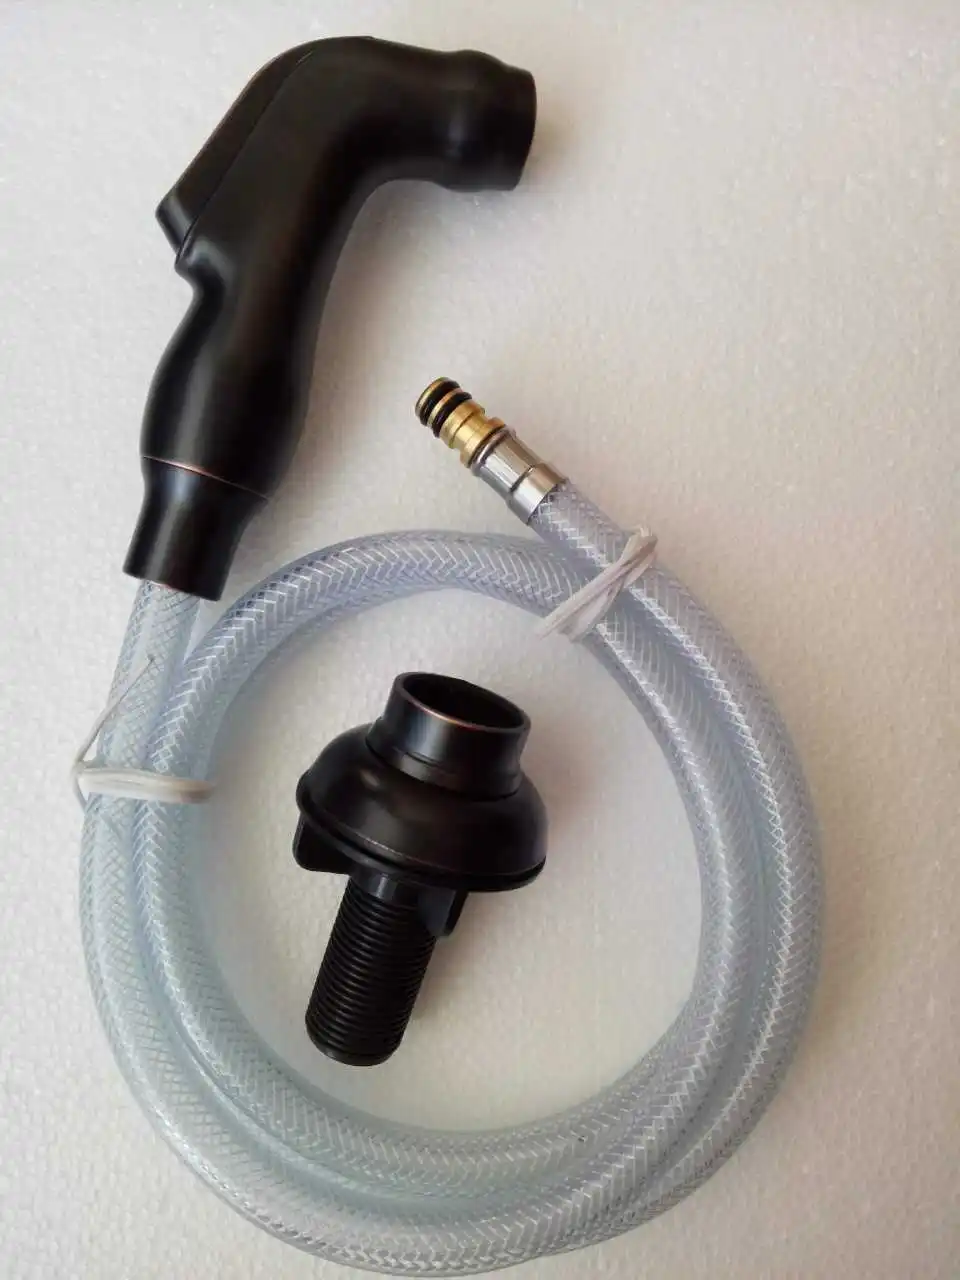
Once the set screw is removed, you can gently pull the spray handle off of the faucet. You may need to wiggle it a bit to loosen it. If the handle is stuck, you can use a handle puller tool to help remove it. Once the handle is off, you'll see the valve cartridge that controls the water flow. Use a pair of pliers to loosen and remove the valve cartridge from the faucet.Step-by-Step Guide for Disassembling a Moen Kitchen Sink Spray Handle


Step-by-Step Guide for Disassembling a Moen Kitchen Sink Spray Handle


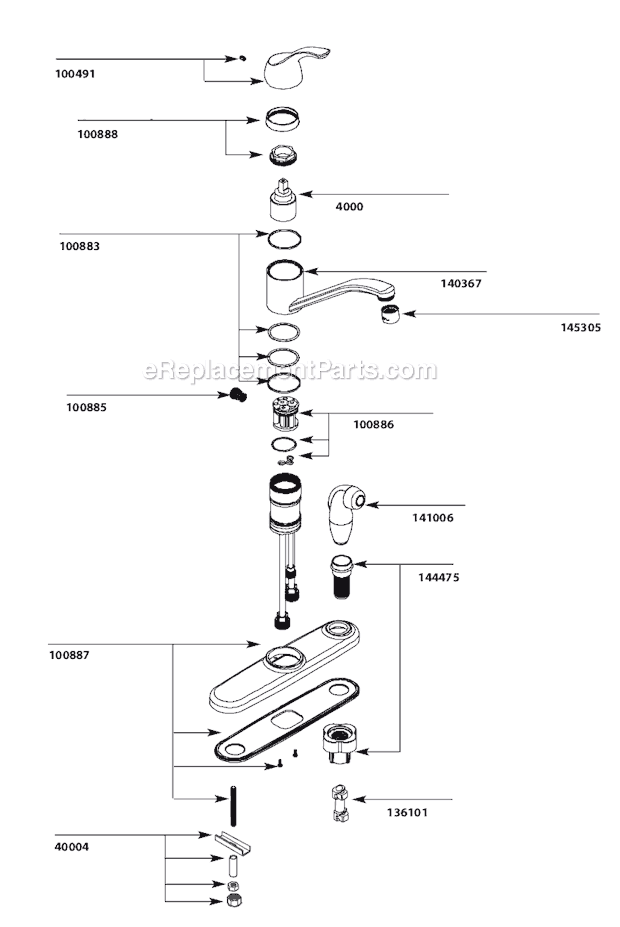
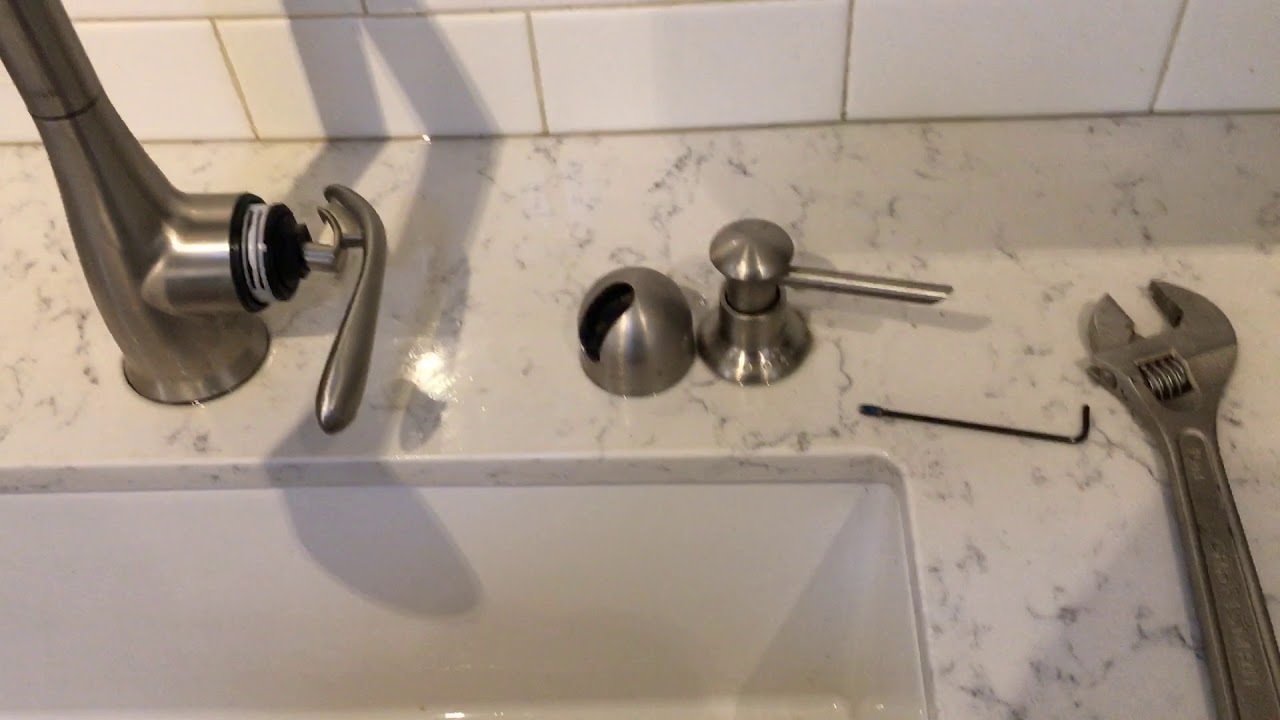
Now that the valve cartridge is removed, you can take apart the spray handle. Look for any retaining clips or screws that may be holding the handle together. Use a screwdriver or pliers to remove these and separate the handle into its individual parts. Be sure to keep track of the order in which the parts are removed, as you'll need to reassemble them later.Moen Kitchen Sink Spray Handle Disassembly Tutorial

Moen Kitchen Sink Spray Handle Disassembly Tutorial


If you're attempting to take apart your Moen kitchen sink spray handle on your own, it's important to have the right tools and knowledge. Make sure to read through the manufacturer's manual or watch online tutorials before starting the process. It's also helpful to have a container or tray to hold the small parts as you remove them, to avoid losing them.DIY: Taking Apart a Moen Kitchen Sink Spray Handle


DIY: Taking Apart a Moen Kitchen Sink Spray Handle


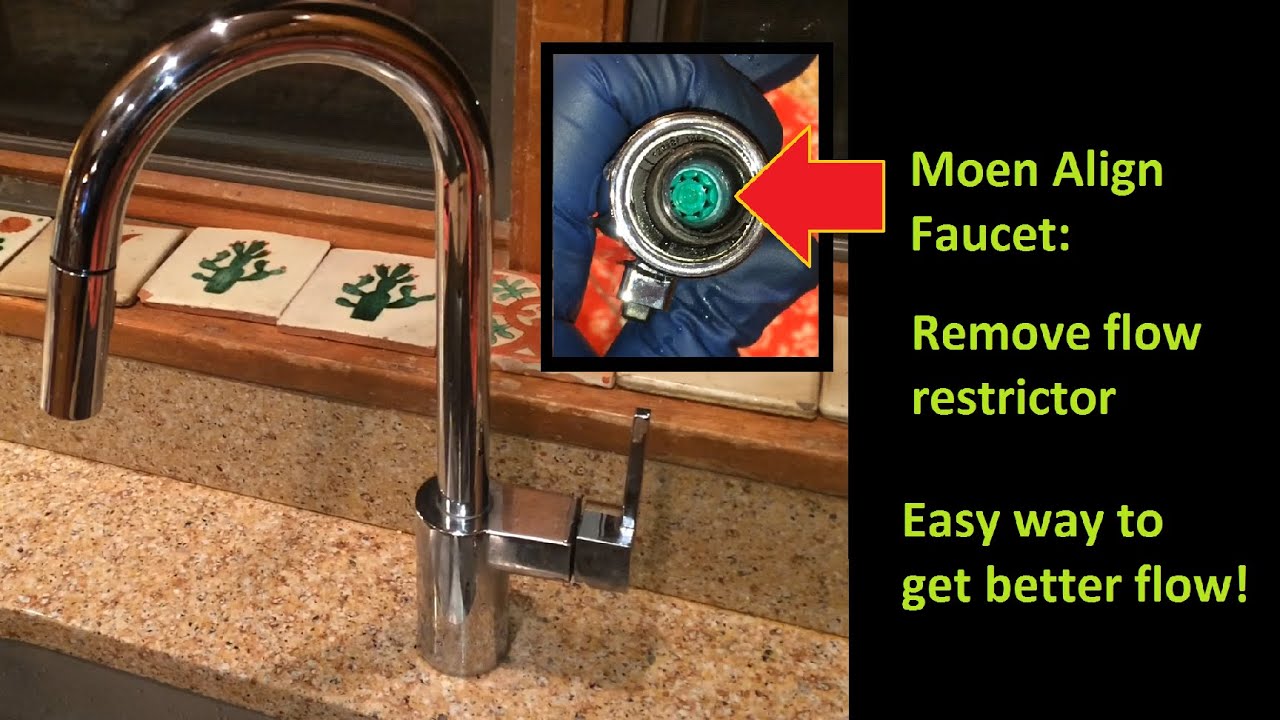
If you're encountering issues with your Moen kitchen sink spray handle, such as low water pressure or a leak, it may be necessary to take it apart for troubleshooting. By disassembling the handle, you can inspect each part individually and determine the source of the problem. This can save you time and money, as you may be able to fix the issue without needing to replace the entire spray handle.Troubleshooting: How to Dismantle a Moen Kitchen Sink Spray Handle

Troubleshooting: How to Dismantle a Moen Kitchen Sink Spray Handle


/installing-a-moen-kitchen-faucet-2718847-05-18a8625ea2ea4e04a984f3df633399cc.jpg)
When removing and disassembling your Moen kitchen sink spray handle, it's important to be gentle and patient. If you encounter any resistance, stop and assess the situation before continuing. Rushing or using excessive force can result in damage to the handle or faucet, which may require costly repairs. Take your time and follow the steps carefully for the best results.Moen Kitchen Sink Spray Handle Removal and Disassembly Tips


Moen Kitchen Sink Spray Handle Removal and Disassembly Tips
If you're unsure about taking apart your Moen kitchen sink spray handle on your own, it may be best to seek the help of a professional plumber. They have the knowledge and experience to safely and efficiently disassemble your spray handle, and can also provide advice on proper maintenance and care to prevent future issues. This can save you time and stress in the long run.Expert Guide: Disassembling a Moen Kitchen Sink Spray Handle

Expert Guide: Disassembling a Moen Kitchen Sink Spray Handle
/25089301983_c5145fe85d_o-58418ef15f9b5851e5f392b5.jpg)

To recap, here are the step-by-step instructions for taking apart a Moen kitchen sink spray handle:Step-by-Step Instructions for Taking Apart a Moen Kitchen Sink Spray Handle
Step-by-Step Instructions for Taking Apart a Moen Kitchen Sink Spray Handle


Now that you know how to take apart your Moen kitchen sink spray handle, let's look at some common problems you may encounter and how to solve them:Moen Kitchen Sink Spray Handle Disassembly: Common Problems and Solutions

Moen Kitchen Sink Spray Handle Disassembly: Common Problems and Solutions


Why Take Apart Your Moen Kitchen Sink Spray Handle?
Improve the Functionality of Your Kitchen Sink
 If you have a Moen kitchen sink spray handle that is not functioning properly, you may be tempted to call a plumber for help. However, before you spend money on a professional, it is worth considering taking apart the spray handle yourself. This can not only save you money, but it can also improve the functionality of your kitchen sink. The spray handle is an essential part of the sink, allowing you to easily wash dishes and vegetables, fill pots and pans, and clean the sink itself. If it is not working correctly, it can be a major inconvenience. By taking apart the Moen kitchen sink spray handle, you can identify and fix any issues, ensuring that your sink is functioning at its best.
Prevent Costly Repairs
 Another reason to consider taking apart your Moen kitchen sink spray handle is to prevent costly repairs in the future. Over time, the spray handle may become clogged with mineral deposits or debris, resulting in reduced water flow or a leaky handle. If left unaddressed, this can lead to more significant problems that may require professional assistance. By taking apart the spray handle and cleaning or replacing any damaged parts, you can prevent these issues from occurring and save yourself from costly repairs down the line.
Gain a Better Understanding of Your Kitchen Sink
 Taking apart your Moen kitchen sink spray handle can also give you a better understanding of how your sink works. As you disassemble the handle, you can see the different components and how they function together. This knowledge can be helpful in troubleshooting any issues that may arise in the future and can also give you a sense of accomplishment in being able to fix a problem on your own.
In Conclusion
 In summary, taking apart your Moen kitchen sink spray handle can improve the functionality of your sink, prevent costly repairs, and give you a better understanding of how your sink works. With a few simple tools and some patience, you can easily disassemble the spray handle and address any issues that may be causing problems. By doing so, you can save money and have a fully functioning kitchen sink once again. So why wait? Take apart your Moen kitchen sink spray handle today and see the benefits for yourself.