Replacing the seal on your kitchen sink drain may seem like a daunting task, but with the right tools and a little know-how, it can be a simple DIY project. A worn or damaged seal can lead to leaks and water damage, so it's important to address the issue as soon as possible. In this step-by-step guide, we will show you how to replace the seal on your kitchen sink drain in no time.How to Replace a Kitchen Sink Drain


How to Replace a Kitchen Sink Drain

/how-to-install-a-sink-drain-2718789-hero-b5b99f72b5a24bb2ae8364e60539cece.jpg)


If you're experiencing leaks or slow draining in your kitchen sink, it may be time to replace the sink drain. This can seem like a daunting task, but with the right tools and a little bit of patience, you can easily replace the sink drain yourself. Follow our guide below for a smooth and successful sink drain replacement.How to Replace a Sink Drain


How to Replace a Sink Drain


:max_bytes(150000):strip_icc()/how-to-install-a-sink-drain-2718789-hero-24e898006ed94c9593a2a268b57989a3.jpg)

Replacing a kitchen sink drain may seem like a complex task, but it can be done easily with the right tools and a little bit of elbow grease. A worn or damaged seal can cause leaks and water damage, so it's important to replace the seal as soon as you notice any issues. In this guide, we will walk you through the steps of replacing a kitchen sink drain in a simple and effective way.Replacing a Kitchen Sink Drain


Replacing a Kitchen Sink Drain

Is your sink drain causing leaks or slow drainage? It may be time to replace the sink drain. With the right tools and a little bit of patience, you can easily replace the sink drain yourself. Follow our step-by-step guide below for a successful sink drain replacement.Replacing a Sink Drain


Replacing a Sink Drain


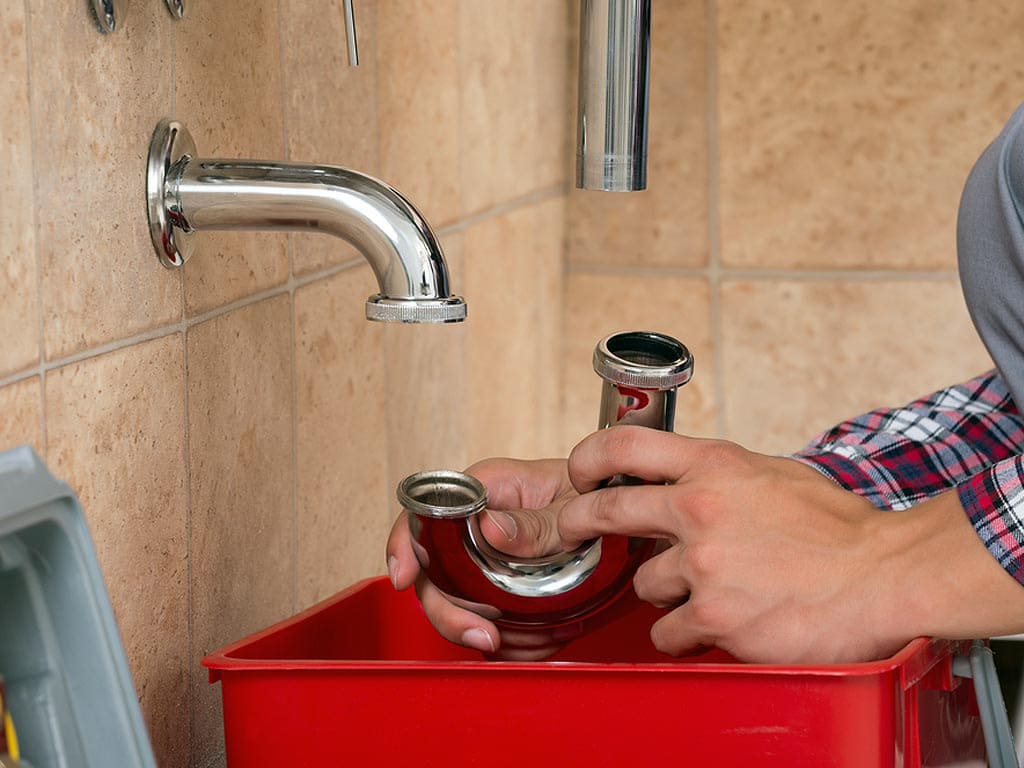
/sink-drain-trap-185105402-5797c5f13df78ceb869154b5.jpg)
Replacing a kitchen sink drain may seem like a job best left to the professionals, but with the right tools and a little bit of DIY spirit, you can easily tackle this project yourself. A worn or damaged seal can lead to leaks and water damage, so it's important to replace it as soon as possible. Follow our guide below for a smooth and successful DIY kitchen sink drain replacement.DIY Kitchen Sink Drain Replacement


DIY Kitchen Sink Drain Replacement


Replacing a kitchen sink drain may seem like a daunting task, but with our step-by-step guide, you can easily tackle this project yourself. A worn or damaged seal can cause leaks and water damage, so it's important to replace it as soon as possible. Follow our guide for a smooth and successful kitchen sink drain replacement.Step-by-Step Guide for Replacing a Kitchen Sink Drain


Step-by-Step Guide for Replacing a Kitchen Sink Drain


Is your kitchen sink drain leaking or not draining properly? It may be time to replace the seal. This may sound like a complicated task, but with the right tools and a little bit of know-how, you can easily replace the seal yourself. In this guide, we will walk you through the steps of replacing the seal on your kitchen sink drain.Replacing the Seal on a Kitchen Sink Drain


Replacing the Seal on a Kitchen Sink Drain


If you're experiencing leaks or slow drainage in your sink, it may be time to replace the seal on your sink drain. This may seem like a difficult task, but with the right tools and a little bit of patience, you can easily replace the seal yourself. Follow our guide below for a successful sink drain seal replacement.Replacing the Seal on a Sink Drain


Replacing the Seal on a Sink Drain


Replacing the seal on your kitchen sink drain may seem like a time-consuming and complicated task, but with our easy guide, you can do it yourself in no time. A worn or damaged seal can lead to leaks and water damage, so it's important to address the issue as soon as possible. Follow our guide for an easy and successful kitchen sink drain seal replacement.Easy Kitchen Sink Drain Seal Replacement

Easy Kitchen Sink Drain Seal Replacement


Is your kitchen sink drain causing leaks or slow drainage? It may be time to replace the seal. This may seem like a daunting task, but with our easy-to-follow guide, you can easily replace the seal on your kitchen sink drain yourself. Follow our step-by-step instructions for a smooth and successful seal replacement.Replacing the Seal on Your Kitchen Sink Drain: A How-To Guide

Replacing the Seal on Your Kitchen Sink Drain: A How-To Guide


Replacing the seal on your kitchen sink drain may seem like a daunting task, but it is a necessary one to ensure your sink functions properly and prevents any potential water damage. In addition to the steps outlined in the previous paragraphs, there are a few more tips to keep in mind when replacing the seal on your kitchen sink drain.
Step 4: Apply the New Seal
Clean and Dry the Area
 Before applying the new seal, it is important to thoroughly clean and dry the area around the drain. Any debris or moisture can prevent the seal from adhering properly, so take the time to wipe down the drain and surrounding area with a clean cloth.
Use the Right Sealant
 When choosing a sealant for your kitchen sink drain, make sure to select one that is specifically designed for use on plumbing fixtures. Silicone sealant is a popular choice as it is waterproof and flexible, allowing for a tight seal that can withstand daily use and potential movement of the sink.
Apply the Sealant
 Using a caulk gun, carefully apply the sealant around the edges of the drain opening, making sure to cover the entire area. Use a damp cloth or your finger to smooth out the sealant and create an even layer. Be sure to work quickly, as silicone sealant can dry fast.
Let it Dry
 Allow the sealant to dry completely before using your sink. This can take anywhere from 24 to 48 hours, depending on the brand and type of sealant used. It is important to follow the manufacturer's instructions for drying time to ensure the seal sets properly.
Test for Leaks
 Once the sealant is dry, run water through your sink to test for any leaks. If you notice any water dripping from the drain, you may need to reapply the sealant or tighten the drain components.
Replacing the seal on your kitchen sink drain is a simple and important maintenance task that can prevent costly repairs down the line. By following these steps and using the right sealant, you can ensure a watertight seal and a functional sink for years to come.
Make sure to also check for any other potential plumbing issues while you have the sink apart, such as leaky pipes or loose connections. With a little bit of time and effort, you can keep your kitchen sink in top shape and maintain a well-designed and functional space in your home.
Once the sealant is dry, run water through your sink to test for any leaks. If you notice any water dripping from the drain, you may need to reapply the sealant or tighten the drain components.
Replacing the seal on your kitchen sink drain is a simple and important maintenance task that can prevent costly repairs down the line. By following these steps and using the right sealant, you can ensure a watertight seal and a functional sink for years to come.
Make sure to also check for any other potential plumbing issues while you have the sink apart, such as leaky pipes or loose connections. With a little bit of time and effort, you can keep your kitchen sink in top shape and maintain a well-designed and functional space in your home.


