If you've noticed your bathroom sink tap leaking or dripping, chances are it's time to replace the washer. A worn-out washer is a common cause of tap leaks, but luckily, it's a simple fix that you can do yourself. Here's a step-by-step guide on how to replace a bathroom sink tap washer.How to Replace a Bathroom Sink Tap Washer


How to Replace a Bathroom Sink Tap Washer

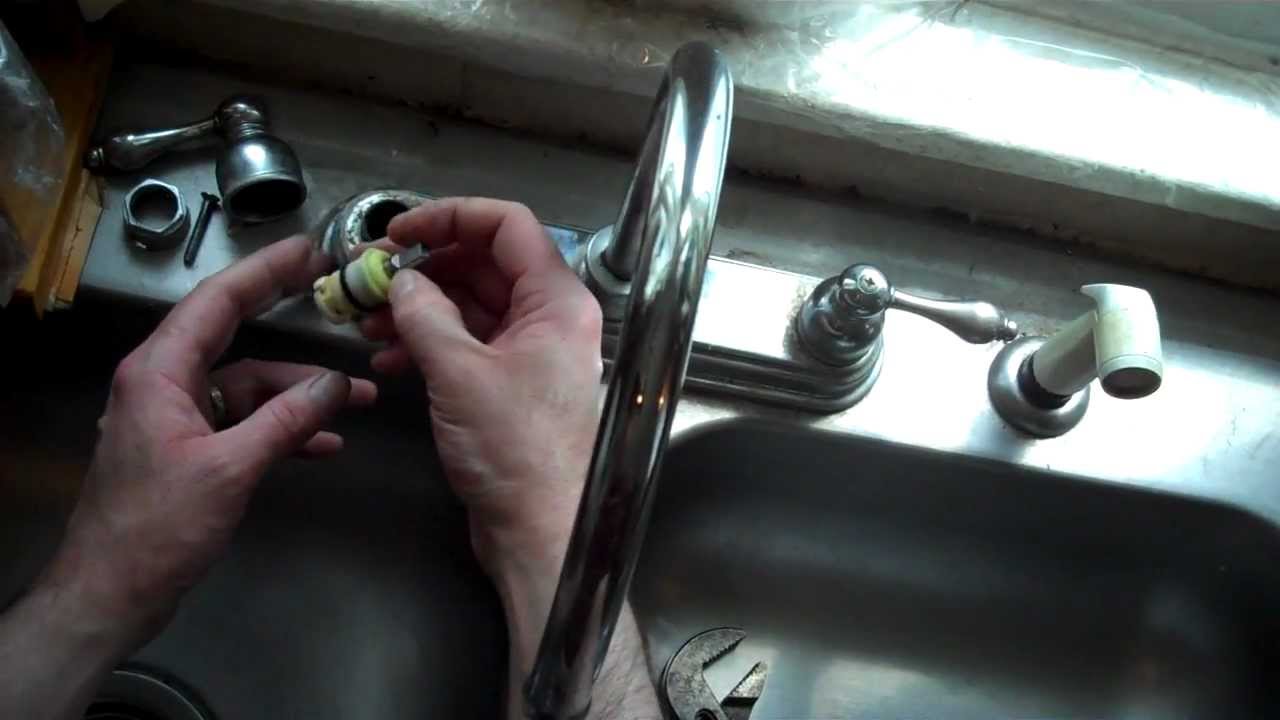


Before you begin, make sure to turn off the water supply to your sink. You can usually find the shut-off valve under the sink or near the main water supply. Once the water is turned off, follow these steps: Step 1: Remove the tap handle by unscrewing the screw on the underside of the handle. Use a screwdriver or an Allen wrench, depending on the type of screw used. Step 2: Use a wrench to loosen and remove the tap bonnet or cap. This will expose the valve and the washer. Step 3: Use pliers to carefully remove the old washer. If it's stuck, you may need to use a flathead screwdriver to pry it off. Step 4: Clean the valve seat with a cloth or brush to remove any debris or buildup. Step 5: Install the new washer by placing it onto the valve seat. Make sure it's a perfect fit and not loose. Step 6: Reassemble the tap by following the steps in reverse order. Step 7: Turn the water supply back on and test the tap to make sure it's no longer leaking.Replacing a Bathroom Sink Tap Washer: Step-by-Step Guide


Replacing a Bathroom Sink Tap Washer: Step-by-Step Guide


Replacing a bathroom sink tap washer is a simple DIY project that can save you time and money. Instead of calling a plumber, follow these steps to replace the washer yourself: Step 1: Gather all necessary tools, including a screwdriver, pliers, and a new washer. Step 2: Turn off the water supply and follow the steps outlined above to replace the washer. Step 3: If the tap continues to leak after replacing the washer, you may need to replace the entire tap assembly. Step 4: If you're not comfortable with DIY projects or the leak continues after replacing the washer, it's best to call a professional plumber for help.DIY: Replacing a Bathroom Sink Tap Washer


DIY: Replacing a Bathroom Sink Tap Washer


Don't let a leaking tap cause you frustration and wasted water. Follow this quick and easy guide to replace a bathroom sink tap washer: Step 1: Gather your tools and turn off the water supply. Step 2: Remove the handle, bonnet, and old washer. Step 3: Clean the valve seat and install the new washer. Step 4: Reassemble the tap and turn the water supply back on. Step 5: Test the tap to ensure the leak has stopped.Quick and Easy Guide to Replacing a Bathroom Sink Tap Washer


Quick and Easy Guide to Replacing a Bathroom Sink Tap Washer


Knowing when and how to replace a bathroom sink tap washer is essential for maintaining your plumbing. Here are a few things you need to know: Leaky taps can waste up to 3,000 gallons of water per year. That's not only bad for the environment, but it can also increase your water bill. Replacing a washer is a temporary fix. If your tap continues to leak, the entire tap assembly may need to be replaced. Regular maintenance can help prevent leaks. Clean the valve seat and replace the washer every few years to avoid leaks.Replacing a Bathroom Sink Tap Washer: What You Need to Know


Replacing a Bathroom Sink Tap Washer: What You Need to Know
For those who prefer a visual guide, here's a step-by-step tutorial for replacing a bathroom sink tap washer: Step 1: Turn off the water supply and remove the tap handle. Step 2: Use a wrench to remove the tap bonnet and expose the valve and washer. Step 3: Use pliers to remove the old washer and clean the valve seat. Step 4: Install the new washer and reassemble the tap. Step 5: Turn the water supply back on and test the tap for leaks.Step-by-Step Tutorial for Replacing a Bathroom Sink Tap Washer

Step-by-Step Tutorial for Replacing a Bathroom Sink Tap Washer
To make the process of replacing a bathroom sink tap washer even easier, here are a few tips and tricks to keep in mind: Always turn off the water supply before starting. This will prevent any accidents or water damage. Take a picture of the tap assembly before disassembling it. This will make it easier to put everything back together correctly. Use plumber's grease on the new washer for a better seal. This will also make it easier to remove the washer in the future.Replacing a Bathroom Sink Tap Washer: Tips and Tricks


Replacing a Bathroom Sink Tap Washer: Tips and Tricks
Replacing a bathroom sink tap washer is a simple task that can have a big impact. Here's why it's important: A leaky tap can waste a significant amount of water and money. By replacing the washer, you can save both. Ignoring a leak can lead to more extensive and expensive plumbing issues. Don't put off replacing the washer and risk a larger problem down the line. Regular maintenance can extend the life of your tap and prevent leaks. Don't wait until it's too late to take care of your plumbing.The Importance of Replacing a Bathroom Sink Tap Washer


The Importance of Replacing a Bathroom Sink Tap Washer


While replacing a bathroom sink tap washer is a simple task, there are a few common mistakes to avoid: Not turning off the water supply. This can result in a flooded bathroom and potential water damage. Using the wrong size washer. Make sure to measure and purchase the correct size for your tap. Not cleaning the valve seat. This can cause the new washer to wear out quickly and lead to another leak.Replacing a Bathroom Sink Tap Washer: Common Mistakes to Avoid


Replacing a Bathroom Sink Tap Washer: Common Mistakes to Avoid

For more tips and advice on plumbing maintenance and repairs, it's always best to consult with a professional plumber. They can provide expert guidance and ensure the job is done correctly. Featured keywords: replacing, bathroom sink, tap, washer, leak Main keywords: replace, bathroom, sink, tap, washer, leak, step-by-step, guide, DIY, quick, easy, tips, tricks, importance, common mistakes, expert adviceExpert Advice on Replacing a Bathroom Sink Tap Washer


Expert Advice on Replacing a Bathroom Sink Tap Washer
Replacing Bathroom Sink Tap Washer: A Simple Guide to Fixing Leaky Faucets
Introduction
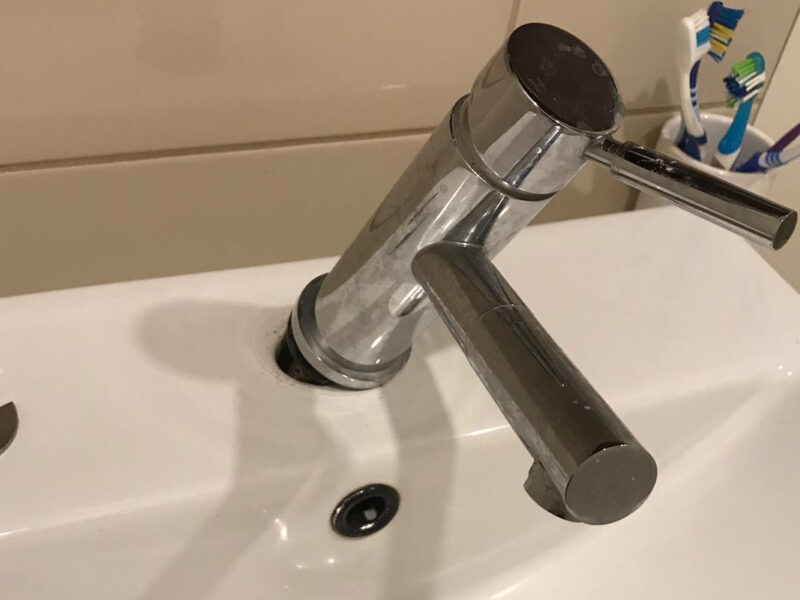
 Bathroom sink taps
are an essential part of any
house design
. Not only do they provide functionality, but they also add to the overall aesthetic of the bathroom. However, over time, these taps can start to leak, causing frustration and potentially leading to water damage. Fortunately, this is a common issue that can easily be fixed by
replacing the tap washer
. In this article, we will guide you through the simple steps of replacing a bathroom sink tap washer, saving you time and money from hiring a plumber.
Bathroom sink taps
are an essential part of any
house design
. Not only do they provide functionality, but they also add to the overall aesthetic of the bathroom. However, over time, these taps can start to leak, causing frustration and potentially leading to water damage. Fortunately, this is a common issue that can easily be fixed by
replacing the tap washer
. In this article, we will guide you through the simple steps of replacing a bathroom sink tap washer, saving you time and money from hiring a plumber.
Step 1: Gather Your Tools
 Before starting any home repair project, it is important to have all the necessary tools on hand. For
replacing a bathroom sink tap washer
, you will need an adjustable wrench, a screwdriver, a new tap washer, and plumber's tape.
Before starting any home repair project, it is important to have all the necessary tools on hand. For
replacing a bathroom sink tap washer
, you will need an adjustable wrench, a screwdriver, a new tap washer, and plumber's tape.
Step 2: Turn Off the Water Supply
 Before you begin replacing the washer, make sure to turn off the water supply to the sink. This can usually be done by turning the shut-off valves under the sink in a clockwise direction. If your sink does not have shut-off valves, you may need to turn off the main water supply to your house.
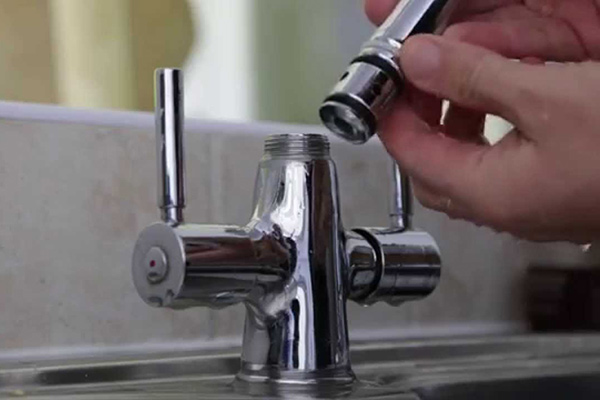
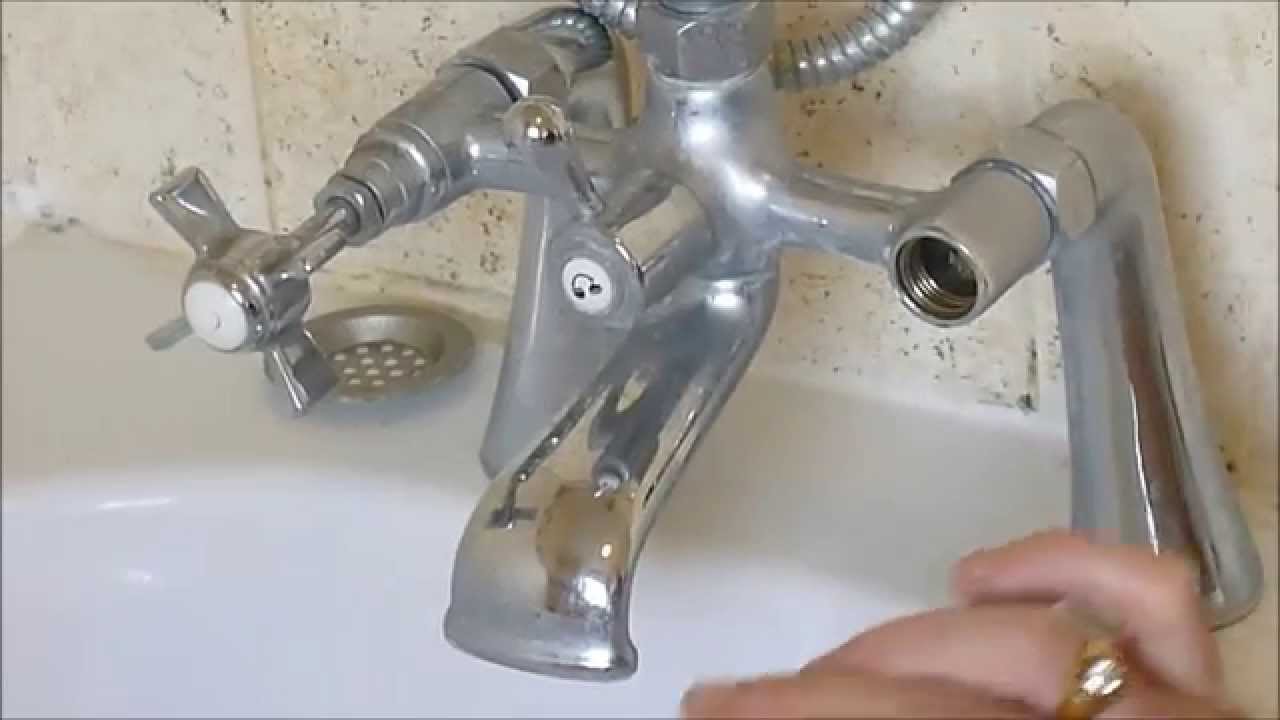
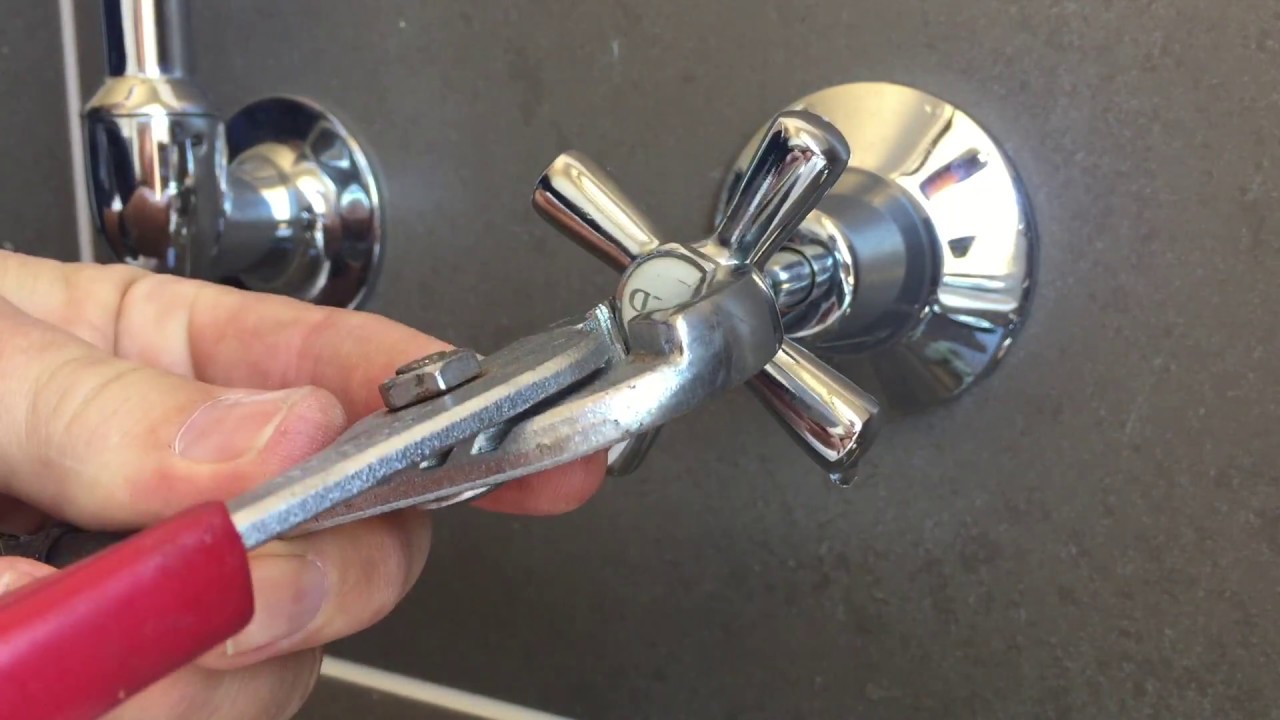
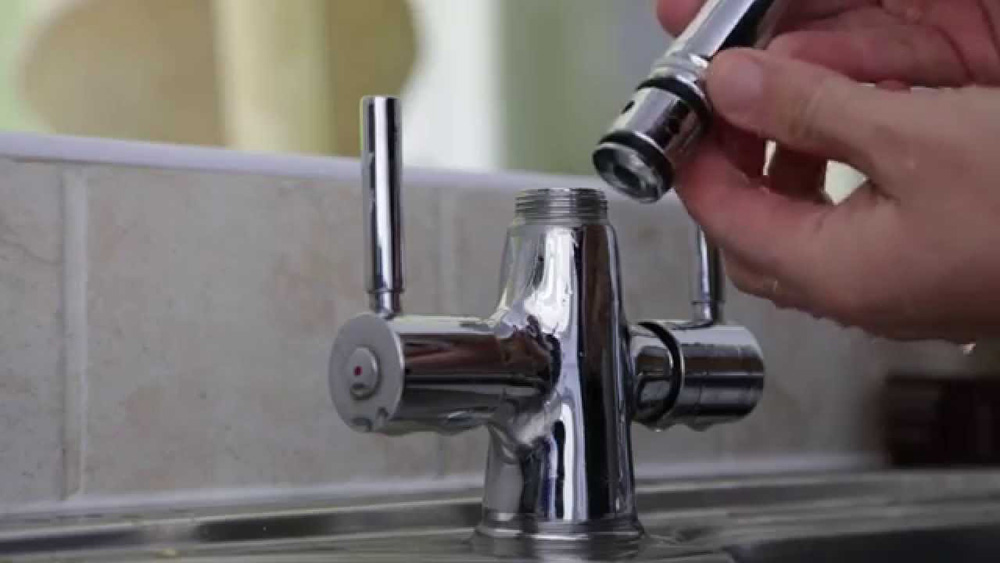
Step 3: Remove the Handle and Tap Assembly
 Using a screwdriver, remove the screw on the top of the tap handle and gently pull off the handle. Next, use an adjustable wrench to loosen the tap assembly and remove it from the sink.
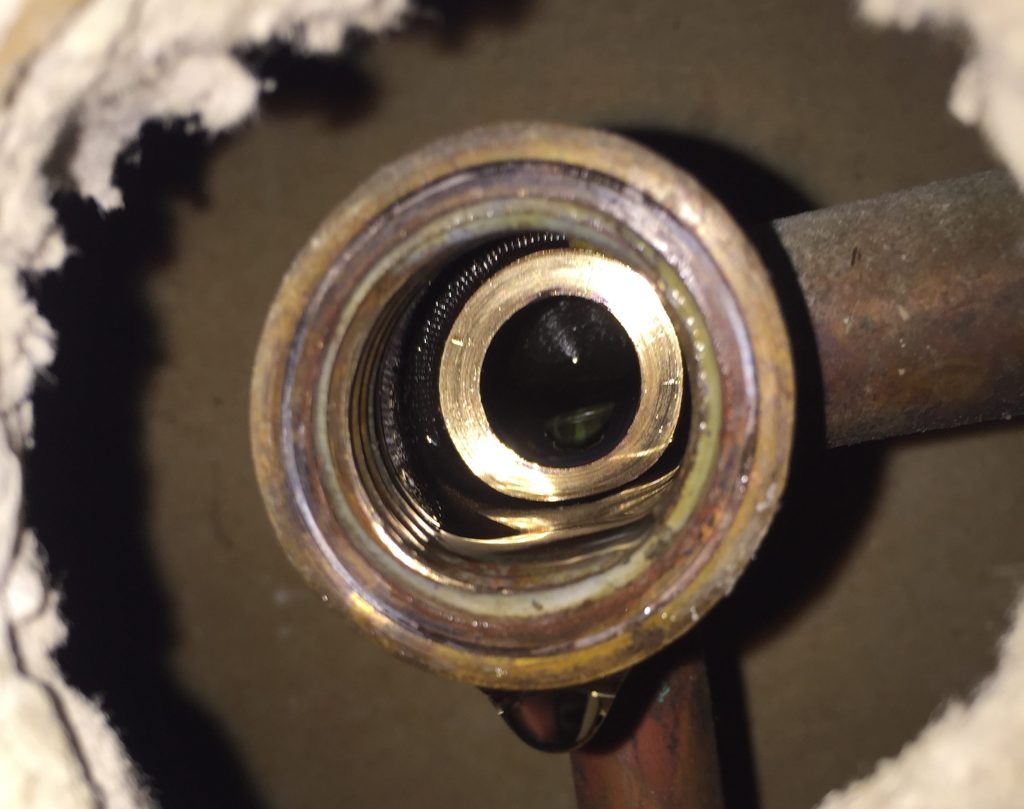
Step 4: Replace the Washer
 Once the tap assembly is removed, you will see the old tap washer. Use your screwdriver to remove it and replace it with a new one. Make sure to apply plumber's tape to the threads before reinstalling the tap assembly.
Step 5: Reassemble and Test
 Reattach the tap assembly and handle, making sure everything is tightened securely. Turn the water supply back on and test the tap to ensure there are no more leaks.
Conclusion
 In just a few simple steps, you have successfully
replaced the tap washer
in your bathroom sink. This not only saves you the hassle of dealing with a leaky faucet, but it also helps to prevent potential water damage in your home. Remember to regularly check and replace tap washers to keep your bathroom taps functioning properly and maintain the overall
house design
of your home. If you found this guide helpful, be sure to share it with your friends and family!
In just a few simple steps, you have successfully
replaced the tap washer
in your bathroom sink. This not only saves you the hassle of dealing with a leaky faucet, but it also helps to prevent potential water damage in your home. Remember to regularly check and replace tap washers to keep your bathroom taps functioning properly and maintain the overall
house design
of your home. If you found this guide helpful, be sure to share it with your friends and family!